To raise patio furniture, you first need to figure out what 'raise' actually means for your situation: do you want it taller for comfort, more stable on an uneven surface, lifted off the ground to improve drainage and airflow, or just cleared up for easier cleaning underneath? Each goal has a different fix. For height, leg extensions or furniture risers are your go-to.
How to Raise Patio Furniture Safely: Leveling and Lift Tips

Maren Grady
9 Jun 2026
Furniture risers are one of the most straightforward ways to make patio furniture higher without major construction changes. For stability and leveling, blank" rel="noopener noreferrer">adjustable leveling feet or rubber shims do the job.
For drainage and airflow, simple rubber blocks or deck tiles elevate the frame just enough to let moisture escape. Once you know which problem you're solving, the actual work is pretty straightforward and can usually be done in under an hour with basic tools.
Figure out what you actually need first
This is the step most people skip, and it's why they end up buying the wrong thing. 'Raising' patio furniture covers at least four different real-world problems, and mixing them up wastes time and money. Before you grab anything from the hardware store, spend two minutes diagnosing your actual issue.
| Your Problem | What's Really Going On | Best Approach |
|---|---|---|
| Seating feels too low | Chair or sofa seat height doesn't suit your body or table | Leg extensions, furniture risers, or thicker cushions |
| Furniture rocks or wobbles | Uneven patio surface or worn/missing glides | Adjustable leveling feet or rubber shims |
| Water pooling under or around pieces | Frame sitting flat on a surface with no drainage gap | Rubber blocks, deck tiles, or furniture feet |
| Hard to clean or store underneath | No clearance gap between frame and ground | Furniture risers or fixed leg extensions |
You might actually have more than one issue at once. A dining table that sits too low for your new chairs AND wobbles on a slightly sloped deck needs both a height fix and a leveling fix. Tackle them together so you're not taking the legs apart twice.
Know what you're working with before you start
Your furniture's material and construction type determines which raising methods are safe and which ones will cause damage. Here's a quick way to assess what you have.
Frame material
- Aluminum: Lightweight and hollow-tubed. Safe to add screw-in leveling feet if the tube wall is thick enough, but overtightening cracks thin-wall tubes. Always pre-drill pilot holes.
- Steel/wrought iron: Heavy and solid. Handles risers and leg extensions well. Check for existing rust at the foot area before adding anything that traps moisture.
- Wood (teak, eucalyptus, cedar): Solid enough for most riser approaches, but avoid metal hardware that holds moisture against the grain. Rubber-tipped options are better here.
- Plastic/resin: Often has hollow or thin legs. Weight-rated risers are especially important here because resin can crack under uneven load. Stack risers centered and level.
- Wicker/rattan over metal frame: The visible wicker is cosmetic. Treat it like the underlying metal frame for any leg work.
Leg and base type
- Fixed legs with flat feet: Most common. Compatible with risers placed underneath, or leg extensions that sleeve over or bolt onto the existing leg end.
- Legs with pre-installed glides or caps: Remove these first before adding adjustable leveling feet. Trying to layer on top of existing glides creates instability.
- Pedestal or single-post bases (common on bistro tables): Adding height to a pedestal requires a threaded extension post or replacing the base entirely. Stacking risers under a pedestal is risky.
- Sled bases (long runners instead of individual legs): Risers placed under each corner of the sled work well. Avoid placing them only in the middle, which creates a flex point.
- Folding or stackable chairs: Do not add permanent extensions to folding furniture. Use thick seat cushions for height instead.
How to safely add height to seating and dining furniture
The most common reason people want to raise patio furniture is comfort, usually because a dining table is too low for standard chairs, or a chair seat is so low that getting up is a struggle. Here are the practical options ranked from easiest to most involved.
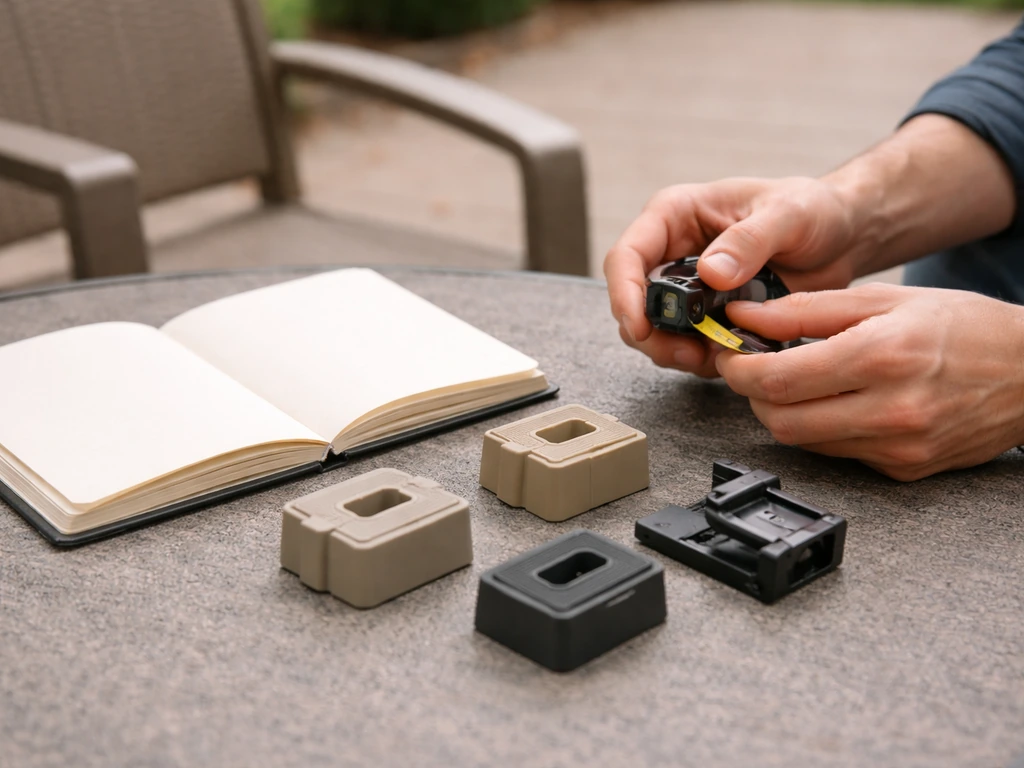
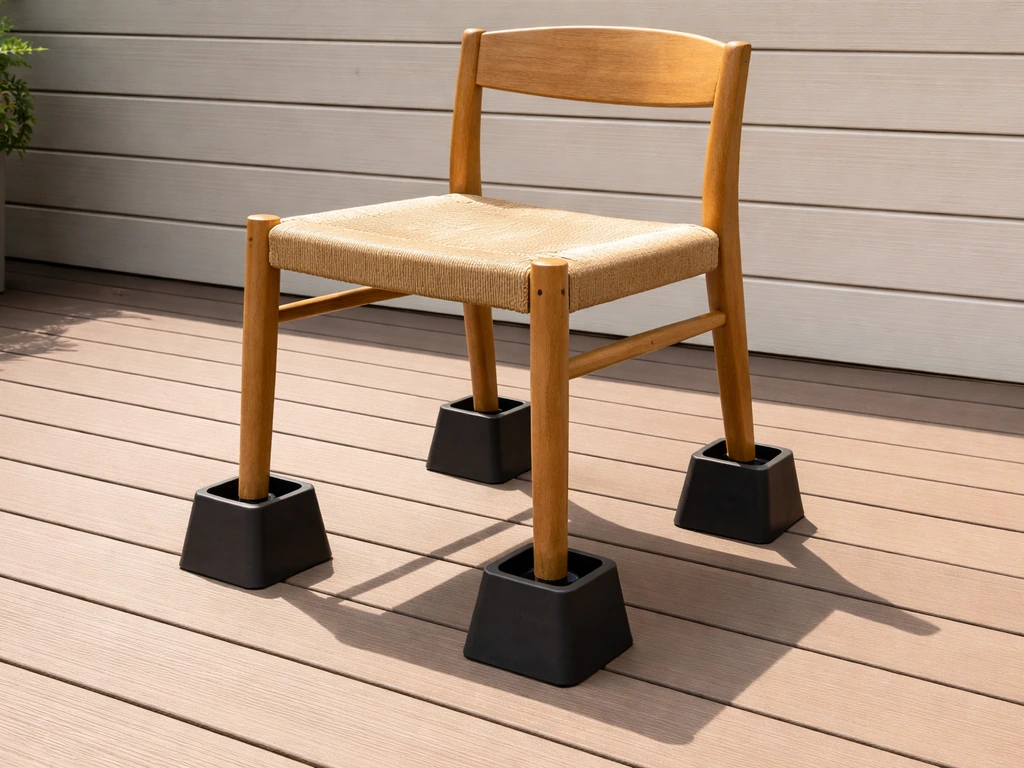
Option 1: Furniture risers (easiest, 15 minutes)
Furniture risers are cup-shaped or square blocks that each leg sits inside. They're sold in sets of four at hardware and home stores, typically in 2-inch, 3-inch, or 5-inch heights, and usually cost between $10 and $30 for a set. Look for ones rated for outdoor use (UV-resistant plastic or rubber composite) and check the weight rating on the package. A standard four-person dining set with a metal frame can weigh 80 to 120 pounds, so you need risers rated for at least 200 pounds per set to have a safe margin.
- Clear the furniture and move it away from the wall or any other pieces.
- Tilt the piece onto its side or lift it with a helper so you can access all four legs at once. Never try to slip risers under legs while weight is on them.
- Place a riser under each leg, making sure the leg sits fully inside the cup, not just resting on the rim.
- Lower the piece and check that all four legs are seated in their risers. Rock it gently by hand. If it shifts, the risers are not centered properly.
- Check the height at the seat or tabletop with a tape measure against a nearby chair or your own body seated in a chair next to it.
Option 2: Screw-in leg extensions (more permanent, 30 to 45 minutes)
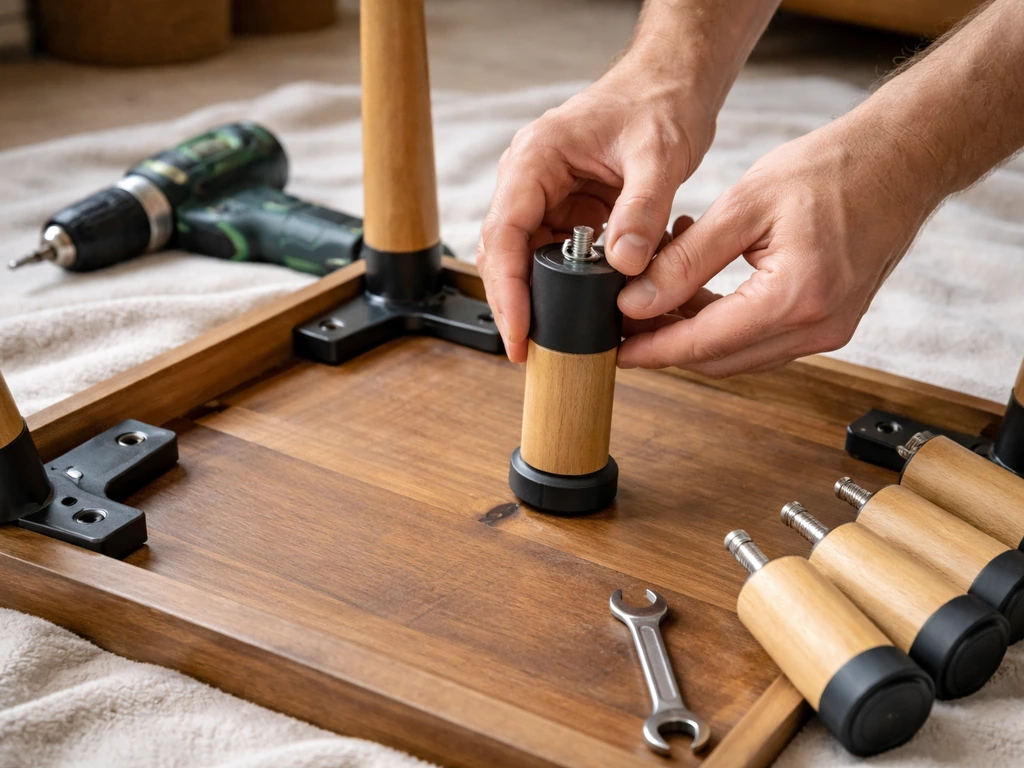
If you want a permanent height increase that won't slip or fall off, screw-in leg extensions are a much better solution. These are threaded extensions that bolt onto the bottom of existing legs. They work best on furniture with hollow metal tubes, wooden legs, or legs that already have a threaded glide or foot. You'll find these at hardware stores or online, typically in 1-inch to 4-inch extension increments. Material cost is usually $15 to $40 depending on the set.
- Flip the furniture upside down on a soft surface (an old blanket or cardboard protects the finish).
- Remove any existing glide or foot cap from each leg. These usually unscrew counterclockwise or pry off with a flathead screwdriver.
- Check if the leg end is threaded (metal furniture often has a threaded insert). If yes, screw in the matching extension post by hand first, then snug it with a wrench. Do not overtighten aluminum tube legs.
- If the leg has no thread, use a drill to create a pilot hole and install a T-nut, then thread in the extension. Pre-drill at slow speed to avoid splitting wood or cracking plastic.
- Install all four extensions, then flip the furniture right-side up. Use a level across the tabletop or seat to confirm everything is even. Adjust individual extensions in or out by small turns until level.
Option 3: Thicker cushions (for chairs and sofas, no tools needed)
This is genuinely the easiest height boost for seating pieces and costs $20 to $60 depending on cushion thickness. A standard outdoor chair cushion is 2 to 3 inches thick. Upgrading to a 4 to 5 inch high-density foam cushion adds real seat height without touching the frame. This works especially well for deep-seat lounge chairs that feel too low but are otherwise in good shape. The downside is it only raises sitting height, not the armrests or table clearance.
Fixing wobbly furniture and uneven legs
Wobbling is one of the most annoying patio problems, and it's almost always caused by either an uneven surface or one leg that's slightly shorter than the others. The good news is this is usually a five-minute fix once you know which problem you have.
Finding the problem leg
Set the furniture on the flattest surface you have. Press down on each corner or armrest one at a time. The corner that lifts up when you press the opposite one is the short leg (or the corner on an uneven surface). Put a piece of tape on that leg so you remember which one it is.
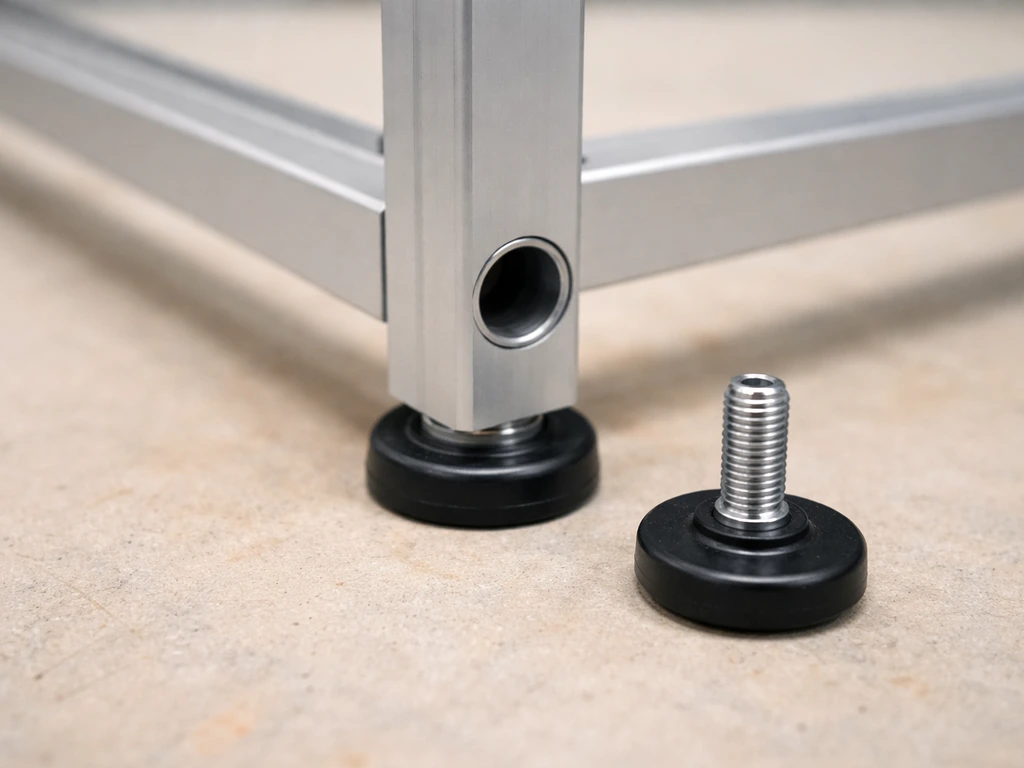
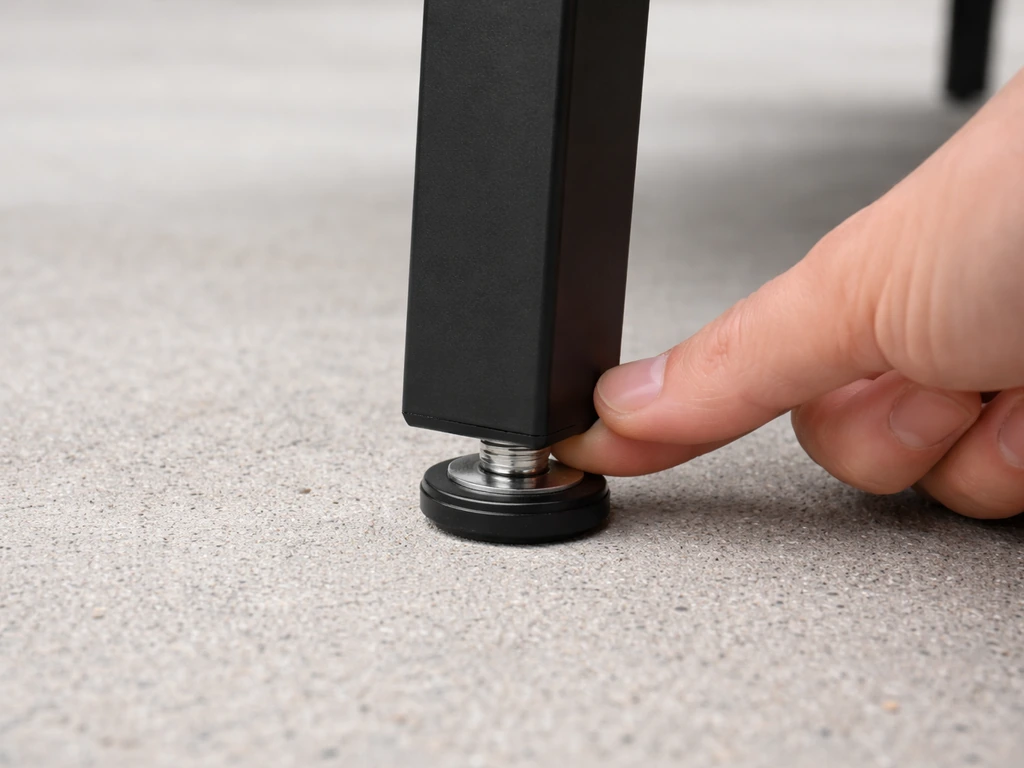
Adjustable leveling feet
Adjustable leveling feet are the right long-term fix here. These are threaded feet that screw into the base of each leg, letting you raise or lower each corner independently by a quarter-inch or more. They're commonly made from nylon, rubber-tipped steel, or stainless steel. For outdoor furniture, rubber-tipped or nylon versions are better because they resist moisture and don't scratch patio surfaces. A set of four costs $8 to $25 at any hardware store.
- Flip the furniture over or tilt it carefully. Have a second person hold it steady if it's a large piece.
- Remove existing end caps or glides by unscrewing or prying them off.
- Thread in the leveling feet by hand until snug. Most are M8 or M10 metric threads for metal furniture, or 5/16-inch for wood. Bring a photo of the leg end to the store if you're unsure.
- Flip the piece back upright and set it in its final position on the patio.
- Adjust the foot on your taped 'problem leg' by turning it clockwise (which lowers that leg tip, effectively raising the corner). Make half-turn adjustments and recheck by pressing each corner. It usually takes two to four adjustments to get it fully stable.
Rubber shims for minor unevenness
If the wobble is very minor (under a quarter inch) and you don't want to pull the legs apart, rubber shims or rubber furniture pads are a fast fix. Cut a piece of EPDM rubber or dense neoprene to the size of the foot and stick it under the short leg with outdoor-rated adhesive. These materials compress slightly and conform to the surface, which helps on slightly textured or gritty concrete patios. A sheet of EPDM or neoprene rubber costs about $5 to $15 and gives you plenty of material to experiment with thickness.
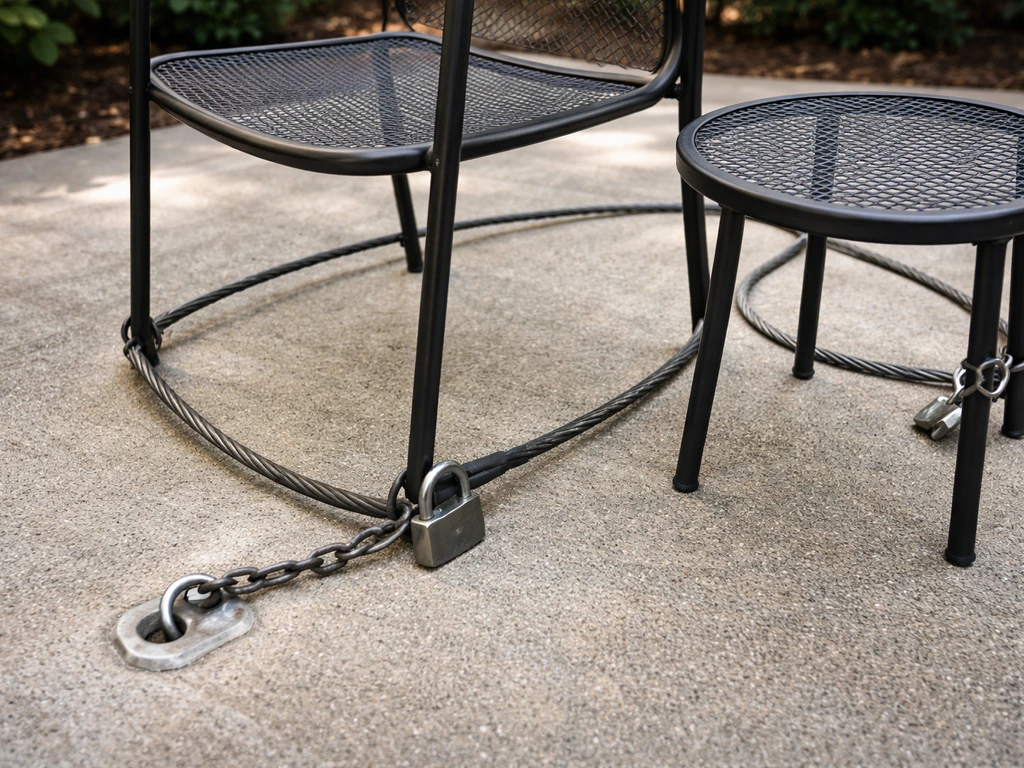
Raising for drainage and airflow
This is the one people most often overlook, and it causes a surprising amount of damage over time. When patio furniture sits directly on a concrete or wood deck surface, the space between the frame and ground stays perpetually damp after rain. That trapped moisture rots wood frames, rusts steel legs, and breeds mold under cushions faster than almost anything else. A common starting point for this is deciding what to put underneath patio furniture, especially if you need height for drainage or a stable base. Elevating the frame even half an inch creates enough airflow to let things dry out between wet weather events.
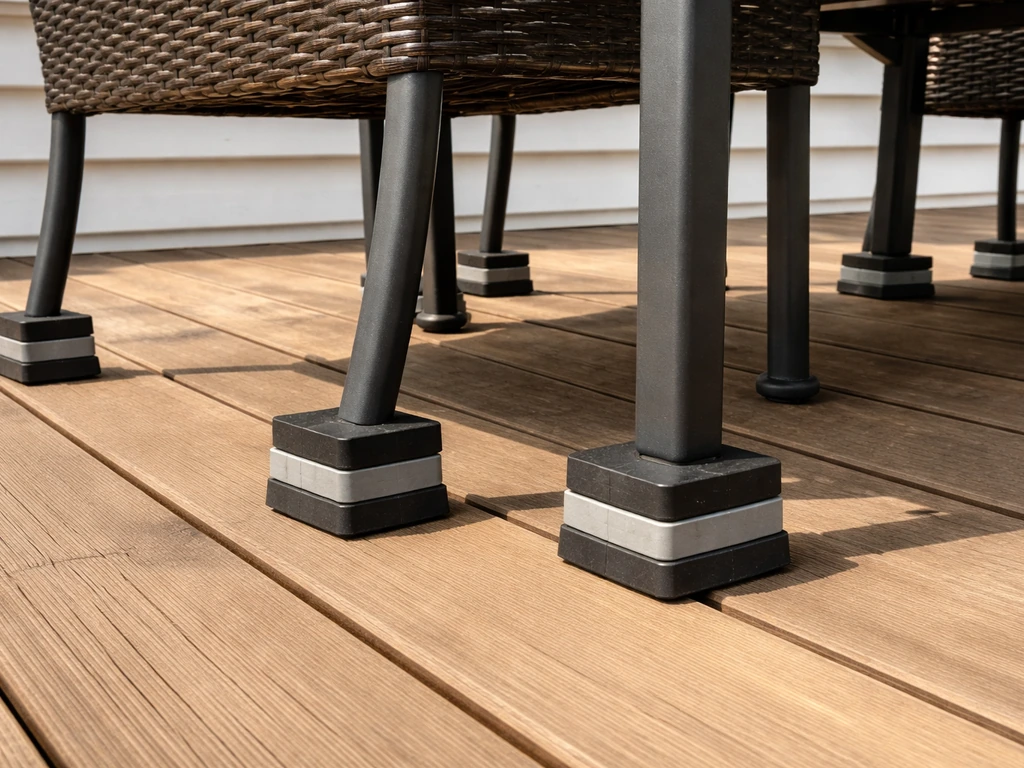
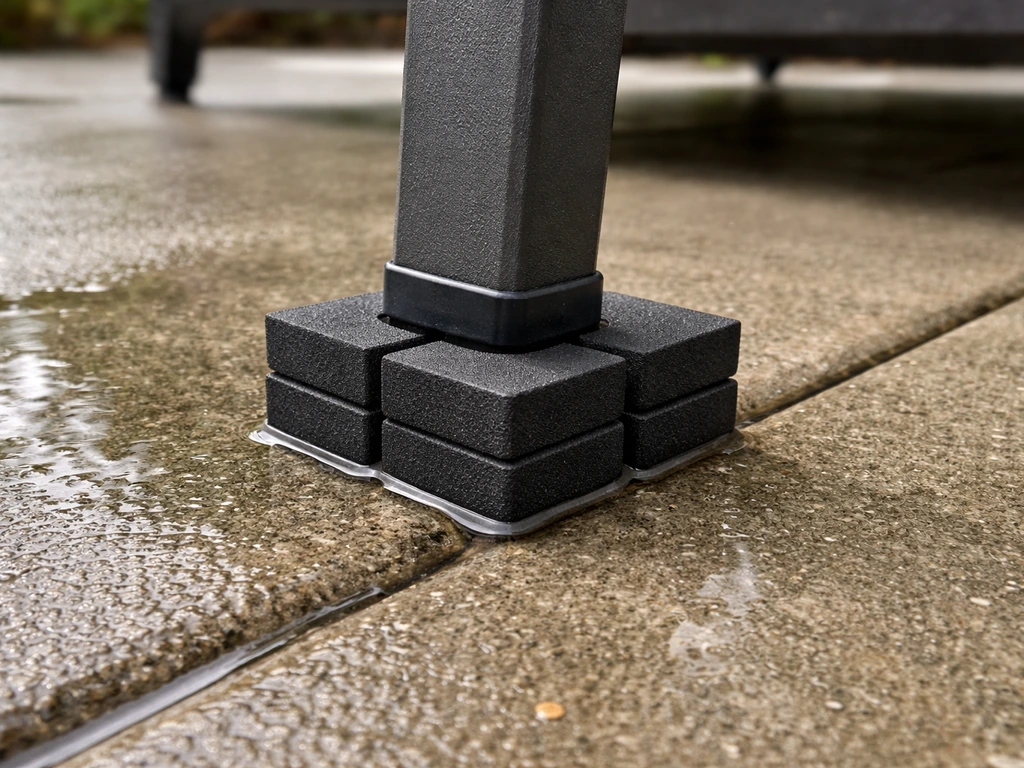
Rubber furniture blocks
Setting-style rubber blocks made from EPDM or neoprene are the simplest solution. You place one under each leg, which lifts the frame off the surface and creates that critical air gap. Look for blocks that are at least half an inch thick and cut them to the footprint of each leg if needed. These materials are load-bearing rated and won't compress flat under normal furniture weight. They also protect your deck or concrete surface from scratches and chemical transfer from metal frames. Cost is minimal, usually a few dollars for enough material.
Deck tiles as a platform
If you want a more finished look and you're setting furniture on a patio that pools water after rain, interlocking deck tiles (wood, composite, or rubber) raise the entire furniture zone about half an inch to three-quarters of an inch and allow water to drain through the gaps between tiles. This works especially well under sectional sofas or dining sets where placing individual blocks under each leg is tedious. Composite or rubber deck tiles hold up better outdoors than bare wood tiles.
Cushion storage matters too
Even if you raise the frame, cushions sitting on the seat after rain will trap moisture between the cushion and the sling or seat surface. Tilt cushions vertically against the furniture back or lean them face-to-face so air can circulate on both sides after it rains. This single habit dramatically reduces mold and fabric breakdown over a season.
Safety things you actually need to know
I've seen (and made) the kind of mistakes that turn a 20-minute job into a broken piece of furniture or a twisted ankle. A few things worth keeping front of mind:
- Always check weight ratings. Risers and leveling feet have load ratings printed on the package. Add up the weight of the furniture plus the weight of anyone who'll use it. A 200-pound person plus a 40-pound chair needs supports rated for at least 300 pounds with a safety margin.
- Never work alone on heavy pieces. A wrought iron dining table can weigh 80 to 150 pounds. Always have someone hold it steady while you work underneath.
- Don't overtighten hardware into hollow aluminum legs. You'll crush the tube wall. Hand-tight plus a quarter turn with a wrench is usually enough.
- Check that all four legs are bearing load equally after any change. If three legs are on the ground and one is floating, the piece will tip. Press each corner before declaring the job done.
- If your patio surface itself slopes significantly (more than an inch across a typical chair footprint), leveling feet alone may not fully solve the problem. At a steep slope, you're better off addressing the surface or repositioning the furniture to a flatter zone.
What to do if it's still uneven after adjusting
If you've adjusted the leveling feet and the piece still rocks, the issue is usually one of three things. First, the patio surface has a curve rather than a flat slope, meaning a simple linear adjustment isn't enough. Try placing a long level or a straight board across the surface to find the high and low points, then fine-tune foot heights to match the contour.
Second, the furniture frame itself is warped or bent, which means one leg is structurally shorter than it used to be. If a metal leg is bent, you may be able to straighten it carefully with padded pliers, but badly bent legs usually need replacing. Third, the risers or blocks are placed on grit or debris and aren't sitting flat. Clean the surface under each foot and try again.
Protecting and maintaining your raised furniture through the seasons
Once you've done the work, a little ongoing care keeps everything stable and extends the life of both the furniture and your hardware. This doesn't need to be complicated.
Covers and weather protection
Fitted outdoor furniture covers are worth the investment, especially after you've done work to raise pieces for drainage. The goal of a cover is to shed rain while still allowing air movement underneath so moisture doesn't condense and get trapped. Look for covers with vented hems or air vents rather than fully sealed skirts. When you cover furniture that's sitting on risers or rubber blocks, make sure the cover hem clears the ground slightly so wind can pull air through the gap you created. A cover that's too long and lies flat on the ground defeats the purpose of the airflow gap.
Seasonal maintenance checklist
Once at the start of the outdoor season and once before storing for winter, run through these quickly:
- Check every leveling foot or riser for cracks, compression, or loosening. Rubber compounds degrade over multiple freeze-thaw cycles and may need replacing every two to three years.
- Tighten any screw-in leg extensions. Vibration from wind and use loosens threaded connections over time. A quarter turn of a wrench is usually all it needs.
- Inspect the contact points where metal legs meet risers or blocks. If you see rust staining or discoloration, dry the area, treat bare metal with a rust-inhibiting primer, and add a rubber isolator between the leg and the riser so they're not in direct contact.
- Re-level the piece in its current spot. Frost heave, settling, and seasonal patio expansion can change the surface profile slightly each year.
- Clean under and around furniture feet. Debris packing around feet traps moisture and accelerates corrosion, especially in wood decks.
Storing raised furniture for winter
If you're storing furniture in a shed or garage for winter, remove rubber risers and blocks and store them separately in a bag. Rubber degrades faster when compressed under weight for months at a time at cold temperatures. Mark which blocks came from which piece so reassembly in spring is fast. Stack furniture on wooden pallets or a raised shelf rather than directly on a concrete floor, which stays damp and cold through winter. This is especially important for wood-framed pieces where the feet can absorb ground moisture even in an enclosed space.
If you're also thinking about where on your patio or yard to position your furniture, or what materials to put underneath it on grass or other surfaces, those placement decisions interact with your raising approach since grass and soft ground require different riser strategies than hard patio surfaces. When you decide where to put patio furniture, think about how rain runoff and airflow will affect the ground and the frame. If you're positioning patio furniture on grass, use a grass-friendly riser strategy to keep the legs stable and prevent trapped moisture on grass or other surfaces. Getting the positioning right first makes the stability and drainage work easier.
FAQ
How do I tell whether I need more height for comfort or a lift for drainage?
Measure the “target” you want to change, sitting height versus table clearance versus total lift off the ground. Then match the fix: risers and leg extensions raise the frame and table height, cushions raise only the seating surface, and deck tiles or rubber blocks address drainage and airflow. If you are unsure, do a quick test by placing a temporary shim under just one leg for stability, then compare overall height with a tape measure.
Can I stack risers or blocks to get extra lift?
Yes, but only if the load is within the riser or block rating. A common failure happens when people mix “sticker” weights with real set weight, then assume one riser per leg is enough for the actual corner loads. Use a conservative margin, and avoid stacking rubber blocks if the product instructions do not explicitly allow stacking.
What should I do if the furniture still wobbles after adjusting leveling feet?
For wobble, check both the short leg and the surface. After leveling feet are adjusted, press down on each corner again, if a different corner lifts than the one you taped earlier, the surface may be out of plane (curved) or there may be debris under a foot. Re-clean and re-test before ordering parts.
Is it okay to use scrap wood under patio furniture to lift it temporarily?
In general, avoid putting wood blocks directly under metal furniture outdoors, since trapped moisture can speed corrosion and the block can rot. If you need a temporary solution for testing, use rubber or EPDM shims, then switch to outdoor-rated rubber blocks or deck tiles once you confirm the needed height.
Will screw-in leg extensions work on any type of furniture leg?
If a leg has a threaded glide, leg extensions designed to screw on can be the most stable option. If the bottom of the leg is smooth or the leg is hollow without threads, extensions may not seat securely and can loosen. In that case, risers or leveling feet are usually safer than trying to force a screw-in fit.
Do I have to take the furniture apart to raise it?
Yes, you can often raise the furniture without disassembling legs, but it depends on the method. Risers and rubber blocks usually require only lifting the frame briefly, while leg extensions require attaching hardware to each leg bottom. If your furniture is heavy, recruit help or remove one piece at a time so you do not twist the frame while lifting.
If I raise chair height with thicker cushions, do I still need to address drainage underneath?
If cushions are the only thing you’re raising, choose outdoor foam that matches existing cushion dimensions and confirm it supports the seat without bottoming out. Also plan for weather, foam can absorb and take longer to dry if it gets trapped between seat and cushion covers, so keep the cushion tilted upright after rain as you would with other moisture-prone areas.
How thick should rubber shims be, and do they need adhesive?
When using rubber shims on slightly gritty concrete, cut EPDM or neoprene pieces so they sit flat and do not overhang beyond the foot area. Overhanging material can shear off as you move the furniture, which can reintroduce wobble. Use outdoor-rated adhesive and let it cure fully before using the furniture.
When should I choose deck tiles instead of individual leg risers or blocks?
Use the same approach for the furniture zone, not just for individual legs. On sloped patios or near pooling water, deck tiles help create a consistently elevated platform that drains through gaps, which reduces the chance that only one corner is lifted by grit under a leg.
What’s the best raising strategy on a patio with noticeable slope?
If you cannot fully level the furniture due to significant patio slope, prioritize drainage and stability together. Deck tiles can reduce uneven loading, and adjustable leveling feet can fine-tune the remaining difference. Avoid relying only on thin risers in steep conditions, since a single leg can end up bearing too much weight.
How should I handle cushions after rain, especially if I raised the furniture frame?
After rain, tilt or lean cushions so air moves between the cushion and the sling or seat, and wipe or shake off standing water. If you store furniture uncovered, condensation can still form under covers that are too tight, use vented or hem-clearing covers and ensure airflow paths around the lifted frame.
Do rubber risers and blocks need special care before winter storage?
Yes, but treat them as part of the system. Remove and store risers and blocks separately if you winter-store, do not leave compressed rubber under load for months. Mark each set to match the furniture, and check the underside of frames for rust or early rot before reassembly in spring.