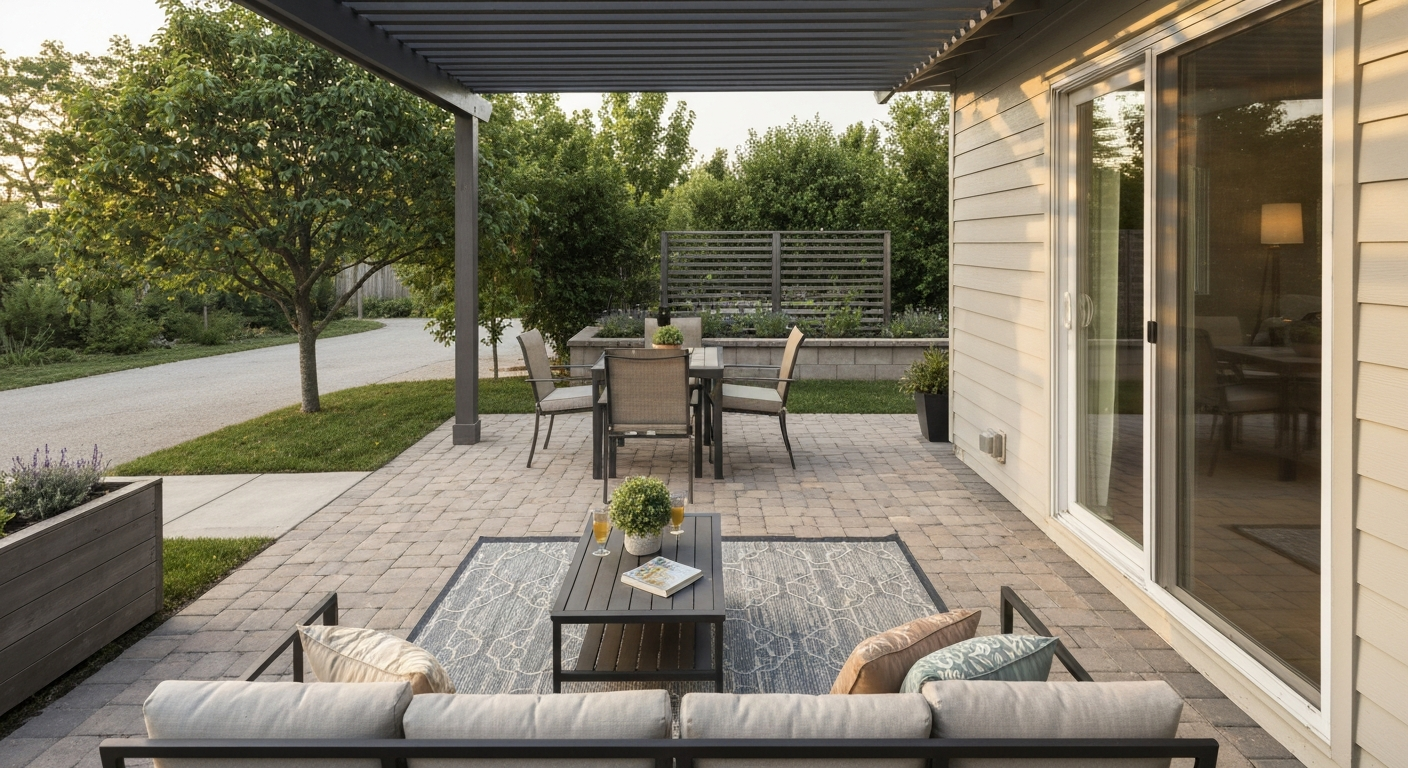
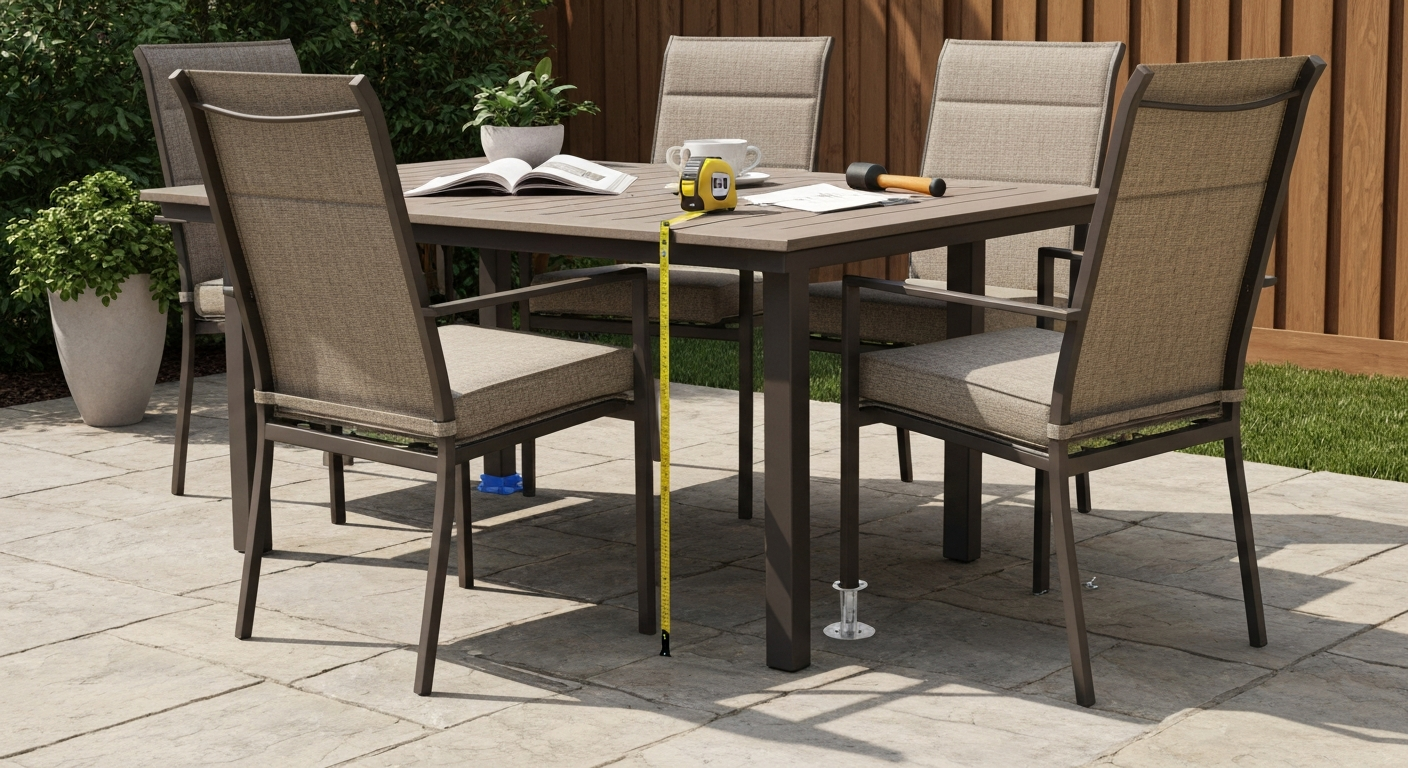
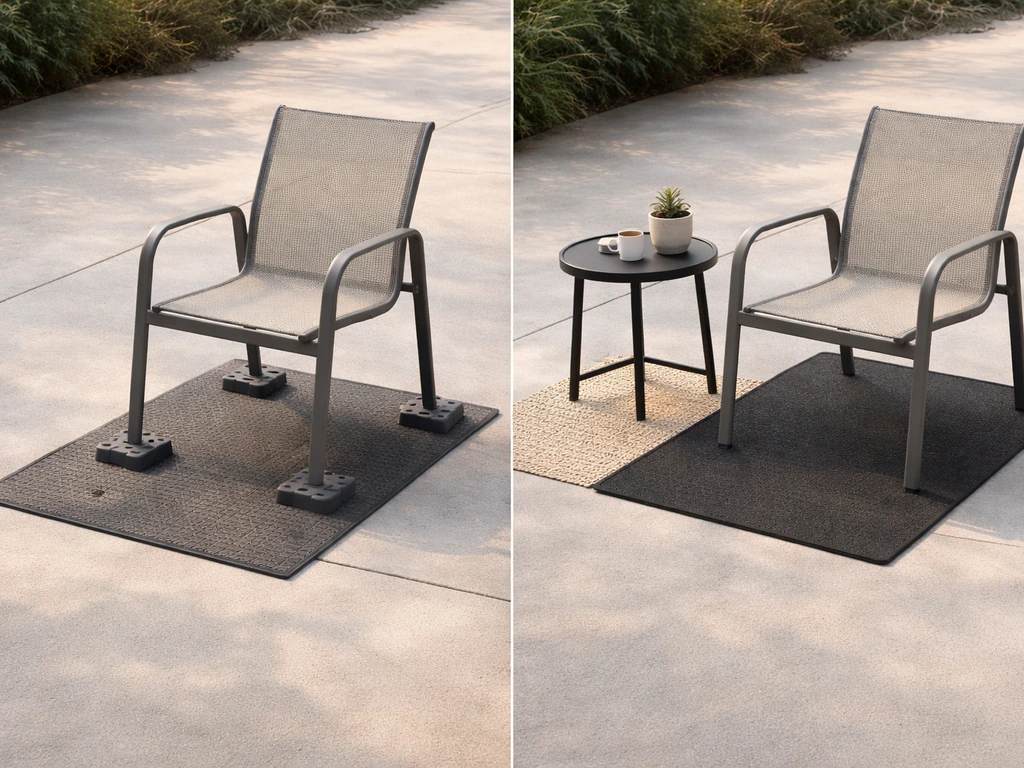
You can raise patio furniture height using furniture risers (the quickest fix), leg extenders or adapter sleeves, replacement or custom-built legs, a stacking platform or raised deck section, thicker seat cushions, or pavers and concrete blocks under the legs. Each method suits a different budget, skill level, and furniture type. The right choice depends on how much height you need to add, whether your furniture sits on a hard surface or grass, and how permanent you want the solution to be. I've tried all of these on my own outdoor pieces, so below I'll walk you through every option with honest pros, cons, and cost estimates. For tips on arranging and styling pieces once they're at the right height, see our guide on how to stage patio furniture. Read our detailed guide on how to make patio furniture higher for step-by-step instructions and product recommendations.
How Can I Raise the Height of My Patio Furniture: 7 DIY Ways

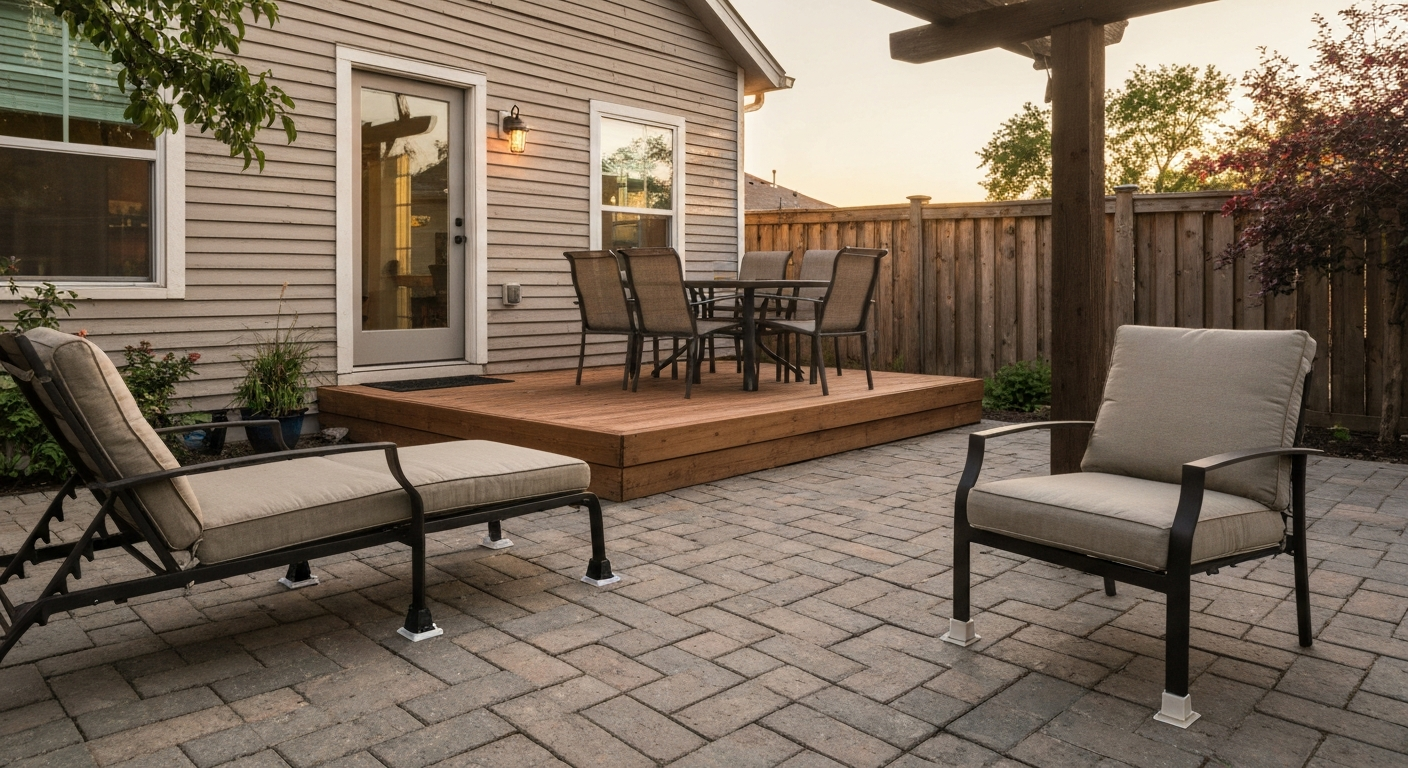
Why raise patio furniture in the first place?
The most common reason people come to this is comfort. Standard patio chairs sit between 14 and 16 inches off the ground, which is fine for some bodies but genuinely difficult for people with bad knees, hip replacements, or limited mobility. The 2010 ADA Standards identify 17 to 19 inches (430 to 485 mm) as the target seat height for accessible transfer seating, so if you're raising a chair for a family member with mobility needs, that's your target range. Beyond accessibility, there's the aesthetic angle: a low loveseat next to a tall dining table looks awkward, and raising pieces can balance a mixed-height furniture set. On grass or uneven ground, raising furniture also prevents legs from sinking into soft soil, which creates an unstable and potentially dangerous wobble over time.
Before you pick a method, ask yourself three quick questions: How much height do I need (2 inches or 6 inches makes a huge difference in method choice)? Is this permanent or seasonal? And what surface is the furniture sitting on? If you're setting up furniture on grass, the paver or platform methods are almost always the smarter starting point.
Measure first: seat height, clearance, and load capacity
Grab a tape measure before you buy anything. Here's what to record for each piece of furniture you want to raise.
- Current seat height: measure from the floor to the top of the seat surface (not the cushion). Write this down, then calculate the difference between this number and your target height to find out exactly how many inches of lift you need.
- Seat depth: measure front to back. A deep seat (over 22 inches) may feel fine at a lower height but become uncomfortable or inaccessible if raised too aggressively because your feet may no longer reach the floor.
- Leg tip diameter or footprint: measure the diameter of round legs or the width/length of square leg tips. This determines which riser cups, extenders, or adapter sleeves will actually fit your furniture.
- Ground clearance under the frame: for sofas and chairs with a skirt or apron, check how much clearance exists between the bottom of the frame and the floor. If it's less than 1 inch, bulky risers will not fit without modification.
- Weight capacity of the existing furniture: check the manufacturer's manual, the product page, or a label on the frame. Many residential patio chairs are rated 250 to 350 lbs per seat. IKEA-type armchairs, for example, often carry around 375 lbs in their manuals. Whatever method you use to add height must not exceed this rating.
Load capacity is where a lot of DIYers skip steps and regret it later. If you're adding a platform under a four-person dining set, you need to account for the weight of the table, all four chairs, and the people sitting in them simultaneously. For calculating compressive and bearing stresses in wood legs and platforms, consult the Wood Handbook: Wood as an Engineering Material (USDA Forest Service/Forest Products Laboratory). That can easily exceed 1,000 lbs for a fully loaded dining setup. Always verify your chosen method's per-leg or total rated load before you commit.
Tools and materials checklist
These are the general items you'll want on hand regardless of which method you choose. Per-method specifics are listed in each section below.
- Tape measure (25-foot is versatile enough for any of these projects)
- Level (a 4-foot level for platforms, a small torpedo level for individual legs)
- Marker or pencil for marking cuts
- Work gloves
- Safety glasses
- Adjustable wrench or socket set
- Rubber mallet
- Drill with standard bit set (3/32 through 1/4 inch)
- Stainless steel or hot-dip galvanized fasteners (for any outdoor wood or metal work — more on this below)
- Sandpaper, 80 and 120 grit
- Exterior wood finish or spar urethane if working with bare wood
On fasteners: for anything that stays outdoors, use A2-70 stainless steel minimum, or A4-70 (316 stainless) in coastal or high-moisture environments. Regular zinc-plated screws will rust through within one season. Simpson Strong-Tie and similar structural fastener guides specifically recommend 300-series or 316 stainless for outdoor and treated-wood applications, and this is one area where spending an extra few dollars upfront saves a total rebuild later.
Method 1: Furniture risers
Furniture risers are pre-made cups (usually polypropylene plastic or cast steel) that the existing legs sit inside, adding 2, 3, 4, or 5 inches of height with zero cutting or drilling. This is the fastest and cheapest option, and for most casual DIYers, it's the right starting point.
Step-by-step installation
- Measure your leg tip diameter (round legs) or leg footprint (square legs) to confirm you're ordering the right cup size. Most sets come in round cup sizes from 1 to 2.5 inches and square sizes from 1 to 2 inches.
- Tilt or lift the furniture piece (get a helper for heavy pieces — do not drag furniture to avoid scratching surfaces or bending legs). Place each riser cup on the ground at the correct position.
- Lower each leg squarely into its cup. Tap with a rubber mallet if there's resistance. The leg should sit flat and fully inside the cup with no rocking.
- Place your torpedo level on the seat surface and check for level in both directions. On a hard flat surface this is usually fine; on uneven stone or a deck, you may need to shim individual cups.
- Test stability by pressing firmly down and side-to-side on the frame before you sit. The furniture should not rock or slide.
- If the risers are smooth-bottomed, apply adhesive-backed felt pads or rubber grip tape to the cup bottoms to prevent sliding on tile, concrete, or composite decking.
A note on load ratings: many 4-pack plastic riser sets advertise combined ratings of 1,300 to 2,200 lbs, which sounds impressive, but those are vendor claims. What matters is the per-leg rating and whether the cup material is rigid enough not to compress or crack under sustained outdoor temperature swings. Polypropylene risers can become brittle in sustained cold or warp in intense heat. For furniture that stays outside year-round, look for cast-steel or heavy-duty reinforced risers, or plan to bring plastic risers inside for winter storage.
| Attribute | Detail |
|---|---|
| Height added | 2 to 5 inches (limited to available sizes) |
| Skill level | Beginner — no tools required |
| Average cost | $10 to $35 for a 4-pack |
| Time to install | 15 to 30 minutes |
| Best for | Hard, flat surfaces; temporary or seasonal use |
| Biggest drawback | Can shift or sink on soft ground; plastic degrades outdoors over time |
Method 2: Leg extenders and adapter sleeves
Leg extenders and adapter sleeves slide over or attach to the existing leg, effectively lengthening it. Metal clamp-style extenders are the most durable outdoor option; screw-on adapter sleeves work well for hollow aluminum or steel tube legs common on modern patio chairs. This method gives you more precision than a cup riser because many adjustable models let you dial in exact height in 1/4-inch increments.
Materials to have ready
- Adjustable leg extenders or adapter sleeves sized to your leg diameter (measure leg outer diameter precisely — even 1/8 inch off makes for a sloppy fit)
- Stainless steel hose clamps or set screws (most metal extender kits include these)
- Thread-locking compound (Loctite Blue 243 or equivalent) for set screws that will see vibration
- Rubber end caps for the new bottom of the extender
- Anti-slip grip tape if the extender base will contact a smooth surface
Step-by-step installation
- Flip or tilt the furniture to access the leg tips. Clean dirt and old rubber caps off the legs with a rag.
- Slide the extender sleeve over the bottom of each leg. For clamp-style extenders, thread the hose clamp loosely around the sleeve.
- Set the extender to your desired height increment and tighten the set screw or clamp firmly. Apply a small drop of thread-locking compound to set screws before final tightening.
- Install a rubber or plastic end cap on the bottom of each extender to protect your surface and add grip.
- Right the furniture and check level with your torpedo level. Adjustable extenders let you compensate for slightly uneven leg lengths — adjust individually until the piece sits flat.
- Do a load test: sit on the piece and wiggle. Listen for any creaking at the attachment point. If you hear movement, the clamp needs tightening.
Stability tip: the longer an extender, the more leverage is applied at the attachment point. For extensions over 3 inches on a chair that will regularly hold an adult, use two clamp points if the extender design allows it, or switch to the leg-replacement method described next. I learned this the hard way when a single-clamp extender rotated 15 degrees mid-dinner and dumped a plate of food on the patio.
| Attribute | Detail |
|---|---|
| Height added | 1 to 6 inches, adjustable in most models |
| Skill level | Beginner to intermediate |
| Average cost | $20 to $60 for a set of 4 |
| Time to install | 30 to 60 minutes |
| Best for | Metal tube-leg patio furniture; precise height targeting |
| Biggest drawback | Clamp can loosen over time; poor fit on non-standard leg sizes |
Method 3: Replace or build new legs
This is the most labor-intensive option, but it's also the most durable and gives you full control over height, material, and finish. It's worth it when the existing legs are damaged, rusted, or simply too short to reach your target height even with extenders. It's also the best approach for solid wood furniture like teak or eucalyptus dining sets where you want a seamless look.
Designing and measuring new legs
Start by measuring the existing leg from the point where it attaches to the frame down to the floor. Subtract this from your target seat height (adding the difference gives you your new leg length). For a dining table, standard table height is 29 to 30 inches from floor to tabletop; for a chair, target 17 to 19 inches seat height. Write down the attachment method too: are the old legs screwed in, bolted through, or glued and doweled? You'll replicate the same attachment for the new legs.
Materials for wood replacement legs
- Lumber: 4x4 posts (3.5 x 3.5 inches actual) for dining tables and heavy pieces; 2x3 or 2x4 for lighter chairs. Teak, ipe, or cedar for outdoor use; treated pine as a budget option
- Table leg hardware: 3/8-inch hanger bolts, leg mounting plates, or T-nuts depending on your attachment style
- Countersink drill bit
- Jigsaw or miter saw for cutting legs to length and tapering if desired
- Spar urethane or marine-grade varnish for finishing bare wood
- Stainless steel screws or bolts (A2-70 minimum for outdoor use)
Step-by-step build and attach
- Remove the old legs. For bolted legs, use a wrench; for screwed legs, use a drill driver in reverse. Label each leg position with tape so you can match attachment holes.
- Cut your lumber to the calculated length. Make sure all four cuts are square (90 degrees) so legs sit flat without rocking. A miter saw is best here; a handsaw works but takes more care.
- Sand all cut faces and edges with 80-grit, then 120-grit. Round over any sharp corners slightly to prevent splitting.
- If your original legs used hanger bolts and a mounting plate, drill a pilot hole for the hanger bolt in the top center of each new leg, then thread the hanger bolt in by hand and tighten with two nuts locked against each other.
- Apply two coats of spar urethane to all surfaces before attaching — it's far easier to finish legs before they're installed. Let each coat dry per the manufacturer's guidance (typically 4 to 6 hours between coats).
- Attach the legs to the frame using the original mounting hardware or new stainless hardware of the same spec. Tighten firmly but do not overtorque and strip the threads.
- Set the furniture upright, check for level, and do a seated load test before putting it into regular use.
| Attribute | Detail |
|---|---|
| Height added | Any amount — you cut to your exact target |
| Skill level | Intermediate — requires basic woodworking cuts and finishing |
| Average cost | $20 to $80 depending on wood species and hardware |
| Time to complete | 2 to 5 hours including finish drying time |
| Best for | Damaged legs; large height changes; solid wood furniture |
| Biggest drawback | Most time-intensive; requires saw and finishing skills |
Method 4: Build or buy a stacking platform or raised deck section
A platform raises all your patio furniture together as a unit, which is ideal for a seating group or dining set where you want a consistent level change across multiple pieces. It also reads as a design feature rather than a repair. Pre-made composite deck tiles (12x12 or 24x24 inch snap-together tiles) give you a fast DIY version; a framed pressure-treated platform is the more permanent and load-bearing route.
Plans and sizing
Map out the footprint of all the furniture you want to raise, then add at least 12 inches on each exposed side for safety, you don't want chair legs right at a platform edge. Standard deck tile thickness runs about 1 to 1.5 inches. A framed platform using 4x4 posts and 2x6 decking can be built to almost any height, with 4 to 8 inches being the most practical range for a furniture riser purpose.
Step-by-step assembly (framed platform)
- Mark out your platform footprint with stakes and string. Check corners are square using the 3-4-5 triangle method (mark 3 feet on one string, 4 feet on the adjacent string — the diagonal between those points should be exactly 5 feet if the corner is square).
- Set your 4x4 posts or beam supports at corners and every 24 inches along the perimeter. On a hard surface, use adjustable post bases anchored with concrete anchors; on a soft surface, use precast concrete deck blocks set on a level compacted gravel bed.
- Frame the perimeter with doubled 2x6 lumber, screwed and bolted together with stainless hardware. Add internal blocking every 16 to 24 inches for a rigid, non-springy surface.
- Lay your decking boards (cedar, pressure-treated pine, or composite) with a 1/8-inch gap between boards for drainage. Fasten with stainless screws, countersunk slightly so screw heads sit flush and do not catch chair legs.
- Install anti-slip strips or apply a grit-infused deck paint to the walking surfaces. 3M Safety-Walk tape or similar products with tested coefficient-of-friction ratings are appropriate here — especially important at platform edges.
- If the platform is more than 3 inches above the surrounding surface, add a beveled edge board or a low step on the entry side so the height change is visually clear and easy to navigate.
Drainage is something a lot of first-time platform builders overlook. If water pools under a low platform, the framing will rot quickly even with treated lumber. Keep that 1/8-inch board gap, ensure the ground beneath slopes away from the structure, and avoid placing a solid underlay that traps moisture against the joists.
| Attribute | Detail |
|---|---|
| Height added | 1.5 inches (tile method) to 8+ inches (framed platform) |
| Skill level | Intermediate to advanced for framed platform; beginner for snap tiles |
| Average cost | $50 to $100 for snap tiles; $150 to $400+ for framed platform (materials only) |
| Time to complete | 1 to 2 hours for tiles; full weekend for framed platform |
| Best for | Raising a full seating or dining group; uneven or soft ground |
| Biggest drawback | Largest investment in time and materials; permanence may be a downside for renters |
Method 5: Thicker cushions or seat inserts
This is the quickest and cheapest way to raise perceived seat height and it's perfectly legitimate for everyday use. A standard patio chair cushion is about 3 to 4 inches thick when new, but compresses to 2 inches or less after a season. Swapping in a higher-loft cushion or adding a firm seat insert can raise your effective seating height by 2 to 5 inches without touching the furniture structure at all.
What types to look for
- Reticulated (open-cell) foam seat inserts: these allow water to drain through the foam rather than pooling inside the cushion. They cost more than standard foam but dry much faster, which matters when they're sitting outside after rain. Look for cushions labeled 'quick-dry' or that list reticulated foam in their construction.
- Memory foam outdoor inserts: very comfortable and available in 3 to 5 inch thicknesses, but make sure the cover fabric is water-resistant. Unprotected memory foam will absorb water and mildew rapidly.
- High-density polyester fiber fill: the lightest option, good for back cushions but tends to compress quickly and is less suitable as a seat-height booster.
- Firm riser cushions: sold specifically as chair-raising cushions for elderly or post-surgery use, these are typically 4 inches of dense foam in a waterproof cover and are meant to stay in place.
For outdoor cushions that will see direct sun, look for covers made from solution-dyed acrylic fabric (Sunbrella is the best-known brand). The solution-dyed process means the color goes all the way through the fiber, not just the surface, which makes it far more UV and mildew resistant than printed or coated alternatives. This matters because a cushion that fades, mildews, or falls apart within one season is not actually a budget-friendly choice.
Attachment tips
Most seat inserts shift around on smooth chair seats. Prevent this by sewing or stapling a 2-inch strip of hook-and-loop (Velcro) tape to the underside of the cushion and sticking the other half to the chair seat with outdoor-rated adhesive. For seat inserts on metal or plastic chairs, non-slip rubber shelf liner cut to shape and placed between the cushion and the chair works extremely well and costs almost nothing.
| Attribute | Detail |
|---|---|
| Height added | 2 to 5 inches |
| Skill level | None required |
| Average cost | $20 to $80 per cushion depending on foam type and fabric |
| Time to install | Under 10 minutes |
| Best for | Temporary fix; rental properties; accessibility adjustments; seasonal changes |
| Biggest drawback | Does not raise table height; cushion eventually compresses; not appropriate for legs that need structural raising |
Method 6: Pavers, concrete blocks, and deck blocks for grass or soft ground
If your patio furniture sits on grass or soft soil, this method solves two problems at once: it stops legs from sinking and adds height. For more on grounding options, see what to put under patio furniture for choices like pavers, deck blocks, and gravel pads that prevent sinking and add height. Setting furniture legs on individual pavers or grouped paver sections is a common approach for lawns and garden areas, and done right it stays level and stable through seasons.
Site preparation and leveling
- Mark the footprint of each furniture leg position using a piece of chalk or a small stake.
- For each leg position, remove the turf in a circle or square about 6 inches wider than your paver. Dig down 2 to 3 inches.
- Fill the excavated area with angular crushed gravel (also called crusher run or road base), not pea gravel — angular gravel compacts and locks in place; rounded pea gravel shifts under load. Compact it firmly with your foot and a piece of scrap lumber.
- Set a 2-inch layer of coarse sand over the gravel and screed it level with a board. This is your bedding layer.
- Place your paver or concrete deck block on the sand bed. Check level in both directions with your torpedo level. Add or remove sand as needed.
- Set the furniture leg on the paver. Check the entire furniture piece for level and adjust individual paver heights as needed by adding or removing sand underneath.
- If the furniture will be permanent-ish, fill the gaps around each paver with polymeric sand and tamp in. This resists ant tunneling and weed growth, both of which destabilize paver height over time.
For a full furniture group on grass, say a four-chair dining set, consider running a connected paver pad rather than four isolated leg pads. This mirrors proper patio paver installation practice: a compacted 4 to 6 inch aggregate base with a 1-inch sand bedding layer, edge restraint, and polymeric joint sand. This level of prep prevents differential settling, which is the main failure mode where one paver sinks faster than another and leaves you with a wobbly table.
Underlay and anchoring notes
Place a woven geotextile fabric between the native soil and your gravel layer if the ground is particularly soft or clay-heavy. This prevents the gravel from gradually mixing down into the soil over years. For furniture anchoring on pavers, avoid the cheap zip-tie-style anchor kits, independent testing has shown these can fail at relatively low loads. If wind loading is a concern in your area, use purpose-made ground anchors driven beside the paver or weight the furniture with sand bags stored beneath seating when storms are forecast. The CPSC's Anchor It! campaign, which has contributed to nearly a 50% decline in tip-over injuries, emphasizes that a stable base design matters more than add-on straps alone.
| Attribute | Detail |
|---|---|
| Height added | 1.5 to 4 inches per paver layer; stackable for more |
| Skill level | Beginner for single pavers; intermediate for a full paver pad |
| Average cost | $5 to $30 for individual pavers and gravel; $80 to $200 for a connected pad |
| Time to complete | 30 minutes per leg pad; half a day for a full group pad |
| Best for | Grass, soft soil, or uneven ground; permanent outdoor setups |
| Biggest drawback | Labor-intensive prep for the proper version; shortcuts lead to settling and wobble |
How these methods compare side by side
| Method | Height Range | Skill Level | Avg. Cost | Best Surface | Permanent? |
|---|---|---|---|---|---|
| Furniture risers | 2 to 5 in | Beginner | $10 to $35 | Hard/flat | No |
| Leg extenders/sleeves | 1 to 6 in | Beginner to intermediate | $20 to $60 | Hard/flat | Semi |
| Replace/build new legs | Any | Intermediate | $20 to $80 | Any | Yes |
| Stacking platform/raised deck | 1.5 to 8+ in | Beginner to advanced | $50 to $400+ | Any | Yes |
| Thicker cushions/inserts | 2 to 5 in | None | $20 to $80 | Any | No |
| Pavers/concrete blocks | 1.5 to 4 in per layer | Beginner to intermediate | $5 to $200 | Grass/soft ground | Semi |
My honest recommendation: if you need a quick, reversible fix on a hard surface, start with furniture risers or thicker cushions. For a detailed step-by-step guide on how to raise patio furniture, see this comprehensive guide. If the furniture will stay outside permanently and sits on grass or soft ground, pavers with a proper gravel base are worth the extra prep work. If you need more than 5 inches of lift or the existing legs are damaged, building new legs is the cleanest long-term solution. And if you're raising a whole furniture group for looks or accessibility, a snap-tile platform is the most design-friendly approach for a weekend project.
Stability and safety checks you should not skip
Raising furniture shifts its center of gravity upward, which means it's slightly more prone to tipping in wind or when someone puts lateral pressure on it. The CPSC recommends anti-tip measures for all raised furniture, and while the campaign focuses primarily on indoor furniture, the physics apply outdoors too. CPSC's "Anchor It!" campaign recommends anchoring furniture to prevent tip‑overs and reports it helped contribute to an almost 50% decline in tip‑over injuries. Here's a quick post-installation safety checklist regardless of method used.
- Sit test: sit normally on chairs and shift your weight to each side. The piece should not rock, slide, or make cracking noises.
- Tip test: with furniture unoccupied, apply firm lateral pressure to the top back of chairs. It should resist, not slide or tip easily.
- Level check: use a torpedo level on the seat surface and tabletop. Even a 1/4-inch difference across a 4-foot table feels noticeable when dining.
- Fastener check: after the first week of use, re-tighten any screws, bolts, or clamps. Outdoor temperature changes cause materials to expand and contract, which can loosen hardware that felt tight at installation.
- Weight check: confirm your chosen method is rated for the maximum combined occupant load you expect. Do not exceed the furniture manufacturer's per-seat weight rating simply because the riser or extender claims a higher rating.
- Annual inspection: before each season, inspect all riser cups, extender clamps, leg joints, and platform fasteners for corrosion, cracking, or loosening. Replace any corroded hardware with fresh stainless steel.
When raising furniture is the wrong answer
Sometimes the real problem is not height, it's placement or the condition of the furniture itself. If legs are cracked, severely rusted, or the frame is bent, adding height to an already compromised structure is not a safe fix, repair or replace the piece first. If the discomfort is about the furniture sitting in a bad spot (sinking lawn, sun exposure, awkward traffic flow), rethinking placement might solve more than raising. See guidance on where to put patio furniture for help choosing placement based on sun, drainage, and traffic flow. Questions about where to put patio furniture, how to set up a group on grass, or how to stage an outdoor seating area for balance are worth working through before committing to any structural change. And if the furniture is simply past its useful life, knowing how to evaluate whether a piece is worth restoring versus selling is a useful step before investing in new hardware.
Troubleshooting the most common problems
| Problem | Likely Cause | Fix |
|---|---|---|
| Furniture rocks after raising | Uneven leg lengths or unlevel ground | Adjust individual risers/extenders; use a level and shim as needed |
| Riser cups slide on tile or composite | Smooth cup base with no grip | Add adhesive rubber pads or anti-slip tape to cup bottoms |
| Extender clamp spins or slips | Clamp too loose or leg surface is smooth powder-coat | Tighten firmly; add a wrap of mesh grip tape around leg before clamping |
| New wood legs split at fastener hole | Pilot hole too small or fastener overtorqued | Drill a properly sized pilot hole; use a washer to distribute load |
| Platform boards feel bouncy | Joists spaced too far apart or not enough blocking | Add blocking between joists at midspan; reduce spacing to 16 inches |
| Pavers sink unevenly after rain | Insufficient compacted base depth or pea gravel used instead of angular gravel | Dig deeper, replace with angular crushed gravel, compact in layers, re-bed |
Keeping raised furniture in good shape season to season
Whatever method you use, outdoor furniture that sits raised has a few extra maintenance needs. Wood legs and platforms should get a fresh coat of spar urethane or marine varnish every one to two seasons, sanding lightly with 120-grit between coats for adhesion. Plastic risers should come inside over winter if temps regularly drop below freezing in your area, polypropylene becomes brittle and can shatter under load in sustained cold. Metal extenders should be inspected for surface rust annually; a light sand and a coat of cold-galvanizing spray keeps them serviceable for years. Paver bases should be checked for heave after the first freeze-thaw cycle and releveled if needed. These are not major tasks but catching them early is far cheaper than replacing a piece because a corroded clamp failed quietly over a winter.
FAQ
What are simple, quick ways to raise the height of patio chairs, sofas, benches, and tables?
Easy quick fixes: furniture risers (stack‑able plastic/wood blocks) under each leg; leg extenders or clamp‑on metal sleeves; add seat cushions/foam pads for chairs and sofas; place a raised platform or decking tile under the whole piece; and stack solid pavers/landscape blocks under legs for use on grass or soil. These methods are fast and often tool‑light, but vary in durability and weather resistance.
How do I decide which height‑raising method is best for my furniture?
Match method to goals: for small seat height increases (1–4 in) use cushions or low risers; for 2–6+ in and heavier loads use commercial risers, leg extenders, or build/replace legs; for whole‑piece elevation or uneven ground use a custom platform or paver base. Consider weight capacity (manufacturer spec or estimated load per leg), outdoor exposure, desired permanence, appearance, and budget. For accessibility targets, aim 17–19 in seat height per ADA guidance for transfer‑friendly seating.
How do I measure and check load capacity before raising furniture?
Measure: seat height now and desired height; leg diameter/footprint; total furniture weight and expected max user load (use manufacturer manual if available—many patio seats list 250–375 lb per seat). Load check: divide total expected load plus furniture weight by number of legs to get per‑leg load. Compare to riser or leg extender rating and material bearing capacity (for wood, use published allowable compressive stresses). Add safety factor (2×) for DIY setups and untested products.
What tools and materials will I need for each method?
Furniture risers: riser set, measuring tape, level, protective pads. Leg extenders/replacement legs: measuring tape, wrench/sockets, drill, wood/metal stock, bolts or marine‑grade screws (stainless A2/A4 per exposure), wood glue, sandpaper, paint/finish. Build platform: plywood/treated lumber, joists, screws, circular saw, drill, compactor (for pavers), pavers or deck tiles, weatherproof finish. Cushions: outdoor foam (reticulated), Sunbrella‑style fabric, staple gun. Pavers/blocks on grass: pavers/blocks, compacted base (gravel/sand), level, edge restraint. Anti‑tip anchors: brackets, straps, drill and anchors suitable for surface.
Step‑by‑step: how to install commercial furniture risers safely?
1) Clean leg bottoms and measure leg diameter/footprint. 2) Choose risers rated above your calculated per‑leg load and sized to fit leg or add adapter pads. 3) Place risers under each leg; use a level to check evenness. 4) Secure with high‑grip adhesive pads, screws (if manufacturer permits), or anti‑slip tape. 5) Test stability by applying weight gradually and check for wobble; adjust with shims if needed. 6) For outdoor use, choose UV‑resistant materials and periodically re‑check condition.
Step‑by‑step: how to install clamp‑on or bolt‑on leg extenders or replace legs?
1) Remove old legs if replacing and measure mounting interface/bolt pattern. 2) Buy extenders or legs sized for load and weather exposure (stainless/hot‑dip galvanized hardware per Simpson guidance). 3) For clamp extenders, follow clamp torque specs, fit to leg, and tighten securely; for bolt‑on, drill pilot holes, use appropriate bolts/washers, and torque to spec. 4) Add anti‑seize or sealant on exterior fasteners to avoid corrosion. 5) Level the piece and test by gradually loading. 6) Finish wooden replacement legs with exterior spar varnish or paint for weatherproofing.