Staging patio furniture comes down to three things done in the right order: plan your layout around how you actually use the space, place pieces so people can move comfortably without bumping into chairs or squeezing past tables, then layer in rugs, cushions, and accessories to make it feel intentional. Get those three steps right and the space looks like a designer touched it, even if you moved everything yourself on a Saturday morning.
How to Stage Patio Furniture: Layout and Styling Steps

Maren Grady
17 Jun 2026
Choosing the right setup for your space and how you'll use it
Before you move a single chair, decide what this patio is actually for. A dining setup, a lounge zone, and an entertaining layout all have different spacing needs, different furniture groupings, and different focal points. Trying to squeeze all three onto one small patio without planning is the number one reason patios end up feeling cluttered and awkward.
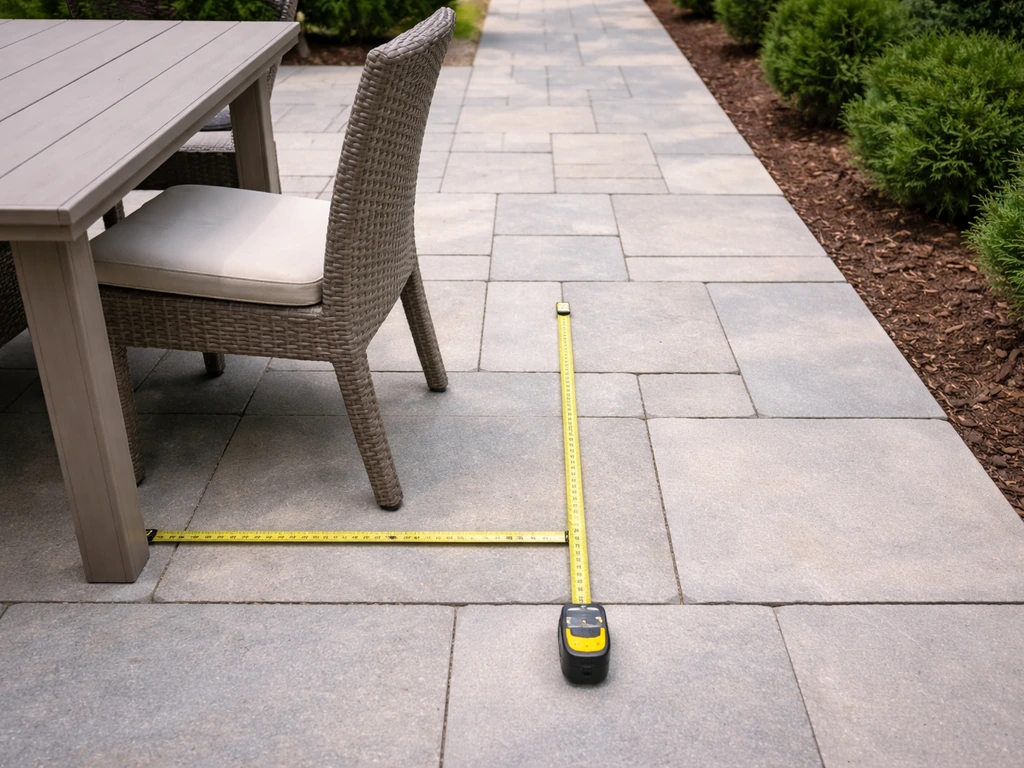
Start by measuring your usable square footage, and be honest about what 'usable' means. Subtract clearance for doors that swing outward, any steps, posts, grill stations, and the path from your back door to the yard. On a typical 10x10 patio, that often leaves you closer to 55–70 square feet of workable staging space once those zones are carved out. That's enough for a bistro table and two chairs, or a small loveseat and coffee table, but not both without things feeling cramped.
Once you know your real footprint, match it to a purpose. Here's how I think about the three common setups:
- Dining-focused: A table and chairs are the centerpiece. Everything else — side tables, a bar cart, a small planter — plays a supporting role and stays out of the chair-pull zone.
- Lounge-focused: Sofas, loveseats, and chairs arranged around a coffee table or firepit. Works best when the focal point (a view, a feature wall, a fire element) is decided first, then seating faces it.
- Entertaining/hybrid: A dining zone on one side, a lounge cluster on the other. Only works well if the patio is at least 12x16 feet — otherwise one area always feels pinched.
If you're working with a smaller patio and want ideas on physically placing furniture on different surface types, like grass or uneven ground, that's a separate consideration worth thinking through before you commit to a layout.
How to stage patio furniture step by step
I always stage outdoors in a specific order because skipping steps creates rework. Here's the process that's worked for me every time.
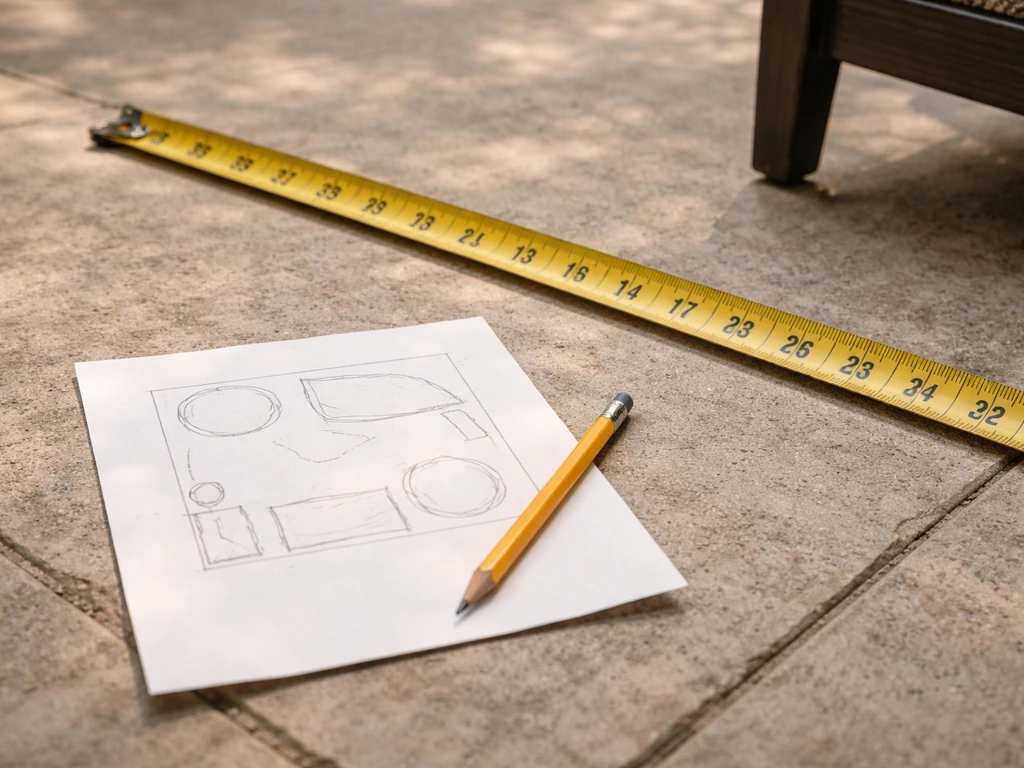
- Sketch your layout on paper first. You don't need graph paper — a rough drawing with rough measurements is enough. Mark where doors, steps, and the yard access path are before you place anything.
- Lay down the rug (if you're using one). The rug defines the zone, so it goes down before any furniture. Once pieces are on top of it, you're locked in. More on sizing in the next section.
- Place the anchor piece first. For dining, that's the table. For lounge, it's the sofa or the largest chair. Everything else positions relative to this piece.
- Build outward from the anchor. Add chairs around the dining table, or pull lounge chairs toward the sofa. Keep spacing generous at this stage — you can always tighten things up, but you can't undo a cramped layout once you've gotten used to it.
- Check your clearances before adding anything else. Walk the space. Open any doors nearby. Pretend you're carrying a plate from the kitchen. If you have to turn sideways anywhere, something needs to move.
- Add side tables, ottomans, and accessories last. These are the easiest things to reposition, so save them for fine-tuning.
The spacing numbers that actually matter
Here's where most DIY stagings go wrong: guessing at spacing instead of measuring. These are the numbers I keep in my back pocket for every outdoor layout:
| Situation | Minimum clearance | Comfortable clearance |
|---|---|---|
| Chair pull-out space around dining table | 27–30 inches | 36–48 inches |
| Main walkway / circulation path | 30 inches | 36–48 inches (48" if carrying items) |
| Path from grill/kitchen to dining table | 36 inches | 48 inches |
| Between lounge coffee table and surrounding chairs | 16 inches | 18–24 inches |
| Outdoor rug extension past table edges | 24 inches on all sides | 36 inches on all sides |
The 36–48 inches around a dining table might feel like a lot until you've watched someone at a party have to drag their chair across pavers every time they stand up. Give people room to move. If the math doesn't work with the furniture you have, either swap out for a smaller table or lose one chair, a comfortable four-person setup beats a miserable six-person one every time.
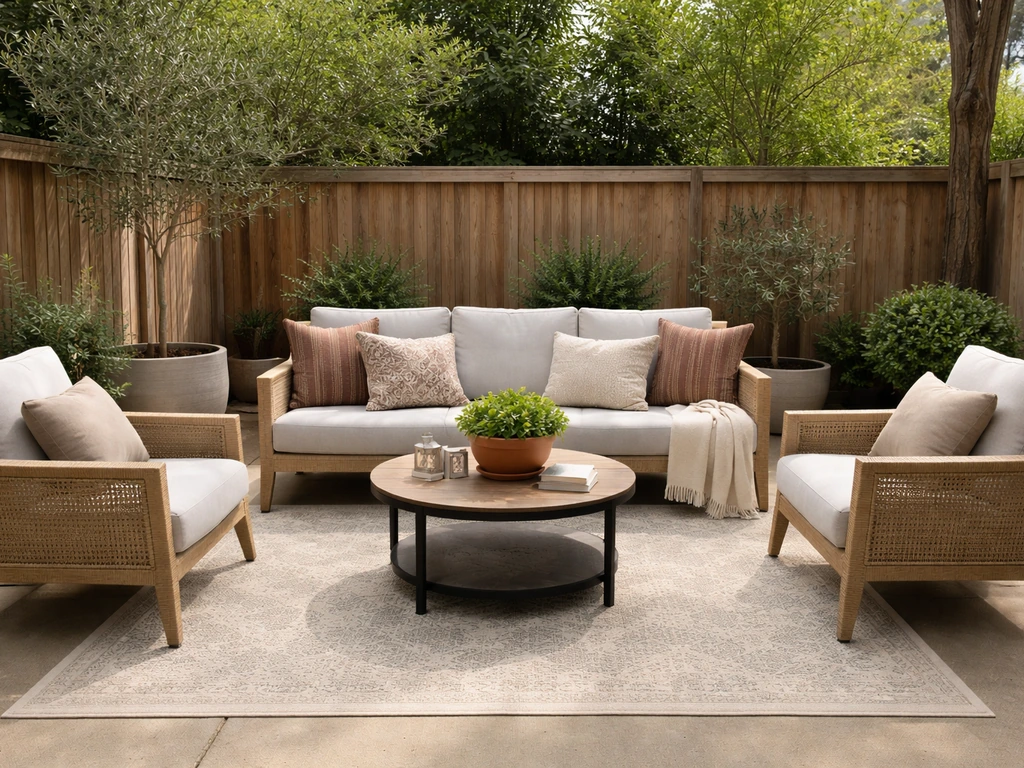
Styling like a designer: focal points, color, and layering
Good staging isn't just about where things go, it's about making the space feel finished. The difference between 'furniture placed outside' and 'an outdoor room' usually comes down to three design moves: picking a focal point, grounding pieces with a rug, and layering texture through cushions and accessories.
Pick one focal point and orient everything toward it
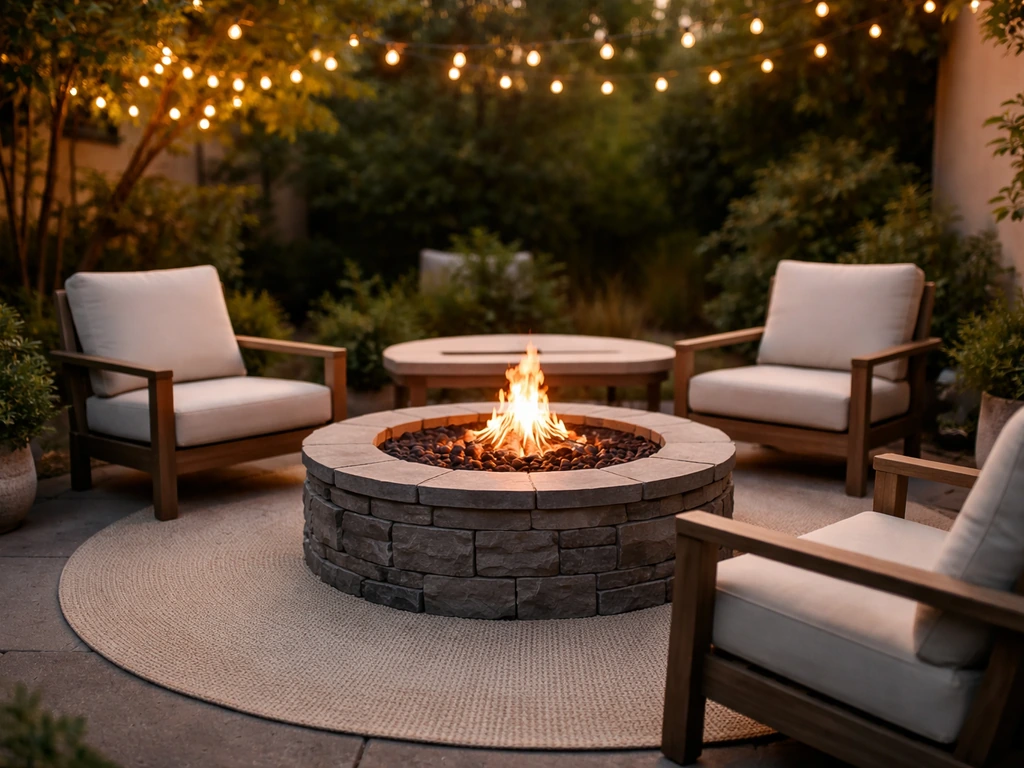
Every well-staged outdoor space has one thing that draws your eye first, a view, a firepit, a feature planter, a string-light canopy, even a bold accent wall. Once you've identified yours, orient seating so it faces that point. This is the same principle designers use for indoor living rooms, and it works just as well outside. If you don't have a natural focal point, create one: a large statement planter or a fire table can anchor a lounge zone in a way that makes scattered furniture read as intentional.
Ground the space with an outdoor rug
An outdoor rug does more visual work than almost any other accessory. It tells the eye 'this is a room,' not just furniture sitting on concrete. One simple way to decide what to put under patio furniture is to use an outdoor rug for visual grounding and comfort. The key is sizing it correctly: the rug needs to extend at least 24 inches beyond all sides of a dining table so chair legs stay on the rug when pulled out. Going to 36 inches is even better. A rug that's too small, where chairs immediately slide off the edge, actually makes the space look worse than no rug at all. For lounge setups, front legs of all seating pieces should rest on the rug at minimum, with all four legs on it being ideal.
Layer cushions, throws, and accessories with color and texture
This is where the personality comes in, and it's easier than it sounds. Start with a simple color rule: pick two main colors and one accent. If your furniture is neutral (most aluminum, wicker, and teak frames are), your cushions carry the color story. Solid cushions in a main color, a pattern that combines both colors, and then a throw or a couple of accent pillows in the pop color, that's a complete, designer-looking palette on a budget. Outdoor-rated fabrics like Sunbrella hold up to UV and moisture, but even budget cushion covers from a home goods store will look great for a season or two if they're brought in when it rains.
For accessories, think in layers: something on the table (a lantern, a small potted succulent, a weather-resistant tray), something vertical (a tall planter, an outdoor floor lamp, a trellis), and something underfoot (the rug). Three layers of accessories at different heights make a patio feel rich without feeling cluttered. Keep accessories outdoor-safe, unglazed ceramics crack in frost, and untreated wood accessories will start looking sad after one rainy week.
Seasonal adjustments and weather-proofing while you stage
Here's the thing most staging guides skip: how you arrange furniture directly affects how easy it is to protect it when weather changes. A little forethought at staging time saves a lot of scrambling when rain rolls in or winter arrives.
Stage with covers and storage in mind
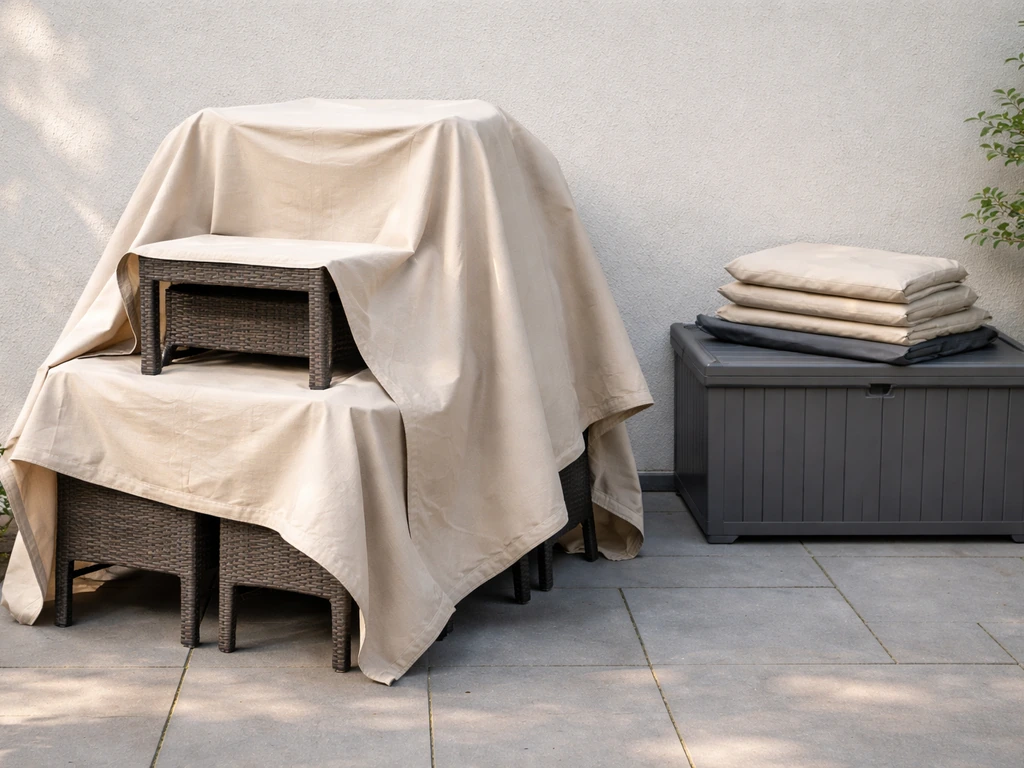
When you finalize your layout, mentally rehearse pulling furniture covers on. Pieces crammed too close together make covering them a nightmare, and if covering is hard, you'll skip it, and the furniture suffers. Leave enough space between pieces that you can slip a cover on each one without having to move anything. If you're using a shared cover for a sectional or dining set, make sure there's enough clearance around the group for the cover to hang down properly on all sides.
When you do use covers, use breathable ones. Trapping moisture under a non-breathable cover creates exactly the dark, damp conditions that mold and mildew love. I've made this mistake with a cheap vinyl cover on a teak bench, came back in spring to find green fuzz everywhere.
Cushion placement and seasonal transitions
For spring and summer staging, cushions go on last, after you've finalized the layout and cleaned everything. For fall and winter, cushions come off first, before you touch anything else. Clean them with mild soap and water, let them air-dry completely (this step is not optional, even slightly damp cushions stored in a bin will develop mildew spores), then store them inside or in a dry covered space. Don't machine-wash cushion covers unless the manufacturer specifically says you can. Sunbrella and similar performance fabrics do well with a hand-wash or a gentle hose-rinse, but machine agitation can break down the water-resistant coating over time.
For aluminum and powder-coated frames, a wipe-down with mild soap and warm water before covering for winter keeps surface grime from bonding to the finish. If you have wrought iron or aluminum, a light coat of clear automotive wax adds a UV and moisture barrier that really does extend the finish life. Teak benefits from a sealer applied after cleaning if you want to keep it from going silver-gray over time.
Troubleshooting the most common staging problems
Even a well-planned layout can develop problems once you actually live with it. Here are the issues I see most often and how to fix them without starting from scratch.
The space feels crowded
Crowding almost always means too many pieces for the footprint, or pieces that are scaled too large for the space. Before removing furniture entirely, try pulling one piece out, often a side chair, a second side table, or an oversized ottoman, and see how the space breathes. If it suddenly feels much better, you had one piece too many. On smaller patios, scaled-down furniture (bistro chairs instead of full armchairs, a round table instead of a rectangular one) makes a bigger difference than any styling trick.
Awkward sightlines and conversation flow
If people sit in your lounge area and can't comfortably make eye contact or talk without twisting around, the seating isn't oriented properly. The fix is almost always to angle chairs slightly inward, toward the center of the group rather than parallel to each other. A U-shape or slight inward-facing arrangement (the way a living room is staged) works far better outdoors than chairs lined up in a row along a railing.
The layout looks visually imbalanced
Visual imbalance usually comes from all the large or heavy pieces on one side of the space. If your sofa and side table are all pushed to the left and there's just one small chair on the right, the space feels lopsided. You don't need to add a matching sofa to fix it, a tall planter, a floor lamp, or even a chunky side table on the lighter side adds visual weight without adding more seating. Think of it like balancing a scale: you're matching visual mass, not necessarily matching piece types.
Tables wobble or sit unevenly on the ground
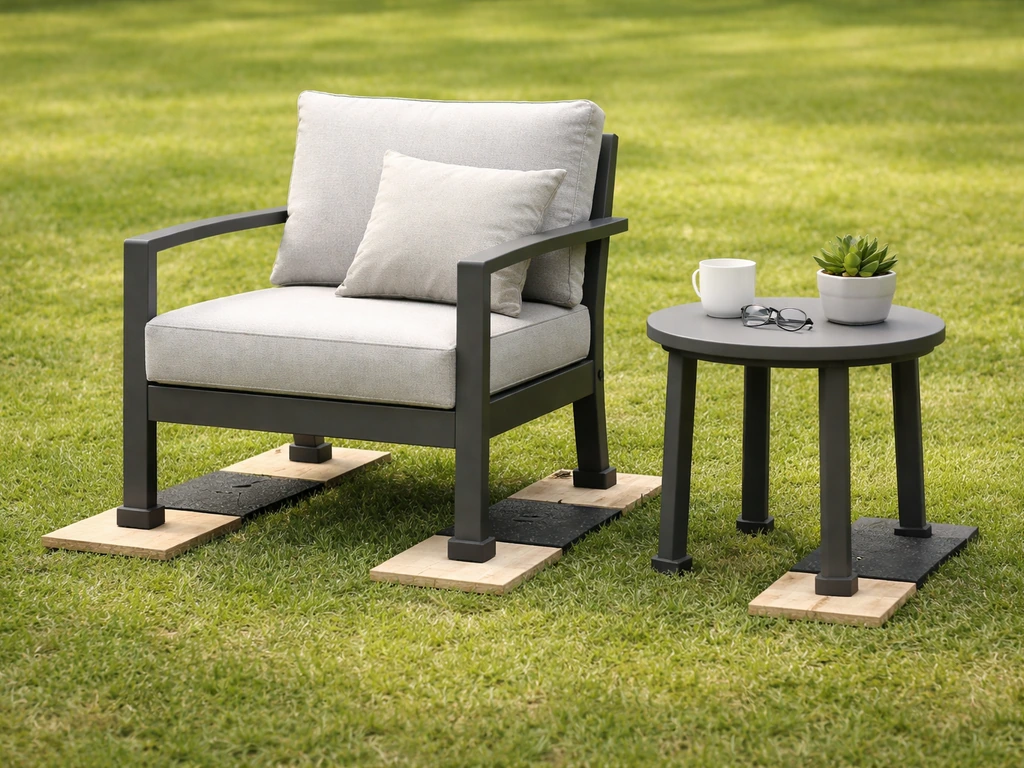
Uneven pavers, sloped concrete, and grass all create wobbly table problems. Before reaching for furniture risers or shims, check whether the issue is the ground or the furniture itself. If the frame legs are bent or the ground is the problem, furniture leveling glides (the screw-in adjustable kind) work well on most aluminum and steel frames and let you dial in level without shimming. If you're on grass, a flat stepping-stone or a patio pad under the table base takes the wobble away entirely. There's more depth on working with uneven ground and raising furniture height in the related guides on this site. If you want to make patio furniture higher for better comfort or sightlines, raising furniture height in the related guides on this site will walk you through safe options and what to measure first.
Mismatched scale between seating and tables
A coffee table that's too tall makes a lounge group feel stiff; one that's too low is a back-strain waiting to happen. The target range for a patio coffee table is roughly 1–2 inches below the sofa seat height, which typically puts it between 16 and 18 inches tall. For dining, seat height and table height need to give about 10–12 inches of clearance between the seat and the tabletop underside, standard dining chairs at 18 inches seat height pair with tables around 29–30 inches tall. If your existing pieces are mismatched, furniture risers can bring a low table up, and seat cushions can raise a chair's effective height. If you want more ergonomic sitting height, the quickest options are adding seat cushions, using risers, or choosing taller chairs that match your table height raise the height of my patio furniture.
Quick DIY fixes to get your furniture staging-ready
Staging reveals every flaw. A wobbly chair, a mildewy cushion, or a frame covered in winter grime will undercut even a perfect layout. Here's the pre-staging checklist I run through before placing a single piece. If you need to adjust height for uneven surfaces, see how to raise patio furniture before you place everything for your final look.
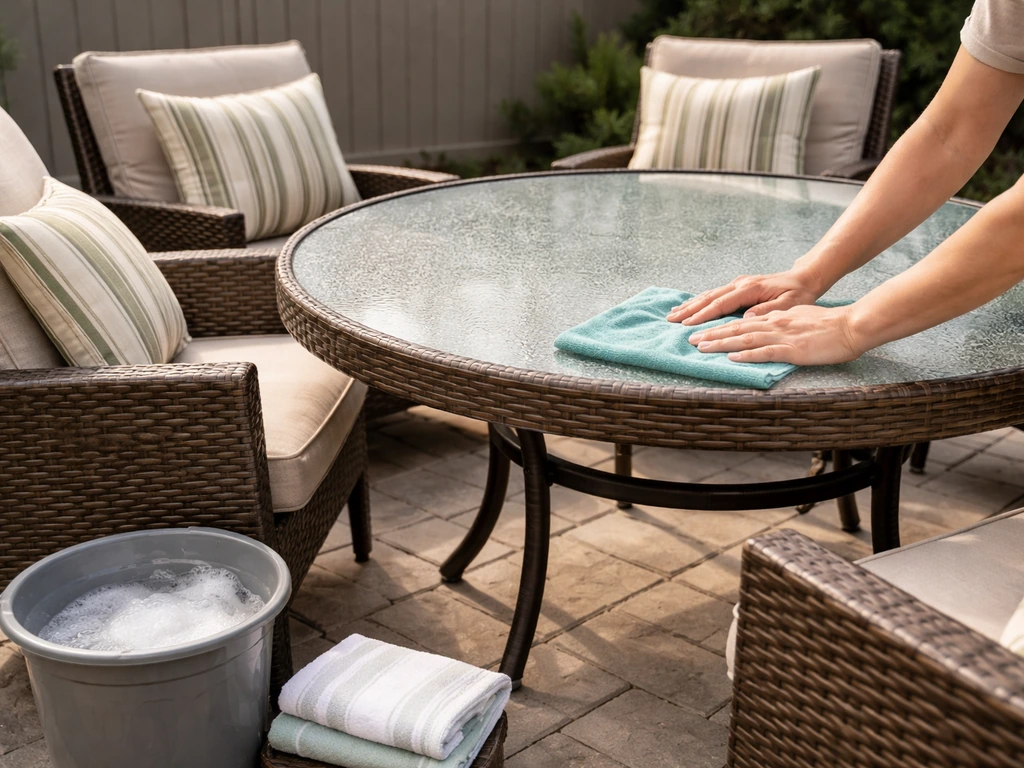
Deep clean everything first
Wipe down all frames with a sponge, mild dish soap, and warm water, then rinse thoroughly. For wicker, work the soapy water into the weave with a soft brush and rinse well. For cushion covers, spot-clean stains with soap and water, rinse, and let them air-dry completely in the sun before putting them back on. Don't skip the rinse, soap residue left on frames attracts more dirt and can streak lighter finishes. Once frames are clean and dry, this is a good time to apply that clear automotive wax to aluminum or wrought iron if you want longer-lasting protection.
Tighten all hardware
Outdoor furniture hardware loosens over a season of use and temperature swings. Grab a screwdriver and a wrench, go over every bolt, screw, and bracket on every piece, and snug everything up. This takes maybe 15 minutes across a full patio set and fixes 80% of the wobbles and creaks that make furniture feel cheap. If any bolts are stripped or missing, a hardware store will have replacements for pennies, bring the old bolt with you to match the thread.
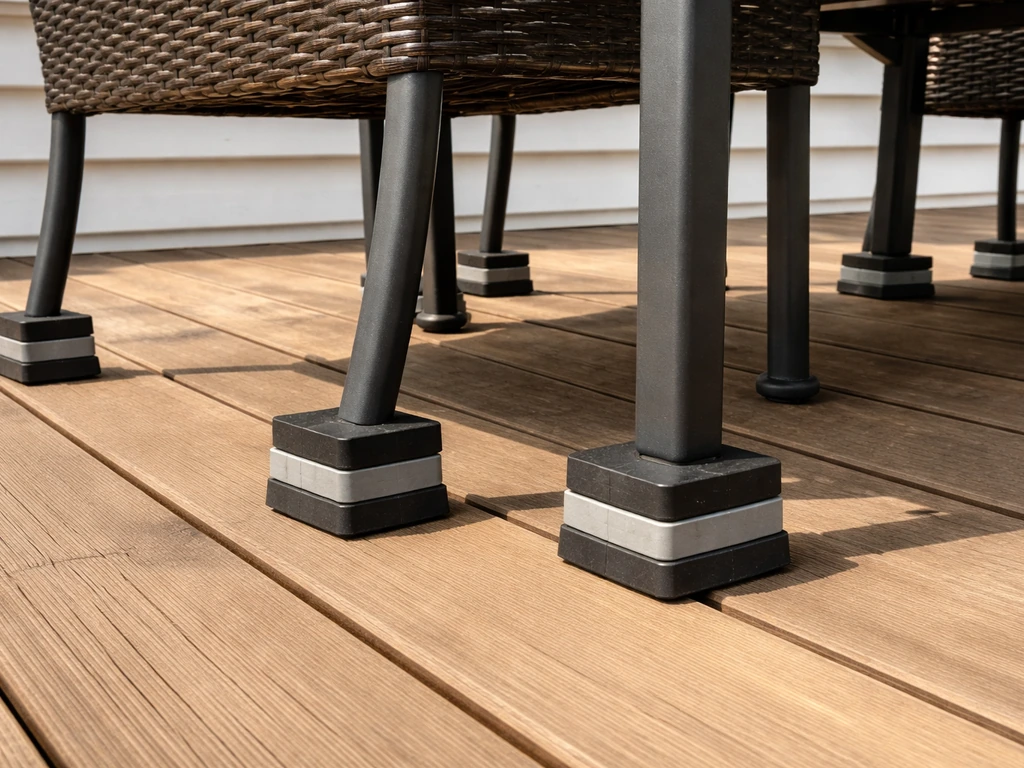
Level and stabilize wobbly pieces
After tightening hardware, test every piece for wobble. If a chair or table still rocks, check whether the ground is uneven or a leg is shorter than the others. For leg-length discrepancies, screw-in leveling glides are a cheap and adjustable solution, most hardware stores carry them for under $10 for a set of four. For ground-level issues, a rubber furniture pad or a flat tile under the short leg gets the job done. Check the levelness of your table surface with a cheap bubble level before staging accessories on it, a tilted table will slide things off and look wrong no matter how nice the accessories are.
Handle minor repairs before you stage
Staging over broken things doesn't hide them, it highlights them. A cracked armrest, a fraying strap, a rust spot on a steel leg: fix these before the furniture goes out. Rust on steel frames can be sanded back to bare metal, primed with a rust-inhibiting primer, and repainted with outdoor spray paint for under $20 total. Fraying sling fabric or webbing on chairs is replaceable with kits you can order online for most common frame sizes. If a wicker strand is unraveling, a dab of outdoor-rated adhesive tucked under the loose end and held for a minute stops the damage from spreading. None of these are big projects, but skipping them means your staging photos (and your guests) will notice.
Once you've cleaned, tightened, leveled, and repaired, you're actually ready to stage, not just move furniture around. That prep work is what separates a patio that looks assembled from one that looks designed. If you’re thinking about selling your patio furniture, these same prep steps also help the pieces look their best for photos and buyers sell patio furniture.
FAQ
Can I stage patio furniture using an outdoor rug if my patio is not level?
Yes, but use the right coverage strategy. For dining, extend the rug far enough that all chair legs stay on it when chairs are pulled out. For lounge, consider a rug that reaches under the front legs of every seating piece, and if you have an outdoor sectional, leave extra rug space so people can slide chairs in without forcing the frame to sit half on the rug edge.
How do I avoid blocking my main walking path when I stage a dining or lounge area?
Start by matching “use comfort” to your walking paths. A safe rule is to keep at least one clear route from your door to your main activity zone, then build furniture around that route instead of around the perimeter. If you frequently carry food or drinks, widen the path through the dining setup so you can pass with both hands (including when someone is seated).
What should I consider when staging patio furniture for maximum sun and heat comfort?
If your patio has a lot of heat, aim for shade before style. Place the seating so the heaviest sun hits cushions for the shortest time, then choose lighter fabrics or breathable cushion covers to reduce fading. If you use string lights or an umbrella, account for where the shade line will move during the day, otherwise you might stage the “perfect” spot that later becomes uncomfortable.
What layout approach works best for tiny patios where everything feels cramped?
For small patios, prioritize fewer, larger items over many small ones. If you want a coffee table, choose one that fits close to the sofa so it does not force long reach, then consider swapping deep armchairs for narrower chairs or even a loveseat that keeps the group tighter. If you are stuck between sizes, default to a round dining table and a single side table, a round footprint usually creates more usable clearance than a long rectangular one.
How do I keep the patio from looking “busy” when I already have patterned cushions?
Tie the color palette to the existing surfaces and avoid competing patterns. If your cushions are already patterned, keep accessories mostly solid (one pop color max) and repeat one of the cushion colors in a planter or tray. Also, avoid mixing too many textures, like simultaneously using shiny metal accents, glossy ceramics, and heavy woven pieces, unless you repeat each texture once to make it feel intentional.
How can I tell if my dining rug is the right size before I commit?
Confirm fit with a “pull test” before finalizing. After you set the rug and dining table, pull each chair out to its normal position, then check that chair backs do not hit other chairs and that chair legs still land on the rug. This catches the common mistake of buying a beautiful rug that is the correct size for the table, but too small once chairs are in use.
What’s the best way to plan for furniture covers while staging?
Do it in a cover-first order. Leave covers accessible by arranging furniture so you can reach each piece without dragging covers over tabletops. If you use shared covers, make sure the cover can hang down on all sides without being blocked by neighboring items. When coverage is hard, you will avoid covering at all, which leads to faster deterioration.
Can I stack outdoor cushions in bins for winter storage?
Yes, but plan for dryness and airflow. Store cushions only when fully dry, and if possible, keep them in breathable storage bags or a ventilated covered area rather than sealed plastic. For wet weather seasons, stagger storage so you can re-check for trapped moisture, especially after a short rain where cushions feel “mostly dry.”
If my patio looks lopsided, how do I fix it without adding more seating?
Often the fix is not more accessories, it is better balance and scale. Start by removing one or two smaller pieces, then add visual weight where it is missing, a tall planter, a floor lamp, or a larger tray. If the patio looks lopsided, treat “visual mass” like a scale, place the heavier items on the lighter side until it feels even.
What should I do first if my dining table wobbles after staging?
If the table wobbles, resolve the ground issue first. Use leveling glides for slight frame height differences, but if the underlying patio is sloped or uneven, place a flat stepping stone, patio pad, or stable tile under the short leg before you try risers. Also check table leveling with a bubble level before staging accessories, tilted tables make items slide even if the furniture feels sturdy.
How do I stage patio furniture so it still works well for real-life entertaining?
Prepare for “life changes” in the seating. If you expect guests frequently, stage with slightly more space between chairs than you think you need, it prevents pinch points when people stand up. If you have kids or pets, avoid small accessories that can topple easily, and anchor trays with non-slip pads so serving items do not slide during normal movement.