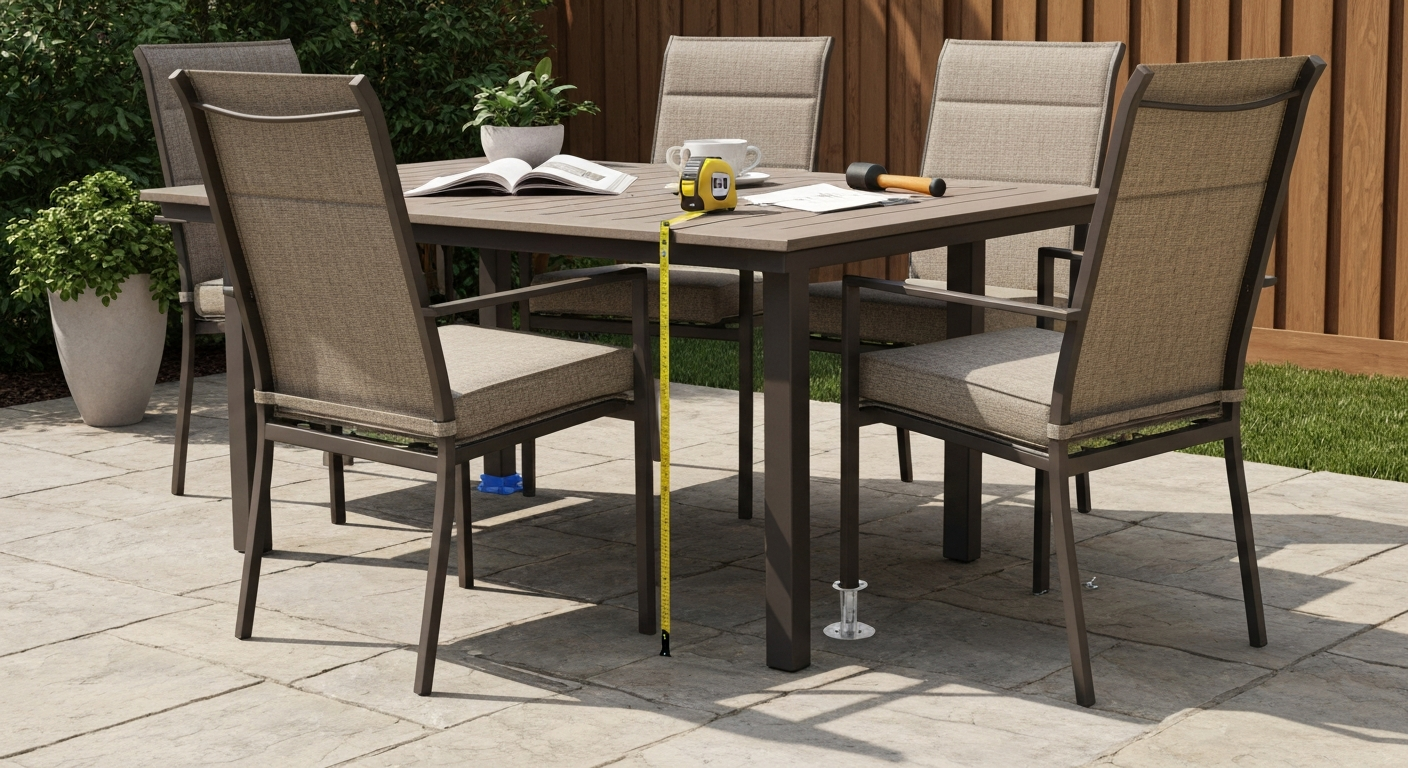
Put patio furniture where it will actually get used: somewhere with manageable sun and shade, protection from the worst wind, a stable level surface, and a clear path in and out. That sounds obvious, but most placement mistakes I've seen (and made) come from skipping the site check and just hauling chairs outside wherever there's open space. Spend 20 minutes walking your yard at different times of day before you move a single piece, and you'll save yourself months of regretting a choice that's hard to undo once you've leveled, anchored, and accessorized everything.
Where to Put Patio Furniture: Practical Placement & DIY Care

Maren Grady
13 Jul 2026
Quick placement checklist before you move anything
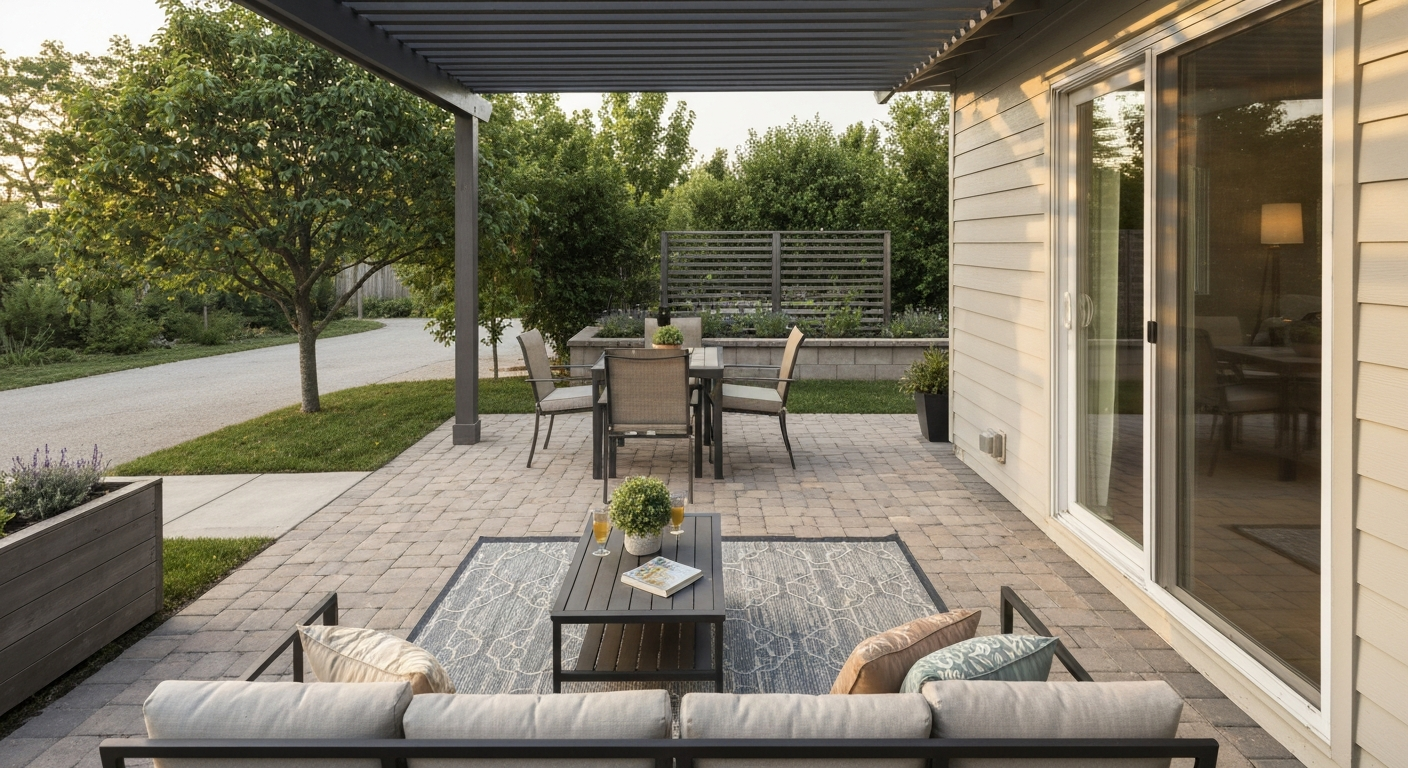
Run through this list before committing to any spot. It takes less than half an hour and catches the problems that cause most placement regrets.
- Sun: Track how much direct sun hits your target spot in the morning, midday, and afternoon. A spot that feels pleasant at 9 a.m. can be a furnace by 2 p.m. in summer. Mark the shady zones at both ends of the day.
- Shade: Note where tree canopy, roof overhangs, fences, or walls create shade. Remember that shade patterns shift as trees grow and as the sun's angle changes between seasons.
- Wind: Stand in the spot on a breezy day. Identify which direction the wind typically comes from and whether the site is exposed or sheltered. Check your nearest NOAA weather station's wind rose for prevailing direction if you want data rather than guesswork.
- Traffic: Walk every route you normally use to get from the house to the yard, to the grill, to the garden. Your furniture should not block any of those paths or force awkward detours.
- Sightlines: Sit down (use a camp chair if nothing is in place yet) and look around. Identify what views you want to face and what you'd rather not stare at, like a utility box or a neighbor's trash bins.
- Access: Check that you can comfortably carry food, drinks, and cushions to the spot. Stairs, narrow gates, and long hauls kill the convenience of even a perfectly placed set.
How to assess your outdoor site: microclimate, views, and flow
Every yard has microclimates, and they matter more than most people expect. A corner sheltered by a fence and a wall can feel 10 to 15 degrees warmer than an open patch of lawn 20 feet away. The north side of a house stays damp longer after rain. A spot between two walls can funnel wind into a tunnel effect. Doing a basic site inventory before you commit to placement is the same approach landscape architects use, and it genuinely pays off.
Walk your yard with a notepad or your phone at three times: early morning, midday, and late afternoon. Sketch a rough map and mark where sun hits, where it's shaded, where you notice pooling water after rain, and which direction wind comes from. Do this on two or three different days if you can. For wind, a $30 to $60 handheld anemometer (I use a Kestrel pocket meter) gives you actual wind speed readings at seating height, which is far more useful than just noticing it's breezy. Hold it at seated head level (roughly 3 to 4 feet off the ground) rather than standing height.
Once you have your notes, look for the spot that balances the things you can't control (sun arc, prevailing wind, drainage slope) with what you can add (a shade sail, a wind-blocking planter, a gravel base for drainage). The best placement is rarely perfect on its own. It's the spot where a little DIY effort fixes the one or two problems that exist.
Pros and cons of common patio surfaces
The surface your furniture sits on affects stability, drainage, furniture longevity, and how much prep work you'll need. Here's an honest look at the five most common options.
| Surface | Pros | Cons | Typical Installed Cost (U.S., 2025-26) | DIY-Friendly? |
|---|---|---|---|---|
| Concrete slab | Flat, durable, very stable for furniture; easy to clean | Cracks in freeze-thaw climates without air-entrained mix; hot in direct sun; hard to fix once poured | $4–$15/sq ft (basic broom finish); up to $30/sq ft stamped | Pouring is not beginner-friendly; repairs and prep are |
| Interlocking pavers | Permeable options available; replaceable if one cracks; good drainage with proper base | Needs engineered sub-base (compacted gravel + edge restraint) or it settles; joints can clog | $8–$30/sq ft installed depending on pattern and complexity | DIY-able with time; base prep is the hard part |
| Wood or composite deck | Warm underfoot; easy to customize height; works on slopes | Wood rots without maintenance; pressure-treated lumber checks and splits; composite is expensive | $15–$40/sq ft installed (pressure-treated at low end) | Moderate DIY; framing and ledger connections need care |
| Grass/lawn | Soft; no installation cost; flexible placement | Compaction damages turf and soil; furniture sinks on soft ground; uneven surface causes rocking | No cost, but protection products add $1–$4/sq ft | Easy to set up; requires anti-sinking measures |
| Gravel or crushed stone | Excellent drainage; inexpensive; easy DIY install | Furniture legs sink or tilt in loose gravel; shifts over time; uncomfortable underfoot without pads | $1–$4/sq ft DIY; $4–$8/sq ft installed | Very DIY-friendly; edging and base cloth are key |
My honest recommendation for most DIYers on a budget: a well-prepped paver or concrete surface wins for durability and stability. If you're on a tight budget and already have a lawn, grass with proper protection products is a fully workable option for seasonal furniture. Gravel is great for drainage but pairs poorly with standard furniture feet unless you add pads or a platform.
Surface preparation: cleaning, leveling, drainage, and base fixes
Skipping surface prep is where most DIY patio projects fail. I've seen perfectly good furniture start rocking, sinking, or rusting within a single season because the ground underneath wasn't ready. Here's how to prep each common surface before a single chair touches it.
Concrete
Sweep and hose down the slab, then inspect for cracks. Hairline cracks under 1/4 inch wide can be filled with a concrete crack filler (under $10 at any hardware store) and left to cure for 24 hours. Check for low spots by laying a 4-foot level across the surface and marking anywhere the gap exceeds 1/4 inch. Low spots that collect water can be built up with a self-leveling concrete resurfacer (about $25 to $40 per bag, covers roughly 50 sq ft at 1/4 inch depth). If you're in a freeze-thaw climate, look for surface scaling. Significant scaling means the original mix may not have been air-entrained (the air-pocket additive that resists freeze-thaw damage). FHWA and industry guidance summarizing PCA/ACI research recommends air‑entrained concrete (typically 4–7% air for exterior flatwork) plus proper mix design and curing to resist freeze–thaw scaling FHWA / concrete literature referencing air entrainment and freeze–thaw resistance (summarizing PCA/ACI research). You can resurface rather than repour, but deep spalling may eventually need a contractor.
Pavers
Wobbly pavers are almost always a base problem, not a paver problem. Pull up any loose units, add or replace compacted gravel base material (ICPI industry guidance calls for a 4 to 6 inch open-graded stone base with a 1 inch bedding sand layer on top), and re-set the paver. Sweep polymeric sand into the joints and compact it. Check that the surface drains away from the house at roughly a 2 percent slope (about 1/4 inch per foot). If water pools in a corner, that paver zone needs to be re-graded or you need to add a permeable paver system with a proper open-graded base designed for drainage.
Decks
Check every board for soft spots, rot, and loose fasteners before loading furniture onto it. Push a screwdriver into any suspicious board end-grain: if it sinks in easily, that board needs replacing. Tighten any popped screws or deck nails, and replace boards that are split deeply enough to catch a sandal. A deck that hasn't been cleaned in a year should get a good scrub with a deck cleaner before furniture goes on. An annual application of a UV-blocking deck sealer significantly extends wood life and protects furniture feet from picking up splinters or tannin stains.
Gravel
Lay a weed-barrier landscape fabric before adding gravel, and install metal or plastic edging around the perimeter to keep the gravel from migrating. Furniture placed directly in gravel will tip and sink without help. Plan from the start to either use flat stepping-stone pads under furniture legs or build a small platform (more on that below). A 3 to 4 inch depth of pea gravel or crushed stone provides good drainage, but don't go deeper or you'll have more sinking issues, not fewer.
What to put under patio furniture: pads, pavers, rubber mats, and turf protection
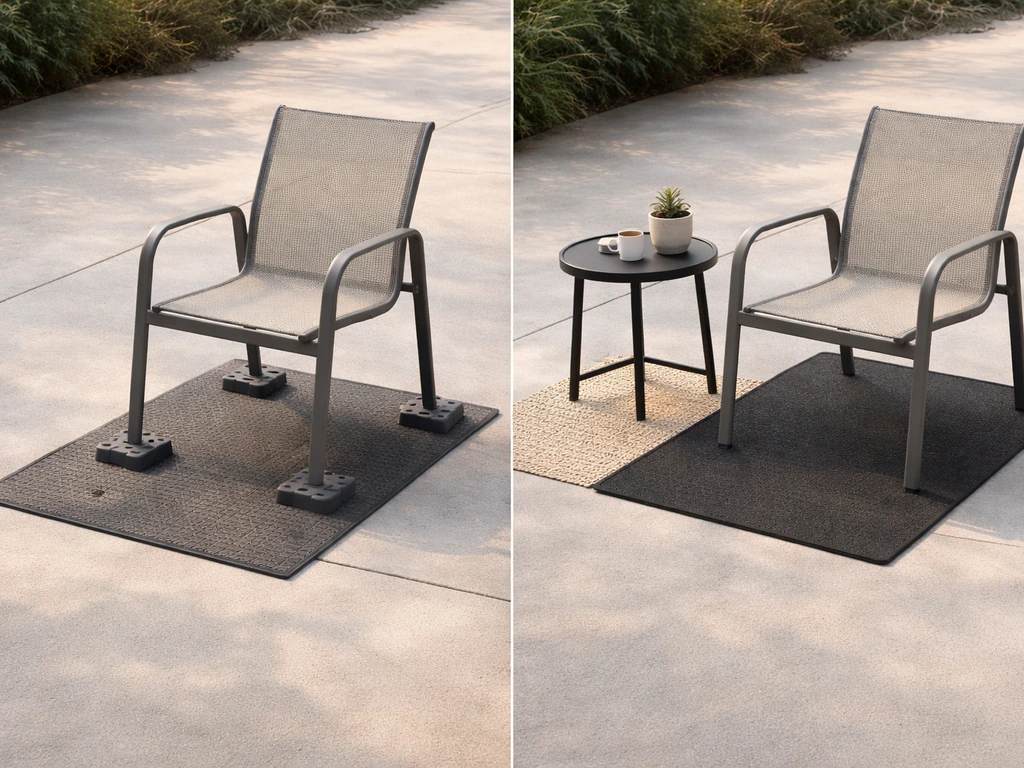
What you put under furniture legs and beneath whole seating areas does three things: protects the surface below, protects the furniture itself, and keeps things from sliding or sinking. For specific options and pros and cons, see the section on what to put under patio furniture. The right choice depends on your surface.
Leg pads and glides
- Felt pads (indoor/outdoor versions): protect wood and composite decks from scratches; wear out in 6 to 12 months outdoors and need replacing
- Rubber furniture caps or tip covers: slip over chair and table legs to cushion and grip; cost $5 to $15 for a pack of 8 to 16; measure the leg diameter before buying
- HDPE plastic glides: snap or screw into the leg base; longer-lasting than felt on rough concrete
- Tennis balls (classic DIY move): free if you have them, but they degrade fast in UV; fine as a short-term fix, not a long-term solution
Rubber mats and outdoor rugs
A rubber-backed outdoor rug or a solid rubber patio mat under an entire seating area unifies the zone, cushions furniture feet, and protects the surface from scratches. Outdoor rugs cost $30 to $150 depending on size and material. Look for polypropylene or polyester construction: both resist moisture and dry quickly. Avoid natural fiber rugs outside. Rubber utility mats (the kind sold for garages) work beautifully under dining sets on concrete or pavers and cost as little as $1 to $2 per square foot.
Turf protection grids and mats for grass
If your furniture is going on a lawn, turf protection products are the most important investment you can make. Standard grass cannot handle sustained point loads from furniture legs. Soil compaction reduces water infiltration and kills roots, leaving dead patches where legs sit. Turf protection grid systems (brands like TRUEGRID or Grasspave2) are plastic modular panels with hollow cells that distribute load across a wider area. They install over a prepared gravel or sand base and are rated for significant compressive loads. For a basic patio set on grass, interlocking rubber turf protection mats ($20 to $60 for a 6 to 9 sq ft mat) give good results without the full grid installation.
Shopping list: under-furniture protection basics
- Rubber furniture leg caps or tip covers: $5–$15 per pack (measure leg diameter first)
- Outdoor polypropylene rug (8x10 ft): $50–$120
- Rubber utility mat (4x6 ft): $20–$40
- Turf protection rubber mat (single panel): $20–$60
- TRUEGRID or Grasspave2 modular grid (per sq ft): $2–$5 installed DIY
- Flat stepping-stone pavers for individual legs: $1–$3 each at hardware stores
Protecting surfaces from damage: feet, glides, coasters, and sealants
Even on a properly prepped surface, furniture without protection causes damage over time. Dragging an unprotected metal chair across a concrete patio leaves scratches that collect water and stain. Bare steel or cast iron legs sitting on wet pavers will rust and stain the stone. Here's how to stop that from happening.
- Add rubber or HDPE plastic glides to all metal legs that contact concrete or pavers: this is the single most effective protection step and takes 10 minutes
- Use flat pavers or rubber coasters under individual table legs on gravel or grass to spread the load and prevent sinking
- Apply a concrete or paver sealer (penetrating silane/siloxane type, about $25 to $50 per gallon) to the surface every 2 to 3 years; this repels moisture, prevents rust staining from furniture feet, and reduces freeze-thaw scaling
- For wood decks, apply a UV-blocking exterior deck stain or sealer annually; this protects the wood and prevents tannin bleed that can stain furniture cushions placed directly on the boards
- Rinse powder-coated or anodized aluminum furniture legs with fresh water after rain in coastal areas; accumulated salt holds moisture against the coating and accelerates corrosion from underneath
- Avoid mixing metals where furniture hardware contacts a dissimilar metal surface: galvanic corrosion (aluminum touching steel in the presence of water) eats through coatings faster than normal weathering
Step-by-step DIY fixes to raise or level furniture
Wobbly or low furniture is one of the most common patio complaints I get asked about, and it's almost always fixable with simple tools and under $30 in materials. For step-by-step instructions on how to raise patio furniture, see the how to raise patio furniture guide. Here are the main approaches in order from simplest to most involved.
Method 1: Shims (for minor rocking on hard surfaces)
- Set the furniture in position and identify which leg is short by pressing down on each corner. The short leg will be the one where pressing causes the piece to rock toward the opposite corner.
- Slide a hard rubber or composite shim (available in packs at any hardware store for $5 to $8) under the short leg. Rubber shims grip better than wood and don't rot outdoors.
- Trim the shim to fit if it sticks out past the leg using a utility knife or scissors.
- Test by pressing all four corners again. If rocking stops, you're done. If it still rocks, a second shim of smaller thickness may be needed to fine-tune.
- For a more permanent fix, apply a small bead of outdoor-rated construction adhesive (like Loctite PL Premium, about $7) to bond the shim to the leg pad.
Method 2: Furniture risers (to raise overall height)
- Measure the existing leg diameter and the height increase you need. Most furniture risers are designed for 1 to 5 inch height gains and come in sets of 4.
- Lift each leg and slip the riser cup under it. For heavy tables, use a piece of 2x4 lumber as a lever to raise one corner at a time rather than trying to lift the whole piece.
- Check that all four risers are seated flat and not tilted. A tilted riser is worse than no riser.
- Test stability by pressing down firmly on each corner. If the riser tips or slides, the diameter is too large. Return and exchange for the correct size.
- Solid rubber risers ($10 to $25 for a set of 4) are the most durable outdoor option. Avoid hollow plastic risers for anything heavier than a side table.
Method 3: Leg extenders (for tube or round legs)
- Measure the outer diameter of the furniture leg precisely with a tape measure or calipers before buying extenders. A 1/8 inch mismatch means the extender won't fit or will be too loose.
- Slide the extender sleeve over the existing leg. Most extenders for round tube legs use a set screw or a friction-fit collar to lock in place.
- Tighten the set screw with a small Allen key (usually included). Do not overtighten on aluminum legs, as this can dent thin tube walls.
- If using a screw-on threaded extender, wrap the threads with PTFE (plumber's) tape first to prevent corrosion seizure that makes them impossible to remove later.
- Check that all legs are extended to the same length by measuring from the floor to the table or seat surface at each corner.
Method 4: Swivel casters (for mobility and minor leveling)
- Purchase locking swivel casters rated for outdoor use (look for stainless steel or zinc-plated hardware and solid rubber wheels). A set of 4 costs $20 to $50.
- Check whether your furniture legs have pre-drilled holes for caster stems. If not, you will need a drill, the correct drill bit size (listed on caster packaging), and wood screws or bolt-on plates.
- Attach each caster plate to the leg base using the included hardware. On metal legs, you may need to drill pilot holes to prevent stripping.
- Lock all casters before loading the furniture with weight. Unlocked casters on a slope are a safety hazard.
- Note: casters raise furniture height by 2 to 4 inches depending on the wheel size. Factor this in before buying to make sure your seated height will still work.
Tools you'll need for most of these fixes
- Tape measure and calipers (for accurate leg diameter measurements)
- 4-foot level (for checking surface flatness)
- Rubber or composite shim packs ($5–$8)
- Utility knife
- Allen key set (for set screws on extenders and casters)
- Drill and bit set (for caster installation)
- Outdoor-rated construction adhesive (for bonding shims)
- PTFE tape (for threaded fittings)
Troubleshooting leveling problems: sinking, rocking, uneven legs, and water pooling
Here's where I see people get frustrated because they fix one symptom without addressing the actual cause. Let's go through the most common ones.
| Problem | Most Likely Cause | Quick Fix | Longer-Term Fix |
|---|---|---|---|
| Chair or table rocks on hard surface | One leg is slightly shorter or the surface has a high spot | Rubber shim under the short leg | Sand down the high surface spot or replace the leg with an adjustable-foot version |
| Legs sinking into grass or gravel | Soil is soft or gravel is too loose and deep; point load exceeds soil bearing capacity | Place flat pavers or rubber coasters under each leg | Install turf protection grid or compact a gravel/sand base before adding a platform |
| Water pools under or around furniture | Surface slopes toward the furniture zone; base has low spot | Redirect water with a gravel channel or adjust furniture position | Re-grade surface or install a permeable paver base with proper 2% slope away from the house |
| Legs corroding or leaving rust stains | Bare metal contact with wet surface; incompatible metals touching | Add rubber glide caps; rinse metal furniture after rain | Apply sealer to surface; replace bare metal feet with HDPE glides; separate dissimilar metals |
| Furniture feels uneven but surface is flat | Legs are uneven due to wear or a manufacturing defect | Test each leg with a level on a flat garage floor; identify the short one | Add an adjustable glide foot (threaded type) to all legs for easy future tuning |
Setting up patio furniture on grass: anti-sinking techniques and turf protection
Setting up on grass is tempting because it's free and flexible, but it goes wrong fast without a few simple precautions. Grass roots and soil structure can't handle sustained point loads. Even a 15-pound chair pressing on four small leg tips creates serious localized compaction after a few weeks, and you'll end up with dead patches and sunken holes. Here's how to do it right. For step-by-step tips on turf protection and anti-sinking techniques, see our guide on how to set up patio furniture on grass.
Step-by-step: placing furniture on grass without damaging turf
- Choose the flattest area of lawn you have. Slopes above 5 degrees will cause furniture to feel tilted and will create runoff that concentrates under legs.
- Mow the area short before placing anything. Longer grass traps moisture against furniture feet and accelerates rust and rot.
- Place a flat paver stone (12x12 or 16x16 inch concrete step stone, $1 to $3 each) under each individual leg. This distributes the point load over a much larger surface area and stops sinking immediately.
- For a full seating area with 4 to 6 pieces, lay interlocking rubber turf protection mats or a modular plastic turf grid across the whole footprint. Follow the manufacturer's base preparation instructions: most require a 1 to 2 inch sand or pea gravel base for proper load distribution.
- If you want a temporary platform for a season, build a simple 2x6 lumber grid on the ground surface (no digging needed) and top it with composite decking boards. This creates a flat, stable surface that lifts furniture off the turf. Remove and store it at the end of the season so the grass recovers.
- Move furniture to a slightly different position every 3 to 4 weeks if you're going without pads. This prevents prolonged compaction in any single spot and lets the turf recover.
- At the end of the season, remove all furniture and protection products and aerate the affected area to help the soil recover its drainage capacity.
Anchoring and windproofing your patio furniture
Wind is the most underestimated threat to patio furniture. A cheap plastic chair can become a projectile in a 30 mph gust. Umbrellas especially act like sails. I've had an unsecured market umbrella tip over and crack a glass tabletop, which was an expensive lesson. Here's how to prevent it.
Options from lightest to most heavy-duty
- Umbrella base weights: fill a commercial umbrella base with sand instead of water (sand won't freeze and crack the base in winter). A 50-pound base is the minimum for a 9-foot umbrella; 75 to 100 pounds is better in consistently windy locations.
- Furniture tie-down straps: flat nylon or polypropylene straps (similar to luggage straps) fed through chair legs and looped around a fixed anchor like a deck railing post or fence post. Cost: $10 to $25 for a pack. Good for overnight or storm prep.
- Sandbag leg weights: fill small nylon sandbags and hang them over lower cross-braces on chairs and tables. Each 20-pound bag adds meaningful resistance to tipping. These are especially useful for lightweight aluminum furniture.
- Ground anchors: spiral steel ground anchors (the kind used for dog runs and small canopy tents) screw into soil or grass and can be connected to furniture legs with carabiner-and-cable setups. Good for exposed locations where furniture is left out long-term.
- Deck anchor plates: for furniture on a wood deck, L-bracket or loop hardware screwed into the deck frame allows you to run a cable or strap to furniture legs. This is the most secure solution for storm-prone areas but requires drilling into the deck.
- Umbrella clamps and wedge fittings: tighten the umbrella hole collar with a wedge insert (often sold as an accessory) so the umbrella pole can't swivel in wind.
The simplest storm-prep habit I follow: any time a weather app shows gusts above 25 mph in the forecast, I fold the umbrella and store cushions inside. That alone prevents 80 percent of wind damage without any hardware at all.
Arranging furniture for comfort and function: social, dining, and lounging layouts
Where you physically place furniture within your chosen spot shapes how the space actually feels. Tight groupings encourage conversation; wide-spaced arrangements feel disconnected. Here are three layout approaches with practical dimensions.
Social/conversation layout
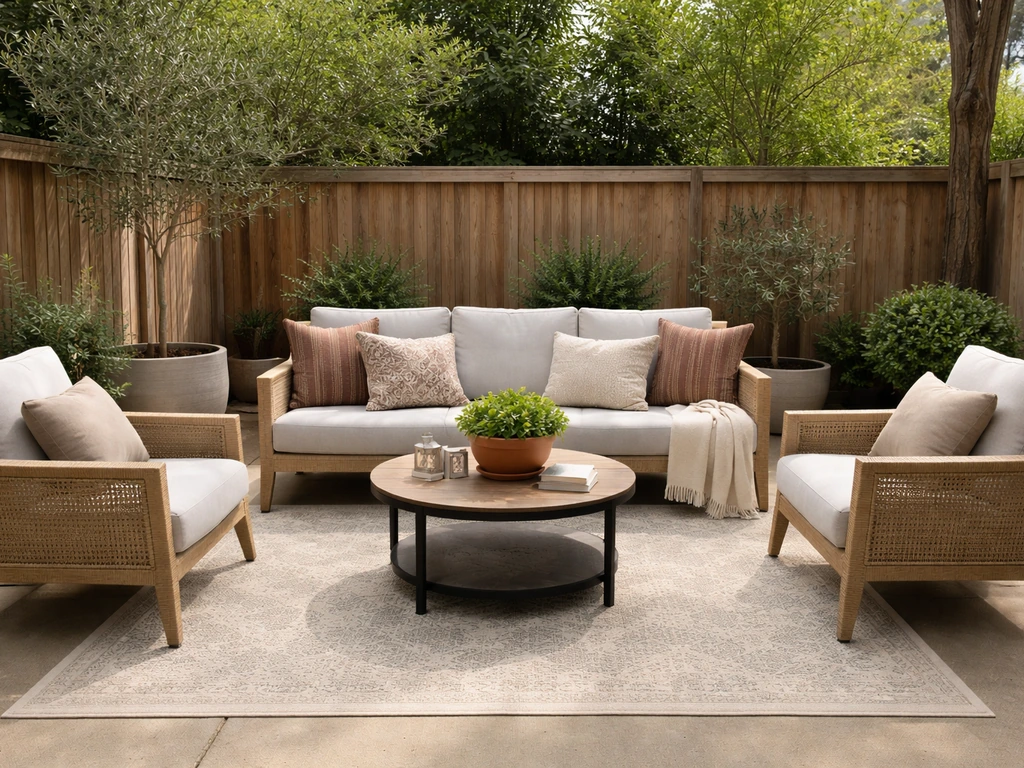
Place chairs and loveseats in a rough U or L shape with a central low table. Aim for no more than 8 feet between facing seats, ideally 6 to 7 feet, which is close enough to talk without raising your voice. Keep at least 18 inches of clearance between seat edges and any low table you're wrapping the chairs around. Allow 36 inches minimum for walkways between any piece of furniture and a wall or railing. Face the open end of the U toward the view you identified in your site check.
Dining layout
A dining table needs 36 inches of clearance on all sides for chairs to be pulled out and for people to walk behind seated guests. That means a 36x72 inch dining table in the center of a space needs a minimum 9x12 foot clear area, which surprises a lot of people who are working with a smaller patio. If you're tight on space, a round table seats the same number of people in a smaller footprint than a rectangle. Orient the table so the primary seats face the best view or face away from direct afternoon sun.
Lounging layout
Chaise lounges need about 7 to 8 linear feet of space including foot room and a 24-inch gap between adjacent lounges for comfortable use. Position them to take advantage of morning or late afternoon sun rather than the harsh midday angle. A side table within arm's reach of each lounge (about 18 to 24 inches away) completes the setup. If you have space constraints, angling lounges at 30 to 45 degrees to the dominant view can make a tight space feel more intentional and open.
Staging patio furniture to sell: layout, presentation, and curb appeal
Whether you're selling a set online or staging a home for real estate, the same principles apply: clean furniture arranged in a purposeful vignette photographs and shows far better than pieces scattered around a yard. For step-by-step tips on arranging pieces and styling vignettes, see how to stage patio furniture. For tips on pricing, photographing, and listing pieces, see our guide on how to sell patio furniture. I've sold pieces twice as fast after doing a proper staging pass, and the photos tell the whole story.
- Deep clean every piece first: scrub frames with a pH-neutral detergent and a soft brush; rinse thoroughly. For fabric, follow manufacturer care instructions (Sunbrella fabrics, for example, clean with mild soap and water and respond well to brand-specific cleaners for mildew or tough stains; re-apply fabric protector spray after a heavy clean).
- Arrange the set as if someone is about to use it: pull chairs up to the table, add cushions, place a simple centerpiece like a small potted plant or a lantern. Buyers want to imagine themselves in the space.
- Declutter ruthlessly: remove anything that isn't part of the set (hoses, toys, garden tools, extra chairs). Every extra item in the frame competes with what you're selling.
- Choose the shooting time: photograph in the morning or late afternoon when the light is warm and directional, not at midday when it's harsh and creates deep shadows. Overcast days actually produce very clean, even light for furniture photos.
- Add one simple accessory: an outdoor rug under the set pulls the grouping together visually and makes the arrangement look intentional and complete.
- For real estate staging, connect the indoor and outdoor spaces visually by placing furniture to align with a door or window sightline so the outdoor area reads as an additional room, not just a yard.
Weather protection and routine maintenance while furniture is in place
The biggest maintenance mistake I see is treating outdoor furniture as set-and-forget. Materials that could last 15 years with basic care fail in 4 or 5 without it. None of these tasks are hard; they just require showing up on a schedule.
Covers
Fitted furniture covers (solution-dyed polyester or vinyl, $20 to $80 per piece) are the single highest-return maintenance investment for furniture left outside. They block UV, keep moisture off cushions, and reduce cleaning frequency dramatically. The key is buying covers with air vents. A sealed cover traps condensation and actually promotes the mildew it's meant to prevent. Leave a small gap at the bottom or buy vented models.
Fabric and cushion care
For solution-dyed acrylic fabrics like Sunbrella, routine cleaning is mild soap and water. For mildew or heavy staining, the manufacturer recommends a specific diluted bleach and cleaner protocol (check their current care chart for exact ratios, as it varies by fabric line) followed by thorough rinsing and re-application of a fabric protector spray. Never put outdoor cushion covers in a hot dryer; let them air dry completely before storing or covering, or you'll grow mildew regardless of the fabric quality.
Rust prevention on metal frames
For powder-coated steel, check the coating for chips or scratches each spring. Touch up any bare metal spots immediately with a rust-inhibiting primer and a small brush before oxidation gets a foothold. For aluminum frames, rinse with fresh water after heavy rain in coastal environments and clean with a pH-neutral detergent (no abrasives, which scratch and expose the anodized layer). Avoid leaving aluminum in contact with steel fasteners or fittings in wet conditions: this creates galvanic corrosion, which is faster and more damaging than standard surface rust.
Quick seasonal maintenance schedule
| Season / Timing | Task |
|---|---|
| Spring (before first use) | Deep clean all frames and fabric; inspect for rust/rot; touch up coatings; re-apply deck sealer if due; add new leg pads if worn |
| Monthly (in-season) | Wipe down frames; brush off debris from cushions; check umbrella base weight; tighten any loose bolts |
| After storms | Inspect for storm damage; re-position any shifted pieces; check anchoring hardware |
| Fall (before storage) | Full clean per material type; treat wood with appropriate sealer; clean fabric per manufacturer instructions and allow to dry completely; check covers for wear |
Seasonal storage and end-of-season actions
Proper end-of-season storage is where you either earn back years of furniture life or throw them away. I've seen sets that were bought the same year at the same store where one person stored theirs properly and the other just left it out: after 5 years, they looked 15 years apart in condition.
End-of-season cleaning checklist
- Wash all frames with pH-neutral soap and water; rinse thoroughly and dry before storage.
- Remove and wash all cushion covers; let dry completely (24 to 48 hours minimum) before storing to prevent mildew.
- Inspect all joints, welds, and fasteners for rust, cracking, or looseness. Make repairs now while the furniture is clean and accessible.
- Sand and re-seal any bare wood surfaces on teak, cedar, or pressure-treated frames.
- Deflate any inflatable furniture or air cushions.
- Fold umbrella canopies, clean the fabric, and store the pole separately from the base.
- Label any bags of hardware (screws, pins, bolts) that you remove for disassembly so you don't spend 20 minutes searching next spring.
Storage options compared
| Storage Option | Best For | Cost | Notes |
|---|---|---|---|
| Garage or basement | Full sets; best protection from moisture and UV | Free if you have space | Stack chairs; break down tables; store cushions in breathable bags, not plastic bins |
| Outdoor storage shed | Medium to large sets; sets used year-round | $200–$800 for a basic resin shed | Must be ventilated; add moisture absorber packets to cushion storage area |
| Deck box or storage bench | Cushions and small accessories | $100–$400 | Choose a vented model; fill only to capacity so items aren't compressed |
| Off-site storage unit | Large sets in small homes; long-season storage | $50–$150/month depending on unit size | Wrap metal frames in moving blankets to prevent scratches; stack efficiently to save space |
| Leave out with covers | Durable materials like teak, aluminum, quality resin | Cost of covers: $20–$80 per piece | Only works well with quality vented covers; not ideal in freeze-thaw or heavy snow climates |
Disassembly and packing tips
- Take photos of the assembled set before disassembly; this makes reassembly fast and prevents frustrating guesswork in spring
- Use a zip-lock bag taped to the frame or leg to keep hardware with its specific piece
- Stack seat cushions flat, not on edge, to prevent the foam from deforming
- Wrap glass tabletops in moving blankets and store vertically, not flat, to reduce the risk of cracking from weight on top
- Store metal frames off the floor on pallets or 2x4 runners to prevent moisture wicking from concrete garage floors
Material and tool shopping lists for every project in this guide
Here's a consolidated list of everything mentioned in this article, organized by task. I've included budget alternatives where they exist.
| Task | Materials Needed | Estimated Cost | Budget Alternative |
|---|---|---|---|
| Surface leveling (concrete) | Self-leveling resurfacer, concrete crack filler, 4-ft level | $30–$60 | For hairline cracks only: DIY hydraulic cement mix |
| Surface leveling (pavers) | Compacted gravel base material, bedding sand, polymeric joint sand | $40–$100 for a small area | Re-use existing base material if uncontaminated |
| Leg protection (hard surfaces) | Rubber tip caps or HDPE glides (pack of 8–16) | $5–$15 | Self-adhesive felt pads (shorter lifespan outdoors) |
| Under-furniture area protection | Outdoor polypropylene rug or rubber utility mat | $20–$120 | Interlocking rubber gym tiles ($1–$2/sq ft) |
| Turf protection (grass) | Rubber turf mats or modular grid system, sand/gravel base | $20–$5/sq ft | Flat 12x12 concrete step stones ($1–$3 each) |
| Raising/leveling | Rubber shims, solid rubber risers, or leg extenders | $5–$30 | Stacked composite shim sets from framing section of hardware store |
| Anchoring/windproofing | Tie-down straps, sandbags, spiral ground anchors | $10–$40 | Ratchet cargo straps (already owned); sand-filled pillow weights |
| Surface sealing (concrete/pavers) | Penetrating silane-siloxane sealer (1 gallon) | $25–$50 | Apply less frequently (every 3 years vs. 2) with the same product |
| Rust touch-up (steel) | Rust-inhibiting primer, matching outdoor paint, small brush | $10–$20 | Rust converter pen ($5–$8) for very small chips |
| Cushion/fabric care | Mild soap, fabric cleaner for outdoor fabrics, fabric protector spray | $15–$40 | Dawn dish soap (diluted) for routine cleaning; skip protector if reapplying annually |
| Seasonal storage | Breathable storage bags, zip-lock hardware bags, moving blankets | $20–$50 | Old pillowcases for cushion storage; repurposed cardboard wrapping for glass tops |
What to tackle next: repair, reupholstery, and follow-up projects
Getting placement and protection right is the foundation, but most furniture eventually needs actual repair work to keep it in service. Once your furniture is properly placed, protected, and stored correctly, the projects most likely to come up next are reupholstering worn cushions, fixing cracked or broken frames, and replacing damaged fabric slings or webbing.
If you're working with a set on an uneven surface and need to go deeper on raising individual pieces, the methods for using risers, leg extenders, and height-adjusting hardware go further than I covered here, including techniques for raising low-slung chairs and sectional sofas to dining or conversation height. For step-by-step options on how can i raise the height of my patio furniture, see the dedicated section covering risers, leg extenders, and height-adjusting hardware. For step-by-step instructions and tool lists on raising low-slung chairs and sectional sofas, see how to make patio furniture higher. Similarly, if your furniture is going on grass permanently, there's a lot more detail available on building a proper temporary platform or installing a full modular turf grid system that can support a heavy dining set through multiple seasons without damaging the lawn beneath.
Reupholstery is intimidating the first time, but it's genuinely one of the highest-ROI DIY projects you can do: a $20 yard of outdoor fabric and two hours of work can make a $300 chair look brand new. The same goes for frame repairs. Most cracked welds, bent aluminum, and broken plastic glides are fixable with straightforward techniques once you know what tools to reach for. Those are the natural next steps after you've nailed the placement and protection work covered in this guide.
FAQ
Quick checklist — what should I evaluate before placing patio furniture?
Do a site inventory: note hours of sun and shade through the day/season, prevailing wind direction(s), drainage/wet spots after rain, ground slope and hard surfaces, pedestrian circulation and access routes, sightlines to views or the house, nearby trees (leaf/debris, roots), and microclimates (hot/cool pockets). Use this to pick zones for dining, lounging, and socializing. Priorities: comfort (sun/shade/wind), safety (level/stable surface), access (paths to house/grill), and maintenance (clearance for mowing, cleaning).
What are the pros and cons of common patio surfaces (concrete, pavers, deck, grass, gravel)?
Concrete — Pros: very stable, low‑maintenance, easy to level; good for heavy sets and dining. Cons: can crack in freeze–thaw without proper mix/base; looks plain unless finished; cost varies with prep. Pavers (interlocking) — Pros: attractive, permeable options available, easier to repair individual units. Cons: need engineered base for drainage and load; can settle if base is poor. Wood deck — Pros: warm look, easy to bolt furniture to joists, raised for views. Cons: needs regular maintenance, rot risk, can sag/deflect under heavy concentrated loads. Grass — Pros: low cost/temporary placement, soft feel. Cons: point loads compact soil and cause sinking, uneven surfaces, damage to turf without protection. Gravel — Pros: inexpensive, good drainage. Cons: unstable for chair legs and dining, requires furniture pads or larger base areas to prevent rocking and sinking.
What should I put under patio furniture to protect surfaces and stabilize legs?
Options by surface: Concrete/pavers/deck — use rubber or cork furniture pads, non‑slip grippers, or felt (indoor use). For powder‑coat frames, use soft rubber or plastic pads to prevent scratching and galvanic contact. Gravel/grass — use solid pavers, stepping pads, or turf‑protection grids under each leg or beneath the whole set to distribute load. For decks, use rubber isolators or foot pads to avoid staining and water trap. For ornamental/professional look, install a small concrete or compacted paver pad under dining sets. Materials list: furniture pads (rubber/plastic), paver squares or patio blocks, turf grids or heavy duty mats, adhesive or screw‑on risers as needed.
How do I raise or level patio furniture — step‑by‑step DIY fixes for rocking or uneven sets?
1) Diagnose: sit and push to find which leg(s) float or rock; use a carpenter’s level across table and seat. 2) Temporary quick fix: use thin shims (plastic or composite) under one leg or stack outdoor‑rated furniture pads until level. 3) Medium fix: install adjustable screw‑in leg extenders or furniture risers rated for outdoor use; tighten to exact height. 4) Permanent fix for chairs/tables: attach bolt‑on or screw‑on adjustable glides to the bottoms of legs; for wide bases, use furniture cups or small paver pads glued to underside. 5) For heavy sets: create a compacted paver or concrete pad beneath the whole set to provide a uniform plane. Materials: plastic/composite shims, rubber pads, adjustable leg extenders or glides, exterior silicone or construction adhesive, small pavers, concrete mix (if pouring pads). Safety: check load ratings and use stainless or coated fasteners to avoid corrosion.
How can I set up furniture on grass without sinking or killing turf?
Option A — temporary: lay a wide flat base such as interlocking grass mats, heavy rubber patio mats, or plywood sheets covered with outdoor rug to spread load. Option B — semi‑permanent: install turf‑protection grids or permeable pavers over a prepared base (geotextile + compacted aggregate) sized for chair/table footprint. Option C — permanent pad: pour small concrete or lay compacted paver pads at furniture locations. Steps: 1) mark area and remove top thatch if needed; 2) level and compact subgrade; 3) install geotextile and base aggregate where required by product instructions; 4) lay grid/pads and backfill with turf or gravel; 5) place furniture. Maintenance: move furniture occasionally to avoid permanent shade or wear. Materials: turf grids, rubber mats, 3/4" crushed stone, geotextile fabric, plywood (temporary), outdoor rug.
Simple staging and layout options — how should I arrange furniture for socializing, dining, lounging, and to stage for sale?
Social (conversation grouping): create a 3–6 foot circle/rectangle with chairs and a low table at center; angle seating slightly toward each other and leave 18–24" between chairs for easy movement. Dining: allow 36–48" clearance behind chairs to walk; center table with adequate surface for services and consider umbrella placement. Lounging: arrange recliners or chaise lounges with small side tables for drinks; place sun loungers to face the view or sun. Staging to sell: keep the arrangement simple and proportionate to space; use neutral cushions, one focal set (seating/dining), maintain clear paths to doors, and tuck accessories (plants, rugs) to suggest use without clutter. Use an outdoor rug to define zones and scale furniture to the space.