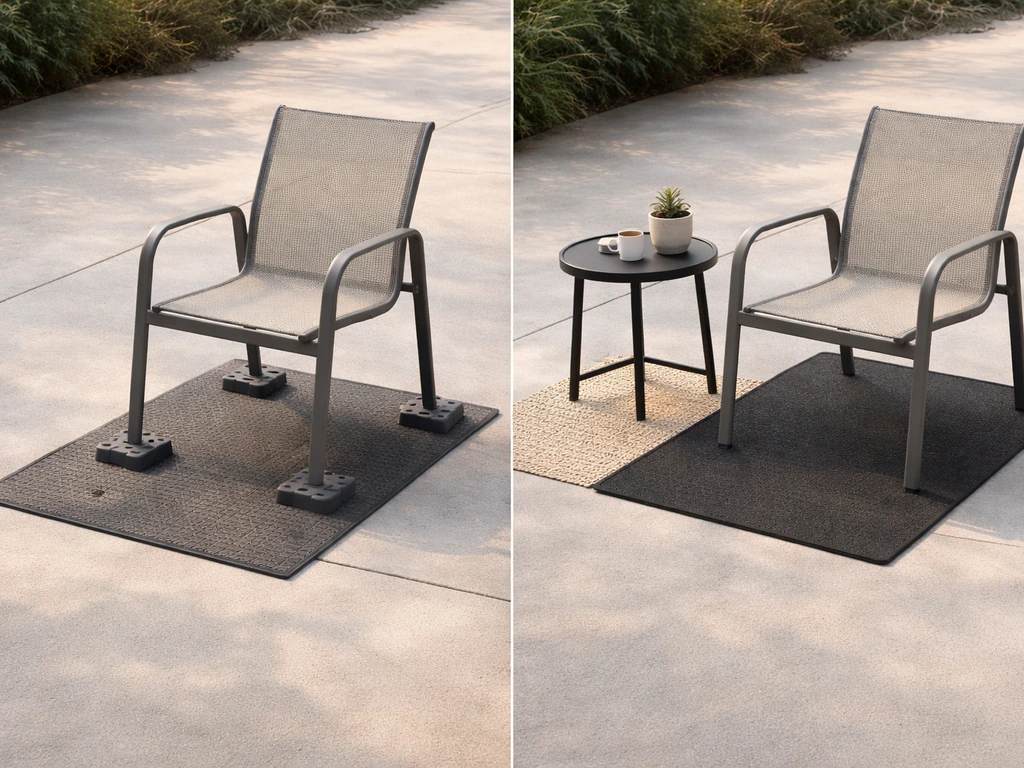
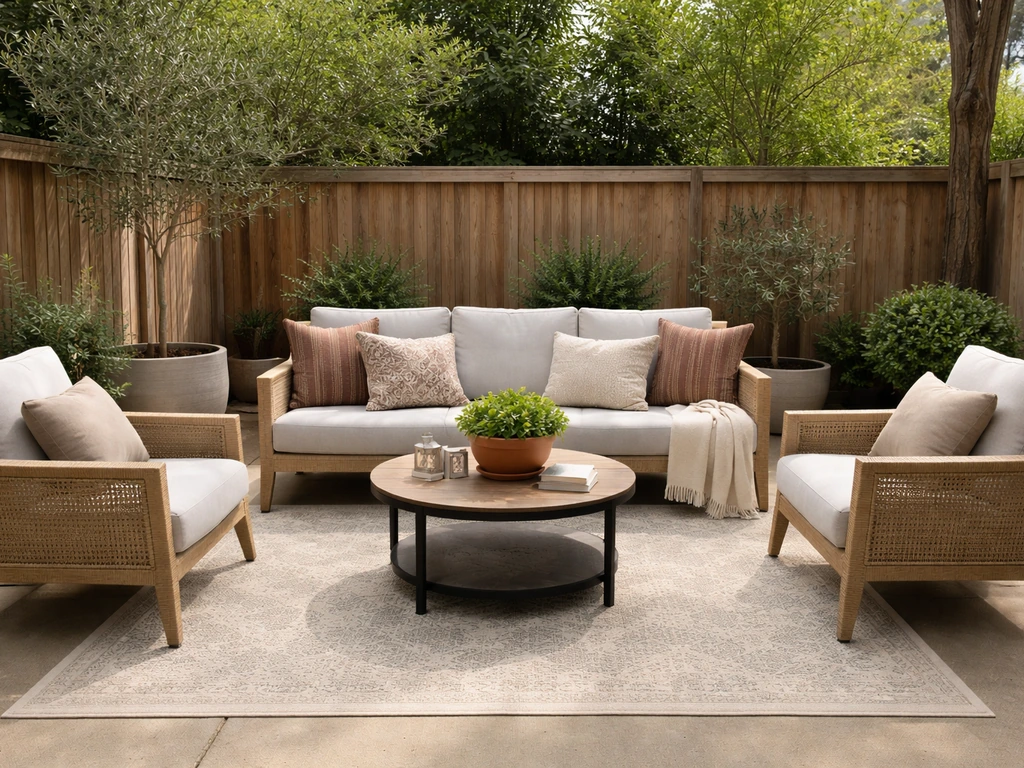
You can raise patio furniture height by adding thick cushions (easiest, 2–4 inches), slipping on leg extenders or adjustable leveling feet (reversible, 1–6 inches), bolting on replacement legs (permanent, any height), or mounting casters (adds 2–5 inches plus mobility). For detailed step‑by‑step options and measurements, see our guide on how can I raise the height of my patio furniture. For a step-by-step guide and product recommendations, see our how to raise patio furniture guide. The right method depends on how much height you need, whether the fix is temporary or permanent, and what your furniture frame is made of. Most of these projects cost under $50 and take less than an hour with basic tools.
How to Make Patio Furniture Higher: DIY Riser, Leg & Platform Guide

Maren Grady
13 Jul 2026
Why you might need to raise your patio furniture
The most common reason people raise patio furniture is comfort. Standard dining seat height is 17–19 inches, and if you or your family members are tall, getting in and out of a low chair after a long meal gets old fast. The ergonomics standard (ISO 9241) says seat height should sit at or just below your popliteal height, which is the back-of-knee-to-floor measurement when you're seated. For most adults that works out to roughly 16–18 inches, but taller people often need 19–21 inches. A seat that's too low forces your knees above your hips, which compresses the lower back and makes meals uncomfortable.
Beyond personal comfort, there are a few practical situations where raising furniture just makes sense: you've replaced a table and the chairs no longer pair well with the new height, you're setting up furniture on a thick outdoor rug or artificial turf that effectively lowers the legs, or your furniture sinks slightly into soft ground. Accessibility is another big one, someone recovering from a knee or hip injury needs a higher seat to stand up without straining. I've also seen people raise a bar cart or side table to match a taller wall-mounted grill station. The scenarios are more varied than you'd think.
One risk worth acknowledging upfront: raising furniture shifts its center of gravity higher, which can make lightweight aluminum or resin pieces tip more easily. Anything you raise more than 3–4 inches should be checked for lateral stability before you invite guests to sit on it. We'll cover stability tests in each method section below.
Getting the measurements right before you do anything
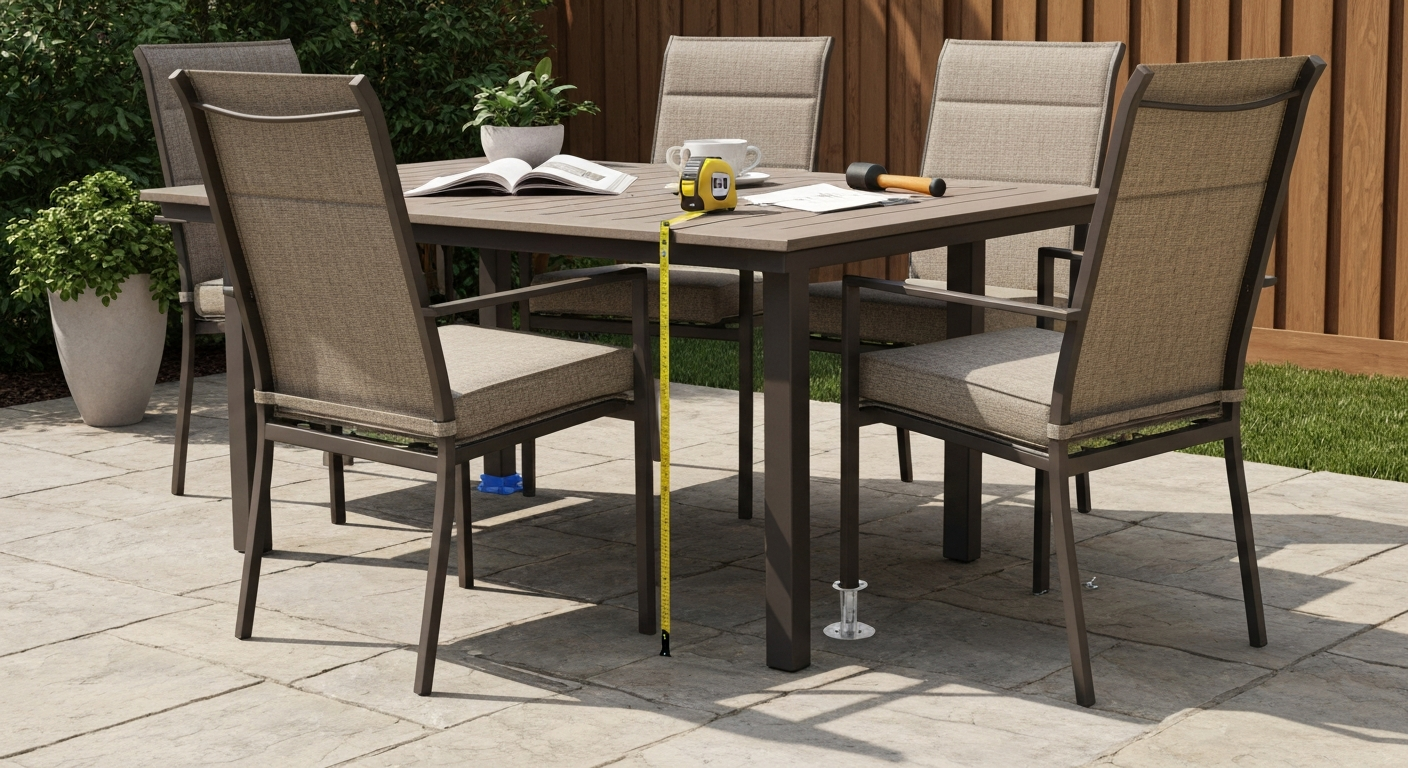
I skipped this step on my first attempt and ended up buying the wrong risers. Don't be me. Grab a tape measure and spend five minutes on this before spending any money. Home Depot project guides provide step-by-step measurement and layout practices that you can adapt to furniture projects.
Seat height and table clearance
Measure from the floor to the top of the seat (not the cushion). Then measure from the floor to the underside of the tabletop apron, the horizontal board just below the tabletop surface. The difference between your seat height and the tabletop surface should land in the 10–12 inch range for comfortable dining. Standard dining tables run 28–30 inches tall. If your seat is currently 17 inches and your table is 29 inches, your clearance is 12 inches, which is ideal. Raising the seat by 2 inches to 19 inches keeps you at 10 inches of clearance, still comfortable. Raising it to 21 inches drops clearance to 8 inches, which starts to feel cramped.
If your furniture has armrests, measure the armrest height from the floor too. You need at least 2 inches of clearance between the armrest and the underside of the tabletop apron, or the chair won't slide under the table at all. This is the most common compatibility problem I see when people mix and match chairs with tables.
| Furniture type | Standard seat height | Standard surface height | Target seat-to-surface clearance |
|---|---|---|---|
| Dining chair + table | 17–19 in (43–48 cm) | 28–30 in (71–76 cm) | 10–12 in (25–30 cm) |
| Counter stool + counter | 24–27 in (61–69 cm) | 36 in (91 cm) | 10–12 in (25–30 cm) |
| Bar stool + bar | 29–32 in (74–81 cm) | 40–43 in (102–109 cm) | 10–12 in (25–30 cm) |
How much height do you actually need to add?
Here's the calculation I use: measure your popliteal height (sit on a hard surface, feet flat, and measure from the floor to the back of your knee). Your ideal seat height equals that measurement, plus the thickness of any cushion you plan to use. If your popliteal height is 18 inches and you want a 2-inch cushion, target seat height is 20 inches. Subtract your current seat height from 20 to get how many inches you need to add. Write that number down, it determines which methods are even worth considering.
Picking the right method: temporary vs. permanent
Before diving into individual methods, it helps to match your situation to the right category. If you're renting, sharing furniture seasonally, or just testing a new height before committing, go temporary. If this is your furniture for the next decade, a permanent fix is worth the extra work.
| Method | Height gain | Reversible? | Approx. cost | Effort level | Best for |
|---|---|---|---|---|---|
| Thick cushions | 2–4 in | Yes | $20–$80 | Very easy | Quick fix, renters, all furniture types |
| Furniture risers / blocks | 1–5 in | Yes | $10–$40 | Easy | Temporary seasonal raise, lightweight pieces |
| Leg extenders / leveling feet | 0.5–3 in | Yes | $15–$60 | Easy–moderate | Fine-tuning height, uneven ground |
| Slip-on leg caps with extender | 1–4 in | Yes | $20–$50 | Easy | Round or square tubular legs |
| Replace or add longer legs | Any | No | $30–$150+ | Moderate–hard | Permanent raise, hardwood or bolted frames |
| Casters / wheels | 2–5 in | Semi | $30–$100 | Moderate | Height + mobility, deck/patio surfaces |
One more thing to factor in: your furniture's frame material determines which methods are structurally safe. Welded aluminum or steel frames can't accept screwed leg extensions without risk of stripping thin-wall tubing. Solid hardwood like teak or cedar handles threaded inserts and bolt-on leg plates very well. Hollow tubular frames (common on budget resin wicker sets) rely on an internal metal skeleton, so always locate that frame before drilling.
Method 1: Cushions and seat pads (the easiest win)
Adding a thick cushion is genuinely the fastest way to raise your effective seating height, and it doubles as a comfort upgrade. A 2-inch cushion adds 2 inches of height; a 4-inch cushion adds 4 inches. For outdoor use, you want foam rated for exterior conditions, look for open-cell reticulated foam with a density of at least 1.8 lb/ft³, and ideally 2.5–3.0 lb/ft³ for pieces that get heavy daily use. Dense foam compresses less over time, so the height gain stays consistent season after season. Cheaper foam at 1.2–1.5 lb/ft³ will pack down within a month and you'll be back where you started.
Materials and tools
- Outdoor reticulated foam: 2–4 in thick, cut to seat dimensions (foam suppliers or online; budget $15–$40 per cushion)
- Solution-dyed acrylic fabric (Sunbrella or equivalent): UV, mildew, and fade resistant — this is not negotiable for outdoor use
- Zipper or hook-and-loop closure tape
- Sewing machine or heavy-duty hand-sewing needle and outdoor thread
- Sharp fabric scissors or electric carving knife (for foam cutting)
- Measuring tape and marker
Step-by-step
- Measure your current seat: length, width, and whether it has a lip or frame edge the cushion needs to sit inside or on top of.
- Order or cut foam 0.5 in smaller than the seat frame on each side so it sits flush without bunching.
- Cut your fabric with a 1-in seam allowance on all sides. For a 20 x 20 in cushion, cut two pieces at 22 x 22 in.
- Sew three sides of the cover together on the wrong side, then turn right-side out.
- Insert the foam, then close the fourth side with a zipper or hook-and-loop strip for easy washing.
- Attach tie straps to the back corners of the cover if your chair has a back rail — this keeps the cushion from sliding forward when someone sits down.
- Check the resulting seat height with a tape measure. If you need more, layer a thin memory-foam topper under the main cushion.
The main failure mode here is buying indoor foam by mistake. Indoor foam absorbs water and grows mildew within a season. Always verify you're getting reticulated (open-cell drainage) foam rated for outdoor use. When in doubt, ask the supplier directly.
Method 2: Furniture risers and blocks
Furniture risers are cup-shaped or plate-shaped supports that each leg sits in or on, lifting the whole piece off the ground. They're inexpensive, completely reversible, and need no tools for basic installation. The catch is stability: risers raise the center of gravity without widening the base, so they're best suited to heavy, wide-based pieces, a solid teak dining table, for example, is a fine candidate. A tall, narrow bistro chair is not.
Types of risers and blocks
- Plastic furniture risers: molded cups, usually in 1–5 in heights, load-rated around 1,000–2,000 lb per set of four — cheap ($10–$25 per set) and fine for light to medium pieces
- Rubber non-slip pads with height: dense rubber blocks in 0.5–2 in increments; good for uneven decks
- Hardwood blocks: cut to size from 2x4 or 4x4 lumber; seal with exterior polyurethane or teak oil to prevent rot; very stable under wide-base furniture
- Concrete or composite deck blocks: heavy, stable, and suitable for grass or gravel surfaces where furniture would otherwise sink
- Stacking combinations: mix a wood block base with a rubber pad on top to add anti-slip grip to a custom height
Installation steps
- Place furniture on a firm, flat surface before installing risers.
- Set one riser under each leg simultaneously — with a helper, tip the piece slightly to slide risers in; alone, use a rubber mallet and a spare piece of 2x4 as a lever.
- Check that all four legs are fully seated in their cups. A leg that's only partially seated is a tipping risk.
- Rock the furniture gently front-to-back and side-to-side. If it wobbles, the surface under the risers is uneven — shim the low side with a thin rubber pad.
- For wood blocks cut from lumber, sand any sharp edges smooth, predrill a small countersink hole from the top face, and thread a short screw up through the block into the hollow of a tubular leg (only if the leg has a cap you can remove) to lock the block in place.
- Seal wood blocks with two coats of exterior polyurethane before outdoor use. Reapply annually.
If you're setting furniture up on grass, concrete blocks or composite deck pads work better than plastic risers because they distribute the load and resist sinking. For step-by-step advice on creating a stable seating area, see our guide on how to set up patio furniture on grass. This is closely related to what you put under patio furniture on soft ground, a wide, flat base prevents legs from punching through turf or soft soil. More on that in the paver/platform section at the end of this article.
Method 3: Leg extenders and slip-on adapters
Leg extenders attach directly to the existing leg, either threading onto a leveling foot stud, clamping around a round or square tube, or slipping over the end of a tapered leg. They give you a cleaner look than blocks and, when properly spec'd, are more stable because the load path goes through the extender into the ground rather than through a cup that the leg can slide out of. I use adjustable stainless steel leveling feet for most of my own outdoor projects because they let me dial in height to the millimeter and handle uneven patios beautifully. See Anti-Slip Stainless Steel Adjustable Leveling Feet (product data), Superior Glide for specs and load ratings Anti-Slip Stainless Steel Adjustable Leveling Feet (product data) — Superior Glide.
Types and specifications
- Threaded leveling feet (M8, M10, M12 stud): screw into a pre-existing threaded insert in the leg bottom; adjustable range typically 0.5–2 in; per-foot static load ratings from 80 kg up to 900+ kg depending on model — always choose a rating at least 25–30% above your expected per-leg load
- Slip-on extender caps: rubber or plastic sleeves that fit over round or square leg ends; available in common sizes (7/8 in, 1 in, 1.25 in round; 1 in, 1.5 in square); typically add 1–4 in; held by friction or a set screw
- Clamp-on tube extenders: steel or aluminum clamps that grip the outside of a tubular leg and extend below it; better for larger diameter aluminum frames
- Threaded insert + bolt-on extender (retrofit): when no insert exists, you drill the leg end and press in a threaded T-nut or barrel nut, then thread in the extender stud
Tools you'll need
- Tape measure and marker
- Adjustable wrench or combination wrench sized to the leveling foot lock nut
- Drill with a bit matched to your insert diameter (only if retrofitting a threaded insert)
- Thread-locking compound (medium-strength, like blue Loctite) — outdoor vibration can loosen threaded feet over a season
- Rubber mallet (for slip-on caps)
- Level
Step-by-step installation
- Tip the furniture onto its side on a padded surface. Check the leg ends: are there existing rubber caps, plastic glides, or threaded studs? Remove all existing foot hardware.
- For existing threaded studs: thread the new leveling foot onto the stud, set to the height you calculated earlier, and tighten the lock nut against the leg bottom. Apply a small dab of thread-locking compound before final tightening.
- For hollow tubular legs with no insert: drill a hole the diameter of your T-nut barrel into the center of the leg end. Tap in the T-nut with a mallet until flush. Thread in the leveling foot stud and repeat for all legs.
- For slip-on caps: choose a cap that's 1/16 in smaller than your leg outer diameter for a snug press fit. Push onto the leg end with a rubber mallet. If the fit is loose, wrap the leg end with two layers of self-fusing silicone tape before inserting.
- Set the furniture upright and place a level on the seat or tabletop. Adjust individual feet in small increments (a quarter-turn changes height roughly 0.5 mm on most M10 feet) until the surface is level.
- Test stability by pressing down on each corner and rocking the piece. All four feet should contact the ground simultaneously. If one lifts, extend that foot slightly.
- For outdoor use, specify stainless steel grade A2 (304) at minimum; in coastal or marine environments, use A4 (316) stainless to resist salt air corrosion.
Method 4: Replacing or adding longer legs (permanent lift)
If you need more than 3–4 inches of additional height, or if your furniture's legs are damaged and you're replacing them anyway, adding longer legs is the cleanest permanent solution. This is a moderate-difficulty project, not hard, but it does require understanding how the existing leg attaches before you start. I've stripped more than one set of screws by guessing at the joinery instead of checking first.
Understanding your existing leg attachment
Premium hardwood patio furniture (teak, cedar) typically uses mortise-and-tenon joinery, sometimes reinforced with dowel pins. Aluminum frames are usually TIG-welded or use bolted junction plates. Budget tubular steel or aluminum pieces often just press-fit or use a single bolt. Each attachment method dictates a different removal and replacement strategy.
| Frame/leg type | Typical attachment method | Removal approach | Replacement method |
|---|---|---|---|
| Solid hardwood (teak, cedar) | Mortise-and-tenon, dowel pin, or threaded hanger bolt | Unscrew hanger bolt or carefully tap out tenon | New leg with matching tenon or hanger bolt; wood glue + hardware |
| Aluminum tube frame | TIG weld or bolted junction plate | Cannot safely remove welded legs — use extender or riser instead | Bolt-on aluminum leg extension plate |
| Powder-coated steel | Welded or bolted | Bolted: remove bolt; welded: not removable without cutting | Bolt-on steel extension with matching finish |
| Hollow tubular resin/wicker frame | Internal aluminum frame, press-fit or single bolt | Remove bolt and slide old leg out | Replacement leg of same diameter, cut to new length + old leg overlap |
Materials and tools
- Replacement legs: hardwood dowel stock, pre-turned furniture legs (hardware stores or online), or aluminum/steel square tube in matching diameter
- Hanger bolts (for wood legs): one end wood screw thread, one end machine thread
- Leg mounting plates: steel or aluminum, 4-hole design, matches your bolt pattern
- Exterior wood glue (for hardwood tenon joints)
- Drill and bits sized to your hardware
- Adjustable wrench, screwdriver set
- Hacksaw or miter saw (for cutting tube stock to length)
- Sandpaper (80, 120, 220 grit) for wood legs
- Exterior paint, stain, or teak oil to finish and weatherproof new wood legs
- Rust-inhibiting primer + exterior spray paint for metal legs
Step-by-step for hardwood furniture
- Tip the furniture upside-down on a padded work surface. Identify the attachment: look for a bolt head at the top of the leg, a wooden tenon entering the seat frame, or both.
- If the leg uses a hanger bolt: insert two nuts onto the machine-thread end, lock them against each other, and use a wrench on the outer nut to unscrew the bolt from the wood. The leg will release once the bolt is out.
- If the leg uses a tenon with glue: score around the joint line with a utility knife, then carefully tap the leg sideways with a rubber mallet to break the glue joint. Never use a steel hammer directly on a finished leg.
- Take the removed leg to a hardware store and match its diameter and tenon dimensions. New replacement legs are available pre-turned from most big-box stores in common sizes.
- If you're extending rather than fully replacing: cut a length of matching dowel stock 1 inch longer than your target extension, drill a centered hole in each end, and join the old leg to the extension with a hanger bolt and exterior wood glue. Clamp for 24 hours.
- Sand the new leg (80 grit to remove rough spots, 120 to smooth, 220 for finish), then apply two coats of teak oil, exterior polyurethane, or matching stain. Let cure fully before reassembly.
- Reattach using the original hardware or new hanger bolts. Verify all four legs are the same length by measuring from the seat frame to each leg end before re-installing.
- Set the furniture upright and check for wobble. If one leg runs slightly short, add a rubber leveling foot to that leg only.
For metal or aluminum frames
If legs are welded, do not attempt to cut them off yourself unless you're comfortable with a grinder and understand load redistribution. Instead, bolt a steel extension plate to the existing leg bottom using self-tapping metal screws or through-bolts. These plates are available in furniture hardware sections and can add 1–4 inches cleanly. Finish any raw metal edges with rust-inhibiting primer and touch-up spray paint in a matching color, exposed metal on an outdoor piece will rust within one season in most climates.
Method 5: Casters and wheels (height plus mobility)
Casters are a smart choice when you want both extra height and the ability to roll furniture across a deck or patio. A standard swivel caster adds between 2 and 5 inches of height depending on wheel diameter, and they're available in load ratings from about 75 lb per caster up to well over 1,000 lb for heavy-duty polyurethane wheels. For outdoor furniture, the math is straightforward: add up the weight of the furniture plus the maximum realistic live load (people sitting, drinks, a loaded side table), divide by the number of casters, and choose a caster rated at least 3 times that per-caster figure. That 3:1 safety factor accounts for uneven loading when someone leans on one side.
Choosing the right wheel material for outdoor use
| Wheel material | Best surface | UV/weather resistance | Floor protection | Notes |
|---|---|---|---|---|
| Polyurethane | Deck, tile, pavers | Good | Excellent | Best all-around outdoor choice; resists hardening with age |
| Rubber | Uneven surfaces, grass | Fair (hardens with UV) | Good | Grips well but can crack in direct sun after 2–3 seasons |
| Nylon | Smooth hard surfaces only | Very good | Poor (can scratch) | Hard and abrasion resistant; transmits vibration; not for soft surfaces |
| Pneumatic (air-filled) | Grass, gravel, uneven terrain | Fair | Excellent | Great for rough ground; needs occasional air pressure check |
Mounting types and what they mean for your furniture
Casters come as either plate-mount (a square or rectangular top plate with bolt holes) or stem-mount (a round or threaded post that inserts into a socket). Plate-mount is more stable and is what I recommend for patio dining chairs and tables, the load spreads across four bolts rather than a single stem. Stem-mount works well for lighter pieces like bar stools where the hollow leg already has a socket, but verify the stem diameter matches your socket before ordering.
Tools and materials
- Casters (4 per piece of furniture, swivel with locking option for stability): choose rust-proof yokes — stainless steel or zinc-plated at minimum, galvanized or stainless in coastal areas
- Mounting hardware: bolts, lock washers, and nylock nuts sized to your caster plate holes
- Plywood mounting plate (1/2 in exterior-grade plywood, cut to match leg bottom) if leg base is too small for direct plate attachment
- Drill and drill bits
- Wrench or socket set
- Exterior silicone sealant or marine-grade thread sealant
- Level
Step-by-step caster installation
- Tip the furniture upside-down. Measure the bottom of each leg — if the flat surface is smaller than your caster's mounting plate, cut a small plywood reinforcing pad (same dimensions as the plate) and glue and screw it to the leg bottom with exterior wood glue and 1-inch screws. Let cure overnight.
- Hold the caster plate against the leg bottom (or plywood pad) and mark the bolt hole positions with a pencil.
- Drill pilot holes slightly smaller than your bolt diameter at each mark to prevent splitting wood legs or cracking resin bases.
- Position the caster and insert bolts from inside the leg downward through the plate. Thread on lock washers and nylock nuts from underneath and tighten firmly.
- Before fully tightening the final nut, apply a thin bead of exterior silicone sealant around the base of each bolt head to prevent water from wicking into the hole and causing rot or corrosion.
- Repeat for all four legs, then set the furniture upright.
- Engage all locking mechanisms and check that the furniture doesn't roll or rock. A piece on locked casters should feel as stable as one on fixed legs.
- Test the total height with a tape measure and compare to your target. If you need a little more, stack a flat rubber riser pad between the leg bottom and the caster plate.
Weatherproofing casters and moving parts
This is the step most people skip, and it's why outdoor casters seize up within a season. At installation, apply a light coat of marine-grade grease or a silicone-based lubricant to the swivel bearing and the wheel axle. Avoid WD-40, it displaces water temporarily but evaporates and leaves the bearing dry. Every spring when you bring furniture out of storage, spin each caster wheel by hand and re-lubricate any that feel gritty or resist turning. Check that locking mechanisms still snap cleanly, a corroded lock tab is a safety issue, not just an inconvenience. If a lock no longer holds, replace the caster before using the furniture.
Raising furniture on grass or uneven ground
All of the above methods assume your furniture sits on a firm, flat surface. For tips on arranging and styling pieces once they're at the right height, see how to stage patio furniture. Grass, gravel, and uneven ground introduce two new problems: legs sink over time, and no riser or leveling foot can compensate for a base that actively shifts. The real fix is creating a stable surface under the furniture, not just raising the furniture itself. For guidance on choosing a stable location and layout, see where to put patio furniture.
For a dedicated seating or dining area on grass, a paver pad is the most durable and practical solution. The Interlocking Concrete Pavement Institute recommends excavating 4–6 inches of subgrade for a pedestrian patio, compacting it, installing 4–6 inches of compacted aggregate base, then 1 inch of bedding sand, then 60 mm (about 2. ICPI Tech Spec 2 (installation & frost/drainage guidance), ICPI advises sizing aggregate base by subgrade and frost susceptibility and ensuring positive drainage to prevent freeze‑thaw movement and wash‑out of bedding sand ICPI Tech Spec 2 (installation & frost/drainage guidance) — ICPI. 5 inch) concrete pavers. That paver surface sits roughly 3 inches above original grade, which means your furniture is effectively raised by that amount relative to the surrounding lawn, and you get a solid, non-sinking base. Always slope the surface 1/4 inch per foot away from your house for drainage. Without that slope, water pools under the pavers, freezes in winter, and heaves the whole pad out of level.
For a quicker, less permanent solution on grass, composite deck tiles (the snap-together kind made from recycled materials) can be laid directly on packed earth or turf and raise furniture by 0.75–1.5 inches while giving legs a non-sinking platform. They don't require excavation, drain well, and can be removed at the end of the season. They won't level significantly uneven ground, though, for that you need the compacted aggregate base approach.
Stability and safety checks for any raised furniture
No matter which method you used, run through this checklist before regular use. These aren't optional, a chair that tips under a guest is a liability, not just an embarrassment.
- Rock test: push on each corner and each side of the piece. All four contact points should stay grounded simultaneously. Any rocking means one leg is shorter or a riser isn't fully seated.
- Tip test: for chairs specifically, press on the back top rail with moderate force (as someone might lean back). The front legs should not lift more than 1/4 inch before the natural righting force takes over.
- Load test: sit on each chair for 30 seconds and check that no riser, block, or extender has shifted or compressed unevenly.
- Hardware check: inspect every bolt, screw, and lock nut for tightness. Vibration and thermal expansion/contraction loosen outdoor hardware faster than indoor hardware.
- Surface contact check: confirm that rubber pads or bases are fully in contact with the ground, not bridging a crack or edge.
Seasonal maintenance and long-term care
Any height modification you make adds components that need their own maintenance. Wood blocks and leg extensions should be re-sealed with exterior finish every spring before the outdoor season. Threaded leveling feet should be re-tightened after the first week of use, thermal expansion causes initial loosening, and checked again mid-season. Cushions should be stored indoors or in a weatherproof deck box during extended rain and over winter; even outdoor-rated foam breaks down faster if left soaking wet for months at a time. Caster bearings need annual re-lubrication as described above. None of this is a big time commitment, but skipping it will cost you replacement parts within 2–3 seasons.
When to hire a pro or just replace the furniture
I'm a big advocate for DIY, but there are a few situations where the honest answer is to call a professional or shop for new furniture. If your existing frames are structurally compromised, cracked welds, rotted wood at the joints, or badly corroded steel, raising them adds stress to an already weakened structure. A cracked weld on an aluminum chair can fail suddenly under load, and no riser or extender will fix that underlying problem. Similarly, if you need more than 5–6 inches of additional height, the geometry of the piece changes enough that stability becomes a real design challenge; at that point, it may be more cost-effective and safer to source a chair or table that matches your target height from the start. If you decide to replace rather than modify, see how to sell patio furniture for tips on recouping some of your cost.
If you're working with antique or high-value hardwood furniture, a furniture restoration specialist can replace or extend legs using proper joinery that maintains the piece's integrity and appearance, that's worth the cost for a piece you want to keep for decades. For budget resin or powder-coated steel sets that cost less than $200 new, honest math often favors replacement over extensive modification. For another relevant comparison, see what to put under patio furniture.
FAQ
Why would I want to make patio furniture higher, and when is it appropriate?
Raising patio furniture improves comfort (better seat-to-table clearance, easier sitting/standing), adapts furniture for taller users or counter/bar heights, compensates for sinking on soft ground, or levels uneven seating. It’s appropriate when measured seat/table clearances are off by 1–8 inches, when chairs force poor posture or feet don’t reach the ground, or when outdoor surfaces (grass, soft soil) cause instability. If required height change is large (>8–10 in), structural replacement or professional alteration is often better than extensive retrofit.
How do I measure ideal seat and table heights and check compatibility between chairs and tables?
Measure current seat top to finished ground and tabletop top to finished ground. Determine target seat height using ergonomic guidance: typical dining seat = 17–19 in (43–48 cm); standard table = 28–30 in (71–76 cm); target clearance between seat top and tabletop ≈10–12 in (25–30 cm). For counters/bars, use counter stool (24–27 in seat for 36 in counters) or bar stool (29–32 in seat for ~40–43 in bar). Also measure underside apron height and armrest clearance; ensure armrests clear table by ≥2 in. Compute needed seat increase = desired seat height − current seat height, and verify resulting seat-to-table clearance remains in the 10–12 in comfort band.
What temporary methods can raise patio furniture height quickly and safely?
Temporary options: (1) Cushions or foam pads (2–4 in typical) — quick, breathable outdoor foam and UV‑resistant fabric; (2) Stackable furniture risers or platform blocks placed under each leg; (3) Pavers/stepping stones or portable platforms for groups of furniture on grass; (4) Clamp-on leg risers or removable stem extenders for tubular legs; (5) Casters/wheels with locking feature if mobility is okay. Temporary methods are best for small lifts (1–4 in) and non‑structural needs; always check stability and slip risk.
What permanent or semi‑permanent methods can I use to increase furniture height?
Permanent/semi‑permanent methods: (1) Leg extenders or threaded leveling feet bolted into leg ends or existing inserts; (2) Replace legs with longer legs (fabricate new wood/metal legs or buy replacement legs matched to mount type); (3) Welded or bolted leg collars/sleeves for metal frames; (4) Attach structural wooden blocks or riser plates securely fastened to leg base; (5) Install plate‑mount casters (bolted to underside) for mobility plus height. Choose a method consistent with leg attachment type, material strength, and outdoor exposure.
Step-by-step: How do I raise a chair with leg extenders or leveling feet?
1) Measure needed rise and available space inside leg (or outside for sleeve). 2) Inspect leg end: hollow tubular, threaded insert, or solid wood. 3) Select extender rated ≥25–30% above expected per‑leg load (see supplier ratings). 4) For threaded inserts: unscrew and replace with longer stainless leveling foot. For hollow legs: insert a stem receiver or furniture insert; glue/epoxy and secure with set screw; screw in extender. For solid wood legs: drill pilot and bolt a screw‑in leveling foot or attach a metal plate and bolt an extender. 5) Check level, lock any adjustment, and test stability with full weight. 6) Weatherproof exposed metal (galvanize/stainless) and seal wood joints.
Step-by-step: How do I add casters or wheels to outdoor furniture safely?
1) Choose outdoor‑rated casters (stainless/galv yokes, polyurethane or pneumatic tread) sized and rated so total caster capacity × number of casters > max live load × safety factor 3:1. 2) Determine mounting type: top plate or stem. 3) If plate‑mounting to hollow tubular legs, add a plywood mounting block or metal plate to distribute load; for solid legs route pilot holes. 4) Bolt through with stainless fasteners and lock washers; use nylon lock nuts or threadlocker. 5) For swivel casters add at least four; use locks or total locks to prevent movement. 6) Test on the intended surface and verify brakes hold on slope. 7) Periodically lubricate and inspect for corrosion.