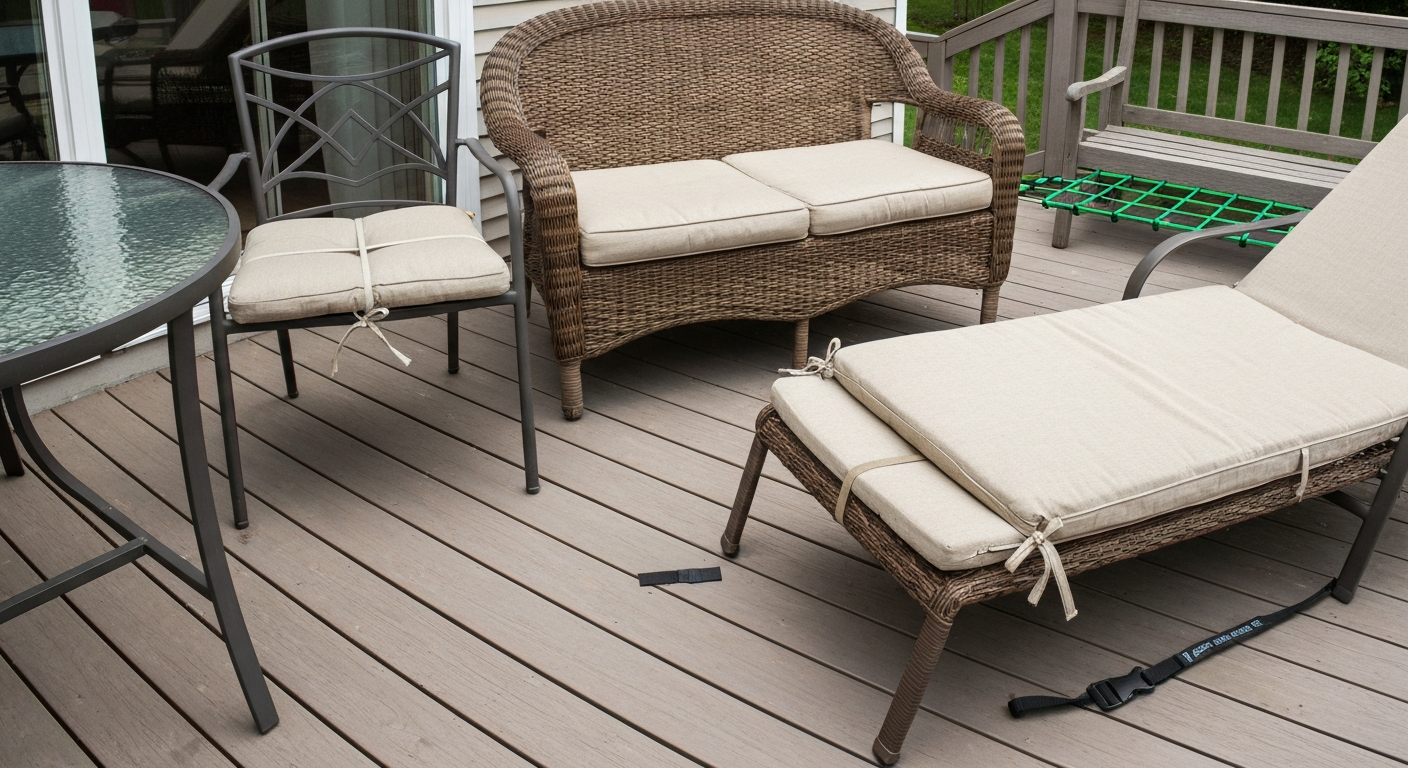
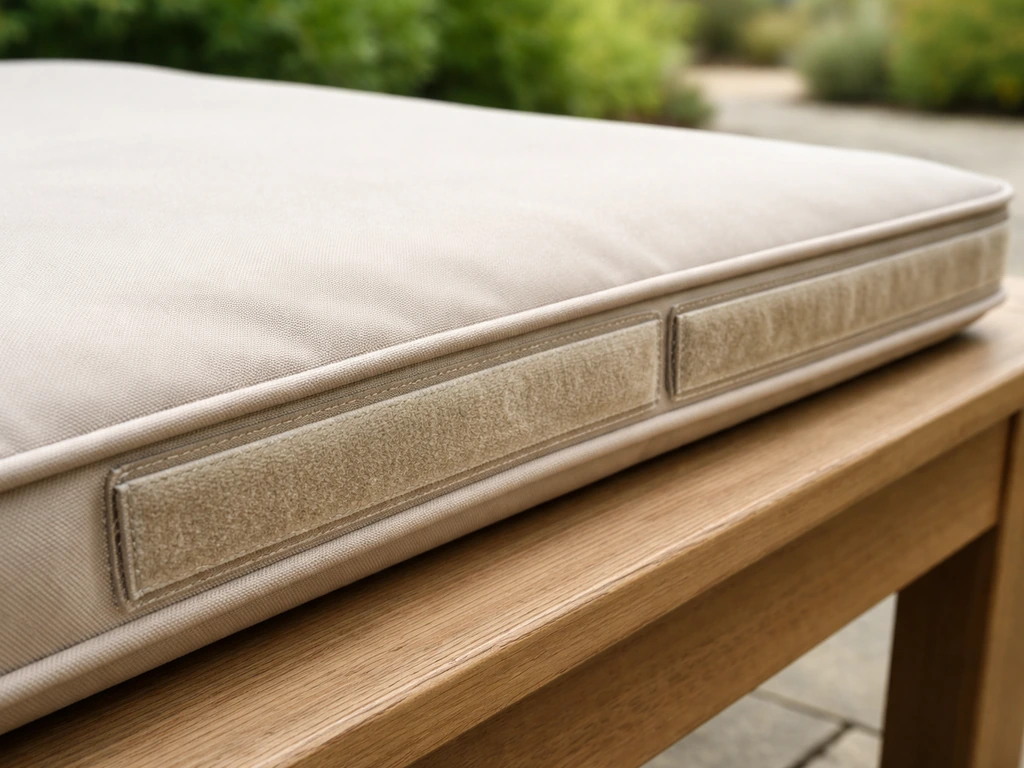
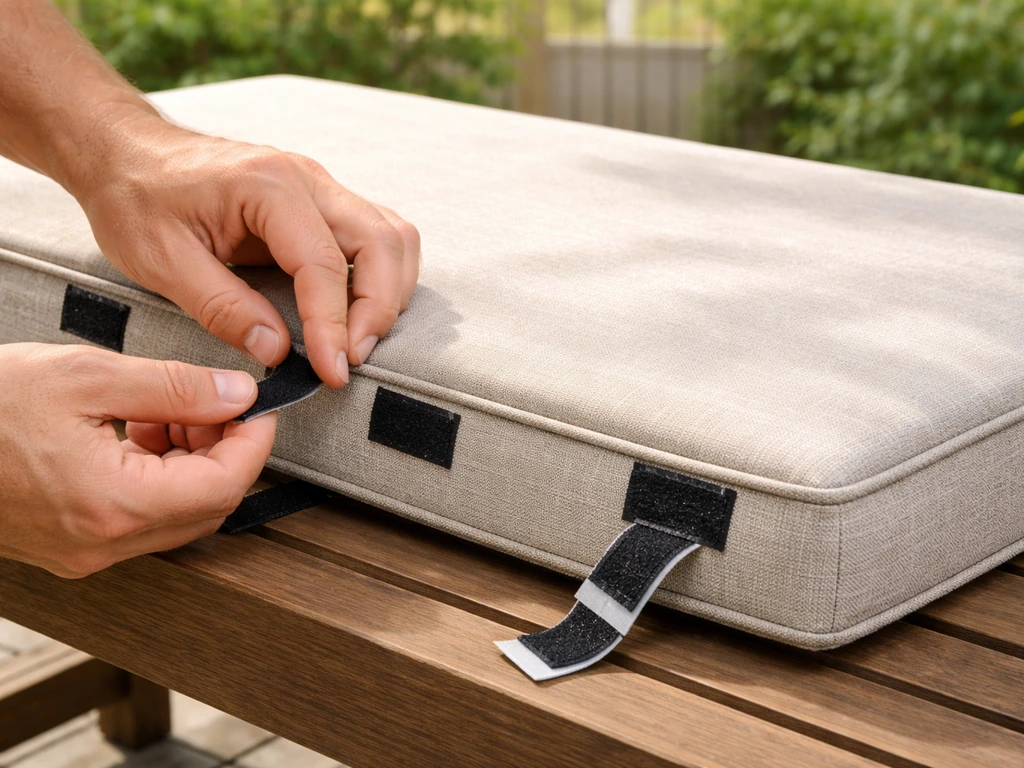
The best way to secure patio cushions from wind depends on how permanent you want the fix and what your furniture frame is made of. For a quick, no-tools solution, rubber anti-slip pads under the cushion combined with clip-on cushion straps handle most breezy days. For high-wind areas or frequent storms, sewn-in tie straps or outdoor-rated hook-and-loop (Velcro) bonded to both the cushion and the frame is the most reliable long-term approach. This guide walks you through every option, from a five-minute temporary fix to a proper permanent installation, so you can pick what works for your specific chair, sectional, or wicker set. For more step-by-step tips and product recommendations, see our detailed guide on how to get patio cushions to stay in place.
How to Secure Patio Cushions from Wind: 10 DIY Methods

Why wind sends cushions flying (and what that actually means for your fix)
Wind exerts real, measurable force on your cushions. Using the standard aerodynamic drag formula (F = 0.5 x air density x drag coefficient x area x velocity squared), a typical 24-inch square seat cushion experiences about 5 lbs of force at 20 mph, roughly 21 lbs at 40 mph, and nearly 47 lbs at 60 mph. Rounded and streamlined shapes have lower drag coefficients than flat plates; for irregular or rounded cushions a conservative Cd ≈ 0.8–1.2 is often used (Drag coefficient, Wikipedia (discussion and ranges by shape)) blank" rel="noopener noreferrer">Drag coefficient — Wikipedia (discussion and ranges by shape). Those aren't huge numbers until you realize most cushions weigh only 2 to 4 lbs and sit on a smooth painted or woven surface with almost no friction. A back cushion standing nearly vertical to the wind sees even more force because its full face is exposed. The implication: at 40 mph, you'd need roughly 35 lbs of dead weight on that cushion to hold it by friction alone (assuming a rubber-on-deck friction coefficient of about 0.6). That's why adding weight alone is rarely practical, and why proper ties or Velcro almost always outperform cushion weights for anything stronger than a gentle breeze.
This guide covers every practical method: anti-slip pads, tie straps, snap fasteners, outdoor Velcro (both adhesive and sew-on), bungee clips, furniture anchors, and built-in ties. For detailed, step-by-step instructions and diagrams, see our guide on how to tie down patio cushions. It also tells you which method pairs with which frame type, how to attach them step by step, and how to troubleshoot the common failures like Velcro tearout, rusting hardware, and straps that slip off wicker.
Pick your method: a quick decision framework
Before you buy anything, run through these two questions: How strong are your typical winds, and how often do you want to remove the cushions? That combination points you straight to the right solution.
| Frame type | Removable cushions OK? | Wind level | Best method |
|---|---|---|---|
| Metal (tubular/flat bar) | Yes | Light (under 25 mph) | Anti-slip pads + cushion ties |
| Metal (tubular/flat bar) | Yes | Moderate to high (25-50 mph) | Outdoor Velcro (sew-on) or snap fasteners |
| Metal (tubular/flat bar) | No / rarely moved | Any | Sewn tie straps anchored to frame |
| Wicker / rattan | Yes | Light to moderate | Anti-slip pads + clip-on straps threaded through weave |
| Wicker / rattan | Yes | High | Sew-on Velcro on cushion + adhesive Velcro on inner wicker surface |
| Wood (teak/cedar) | Yes | Light to moderate | Screw-in eye hooks + tie straps or anti-slip pads |
| Wood (teak/cedar) | No / rarely moved | High | Sewn ties with stainless steel D-rings screwed to frame |
| Concrete / masonry bench | Yes | Any | Non-slip pad + sandbag-style cushion weights |
| Sectional (modular) | Yes | Any | Sectional connector clips + Velcro between cushion and base |
A few frame-specific notes worth calling out: on wicker, never use a screw-in anchor directly into the weave, you'll crack the resin or natural rattan. Instead, thread straps through the gaps in the weave and tie them off on the structural underframe. On bare teak or cedar, test any adhesive Velcro on a hidden spot first since some adhesives raise the grain or leave staining on oiled wood. On powder-coated metal, rough up the bonding area lightly with 220-grit sandpaper before pressing on any adhesive-backed product.
Materials and tools checklist
Gather these before you start. I've included rough cost ranges so you can decide what to skip based on which method you're using.
- Outdoor-rated rubber anti-slip pad or shelf liner (approx. $5-$12 per roll, enough for 4-6 cushions)
- Outdoor hook-and-loop (Velcro) tape, 1-2 inch wide: either adhesive-backed industrial strength or sew-on polyester — UV-rated versions like VELCRO Brand Outdoor or 3M Dual Lock SJ4570 ($8-$20 per yard/pack)
- UV-stabilized polyester webbing, 1 inch wide (breaking strength typically 3,400-4,400 lbf — far more than needed, but polyester outlasts nylon outdoors) ($3-$6 per yard)
- Stainless steel D-rings or O-rings, 1 inch ($4-$8 for a pack of 10)
- Stainless steel Chicago screws or snap-hook clips ($5-$10 per pack)
- Heavy-duty outdoor snaps or cam buckles ($6-$15 per pack)
- Bungee cords or ball-tie bungees, 6-12 inch ($4-$8 per pack)
- Rubber furniture grip pads / adhesive bumpers (3M Bumpon style) ($5-$10)
- Stainless steel eye screws (for wood frames) ($3-$7 per pack)
- Upholstery thread (UV-resistant polyester), hand-sewing needle or sewing machine with denim needle
- Scissors or rotary cutter
- Measuring tape
- Lighter or heat gun (to melt-seal cut webbing ends and prevent fraying)
- Rubbing alcohol wipes (to clean surface before any adhesive application)
- 220-grit sandpaper (light scuffing for adhesive-backed Velcro on painted metal)
- Clamps or binder clips (to hold Velcro in place during adhesive cure)
Budget tip: if you're outfitting more than four chairs, buy hook-and-loop by the roll (25-foot rolls) rather than pre-cut packs. You'll cut the per-yard cost roughly in half. Anti-slip shelf liner from a dollar store works almost as well as branded grip pads for light-wind situations, and I've used it on my own set for two seasons without complaints.
Where to place everything: pad locations, strap routes, and tie points
Seat cushions on chairs and loveseats
For a standard seat cushion on a chair frame, place anti-slip pads in all four corners of the cushion's underside, plus one in the center if the cushion is larger than 20 inches square. This gives you five contact points that prevent both forward-slide and rotational drift. For tie straps, the rear two corners of the seat cushion should tie to the rear legs or frame crossbar. On chairs with back cushions, run a strap from the top-center of the back cushion down and tie it to the headrest rail or the topmost horizontal bar. If your back cushion has a bowed shape (common on Adirondack-style chairs), add a second strap across the mid-point of the cushion connecting to the chair sides.
Sectional pieces and chaise lounges
On sectionals, the biggest problem isn't individual cushions lifting, it's the whole seat cushion creeping forward on the frame. Place a continuous strip of anti-slip pad or Velcro along the full back edge of the seat base (where the cushion meets the backrest), then add corner pads at the front two corners. For chaise lounges, a single strap at the top and bottom of the cushion tied to the frame ends is usually sufficient because the cushion is mostly lying flat, reducing the wind's leverage considerably.
Wicker and rounded frames
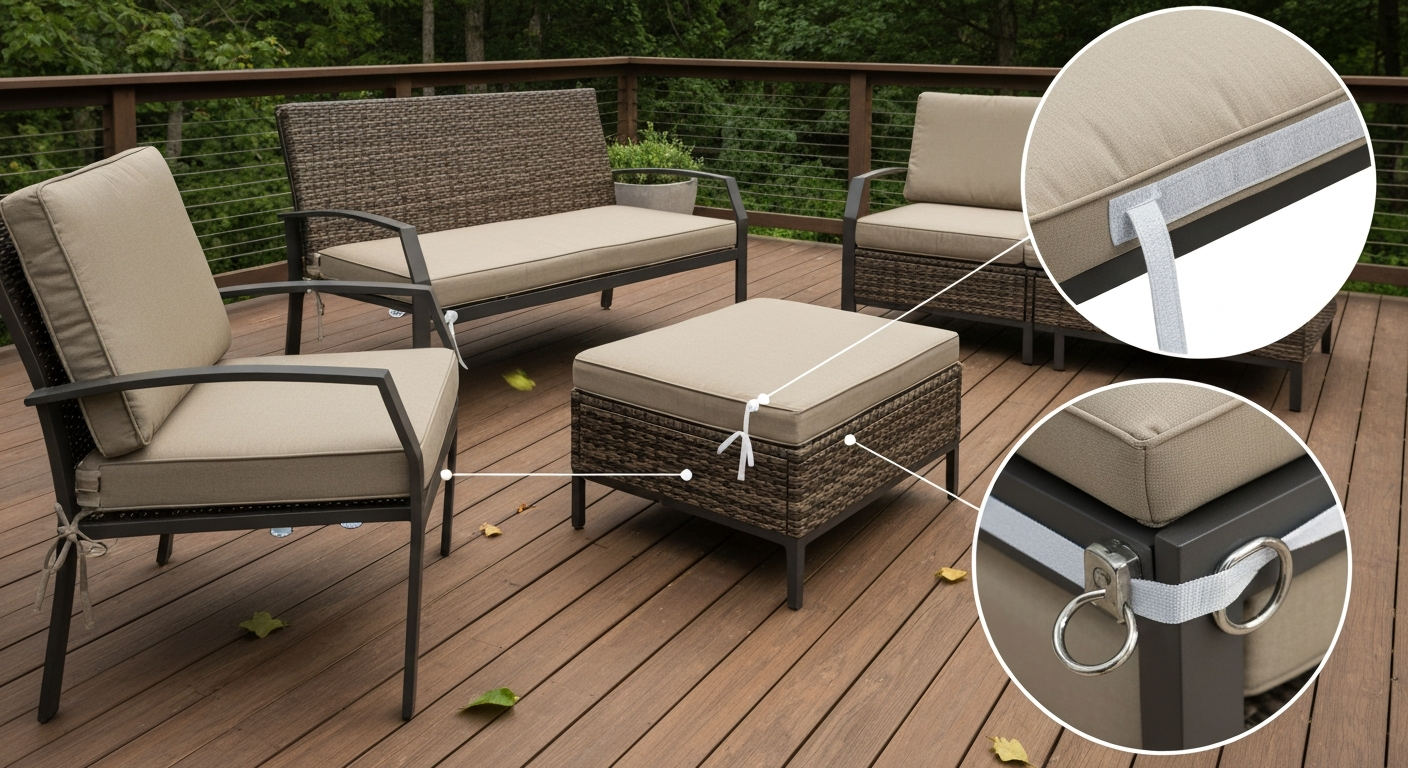
On wicker, thread a length of 1-inch polyester webbing through two gaps in the weave near the back of the seat, cross it under the frame's structural rail, and bring the ends up to tie off on the cushion's rear loops or a D-ring sewn to the underside of the cushion. This distributes the load across the weave rather than concentrating it at one point. Avoid routing straps over the top edge of wicker armrests or backrests, as the strap will chafe and eventually cut into the weave.
How each method stacks up: a full comparison
| Method | Pros | Cons | Approx. cost (per chair) | Permanence | Wind resistance |
|---|---|---|---|---|---|
| Anti-slip rubber pads | No tools, no damage, fast setup, cheap | Low holding force — not enough above ~25-30 mph on their own | $1-$3 | Temporary / seasonal | Low-moderate |
| Cushion weights / weighted hems | Invisible, no attachment to frame needed | Need ~35 lbs at 40 mph — heavy and impractical for most cushions | $5-$20 (DIY) | Permanent (sewn in) | Moderate (limited by practicality) |
| Outdoor adhesive Velcro (hook-and-loop) | Fast, removable, no sewing | Adhesive can fail under UV/moisture over time; needs clean dry surface | $4-$8 | Semi-permanent | Moderate |
| Sew-on outdoor Velcro (hook-and-loop) | Very strong, long-lasting, washable | Requires sewing; must sew to cushion cover and attach to frame | $3-$6 (plus labor) | Permanent | High |
| 3M Dual Lock (reclosable mushroom-head) | Highest shear/tensile strength of adhesive options; locks firmly until peeled | More expensive; stiffer feel; not available in wide widths | $8-$15 | Semi-permanent | High |
| Tie straps / polyester webbing ties | Very strong (thousands of lbs breaking strength), cheap | Visible; must tie/untie to remove cushions | $2-$5 | Semi-permanent | High |
| Snap fasteners (grommets + socket snaps) | Clean look, quick attach/detach | Requires installation tools (punch and setter); can tear if wrong size | $8-$18 (tool + snaps) | Permanent | High |
| Bungee cords / ball-tie clips | Instant, very cheap, no tools | Stretchy = less resistance; can unhook in high winds | $1-$3 | Temporary | Low-moderate |
| Frame-anchored tie-down straps | Extremely secure, works in high winds | Most permanent — hard to undo; requires hardware in frame | $10-$25 | Permanent | Very high |
My honest recommendation: for most homeowners in a typical suburban setting who deal with occasional gusty afternoons, a combination of anti-slip pads plus sew-on Velcro is the sweet spot. For more detailed instructions on how to keep patio cushions from sliding, consult our full guide. It handles winds up to about 40 mph, cushions come off easily for storage, and the whole setup costs under $20 per chair. If you're in a coastal area or somewhere with regular 50-plus-mph wind events, go straight to sewn tie straps with D-rings anchored to the frame.
Temporary fixes: step-by-step instructions
Method 1: rubber anti-slip pads
- Cut your rubber anti-slip pad or shelf liner into roughly 4-inch squares using scissors. You'll need five pieces per seat cushion.
- Flip the cushion upside down on a clean surface.
- Wipe the corners and center of the cushion bottom with a dry cloth to remove dust.
- If your pads are self-adhesive, peel the backing and press one pad firmly into each corner, about 1 inch in from each edge. Add the fifth pad dead-center. Hold each for 30 seconds.
- If your pads are non-adhesive (shelf liner), cut them slightly larger (6-inch squares) so they stay put from friction alone — no adhesive needed.
- Flip the cushion back onto the frame and press down. The pads grip both the cushion fabric and the frame surface.
- Check by pressing sideways with moderate force. If the cushion slides easily, add a thin bead of outdoor-rated silicone caulk under each pad corner for extra grip (let it cure 24 hours before use).
Method 2: adhesive-backed outdoor Velcro
- Buy UV-rated adhesive hook-and-loop tape in 1- or 2-inch width. VELCRO Brand Outdoor or 3M Dual Lock are the two I'd recommend. Dual Lock is pricier but grips harder.
- Decide on placement: for a seat cushion, two 3-inch strips at the rear corners work well. For a back cushion, one strip at the top center and one at the bottom center.
- Clean the frame surface and the cushion bottom at each placement spot with a rubbing alcohol wipe. Let dry completely — this step is non-negotiable. Adhesive on a dusty or damp surface will peel off within days.
- If the frame is painted metal, scuff the adhesive location lightly with 220-grit sandpaper, then wipe again with alcohol.
- Peel the backing from the hook side and press it firmly onto the frame. Press hard for 60 seconds. Clamp or tape it in place and let the adhesive cure for at least 1 hour (24 hours gives a full bond).
- Peel the backing from the loop side and press it onto the corresponding spot on the cushion bottom. Same 60-second firm press.
- Once both sides are cured, press them together to engage the fastener. You should hear and feel the lock engage with Dual Lock, or feel the grab with standard hook-and-loop.
- Caution: if using adhesive Velcro on oiled teak, test on a hidden area first. The adhesive can darken the wood or lift the finish.
Method 3: bungee cords and clip ties
- Choose bungee cords short enough to hold tension when clipped: 6-inch ball-tie bungees or 8-inch hooked bungees work well for most chair frames.
- Hook or loop one end through the cushion's existing tie strap loop, grommet, or around the cushion's corner edge (not through the fabric itself).
- Run the bungee under the frame rail or around a chair leg, and hook the other end to a matching point on the opposite side.
- The goal is snug, not stretched: a bungee that's pulled tight at rest will rebound hard if it unclips. Aim for slight tension, not maximum stretch.
- Check the clips after the first windy day. If the hooks are bending open, switch to locking carabiner-style clips instead of open hooks.
- This method is great for a quick storm prep fix — it takes under two minutes per cushion, uses gear you probably already own, and leaves no marks on the furniture.
Method 4: sandbag-style cushion weights
- Sew or purchase small fabric pouches (roughly 4 x 6 inches) from outdoor canvas or Sunbrella-type fabric.
- Fill each pouch with washed play sand or poly pellets. For moderate wind resistance at 40 mph, you'd theoretically need about 35 lbs total from friction alone — this is why weights work best as a supplement to pads or ties, not as a standalone method.
- Seal the pouch opening with a double-stitched seam or use a waterproof zipper.
- Slide the pouches into the gaps between cushions on a sectional, or tuck them along the rear edge of a seat cushion under the back cushion.
- For lounge chairs, place one weight at the foot end of the cushion where it won't be felt during use.
- Replace the fill annually if using sand — it can compact and grow mildew inside the pouch.
Permanent fixes: step-by-step instructions
Method 5: sew-on Velcro attached to cushions and frame
This is my go-to recommendation for anyone willing to do twenty minutes of hand-sewing per cushion. Sew-on hook-and-loop is washable, doesn't peel, and holds far better than adhesive under repeated outdoor cycles. For recommendations on the best velcro for patio cushions, see my buyer's picks and ratings for outdoor-rated hook-and-loop options. The only tricky part is attaching the frame side without sewing into the furniture itself. For a detailed, step-by-step guide on how to attach cushions to patio furniture, including stitch patterns and attachment locations, consult the dedicated how-to.
- Cut two 3-inch lengths of sew-on hook tape and two 3-inch lengths of sew-on loop tape for each cushion. Use UV-stabilized polyester hook-and-loop, not nylon, which degrades faster outdoors.
- On the cushion: mark your attachment points with chalk or a fabric pen — typically the two rear corners of a seat cushion's underside, or the top and bottom center of a back cushion's back face.
- Thread a needle with heavy UV-resistant polyester upholstery thread. Use a doubled strand for strength.
- Stitch the loop (soft) side of the Velcro to the cushion cover at each marked point. Sew around all four edges of the Velcro strip, then add an X stitch through the center. Pull each stitch firm. If you have a sewing machine, use a denim needle and set the stitch length to 2.5-3mm.
- For the hook (rough) side on the frame: if the frame is metal, apply the hook side with industrial-strength adhesive, or drill a small hole and use a Chicago screw to mechanically fasten a small fabric tab that carries the hook tape.
- On a wood frame, staple-gun the hook side directly to the wood using stainless staples, then cover the edges with a bead of outdoor sealer to prevent water wicking under the fabric.
- On wicker, glue the hook side to a rigid backing piece (a thin strip of outdoor-rated HDPE plastic or nylon webbing works well), then tie or screw that backing to the inner structural frame of the wicker piece.
- Press the cushion onto the frame and firmly push the two Velcro sides together. You should feel a solid catch.
- After the first season, check all sewn edges for thread abrasion and re-stitch any loose corners.
Method 6: sewn tie straps with D-rings
- Cut two 12-inch lengths of 1-inch UV-stabilized polyester webbing for each tie point. You'll typically need four ties per seat cushion (one at each corner) and two per back cushion.
- Fold one end of each strap 1.5 inches over a stainless steel D-ring and stitch it closed with a box-X pattern (a rectangle stitch with an X inside): this is the standard anchor stitch used by saddlers and awning fabricators and is far stronger than a single line of stitching.
- Sew the D-ring end of each strap to the inside of the cushion cover at each corner, stitching through all layers of the cover. If the cushion has a removable cover with a zipper, open the cover, stitch the strap base to the inner liner fabric, then close the cover back up, threading the strap through a small cut or existing seam opening.
- Thread the free end of each strap through the corresponding frame member (leg, rail, or wicker weave gap) and tie it off with a square knot or pass it through a cam buckle for easy adjustment.
- For a cleaner look, add small snap hooks to the free ends and install matching eye screws or small rings on the chair frame so cushions snap on in under 10 seconds.
- Trim strap ends and melt the cut edge with a lighter to prevent fraying.
- Check strap tension once a month in-season. Polyester stretches slightly when wet and may need minor adjustment after a heavy rain.
Method 7: frame-anchored tie-down points
This is the nuclear option, appropriate for high-wind zones or furniture that rarely needs to be moved. You're installing permanent anchor points on the frame that straps clip to. See the manufacturer technical bulletin, SNAPTOGGLE® Heavy‑Duty Toggle Bolts, TOGGLER (technical bulletin with capacity notes), for ultimate test loads and working-load guidance when installing mechanical anchors into common substrates SNAPTOGGLE® Heavy‑Duty Toggle Bolts — TOGGLER (technical bulletin with capacity notes).
- For wood frames: drill a pilot hole and install a stainless steel eye screw at each tie point on the frame. For teak (dense hardwood), pre-drill at 70% of the screw's shank diameter to avoid splitting.
- For metal frames: drill a hole and install a stainless steel rivet nut (also called a blind nut or Rivnut). Thread a bolt-eye through the rivet nut to create a permanent attachment point. Use stainless fasteners only — galvanized or zinc-plated hardware will rust and stain your frame within one season.
- For concrete or masonry benches: use a hammer drill and Tapcon concrete screws. Follow the manufacturer's edge-distance and spacing guidance from the ESR documentation (typically minimum 1.75 inches from any edge). Install stainless steel eye bolts into the Tapcon anchors.
- For hollow-frame aluminum or tubular steel where you can't access the back side: use a toggle-style anchor (TOGGLER SNAPTOGGLE style). Follow the manufacturer's load data for the specific wall thickness and bolt size. These are rated for real loads and are far more reliable than plastic drywall anchors.
- Once anchor points are installed, attach your cushion tie straps using snap hooks or D-rings so cushions can still be removed seasonally without any tools.
Attaching Velcro to patio cushions: adhesive vs sew-on vs staple-on
There's real confusion about which type of Velcro to use outdoors, so let me lay it out plainly. For a step-by-step demonstration on how do you attach Velcro to patio cushions, see this detailed guide.
| Velcro type | Best for | How to apply | Outdoor lifespan | Holding strength |
|---|---|---|---|---|
| Adhesive-backed (standard) | Quick fixes, smooth non-porous frames | Peel, clean surface, press 60 sec, clamp 1 hr | 1-2 seasons (UV/moisture degrades adhesive) | Moderate (peel resistance limited by adhesive bond) |
| Adhesive-backed (industrial / 3M Dual Lock) | Higher-load temporary fixes on metal or hard plastic frames | Same as above; surface prep critical | 2-3 seasons with good prep | High shear/tensile — best adhesive option |
| Sew-on (polyester, UV-rated) | Permanent cushion attachment | Stitch around perimeter + X-stitch center; UV polyester thread | 5+ seasons (fabric degrades before fastener) | Very high — limited by thread/fabric, not the Velcro |
| Staple-on (to wood frames) | Attaching hook side to wood furniture frames | Stainless staples every 1 inch along edges | Depends on wood/finish; check annually | Good if staples are dense and evenly spaced |
The prep step people skip: cleaning the bonding surface. I've seen $20 worth of industrial Velcro peel off in two weeks because the frame had a thin film of sunscreen, pollen, or teak oil on it. Wipe with rubbing alcohol, let it dry for at least 5 minutes, then apply. On powder-coated metal, that light scuff with 220-grit sandpaper before the alcohol wipe makes a meaningful difference. Don't skip either step.
Choosing between hook and loop sides: always put the rough hook side on the hard surface (the frame) and the soft loop side against the cushion fabric. If the hook side contacts skin or clothing, it scratches and snags. The one exception is if you're using Dual Lock on both sides, which uses matching mushroom-head profiles on both pieces.
Special guidance for wicker and irregular frames
Wicker trips people up because there's no flat, hard surface to bond to, and the weave is surprisingly fragile at point loads. The strategy that works: use the structural metal or wood underframe (the frame inside the wicker skin) as your anchor, not the wicker weave itself. Most resin wicker patio furniture has a welded aluminum or steel inner frame. Thread your tie straps through the weave and loop them around that inner rail, not around an individual wicker strand.
For Velcro on wicker: bond the hook side to a rigid fabric or nylon backing strip (use outdoor Velcro with a sew-on or grommet-mounted backing), then tie or zip-tie that backing strip to the inner frame. For step-by-step instructions on how to attach cushions to wicker patio furniture, consult the dedicated guide for clear, illustrated methods tailored to wicker frames. This way, if the Velcro ever needs replacing, you're not trying to remove adhesive from fragile wicker. On the cushion side, a sewn loop strip at each corner handles the connection.
A related concern with wicker: wind can lift the entire chair, not just the cushion. If you have lightweight resin wicker chairs, consider adding rubber-grip feet to the chair legs (simple stick-on rubber bumpers like 3M Bumpon work well) to prevent the chair from skidding on a smooth deck before you've even thought about the cushion.
Seasonal maintenance and storage tips
Securing cushions well is only half the job. Maintaining that security through a full outdoor season takes a bit of attention.
- At the start of each season, test every Velcro strip and strap tie before relying on it. Peel each Velcro pair apart and re-press. If adhesive-backed strips peel off, now is the time to replace them rather than finding out during the first storm.
- Inspect sewn stitching for thread abrasion, especially anywhere the stitch touches a metal edge. Metal will saw through polyester thread in one season if the contact point isn't padded.
- Clean Velcro every 4-6 weeks during summer. Pollen, debris, and pet hair clog the hook side and reduce holding strength significantly. Use a stiff-bristled brush or a toothpick to clear the hooks.
- At season end, remove cushions and store them indoors or in a deck box. Even the best outdoor-rated Velcro and webbing lasts longer when it's not sitting through freeze-thaw cycles.
- If you store cushions with Velcro still engaged (hook-to-loop), the hook side can permanently deform the loop pile over months of compression. Store with the Velcro open (separated) or fold a piece of felt between the two sides.
- Check metal anchor hardware (eye screws, snap hooks) for rust annually. Replace any zinc or galvanized hardware with stainless immediately — one winter is enough to seize or weaken galvanized fasteners at most coastal locations.
- Re-seal any cut webbing ends if you notice fraying. A quick pass with a lighter melts the end into a fused edge that won't unravel.
Troubleshooting common failures
Velcro keeps peeling off the frame
Almost always a surface prep issue. Strip the old Velcro completely (use a heat gun on low to soften the adhesive residue, then rub with rubbing alcohol to clean off residue). Rough up the frame surface lightly with sandpaper, wipe with alcohol, let it fully dry, then apply fresh tape. If the frame is oily wood or has wax or sealer on it, adhesive Velcro simply won't bond reliably. Switch to sew-on Velcro with a mechanical anchor point instead.
Tie straps tear out of the cushion
This happens when the strap is sewn only through the cover fabric without a backing patch. The fix: open the zipper or a seam, and sew a 4x4-inch square of canvas or heavy duck cloth as a backing behind the strap attachment point. The strap now distributes its load over the larger patch area instead of tearing through the thin cover fabric. Use a box-X stitch through both the backing patch and the strap loop, not just a straight-line stitch.
Cushions still sliding forward even with pads
This is usually a friction mismatch: smooth Sunbrella-type fabric on smooth powder-coated metal slides even with rubber pads if the pad area is too small. Increase pad coverage, instead of four small corner squares, cut a single continuous strip of non-slip material that runs the full width of the cushion's rear half. Or switch from pads to a rear strap tie that physically restrains forward movement, which anti-slip pads alone can't prevent at the aerodynamic forces involved above 25 mph.
Rust stains on cushion fabric
This usually traces to non-stainless metal hardware: snap hooks, D-rings, staples, or eye screws that aren't fully stainless steel (or at least marine-grade zinc-plated). Replace any hardware that's showing surface rust. To remove existing rust stains from cushion fabric, a cream of tartar paste (mix cream of tartar with a little water, apply, let sit 30 minutes in sunlight, rinse) works surprisingly well on most outdoor fabrics including Sunbrella, without bleaching the color.
Bungee cords keep unhooking
The hook opens under load if it's a standard J-hook style. Replace the hooks with locking carabiners or ball-end bungees where the loop end can't unhook from a frame rail. Ball-tie bungees (the ones with a rubber ball on one end and a hook on the other) thread through a hole or gap and can't pull free, which makes them much more reliable than open-hook bungees in windy conditions.
FAQ
Title and meta description for the article
Title: How to Secure Patio Cushions from Wind — Decision Guide & Step‑by‑Step Fixes Meta (≤160 chars): Practical DIY methods to keep patio cushions from blowing away—choose by cushion/frame, step‑by‑step temporary & permanent fixes, product picks.
Decision framework: How do I choose the right securing method for my cushions?
Quick decision flow: 1) Identify cushion type: loose seat cushion (square/rect), bench/bolster, hammock‑style or irregular-shaped. 2) Identify frame material: wood, metal (aluminum/steel), wicker/resin wicker, or freestanding cushion (no frame). 3) Match protection need: temporary (seasonal, quick storms) vs permanent (windy location year‑round) vs cosmetic (must be invisible). Recommendations by combination: - Loose foam/polyester seat cushion on solid deck: anti‑slip pads or adhesive silicone pads (temporary); sew‑in ties or heavy‑duty hook‑and‑loop or weights for longer term. - Cushions on metal/wood frames with available anchor point: webbing straps with snap hooks or sewn/buckled ties (permanent) or adhesive+sew-on Velcro (semi‑permanent). - Wicker/irregular frames: flexible straps that wrap and clip, sew‑on ties attached to cushion hem, or stitch‑in stainless chain/weight in hem if weights needed. - High wind exposure: use mechanical tie‑downs (webbing + anchors) or 3M Dual Lock/industrial sew‑on hook & loop; avoid relying solely on adhesive-backed hook & loop or light adhesive pads. Use the wind‑force quick check (see FAQ on sizing) to decide whether friction alone is enough or you need ties/weights.
How to estimate wind force on a cushion and use it to size fasteners or weight
Quick calculation (conservative): F = 0.5·ρ·Cd·A·V² with ρ≈1.225 kg/m³. - Example: 24"×24" cushion → A≈0.37 m². Using Cd=1.28 (flat plate): -- 20 mph (9 m/s) → F ≈ 5 lbf -- 40 mph (18 m/s) → F ≈ 21 lbf -- 60 mph (27 m/s) → F ≈ 47 lbf Friction check: required deadweight ≈ F/μ. For rubber anti‑slip pads μ≈0.6 → a 24" cushion at 40 mph needs ≈35 lbf of weight to avoid sliding. Use this to pick strap ratings, number of Velcro strips, or mass for sewn weights. Add safety factor (×1.5–2) for gusts and wear.
Step‑by‑step: Temporary fixes (easy, removable)
Materials/tools: anti‑slip pads or adhesive rubber dots, outdoor Velcro (adhesive-backed), 3M dual‑lock small strips, bungee straps. Steps: 1) Clean surfaces: wipe cushion underside and chair frame/deck with isopropyl alcohol; dry fully. 2) Anti‑slip pads: place 4 pads near corners of cushion bottom, press for 30 seconds; let adhesive cure per product instructions. 3) Adhesive Velcro / Dual Lock: attach loop side to cushion underside and hook side to frame (or vice versa). Use multiple strips (one per corner + center). For higher loads prefer Dual Lock over standard adhesive Velcro. 4) Bungee/elastic loops: hook around back slat and cushion, use as temporary tether. 5) Test: tug cushion horizontally and upward; if it moves easily, add more pads or a strap. Removal: gently heat (hair dryer) adhesive Velcro to soften then peel; clean residue with adhesive remover.
Step‑by‑step: Permanent fixes (durable, long‑term)
Materials/tools: UV‑stabilized polyester webbing, stainless steel snap hooks or D‑rings, sew‑on industrial hook & loop or 3M Dual Lock (sew or adhesive+stitch), stainless chain or poly pellets for hem weights, toggle/concrete anchors (if anchoring to deck). Steps: 1) Plan anchor points: choose discreet points on frame that won’t stress material; for wicker find structural members or insert small blocks underneath to anchor. 2) Install anchors: for wood frames, drill pilot and use stainless screw eye; for hollow walls or masonry use TOGGLER SNAPTOGGLE or Tapcon per manufacturer spacing and load guidance. 3) Sew or affix ties: sew 2–3 ties into cushion seams (use UV polyester thread or nylon coated polyester). For sew‑on Velcro, stitch loop side to cushion hem and bolt or screw hook side to frame or to webbing straps. 4) Attach webbing: rivet or stitch webbing to cushion, add stainless snap fasteners. Use multiple straps or a single wrap with a buckle depending on style. 5) Hem weights where discreet weight helps: sew pockets and add stainless chain or poly pellets; stitch with reinforced seams. 6) Test under load and simulate gusts. Periodically inspect stitching, anchors and hardware for corrosion or wear.
How to attach Velcro or hook‑and‑loop correctly for outdoor cushions (adhesive vs sew‑on vs mechanical)
Best practice ranking (outdoor, high load): sew‑on industrial hook & loop or 3M Dual Lock (mechanical engagement) > mechanically fastened strip with rivets/screws > adhesive‑backed hook & loop (convenient only for low loads). How to attach: - Sew‑on: use heavy‑duty polyester thread and a box‑stitch or backstitch at the ends; stitch along both edges. Reinforce corners. - Adhesive: clean surfaces; press firmly and allow full cure per manufacturer. Use adhesive on both cushion and frame when possible (but adhesive to painted/dirty metal degrades faster). - Combined: apply adhesive tape, then stitch through tape edge into seam to get best initial hold + long‑term security. - For very high shear loads use 3M Dual Lock panels (snap mushroom fasteners) sized to provide required shear capacity—follow datasheet recommended area for expected forces. Notes: avoid relying on adhesive alone in UV/temperature cycles; sew‑on or mechanically anchored ends are best for permanence.