The most reliable way to tie down patio cushions is to combine two methods: a grippy anti-slip base to stop sliding, plus fabric ties or hook-and-loop fasteners to stop wind lift. Either sew-on Velcro (marine-grade, 2" wide) or simple fabric ties sewn from 1" polyester webbing handle 95% of everyday situations. For high-wind exposure, add a bungee or shock-cord system underneath the frame. The sections below walk you through every method, step by step, so you can pick the one that fits your furniture and your skill level. For a practical overview and step-by-step fixes on how to get patio cushions to stay in place, see our complete guide.
How to Tie Down Patio Cushions: Secure, Windproof Methods

Maren Grady
24 Jul 2026
Why your cushions won't stay put (and why it matters)
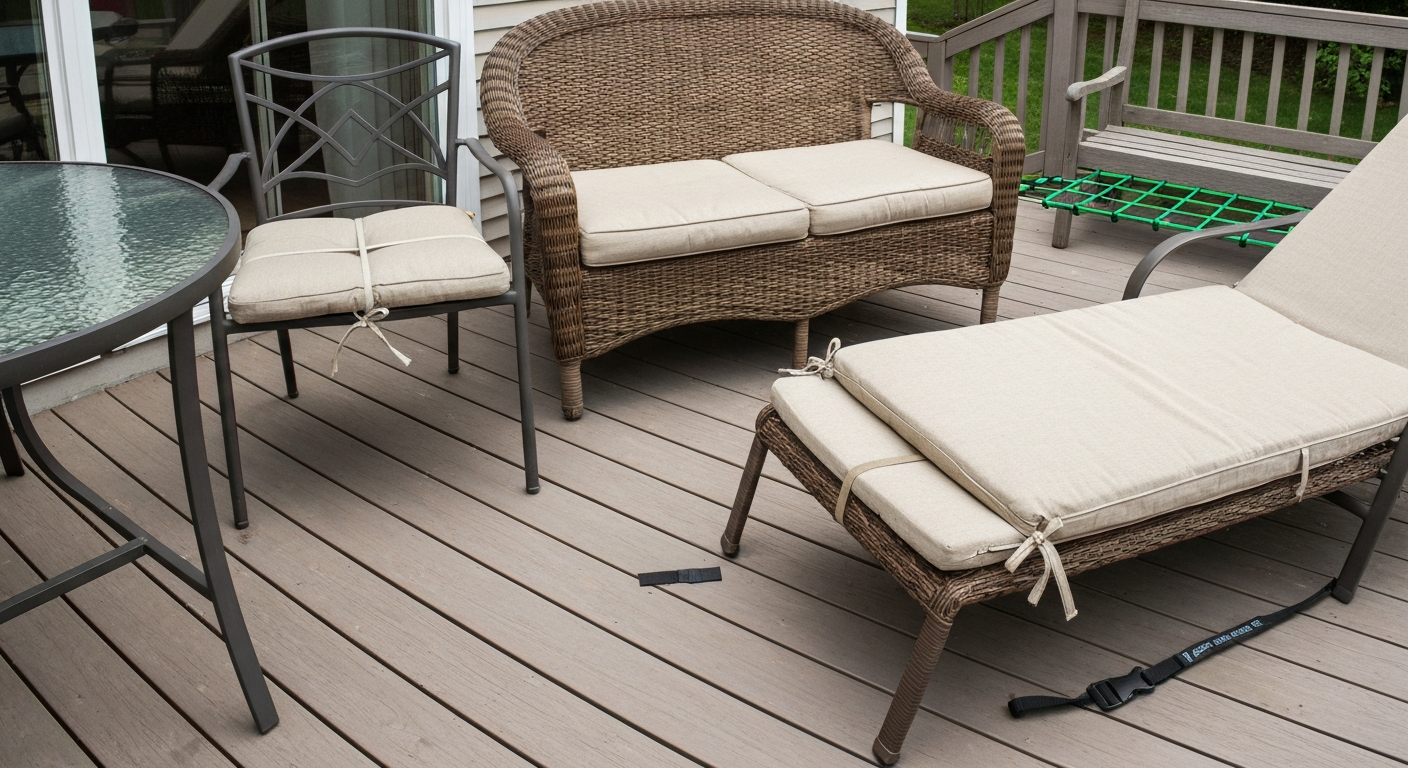
Loose cushions are more than annoying. A cushion that slides repeatedly scuffs the frame finish, especially on powder-coated aluminum or painted wood. One that blows across the yard picks up dirt, tears ties, and can crack or chip if it lands badly. I've also watched a heavy seat cushion knock over a glass-topped side table on a gusty afternoon, that's a $200 mistake I won't repeat. The problem usually comes from one of three causes: no friction between cushion and frame, no vertical anchor to resist wind lift, or worn-out fasteners that have outlived their UV life.
This guide covers every practical fix: sew-on and adhesive Velcro, fabric ties and webbing straps, bungee and shock-cord systems, and wicker-specific techniques. For a step-by-step walkthrough on how to attach cushions to patio furniture, see this section of the guide. I'll give you honest time and cost estimates for each, point out the mistakes I've made so you don't repeat them, and include a troubleshooting table at the end for when something fails mid-season.
Quick decision guide: which method fits your setup
Before buying anything, match your method to three factors: your furniture type, how often you move the cushions, and how much wind your space gets. This table cuts through the decision quickly.
| Furniture type | Wind exposure | Best primary method | Best secondary method | Estimated cost |
|---|---|---|---|---|
| Metal frame (aluminum, steel) | Low to moderate | Sew-on Velcro (2" marine-grade) | Anti-slip pad underneath | $8–$20 |
| Metal frame (aluminum, steel) | High (coastal, elevated deck) | Fabric ties + cam-buckle strap | Shock cord through frame | $10–$25 |
| Wicker / resin wicker | Low to moderate | Adhesive Velcro on wicker weave | Fabric ties looped through weave | $8–$15 |
| Wicker / resin wicker | High | Fabric ties looped through weave | Bungee cord under seat rail | $10–$20 |
| Teak / hardwood | Low to moderate | Sew-on Velcro on cushion + adhesive on wood | Anti-slip pad | $10–$18 |
| Teak / hardwood | High | Screw-in D-ring + webbing strap | Fabric ties | $15–$30 |
| Dining chair (any frame) | Low to moderate | Tie-on fabric ties (chair-back bow) | Anti-slip pad on seat | $5–$15 |
| Chaise lounge | Any | Fabric ties at 3 points along length | Cam-buckle strap under frame | $10–$25 |
A note on wind: a 40 mph gust generates roughly 4 psf of dynamic pressure on a flat surface (using the standard q = 0.5 · ρ · V² relationship). A typical 20" x 20" seat cushion presents about 2.8 square feet of area, so that gust is pushing with around 11 lbs of lift force. That's enough to launch any cushion that only has friction holding it. If you're in a regularly windy spot, plan on at least one positive anchor method, not just a grippy mat. For detailed, step-by-step options and comparisons, see our guide on how to secure patio cushions from wind.
Tools and materials checklist
You don't need a fully equipped workshop for any of these methods. Here's everything you might use across all the techniques covered below. Pick what applies to your chosen method.
- Sewing machine with a walking foot (or heavy-duty hand-sewing needle, size 16–18, for small jobs)
- UV-resistant polyester thread (Tex 69 weight) or PTFE/Tenara thread for outdoor seams — Tenara holds up longer outdoors than standard nylon and resists mildew
- Sharp fabric scissors or rotary cutter and cutting mat
- Seam ripper (for removing old ties or existing Velcro)
- Measuring tape and fabric marker or chalk pencil
- Straight pins or basting clips
- 2" marine-grade sew-on Velcro (hook and loop sold separately or as paired tape) — look for polypropylene or nylon versions rated for outdoor/UV use
- 1" wide adhesive-backed hook-and-loop tape (for no-sew applications on smooth surfaces)
- Contact cement or outdoor fabric adhesive if supplementing adhesive Velcro
- 1" polyester tubular webbing (for fabric ties — tubular polyester breaks at roughly 4,180 lb per manufacturer data, far stronger than any cushion will ever need)
- 1" cam-buckle straps (look for a working load limit label; 250–300 lb WLL is plenty)
- 1/4" shock cord / bungee cord (breaking strength around 300 lb per spec data; 1/8" at ~100 lb is enough for cushion retention)
- Cord-lock toggles or S-hooks for shock cord routing
- Screw-in D-rings or eyelet screws (for hardwood frames only)
- Anti-slip shelf liner or rubberized grip mat (cut to cushion size)
- Isopropyl alcohol wipes (for cleaning surfaces before applying adhesive Velcro)
- Clamps or binder clips (to hold adhesive Velcro during cure)
- Ruler or square for marking straight lines
Budget tip: anti-slip shelf liner from a dollar store works just as well as branded "non-slip cushion pads" sold at patio stores for $15 or more. Cut it to size with scissors. For webbing, a fabric store or online marine supplier (like Sailrite) sells tubular polyester by the yard for about $0.50–$1.00/yard, which is far cheaper than pre-made strap kits.
Preparation: measure, test, and stay safe before you start
Measuring your cushions and frame
Measure the cushion's seating surface (not the overall dimensions) and note where the existing seam lines run. Most cushions have a welt (piping) seam around the perimeter, this is where you'll attach Velcro or ties without disturbing the main fabric panel. Measure the frame's top rail or seat pan width too, because your tie or Velcro placement has to line up with something solid, not just the air between slats.
Testing your fabric before committing
Before applying any adhesive, test a small hidden area of the cushion fabric. Press a 1" square of adhesive Velcro onto the corner tucked under the seat, wait 24 hours, then peel it back. If it pulls fibers or leaves a stain, switch to the sew-on method. Outdoor fabrics like Sunbrella (which are solution-dyed acrylic, engineered to AATCC UV and mildew test standards) typically bond well with adhesive products, but older, sun-degraded fabrics sometimes have surface breakdown that causes adhesive failure. ASTM publishes standards used for textile UV and outdoor testing (example: ASTM D6544 – Standard Practice for Preparation of Textiles Prior to Ultraviolet (UV) Transmission Testing, ASTM (store page)) ASTM publishes standards used for textile UV and outdoor testing (example: ASTM D6544 – Standard Practice for Preparation of Textiles Prior to Ultraviolet (UV) Transmission Testing — ASTM (store page))..
Safety basics
- Work on a flat, clean surface — a picnic table or workbench beats the ground for keeping everything square
- Keep fingers clear of the sewing machine needle; use a seam guide rather than your fingertip to steer fabric
- When applying contact cement or adhesive, work outdoors or in a ventilated space
- If you're drilling into a hardwood frame for D-rings or eyelets, use a pilot hole slightly smaller than the screw shank to avoid splitting the wood
- Don't overtighten cam straps — you're securing a cushion, not a truck load; snug is enough
Method 1: Sew-on Velcro (the most durable option)
Materials and when to use it
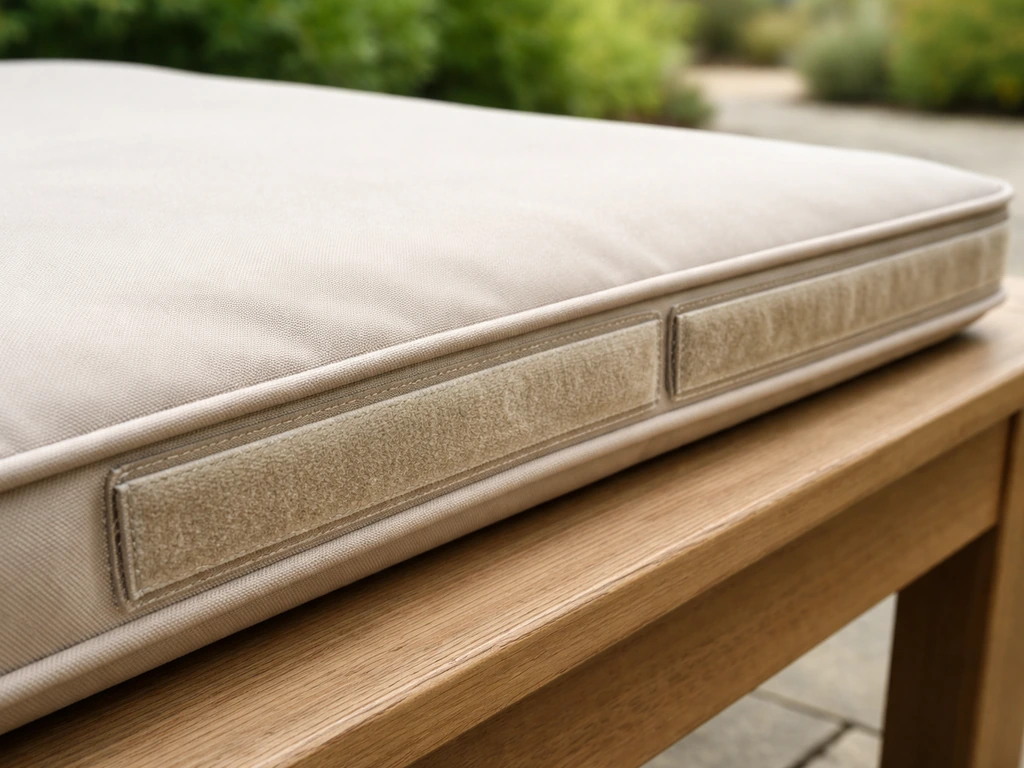
Sew-on hook-and-loop is the longest-lasting method for cushions you'll wash or use daily. For a step-by-step walkthrough, see how do you attach velcro to patio cushions. Marine-grade polypropylene Velcro (or VELCRO® Brand Professional Series equivalents with shear strengths around 24.5 PSI) resists UV, salt spray, and repeated washing far better than adhesive-backed versions. Use 2" wide tape, it gives you more contact area and holds up better at the corners where stress concentrates. For specific product recommendations, see our roundup of the best Velcro for patio cushions to match marine-grade, 2" options to your fabric and exposure conditions. I recommend pairing Tex 69 or heavier UV-resistant polyester thread with this, or Tenara PTFE thread if you want maximum outdoor longevity. Tenara is more expensive (around $20–$30 a spool) but it genuinely outlasts polyester thread in direct sun.
This method works best on cushions with a sewn fabric cover you can stitch through, on chairs or frames where you can also sew or adhere the loop side to a fabric underliner. It's the right call for dining chair cushions, bench cushions, and any cushion you plan to wash regularly.
Step-by-step: sewing Velcro to a cushion
- Cut two strips of hook tape and two strips of loop tape, each 3"–4" long, for a standard seat cushion. For a longer bench cushion, cut four strips (one pair per end).
- Position the loop (soft) side on the bottom face of the cushion, centered side-to-side, about 1" in from the back edge. Pin it in place. Loop side goes on the cushion; hook side goes on the frame — this way the scratchy hooks don't catch on clothing if a cushion flips over.
- Sew around all four edges of the tape with a straight stitch, using the walking foot to feed the Velcro evenly. Backstitch at the start and end of every run. If your machine struggles with the thickness at the seam, use a hand-sewing needle for those last few stitches.
- Repeat for the front edge of the cushion bottom.
- For the frame side: if you have a fabric sling seat or a padded seat pan, sew the hook side directly to that fabric in the matching positions. If you have a bare metal or wood rail, use the adhesive-backed hook strip instead (clean the surface with isopropyl alcohol first, press firmly, and clamp for 24 hours before use).
- Test the bond before putting the cushion out: press the cushion down firmly, then pull one corner upward sharply. You should feel resistance, not immediate release.
Here's where I messed up the first time: I sewed the Velcro too close to the welt seam, and the extra thickness caused the machine needle to skip stitches. Leave at least 3/8" clearance from any piping seam and your stitches will be much more consistent.
Method 2: Adhesive (no-sew) Velcro
Best practices and what actually sticks
Adhesive hook-and-loop is the fastest fix, but it's also the most likely to fail if you rush the prep. The adhesive on most consumer products is a pressure-sensitive acrylic, it bonds best to smooth, clean, dry surfaces. It does not bond reliably to raw wicker, rough-sawn wood, or powdery/degraded vinyl. On powder-coated aluminum or painted steel, it works well with proper surface prep. Peel strength on quality adhesive Velcro (like VELCRO® Brand's adhesive-backed versions) is typically reported around 4 PIW (pounds per inch of width), meaning a 2" wide, 4" long strip provides about 32 lb of peel resistance. That's enough for everyday use but not for serious wind events.
Step-by-step: applying adhesive Velcro
- Wipe both surfaces (cushion bottom and frame top rail or seat pan) thoroughly with an isopropyl alcohol wipe. Let them dry completely — at least 5 minutes. Any oil, dust, or moisture will cut the bond dramatically.
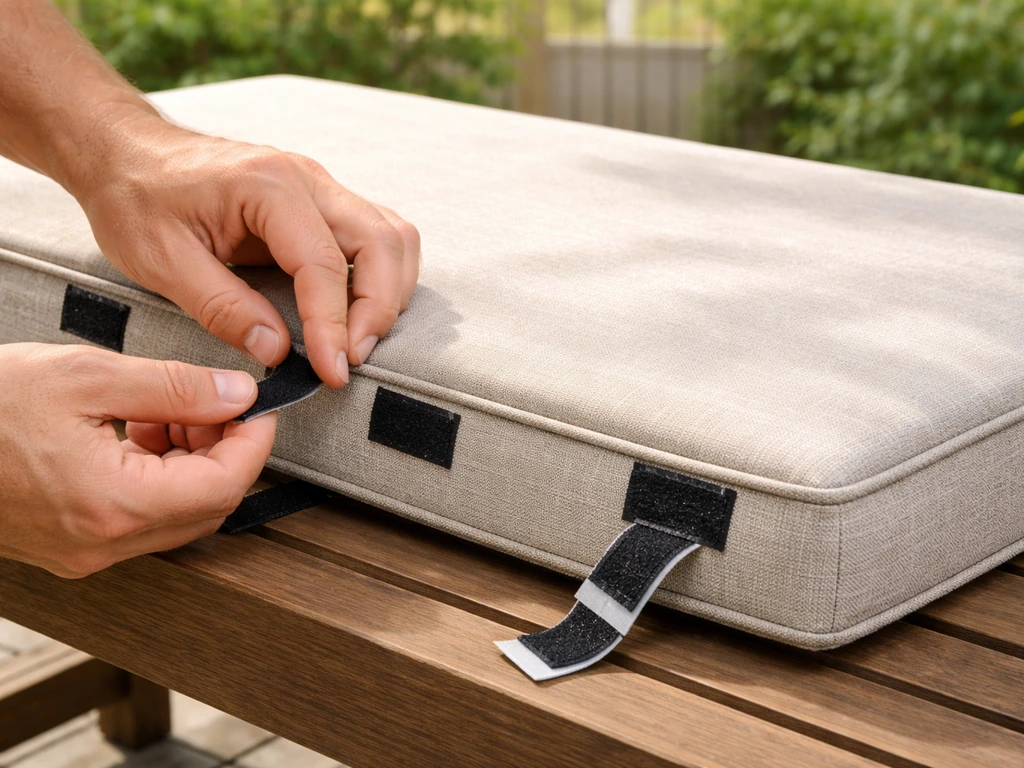
- Cut your hook strips to length (3"–4" per corner for a seat cushion). Peel the backing and press the hook side firmly onto the frame surface. Apply hand pressure for a full 30 seconds per strip. Do not just lay it down and walk away.
- Cut matching loop strips and press the loop side onto the cushion bottom in the corresponding positions.
- Wait 24 hours before putting the cushion into service. Most pressure-sensitive adhesives need that full cure time to reach working strength — using them after 1 hour means you're working with maybe 30% of rated bond strength.
- After 24 hours, press the cushion onto the frame, engaging all hook-and-loop pairs simultaneously.
- Check every 2–3 weeks for edge lifting. If a corner starts to peel, clean the area and press it back with a drop of outdoor adhesive (like a thin bead of contact cement) under the lifted edge before it gets worse.
Important: skip 3M 5200 or similar permanent marine sealants for this application. 3M 5200 is classified as a permanent assembly adhesive, it bonds so aggressively that removing it often damages the fabric surface underneath. Use it only if you're bonding something you never plan to take apart. For Velcro on cushions, a standard outdoor-rated pressure-sensitive adhesive or contact cement is the right call.
Method 3: Fabric ties and webbing straps
Making and attaching fabric ties
Fabric ties are the classic solution for dining chairs, and for good reason, they're cheap, they look intentional, and they don't require precise alignment every time you put the cushion back. The traditional version is a fabric bow at the chair back, but for heavier cushions or windier spots, webbing straps with cam buckles are much more secure.
For basic fabric ties: cut four strips of 1" polyester tubular webbing, each about 18" long. Fold each strip in half and sew the folded end to the corner of the cushion using a box stitch (a rectangle of stitching with an X through it). The box stitch distributes pull force across multiple thread passes, it's the standard reinforcement for any load-bearing fabric attachment. Use UV-resistant polyester or Tenara thread here. To tie onto the chair, loop each pair of ties around the chair rail or through the back spindles and tie a square knot or a bow. Budget: about $3–5 in materials per cushion.
Upgrading to webbing straps with cam buckles
For chaise lounges, bench cushions, or anywhere you need quick attachment and release, 1" cam-buckle straps are excellent. Consumer-grade 1" cam straps have working load limits of roughly 250–300 lb (with breaking strengths of 750–1,000 lb per manufacturer data), wildly overbuilt for cushion retention, which means they'll last essentially forever in this application.
- Cut two lengths of 1" polyester webbing, each long enough to wrap under your furniture frame and connect to the cushion on both sides — typically 24"–36" for a chaise lounge.
- Sew a D-ring or rectangular ring to each end of one strap using a bar-tack stitch. This is a very dense zigzag stitch run across the folded webbing end; it's what professional gear makers use to attach hardware to straps.
- Thread the free end through a cam buckle and back through, leaving 6" of tail.
- Route the strap under the frame rail (not over — it should be hidden), hook the rings over the frame, and tighten the cam buckle until the cushion sits firmly but isn't compressed.
- If the strap rubs a painted or powder-coated rail, wrap the contact point with a 2" length of self-amalgamating tape to prevent chafing and finish damage.
Method 4: Bungee cords, shock cord, and cord-lock systems
Shock cord and bungee systems are the best choice when you want quick removal (daily storage, for example) combined with decent wind resistance. They're also easier to retrofit onto existing furniture without any sewing. The tradeoff is durability, shock cord degrades with UV and ozone exposure faster than polyester webbing, so plan to replace it every 1–2 seasons depending on sun exposure. Use 1/4" shock cord for most cushion applications; its breaking strength is around 300 lb per spec data, and the elasticity absorbs wind gusts rather than fighting them rigidly.
Setting up a bungee or shock-cord system
- Measure around the frame perimeter (or the path you want the cord to take — typically under the seat pan and up both sides). Add 20% extra length to account for the stretch you'll be working with.
- Thread the shock cord through any existing frame holes, around frame legs, or through cord guides if your furniture has them. On slatted metal frames, weave the cord back and forth between slats to create a grid under the cushion.
- At each end, feed the cord through a cord-lock toggle or tie it to a small S-hook. If you're looping around a frame leg, a simple overhand knot on a bight is secure enough — shock cord holds knots better than solid rope because the elasticity keeps tension on the knot.
- With the cushion in place, route the cord up and over the cushion edges or through loops sewn onto the cushion cover. Pull just enough tension to keep the cushion seated without compressing it — you're not cinching it down, just constraining it.
- Test by lifting one corner of the cushion forcefully. The cord should stretch and spring back, not release entirely. If it releases, reduce the loop size or add a second anchor point.
- For a more polished look, use S-hooks to clip bungee loops directly to screw-in D-rings mounted to the underside of a wooden frame — two D-rings and two bungee hooks per cushion, one front, one back.
Quick tip: if you're buying shock cord, get it from a marine or outdoor supplier rather than a discount store. The cheap braided bungee sold in toy departments loses elasticity in one season. Look for cord with a continuous rubber core and a woven polyester sheath, the sheath protects the rubber from UV.
Wicker-specific attachment techniques
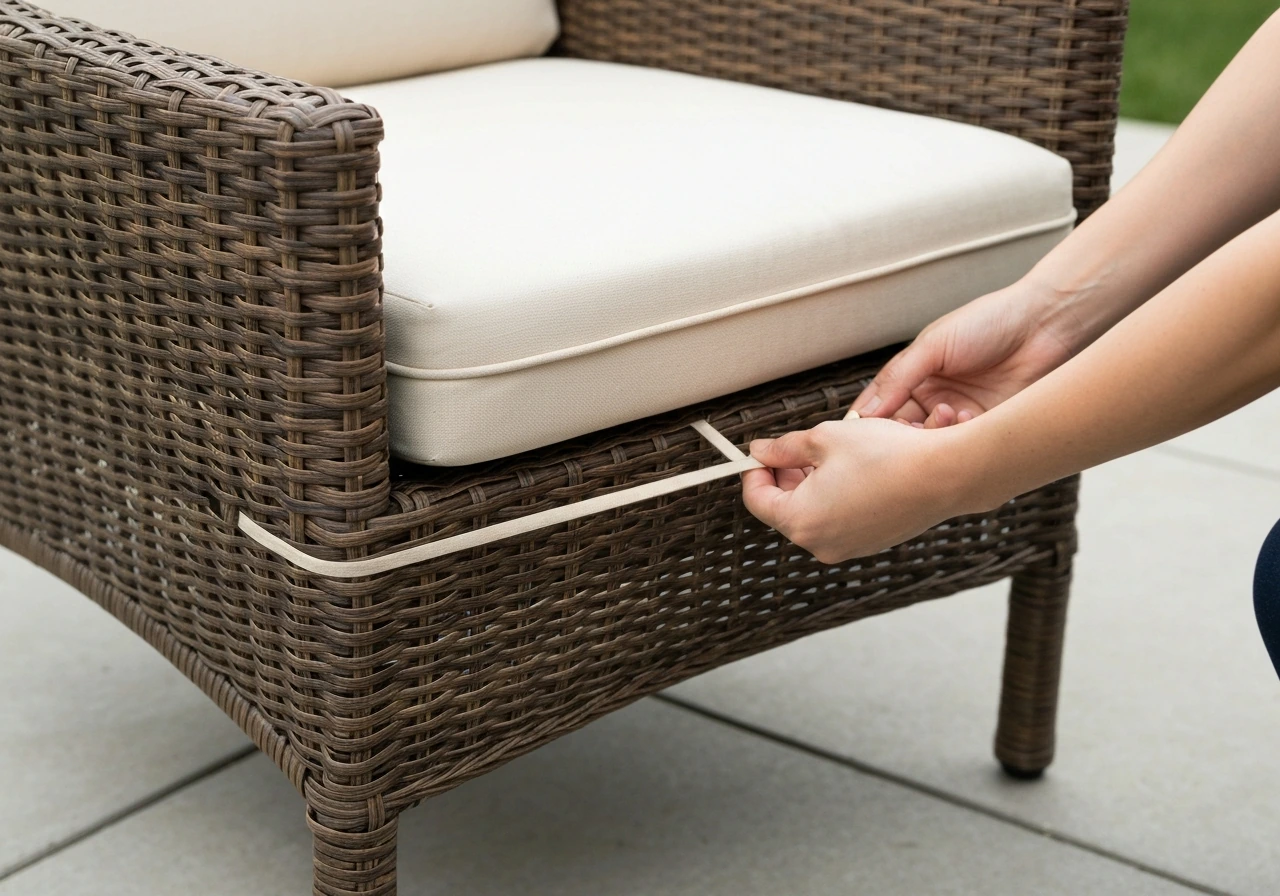
Wicker and resin wicker frames need a different approach because you usually can't sew to the frame and adhesive Velcro doesn't grip the irregular woven surface reliably. The best approach is to use the weave itself as an anchor. Thread fabric ties directly through the wicker gaps and tie them under the frame, the tie becomes trapped by the weave rather than relying on any adhesive bond. For step-by-step instructions on how to attach cushions to wicker patio furniture, see the dedicated guide for wicker-specific attachment techniques. Use ties at least 3/4" wide so they don't cut into the weave under tension.
For adhesive Velcro on resin wicker: look for a flat horizontal rail on the inner face of the seat opening, most resin wicker chairs have a flat painted rail here that's smooth enough for adhesive. Clean it thoroughly, apply the hook strip there, and position the loop strip on the cushion to match. This works well for lighter seat cushions in moderate wind. For back cushions on wicker, sew ties onto the cushion cover and loop them around the wicker back frame verticals, two ties per cushion is usually enough.
Troubleshooting when things don't hold
| Problem | Likely cause | Fix |
|---|---|---|
| Cushion slides forward on slick metal frame | No friction between surfaces | Add rubberized anti-slip mat cut to seat size; pair with Velcro or ties at back edge |
| Velcro adhesive peels off frame within days | Surface not cleaned or not fully cured before use | Strip off old Velcro, clean with isopropyl alcohol, reapply, clamp for 24 hours before use |
| Sew-on Velcro separates from fabric | Thread degraded from UV or stitching was too sparse | Re-stitch with UV-resistant polyester (Tex 69) or Tenara PTFE thread; add box stitch reinforcement at corners |
| Fabric ties fray or break at attachment point | No reinforcement stitch; cheap webbing | Re-attach with bar-tack or box stitch; upgrade to tubular polyester webbing (1" ~4,180 lb break strength) |
| Shock cord loses elasticity mid-season | UV/ozone degradation of rubber core | Replace cord; switch to cord with woven polyester sheath for UV protection |
| Cam buckle strap slides along chaise frame | No stop point on smooth rail | Add self-amalgamating tape bump or a small zip-tie stopper on frame rail to keep strap positioned |
| Cushion bow ties loosen and come undone | Square knot replaced by granny knot; or ties too short | Use a reef (square) knot or double bow; lengthen ties to at least 18" for a proper bow |
| Wicker Velcro won't grip | Irregular surface prevents full contact | Move to the flat inner rail; or switch to fabric tie looped through weave instead of adhesive |
Cost and time summary for each method
| Method | Material cost (per cushion) | Time to install | Skill level | Expected lifespan |
|---|---|---|---|---|
| Anti-slip mat only | $1–$3 | 5 minutes | Beginner | 1–2 seasons |
| Adhesive Velcro (no-sew) | $5–$10 | 20–30 min (plus 24 hr cure) | Beginner | 1–2 seasons |
| Sew-on Velcro | $8–$15 | 30–60 min | Intermediate | 3–5+ seasons |
| Fabric bow ties (sewn) | $3–$6 | 30–45 min | Beginner–Intermediate | 2–4 seasons |
| Webbing straps + cam buckles | $10–$20 | 30–60 min | Intermediate | 4–6 seasons |
| Shock cord / bungee system | $8–$15 | 20–40 min | Beginner | 1–2 seasons (replace cord annually) |
| Screw-in D-ring + strap (hardwood) | $15–$30 | 45–90 min | Intermediate | 5+ seasons |
Maintaining your fasteners through the season
Even the best Velcro loses grip when it fills with lint, pet hair, and pollen, and outdoor environments are full of all three. Every month or so, pick debris out of the hook strips using a stiff brush (an old toothbrush works perfectly) or a piece of the loop tape itself dragged across the hooks. This takes two minutes and noticeably restores grip. Wash cushion covers with Velcro attached per the fabric manufacturer's care instructions, Sunbrella, for example, recommends mild soap and water, and allows diluted bleach for tough stains, though re-treatment with a fabric protector is recommended after bleach washes to restore water repellency.
Check webbing ties and straps at the start and end of each season. Look for fraying at the bar-tack stitches, UV bleaching of the webbing (which can indicate fiber degradation even if it looks intact), and any cracking in cam-buckle plastic. Replace anything that looks questionable, a new length of webbing costs less than $5 and far less than replacing damaged furniture.
Seasonal storage: what to do with your fasteners in winter
At end of season, remove cushions and store them indoors or in a weatherproof storage box. Before storing, press the Velcro pairs together, this protects the hooks from snagging other fabrics in storage and keeps the hook geometry intact. Fold fabric ties loosely rather than kinking them tightly; sharp creases weaken webbing fibers over repeated seasons. Coil and hang shock cord rather than storing it flat and compressed under heavy items, which sets a permanent curve in the rubber core. If you live somewhere with hard winters, bring cam buckles inside, prolonged freezing can embrittle the plastic release mechanisms on cheaper buckles.
When you reinstall cushions in spring, give all your Velcro contact surfaces a quick clean before reconnecting. If any adhesive Velcro has fully lifted over winter, replace it rather than trying to re-glue the original strip, the adhesive backing usually only bonds fully once, and a fresh strip costs pennies.
FAQ
Quick decision guide: Which cushion‑tie method should I pick for my furniture type and use?
Match method to furniture and conditions: - Slippery metal/teak/painted frames, low wind, frequent removal: anti‑slip pads + sew/adhesive Velcro. - Wicker (woven/rattan) where drilling is undesirable: woven‑band ties or zip‑tie anchors woven into wicker + sewn webbing loops. - High wind exposure (porches, coastal): screw‑in eyelets into frame + cam/ratchet or sewn tubular webbing with stainless hardware; add weights if needed. - Heavy cushions or commercial use: 1"–2" polyester tubular webbing sewn with box‑stitch + heavy cam/ratchet or stainless quick‑connects. - Temporary/elastic retention (short trips, occasional gusts): UV‑resistant shock cord or bungee as secondary restraint only. Consider frequency of removal (Velcro/straps faster), exposure (choose UV/mildew resistant materials), and furniture fragility (avoid drilling into delicate wicker unless using small anchors or internal thread/clip methods).
Essential tools and materials checklist
Tools: sewing machine with walking foot or heavy‑duty needle (or hand‑sewing awl), drill and bits, rivet gun (optional), screwdriver, pliers, scissors, measuring tape, fabric marker, seam ripper, silicone/cleaner. Materials: marine/outdoor Velcro (extruded Professional Series or 3M marine‑grade hook‑and‑loop), UV‑resistant webbing (1/2"–1" tubular polyester or 1"–2" flat polyester), Tenara/PTFE or heavy UV polyester thread, cam buckles or 2" ratchet straps (specify WLL), stainless screw‑in eyelets/eyes or pad eyes (AISI 316 for coastal), anti‑slip grip pads (rubber with weatherproof adhesive), zip ties (UV‑stabilized), shock cord (UV resistant), adhesive (3M marine adhesive for permanent installations OR removable 3M VHB for non‑structural), small weights (lead or stainless ballast bags), epoxy or wood screws for frames.
Step‑by‑step: Sew‑on Velcro method (durable, neat, frequent removal)
1) Choose Velcro: outdoor/marine extruded hook (VELCRO® Professional or 3M reclosable with high shear) sized 1"–2" wide; higher PIW/PSI for stronger hold. 2) Clean and mark cushion and frame contact areas. 3) For cushions: sew loop side to underside of cushion flange using Tenara/PTFE or heavy UV polyester thread; reinforcement: box‑stitch or bar‑tack at ends. 4) For frame: sew a short loop tab or adhere loop to frame underside (if fabric) OR adhere hook side to clean rigid surfaces using manufacturer adhesive; predrill and screw sewable Velcro or attach with stainless screws through Velcro backing if available. 5) Mate and test: press firmly, verify peel requires reasonable force (expect several PIW for secure hold). 6) For extra wind security, add webbing ties at corners. Time: 30–90 minutes per cushion depending on prep.
Step‑by‑step: Adhesive Velcro (no‑sew) and product selection
1) Select marine/outdoor Velcro with acrylic‑based adhesive and extruded hooks (VELCRO® Professional or heavy‑duty 3M hook‑loop). 2) Clean surfaces with isopropyl alcohol; allow to dry. 3) Roughen smooth painted/metal surfaces lightly with sandpaper for better mechanical bite. 4) Apply pressure for full contact; follow manufacturer dwell time (some need 24–72 hours to reach full strength). 5) Use mechanical backup (screws or rivets) if you expect high peel loads or frequent use. Note: Adhesive weakens with dirt and repeated shear; prefer sewn attachment on cushions for longevity.
Step‑by‑step: Sewn webbing ties and strap anchors (strong, recommended for wind)
1) Choose webbing: 1/2"–1" tubular polyester for light/medium cushions; 1"–2" flat polyester for heavy cushions or high wind (see Sailrite breaking strength specs). 2) Cut and finish ends to prevent fraying; fold into 1.5"–2" loops. 3) Sew to cushion underside with box‑stitch or bar‑tack using Tenara or heavy polyester thread; reinforce with multiple passes. 4) Anchor to frame with stainless pad eyes, screw‑in D‑rings, or wrap around structural rails; for wicker weave through strands and secure with internal knot/zip tie then cover with webbing to hide. 5) Attach mating strap hardware (cam buckle for adjustable tightness; ratchet for heavy loads). 6) Test WLL: choose strap hardware with working load limit (WLL) ≥ estimated wind force divided by safety factor (typical safety factor 3:1). Time: 45–120 minutes per cushion set.
Step‑by‑step: Bungee/shock cord retention (quick, elastic)
1) Select UV‑resistant shock cord sized to expected loads (1/8" for light, 1/4"–1/2" for heavier). 2) Install small anchor points (stainless pad eyes or sewn webbing loops) under cushion or on frame. 3) Loop shock cord through anchors and over/around cushion, tying with secure knot or crimping with cord ends. 4) Use as supplement to non‑elastic tie or for low‑wind zones only; avoid as sole anchor in high wind. Note: shock cord degrades with UV/ozone—inspect yearly.