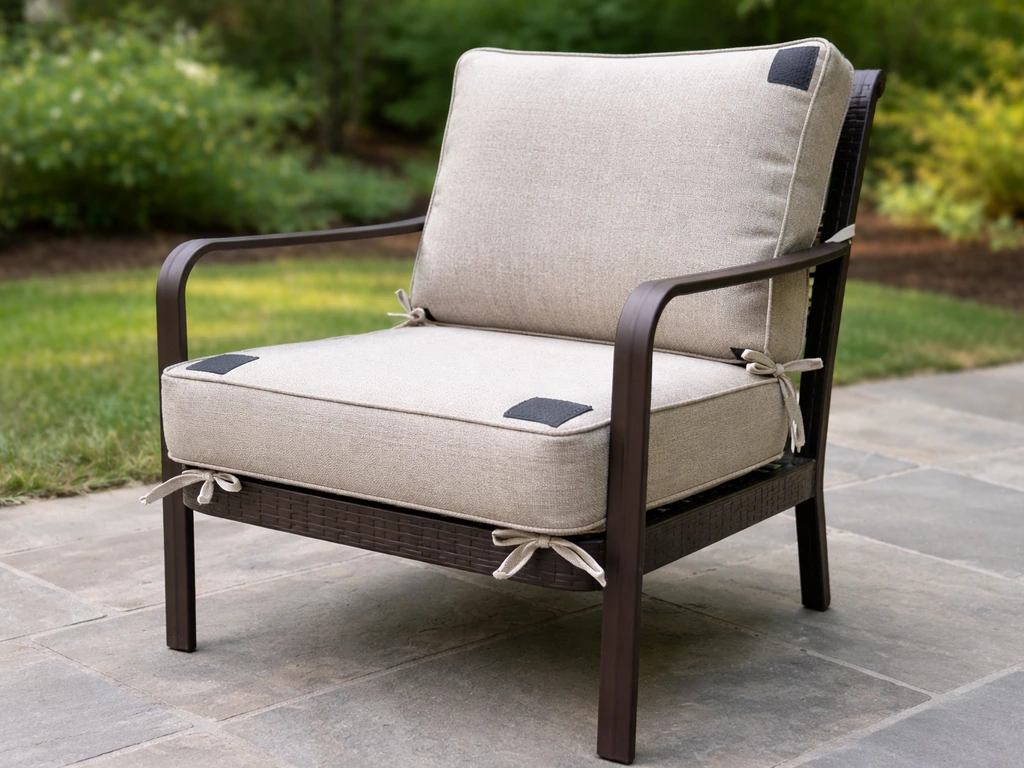
The most secure way to attach patio cushions depends on your furniture frame and what anchor points already exist. If your cushions have fabric ties, loop them around the nearest frame bar or slat and knot them as close to the cushion edge as possible. If there are no ties, adhesive-backed hook-and-loop (Velcro) on clean, dry surfaces is your fastest DIY fix, but for anything exposed to full sun and rain, you need polyester hook-and-loop with a UV-resistant adhesive, not standard nylon versions which degrade quickly outdoors. For maximum hold on metal or wood frames, snap fasteners or bracket clips will outlast any adhesive method by years.
How to Attach Cushions to Patio Furniture Securely

Maren Grady
29 May 2026
Step 1: Figure Out What You're Working With
Before you buy anything, spend five minutes identifying your cushion type and your furniture's connection points. Getting this wrong is the most common reason DIY cushion fixes fail within a season.
Cushion types
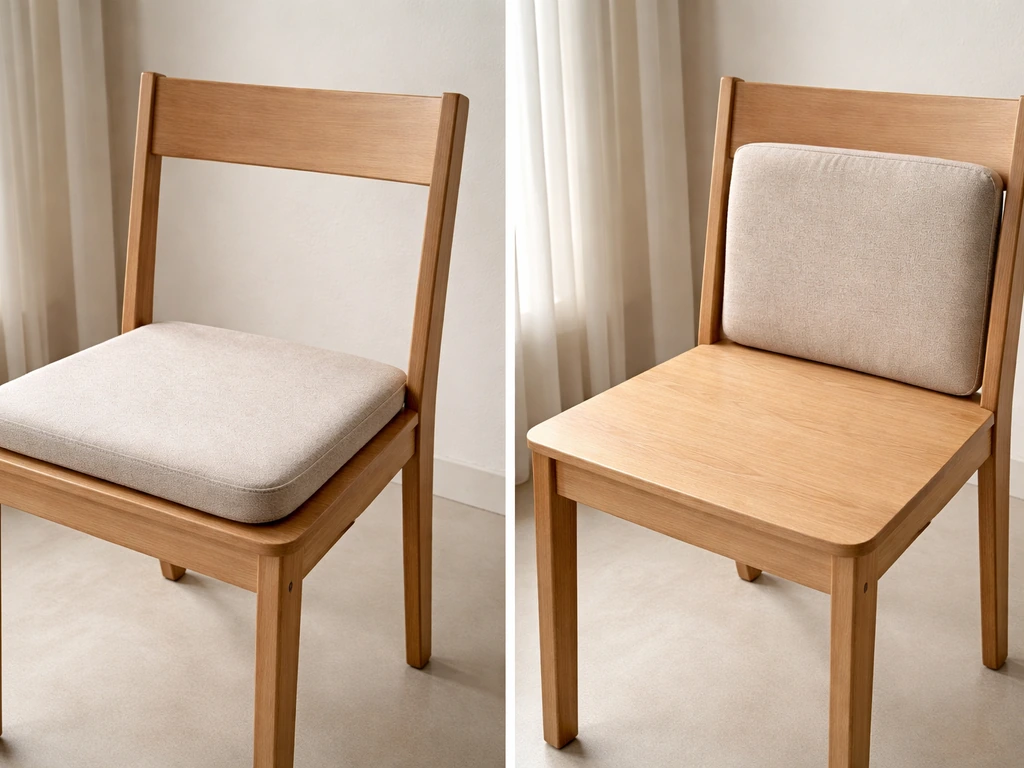
- Seat cushions: Flat pads that sit on a chair seat or bench. Usually the main offenders for sliding forward or blowing off.
- Back cushions: Thinner pads that hang against a chair back. They need vertical support as well as a hold against slipping sideways.
- Chaise lounge cushions: Long, heavy pads with multiple zones. Tend to shift under weight rather than blow away, but wind can still flip them.
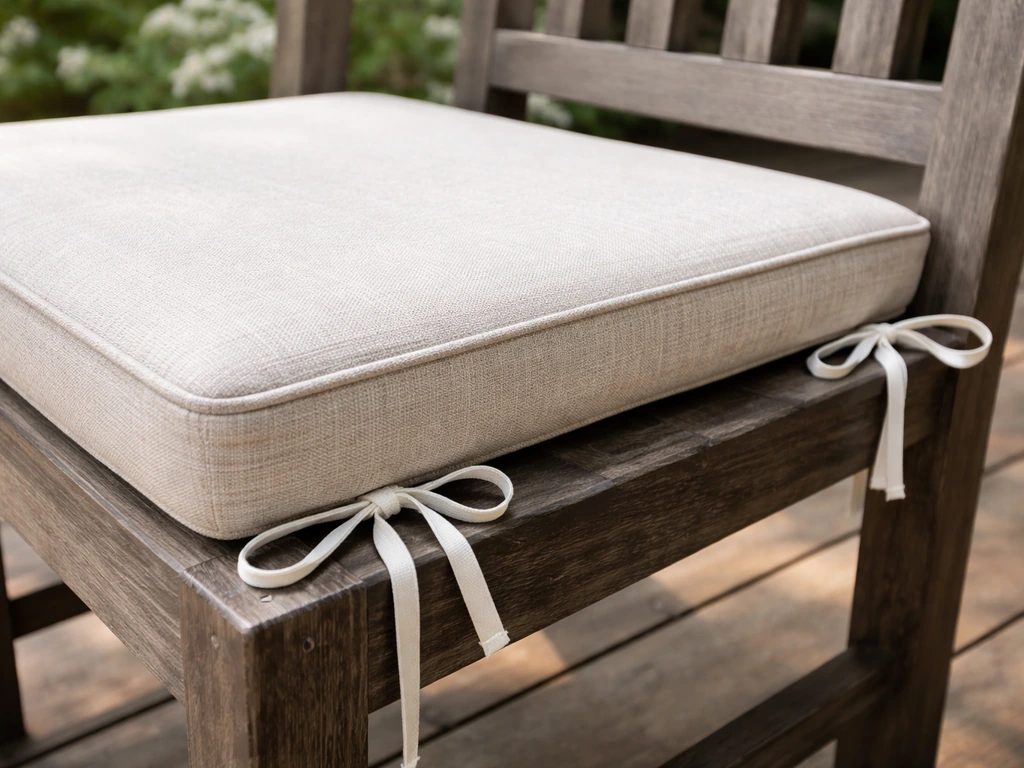
- Box cushions with ties: Have fabric loops or sewn-on ties already built in—your easiest attach point.
- Zippered cushion covers: Often slipcover-style with no built-in ties. You're working with the cover fabric itself.
- Bare foam wrapped in fabric: No hardware, no ties, no anchor points. These need the most work to secure.
Furniture connection points
Look at your frame and ask: where can something actually grip or tie? Metal chairs with tubular frames usually have bars or rungs you can loop ties around. Wood furniture (Adirondack, teak dining chairs) often has flat slats where Velcro or non-slip pads work well. Wicker and resin wicker has woven surfaces where ties can lace through gaps, or you can apply Velcro to flat inner rails. Backless benches and loungers have no natural anchor point behind the cushion, so snaps or straps are usually your best bet.
Step 2: Pick the Right Attachment Method for Your Setup
There's no single best method. Here's how each one performs in real outdoor use, and when to choose it.
| Method | Best For | Hold Strength | Weather Resistance | Approx. Cost |
|---|---|---|---|---|
| Fabric ties (sewn-on) | Chairs/benches with rails or rungs | High when tied tightly | Good if polyester | $0 if already present; $5–10 to add |
| Adhesive hook-and-loop (Velcro) | Flat surfaces, wood/metal/resin frames | Medium | High only with polyester + UV adhesive | $8–20 per set |
| Sewn-on hook-and-loop | Cushion covers you can sew | High | Excellent with polyester tape | $5–15 per yard |
| Elastic straps / bungee loops | Bench cushions, lounger pads | Medium-high | Good if UV-rated elastic | $6–15 |
| Snap fasteners | Metal/wood frames you can drill | Very high | Excellent with marine-grade snaps | $15–35 installed |
| Bracket clips / chair clips | Outdoor dining chair seats | High | Good with powder-coated or stainless clips | $10–25 per set |
| Non-slip backing / grip pads | Flat seats, gliders, bench tops | Low-medium (wind will still move them) | Good | $5–12 |
When to use ties
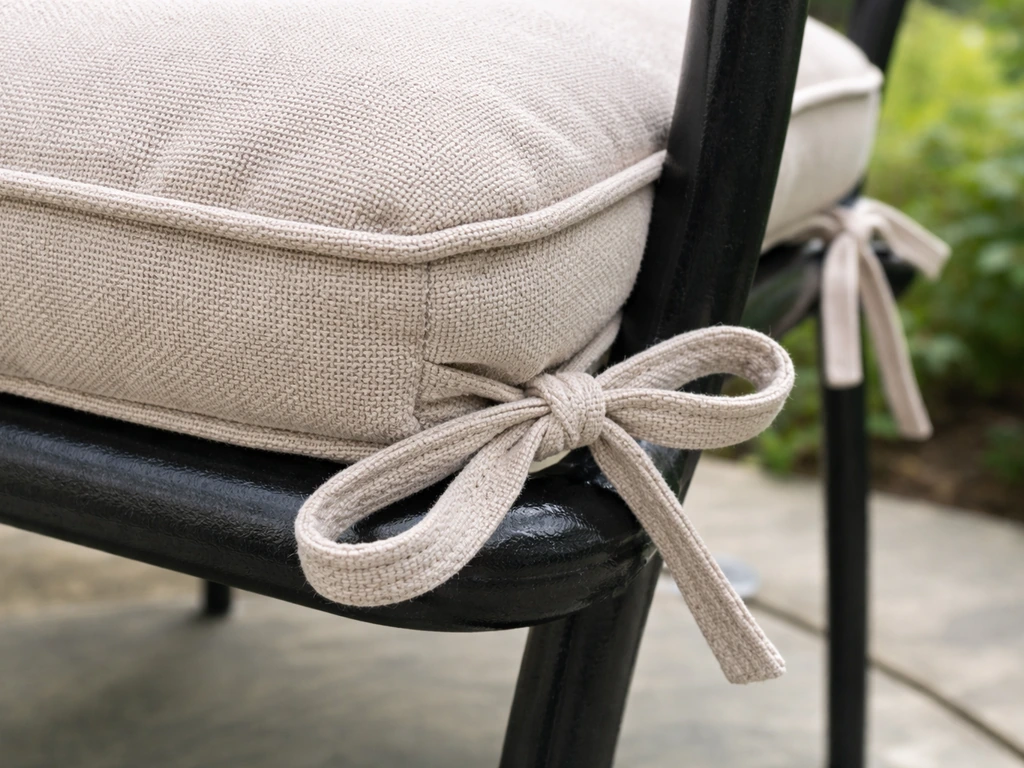
Ties are the classic solution, and they work great when you place them correctly. The key tip from WickerLiving's advice holds true in practice: tie your cushion straps as close to the edge of the cushion as possible, so there's almost no slack between the knot and the frame bar. Loose, floppy ties actually make sliding worse because the cushion can pivot around the knot. If your cushion already has ties sewn in, you're ahead. If not, you can hand-sew or use a sewing machine to add ribbon ties or heavy twill tape to the corners and back edge.
When to use Velcro / hook-and-loop
Adhesive Velcro is great for flat, smooth surfaces where drilling or sewing isn't practical. The critical detail most people miss: standard nylon hook-and-loop breaks down fast in UV exposure, which is exactly the environment your patio cushions live in. Go with polyester hook-and-loop for anything that sees regular sun and rain. For the adhesive itself, VELCRO Brand Extreme Outdoor Strips use a heavy-duty adhesive rated for outdoor use on smooth surfaces including plastic.
If you want to step up, 3M VHB tape used alongside sewn Velcro on the cushion side creates a very strong bond, but VHB only works well if you properly prep the surface (more on that in the steps below). Marine-grade UV-resistant hook-and-loop with a PSA (pressure-sensitive adhesive) backing is also worth considering for any setup near a coast or in a high-sun climate.
Fisheries Supply also lists marine or UV-resistant hook-and-loop options with adhesive backing, noting that while hook-and-loop is water-tolerant, the PSA performs best when the adhesive is specifically rated for marine or UV exposure marine-grade UV-resistant hook-and-loop with a PSA backing.
When to use snaps
If you're willing to spend a little more and want a solution that holds through storms without constant re-tying, snap fasteners are the premium DIY option. The general rule for seat cushions: a roughly 12x18 inch cushion needs four snaps, one at each corner. Marine-grade 316 stainless steel snaps are the minimum for outdoor use, but higher-end options like NuSnaps claim to be twice as corrosion-resistant as standard marine snaps, which matters a lot if you're in a coastal or humid climate. The downside is you're drilling into your furniture frame, which is a commitment. But if you love your patio set and want it to last another 10 years, it's worth it.
When to use elastic straps or bracket clips
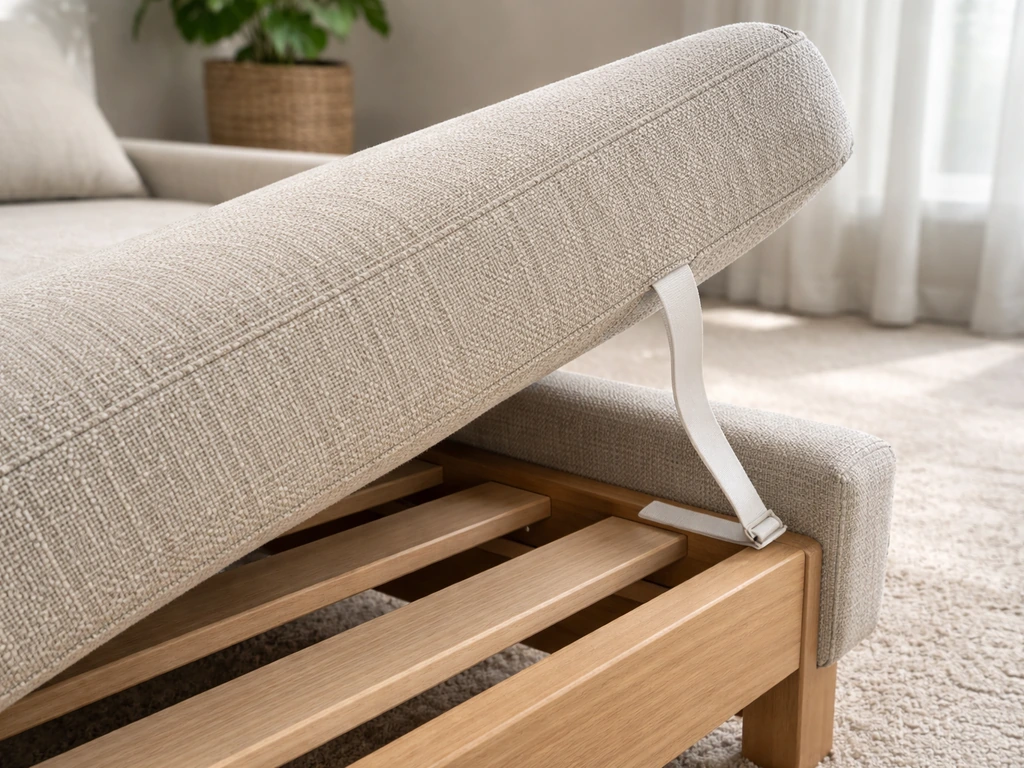
Elastic straps work really well for bench cushions and chaise loungers. You sew or staple elastic bands to the underside corners and loop them around the frame legs or slats. Bracket-style chair clips are sold as universal fits for outdoor dining chairs and slide over the seat frame without any drilling. Check that any elastic you buy is UV-rated, otherwise it'll go brittle and snap after one summer.
Tools and Materials Checklist
What you need depends on which method you're using, but here's a complete list so you can grab everything in one trip. You won't need all of it, just pick the items that match your chosen method.
- Polyester hook-and-loop tape (adhesive-backed for hard frames; sew-on for cushion fabric) — avoid nylon for outdoor use
- VELCRO Brand Extreme Outdoor Strips or equivalent heavy-duty outdoor adhesive hook-and-loop
- Isopropyl alcohol (70% or higher) and disposable cloths for surface cleaning before adhesive application
- 3M VHB tape (optional, for extra-strong adhesive bonds on metal or plastic frames)
- Heavy-duty polyester ribbon or nylon twill tape (for sewn-on ties, about 1-inch wide, cut to 12-inch lengths)
- UV-resistant elastic banding, 1–2 inches wide (for strap-style attachment on bench/lounge cushions)
- Marine-grade snap fasteners, 316 stainless steel or better, with installation tool/setter
- Drill with appropriate bit (if installing snaps or bracket clips into wood or metal frames)
- Heavy-duty upholstery needle and outdoor-rated polyester thread (or a sewing machine with denim needle)
- Scissors or rotary cutter
- Metal grommets kit (optional, if you're adding grommet-through-tie points to a cushion corner) — choose brass for general outdoor use, 304 stainless for coastal environments
- Non-slip rug pad or grip fabric (for a quick underlay fix on flat seat surfaces)
- Seam ripper (to open existing seams if you're adding hardware to a finished cushion cover)
- Measuring tape and fabric marker or chalk
Step-by-Step: Attaching Cushions to Common Furniture Styles
Outdoor dining chairs (metal or wood frame with seat rails)
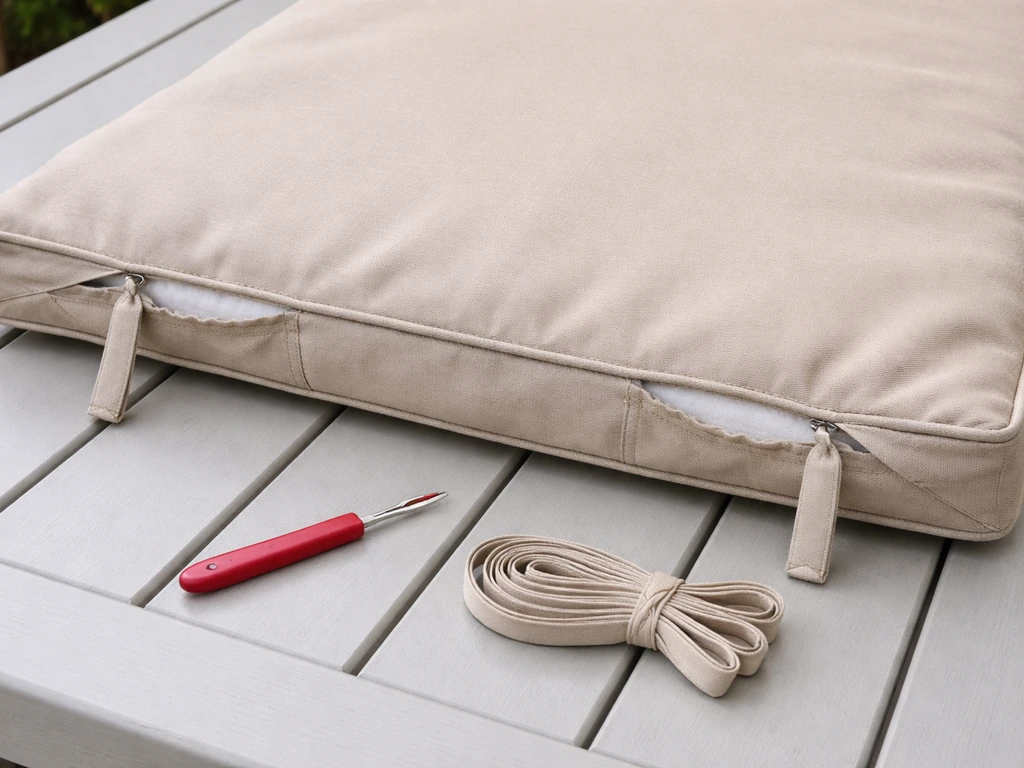
- Check whether your cushion has existing tie loops. If yes, skip to step 4.
- If no ties exist, use a seam ripper to open about 2 inches of the back seam at each rear corner. Fold a 12-inch length of polyester ribbon in half, insert the looped end into the opening, and sew it shut with a tight zigzag stitch using outdoor polyester thread. Repeat for the front corners if the cushion tends to slide forward.
- For Velcro instead of ties: cut 2-inch squares of adhesive polyester hook-and-loop. Clean the chair seat surface and the cushion underside fabric with isopropyl alcohol and let dry completely (at least 5 minutes). Press the adhesive (loop) side onto the chair seat firmly for 30 seconds. Press the hook side onto the cushion underside. Press the cushion down onto the chair and apply firm pressure for at least 60 seconds.
- If using ties: place the cushion on the seat, loop each tie around the nearest horizontal frame bar or back rung, and tie a snug bow or double knot. Leave minimal slack. Trim excess tie length if it drags on the ground.
- Test by grabbing the cushion edge and pulling upward and sideways. There should be resistance in both directions.
Lounge chairs and chaise loungers
- Lay the cushion on the frame and identify the front, back, and side rails.
- Cut four 18-inch lengths of 1.5-inch UV-rated elastic. Sew or staple one length to each underside corner, creating a loop that can slip over the frame rail.
- Alternatively, sew two ties to the head end of the cushion and loop them through the frame's top rung or head rail. The foot end usually stays put from weight alone.
- For cushions wider than 24 inches, add a center-back tie as well to prevent the sides from lifting in wind.
- If the lounge has a hinge in the middle (a reclining design), attach the seat and back sections of the cushion independently so the hinge can still move.
Wicker chairs (round or irregular frames)
Wicker creates a challenge because the curved back and woven surface don't give you clean flat attachment points. The best approach is to look for the inner structural rail inside the wicker weave. Most wicker chairs have a flat resin or metal rail you can actually reach if you look inside. Attach the Velcro adhesive strips to this inner rail surface after cleaning it.
If you’re working with wicker patio furniture, focus on the inner structural rail or woven gaps so the cushion can grip securely. On the cushion side, sew on the matching Velcro tape rather than using adhesive, since cushion fabric holds sewn Velcro far better than any adhesive. For back cushions on wicker, lacing tie straps through the weave at the top two corners is usually simpler and more reliable than Velcro.
Wicker-specific guidance is worth a deeper look if this is your main furniture type.
Outdoor benches (no individual seat backs)
- For bench cushions, elastic corner loops are your cleanest solution. Sew a 2-inch-wide elastic band to each underside corner, sized to loop snugly around the bench leg or under the seat rail.
- If the bench has slats on the seat surface, non-slip grip fabric cut to size and placed between the slats and the cushion underside also works well as a first line of defense.
- For windy areas, add front-tie loops that anchor to the front bench leg and rear ties that anchor to the back leg. Four tie points on a bench cushion will hold in most weather.
Installing snap fasteners (for a permanent fix)
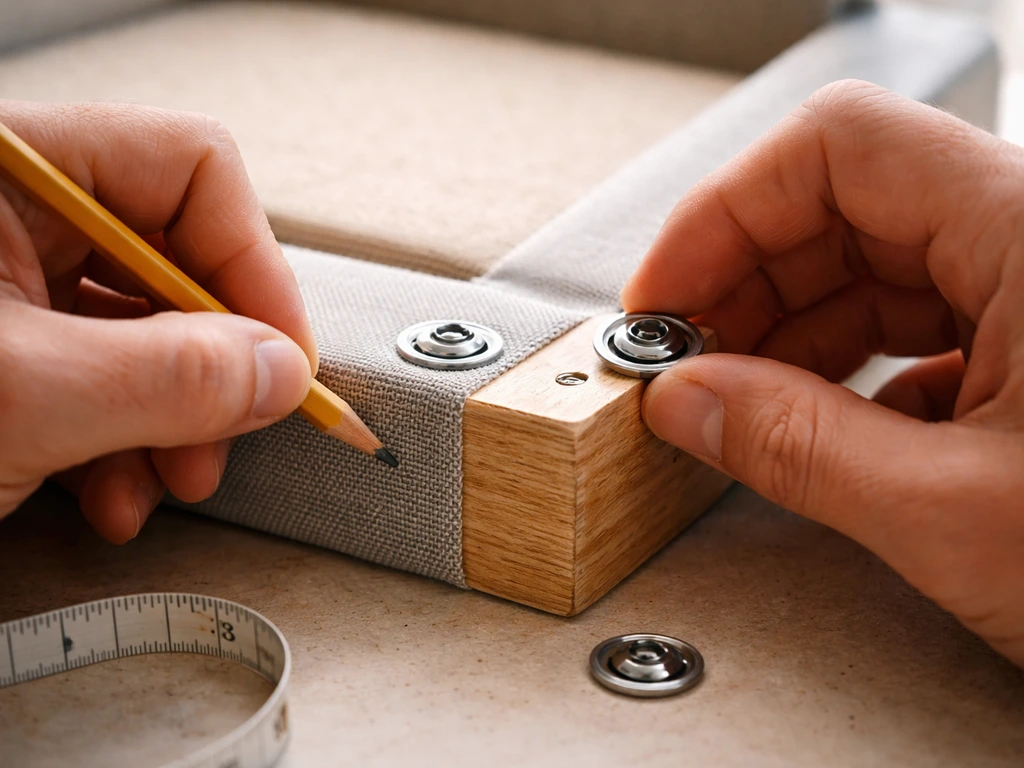
- Mark your snap positions on the frame: one near each corner, roughly 1–2 inches from the edge of where the cushion sits. For a 12x18-inch cushion, four snaps is the standard layout.
- Drill pilot holes into the frame at each mark using a bit slightly smaller than your snap post diameter.
- Install the socket half of the snap into the frame using the snap setter tool included with your kit. Tap firmly with a mallet until fully seated.
- Position the cushion on the frame and mark through the pilot holes onto the cushion fabric to identify stud placement.
- Install the stud half of each snap through the cushion fabric and backing, sandwiching the fabric securely between the cap and post.
- Press the cushion down onto the frame until each stud clicks into its socket. Tug the cushion firmly from each corner to verify the hold.
Stopping Slip, Sag, and Weather Damage
Even a well-attached cushion can shift, sag, or deteriorate if you ignore a few placement and tension basics. Here's what actually makes the difference between a fix that lasts one season and one that lasts five.
Placement and tension
The tighter the tie, the less the cushion can pivot. That sounds obvious, but most people leave too much slack because they're worried about making it hard to remove for cleaning. The sweet spot: ties should hold the cushion firmly in position but release with a simple tug on the bow. If you're still dealing with shifting, use these same ideas to master how to get patio cushions to stay in place even in wind and heavy use.
If you're using Velcro, use at least two attachment points per cushion (four is better) to prevent rotational slip, where the cushion stays put at one corner but swings around the other. Non-slip grip fabric under the cushion is a great supplement to any tie or Velcro system, not a replacement.
Wind security
Wind is the main reason cushions end up across your yard. If you live somewhere with regular afternoon gusts or stormy summers, ties alone won't cut it for back cushions. Add a second anchor point: a horizontal tie across the back of a chair cushion, or a center-tie through a grommet if you're dealing with large lounge pads. Grommets through cushion corners or edges are a surprisingly strong wind anchor when you lace cord or a bungee through them and loop it around a frame bar. Use brass grommets for general outdoor exposure, or 304 stainless steel grommets if you're near the coast. Lowe's sells grommet kits with installation tools if you've never done it before.
Waterproofing your adhesive bonds
Adhesive-backed Velcro and tape bonds are the most vulnerable part of any attachment system in wet weather. There are two things you can do to protect them. First, always prep the surface properly before application: wipe with isopropyl alcohol, let dry completely, and apply in temperatures above 50°F. Applying adhesive on a cold, damp surface is the number one reason bonds fail early.
Second, consider using 3M VHB tape on the frame-side attachment. VHB (Very High Bond) tape is an industrial-grade foam-backed tape with excellent outdoor weathering resistance, designed to stay bonded through temperature swings and moisture.
It's overkill for most setups but worth it if your frame is aluminum or powder-coated steel and you want a no-drill solution that actually lasts.
Cushion materials and UV durability
The attachment is only as good as the material it's attached to. If your cushion fabric is degrading from UV exposure, ties will pull through, Velcro loops will separate, and adhesive will lose its grip on a crumbling surface. When shopping for replacement cushions, look for UV ratings on the product label. Some outdoor cushions list specific ratings like 500-hour UV resistance, which gives you a real benchmark. Solution-dyed acrylic (like Sunbrella) is the gold standard for UV resistance. Polyester outdoor fabric is the budget-friendly middle ground and holds up reasonably well for a few seasons.
Keeping Your Attachment System Going Season After Season
After cleaning
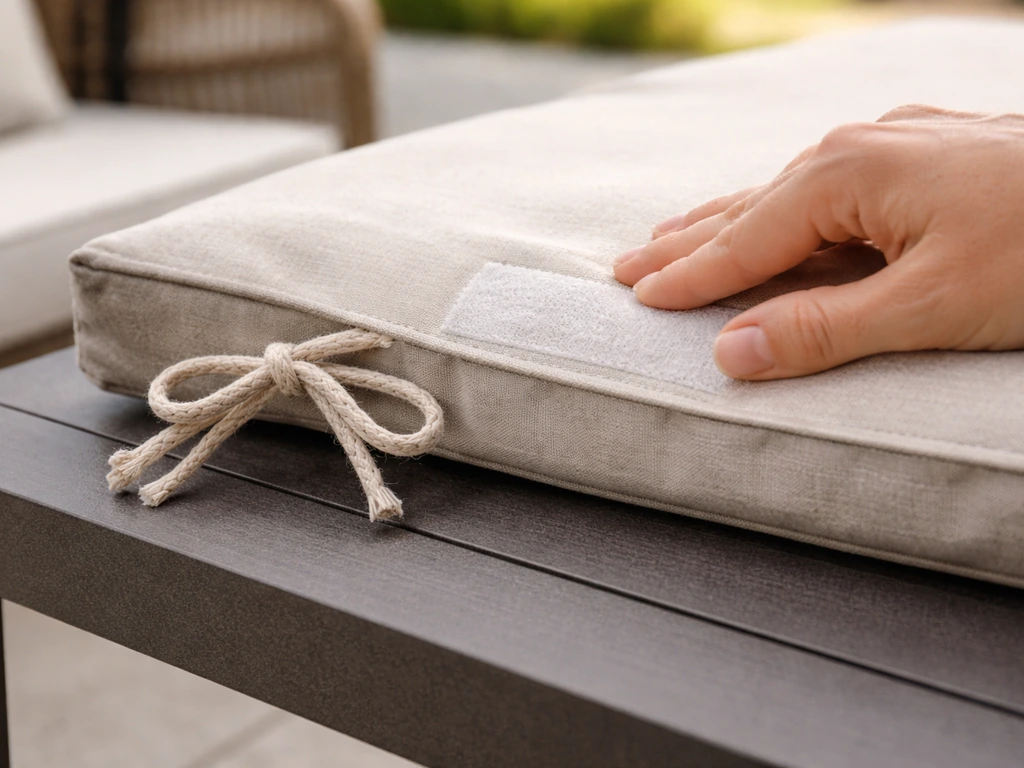
Every time you clean your cushions, check the attachment points before putting them back. Washing can loosen adhesive bonds (especially if you machine-wash the cushion covers) and weaken sewn ties over time. If a tie looks frayed or a Velcro patch is starting to peel, fix it before the season starts, not after a windstorm destroys the cushion. Re-press adhesive Velcro firmly after cleaning and let it dry for at least 24 hours before putting cushions back in service.
Pre-storm checklist
- Tighten all ties and check for fraying at the knot points.
- Press down on any adhesive Velcro patches and listen for the full grip sound—if it feels spongy or pulls off easily, reapply.
- Check snap fasteners for corrosion (white or reddish pitting) and replace any that don't click solidly.
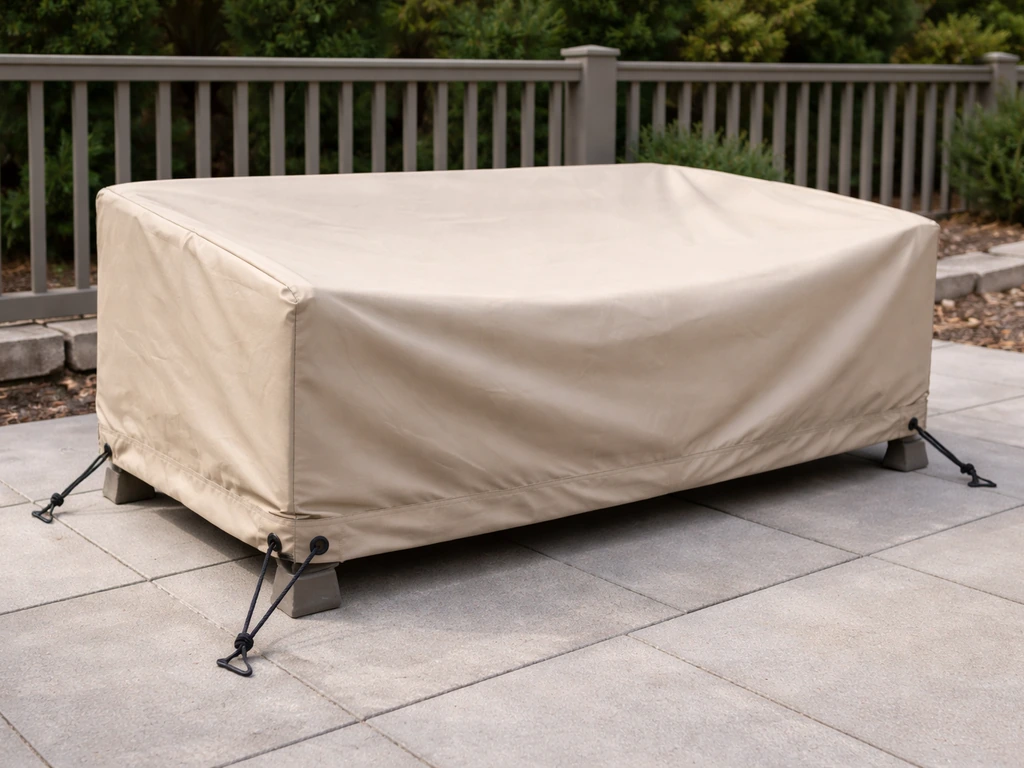
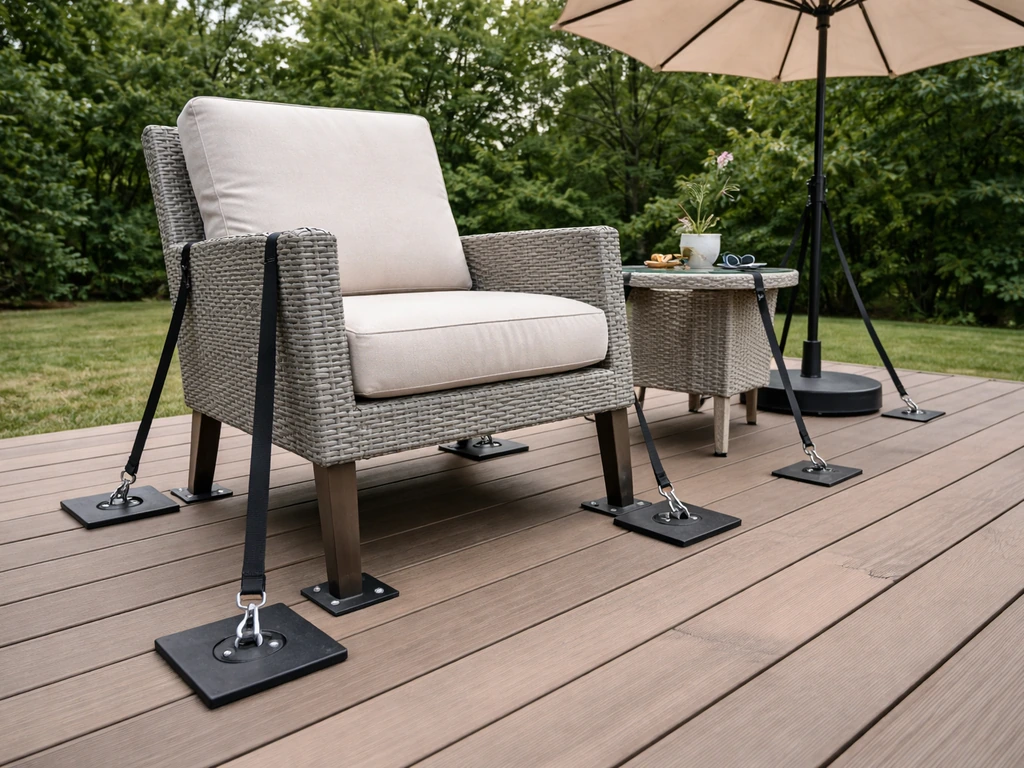
- For high-wind events, bring cushions inside entirely—no attachment system is rated for hurricane-force gusts on a patio.
End-of-season hardware check
Before you store cushions for winter, pull each one off and inspect the hardware on the frame side. Adhesive strips that have gone yellow or brittle need to be scraped off and replaced before next season. Snaps should be rinsed, dried, and given a light coat of silicone spray to prevent seizing. Metal clips and brackets should be checked for rust, especially if they're not stainless. Replace any hardware that looks compromised now, while it's easy to access, rather than discovering it mid-summer.
Storage best practices
The attachment hardware you install is usually meant to stay on the furniture frame year-round, while the cushions themselves go into storage. Store cushions in a breathable bag or bin with some airflow to prevent mildew, which can rot both the fabric and the sewn-on tie points faster than UV exposure. If you're storing Velcro-equipped cushions stacked on top of each other, press the hook and loop sides together before stacking so they don't snag on the fabric. Keeping cushions protected during off-season storage is the single best thing you can do to extend the life of every attachment method described here.
FAQ
Can I attach patio cushions to furniture if the frame is painted or textured (not smooth)?
Yes, but adhesive Velcro usually won’t bond well to chalky paint, glossy coatings, or heavy texture. For painted or textured frames, prioritize sewn ties, snap fasteners, or bracket clips, or use a frame-side system on inner rails that are smoother. If you do use adhesive, test a small strip first and use proper surface cleaning plus a 24-hour cure time before exposing it to rain.
How do I stop cushions from shifting without making them too hard to remove for cleaning?
Use a “tight, not locked” setup: pull ties snugly and aim for minimal slack while still being able to release the bow with a quick tug. For Velcro, add at least two attachment points per cushion and keep the Velcro strips aligned so lifting doesn’t require peeling across the whole pad. Consider non-slip grip fabric as a helper, not the only method.
What’s the safest way to add ties to cushions that don’t have them?
Use heavy twill tape or ribbon ties sewn at the corners and along the back edge, then reinforce the fabric where the tie passes through (bar tacking or multiple stitches). Place ties close to the cushion edge so the knot sits near the frame bar, and avoid attaching ties only at the center because wind can still pivot the cushion.
Will snap fasteners work on resin or aluminum patio frames, and what size should I use?
They can work on resin and aluminum, but only if there’s enough material thickness to grip and the snap set is compatible with that frame. Use marine-grade 316 stainless, and match the snap kit’s recommended hole size to avoid cracking or pull-through. If you’re unsure, test on an inconspicuous spot or use bracket-style clips instead of drilling.
How many attachment points are enough for large seat cushions or back cushions?
For typical seat cushions, the common baseline is four snaps (one per corner) or multiple tie points at corners plus a back anchor if the cushion catches wind. For large lounge pads and back cushions, add a center tie or a horizontal tie across the back to reduce rotational slip and upward lifting.
Can I use regular Velcro (nylon) outdoors if I apply it only on the shaded side?
It may last longer in shade, but standard nylon hook-and-loop still degrades from UV and moisture cycling over time, especially on patio furniture where water and heat vary. If the cushion sees regular sun, choose polyester hook-and-loop with UV-rated outdoor construction, or switch to snaps or bracket clips for a longer lifespan.
What’s the best surface-prep routine for adhesive Velcro so it actually holds?
Clean the frame-side surface thoroughly, then wipe with isopropyl alcohol and let it fully dry. Apply only when the temperature is above 50°F, and press firmly for better initial grab. Avoid putting cushions back into service immediately; let the bond cure at least 24 hours, especially if you expect humidity or rain soon.
Do grommets weaken outdoor cushions or cause tearing at the corners?
They can if they’re placed too close to the edge or installed without proper reinforcement. Use a grommet kit sized for outdoor fabric, install at corners or edges where you can support the material, and lace through with appropriate tension (snug, not over-tight). Prefer brass for general outdoor exposure, stainless steel for coastal salt air.
How should I clean cushions without ruining the attachment points?
If you have adhesive or hook-and-loop, avoid soaking the frame contact area. For machine-washable covers, remove cushions first, then inspect after washing before you reinstall. If adhesive Velcro loosens, re-press firmly and allow it to dry fully, and repair frayed sewn ties before the next windy period.
What’s the best way to store cushions so Velcro or ties don’t get damaged?
Store cushions in breathable bags or bins with airflow to reduce mildew. If cushions have Velcro, press hook and loop together before stacking so they don’t snag on fabric. Keep hardware-accessible parts on the frame inspected before reassembly, and replace any brittle or yellowing adhesive strips before the season starts.