To tarp patio furniture for winter, you need the right size tarp (add at least 12 inches on every side), clean and completely dry furniture before covering, a loose drape with ventilation gaps rather than a tight wrap, and solid wind anchoring with bungee cords or straps. Skip any of those steps and you're not protecting your furniture, you're just trapping moisture against it for four months.
How to Tarp Patio Furniture for Winter: Step-by-Step

Maren Grady
3 Jul 2026
I've made every mistake in this process. I threw a tarp over damp cushions in October and pulled it off in March to find a fuzzy gray mildew situation I couldn't fully reverse. I've had tarps act like sails in a November wind and wake up to find my bistro set tipped over in the yard. This guide covers what actually works, including the small details that most quick-tip articles skip.
Choosing the right tarp: size, material, and shape
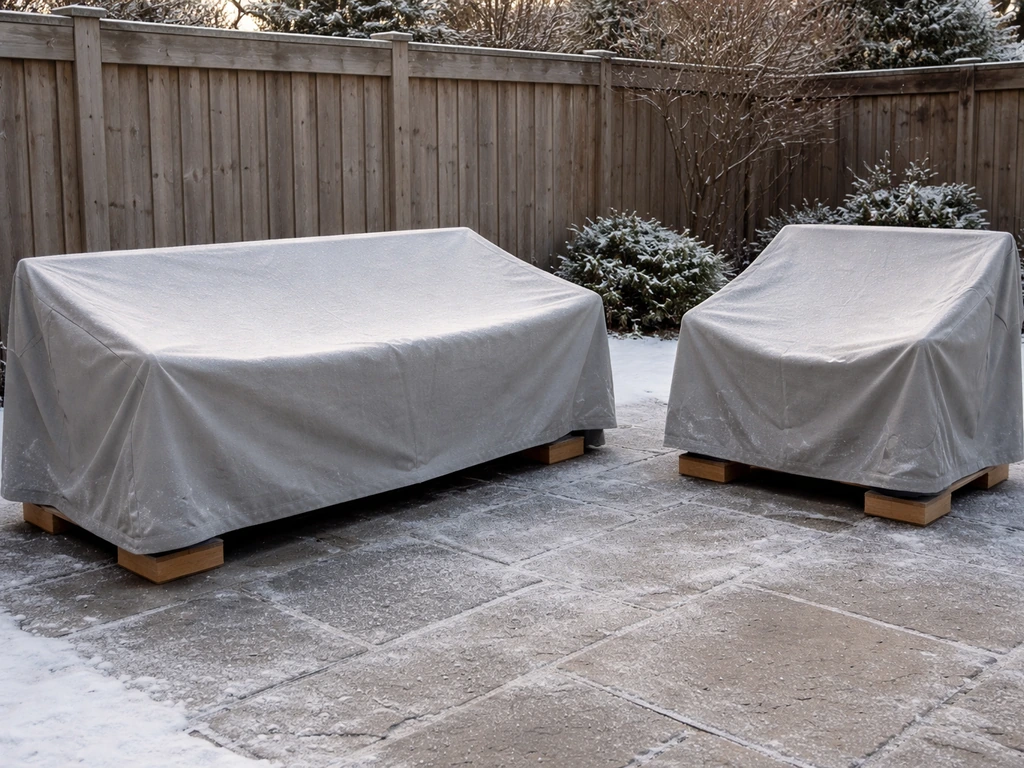
The single biggest mistake people make is buying a tarp that fits too tightly. You want at least 12 inches of overhang on every side so the tarp drapes down to near ground level and sheds water away from the furniture. For a standard 4-person dining set (table plus four chairs), a 10x12 foot or 12x16 foot tarp is usually the right call depending on how you stack the chairs. For individual lounge chairs or armchairs, a 6x8 foot tarp per piece works well. Measure the widest footprint of your furniture arrangement, then add two feet to each dimension.
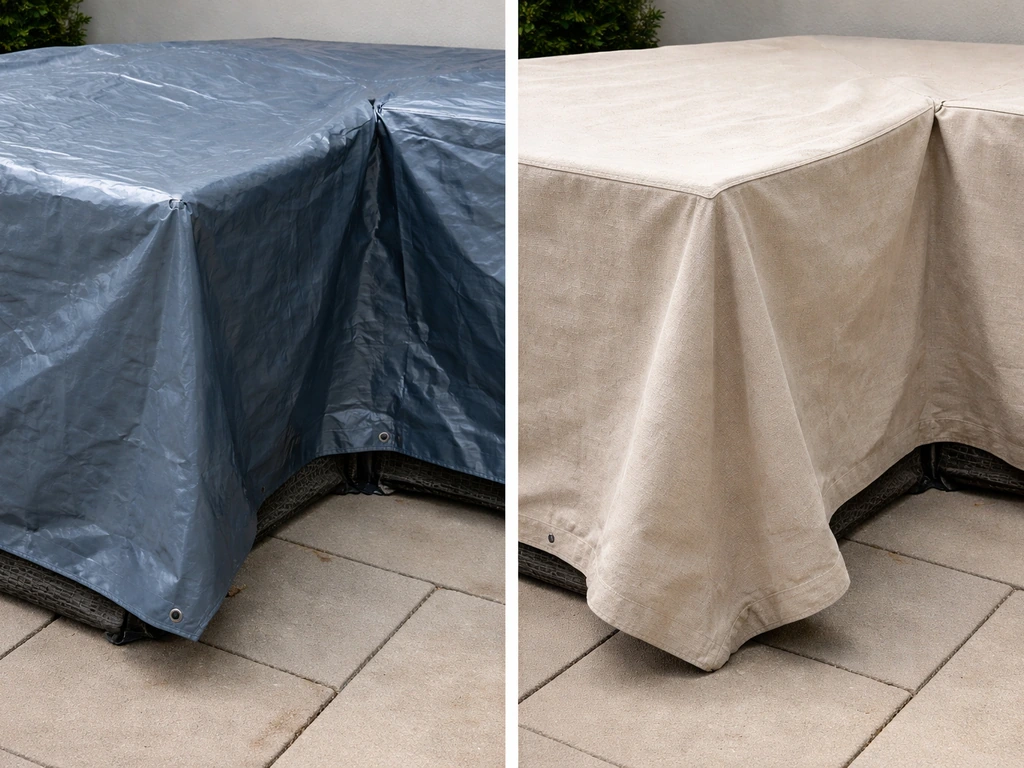
For material, you have three main options: standard poly tarps, canvas tarps, and woven poly tarps with UV coating. Poly tarps are the cheapest option (usually $10 to $25 for a midsize tarp) and are fully waterproof, but they trap all moisture and humidity inside. FrenchCovers notes that breathable anti-mold covers are designed for humid weather to help prevent condensation and moisture issues that can lead to mildew on outdoor furniture Poly tarps are fully waterproof, but they trap all moisture and humidity inside.. Canvas tarps breathe slightly better and handle condensation more forgivingly, but they're heavier and can hold water if the weave gets saturated. UV-coated woven poly tarps are a good middle-ground: they shed water on the outside, resist UV degradation, and are more durable than basic poly. Expect to spend $20 to $45 for a quality UV-rated tarp in a useful size.
| Tarp Type | Waterproof | Breathability | Durability | Approx. Cost | Best For |
|---|---|---|---|---|---|
| Standard poly tarp | Yes | None | Low to medium | $10–$25 | Short-term, budget use |
| UV-coated woven poly | Yes | Low | High | $20–$45 | Most patio furniture |
| Canvas tarp | Partial | Medium | Medium | $25–$60 | Furniture with cushions left on |
| Mesh tarp | No | High | Medium | $15–$35 | Frames only, mild climates |
Avoid mesh tarps for snowy or rainy climates since they won't keep precipitation out. For patio umbrellas, you want a tall, narrow cover or a tarp tied around the folded canopy and pole, not a flat sheet draped over it. For sectional sofas or large L-shaped sets, two overlapping tarps are often easier to manage and secure than one oversized one.
Prep the furniture before you cover it
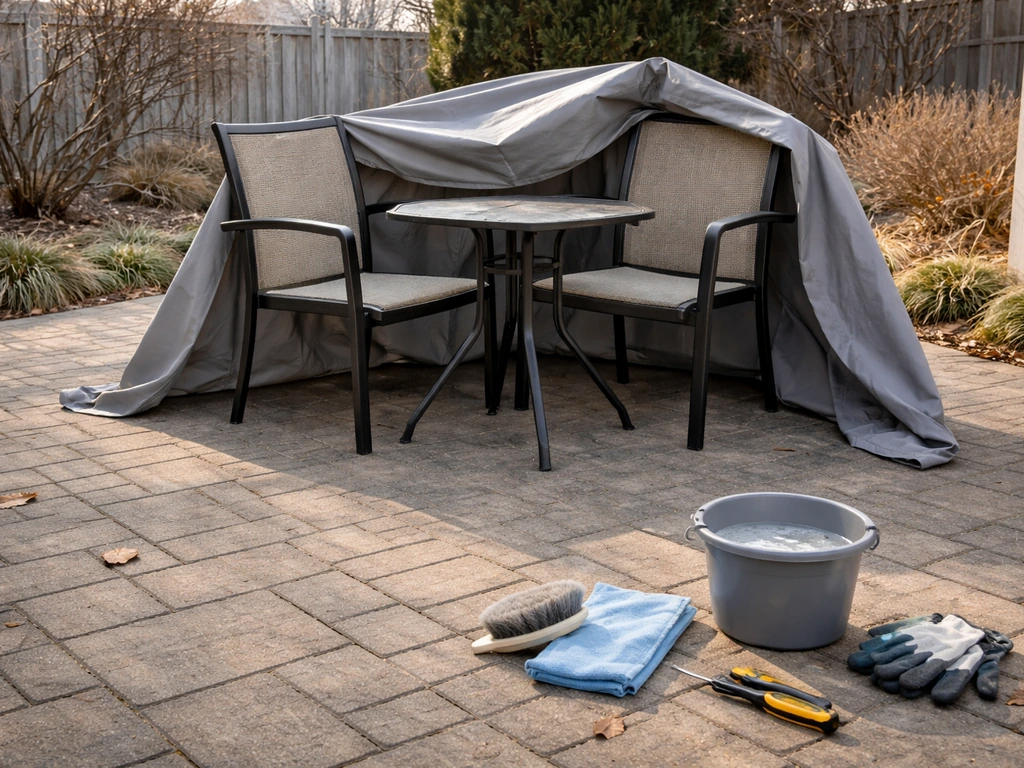
Covering dirty or damp furniture is the fastest way to ruin it. Anything you trap under that tarp in fall is what you'll find magnified in spring. Spend an hour doing this right and you'll save yourself a whole season of damage.
Clean everything first
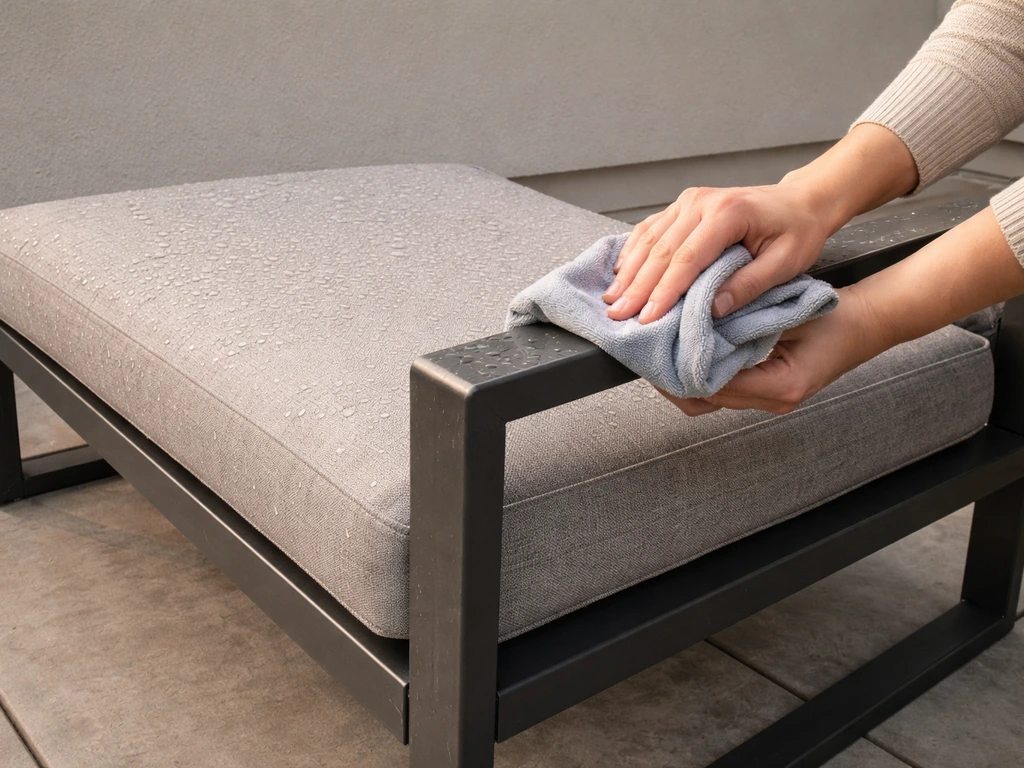
Wipe down metal, wood, and resin frames with a mild dish soap and water solution. For aluminum or wrought iron, check for rust spots and hit them with a wire brush before covering. Scrub cushion fabric with an outdoor fabric cleaner or a diluted white vinegar solution, then rinse well. Any dirt, pollen, bird droppings, or mildew spores sitting on the surface when you cover it will keep working all winter.
Dry everything completely, and that means really dry
This is where I've slipped up before, and where most condensation problems start. Even slightly damp cushions or frames will release moisture vapor once covered, and that vapor has nowhere to go. Leave cushions upright in the sun for a full day after washing. For the frames, wipe them down and let them air dry for several hours. If you're heading into late fall and sunny days are short, I'd rather wait an extra day for dry conditions than rush the cover-up.
Do any minor repairs now
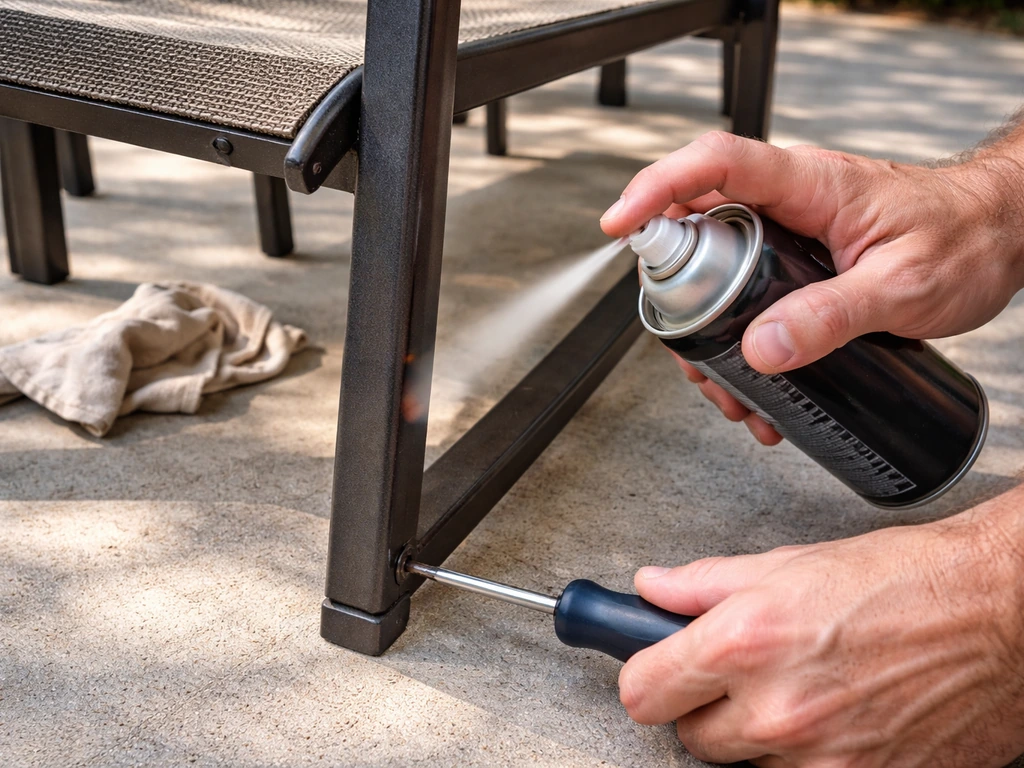
Fix anything that's going to get worse over winter: tighten loose screws on chair legs, touch up paint chips on metal frames with rust-inhibiting spray paint, re-glue any loose wicker or rattan strands with outdoor adhesive. A small rust spot covered with a tarp in October turns into a spreading rust problem by March. A few minutes of repairs now saves you a much bigger job in spring. This prep step connects directly to a full winterizing routine, which goes beyond just tarping. Following a true winterizing routine involves more than just tarping, like protecting finishes and making small repairs before cold weather sets in how to cover patio furniture for winter.
Store or wrap cushions separately if possible
If you have any storage at all (a deck box, garage shelf, or dry basement corner), this is the one thing worth prioritizing. Cushions hold moisture, and keeping them under a non-breathable tarp all winter is hard on the foam and fabric even when dry. If they have to stay outside, stand them upright so any condensation runs off rather than pooling on a flat surface.
How to tarp correctly: drape, tension, and ventilation
A tarp isn't just a blanket you throw over things. How you position and tension it determines whether moisture gets trapped underneath or has a way out. Here's how to do it right.
- Stack or arrange your furniture compactly. Nest chairs seat-to-seat, flip lightweight chairs upside down onto the table, or push pieces close together. The smaller your covered footprint, the easier the tarp is to secure and the less air volume you're trapping.
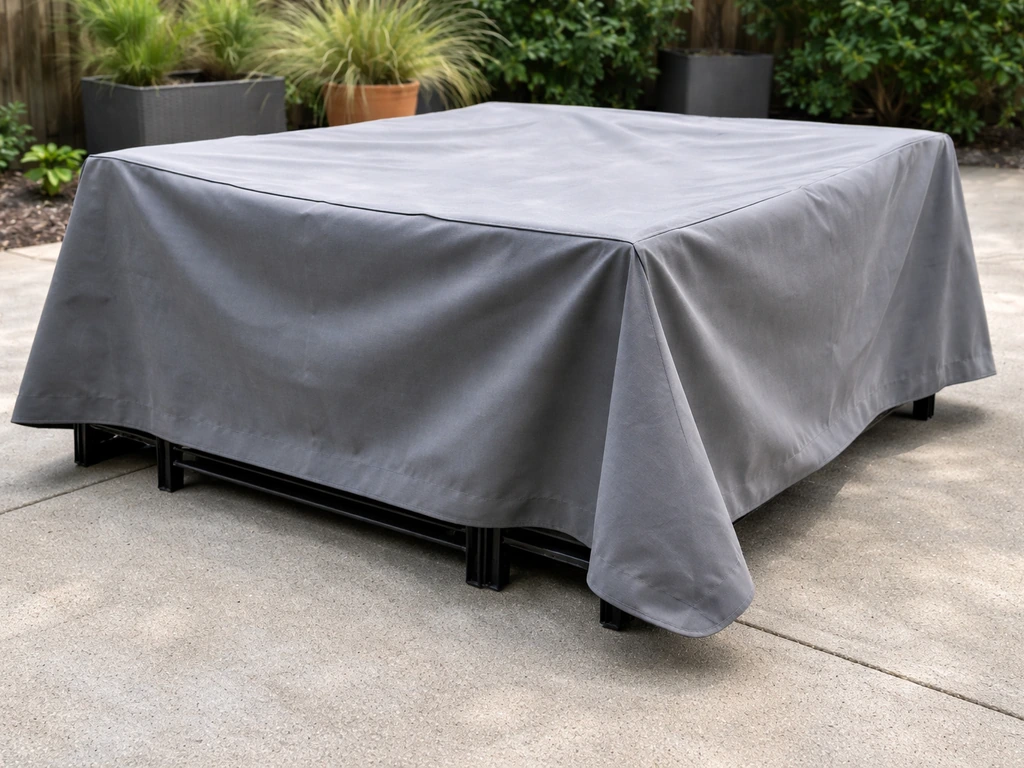
- Drape the tarp over the furniture with even overhangs on all sides. You want the edges to come down close to ground level on all sides so rain and snow shed outward, not inward.
- Do not pull the tarp tight against the furniture like a shrink wrap. Leave a few inches of air gap between the tarp surface and the top of the furniture. This air gap is your ventilation buffer and it's what prevents condensation from forming directly on your cushions and frames.
- At the base of the tarp, do not seal it all the way to the ground. Leave a 2 to 4 inch gap at ground level on the leeward side (the side facing away from the prevailing wind). This allows some passive airflow so humid air can escape rather than building up inside.
- If you're covering a set with cushions still attached, consider leaving one corner of the tarp slightly lifted and pinned back (not flapping loose) to improve air circulation. A few clothes pegs clipped to create a small intentional vent work well for this.
The reason ventilation matters so much is physics: warm, moist air that gets trapped inside the tarp will hit the cold tarp surface and condense into liquid water. That water then drips back onto your furniture. Tight, sealed tarps create this problem every single time. A little airflow breaks the cycle.
Securing the tarp so it doesn't go anywhere
Wind is the number one enemy of a well-laid tarp. An unsecured or poorly secured tarp either blows off entirely or spends the whole winter flapping and chafing against your furniture, which is almost as bad. Here are the methods that actually hold.
Bungee cords and adjustable straps
Run bungee cords through the tarp's grommets and hook them under the furniture frame, around chair legs, or to a ratchet strap looped underneath the entire stack. For most setups, four bungee cords (one at each corner grommet) provide enough hold for moderate wind. In windy regions or on exposed decks, add two more along the long sides. Ratchet straps give a more secure hold than bungees for large, heavy setups and cost about $8 to $15 per strap at any hardware store.
Rope tie-downs
Run a length of paracord or poly rope through the grommets and cinch it in a loop around the base of the furniture. You can also run rope diagonally across the top of the tarp from corner grommet to corner grommet to keep it from ballooning up. Use a simple trucker's hitch knot if you want the rope tight enough to actually hold without slipping.
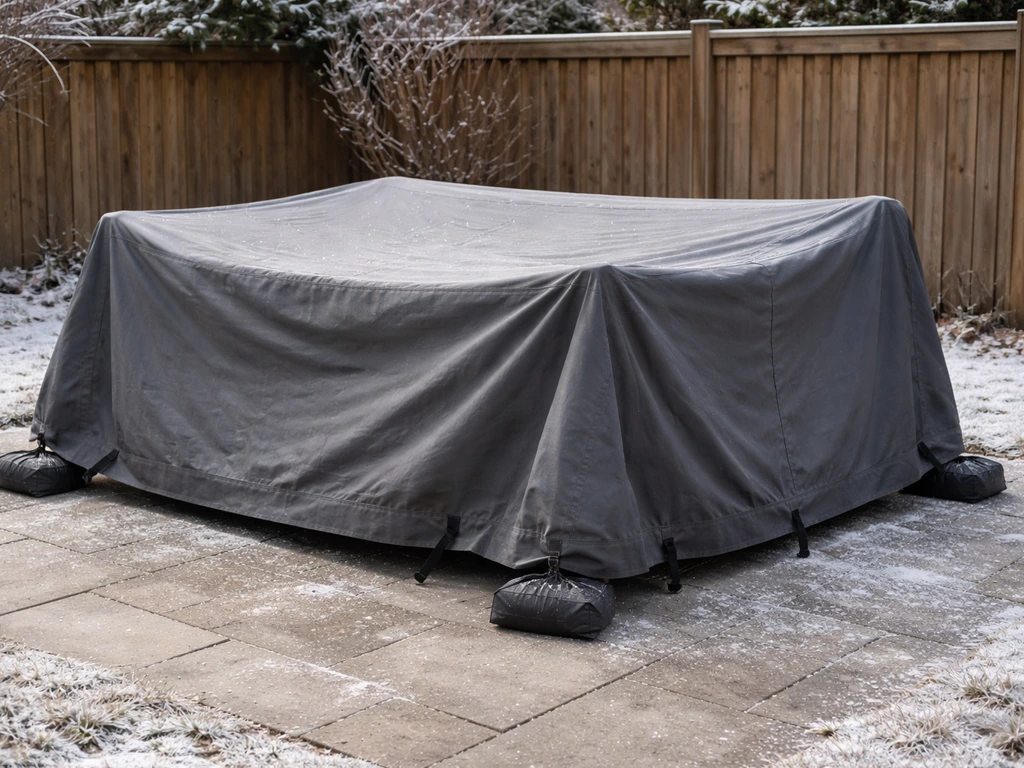
Sandbags and weight bars
For furniture sitting on a flat deck or patio surface, lay the tarp edges flat on the ground and place sandbags, bricks, or concrete blocks on the hem every few feet. This works well as a secondary anchor on top of cord tie-downs and adds almost no cost if you use bricks or pavers you already have. Do not rely on weights alone in areas that get sustained wind over 20 mph.
Zip ties for tarp-to-frame attachment
For a tighter, more reliable hold, thread zip ties through the tarp grommets and directly around chair legs or table frame crossbars. This prevents the tarp from riding up in wind. Use heavy-duty UV-resistant zip ties so they don't become brittle and snap in the cold. Cut them off with scissors in spring and replace them next season. They're cheap enough that this is a no-brainer.
Moisture management: what to do and what to avoid
Even a perfectly secured tarp can trap moisture if you don't manage a couple of key details. This section is where a lot of DIY winter covers fail, so it's worth paying close attention.
Keep the tarp off the ground
If the tarp touches bare soil, grass, or a wet patio surface and is sealed tight against it, moisture from the ground will wick upward. Place your furniture on a pallet, rubber deck tiles, or at minimum a sheet of plastic sheeting on the ground before covering. Elevating even an inch or two with wooden blocks or small plastic furniture feet breaks that ground-moisture contact and makes a real difference over a full winter.
Don't seal the tarp like a tent
Completely sealing all four sides traps humid air and creates a condensation chamber. Leave that passive vent gap at the base as described in the covering section. If you're in a climate with heavy snowfall, you can close the gaps temporarily during a major storm and then reopen them once it passes, but don't leave it fully sealed for weeks on end.
Tarp do's and don'ts
- Do start with completely dry furniture and cushions before covering
- Do leave a small ventilation gap at the base of the tarp on one side
- Do elevate furniture off the ground or use a moisture barrier underneath
- Do check for water pooling on top of the tarp after heavy rain or snow and shake it off
- Don't wrap the tarp so tightly it presses against cushion fabric (traps condensation)
- Don't let the tarp edge sit directly in standing water or soggy soil
- Don't ignore a tarp that keeps blowing off, as furniture with intermittent cover is worse than consistent no cover because it cycles between wet and dry repeatedly
- Don't use a single small tarp stretched tight over a large set; use two overlapping tarps instead
Your winter recheck schedule
Tarping isn't a set-it-and-forget-it job. A quick check every few weeks takes five minutes and catches problems before they become expensive. For a full refresher on the steps to winterize patio furniture before covering, see the complete guide on how to winterize patio furniture. Here's a simple schedule to follow from first cover in fall through the final uncover in spring.
| Timing | What to Check | What to Do |
|---|---|---|
| 1 week after covering | Tarp position, grommet stress, ground contact | Adjust any slipped corners, retighten cords |
| After first major storm | Water pooling on top, tarp still anchored | Push off pooled water, recheck anchors |
| Mid-winter (January) | Lift one corner to check for condensation or mildew smell | Air out for an hour if damp; recheck ventilation gap |
| After heavy snow | Snow weight on tarp, sagging | Brush off snow to prevent prolonged pressure damage |
| Late winter / early thaw | Any pooling meltwater underneath | Lift and air out before refreezing overnight |
| Spring uncover | Mildew, rust, fabric condition | Clean and treat any issues before storing covers |
The mid-winter check is the one most people skip and later regret. Lifting one corner for a quick sniff and visual check takes two minutes. If it smells musty or you see moisture droplets on the furniture, pull the tarp off for a few hours on a dry day to air everything out, then re-cover. Catching it in January beats discovering a mildew situation in March when you're ready to use the furniture again.
Troubleshooting common tarp problems
The inside is wet even though the tarp hasn't leaked
This is almost always condensation, not a leaking tarp. Warm, humid air got trapped inside, hit the cold tarp surface, and turned into water droplets that dripped back down. The fix is to improve ventilation by leaving a larger base gap, and to make sure the furniture was fully dry when you covered it. The Gloster protective covers fact sheet notes that breathable cover construction can reduce dampness and heat build-up and decrease the chances of mold or mildew, but that small amounts of moisture can still penetrate breathable covers, especially if furniture is not fully dry before covering make sure the furniture was fully dry when you covered it. If it keeps happening, lay a handful of moisture-absorbing silica gel packs inside the covered area, the kind that come in shoe boxes or can be bought cheaply in bulk online.
Mildew smell or visible mold spots
Uncover everything immediately on a dry, breezy day. Take cushions and fabric pieces outdoors and shake them vigorously to dislodge any loose spores before you do anything else (shaking indoors just spreads them). Scrub affected surfaces with a solution of one cup white vinegar per quart of water, or use an outdoor fabric mildew remover. Let everything dry completely in sunlight, which is a natural mildew killer. Once dry, recheck your covering setup before putting things back under the tarp: tighter sealing and trapped dampness are almost always the cause.
The tarp keeps sagging in the middle
Sagging means rain and meltwater are pooling on top instead of running off, and the weight of that water can stress the tarp and press it into your furniture. The simple fix is to prop up the center. Put an inverted plastic bucket, a foam pool noodle, or a stack of empty plastic containers in the middle of your furniture pile to create a high point under the tarp so water sheds off the sides. Don't use anything that can absorb water or rust.
The tarp doesn't fit properly
If a tarp is too small, don't try to stretch it tight. You're better off buying a larger one or using two tarps with a 12-inch overlap on the seam, securing the overlap with binder clips or tarp clamps. A too-tight tarp presses against furniture surfaces, eliminates the air gap that prevents condensation, and is more likely to tear at the grommets in wind. Two well-secured overlapping tarps beat one poorly fitting tarp every time.
The tarp keeps blowing off
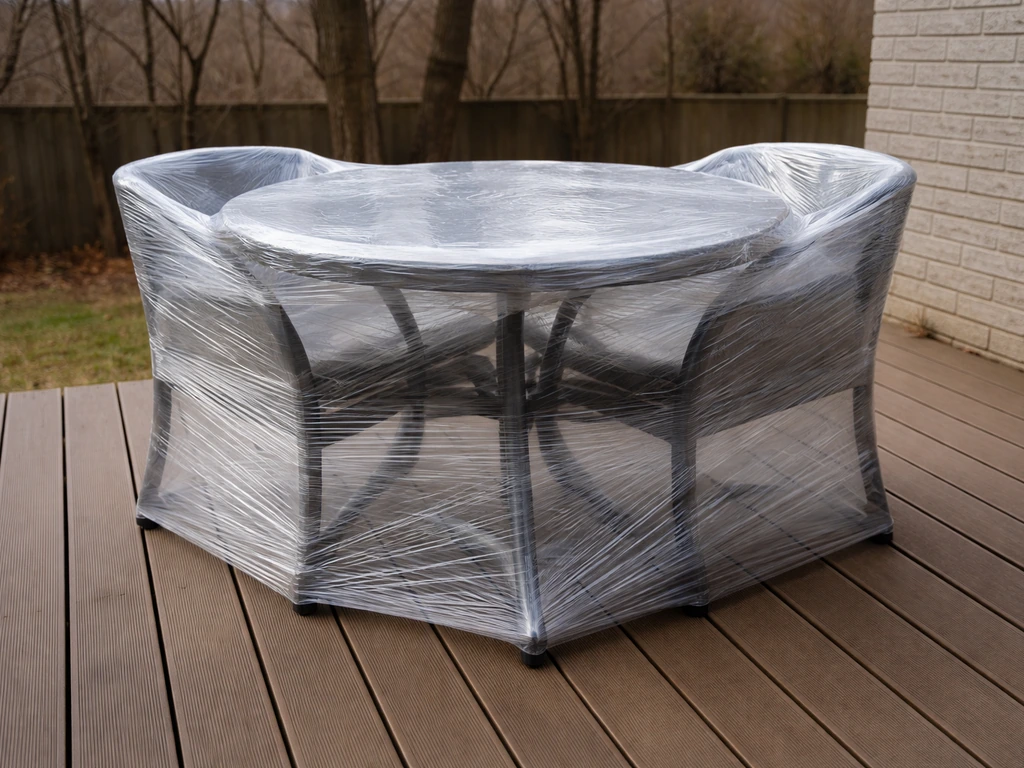
If bungee cords alone aren't holding, add ratchet straps cinched under the furniture frame, run paracord through the grommets and anchor it to deck screws or heavy ground stakes, and add weight bags or bricks on the hem around the perimeter. For chronically windy spots, consider switching to purpose-made furniture covers with drawstrings or elastic hems, which are much harder for wind to catch than a flat tarp. Some homeowners in very exposed locations find that storing furniture inside or using a more enclosed solution like shrink wrapping is genuinely the better option over battling a tarp all winter. If you want a tighter, more weatherproof option, learn how to shrink wrap patio furniture correctly so you limit moisture while keeping ventilation in mind shrink wrapping.
A few last things worth knowing
Tarping is a solid, budget-friendly option for winter protection but it does require a bit more active management than purpose-made furniture covers with proper fit and venting built in. Shrink wrapping patio furniture is another option, but the price depends on how much coverage and how many pieces you’re wrapping shrink wrap patio furniture. If you're spending significant time troubleshooting moisture, sagging, or wind issues every season, it might be worth comparing your total tarp costs over a few winters against a one-time investment in fitted covers. The goal either way is the same: dry, clean furniture that comes out of winter in the same condition it went in.
For furniture that's genuinely borderline in terms of weather tolerance (certain hardwoods, wicker, or older painted metal), the decision of whether to tarp in place or bring pieces inside is worth thinking through carefully. Some materials really don't handle four months under a cover well no matter how good your setup is. Getting that foundational question right before you invest in tarps and hardware saves a lot of frustration. If you want extra protection beyond tarps, learn how to protect your patio furniture in the winter with smart storage, cleaning, and ventilation steps.
FAQ
Can I leave my cushions under the tarp if I don’t have any indoor storage space?
Yes, but treat them as the moisture bottleneck. Stand cushions upright (not flat), keep them on a breathable barrier like a dry pallet, and place a few moisture absorbers (silica packs) inside the covered area. If your cushions are already fabric with any mildew, clean and fully dry them first, then tarp, otherwise you can lock the problem in again.
Is it better to cover furniture as soon as the weather turns, or wait until late fall?
Wait until the forecast has a stretch of dry weather for your initial clean-and-dry cycle. Covering too early often means more pollen, dew, and dew-driven condensation trapped under the tarp for weeks. A simple approach is to tarp only after you can wipe frames clean, wash/clean cushions, and confirm everything is dry to the touch and not cool-damp.
What should I put under the tarp if my patio gets puddles or stays damp overnight?
Use a rigid barrier plus elevation. A sheet of plastic sheeting helps block ground moisture, but for best results elevate the furniture an inch or two using rubber deck tiles or small plastic feet, then make sure the tarp hem is not sealed tight against wet surfaces. If the tarp edge sits in puddles, wicking can still pull moisture upward.
Will a tarp damage the finish on wood or painted furniture?
It can, mainly due to trapped condensation and abrasion from wind. To reduce risk, do not wrap tight, avoid letting the tarp touch bare soil or consistently wet concrete, and check the setup after the first few storms. If you have glossy painted metal, keep the tarp slightly off the surface and avoid rough contact that can create rub marks over time.
How do I handle a patio umbrella during winter, especially if it’s windy?
Don’t drape a flat tarp directly over a typical umbrella when possible, because the canopy often collects moisture and wind can work the fabric loose. Use a tall, narrow cover, or secure the folded canopy so the tarp cannot balloon. Tie or strap near the pole and base, and ensure the cover has enough clearance that water cannot pool inside the folds.
My tarp has grommets but the furniture doesn’t have convenient tie points. What’s the safest way to anchor it?
Anchor to the furniture frame or to the patio structure, not to flimsy legs that can bend. Run tie-downs around sturdier crossbars, chair bases, or through grommets to a ratchet strap looped under the main stack. For decks or patios, stakes can work only if the soil is reachable and secure, otherwise use sandbags or weights on the hem sections.
How often should I check the tarp in winter?
A quick inspection every few weeks is the sweet spot, plus a check after major wind or snow events. Lift one corner and look for moisture droplets, sagging, or a musty smell. If you find condensation, re-air the furniture on a dry day and adjust ventilation gaps before re-covering.
What’s the difference between condensation and a leak, and how can I tell?
Condensation usually shows up as water droplets on the underside of the tarp or on cool surfaces, and it often correlates with warm humid afternoons followed by cooler nights. A leak tends to follow a specific seam, hole, or area where water comes in, and it may leave tracks rather than widespread dampness. If you see repeating dampness without any obvious tear, prioritize ventilation and confirming the furniture was fully dry.
Is it okay to use bungee cords only, or do I need ratchet straps?
Bungees are often enough for moderate wind and small sets, especially when you use enough of them. Ratchet straps are better for large or heavy arrangements, exposed decks, and high-wind areas because they maintain tension more reliably and reduce flapping. If your tarp ballooning or rubbing is recurring, switch or add ratchet straps under the frame.
What do I do if the tarp sags in the middle after snow and melting?
Treat sagging as a run-off problem, not just a cosmetic one. Create a high point under the center using a non-absorbing prop like an inverted plastic bucket or foam pool noodle so water sheds off the sides instead of pooling. Avoid anything that can soak up water or rust, since it can become a new moisture source.
Can I patch a small tear in the tarp instead of replacing it?
Yes, for small issues, as long as you patch in a way that prevents water from migrating under the tarp. Clean and dry the tarp area first, use a tarp repair patch compatible with the tarp material, and re-check tension after anchoring. However, if multiple tears appear around grommets, that often means the tarp is too small or too tight and will keep failing.
Should I remove the tarp during sunny days to prevent moisture build-up?
Sometimes, but do it strategically. After a dry, breezy day, you can partially lift and air the covered space for a short period, especially if your area alternates freezing and thawing. If you do this, make sure you can fully re-secure the tarp afterwards, since leaving it half-covered can invite wind-driven water intrusion.