To secure patio furniture to concrete, your best permanent option is a concrete screw anchor (like a Tapcon) or a wedge/sleeve anchor drilled into solid concrete with a hammer drill or rotary hammer. For most dining chairs and tables, a 1/4" Tapcon with 1" to 1-1/4" embedment is enough. If you need heavier-duty holding power, step up to a 3/8" wedge anchor. If you'd rather not drill at all, weighted bases, furniture straps anchored to a wall or post, and anti-tip clips that lock pieces together are real alternatives that work well for low-to-medium wind exposure.
How to Secure Patio Furniture to Concrete: Complete Guide

Maren Grady
4 Aug 2026
Why you'd actually need to anchor patio furniture to concrete
Most people don't think about this until a storm does the deciding for them. A 40 mph wind gust can flip a standard aluminum patio chair and send it through a sliding glass door. Heavier cast-iron pieces can still roll and tip. If you live anywhere with seasonal storms, afternoon thunderstorms, or a patio that sits exposed without a fence or wall windbreak, furniture that isn't secured is a liability, not just an inconvenience.
Beyond weather, there are a few other reasons to anchor down: young kids who climb on chairs, sloped concrete patios where furniture creeps, pool decks where a toppled umbrella stand becomes a drowning hazard, and commercial or rental setups where liability matters. If any of those apply to you, this article walks you through every option from permanent bolt-down methods to temporary low-impact alternatives. For a step-by-step guide on techniques and fastener choices, see how to anchor patio furniture.
Quick decision guide: bolt, anchor, epoxy, or no-drill solution?
Before you grab a drill, spend two minutes figuring out which approach actually fits your situation. The right choice depends on how permanent you want the installation, what your concrete looks like, and how much load you're dealing with. Here's a simple way to think through it.
| Your situation | Best approach | Why |
|---|---|---|
| Solid concrete slab, want permanent hold | Concrete screw (Tapcon) or wedge anchor | Fast, strong, removable if needed, widely available |
| Heavy furniture or high wind zone | Wedge/sleeve anchor or epoxy anchor | Higher pull-out and shear capacity than screws alone |
| Cracked, thin (under 3"), or old spalling concrete | Epoxy/chemical anchor or no-drill alternative | Mechanical anchors rely on concrete integrity; epoxy distributes load better |
| Pavers or flagstone (not bonded slab) | No-drill: weights, straps, or furniture clips | Pavers shift; drilling into individual pavers risks cracking them |
| Renting or want to move furniture seasonally | Anti-tip clips, cable locks, or weighted bases | No permanent holes, easy removal |
| Connecting multiple pieces together on concrete | Furniture clip connectors + no-drill anchor | Clips handle lateral movement; a single anchor point manages wind lift |
| Wood deck (not concrete) | Lag screws into joists | Completely different fastener system — concrete anchors don't apply here |
If you have a wood deck instead of a concrete slab, the approach is entirely different, lag screws into joists, not masonry anchors. For step-by-step guidance on securing patio furniture to a wood deck, see our how to secure patio furniture to deck guide. That's a separate process worth reading about on its own. For step-by-step instructions on fastening furniture to wood decks, see how to anchor patio furniture to deck.
Safety first, before you touch a drill
Here's where I see a lot of people skip steps and regret it. Drilling into concrete without knowing what's below or inside it is genuinely dangerous. Old patios sometimes have rebar that can deflect your bit, damage it, or in rare cases create a spark-related hazard. Conduit or PVC pipes for outdoor lighting or irrigation sometimes run just below or through slabs. Take five minutes to do these checks before you start.
PPE you actually need
- Safety glasses or goggles — concrete dust and bit fragments travel fast
- Dust mask rated N95 or better — concrete dust contains silica, which causes serious lung damage with repeated exposure
- Work gloves — vibration from a rotary hammer over multiple holes adds up, and edges are sharp
- Hearing protection if using a rotary hammer for more than a few minutes
Site inspection before drilling
- Use a rebar scanner or concrete scanner (rentable at most tool rental shops for around $30–$50/day) to locate rebar before drilling. If you hit rebar mid-hole, stop immediately — drilling through it ruins your bit and can compromise structural integrity
- Check slab thickness. Tap the surface with a hammer and listen for hollow sounds, which indicate delamination or voids. Thin slabs under 3" limit your embedment depth and anchor choices
- Look for existing cracks wider than 1/8". Mechanical anchors in cracked concrete can cause further splitting — epoxy anchors handle cracked zones better
- Identify any conduit, pipes, or radiant heat tubing. When in doubt, use a voltage detector along planned drill lines and keep anchor locations at least 6" from any suspected utility path
- Check edge and spacing distances: most anchors require at least 6 anchor diameters from a slab edge and 10–12 diameters between anchors to prevent concrete breakout
Tools and materials you'll need
You don't need a truck full of gear, but cutting corners on the drill is one place that will genuinely cost you time and frustration. Here's what to gather before you start.
The drill question: hammer drill vs. rotary hammer
A standard hammer drill works fine for a few small holes (1/4" Tapcons in reasonably fresh concrete). For anything 3/8" or larger, or if you're drilling more than four or five holes, rent or borrow an SDS-Plus rotary hammer. It's faster, the carbide SDS bits stay sharp much longer, and you're far less likely to end up with a wandering, off-angle hole. Rotary hammer rentals run about $40–$60 per day at most home centers, and it's worth every dollar.
Full checklist
- Hammer drill (for 1/4" Tapcons in solid concrete) or SDS-Plus rotary hammer (preferred for 3/8"+ anchors or multiple holes)
- Carbide-tipped masonry bits: for Tapcons, use a 3/16" bit for 1/4" anchors; for 3/8" wedge anchors, use a 3/8" carbide SDS bit
- Concrete screws (Tapcons), wedge anchors, or epoxy cartridge and threaded rod as applicable
- Torque wrench or impact driver with torque-limiting setting (critical — over-tightening destroys anchor performance)
- Compressed air can or small compressor with nozzle for hole cleaning
- Wire brush sized to your hole diameter (sold in anchor kits or separately, matches bore diameter)
- Depth gauge or tape measure and marker for setting drill depth
- Vacuum or shop vac for surface dust
- Rebar/concrete scanner for pre-drill inspection
- Caulk or polyurethane sealant if you want to weatherproof around installed anchors
- Corrosion-resistant fasteners: 304 or 316 stainless steel for coastal or wet environments; hot-dipped galvanized for inland patios
Understanding loads, measurements, and fastener sizing
You don't need to be an engineer to make a good anchor selection, but understanding a few basics helps you avoid under-anchoring. Wind load is the main force you're designing against. A 50 mph wind produces roughly 6–7 lbs of pressure per square foot on a flat surface. A patio table with an umbrella might present 15–20 sq ft of surface area, which translates to 90–140 lbs of lateral force in a moderate gust, and that's before the uplift component that tries to flip the piece over.
For typical residential patio furniture without umbrellas, two anchors per piece (one per leg on a diagonal) is a common minimum. With umbrella tables or large sectionals, four anchors or more is smarter. Anchor spacing matters too: most manufacturers require a minimum edge distance of 6 anchor diameters from a concrete edge, and a center-to-center spacing of at least 10–12 anchor diameters between adjacent anchors. For a 1/4" anchor, that means staying at least 1.5" from a slab edge and 2.5"–3" between anchors.
| Anchor size | Pilot hole bit | Min. embedment | Drill hole depth | Approx. install torque |
|---|---|---|---|---|
| 1/4" Tapcon concrete screw | 3/16" | 1" to 1-1/4" | Embedment + 1/4" | 45–60 in-lb |
| 3/8" Tapcon or concrete screw | 5/16" | 1-3/4" | Embedment + 1/4" | Per manufacturer TDS |
| 3/8" wedge/sleeve anchor | 3/8" | 2-1/4"+ (model-specific) | Embedment + slab clearance | ~15 ft-lb (Hilti Kwik-Bolt typical) |
| 1/2" wedge anchor | 1/2" | 2-1/4"+ (model-specific) | Embedment + slab clearance | Per manufacturer TDS |
| 3/8" epoxy anchor (threaded rod) | 3/8" | 3-3/4"+ (product-specific) | Per cartridge instructions | Hand-tight after cure |
Always verify exact values against the manufacturer's Technical Data Sheet (TDS) or ICC-ES evaluation report for the specific product you're buying. The numbers above are representative starting points, not design values.
Anchor types: which one is right for your project
There are three main mechanical anchor families plus epoxy anchors. Each has a real best-use case, and picking the wrong one for your concrete type is the most common mistake I see on DIY anchor projects.
Concrete screws (Tapcons and equivalents)
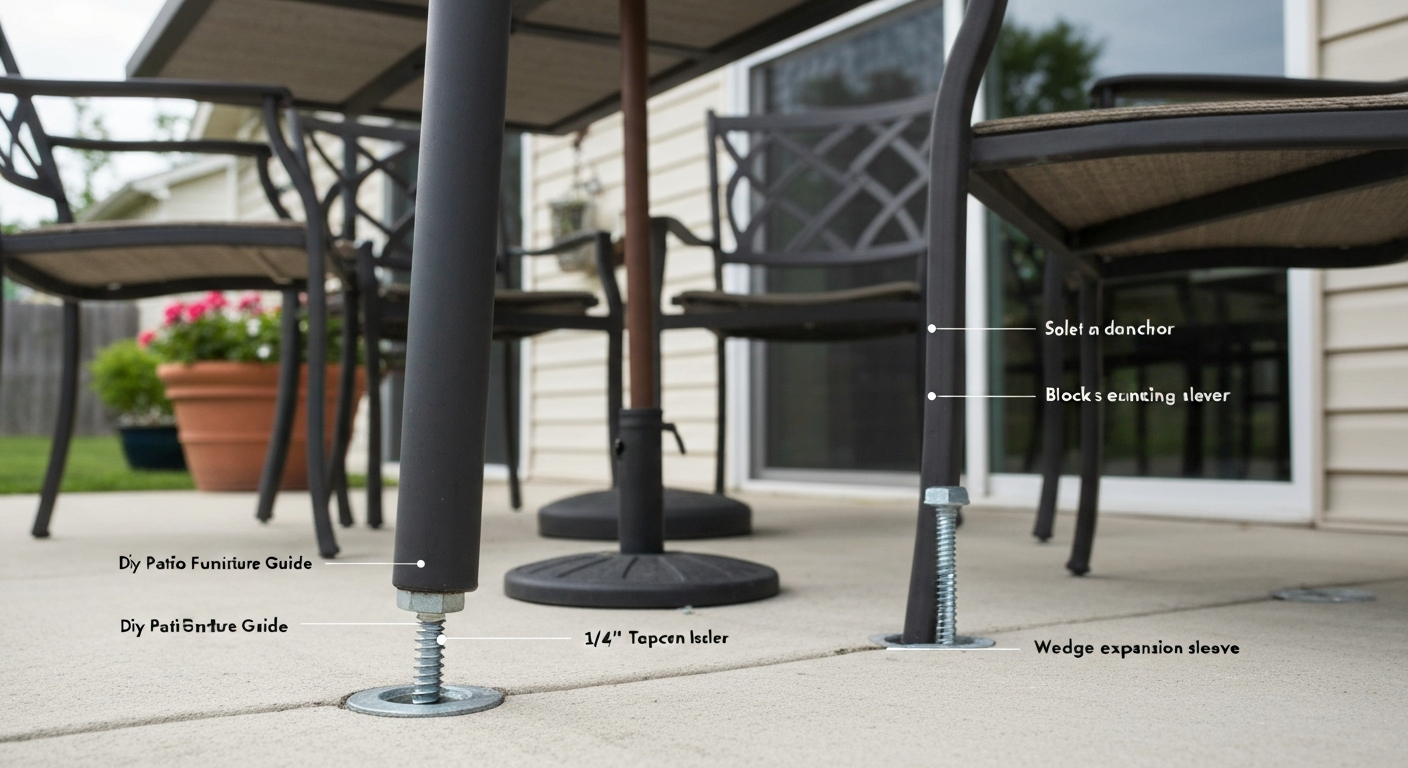
These are the go-to for most patio furniture work. A Tapcon is a hardened steel screw with a thread profile designed to cut into concrete. You drill a pilot hole, clean it, and drive the screw directly. They're removable, reusable a limited number of times, and cost-effective, a box of 1/4" x 1-3/4" Tapcons runs about $15–$25. The limitation is load capacity: they're rated for moderate shear and pull-out in solid concrete, but they're not the right choice for very heavy furniture in high-wind areas or for cracked/weak concrete.
Wedge and sleeve anchors
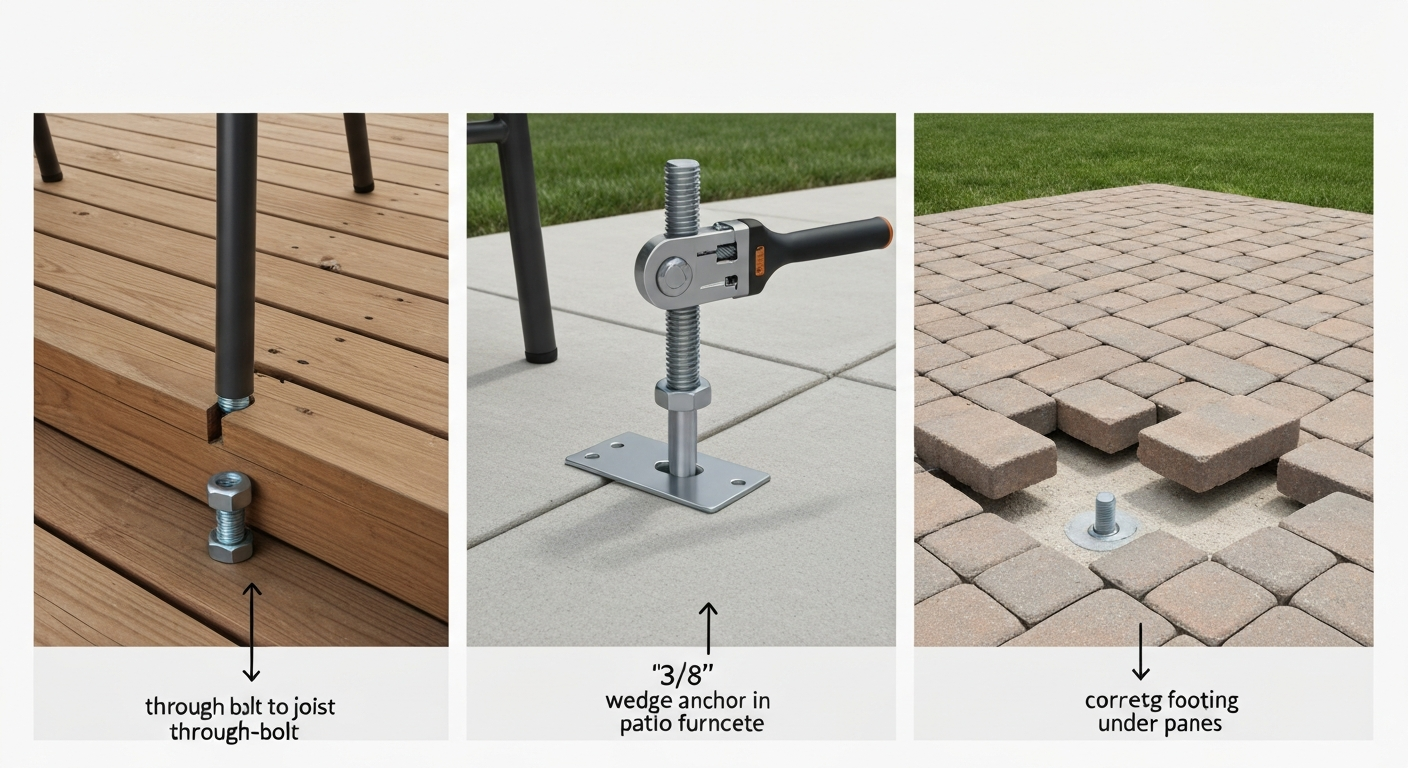
Wedge anchors work by expansion, you insert the anchor into a drilled hole, and tightening the nut drives a cone that expands wedge clips against the hole wall. They have significantly higher load ratings than concrete screws of the same diameter, making them the right call for heavier furniture, umbrella base anchors, or any situation where you need real pull-out resistance. The trade-off: they're harder to remove (you typically have to grind the bolt flush), and they require deeper embedment. Sleeve anchors work on a similar principle but expand differently and suit softer concrete or hollow-core applications better.
Through-bolts
A through-bolt passes entirely through the furniture leg and the full slab thickness, with a washer and nut on the underside. This is the strongest option mechanically, but it requires access to the underside of the slab, possible on elevated decks or thin slabs near a foundation edge, but not practical for most poured-on-grade patios. If you do have access, this approach is very hard to beat for sheer holding power.
| Anchor type | Holding power | Removability | Best concrete condition | Typical cost per anchor |
|---|---|---|---|---|
| Concrete screw (Tapcon) | Moderate | Yes, limited reuse | Solid, uncracked, ≥3" thick | $0.50–$2 |
| Wedge/sleeve anchor | High | Difficult (grind flush) | Solid, uncracked, adequate thickness | $1–$4 |
| Through-bolt | Very high | Yes (nut accessible) | Full-depth slab with underside access | $1–$5 |
| Epoxy/chemical anchor | High to very high | No (permanent) | Cracked, thin, or low-strength concrete | $5–$15+ (cartridge cost shared) |
Epoxy and chemical anchors: when the concrete isn't cooperating
Chemical anchors are the answer when mechanical anchors would struggle, specifically in cracked concrete, old concrete with lower compressive strength, thin slabs, or situations where you need higher loads than a screw anchor can deliver. Instead of relying on mechanical friction or thread engagement, an epoxy anchor bonds a threaded rod or rebar into the hole using a two-part adhesive that cures solid. The load is transferred through the adhesive bond, which distributes stress over the full embedment length rather than concentrating it at expansion points.
Products like Hilti HIT-RE 500 V3 injection mortar are popular professional choices, but consumer-grade options like Simpson SET-XP or DEWALT anchoring adhesives are widely available at home centers for $30–$60 per cartridge (which covers multiple anchors). The critical variables are temperature and cure time. At 68–84°F (20–29°C), working time is around 30 minutes and full cure takes about 12 hours before you can apply load. Drop to 50–59°F (10–15°C) and your working time extends to roughly 2 hours but full cure stretches to 48 hours. Don't rush it, loading an epoxy anchor before full cure is one of the most common DIY mistakes with chemical anchors.
Hole cleaning is even more critical with epoxy than with mechanical anchors. Concrete dust acts as a bond breaker, and research consistently shows that poorly cleaned holes can reduce pull-out strength by a significant margin. The standard procedure is the blow-brush-blow sequence, done twice: blow compressed air from the bottom of the hole out (at least 90 psi), brush the full depth with a wire brush matched to the bore diameter, blow again, brush again, blow a final time. For holes deeper than 4", use extension tubes on your brush and air nozzle. Once you inject the epoxy, work from the deepest point of the hole outward, filling about two-thirds to three-quarters of the hole depth, then insert your threaded rod with a slight twisting motion to seat it without trapping air voids.
Step-by-step: installing Tapcon concrete screws into solid concrete
This is the most practical method for the majority of patio furniture anchoring projects. It works in any solid concrete slab at least 3" thick, requires no curing time, and the screws can be removed and reinstalled a handful of times if you need to adjust placement. Manufacturer blank" rel="noopener noreferrer">ICC‑ES report ESR‑1671 for ITW Buildex (Tapcon) specifies drilling the specified pilot hole diameter, drilling the hole at least 1/4" (6.35 mm) deeper than the anchor embedment, and cleaning the hole (compressed air) before installing Tapcon concrete screws. Anchor Fastening Technical Guide, Hilti (B25981): run the rotary hammer in hammer+rotation mode, use an appropriately sized carbide SDS or twist masonry bit, keep the bit perpendicular, drill the full depth plus an extra 1/4"–1/2" for dust, then clean with the blow/brush/blow sequence blank" rel="noopener noreferrer">Anchor Fastening Technical Guide — Hilti (B25981). I'll walk through every step the way I'd explain it standing next to you at the patio. For a step-by-step overview on how to bolt down patio furniture, see our detailed guide on how to bolt down patio furniture.
What you need for this method
- 1/4" Tapcon concrete screws, 1-3/4" or 2-1/4" length (longer gives more embedment in thicker slabs)
- 3/16" carbide-tipped masonry bit (this is non-negotiable — Tapcons require this exact pilot hole size)
- Hammer drill or SDS-Plus rotary hammer
- Depth stop or tape marked on the bit to set drilling depth
- Compressed air (a $5 canned air duster works for a few holes; a compressor is better for many)
- Wire brush, 3/16" diameter
- Torque wrench or screwdriver with torque setting (45–60 in-lb range)
- Safety glasses and N95 dust mask
The full installation procedure
- Position your furniture and mark the anchor locations. For a chair leg, mark through the mounting hole (or alongside the leg base if you're using a clip or strap). Use a center punch or nail to mark the spot — this keeps your bit from skating on the smooth concrete surface when you start drilling.
- Set your drill depth. Your hole needs to be at least 1/4" deeper than the anchor embedment to capture the dust that gets pushed down during driving. For a 1-3/4" Tapcon with 1-1/4" embedment, set your depth stop at 1-1/2". Mark the bit with tape if you don't have a depth collar.
- Put on your PPE. Safety glasses and dust mask go on before the drill starts, not after the first cloud of concrete dust hits your face. I learned this the embarrassing way.
- Drill the pilot hole. Set your drill to hammer mode, hold the bit perpendicular to the concrete surface, and apply steady forward pressure without forcing. Let the drill do the work. Keep your wrist straight to avoid angled holes, which will cause the screw to bind or strip out. Drill to your marked depth.
- Clean the hole with blow-brush-blow. Insert the air nozzle to the bottom of the hole and blow out the dust. Insert the 3/16" wire brush and work it up and down the full depth at least twice. Blow again. This step is the one people skip, and it's why screws strip out or spin without gripping. Dust in the hole is a lubricant, not a substrate.
- Drive the Tapcon screw. Insert the screw into the hole and start it by hand if possible, then drive it with your drill or driver on a low-torque setting. The screw cuts its own thread as it goes — you'll feel and hear a slight resistance, which is normal. Drive until the head seats firmly against the fixture or washer.
- Check your torque. Stop at 45–60 in-lb for 1/4" Tapcons. If you're using a standard drill, the moment the screw stops turning smoothly and resistance increases sharply, stop. Overtightening is the single most common Tapcon failure mode — the threads strip out of the concrete and the screw spins freely. If that happens, the hole is compromised. You'll need to move to an adjacent spot or switch to an epoxy anchor in that location.
- Test the connection. Try to rock and lift the furniture by hand. There should be zero play at the anchor point. If there's movement, check that the screw head is fully seated and that the fixture hole isn't oversized (add a washer if needed).
- Seal around the anchor (optional but recommended). Apply a small bead of polyurethane or silicone sealant around the base of each screw head to prevent water from wicking into the hole and freezing in winter climates. This extends the life of both the fastener and the surrounding concrete.
Troubleshooting common Tapcon problems
- Screw spins without tightening: Hole is stripped. Don't try to force it. Use a longer Tapcon in the same hole for more fresh concrete contact, or fill and re-drill 1" away with epoxy anchoring for the next attempt.
- Bit won't make progress after 1": You've likely hit rebar. Stop, withdraw the bit, and move your location at least 2" away. Do not try to drill through rebar with a masonry bit.
- Concrete cracking at surface: Too close to a slab edge, or the concrete is weak/old. Move your anchor point inward at least 1-1/2" from any edge, or switch to epoxy anchors.
- Screw head breaks off: The torque was too high or the hole was slightly undersized. Use a screw extractor kit to remove the stub, and drill a fresh hole.
- Furniture still wiggles: The furniture's mounting hole is larger than the screw head. Add a large-diameter washer to bridge the gap and redistribute the load.
Low-impact alternatives when drilling isn't an option
Not every situation calls for a drill. If you're renting, have paver surfaces, want seasonal flexibility, or just don't feel ready to commit to permanent holes, there are real alternatives that provide meaningful wind resistance. These aren't just stopgaps, I use a combination of these on furniture I move around seasonally.
- Weighted bases and ballast bags: Sandbag-style weight bags designed for furniture legs add 15–25 lbs per leg and are very effective for chairs and smaller tables. They're about $10–$20 each and can be moved easily.
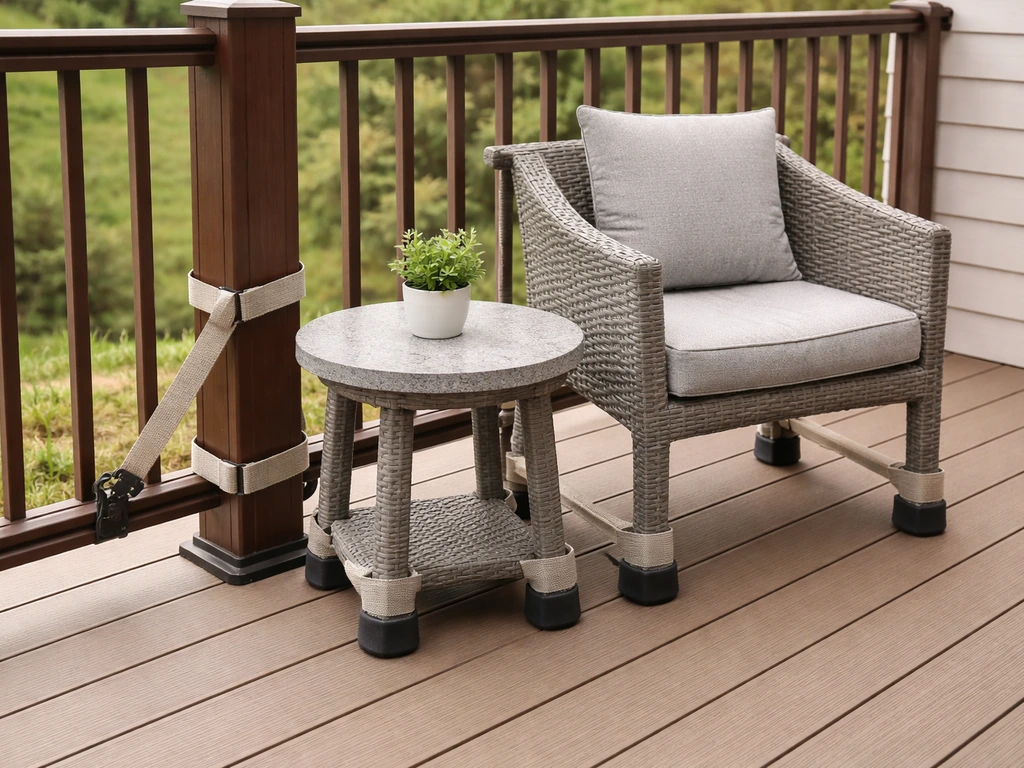
- Patio furniture straps and tie-downs: Ratchet straps or bungee cord kits designed for patio furniture anchor pieces to a wall, post, or fence. These work especially well for tall items like umbrella stands and outdoor bars.
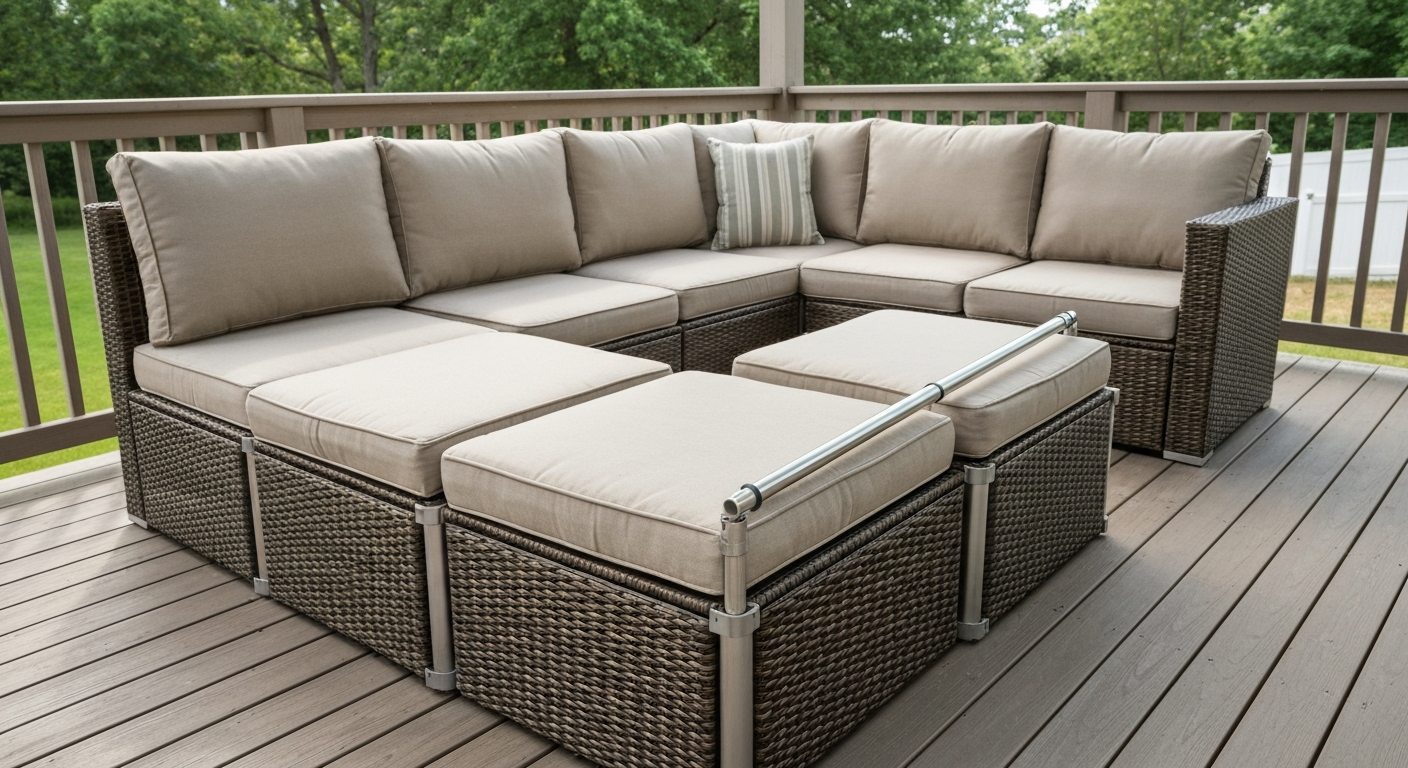
- Anti-tip furniture clips and connector kits: These clip multiple pieces of outdoor sectional furniture together so they behave as one heavier unit rather than individual pieces that can topple separately. If you're working with a modular sofa set, this is the smartest first step. The process of installing these clips is detailed enough to warrant its own walkthrough.
- Cable locks: A simple bicycle-style cable lock can loop through chair frames and around a fixed post or railing. Not wind-rated by any standard, but it prevents casual theft and keeps pieces from scattering in light storms.
- Furniture covers with weighted or staked edges: Heavy-duty covers with pockets for ballast weights or tie-down stakes keep furniture from catching wind when it's not in use.
Special cases: pavers, thin slabs, and cracked concrete
Standard Tapcon installation assumes a solid, uncracked slab with at least 3" of thickness. When your concrete doesn't fit that description, you need to adjust your approach.
Pavers and flagstone
Don't drill into individual pavers. They're typically 2-3/8" to 3-1/8" thick, they sit on compacted sand or a thin mortar bed, and drilling into them risks cracking the paver and gives you essentially no holding depth in the substrate below. Use the no-drill alternatives above, or if permanent anchoring is essential, consider drilling through the paver into a concrete sub-base beneath, which requires confirming that sub-base exists and is thick enough.
Thin concrete slabs (under 3")
Thin slabs limit your embedment depth and create edge-breakout risk. If you can achieve 1" embedment minimum, a 1/4" Tapcon can still work for light furniture, but skip wedge anchors entirely, they need more depth to expand safely. Epoxy anchors are the better choice here because they use the available depth more efficiently by bonding the full length rather than relying on a mechanical expansion zone.
Cracked concrete
If your slab has visible surface cracks wider than about 1/8", mechanical expansion anchors can propagate those cracks further as they expand. Use epoxy anchors, which don't expand and won't worsen existing damage. For hairline cracks (under 1/16"), standard mechanical anchors are usually fine as long as you keep them well away from the crack line.
Corrosion resistance and seasonal maintenance
Anchors you install today should still be working in five or ten years. That means choosing the right corrosion protection for your environment and doing a quick annual inspection.
For most inland patios with normal seasonal exposure, hot-dipped galvanized fasteners are adequate and cost-effective. Within about 1–2 miles of saltwater, or on pool decks where chlorine is present, go straight to 316 stainless steel. It costs more (a box of stainless Tapcons runs about $20–$40 depending on size) but standard zinc-coated anchors will rust through in two to three seasons in a salt or chlorine environment, leaving streaks on your concrete and failing long before they should.
Once a year, usually in spring when you're bringing furniture back out, check each anchor point. Wiggle the furniture at each anchor location, any play means the anchor has loosened or the concrete around it has degraded. On Tapcons, you can often re-snug a slightly loose screw carefully (don't over-torque). For expansion anchors, once they're loose, they need to be replaced or augmented with an epoxy fill. Also inspect for rust staining around anchor heads, which signals moisture infiltration and future corrosion. Seal any open gaps with fresh sealant.
What to tackle next
If your patio setup includes a wood deck instead of a concrete slab, the anchoring method changes completely, you're looking at lag screws into deck joists, not masonry anchors, and getting the joist location right is the whole game. That process is worth reading through separately before you start drilling into deck boards. Similarly, if you have a sectional sofa set or modular pieces that you want to keep together without permanently bolting each one to the ground, learning how to properly install furniture clip connectors between pieces is a practical middle-ground solution that handles lateral movement and wind scatter without any concrete work at all. For a step-by-step guide on joining pieces without drilling into concrete, see how to install patio furniture clips. See our guide on how to clip patio furniture together for step-by-step instructions and connector choices.
FAQ
When should I bolt patio furniture to concrete versus using a low‑impact option (weights, straps, clips)?
Bolt to concrete when permanent, high‑resistance anchoring is required (wind‑prone locations, theft risk, commercial settings, or heavy furniture you don’t plan to move). Choose low‑impact options (concrete‑safe weights, straps, cable locks, anti‑tip clips, or connector kits) when you want temporary removability, to preserve the slab, or if the slab is too thin/cracked for reliable anchoring. Evaluate slab condition, desired permanence, and expected loads: if you need >100–200 lbf resistance to uplift/tip or legal/HOA rules require bolting, use mechanical or adhesive anchors; for light hold or occasional security, use weights/straps/cable locks.
Which anchor types are best for patio furniture on concrete and when to use each?
Concrete screws (Tapcon/Simpson): fast, economical for thin to medium slabs; good for light–moderate loads and removable fixtures. Wedge/expansion anchors (Kwik‑Bolt, wedge anchors): strong, permanent for thicker slabs and heavier loads. Threaded sleeve/through‑bolt (attach nut under slab or use epoxy): use when you can access underside or need maximum tension capacity. Epoxy/chemical anchors (HIT‑RE type): best for cracked concrete, high loads, or when maximizing capacity is needed; require proper hole cleaning and cure time. Choice rules: use concrete screws for simple removable installs on sound concrete ≥2
What tools and materials do I need for drilling and installing concrete anchors?
Basic list: rotary hammer (SDS‑Plus) for ≥3/8" holes or repeated use, hammer drill for occasional small holes, correct masonry bits (carbide SDS or twist masonry for Tapcon), compressed oil‑free air or vacuum, round steel brush sized to hole, blow/brush/ blow cleaning routine, anchors (concrete screws, wedge/ sleeve anchors, adhesive cartridges and mixing nozzle/piston plugs), torque wrench or driver with torque control, socket/impact driver for screws, measuring tape, marker, safety gear (safety glasses, ear protection, dust mask, gloves). For epoxy anchors: caulking gun compatible with cartridge, temperature‑rated adhesive, and time to cure per product data sheet.
Step‑by‑step: How do I install a Tapcon/concrete screw to secure furniture?
1) Mark hole locations through the furniture base. 2) Select pilot bit per manufacturer (e.g., 1/4" Tapcon → 3/16" pilot). 3) Drill perpendicular to full embedment depth + 1/4" for dust using hammer‑drill or rotary hammer. 4) Clean hole with blower or vacuum; follow ICC‑ES guidance to drill deeper than embedment and clean. 5) Position fixture and drive the Tapcon with impact driver or wrench until head seats; don’t over‑torque (follow manufacturer torque or hand‑tighten firmly). 6) Use stainless or coated screws for corrosion resistance and washers if needed. Tapcons are removable but have lower pull‑out capacity than epoxy/wedge anchors.
Step‑by‑step: How to install wedge or sleeve anchors for permanent mounting?
1) Select anchor diameter/length per load and concrete thickness; follow manufacturer embedment and edge‑distance charts. 2) Mark and drill hole diameter exactly as anchor spec with rotary hammer. Drill to embedment depth + 1/4"–1/2". 3) Clean hole with blow/brush/blow sequence. 4) Insert anchor and tighten the nut while keeping the fixture against the concrete—tighten to the specified installation torque (see TDS). 5) Do not exceed torque; use stainless/galvanized anchors and apply sealant over fastener if exposure demands. Wedge anchors expand to bear on concrete; ensure required edge‑distance and spacing to avoid concrete breakout.
Step‑by‑step: How to install adhesive (chemical) anchors?
1) Select product rated for cracked concrete if slab may be cracked; check temperature cure times on TDS (e.g., Hilti HIT‑RE gel/time charts). 2) Drill hole to specified diameter/depth, + extra depth for dust. 3) Clean the hole: blow twice, brush twice with correct brush, blow twice (start at hole bottom). 4) Attach mixing nozzle and inject adhesive from the back of the hole, filling 2/3–3/4 full; use piston plugs for horizontal/overhead. 5) Insert threaded rod or anchor slowly while twisting to expel air; keep rod aligned. 6) Wait full cure per temperature chart before applying load. 7) Torque to specified value when cured. Adhesive anchors give highest capacities and perform well in cracked concrete when installed per instructions.