Patio furniture clips are small plastic or metal connectors that link modular furniture pieces together, keeping sectional sofas, benches, and dining sets from sliding apart on your deck or patio. For most wicker, resin, and aluminum sectionals, you simply hook one clip onto the frame rail of one module, align the mating piece on the adjacent module, and press until it snaps or locks. No drill, no concrete screws, no permit needed. That said, clips alone won't cut it if you live somewhere with regular high winds or if you're working on a permanent installation. In those cases, you'll want to add deck anchors, lag screws, or concrete fasteners alongside your clips.
How to Install Patio Furniture Clips: Guide for Decks & Concrete

Maren Grady
23 Jul 2026
Why you actually need to secure patio furniture (and when clips are enough)
Unsecured patio furniture moves more than most people expect. Even a 20-mph gust can shift a lightweight aluminum chair several inches, and sustained winds in the 40-50 mph range common during summer thunderstorms can send full sectional modules across a deck or over a railing. Beyond wind, furniture that slides freely on composite or painted decking can scratch the surface, and sectional pieces that drift apart are a tripping hazard. Clips solve the immediate joining problem cleanly and cheaply, often for under $15 for a full set. But clips grip frame-to-frame, not frame-to-ground, so if a windstorm can lift the whole set, you need anchoring hardware as well.
The sweet spot for clips-only installs is a sheltered patio or a covered deck where the furniture is used regularly and stored or weighted down before storms. If you're in an open yard, near the coast, or at elevation where wind loads are genuinely high, pairing clips with deck anchors or concrete fasteners is the smarter long-term move.
Clips alone vs deck anchors, concrete anchors, and bolt-down hardware
Before you buy anything, answer two questions: Where is the furniture sitting, and how exposed is it to wind? Your answers will tell you exactly how much hardware you need.
| Situation | Best approach | Typical hardware | Permit likely needed? |
|---|---|---|---|
| Sheltered covered patio, low wind zone | Clips only | Manufacturer-supplied or aftermarket plastic/nylon connector clips | No |
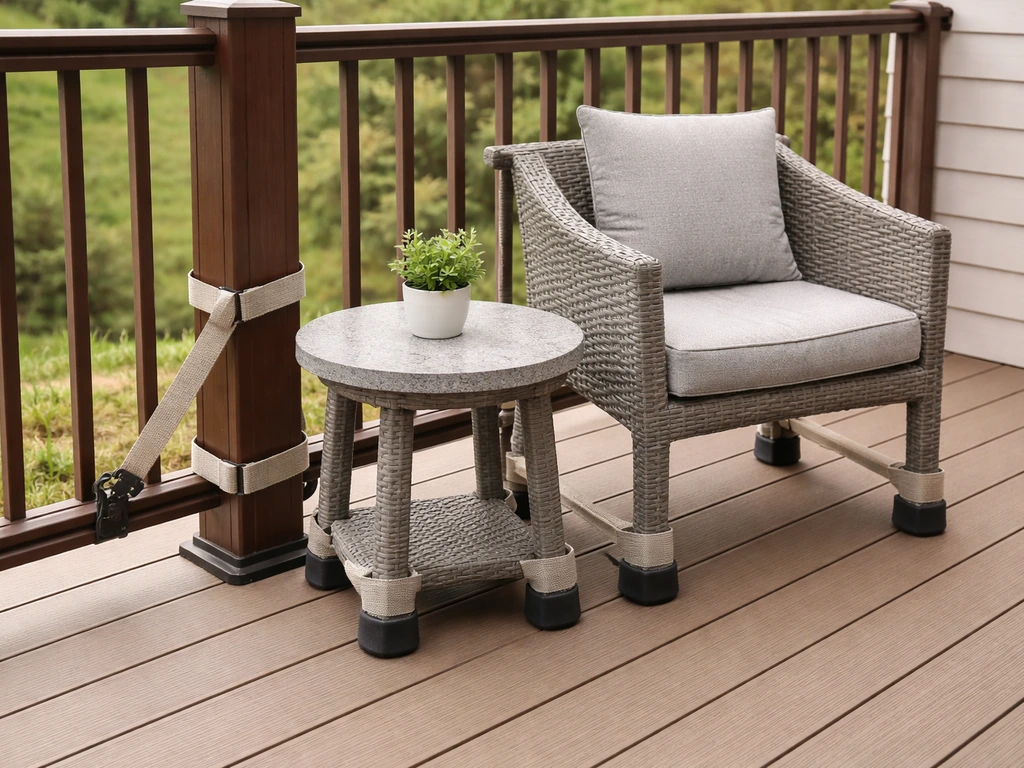
| Open wood or composite deck, moderate wind | Clips + deck anchors or furniture feet straps | Clips, strap anchors through deck boards into joists, lag screws | Rarely |
| Open concrete patio, moderate to high wind | Clips + concrete anchors or concrete screws | Clips, Tapcon masonry screws, expansion anchors, or epoxy anchors | Sometimes |
| Pavers, moderate to high wind | Clips + epoxy-set anchors through paver gaps or furniture weights | Epoxy anchors into concrete base, or heavy ballast alternatives | Rarely |
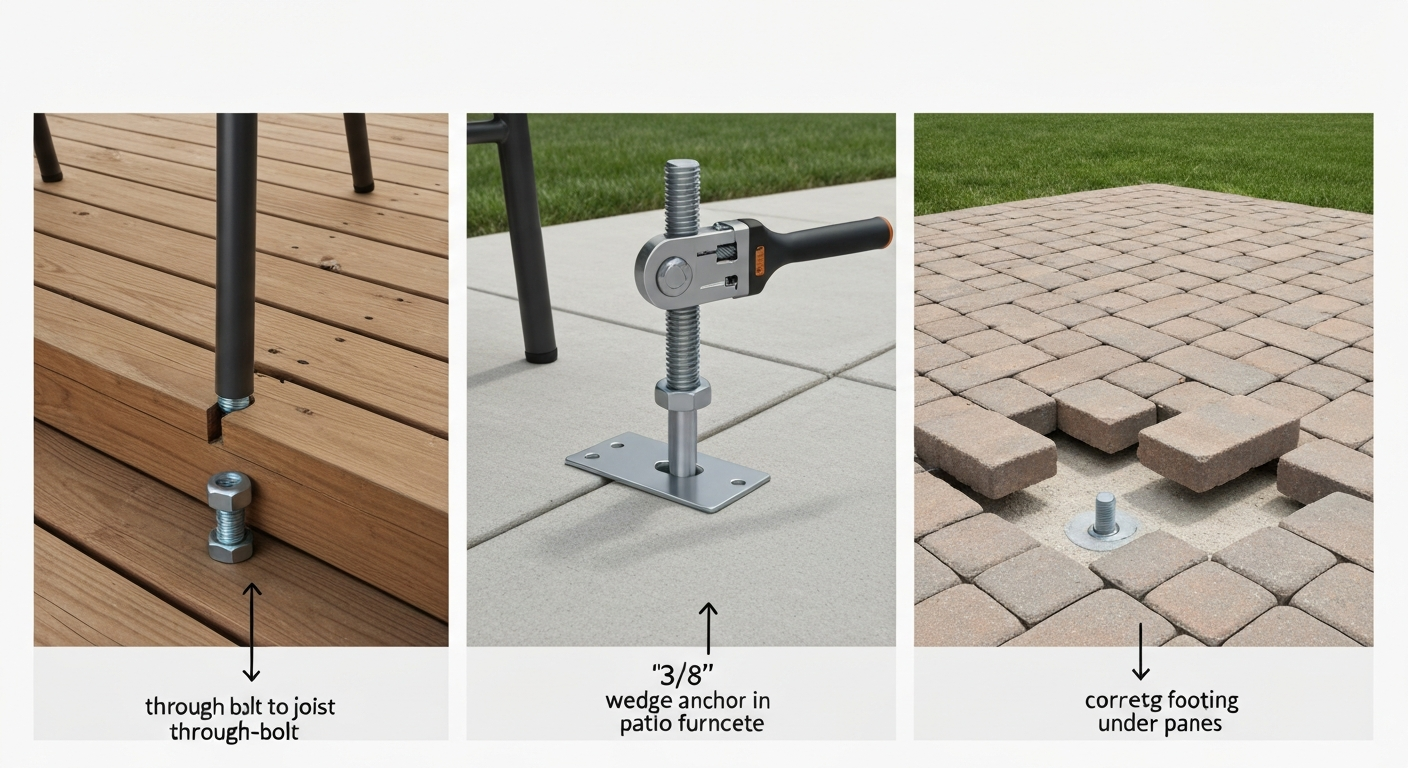
| Permanent fixed installation, any surface, high wind zone or coastal | Bolt-down with through-bolts or lag screws into structure | Through-bolts with washers, lag screws into joists, wedge or chemical anchors in concrete | Often — check local code |
A good rule of thumb: if the furniture will be left out unattended through storm season, anchor it. If you bring pieces in or stack them before any significant weather, clips paired with rubber feet or anti-slip pads are usually sufficient and much easier to remove for storage. Closely related methods, like bolting furniture to a deck or anchoring to concrete, are worth reading up on separately if your situation calls for the more permanent approach. For step-by-step instructions on permanent installations, see our guide on how to bolt down patio furniture.
Patio furniture clip types and what they work with
Not all clips are the same, and using the wrong type on your furniture frame is one of the most common mistakes I see. Here's a breakdown of what's available and what it actually fits.
Snap-fit and press-fit plastic connector clips
These are the most common type, almost always molded from nylon or UV-stabilized thermoplastic. They're designed to hook onto one frame tube and snap around or into the adjacent tube. Most manufacturer-supplied clips for Hampton Bay, Outsunny, and similar wicker or resin sectionals are this style. They install without tools, cost almost nothing to replace (usually $8 to $15 for a pack of 10), and handle moisture and UV well. They work best on standard round or square frame tubing in the 3/4-inch to 1-1/4-inch range. The catch is that clip sizing is not universal. Check your frame's tube diameter before ordering aftermarket replacements.
U-shaped and interlocking plastic clips
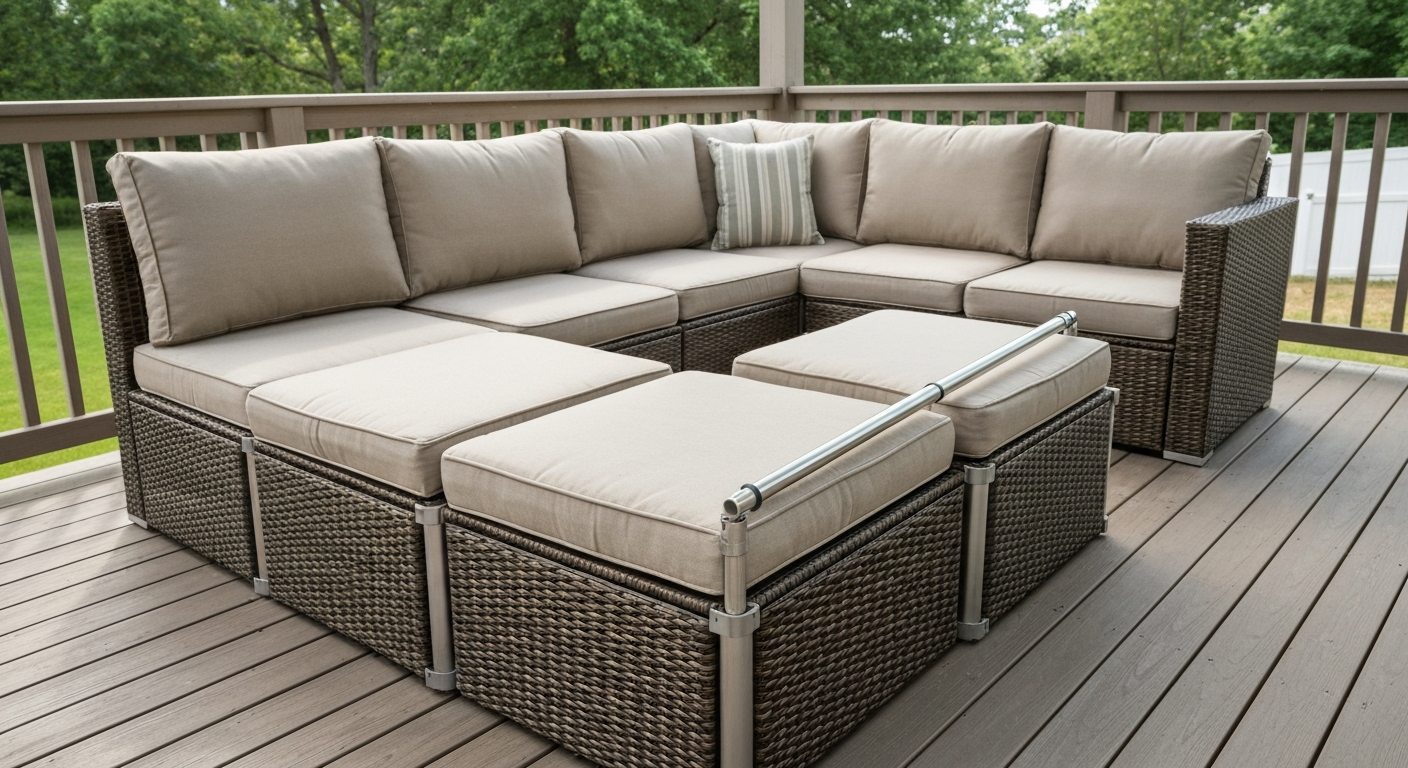
These are slightly more robust than pure snap-fit styles. One half of the clip hooks onto the frame of one module; the other half slots or presses into the first, interlocking the two pieces. Hampton Bay's assembly manuals show this design for their sectional sofa systems. Like snap-fit clips, installation is tool-free and takes about 30 seconds per connection. These are excellent for wicker, all-weather resin wicker, and powder-coated aluminum frames.
Metal interlocking and alligator-style connectors
Zinc-plated or stainless steel clamp connectors, sometimes called alligator clips or buckle connectors, provide a stronger frame-to-frame connection than plastic. They typically use a mechanical cam or screw mechanism, so you'll need a screwdriver or small wrench to tighten them fully. These are a good upgrade for heavier furniture sets or situations where plastic clips have broken repeatedly. They still connect frame to frame only, not to the ground surface. Look for 316 stainless steel if you're near the coast since regular zinc-plated hardware degrades fast in salt air. British Stainless Steel Association, Selection of 316 vs 304 for Seawater Applications states Type 316 is recommended over 304 for seawater/salt-spray exposure because its molybdenum improves resistance to chloride pitting blank" rel="noopener noreferrer">British Stainless Steel Association — Selection of 316 vs 304 for Seawater Applications.
Compatibility by furniture material
| Furniture material | Compatible clip types | Notes |
|---|---|---|
| All-weather wicker / resin wicker over aluminum frame | Snap-fit or U-clip plastic connectors | Most common; use clips sized to the aluminum tube under the wicker weave |
| Powder-coated aluminum frame | Snap-fit, U-clip, or metal interlocking connectors | Avoid bare steel clips that can cause galvanic corrosion on aluminum; use nylon-isolated or stainless clips |
| Steel frame (painted) | Metal interlocking connectors or strap clips | Heavier weight makes plastic clips less reliable for large pieces; metal clips preferred |
| Resin/plastic frame (solid molded) | Snap-fit plastic connectors or bungee-style straps | Many resin pieces have integrated clip points molded in; check manufacturer manual first |
| Natural or painted wood | Strap clips, L-bracket clips, or bolt-down hardware | Frame geometry varies too much for standard tube clips; straps or mechanical fasteners work better |
| Teak or hardwood | Bolt-down hardware or furniture linking straps | Hardwood frames can accept screws cleanly; use stainless to avoid staining the wood |
Tools and materials checklist
What you need varies a lot depending on whether you're just clipping sectional pieces together or doing a full anchor installation into a deck or concrete. I've split this into two lists so you can shop for exactly what your job requires and skip the rest.
For clips-only installations (sectionals, benches, dining sets)
- Manufacturer-supplied connector clips (check your assembly manual first) or aftermarket nylon/plastic replacement clips sized to your frame tube diameter
- Metal interlocking connectors if upgrading to stainless for strength or coastal use
- Measuring tape to confirm frame tube diameter before ordering aftermarket clips
- Flat-head screwdriver or small wrench (only needed for mechanical-clamp style metal connectors)
- Rubber mallet (helpful for stubborn snap-fit clips without cracking the frame)
- Anti-slip pads or rubber furniture feet for added stability under the set
For clip-plus-anchor installations on wood decks
- Drill/driver with 3/8-inch chuck or larger
- Drill bits sized to your fastener (see fastener packaging for correct pilot hole size)
- Lag screws or through-bolts — 1/2-inch diameter lag screws are common; length should reach at least 1-1/2 inches into the joist
- Washers (flat and lock) for all bolted connections
- Stud finder or joist locator to find deck joists under deck boards
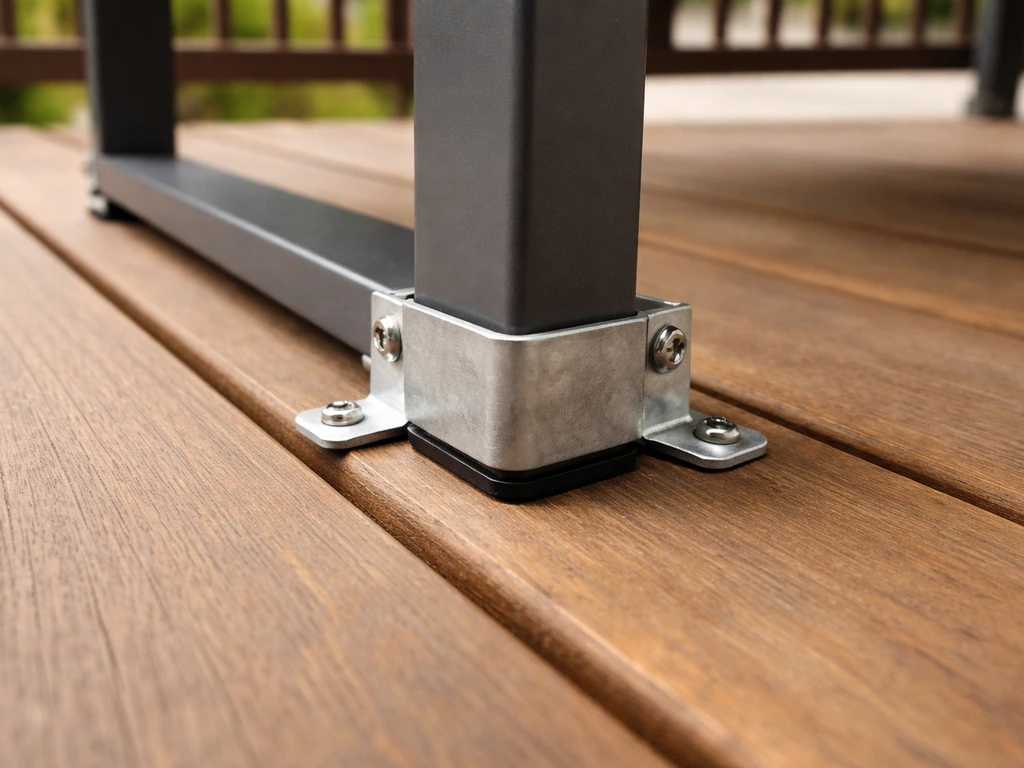
- Furniture anchor plates or L-brackets that match your furniture leg diameter
- Hot-dip galvanized or stainless steel hardware if attaching to pressure-treated ACQ or MCQ lumber (standard steel corrodes fast in treated wood)
- Carpenter's pencil or chalk for marking hole locations
- Socket wrench or impact driver for tightening lag screws (target 25-40 ft-lb for 1/2-inch lags in wood)
- Safety glasses
For clip-plus-anchor installations on concrete
- Hammer drill (not a standard drill — a hammer drill is essential for concrete)
- Carbide-tipped masonry drill bits sized per your anchor manufacturer's spec (e.g., Tapcon 3/16-inch screws require a 5/32-inch bit)
- Tapcon masonry screws or concrete wedge anchors, sized to your bracket
- Compressed air or a hand bulb blower and a stiff wire brush for hole cleaning
- Epoxy adhesive anchor system (e.g., Hilti HIT-RE or similar) if using chemical anchors for heavier loads
- Torque wrench (required for wedge anchors; follow manufacturer's torque table for the anchor diameter and embedment depth)
- Anchor brackets or plates that fit your furniture leg
- Vacuum or shop vac (useful for cleaning deep anchor holes)
- Safety glasses and dust mask
Choosing the right clips and fasteners for your situation
Matching hardware to your surface and wind exposure is where most people shortcut and end up disappointed. Here's how I think through it.
Wind load and connection strength
Plastic snap-fit clips are fine for calm or sheltered conditions, but their frame-to-frame hold is only as strong as the clip's plastic. For high-wind zones (think exposed decks, coastal areas, or anywhere that regularly sees 50+ mph gusts), upgrade to stainless steel interlocking connectors for the piece-to-piece joints, and add anchor hardware to tie the set to the surface. If you're going to anchor into concrete, wedge anchors and chemical epoxy anchors both offer published tensile and shear load tables. Epoxy anchor systems like Hilti HIT-RE provide significantly higher allowable loads at deeper embedments, which matters if you're anchoring heavy cast-aluminum or wrought-iron furniture through a concrete slab. Hilti HIT-RE epoxy product datasheets list allowable tensile and shear bond capacities by rod/anchor diameter and embedment depth blank" rel="noopener noreferrer">Hilti HIT-RE epoxy product datasheets list allowable tensile and shear bond capacities by rod/anchor diameter and embedment depth..
Matching fasteners to surface type
For wood decks, the fastener must reach into a joist or blocking, not just the deck board itself. Deck boards alone won't hold a lag screw under load. Use a stud finder to locate joists and plan your anchor point locations around them. If the furniture leg doesn't land over a joist, add a short blocking section between joists and fasten into that. For concrete, Tapcon masonry screws are the easiest option for moderate loads and require only a hammer drill and the correct carbide bit. For heavier loads or permanent installs, wedge anchors or epoxy-set threaded rods give you more holding power. Always follow the manufacturer's drill bit size and minimum embedment depth. For Tapcon screws, the minimum embedment is 1-3/4 inches; going shallower than that and the screw can strip out of the concrete under load.
Corrosion and material compatibility
This is where I've made expensive mistakes. Fastening aluminum furniture frames with bare carbon steel hardware causes galvanic corrosion. Over a season or two, you'll get ugly white-gray pitting on the aluminum and rust weeping from the fastener. Use stainless steel hardware (304 grade for most locations, 316 grade for coastal or salt-spray environments) and add nylon or EPDM isolating washers between the aluminum and the metal fastener wherever they contact directly. If your deck is built from pressure-treated lumber (ACQ or MCQ treated), use hot-dip galvanized or stainless fasteners only. Standard zinc-plated hardware degrades rapidly in contact with modern preservative-treated wood.
Preparing your furniture and surface before you install anything
Skipping prep is how you end up with crooked clips, stripped pilot holes, and anchor points that miss the joist entirely. Take 20 minutes here and the actual install goes smoothly.
- Lay out all furniture pieces in their final arrangement. For a sectional, configure the corner and armless modules exactly as you want them before marking anything. This is the step I always rush and always regret.
- Measure the frame tube diameter on each piece where clips will attach. Tube diameters vary by manufacturer and even between product lines from the same brand. Write the measurement down.
- Locate the manufacturer-specified clip attachment points on each module. Most sectionals have small notches, molded slots, or exposed tube sections specifically designed for connector clips. If you're using aftermarket clips, identify the equivalent points on the frame.
- For deck anchors: use a stud finder or probe tool to map your joist locations and mark them on the deck surface with chalk. Confirm a joist runs beneath each intended anchor point before drilling anything.
- For concrete anchors: mark your anchor hole locations with a pencil or chalk. Use a layout square to keep holes perpendicular. Check that you're not drilling near existing abandoned holes or within the minimum edge distance specified by your anchor manufacturer (usually 1-1/2 to 2-1/2 times the anchor diameter from the edge of the slab).
- Wipe down frame surfaces where clips will seat. Dirt or old wax on the frame can prevent clips from seating fully and clicking into place.
Step-by-step: clipping patio furniture pieces together
This covers the frame-to-frame joining process for sectionals, linked benches, and dining sets using snap-fit, U-clip, or interlocking connector hardware. For a short, step-by-step guide on how to clip patio furniture together, see our detailed guide. The process is nearly identical across brands once you have the right clip type.
For snap-fit and U-shaped plastic connector clips
- Position the two furniture modules side by side in their final arrangement. The frames should be touching or nearly touching along their shared edge.
- Locate the clip attachment points on both pieces — usually a short section of exposed frame tube or a molded slot.
- Orient the clip so the hook or channel faces the first module's tube. Slide or hook the clip's first side onto the tube, pressing it inward until it seats against the frame. You should feel it catch on the tube rather than sliding freely.
- Pivot the clip's second side toward the adjacent module's tube. Align it carefully — misaligned clips almost always result in a partial snap that feels solid but pops off under load.
- Press firmly until you hear or feel a definite click. If the clip won't seat with hand pressure, place a folded cloth over the clip and tap gently with a rubber mallet. Don't hammer directly on the plastic.
- Repeat for all clip attachment points on the shared edge. Most manufacturer manuals show 2-4 clips per module joint depending on the piece size.
- Test the connection by pushing the two pieces apart firmly. A properly seated clip set should show no gap opening. If a module shifts more than a few millimeters, recheck each clip — one is likely only partially engaged.
For metal interlocking and alligator-style connectors
- Position modules as above with frames touching along the shared edge.
- Open or loosen the connector clamp mechanism (usually a wing nut, cam lever, or set screw) until it will slip over both frame tubes.
- Position the connector so one jaw captures the tube on the first module and the other jaw sits against the tube on the second module.
- Close or tighten the clamp mechanism, drawing the two frames together. Tighten firmly but not so hard that you deform the frame tube — this is especially important on thin aluminum.
- Check that both jaws have full contact with the tube surface, not just a corner or edge. A connector that's clamped at an angle will loosen and eventually fail.
- Repeat for all connection points, then perform the push-apart test as above.
Linking dining sets and benches
Dining chairs and benches aren't usually joined to each other the way sectional modules are, but you can link a bench to a fixed dining table frame using furniture linking straps or L-bracket clips screwed to the underside of the table. For benches with wooden frames, a short carriage bolt through both legs into a shared cross-member works cleanly. For metal-frame benches and chairs, strap-style connectors looped around adjacent legs and tightened with a buckle or cam lever keep chairs aligned without any drilling.
Step-by-step: installing clip and anchor systems on wood decks
If your deck is in an exposed location or you're keeping the furniture set in place semi-permanently, anchoring through the deck boards and into the joists below is the right move. See our guide on how to anchor patio furniture to deck for step-by-step instructions. For step-by-step instructions on how to secure patio furniture to deck, see our guide. For detailed methods on lag screws, deck anchors, and best practices for joist attachment, see how to anchor patio furniture. This is where the project jumps from tool-free to actually requiring a drill, but it's still a half-morning job for a beginner.
- First, clip your furniture pieces together using the process above. It's much easier to work on the assembled set than to anchor individual modules separately.
- Use a stud finder or probe to confirm joist locations under the deck boards at each planned anchor point. Mark with chalk. If a furniture leg doesn't land near a joist, plan to drill at an angle into blocking or reposition the set slightly.
- Select your anchor bracket or plate. L-shaped anchor brackets that screw to the side of a furniture leg and then lag-bolt down through the deck board and into the joist are the most reliable and least visible option. Furniture strap anchors that loop around legs and bolt to the deck are a simpler alternative but less permanent.
- Hold the bracket in position against the furniture leg, mark the hole locations on the deck board and leg with a pencil.
- Drill pilot holes through the deck board and into the joist. Pilot hole diameter should be about 75% of the lag screw's shank diameter. For a 1/2-inch lag screw, that's roughly a 3/8-inch pilot hole. Going without a pilot hole in hardwood decking will split the board.
- If attaching to the furniture leg itself, use a drill bit appropriate for the leg material (aluminum needs a sharp metal bit; drill at low speed to avoid stripping the hole).
- Set the anchor bracket against the furniture leg and the deck surface. Drive lag screws through the bracket, through the deck board, and into the joist. Tighten with a socket wrench to approximately 25-40 ft-lb for 1/2-inch lag screws. The right feel is when the washer just begins to slightly indent the wood surface. Overtightening crushes the wood fibers and actually reduces holding strength.
- If you're in an area with pressure-treated ACQ lumber decking, confirm you've switched to hot-dip galvanized or stainless steel fasteners. Using standard zinc-plated lag screws in treated lumber is one of the most common errors I see, and they'll be visibly corroding within a year.
- Repeat for all anchor points. A 3-module sectional typically needs a minimum of 4 anchor points: one near each outer corner of the assembled set.
- Test the whole assembly by pushing firmly against the set from multiple directions. There should be minimal movement and no creaking from anchor points.
Anchoring to concrete and pavers
Concrete is arguably easier to anchor into than wood once you have a hammer drill, because you don't have to locate hidden joists. The challenge is that mistakes are harder to fix, a stripped or misplaced anchor hole in concrete is a pain to repair. Take your time with the layout. For step-by-step guidance on how to secure patio furniture to concrete, consult the dedicated guide.
Using Tapcon masonry screws (best for moderate loads)
- Mark your anchor hole locations with a pencil or chalk. Check that no location is within 1-1/2 inches of a slab edge and that you're not drilling into an existing hole or crack.
- Fit your hammer drill with a carbide-tipped masonry bit in the size specified by the Tapcon manufacturer for your screw diameter (e.g., a 3/16-inch Tapcon screw requires a 5/32-inch carbide bit).
- Set the drill to hammer mode. Hold it perpendicular to the concrete surface and drill to the required depth. For 3/16-inch Tapcons, minimum embedment is 1-3/4 inches, so drill at least 1/2-inch deeper than that to allow for dust in the bottom of the hole.
- Remove the bit and clear debris from the hole. Use a hand bulb blower, compressed air, or a shop vac to remove all concrete dust. A dirty hole prevents the screw from reaching full embedment and seriously reduces holding strength.
- Position your anchor bracket over the hole and drive the Tapcon screw through the bracket and into the hole using a drill/driver or impact driver. Drive until the screw head is snug against the bracket but don't overtorque — Tapcon screws strip their own threads in concrete if run too fast or too hard.
- Repeat for all anchor points, then test by pushing the furniture set firmly.
Using epoxy chemical anchors (best for heavy loads or pavers)
- Drill holes to the diameter and depth specified by the epoxy anchor manufacturer. Hilti HIT-RE and similar products provide exact drill-bit size and embedment depth tables for each threaded rod diameter and load requirement.
- Clean the hole thoroughly: blow out dust with compressed air, brush the walls with a wire brush to remove loose material, and blow out again. This step is non-negotiable. Epoxy bond strength drops significantly in a dirty hole.
- Load the epoxy cartridge into the dispensing tool, dispense and discard the first small amount of mixed epoxy (to purge any unmixed material), then inject the cartridge into the bottom of the hole and fill from the bottom up to avoid air pockets.
- Insert the threaded rod immediately by pushing it in with a twisting motion to distribute epoxy around the rod. Wipe excess epoxy from the surface.
- Do not disturb the anchor until the epoxy has fully cured. Cure time depends on the product and temperature; consult the manufacturer's datasheet. At 70°F, most products reach working strength in 24 hours, but can be faster or much slower at temperature extremes.
- After cure, attach your anchor bracket to the threaded rod with a nut and washer, and torque per the manufacturer's table for the rod diameter.
- For pavers: epoxy anchors can be set into the concrete base beneath the paver layout, either by lifting a paver and drilling through the base, or by drilling through a paver and into the base. Alternatively, furniture weights or ballast bags looped through the frame are a completely non-destructive option for paver patios.
Removal, seasonal storage, and maintenance
One of the biggest advantages of connector clips over bolt-down hardware is how fast they come off. Most snap-fit and U-clips release by pressing a tab or prying gently with a flathead screwdriver at the clip's seam. Metal cam connectors loosen with a half-turn. The whole set can be clipped apart and stacked for storage in under 10 minutes. Make it a habit to inspect clips each time you take them off. Cracked, brittle, or discolored plastic clips are done. Replacement packs are cheap, and a broken clip at the start of the season is much easier to deal with than one that fails mid-summer.
For lag-bolt and anchor installations, seasonal removal is obviously more involved, but it's still doable. Unbolt the anchor brackets, fill the lag holes in the deck board with exterior-grade wood filler or stainless cap screws flush-set for the off-season, and store the brackets with the furniture. Concrete anchor points (especially epoxy set rods) are usually left in place year-round since refilling and redrilling is disruptive. Cap the threaded rods with plastic thread protectors or duct tape to keep debris out.
Troubleshooting common problems
Clips keep popping off
The most common cause is a size mismatch. If the clip's channel is even a few millimeters wider than the frame tube, it won't seat fully and will pop free under normal use. Remeasure your tube and order clips to match. The second cause is a warped or bent frame. If the two modules aren't coplanar (meaning they're at slightly different heights or angles), the clips are holding under tension and will eventually work loose. Try adjusting the furniture on a level surface before clipping.
Lag screw won't tighten or spins freely
You've hit the gap between deck boards and missed the joist, or the pilot hole is too large. Remove the screw, check joist location with a probe, and redrill into solid wood. If the pilot hole is stripped, move to the next joist bay and start fresh. Never try to fix a stripped lag hole by going up a screw size in the same hole, it won't hold.
Tapcon screw strips out of concrete
This almost always means the hole wasn't cleaned properly, the bit was the wrong diameter, or the hole was drilled in weak or hollow concrete. Remove the screw (they back out with a reverse-drive), clean the hole completely, confirm the bit diameter matches the Tapcon spec, and try again in a slightly different location if the concrete in the original spot looks crumbly or aggregate-heavy.
Clips or fasteners corroding after one season
Zinc-plated hardware on aluminum frames or pressure-treated wood is the usual culprit. Swap to stainless (316 grade near the coast, 304 grade everywhere else). If plastic clips are cracking after one season, the material is likely not UV-stabilized. Reorder specifically from listings that mention UV-resistant or UV-stabilized nylon and check that the product description confirms weatherability.
Safety and permit considerations
Connector clips and moderate anchor installations for furniture are generally below the threshold that triggers a building permit. However, once you're bolting into a structural deck or making permanent modifications to a concrete slab, it's worth a quick call to your local building department. Some municipalities treat any deck penetration as a permit item, especially in high-wind or seismic zones. Coastal areas in particular often have wind-load requirements for outdoor structures and accessories. If you're in a HOA community, check the CC&Rs before drilling into a concrete patio that may be considered common property. For rental properties, get written permission from the owner before any fastener-based installation.
From a practical safety standpoint: always wear safety glasses when drilling concrete, and use a hammer drill rather than a standard drill. A regular drill spinning a masonry bit with the hammer function off will overheat the bit, produce an undersized hole, and potentially shatter the bit tip. It's not worth saving the rental fee on a hammer drill for a job that requires one.
FAQ
What types of patio furniture clips are available and which materials are they compatible with?
Common clip types: 1) Snap/press-fit plastic clips (nylon/thermoplastic) — used for wicker/resin/rattan modular sectionals; hook one frame then press the mating clip into place. 2) Metal interlocking clamps or “alligator” connectors (zinc-plated or stainless) — for heavier frames, metal or aluminum furniture, or higher-strength connections; often tighten with a screwdriver or wrench. 3) U‑shaped or bracket connectors that bolt to frame tubing — used when a mechanical fastener is needed for extra security. Compatibility: - Wicker/resin/rattan: plastic snap clips or molded connector clips. - Metal/aluminum: metal clamps, stainless or painted clips sized for tubing. - Wood frames: wood-to-wood brackets or clips that accept screws/bolts into wood. - Resin/composite: check clip geometry; plastic clips typically match. Consider corrosion and galvanic risk: use stainless (316 in coastal areas) or isolated washers when attaching dissimilar metals to aluminum frames.
How do I decide whether clips alone are enough or I need anchors/bolts?
Decide based on furniture weight, wind exposure, use, and surface type: - Clips alone: fine for low‑profile, interlocking sectionals used on calm patios where pieces only need to sit together horizontally. - Add mechanical fasteners (bolts/clamps): recommended for light furniture that may shift under use or occasional wind. - Anchors/bolt-down: required when wind uplift/overturning is a concern, for heavy commercial seating, for securing to decks or concrete to prevent theft, or where local code/HOA requires anchoring. Consider wind load roughly: if your area can see gusts over ~30–40 mph, or the furniture is lightweight and has a high center of pressure (e.g., tall backs), plan on anchors or bolted connections.
What tools and materials will I need for typical installations on wood deck, concrete, and pavers?
Basic tools: tape measure, pencil/marker, level, drill (regular and hammer drill), assortment of drill bits (wood and masonry carbide bits), screwdriver set, socket/wrench set, hammer, wire brush/air blower for holes, caulk gun (for epoxy anchors), adjustable pliers. Materials: manufacturer clips (plastic or metal), stainless or hot-dip galvanized lag screws/through‑bolts for wood, Tapcon or stainless masonry screws for concrete, wedge anchors or chemical/epoxy anchors for heavy loads, isolation washers (nylon/EPDM) to prevent galvanic corrosion, exterior-grade sealant for holes on decks, and appropriate washers/nuts. PPE: safety glasses, dust mask, hearing protection, gloves.
Step-by-step: how to install press-fit or snap furniture clips to join sectional pieces?
1) Confirm clip type matches frame tubing dimension and orientation. 2) Position the two sectional pieces in final layout on a flat surface. 3) Clean mating frame areas of dirt/debris. 4) Hook one side of the clip onto the first frame member as instructed (or align bracket with tube). 5) Align the second module so frames meet, press the clip until it seats and locks (you may feel a snap). 6) Repeat along the length at recommended spacing (manufacturer guidance or at every frame intersection). 7) Test by gently pulling modules apart and by normal seating to verify secure engagement.
Step-by-step: how to attach clips/anchors to a wood deck or composite deck?
1) Locate blocking or joist under the deck board; you must engage framing for strength. 2) Mark clip or anchor location on deck board in final furniture position. 3) If using surface brackets, drill pilot holes through deck board and into framing per fastener instructions. 4) Use hot‑dip galvanized or stainless lag screws or through‑bolts; for through‑bolts, drill clearance hole and use a washer and nut under the joist/blocking. 5) Torque lags to snug—do not overdrive; a guide is ~25–40 ft‑lb for 1/2" lag into structural framing but follow fastener manufacturer specs. 6) Seal exposed holes on composite or treated wood with appropriate sealant to prevent moisture intrusion. 7) For composite decking, consult decking manufacturer for recommended fasteners and spacing to avoid voiding warranty.
Step-by-step: how to attach clips/anchors to concrete or pavers?
Concrete: 1) Lay out and mark anchor locations. 2) Use hammer drill with carbide masonry bit sized to anchor manufacturer specs. Drill to required depth. 3) Blow and brush-clean the hole thoroughly. 4a) For mechanical anchors (wedge/sleeve): insert anchor, hammer home per instructions, then torque to specified value. 4b) For concrete screws (Tapcon): clear hole, insert screw and drive until flush; follow manufacturer minimum embedment (e.g., 1‑3/4" for many sizes). 4c) For chemical/epoxy anchors for heavy loads: inject epoxy, insert threaded rod with twisting motion to fully coat, leave recommended gap to top, and cure fully before loading. Pavers: where possible, anchor into the concrete footing/bed below pavers or install a concrete footer under the paver area — do not rely on loose paver base; use epoxy‑set anchors into the concrete base.