Bolting down patio furniture means driving lag screws or through-bolts into wood deck joists, setting wedge or epoxy anchors into concrete slabs, or using approved hardware through pavers into a structural base beneath, and doing it with corrosion-resistant fasteners sized to the load. Most homeowners can handle this in an afternoon with a drill, a hammer drill (rentable for about $40/day), and hardware that costs under $30 per anchor point. The method you choose depends entirely on what surface you're working with and how permanent you want the installation to be.
How to Bolt Down Patio Furniture: Secure Decks & Concrete

Maren Grady
17 Jul 2026
When and why bolting furniture down actually matters
Wind is the most urgent reason. A 40 mph gust can send an aluminum chair airborne, and a 60 mph gust, common in coastal areas, the Midwest, and during summer thunderstorms, can launch a full dining set across a yard or into a neighbor's fence. Beyond wind safety, theft is a real concern: heavy cast-iron or teak pieces are frequent targets in urban and suburban neighborhoods. Stability is the third driver, especially for bar-height chairs on uneven decks or heavy umbrella bases that tip even in moderate breezes. ASCE 7, the structural loading standard referenced in the International Building Code, treats outdoor equipment attachments as nonstructural components that still require designed connections in high-wind or seismic zones. ICC (IBC/IRC), Chapter 16 Structural Design (references ASCE 7 requirements) clarifies how model codes incorporate ASCE 7 anchorage requirements for nonstructural components and equipment attachments, supporting the need to design attachments for governing wind and seismic loads ICC (IBC/IRC) — Chapter 16 Structural Design (references ASCE 7 requirements). In practical terms, that means if you're in a hurricane zone or a high-wind corridor, bolted anchoring isn't optional, it's the right thing to do.
A quick note on HOA rules: many associations restrict permanent anchoring because it can affect the appearance of a patio or deck surface. Before you drill a single hole, check your HOA covenants and any local permit requirements for structural modifications to a deck. For most residential furniture anchoring, no permit is required, but if you're bolting a pergola post or a heavy shade structure, that conversation is worth having first.
Choosing the right anchoring method before you buy hardware
Here's where I've watched people waste money: they buy a bag of concrete anchors and then realize they have composite decking, or they grab lag screws and then discover their 'concrete' patio is actually loose pavers over sand. The surface dictates the method, and the furniture material affects your attachment point. Use this table to match your situation before you spend anything.
| Surface | Furniture Material / Attachment Point | Recommended Method | Removable? |
|---|---|---|---|
| Wood deck (joists accessible) | Metal frame with welded foot plate | Lag screw through foot plate into joist | Yes, with effort |
| Wood deck (joists accessible) | Wood or metal frame, no foot plate | Deck anchor bracket + lag screw | Yes |
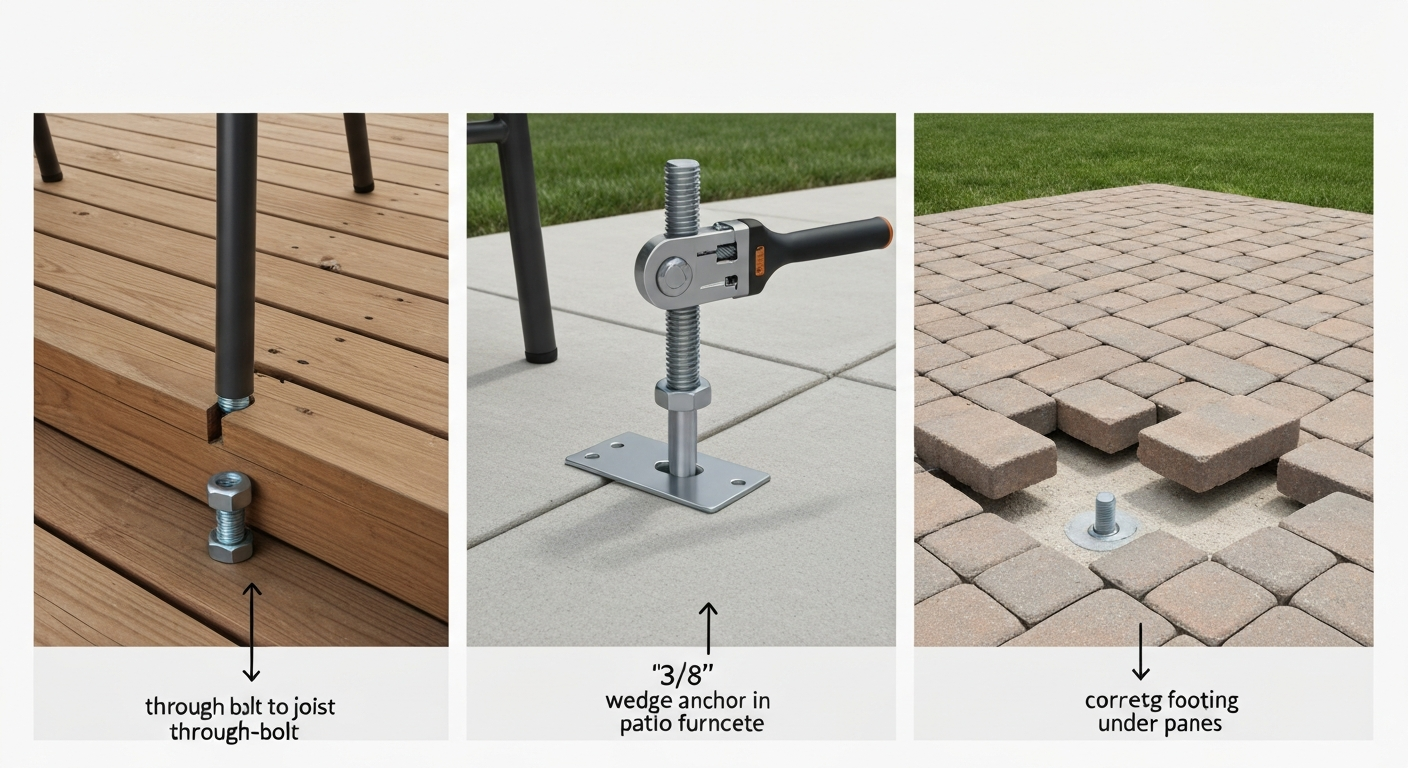
| Wood deck (any) | Heavy piece, high uplift concern | Through-bolt with washer + nut beneath joist | Yes |
| Composite decking (e.g., Trex) | Any furniture frame | Bolt through board AND into joist — never board alone | Yes |
| Solid concrete slab | Metal or wood frame | Wedge anchor or sleeve anchor | Difficult; mostly permanent |
| Solid concrete slab | Any frame, high-load or near edge | Epoxy (chemical) anchor | Permanent |
| Interlocking pavers over sand | Any furniture | Remove paver, set concrete footing, reattach | No — structural base needed |
| Pavers over concrete slab | Light-to-medium furniture | Through-paver wedge anchor into slab below | Difficult |
| Brick or CMU | Any furniture | Hollow-unit or grout-filled cell anchor (per ICC-ES tables) | Mostly permanent |
One important rule for composite decking: Trex and similar brands explicitly warn in their installation manuals that fasteners relying only on the decking board, not passing into the joist beneath, are not approved for structural anchoring and can void your warranty. Always bolt through the board and into the joist below.
Tools, fasteners, and hardware: what to buy and what to skip
The tool list
- Cordless drill/driver (you probably already own one — any 18V model works for wood)
- Rotary hammer drill with SDS+ chuck — rent this for concrete work, about $35–45/day at most home centers
- Carbide-tipped masonry drill bits sized to your anchor diameter (sold individually or in sets for about $8–15 each)
- Torque wrench or socket set (3/8" drive handles most 1/4" to 1/2" fasteners)
- Wire brush and compressed air can (or a hand bulb pump) for hole cleaning in concrete
- Tape measure, carpenter's pencil, and a center punch
- Safety glasses and hearing protection — non-negotiable with a rotary hammer
Fastener materials: why corrosion resistance matters more than you think
Outdoor anchors fail from corrosion far more often than from overloading. FHWA / Ground Anchors and Anchored Systems (discussion of failure modes and design practice) documents common anchor failure modes, concrete breakout, pullout/bond loss, steel tensile/shear failure, and corrosion, and recommends mitigation such as increased embedment, spacing/edge distance, backing plates or through‑bolting, adhesive anchors where appropriate, and corrosion‑resistant materials. The standard to know is ISO 3506, which classifies stainless steel fasteners by grade: A2 is equivalent to 304 stainless (fine for most inland patios) and A4 is equivalent to 316 stainless (required for coastal locations, pool surrounds, or anywhere chloride exposure is a concern). For carbon steel hardware, hot-dip galvanizing to ASTM A153 is the minimum acceptable coating. Hilti and Simpson Strong-Tie both reference these standards in their anchor selection guides. In practice: spend the extra dollar or two per fastener to go stainless. A bag of 316 stainless hex bolts costs about $12–18 at a hardware store versus $6–8 for zinc-plated equivalents that will rust through within two or three seasons in a humid climate.
Fastener sizes and specs to keep on hand
| Fastener Type | Common Size for Patio Furniture | Pilot Hole Size | Minimum Embedment / Notes |
|---|---|---|---|
| Lag screw (wood deck) | 5/16" x 3" or 3/8" x 3.5" | 60–75% of shank diameter for softwood | Full thread engagement into joist required |
| Through-bolt (wood deck) | 1/2" x length to suit assembly | 17/32" to 9/16" clearance hole | Washer + nut both sides; AWC DCA-6 guidance |
| Wedge anchor (concrete) | 3/8" x 3" or 1/2" x 3.75" | Matches anchor OD exactly | Min. ~1-5/8" (3/8") or ~2-1/4" (1/2") embedment in solid concrete |
| Sleeve anchor (concrete) | 3/8" or 1/2" | Matches anchor OD | Follow manufacturer table; lower load than wedge |
| Epoxy anchor + threaded rod (concrete) | 3/8" or 1/2" all-thread rod | Matches rod/anchor OD | Hilti HIT-RE 500 V3: blow-brush-blow cleaning required; load only after full cure |
Budget note: a 10-pack of 3/8" x 3" hot-dip galvanized wedge anchors runs about $18–25. A comparable pack of 316 stainless sleeve anchors will be $30–45. If you're anchoring just two or three pieces, buy individual anchors rather than full boxes, most hardware stores sell them individually for $1.50–4 each depending on size and material.
Template, measurement, and placement tips for a clean install
The most common mistake I've made (and seen others make) is drilling anchor holes first and then realizing the furniture leg doesn't line up with the joist, or the anchor hits a paver joint at an angle. Take the time to lay this out before you drill anything.
- Set the furniture in its final position and mark all four feet or anchor points with a chalk line or painter's tape. Take a photo before you move it — you'll thank yourself later.
- For wood decks: use a stud finder or tap-test to locate joists beneath the decking boards. Anchor points should land over a joist or a doubled joist wherever possible. If a foot sits between joists, you'll need a blocking piece nailed between joists first.
- For concrete: look for expansion joints and avoid drilling within 4–6 anchor diameters of a joint edge. Hilti and Simpson ICC-ES tables give minimum edge distances — for a 3/8" wedge anchor, that's typically around 1.5" to 2.5" minimum from a free edge (always check the specific product's table).
- Make a cardboard template: trace the furniture foot or bracket onto cardboard, punch holes where the fasteners go, and use it to transfer the hole pattern to the surface. This is the single best trick for getting symmetrical bolt patterns right the first time.
- Mark hole centers with a center punch before drilling. On concrete, this gives your masonry bit a seat so it doesn't skate across the surface. On wood, it prevents the drill from wandering.
- Double-check spacing between anchor points. If two anchor holes end up too close together (less than the critical spacing listed in the anchor's ICC-ES report), the load capacity drops significantly — you don't want that.
- For a 'photo-ready' look, use a framing square to verify the furniture is square to the deck edge or patio edge before finalizing hole positions. It takes 60 extra seconds and makes the finished install look intentional rather than accidental.
Bolting to wood decks: what to expect going in
Wood and pressure-treated lumber is the most forgiving surface to anchor into, which is why most beginners start here. For step-by-step instructions on how to anchor patio furniture to deck, see our dedicated guide outlining tools, fasteners, and placement tips. A properly installed lag screw or through-bolt into a sound joist can handle significant uplift and lateral load, more than most patio furniture will ever generate in wind. The realistic challenge is finding the joist, drilling a clean pilot hole without splitting the wood, and choosing fasteners that won't corrode and stain your deck boards. Expect this work to take about 30–60 minutes per anchor point if you're doing it for the first time.
One honest caveat: if your deck joists are old, soft, or showing signs of rot, bolting furniture down is not going to help you, it may actually pull weakened wood apart under stress. Probe any suspicious lumber with a screwdriver before trusting it with an anchor. If it sinks in more than 1/4" with moderate pressure, that joist needs to be sistered or replaced before you anchor anything to it.
Placement guidance for wood decks: position anchor points directly over joists (typically spaced 16" or 24" on center). If your furniture legs fall between joists, install a 2x blocking piece between adjacent joists and anchor into that. For furniture with a base frame rather than individual legs, you have more flexibility, you can often angle the bracket slightly to catch a joist.
Step-by-step: lag screws and deck anchor brackets on wood decks
This method works well for furniture with welded foot plates (like iron bistro chairs or some aluminum dining sets) or when you add a small steel bracket or commercial deck anchor to the furniture leg. For step-by-step guidance and recommended hardware, see our guide on how to secure patio furniture to deck. It's removable, you can back the lag screw out in spring and fill the hole with a wooden plug if needed. For a removable, non‑permanent option that secures legs without through‑bolting, see a step‑by‑step guide on how to install patio furniture clips.
- Position the furniture and mark the anchor locations using your cardboard template. Confirm each mark sits over a joist by tapping or using a stud finder.
- Move the furniture aside. Use a center punch to mark the drill point precisely.
- Drill the pilot hole. For a 5/16" lag screw into softwood (typical pressure-treated pine), drill a pilot hole at roughly 60–70% of the shank diameter — about a 3/16" to 7/32" bit. For a 3/8" lag screw, use a 1/4" pilot bit. Drill straight down to at least the depth of the lag screw's threaded portion. A piece of tape wrapped around the bit marks your target depth.
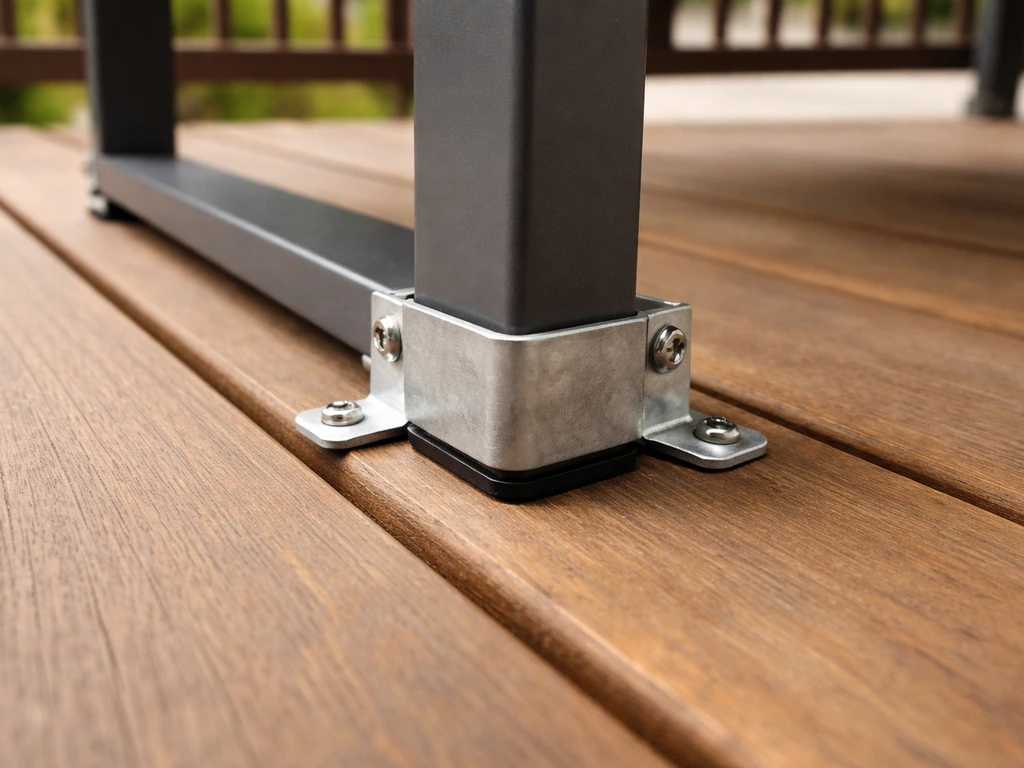
- If you're using a deck anchor bracket (a metal L-bracket or U-bracket that clamps to the furniture leg), position it on the leg first and mark the foot plate holes. These brackets typically accept a 5/16" or 3/8" lag through the foot flange.
- Drive the lag screw with a socket wrench or impact driver set to low torque. Do not overtighten — snug plus a quarter turn is enough in softwood. Crushing the wood fibers reduces holding power rather than increasing it. This is the mistake I made on my first install and I stripped the hole completely.
- Slide the furniture back over the anchor point, lower the leg or bracket over the lag head (for deck anchors), and secure the leg to the bracket with the provided bolt or pin.
- Test by trying to lift and rock the furniture. There should be minimal movement. A little lateral rock is normal with bracket-style anchors; vertical uplift resistance is the critical factor.
Step-by-step: through-bolts and structural bolting on wood decks
Through-bolting is stronger than lag screws because the fastener passes completely through both the furniture frame/bracket and the deck structure, with a washer and nut on the underside. It requires access to the underside of the deck, easy on elevated decks, not possible on ground-level platforms. The American Wood Council's DCA-6 guide specifies a pilot hole of 17/32" to 9/16" for a 1/2" through-bolt clearance. This method is the best choice for heavy furniture (cast iron, solid teak dining tables) or any piece you genuinely need to stay put in a high-wind event.
- Mark and punch your hole locations as described above. Confirm joist locations from below the deck before drilling.
- Drill a clearance hole straight through the decking board and joist using a 17/32" or 9/16" spade bit or auger bit for a 1/2" bolt. Keep the drill perpendicular — an angled hole causes the bolt to bear unevenly.
- On the furniture side, you need a drilled or existing hole in the furniture frame or a welded foot plate that the bolt passes through. If your furniture leg is tubular and doesn't have a plate, fabricate a simple flat-bar steel backing plate (1/8" x 1.5" flat bar, about $4/foot at metal suppliers) and drill a hole through it.
- Insert the 1/2" stainless through-bolt from the top. Slide a flat washer onto the bolt above the deck surface (between furniture and deck) and again on the underside below the joist.
- Thread on a stainless hex nut from below. Hold the bolt head with a wrench above while you tighten the nut below — 25–30 ft-lbs of torque is appropriate for a 1/2" bolt in a structural wood connection. Do not crush the joist by over-tightening.
- Check that the washer bears fully on solid wood, not across a gap or a knot. If a large knot is present at the bearing surface, move the hole 1"–2" to avoid it.
- Cap the bolt head above the deck with a stainless acorn nut for aesthetics and to eliminate sharp edges, especially in dining areas or anywhere bare feet are nearby.
Anchoring to concrete and pavers: surfaces, methods, and what you're actually drilling into
Solid concrete slabs
A solid concrete slab is the strongest base you can anchor into, but it requires a rotary hammer (not a standard drill) and carbide-tipped SDS+ bits. For step-by-step instructions on how to secure patio furniture to concrete, consult our detailed guide. The two most common mechanical anchor options are wedge anchors and sleeve anchors. Wedge anchors (like the Hilti KWIK-BOLT series) expand as you tighten the nut, biting into the concrete. Minimum embedment for a 3/8" wedge anchor in solid concrete is approximately 1-5/8"; for a 1/2" anchor, approximately 2-1/4", always verify against the specific manufacturer's load tables, because allowable tension and shear loads drop significantly if you under-embed. Hilti and Simpson Strong-Tie publish ICC-ES evaluation reports with exact load tables by anchor diameter, embedment depth, and cracked-versus-uncracked concrete condition.
Epoxy anchors (Hilti HIT-RE 500 V3, Simpson SET-3G, or similar) are the strongest option and are the right choice when you're near a slab edge, working in cracked concrete, or need maximum holding power. The trade-off is complexity: epoxy anchors require the 'blow-brush-blow' hole-cleaning procedure (blow out debris, scrub with a wire brush, blow again, at least three cycles each), correct injection using the manufacturer's specified mixing nozzle, and full cure before loading. Hilti's HIT-RE 500 V3 has ICC-ES approval and publishes gel time and cure time tables by concrete temperature. At 50°F, cure time can be several hours to overnight. At 70°F, it may be as little as 1–2 hours. Do not load the anchor before full cure, this is the most common way epoxy anchors fail in DIY installations.
Expected outcomes on solid concrete: a properly set 3/8" wedge anchor in uncracked concrete can handle over 1,000 lbs of tension and shear load in typical residential conditions, far more than patio furniture requires. For furniture anchoring, the practical concern is not failure under load; it's corrosion over time and the permanence of the installation. Wedge anchors are very difficult to remove cleanly, so think carefully before committing.
Interlocking pavers and unit pavers over sand
Here's the honest truth about pavers: if they're sitting on bedding sand over a gravel base (the most common residential installation), you cannot anchor meaningfully into the individual paver units. The paver itself has no structural continuity with anything below it, it's essentially a loose stone on sand. Drilling an anchor into a single paver will give you a fastener that tips and rotates with the paver when loaded. For permanent anchoring on a sand-set paver patio, the correct approach is to remove one or two pavers at each anchor location, dig down to or below the base, pour a small concrete footing (a tube form filled with 3,000 psi mix works fine), set an anchor bolt in wet concrete, allow full cure (typically 24–48 hours minimum), and reinstall the pavers around the anchor. This is a half-day project per anchor point, but it's the only method that actually works.
If your pavers are set over an existing concrete slab (a 'thin-set' or mortar-bed installation), you have better options. You can drill through the paver and into the structural slab beneath using a wedge or epoxy anchor. Use a diamond-core bit or carbide masonry bit to get through the paver face cleanly, expect 3–5 minutes per hole with a rotary hammer. Stay away from mortar joints when possible; joint material is weaker than solid concrete and provides less bearing for the anchor. For hollow or CMU base material (block), use anchor products specifically rated for hollow masonry, Hilti and Simpson both publish separate ICC-ES load tables for hollow-unit face installations versus grout-filled cells, and the allowable loads differ significantly.
Step-by-step: wedge anchor install in solid concrete
- Mark and punch your anchor hole locations. Double-check that each location is at least 4–6 anchor diameters away from any slab edge or control joint.
- Fit your rotary hammer with an SDS+ carbide bit matched exactly to the anchor's nominal diameter (a 3/8" anchor needs a 3/8" bit). Drill to the required depth: embedment plus the thickness of any fixture being clamped, plus the nut-and-washer stack. Mark depth on the bit with tape.
- Clean the hole thoroughly: blow out debris with compressed air or a bulb pump, scrub the hole walls with a wire brush (wire brush sized to the hole diameter), blow again. Repeat the full sequence at least three times. For wedge anchors, this removes the fines that reduce bearing; for epoxy anchors, it's absolutely critical for bond strength.
- Insert the wedge anchor into the hole and tap it down with a hammer until the nut and washer rest on the fixture or deck surface.
- Tighten the nut to the manufacturer's recommended installation torque (printed on the product packaging or in the ICC-ES report). For a 3/8" Hilti KWIK-BOLT, this is typically around 25 ft-lbs. For 1/2", around 40–45 ft-lbs. Use a torque wrench, not just 'tight enough' — under-torquing leaves the expansion clip incompletely engaged.
- Test by rapping the anchor side-to-side with a wrench handle. Properly set wedge anchors feel completely solid with no movement.
- If the furniture needs to be removable seasonally, consider sleeve anchors (slightly lower load capacity but the bolt can be removed leaving the sleeve flush with the surface) or a surface-mount deck bracket that bolts to the concrete and accepts a removable furniture leg pin.
Common pitfalls, failures, and how to fix them
| Problem | Why It Happens | Fix |
|---|---|---|
| Lag screw spins without gripping (wood) | Pilot hole too large, or wood is rotten | Fill hole with epoxy wood filler, re-drill smaller pilot after cure; or sister a new joist beside the damaged one |
| Wedge anchor won't tighten / feels loose | Under-drilled hole or hole not cleaned; concrete too soft or cracked | Remove anchor, clean hole thoroughly, re-drill to correct depth; in cracked concrete, switch to epoxy anchor |
| Anchor pulls out of concrete | Insufficient embedment or hole too close to slab edge | Relocate anchor farther from edge; use epoxy anchor with correct embedment per ICC-ES tables |
| Rust staining on deck or patio surface | Zinc-plated or carbon-steel hardware corroding | Replace with 316 stainless or hot-dip galvanized (ASTM A153) hardware; clean stain with oxalic acid deck cleaner |
| Deck board splits during lag install | No pilot hole or pilot hole too small | Pre-drill correct pilot size; for composite decking, follow Trex 1/8" near-edge pilot guidance; back out screw and re-drill |
| Epoxy anchor has low strength / failed | Hole not cleaned (blow-brush-blow skipped), or anchor loaded before full cure | Remove rod (while epoxy is still soft, if caught early), clean hole completely, re-inject following gel/cure time table |
| Paver tips or rotates when furniture is loaded | Anchor set only in paver, not structural base | Remove pavers, install concrete footing, reset anchor in footing |
Removable vs permanent: matching the method to your situation
Not every installation needs to be permanent, and not every furniture piece warrants the effort of through-bolting. For a quick guide on temporary fastening, see how to clip patio furniture together for seasonal anchoring. For seasonal anchoring, furniture that goes inside or under a cover from November through March, removable options make more sense and protect your surface from unnecessary holes. For step-by-step instructions and hardware recommendations, see our guide on how to anchor patio furniture. Here are the practical tiers:
- Furniture leg weights and ballast bags: the cheapest and most reversible option. Purpose-made umbrella base weights (filled with sand or water) cost $20–60 and add 50–200 lbs to a base. Effective for moderate wind but not a substitute for anchoring in high-wind zones.
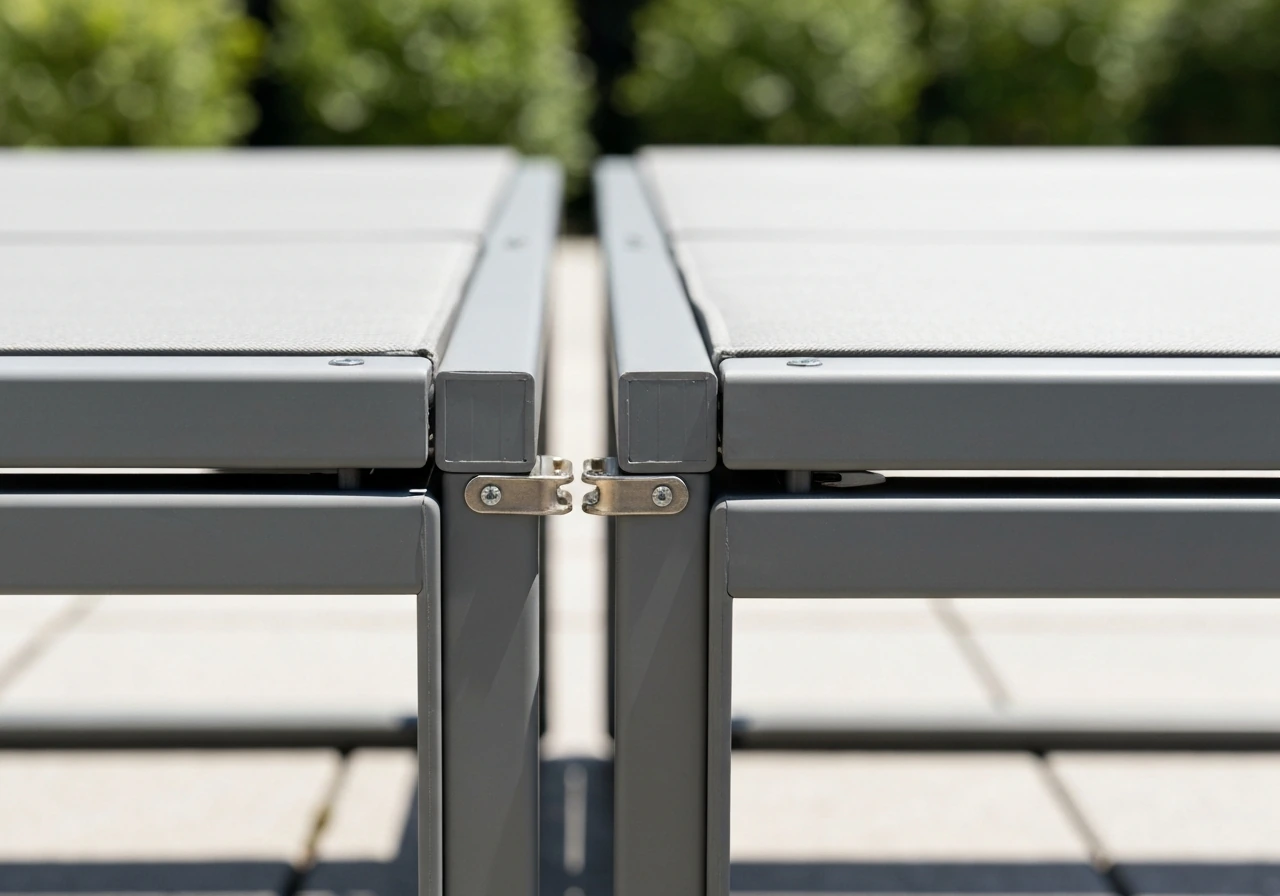
- Deck anchor brackets with removable pins: L-brackets or U-channel brackets that bolt permanently to the deck but accept the furniture leg with a pin or clip. The bracket stays; the furniture comes and goes. Cost is $15–40 per bracket. Related methods like furniture clips and bracket connectors that link pieces together are a good complement to this approach.
- Sleeve anchors in concrete with removable bolts: the anchor sleeve stays flush with the concrete surface; you insert the furniture bolt seasonally and remove it for storage. Leaves a small flush hole in the patio surface that is barely noticeable.
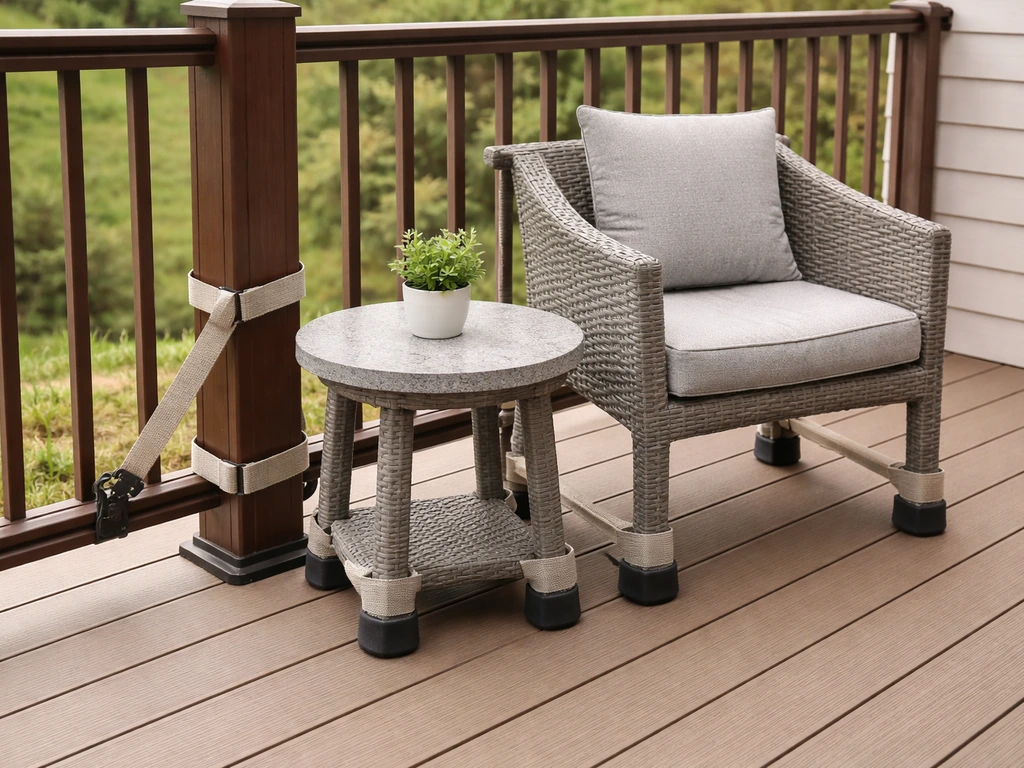
- Quick-release tie-down straps: furniture-specific nylon straps anchor around a heavy post, railing, or adjacent structure. Easy to install and remove; $25–60 for a set of four. Best for balconies or situations where drilling is not allowed.
- Permanent wedge or epoxy anchors: best for commercial-grade furniture that stays year-round, or for heavy structural pieces like pergola posts and shade structures.
Maintenance and seasonal care for bolted furniture
An anchored installation needs attention at least twice a year: once at the beginning of outdoor season (typically April or May) and once before winter. At each check, tighten any hardware that has worked loose (thermal cycling causes fasteners to back off over time), inspect for rust or white oxidation on fastener heads, and probe any wood around lag screws for softness that would indicate moisture infiltration. For concrete anchors, look at the anchor shoulder at the surface level, early rust streaking there signals that the coating has failed and the anchor should be replaced before it corrodes through. Applying a dab of marine-grade anti-seize compound to anchor threads before reassembly each season makes seasonal removal and reinstallation much easier and prevents galvanic corrosion between dissimilar metals.
If you're removing furniture for winter storage, back out removable anchors and fill deck holes with marine-grade wood plugs or flexible polyurethane sealant to prevent moisture from wicking down into the joist. In concrete, leave sleeve anchors in place (they sit flush) or plug the hole with a piece of backer rod and an outdoor caulk. These small steps add years to both your deck and your concrete surface.
FAQ
When and why should I bolt down patio furniture?
Bolt furniture when wind, theft, tipping, or heavy use create safety or damage risks. Common triggers: frequent high winds or summer storms, unsecured tall or umbrella‑equipped pieces that can overturn, public/communal areas or visible yard furniture at theft risk, and furniture on elevated or uneven surfaces where stability matters. Expected outcomes: reduced tipping/overturning, lower theft risk, and a more secure, long‑lasting outdoor setup. Check local codes/HOA rules first — some associations restrict visible permanent anchors or require removable systems.
How do I choose the right anchoring method for different surfaces (wood/composite deck, concrete, pavers, brick/CMU)?
Match the anchor to the base material and furniture load: - Wood/composite decks: use through‑bolts or lag screws into structural joists or blocking; use backing plates under the deck when possible. - Concrete slab: use mechanical wedge anchors (Kwik‑Bolt type) for quick installs, or adhesive (chemical) anchors (HIT‑RE/SET‑3G) for higher loads and cracked‑concrete performance. - Pavers/interlocking units: avoid anchoring into the paver alone; remove pavers and anchor into underlying concrete slab or use through‑bolt into structural edge/footing with a backing plate. - Brick/CMU: follow manufacturer ICC‑ES tables — use anchors sized and embedded for hollow vs grout‑filled units; adhesive anchors into grout or solid brick perform best. Use manufacturer load tables (Hilti/Simpson) to size embedment, spacing, and edge distances.
What corrosion‑resistant hardware should I use outdoors?
Use stainless or properly coated anchors: - Coastal/high‑chloride: use A4/316 stainless steel. - General exterior: A2/304 stainless is OK away from salty exposure; hot‑dip galvanized (per ASTM A153) carbon steel can work for many mechanical anchors. - For chemical anchors use cartridges and rods rated for outdoor exposure and matching stainless options where offered. Follow manufacturer recommendations; ISO/ASTM standards are commonly referenced by Hilti/Simpson.
What tools and materials do I need for bolting furniture to a deck or concrete?
Basic tools: drill (corded/brushless), impact driver, torque wrench or calibrated impact setting, SDS+ rotary hammer for concrete, masonry/carbide bits sized to anchor hole, drill stop or depth marker, wire brush and compressed‑air or vacuum for hole cleaning, center punch, clamps, backing plates/washers, socket set, safety gear (glasses, dust mask, gloves). Materials: chosen anchors (wedge, sleeve, epoxy), stainless or galvanized bolts/plate washers, stainless nuts, locking washers or threadlocker for permanence, neoprene pads or isolation washers for furniture feet.
Step‑by‑step: How to bolt patio furniture to a wood or composite deck (photo‑ready instructions)?
1) Plan: locate a structural joist or blocking under the furniture foot; mark bolt locations and account for hardware/washers. 2) Template & measure: use cardboard/plastic template to mark symmetric hole centers; verify below with an inspector or by probing with a thin bit. 3) Drill pilot holes: for through‑bolts drill clearance hole in top board (hole diameter = bolt diameter), and a pilot hole into joist per AWC guidance (example: 1/2" through‑bolt pilot ~17/32"–9/16"). For lag screws, make pilot holes 60–85% of shank depending on wood hardness. 4) Pre‑drill for countersink if needed and protect board edges with backing plate or washer. 5) Install bolt: pass bolt through, place washer/backing plate under joist, and tighten nut to snug plus recommended torque; avoid over‑tightening to prevent crushing composite boards. For a permanent, stronger connection use a full‑thread through‑bolt with nut and backing plate; for removable use carriage bolts with nut and leave accessible. 6) Seal exposed holes with compatible sealant (especially on composite) and check for squeaks. Expected outcome: firm, low‑movement connection into structural member; seating should not split wood if pilot hole sized correctly.
Step‑by‑step: How to anchor patio furniture to concrete or pavers (photo‑ready instructions)?
1) Decide anchor type: for solid concrete use mechanical wedge anchors (quick) or adhesive/chemical anchors (higher capacity, for cracked concrete or reduced edge distances). For pavers, remove pavers and anchor into underlying concrete slab or install a through‑bolt with a backing plate that spans below the paver layer. 2) Mark and center‑punch the hole location on the concrete. 3) Drill hole with SDS+ and carbide bit to the anchor manufacturer's specified hole diameter and depth (mark bit for depth). 4) Clean hole: follow 'blow‑brush‑blow' (compressed air/vacuum + nylon brush + air) for epoxy anchors — manufacturers require this. 5) For adhesive anchors: inject resin per cartridge instructions, insert threaded rod with twisting action to expel air, follow gel and cure times (temperature‑dependent) before loading. 6) For mechanical anchors: insert anchor, set per instructions (tighten nut to specified setting torque or to specified embedment) and verify torque per manufacturer chart. 7) For pavers, reinstall pavers carefully around installed anchor or cover anchor heads with plastic caps. Expected outcomes: properly set wedge anchors deliver rated shear/tension per embedment/spacing; adhesive anchors provide higher bond and work in varied concrete conditions when installed exactly per manufacturer instructions.