To secure patio furniture to a deck, your best starting point is heavy-duty non-slip rubber pads under every leg combined with furniture strap anchors screwed into the deck framing. That combo handles most everyday blank" rel="noopener noreferrer">wind and vibration without major work. If you're a renter or just want zero holes in the deck, weighted bases and interlocking furniture clips are your go-to. For permanent setups where you're okay with drilling, bolt-down brackets or ratchet strap tie-downs anchored to deck cleats will hold through serious storms. The right choice depends on your deck material, your furniture's feet, and how permanent you want the fix to be. This guide walks through all of it.
How to Secure Patio Furniture to a Deck Without Damage

Maren Grady
11 Jul 2026
Why patio furniture keeps moving (and why it matters)
Wind is the obvious culprit, but it's sneakier than most people realize. The National Weather Service notes that lightweight loose objects like lawn furniture start getting tossed or toppled at just 30 to 44 mph. That's not a rare storm, that's a gusty afternoon in most parts of the country. Wind also creates uplift and suction forces, not just lateral push, which means a chair can flip backward even when the wind seems to be blowing from the side.
Beyond wind, there's the everyday drift problem. Composite decking has a smooth, slightly waxy surface that acts almost like a skating rink under furniture feet. Before a storm, it helps to consider which items are most likely to move, and to place furniture so surrounding structures can block some of the wind force surrounding structure can block wind force.
Wood decks are better but still slippery when wet. Every time someone scoots a chair back from a table, sits down hard, or a kid leans on the arm of a chair, it moves a little. Over a season, chairs end up at the edge of the deck, umbrellas lean dangerously, and dining sets are crooked. On a deck near stairs or a railing, that's a real safety hazard.
Positioning furniture on the leeward side of a wall, fence, or structure helps reduce the wind load it faces, something worth thinking about before you even pick up a drill.
Assess your deck and furniture before you buy anything
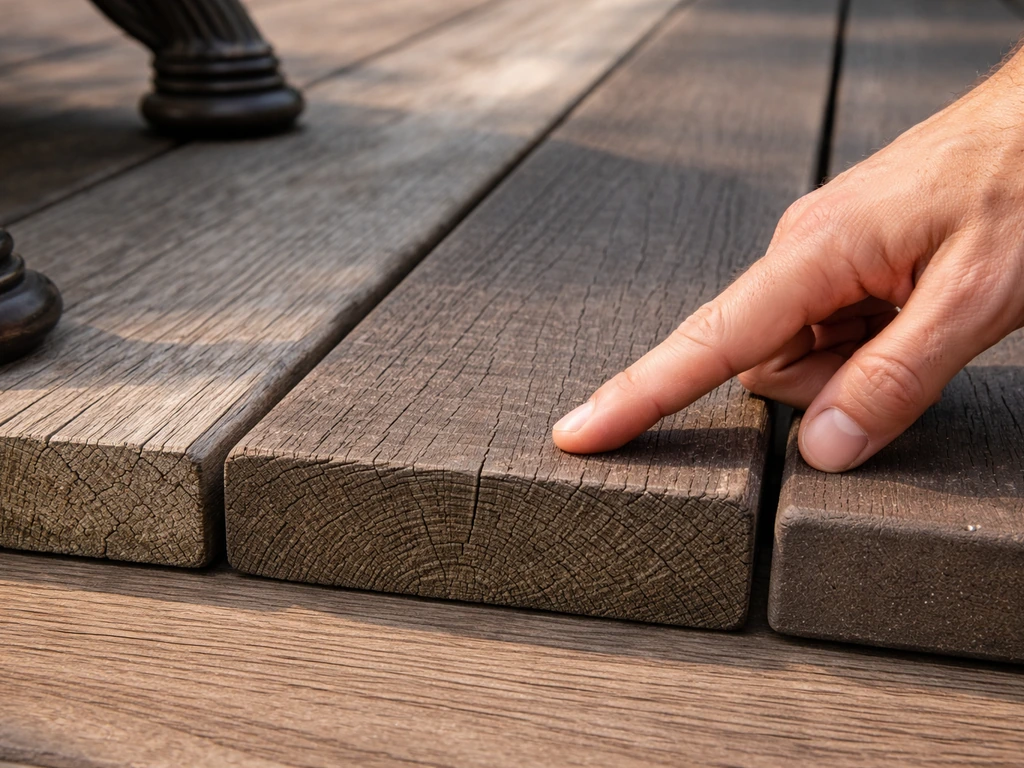
Before you grab a cart full of hardware, spend five minutes sizing up what you're working with. The right method for a composite deck with heavy cast-aluminum chairs is completely different from the right method for a wood deck with lightweight plastic chairs. Getting this wrong is how people end up with stripped screws, damaged decking, or furniture that still slides around.
Check your deck material
- Pressure-treated wood: most forgiving for drilling; accepts standard wood screws and lag bolts without special prep; watch for knots and splits near the edge
- Cedar or redwood: softer than PT wood, so predrill everything to avoid splitting; holds hardware well once it's in
- Composite decking (Trex, TimberTech, etc.): drilling is fine but check your warranty — some manufacturers void it for structural modifications; always predrill to avoid cracking; screws should be stainless or composite-rated to avoid staining
- PVC decking: similar rules to composite; avoids rust stains from regular screws; can be more brittle in cold weather so take care drilling in winter
Look at your furniture's feet
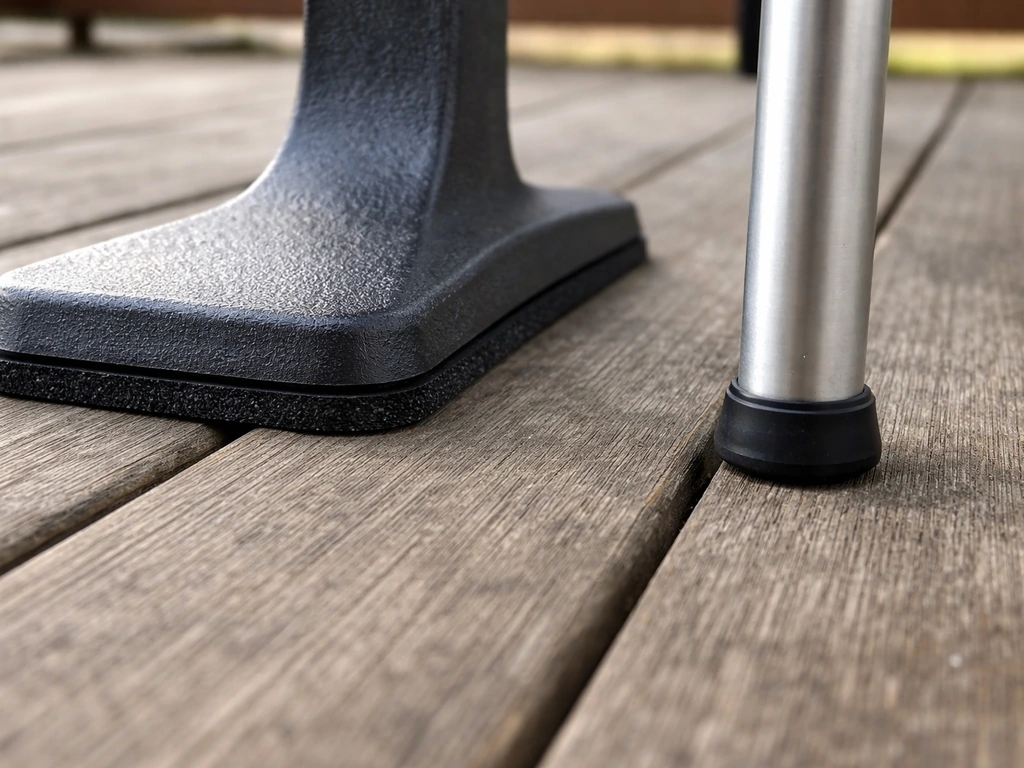
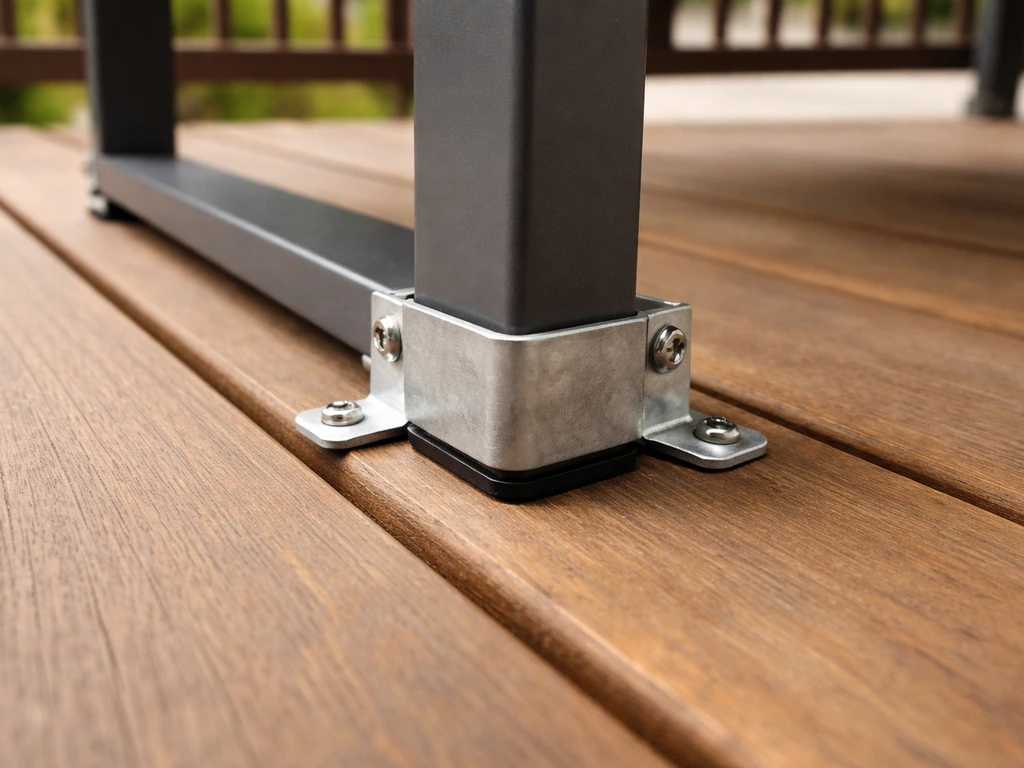
- Flat wide feet or pads (most cast aluminum and resin furniture): great surface area for non-slip pads; strap anchors attach easily
- Narrow tube feet (steel or aluminum frames): can dig into soft wood over time; rubber end caps help distribute weight and grip; harder to strap without a bracket
- No feet or flat base (Adirondack-style or sled-base chairs): excellent for surface pads and the most stable in wind; can be directly screwed through the base if you're okay with permanent mounting
- Wheels or glides: remove them or swap them out for rubber feet — you can't secure furniture that's designed to roll
Map the furniture placement
Where the furniture sits on the deck affects which method works. Furniture near a railing or exterior wall has some natural wind protection. Furniture in the middle of an open deck is fully exposed. Furniture near stairs is the highest-risk zone because a tipped chair can go off the edge. Mark out your layout before anchoring anything, use chalk or painter's tape to outline where each piece will live. This also helps you measure for hardware and make sure you're anchoring into actual deck boards or joists, not just screwing into thin air.
No-drill options: start here if you're a renter or just testing a layout
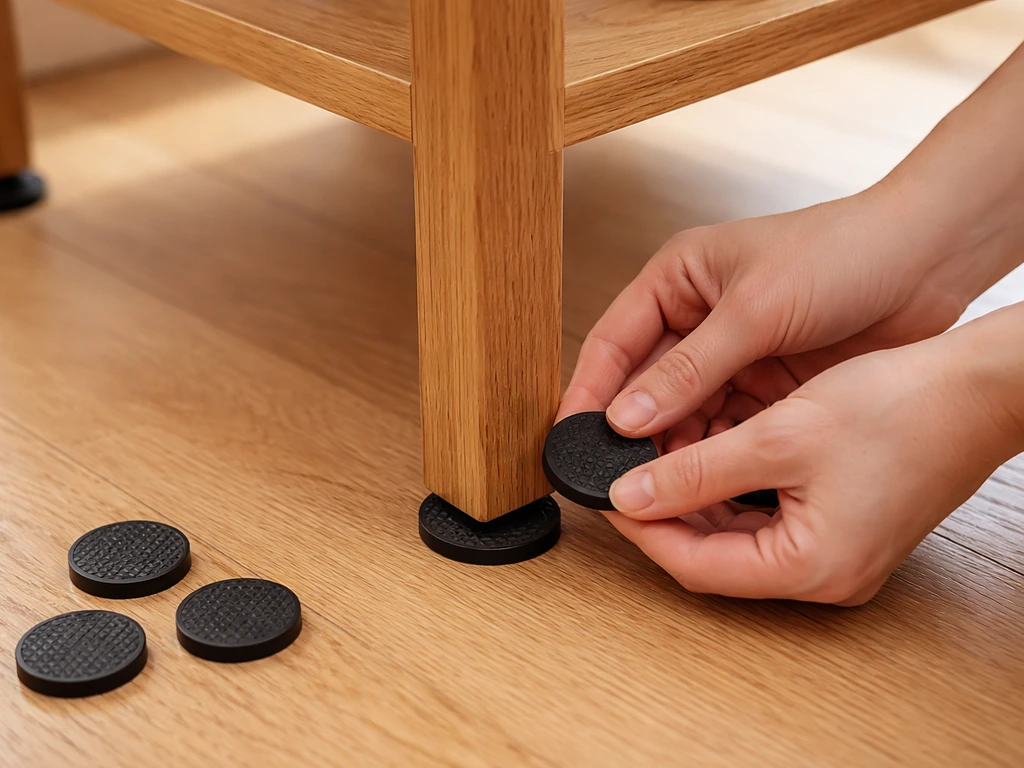
I always recommend trying the no-drill route first, even if you're eventually going to anchor things permanently. It costs less, it's reversible, and for a lot of setups it works well enough that you never need to drill. Here are the three approaches worth trying.
Non-slip rubber pads and furniture cups
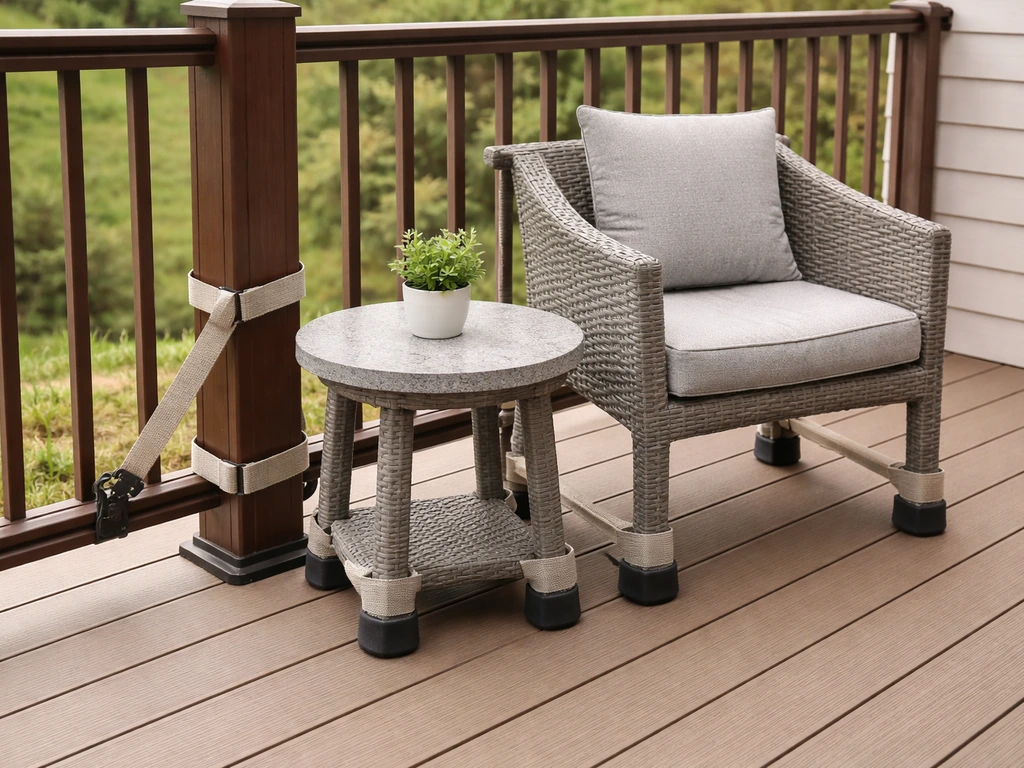
Heavy-duty rubber grip pads placed under each leg do more than most people expect. Look for pads with a textured or suction-cup-style underside (brands like Rubber Feet Store or Shepherd Hardware make these). For tube-leg furniture, rubber end caps that slip over the bottom of each leg are even better because they grip the deck surface on three sides. You want pads rated for outdoor use, cheap foam pads absorb water, compress flat, and basically become a slip surface after a few weeks. Expect to pay $8 to $20 for a set of four quality rubber pads. This won't stop furniture from moving in a 45 mph gust, but it handles everyday drift and protects your deck from scratches.
Furniture weights and ballast
Adding weight directly to the furniture is a legit strategy, especially for umbrellas and lightweight chairs. Purpose-built umbrella base weights (water-filled or sand-filled rings) are the obvious example, but you can also slip sandbags or decorative concrete planters near the base of chairs or benches to add mass. This approach works best for wind resistance rather than vibration or drift. It's also useful for sectionals, a heavy corner unit with a stone or concrete tray underneath the center is tough to budge. The downside is that heavy add-ons can be inconvenient to move and can trap moisture under the furniture if you're not careful.
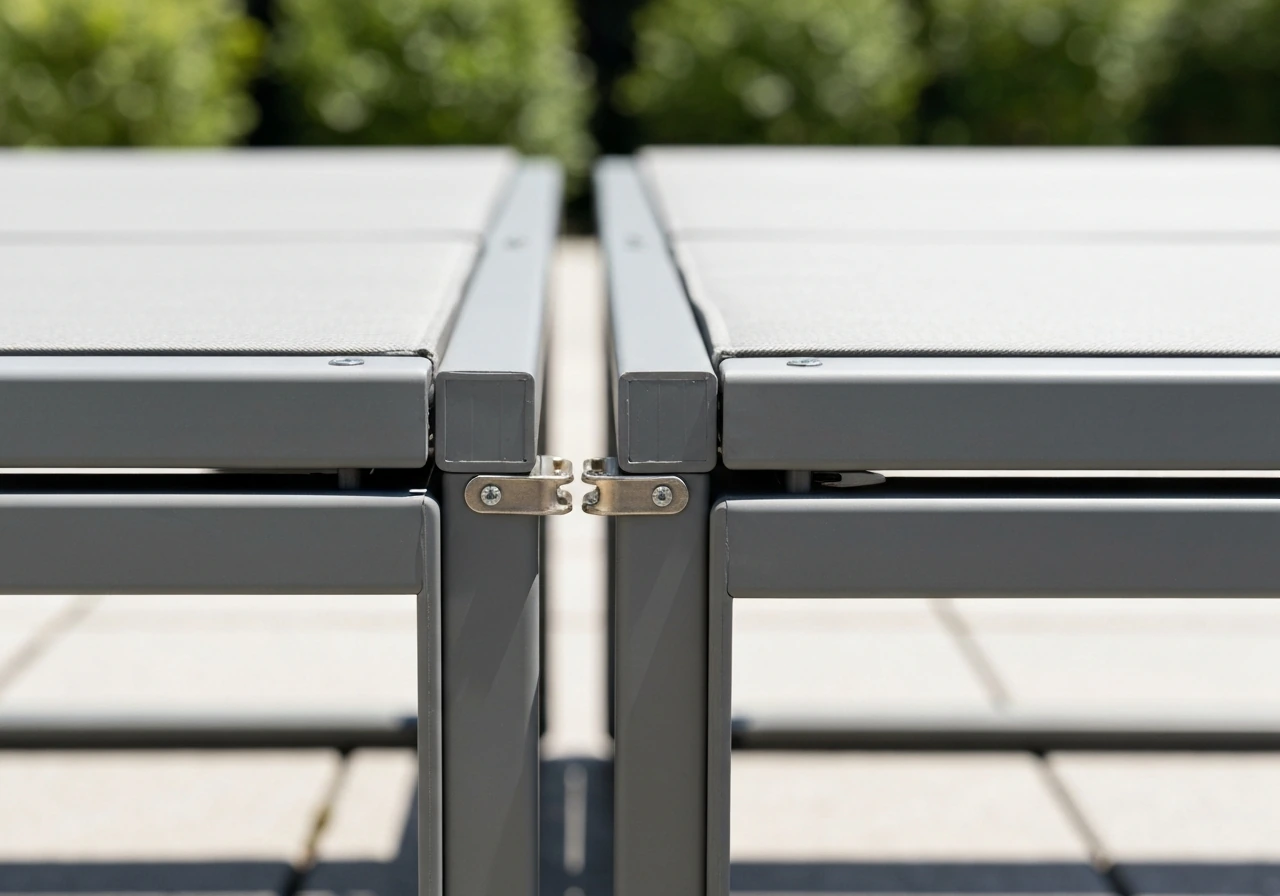
Furniture clips and connecting pieces
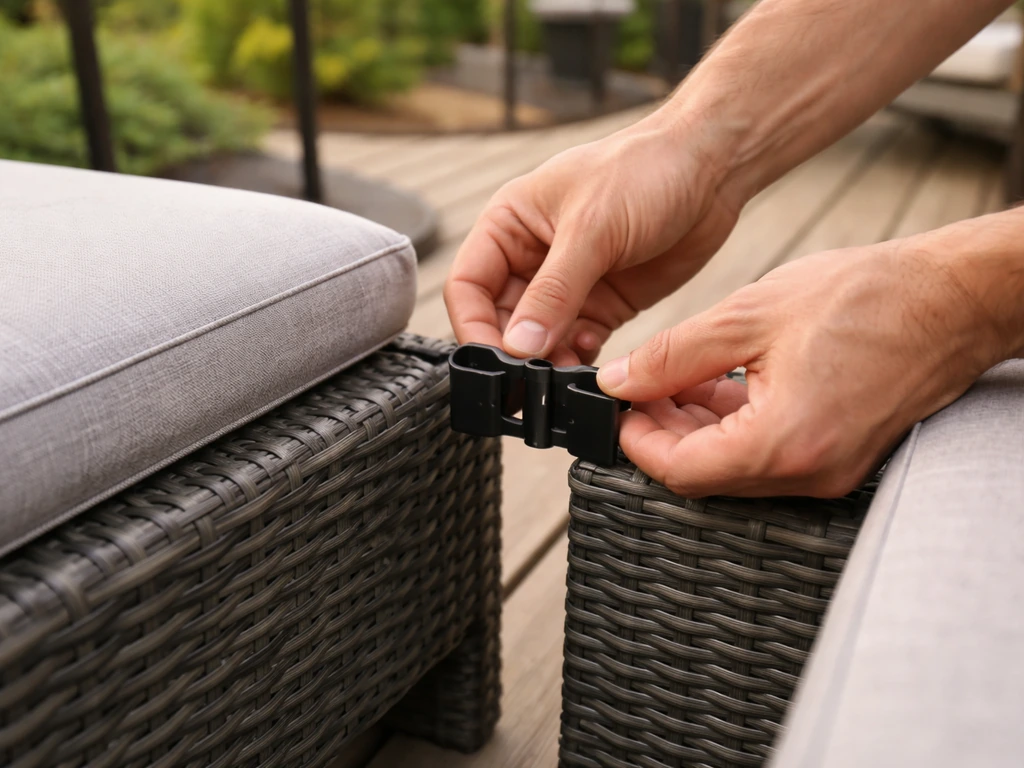
Connecting chairs to a table or sofa sections to each other using furniture clips or sectional connectors keeps the whole group from drifting apart. If the dining table itself is heavy and stable, clipping lightweight chairs to its frame means you only need to secure one anchor point instead of four or six. Sectional clips are especially useful for modular outdoor sofas that tend to migrate across the deck. These clips won't stop the whole group from moving together in wind, but they prevent the individual pieces from scattering, and securing the one heavy anchor piece becomes a much simpler job.
Ratchet straps and rope tie-downs (no-drill)
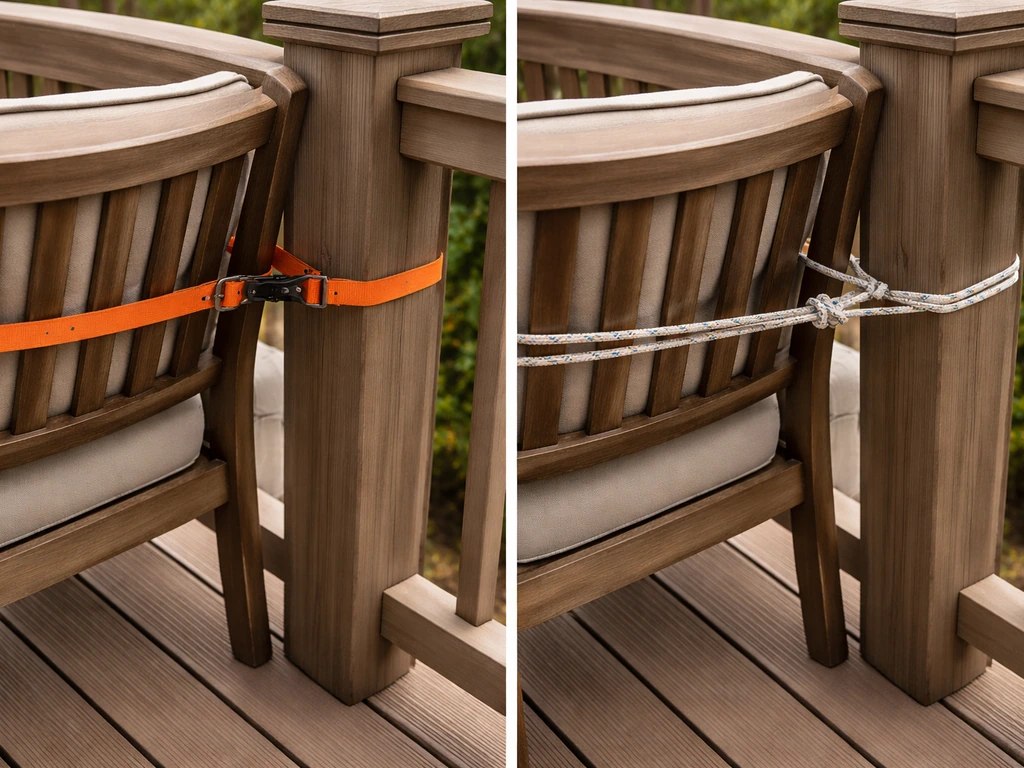
For storm prep or seasonal heavy-wind periods, a simple loop of ratchet strap or rope run under a deck railing post and over a chair back or through a table frame works without any drilling. Loop one end around a railing post or through a railing baluster, run it under or through the furniture frame, and snug it up. This is temporary and meant to stay on for a day or two during a storm, not as a permanent solution. UV-resistant polypropylene rope or 1-inch cam buckle straps are cheap and store compactly in the off-season.
Drilling and anchoring: the permanent solutions
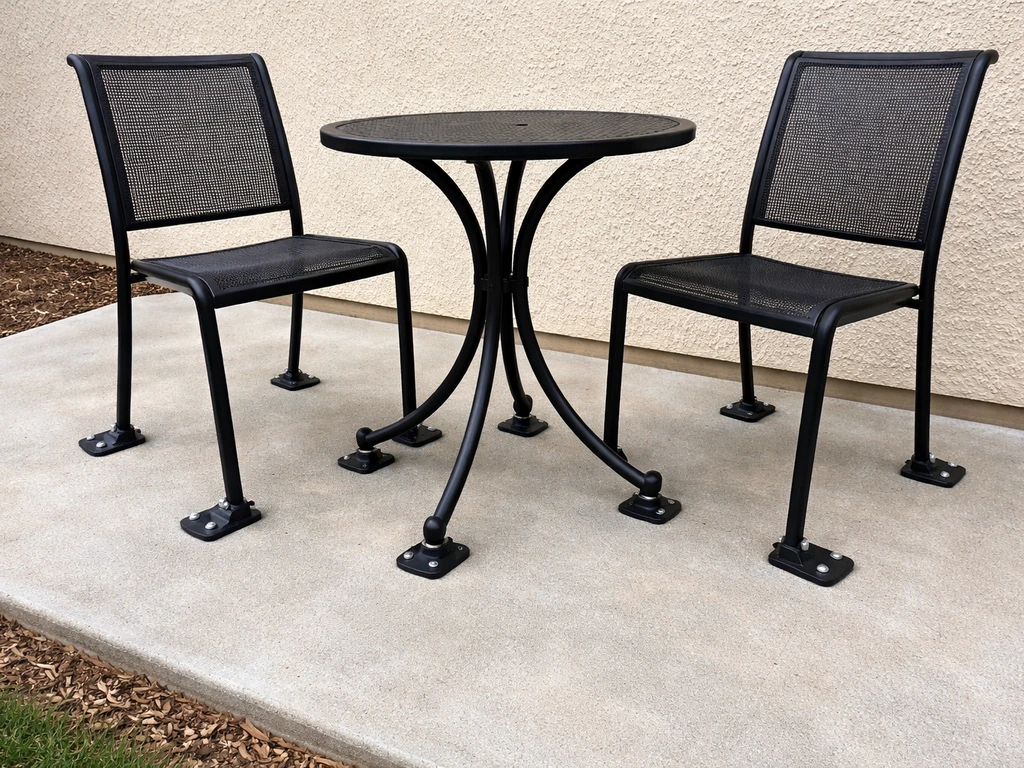
If your furniture is staying in one spot all season and you want it locked down properly, it's time to drill. Once you move from deck boards to concrete, the anchoring method changes, so make sure you use the right approach for securing patio furniture to concrete secure patio furniture to concrete. Don't let that intimidate you, most of these installs take under an hour and use basic tools. The key is using the right hardware for your deck material and locating your fasteners correctly so they actually hold.
Deck strap anchors
Furniture strap anchors are the most versatile option. These are small L-shaped or flat metal plates with a strap or webbing loop attached. You screw the plate into the deck board (or ideally into a joist below), run the strap through or around a furniture leg or frame crossbar, and buckle or ratchet it tight. You can find these branded as furniture tie-down straps, patio anchors, or deck anchor straps.
Look for stainless steel hardware with UV-stabilized strapping. Cost: $15 to $40 per strap kit. You'll want one strap per major furniture piece, placed diagonally from opposite corners for maximum stability. For a four-chair dining set, anchoring the table and two chairs on opposite sides of it is usually enough.
Furniture brackets and edge cleats
An edge cleat is a small piece of wood or metal screwed to the deck flush against the outside of a furniture leg or foot. Think of it as a low curb that stops the leg from sliding. This is especially practical for heavy Adirondack chairs, benches, and dining tables with wide flat feet. Cut a 1x2 pressure-treated board into 3-inch pieces, predrill them, and screw them to the deck surface, butted up against each leg. They're barely visible, easily removed, and very effective. You can also buy L-bracket furniture stops from hardware stores for about $3 to $8 each. For a cleaner look, use stainless steel corner brackets and countersink the screws.
Bolt-through anchoring for heavy furniture
For very heavy furniture or anything permanently located on the deck, a built-in bench, a heavy outdoor sectional, a freestanding daybed, bolting directly through the furniture frame and into the deck or joist is the most secure method. Use 3/8-inch carriage bolts with washers and lock nuts on the underside. If you're going through a deck board into a joist, you need to locate the joist first (use a stud finder or probe with a small finish nail).
Through-bolting is overkill for most chairs and dining sets but genuinely appropriate for large sectionals and lounge beds near railings. This is essentially the same logic as anchoring patio furniture to a deck at the structural level, the bolt transfers force directly to the frame.
Turnbuckle and cable systems
For a cleaner, more adjustable look, stainless steel turnbuckle-and-cable setups work well for larger pieces. A small eye bolt screws into the deck (into a joist if possible), a stainless cable connects to a corresponding eye bolt on the furniture frame, and a turnbuckle in the middle allows you to dial in the tension. These look intentional and almost architectural, not like a storm lashing job. Marine hardware suppliers stock all these parts. Budget about $25 to $60 per anchor point for this approach.
How to install strap anchors and cleats: step-by-step
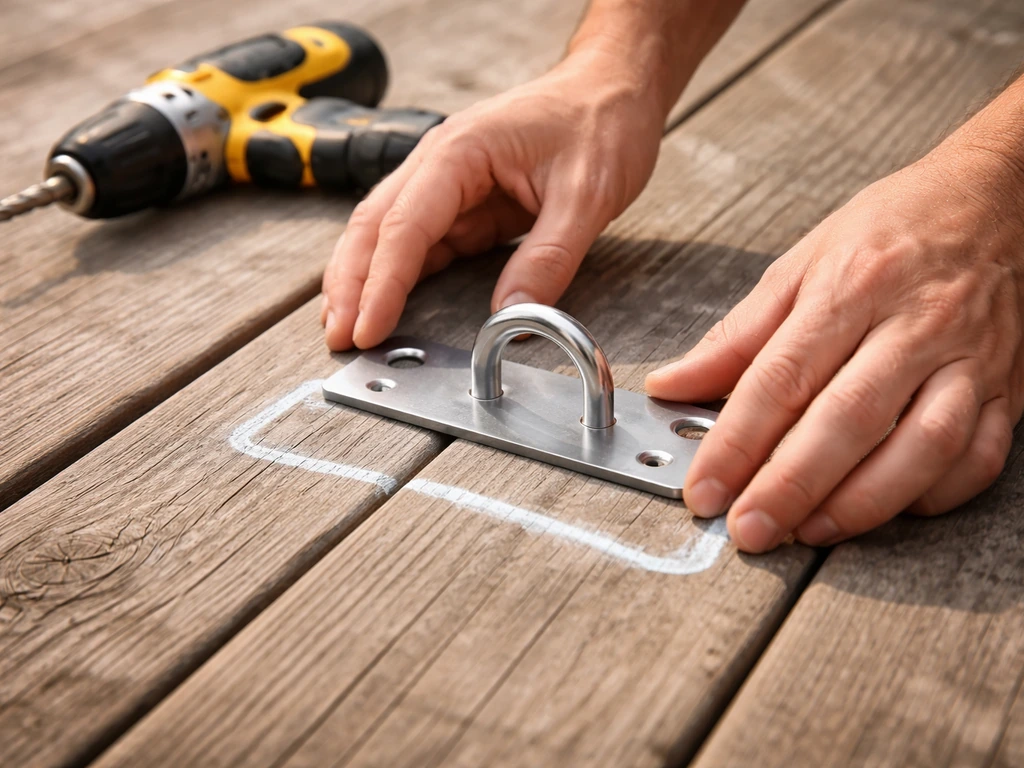
This is the install I'd recommend for most people starting out. It covers the majority of deck furniture setups and doesn't require specialty tools.
What you'll need
- Drill/driver (cordless is easiest) and a bit set
- Stainless steel furniture strap anchors or L-brackets
- Stainless steel or exterior-grade screws (1-5/8 inch for deck boards, 3-inch for into joists)
- Tape measure and chalk or painter's tape
- Stud/joist finder
- Pencil or marking awl
- Level (optional but useful for sloped decks)
- Rubber mallet (for tap-fitting end caps)
Installation steps
- Set the furniture in its final position and use chalk or tape to mark the footprint on the deck. Slide the furniture away and you'll have a clear outline to work from.
- Locate the deck joists with a stud finder. Joists on standard decks run every 16 inches on center. Anchoring into a joist is always stronger than anchoring into the deck board alone. Mark joist locations with tape.
- Position your anchor plates or strap bases inside the furniture footprint, close to where each leg or frame member will sit. For a dining table, place one anchor at each of two diagonal corners. For a sectional, anchor the two end units.
- Predrill pilot holes slightly smaller than your screw diameter. For composite or PVC decking, this step is not optional — skipping it cracks the board. For wood decking, predrilling prevents splitting near edges.
- Drive screws through the anchor plate and into the deck. If you're hitting a joist, use 3-inch screws. If you're into the deck board only, use 1-5/8-inch screws and add a second anchor plate nearby for redundancy.
- Set the furniture back into the footprint. Run the strap through or around the furniture frame leg at a low point — the closer to the deck surface, the more leverage you get against tipping.
- Buckle or ratchet the strap until there's no slack. You don't want to crush the furniture frame — snug is enough. The strap should resist hand-tug without any give.
- Check that the furniture sits level. On a sloped deck, shim the low side with a rubber pad or composite shim to prevent the furniture from always wanting to slide downhill.
- Tug-test each piece: pull firmly from the top (simulating wind uplift) and from the side. If anything moves more than a half-inch, tighten the strap or add a second anchor point.
Measurements and spacing guidance
For dining sets, keep anchor points at least 12 inches from deck edges and from any railing post to avoid splitting end grain. Space two anchor straps at least 24 inches apart on opposite corners of a table for the best resistance to both lateral movement and tipping. For chairs anchored individually, one strap through the rear leg pair placed 6 to 8 inches from the back is usually enough. For sectionals longer than 8 feet, use a minimum of three anchor points: one at each end and one in the middle.
Troubleshooting: what to do when it still moves
The furniture keeps sliding even with pads
If rubber pads aren't gripping, it's almost always because the deck surface is smooth, wet, or the pads themselves are the wrong type. Swap to furniture pads with a suction-cup or micro-grip texture rather than flat rubber. For composite decking especially, look for pads specifically rated for smooth surfaces. Another option: apply a bead of clear silicone caulk under each pad before pressing it into place, it bonds the pad to the deck without permanently damaging anything and can be peeled off later.
Screws or anchors are loosening over time
Loose screws in wood decking usually mean the wood is soft, wet-damaged, or you installed into end grain. Fix it by pulling the screw, filling the hole with a wooden toothpick and wood glue (seriously, this works), letting it dry, then driving the screw back in. For composite decking, stripped holes need a toggle-bolt anchor designed for hollow panels or a larger-diameter screw. Going forward, always anchor into joists rather than just deck boards when you can reach one.
Furniture still tips on a sloped deck
Sloped decks are designed to shed water, but they make furniture want to walk downhill. The fix is two-part: level the furniture with composite shims under the low-side legs, then anchor it with straps running perpendicular to the slope (not parallel). Straps running downhill don't resist tipping, they need to pull against the direction the furniture wants to fall.
Hardware is corroding or staining the deck
Rust-colored staining on composite or wood decking almost always comes from using zinc-plated or uncoated screws. Swap all hardware to 304 or 316 stainless steel (316 if you're within a mile of saltwater). For strap anchors, look for powder-coated aluminum or stainless frames with UV-stabilized nylon strapping. If corrosion has already stained composite decking, a deck cleaner with oxalic acid (sold as deck brightener) removes the staining without damaging the surface.
The strap tears or loosens in UV exposure
Cheap polypropylene strapping degrades fast in direct sun, I've had bargain-bin straps become brittle in a single season. Spend the extra money on UV-stabilized polyester or nylon webbing. Marine-grade cam straps and ratchet straps hold up much better. Inspect strapping every spring and replace anything that looks chalky, frayed, or discolored.
Seasonal maintenance and long-term protection
Securing patio furniture isn't a one-time job. Hardware shifts, wood swells and shrinks, straps degrade, and the whole setup needs a once-over at the start and end of each season. Building this habit keeps you from dealing with tipped furniture or a stripped-out anchor mid-summer.
Spring setup checklist
- Inspect all strap anchors, brackets, and cleats for rust, cracking, or looseness before you set furniture out
- Replace any rubber pads that have flattened, hardened, or cracked over winter
- Retighten all screws — wood decks expand and contract seasonally and fasteners often back out slightly
- Check strap webbing for UV degradation, fraying, or stiffness and replace if needed
- Re-mark furniture placement with chalk if you want to position things in the same spots as last year
- Apply a thin coat of paste wax or silicone spray to metal anchor hardware to slow corrosion through the season
Storm prep during the season
When a storm warning comes in, don't just tighten the straps and hope for the best. Add supplemental rope or ratchet tie-downs run to railing posts or structural posts for anything that's normally just padded or clipped. Fold up and store lightweight chairs indoors or in a shed, even well-anchored chairs can get damaged by debris or topple under severe wind loads, and no anchor is rated for hurricane-force gusts on residential hardware. Position anything you can't store on the leeward side of a wall or fence to reduce direct wind exposure.
Fall teardown and storage
- Unbuckle and remove strap anchors — leaving them attached through winter traps moisture and accelerates rust
- Leave anchor plates and cleats installed but back the screws out slightly, clean the threads, apply a dab of anti-seize compound, and drive them back in flush — this makes spring removal easy
- Store rubber leg pads indoors rather than leaving them on the deck; cold makes rubber brittle and they'll compress permanently under furniture weight
- Clean and dry all strap webbing before storing coiled in a dry area
- Apply a UV-blocking furniture cover to any pieces staying on the deck over winter — this protects both the furniture finish and the anchor hardware underneath
Protecting your deck surface from anchor hardware
The spots where anchor plates sit are the most likely places to trap water and start rot in wood decks or staining in composite. Place a small stainless steel or rubber washer under each anchor plate to create a tiny gap that lets water run through rather than pool. Once a year, pull each plate, let the area dry, and inspect for soft wood or discoloration before re-seating the hardware. On wood decks, a bead of exterior sealant around each screw hole prevents water from wicking down the threads into the wood.
Quick-reference: which method for which situation
| Situation | Best Method | Approx. Cost | Drilling Required? |
|---|---|---|---|
| Renter or temporary setup | Rubber grip pads + furniture clips | $10–$30 | No |
| Lightweight chairs on composite deck | Suction-grip pads + strap anchor to railing post | $20–$50 | No |
| Dining set on wood deck (permanent) | Strap anchor plates screwed into joists | $30–$80 | Yes |
| Sectional on open deck | Sectional clips + 3 strap anchors into joists | $40–$100 | Yes |
| Heavy bench or Adirondack chair | Edge cleats or bolt-through into joist | $10–$40 | Yes |
| Storm prep (short-term) | Ratchet straps to railing posts | $15–$30 | No |
| Sloped deck | Composite shims + downhill-facing strap anchors | $25–$60 | Yes |
| Umbrella base | Weighted water/sand base + strap to table frame | $30–$70 | No |
If you want to go deeper on specific methods covered here, the approach of drilling and bolting furniture directly to deck framing is worth its own deep-dive, as is working on concrete patios where the anchoring hardware is completely different. Securing furniture to concrete uses masonry anchors and wedge bolts instead of wood screws, so don't assume the same hardware applies if you have a mixed deck-and-patio setup. Similarly, if your goal is connecting sectional pieces to each other rather than to the deck surface, furniture clips and sectional connectors are their own category worth exploring in more detail. If you're wondering how to install patio furniture clips, the key is choosing the right clip type for your chair or table frame and securing it to a solid surface.
FAQ
Do I need to re-tighten or re-check the anchors after installing patio furniture on my deck?
No, even a “tight” anchor can loosen as wood swells or as straps stretch slightly. For seasonal reliability, recheck strap tension at least twice during the first week after installation (especially on hot afternoons and cool mornings), then inspect monthly during heavy-wind months.
What should I do if I can’t tell whether my deck boards are hollow or solid when anchoring?
If your deck boards are hollow or you are on composite with visible hollow space, toggle-bolt style anchors are often safer than forcing a standard screw. The key is confirming what’s behind the surface, then using hardware rated for that substrate so you don’t create a stripped hole that won’t hold.
Why do rubber pads still slip even after I bought “heavy-duty” ones?
Use suction-cup or micro-grip style pads, but also confirm the bottom of your furniture is dry and clean. A quick wipe with isopropyl alcohol (let it fully dry) helps pads grab, and for composite specifically you may need pads marketed for smooth surfaces rather than generic outdoor grippers.
Are flat rubber pads enough for tube-leg furniture, or should I use end caps?
If your furniture has tube legs, end-cap style grips are typically more effective than flat pads because they contact more sides and resist twisting. If you only have flat pads, place one pad per leg but avoid stacking multiple thin pads, because compressed layers can slip more over time.
On a sloped deck, where should I route the straps so they resist tipping?
That’s a common mistake. If you’re using diagonal straps, measure your anchor locations so the strap pulls toward the direction that resists tipping, not straight downhill. For sloped decks, straps should run perpendicular to the slope to counter the “walk” direction.
How do I improve stability if my initial strap layout still lets furniture drift?
Try the pad or clip solution temporarily to test stability before drilling. If it still moves, move one anchor point closer to the high-risk area, then add a second anchor on the opposite corner of the main mass (table for dining sets) instead of adding several anchors at random spots.
Can I mix stainless straps with other hardware, like zinc-plated screws, if it’s cheaper?
For stainless hardware, avoid mixed metals like zinc-plated screws with stainless straps, because galvanic corrosion can still stain and weaken fittings over time. If you already have corrosion around holes, replace the affected fasteners and consider stainless washers or spacers under plates to reduce water pooling.
Is it okay to use my railing as an anchor point for storm tie-downs?
Yes, but only for short-term storm coverage. Do not rely on balusters or railing posts that are not engineered for lateral loads, and do not run the strap so it can slip off the chair back during gusts. Use this approach as supplemental lashing while you store movable pieces indoors when possible.
How can I ensure I’m anchoring into the joists instead of just the deck boards?
You’ll usually get a cleaner and safer result by anchoring into structure (joists) rather than just deck boards. Use a stud finder for joists, then predrill the correct pilot size to prevent splitting or creating a loose hole that won’t hold the strap plate under repeated vibration.
What’s the best way to stop drift without drilling, but still keep it long-lasting on composite?
Start with foam or silicone only as a temporary slip preventer, especially on composite, because some pads can absorb water and lose grip. If you need something that lasts the season, choose outdoor micro-grip or suction-cup pads and consider a thin bead of silicone under each pad only if you’re comfortable peeling it off later.
What’s the fix if my screw holes strip after a season?
If you used surface screws into deck boards and they loosen, don’t keep re-screwing the same hole. Pull the fastener, fill with a suitable filler or toothpick-and-glue approach for wood, or use a hardware solution meant for hollow panels on composite (for example, toggle anchors), then anchor again into joists if available.