To clip patio furniture together, flip the pieces upside down to expose the underside frames, align the mating sections so their edges are flush, then press or snap the clip connectors over both frames until you feel or hear a click and the clip sits flat. That's the core move. The rest of this guide is about making sure you're using the right clip for your specific frame, getting the joint level and wobble-free, and knowing what to do when the clip won't catch or the hardware is damaged.
How to Clip Patio Furniture Together Step-by-Step

Maren Grady
15 Jun 2026
First, Figure Out What Kind of Connection You're Actually Working With
Not all patio furniture clips work the same way, and using the wrong type is the number-one reason people end up frustrated. Before you buy anything or force anything together, spend two minutes identifying your connection type. Here's a breakdown of the most common ones you'll run into.
Modular sectional snap clips
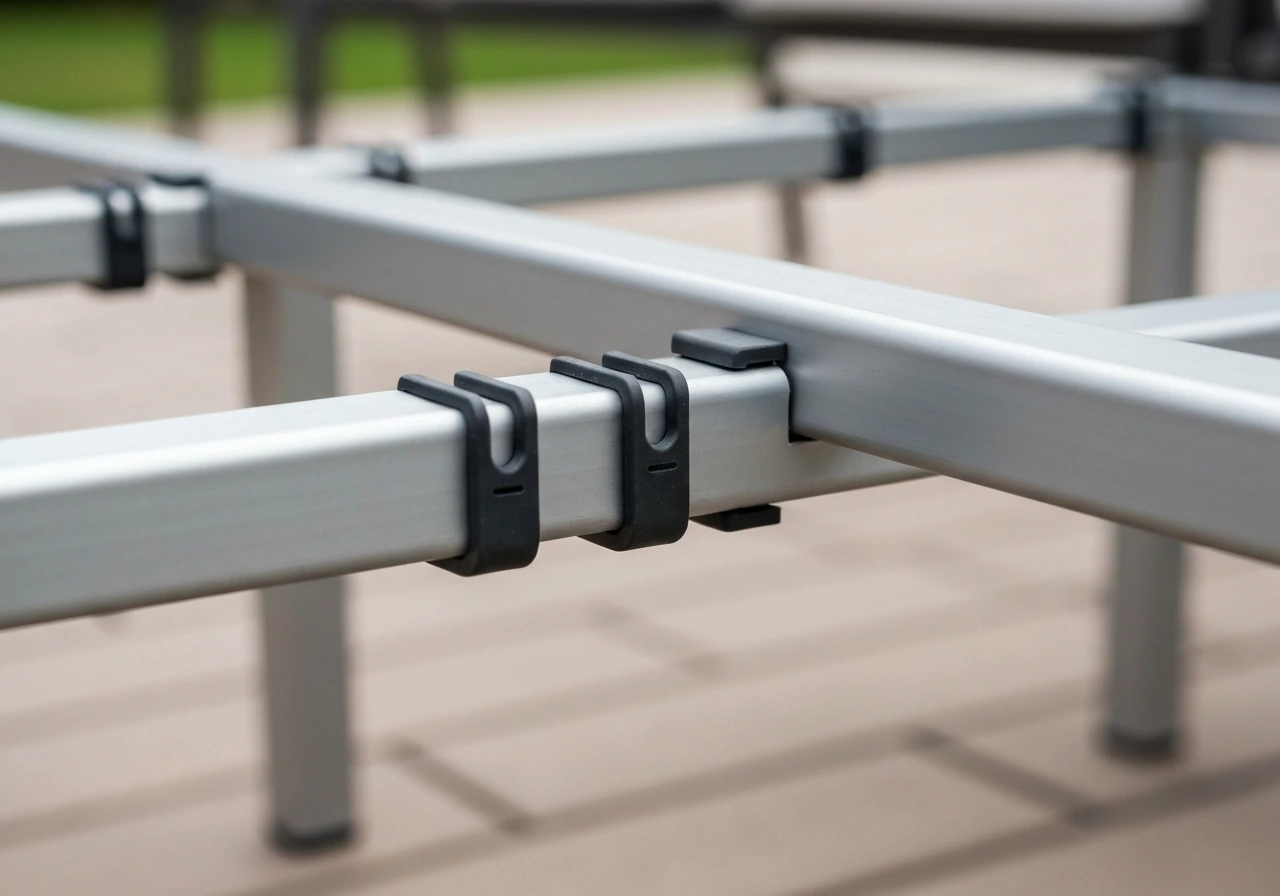
These are the most common type on wicker and rattan-style sectionals. They're usually small C-shaped or U-shaped plastic brackets that clip onto the bottom steel or aluminum frame of two adjoining seat sections, locking them side-by-side so they don't drift apart when someone sits down or stands up. Brands like Velago sell these as alignment connector clips, and third-party packs (like the SenQWFa 12-piece sets you'll find online) are heat-resistant plastic versions designed to do the same job. If you have a modular outdoor sectional sofa, this is almost certainly your clip type.
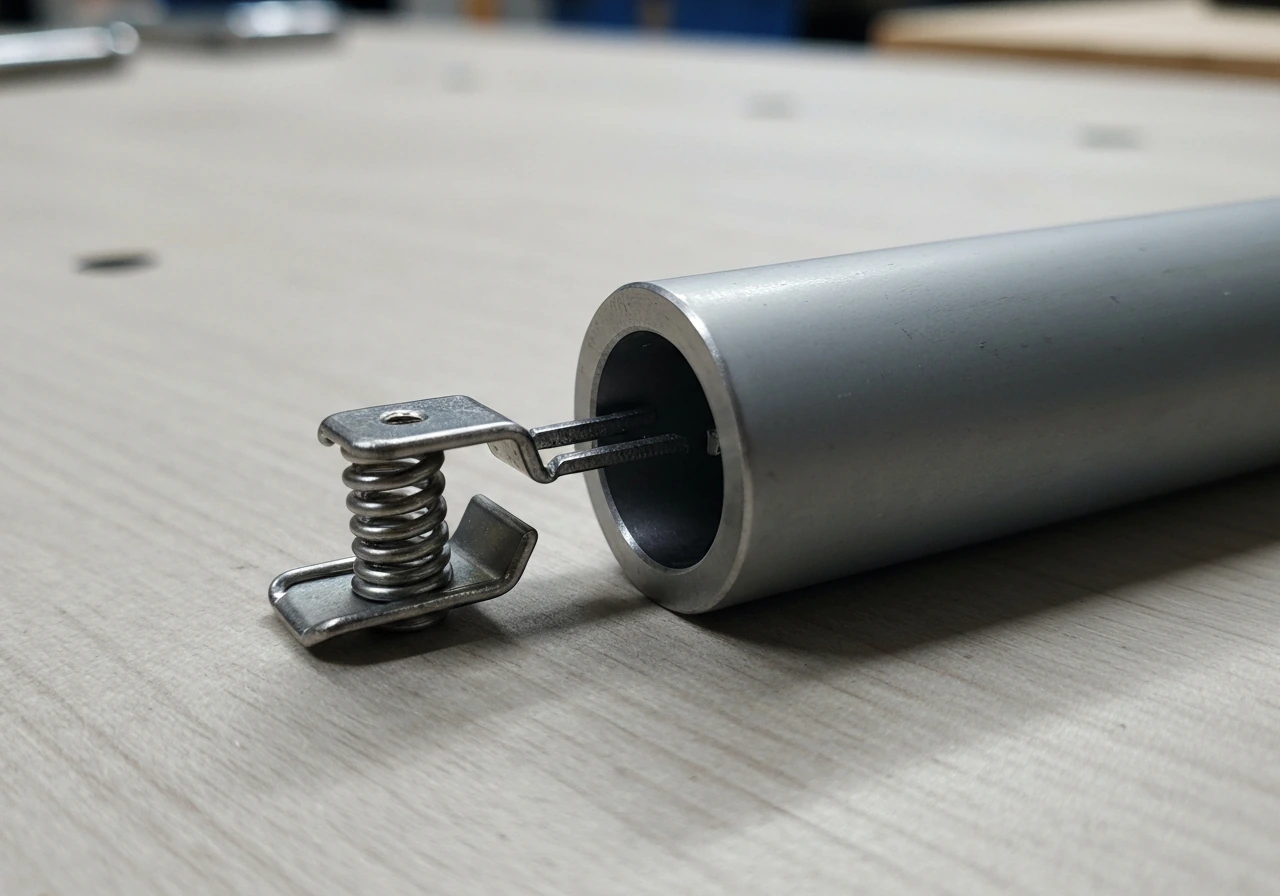
E-clips and S-clips for vinyl strap furniture
If you have a classic chair or lounger with woven vinyl straps, the clips holding those straps to the frame are a different animal entirely. These are sized to the frame tube dimensions. Patio Direct, for example, lists their #30-800 E-Clip for 5/8-inch square frames and their #30-801 S-Clip for 1/2-inch square frames. Getting the wrong size here means the clip either won't grip the frame or will pop off under load. Measure your frame tubing before ordering anything.
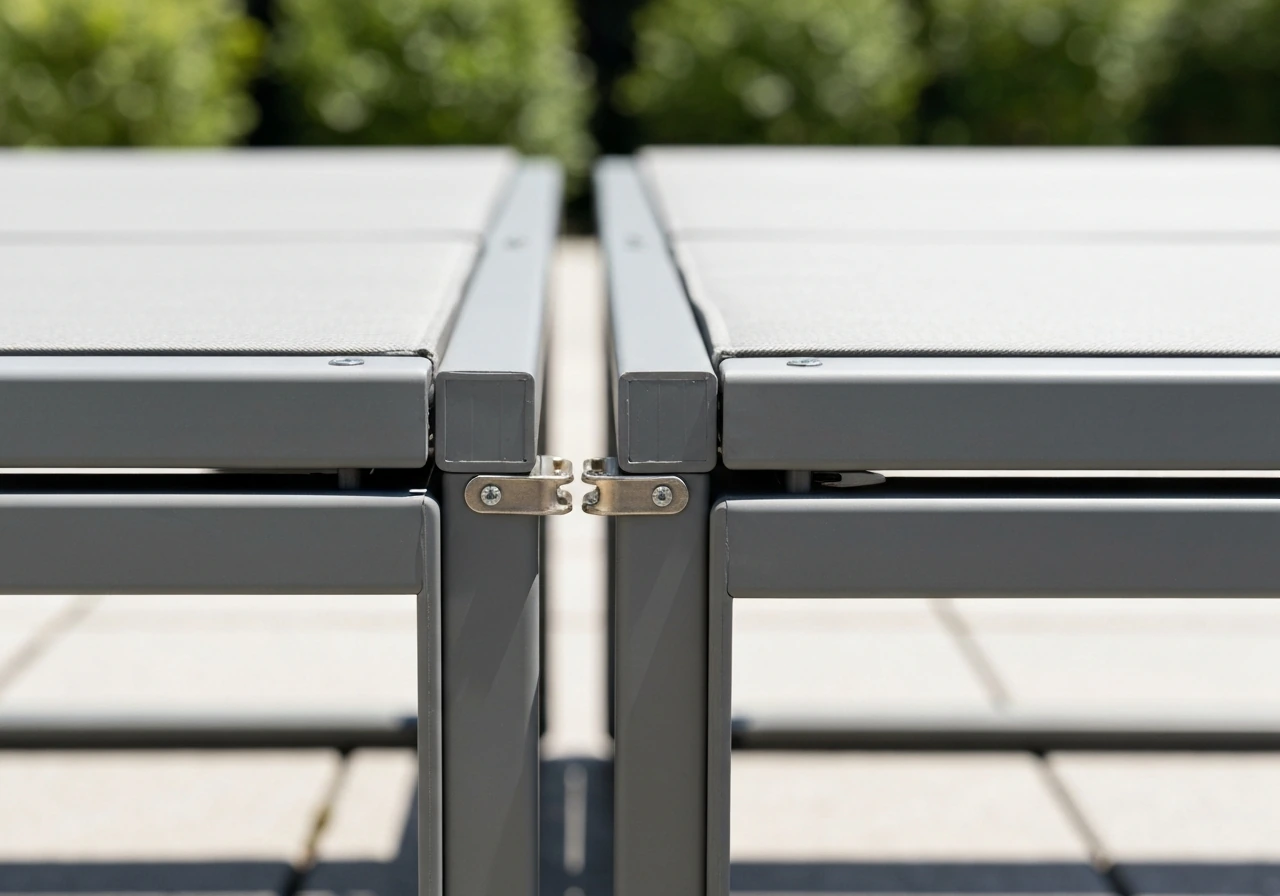
Click-lock and cam-lock table connectors
Tables and table-leaf extensions often use a different system. Click-catch style connectors (like the F4242 style from table hardware suppliers) have a male piece and a female piece that snap together when you press the table sections toward each other. They're typically zinc-plated steel and have specific diameter and length requirements, so compatibility is dimension-specific, not generic. Cam-lock connectors are similar but use a rotating cam to clamp a bolt-head in place, and they rely on precisely aligned pre-drilled holes. If your cam doesn't turn smoothly or the joint stays loose, the holes are usually the problem.
Click-lock leg and frame connections
Some outdoor table legs and bases use a positive-lock click system where the leg top is engineered to click into the table base assembly with a single push. These are typically proprietary to the manufacturer, and if one breaks, you'll need the exact replacement part from that brand. Check your original documentation or look for a model number stamped on the underside of the frame.
Gather the Right Tools and Hardware Before You Start
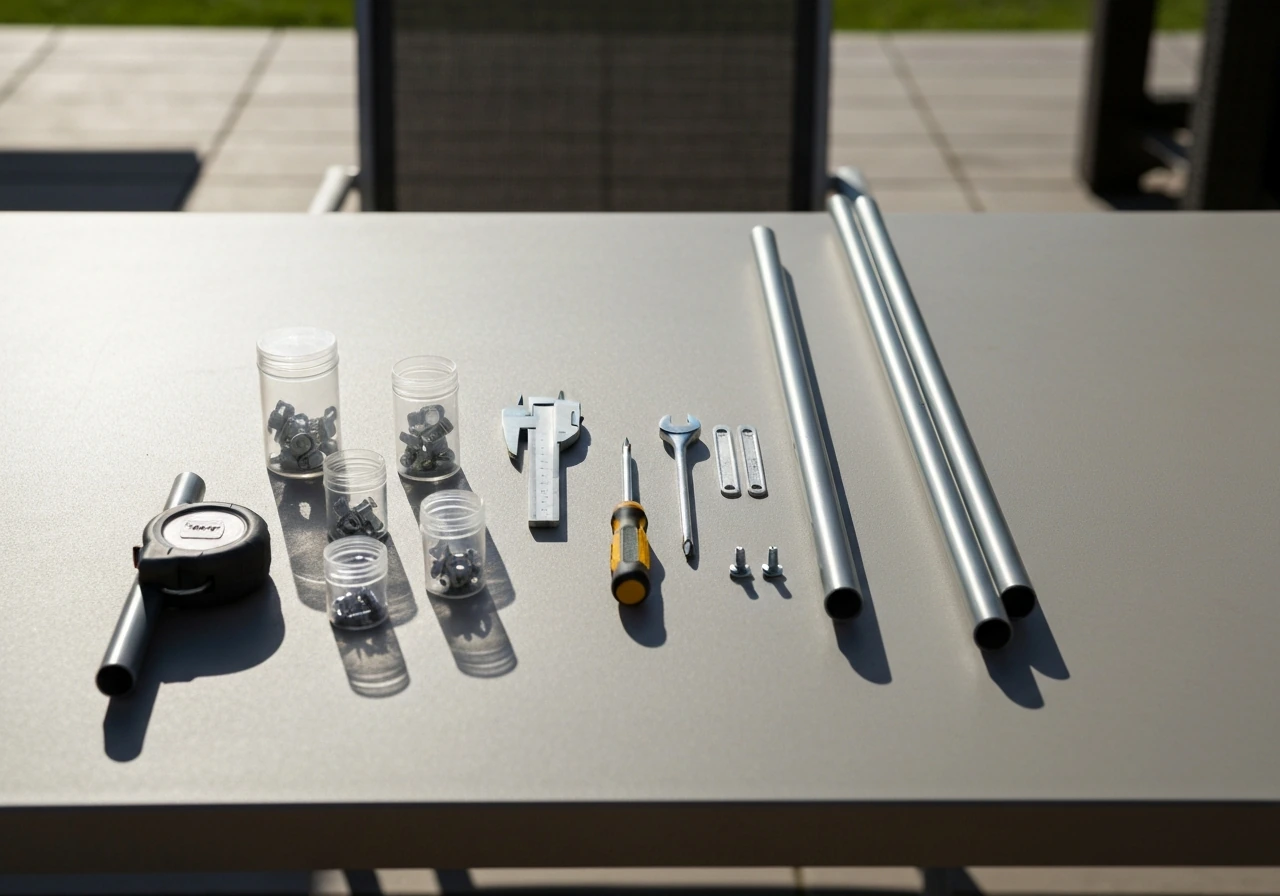
One of the biggest time-wasters is starting the job and then having to stop because you're missing a clip or the right size screwdriver. Here's what you actually need.
- Replacement clips or connectors matched to your frame type and size (measure frame tubing with a tape measure or calipers before ordering)
- Flathead screwdriver or a plastic pry tool (for releasing old or stuck clips without scratching the frame)
- Needle-nose pliers (for crimping E-clips or S-clips onto strap furniture frames)
- A rubber mallet (for pressing snap connectors into place without cracking plastic)
- Tape measure and a small carpenter's level
- Cleaning rag and mild soapy water (clip surfaces need to be clean and dry to seat properly)
- Thread-lock compound like Loctite Blue 243 if you're also working with bolts or screw-type connectors
- Adjustable furniture levellers or plastic shims (for getting joints level on uneven surfaces)
- Spray lubricant like WD-40 or white lithium grease (for stubborn or corroded clip mechanisms)
For replacement clips, start with your furniture manufacturer's website. If the set is discontinued, search by clip type and frame dimensions on Amazon or hardware sites. Generic 12-packs of sectional snap clips run about $8 to $15 and often work fine for wicker modular sets. E-clips and S-clips from patio specialty suppliers like Patio Direct typically run under $1 each when bought in small quantities. Cam-lock hardware from woodworking suppliers is similarly cheap, usually 50 cents to $2 per connector. Repairing Broken Sectional Clips on Outdoor Furniture | Carolina Patio Furniture notes that a sectional-clip repair guide recommends aligning the replacement clip to the existing hole/position from the prior clip and checking alignment before final adjustments (repair workflow for modular clip hardware).
How to Clip Your Patio Furniture Together, Step by Step
I'll walk through the modular sectional clip process in detail since it's the most common, then cover the variations for strap furniture and table connectors. The core technique is the same across all of them: clean, align, clip, confirm.
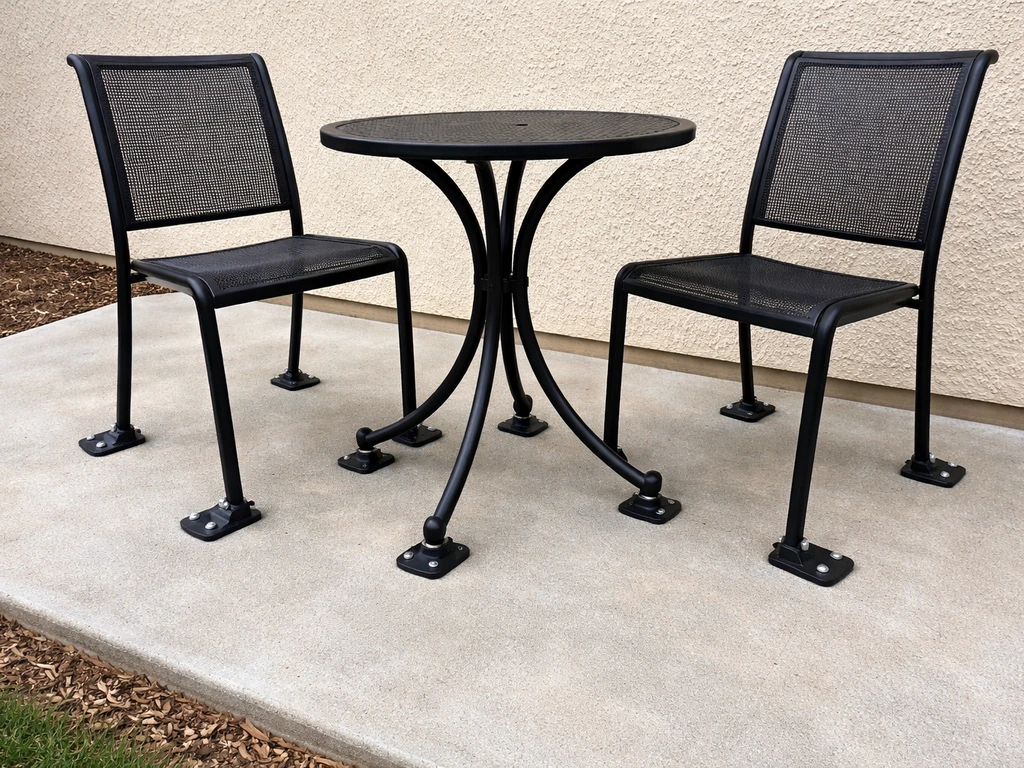
- Clear the area and flip the furniture sections upside down on a clean, flat surface like a patio or garage floor. Put down a moving blanket or cardboard first if your cushion fabric or frame finish is delicate. This gives you clear access to the underside frame where the clips attach.
- Clean the frame channels where the clips will sit. Wipe off any dirt, old grease, or rust scale with a damp rag. Clips won't seat fully on a dirty frame, and that leads to a wobbly joint even when you think it's locked.
- Position the two sections next to each other with their frames touching along the intended mating edge. The frame rails should be parallel and the edges flush. If one piece is sitting higher than the other, fix that now before you install any clips.
- Hold the clip so the open channel of the C or U shape faces the two frame rails you're joining. For modular sectional clips, you're bridging the clip across both frame rails at the same time.
- Press the clip firmly down over both rails using your thumbs or the rubber mallet with light taps. You're looking for the clip to wrap snugly around both frame rails and sit flush against the underside of the frame. On quality clips, you'll feel a definite snap or resistance increase when it's fully seated. As one manufacturer instructions put it simply: press connectors together until they click.
- Install clips at both ends of the connecting edge, then add any middle clips if your set includes them. A typical two-seat sectional join needs at least two clips: one near each corner of the shared edge. Longer sectional runs may need three or four.
- For E-clips and S-clips on strap furniture: thread the vinyl strap through the clip channel first, fold the strap end back, then use needle-nose pliers to crimp the clip closed over the frame tube. Note that replacement vinyl straps often need to be warmed with a heat gun to stretch properly onto the frame before the clip can engage.
- For click-catch table connectors: insert the female half into the underside of one table section per the manufacturer's placement dimensions, then bring the mating table section close, align the male piece with the female receiver, and press the sections together firmly until the connector clicks. These are not reversible without a release tool.
- Flip everything right-side up and press down on the joint from above to confirm nothing shifts. A properly clipped joint should feel solid under hand pressure.
Check for Stability and Alignment Before You Call It Done
This step is easy to skip and really easy to regret. A joint can look clipped and still wobble, especially if the furniture is sitting on an uneven patio surface or if the clip is holding the frames at a slight angle.
Set the assembled piece on the surface where it will actually live and sit in it or lean on it. Rock it front to back and side to side. Any movement beyond a small flex in the frame itself means either the clips aren't fully engaged, the frames weren't fully flush when you clipped them, or the surface underneath is uneven. Don't try to fix an uneven surface problem by forcing the clips tighter. That just stresses the plastic and can crack it.
Use a small level across the seat frame or tabletop to confirm the joint isn't introducing a tilt. For minor surface unevenness, adjustable furniture levellers or plastic shims wedged under the appropriate leg are the right fix. One important thing to remember: if you move the furniture to a different spot after leveling, you'll likely need to re-check the level again. The geometry changes with the surface.
For cam-lock and table connector assemblies, if holes aren't aligning properly, the most common fix is to back out all fasteners to a loose state first and then re-approach the final tightening sequence from scratch. Over-tightening one side early is what causes the misalignment in the first place. Work in a crisscross pattern, snugging fasteners gradually rather than fully tightening one at a time.
When Things Go Wrong: Fixing the Most Common Clip Problems
Here's where I've personally messed up and wasted a weekend. Let me save you some of that.
The clip won't engage or keeps popping off
Nine times out of ten this is a sizing issue. The clip channel is either too wide for your frame tube or the clip has been slightly bent out of shape. If it's a new clip that won't grip, compare the internal channel width against your frame tube measurement. A 5/8-inch E-clip on a 1/2-inch frame will never hold properly. If the clip is the right size but still won't catch, try cleaning both the clip and the frame surface, then press firmly with the rubber mallet rather than just hand pressure. If it still won't seat, the clip may be defective or the frame tube itself is bent or burred. MOD Corner Connector Instruction Manual notes that a modular outdoor furniture corner connector manual format exists for snapped/clicked modular frames and commonly addresses replacement/defective parts through the manufacturer’s documented process (useful template for what manufacturers provide for snap/clip systems).
Stripped or damaged screw holes on connector hardware
For connectors that use a screw or bolt alongside a clip (common on cam-lock systems), stripped holes are usually caused by over-tightening or cross-threading. If a bolt hole in an aluminum frame is stripped, your best fix is a slightly larger bolt with a corresponding anchor insert, or a furniture repair insert that threads into the damaged hole and gives the bolt fresh material to grip. Don't keep trying to tighten a bolt into a stripped hole. You'll just make the hole bigger.
Bent frames that prevent clips from seating
If a frame rail is bent, no clip will compensate for that. You can sometimes straighten aluminum tubing with careful pressure from a rubber mallet working in small increments, but assess honestly whether it's worth it. A badly bent frame that holds less weight than rated is a safety risk, especially on seating. For modular sectionals, it's often cheaper to replace a single damaged module than to fight with bent frames.
Misaligned pre-drilled holes
This is a classic new-furniture assembly problem. The holes look like they should line up but they're off by a few millimeters. Loosen everything you've already tightened, reposition the panels or sections so they're fully flush by hand, and then re-insert fasteners loosely before doing any final tightening. Forcing alignment by tightening bolts gradually is the right approach. A sectional clip repair guide recommends aligning the replacement clip to the existing hole position from the previous clip before making any final adjustments, which is good advice for any connector system.
Cracked or worn plastic clips
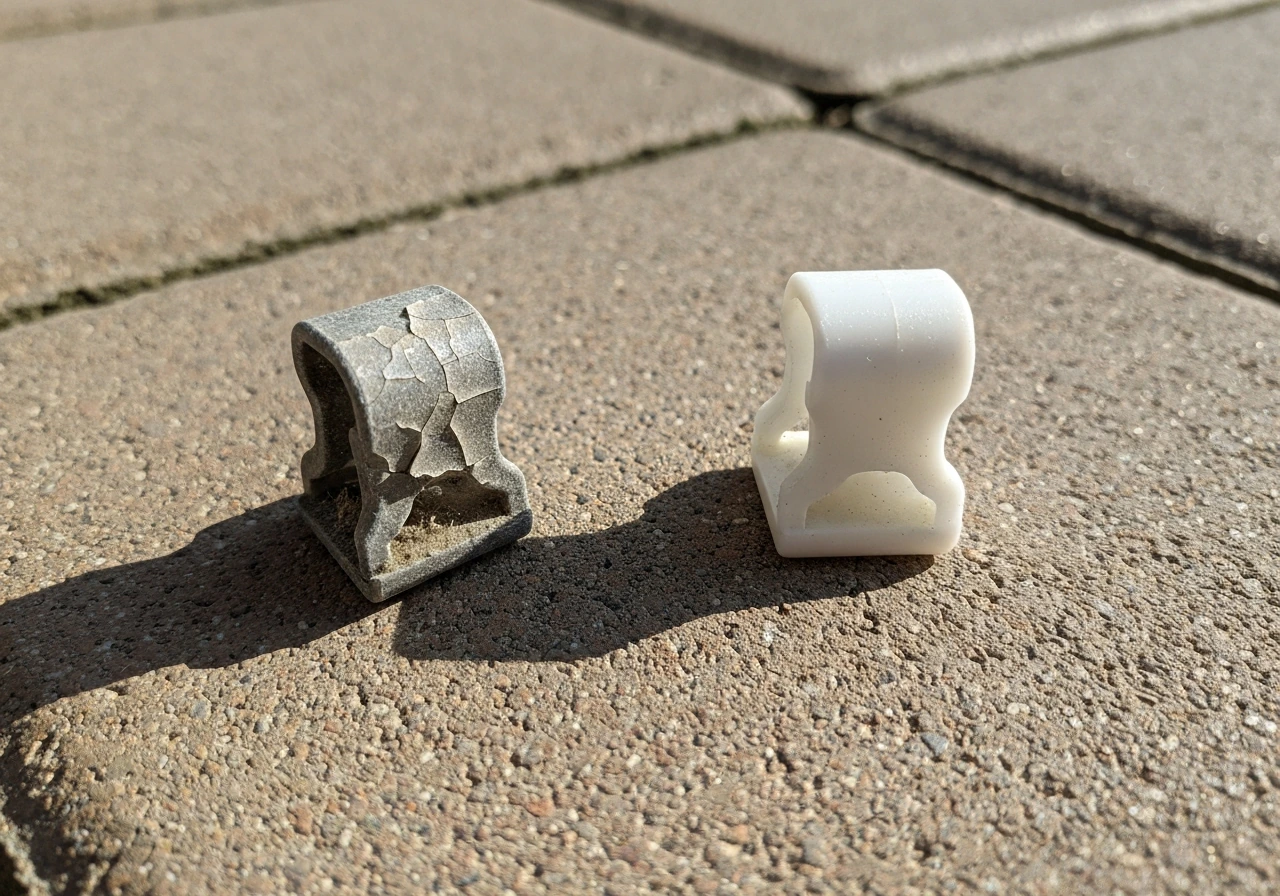
Plastic snap clips degrade in UV exposure over time. If you see visible cracks or the clip feels brittle, replace it rather than reuse it. Patio Products specifically notes that old clips can sometimes be saved if undamaged, but cracked plastic is not undamaged. A cracked clip under load is a failure waiting to happen. Budget replacement 12-packs are cheap enough that there's no reason to gamble on a cracked one.
Keeping Your Clips and Connections Solid Season After Season
Getting everything clipped together is only half the job. Outdoor furniture takes a beating from rain, UV, freezing temperatures, and general use, and the hardware that holds it together needs some attention if you want it to last more than a season or two.
Rust and corrosion prevention
Even zinc-plated steel connectors will eventually show surface rust if they're left wet repeatedly. After any rain or cleaning, wipe down exposed metal connectors with a dry cloth. Once a season, hit steel connectors with a light coat of white lithium grease or a corrosion-inhibiting spray. For aluminum frames, look for white oxidation powder forming around the clips, which is galvanic corrosion from the different metals touching. A thin barrier of silicone grease between a steel clip and aluminum frame slows this down considerably.
Inspection schedule
Check every clip and connector at the start of each season and again mid-season if the furniture sees heavy use. You're looking for clips that have worked loose, cracked plastic, and any visible rust. It takes about five minutes per chair or sectional section to flip it over and do a quick visual. Catching a failing clip early means a $10 replacement pack, not a sprained back from a chair that gave way.
Storage and covering
When storing sectional furniture for winter, detach the clip connectors before stacking the sections. Leaving clips under compression stress in storage accelerates plastic fatigue, especially with temperature swings. Store clips in a labeled zip-lock bag taped to the furniture or stored with it so they don't get lost. If you're leaving furniture outside through mild winters, use fitted outdoor furniture covers that allow some airflow to prevent moisture buildup around metal connectors. A good cover that traps condensation will actually cause more corrosion than no cover at all.
Post-move rechecks
Any time you move assembled sectional furniture across the yard or in and out of storage, re-check that all clips are still seated. Dragging furniture across concrete or uneven pavers is one of the most common ways clips pop loose without anyone noticing. Give the assembled set a firm push from multiple directions before anyone sits in it after a move.
Your Next Step Based on What You're Looking At Right Now
If your clips are missing entirely, order a replacement pack matched to your frame tube size and clip style before doing anything else. If your clips are present but not engaging, work through the sizing and cleanliness checks before assuming the clips are broken. If your clips are cracked, replace them today. If your frame holes aren't lining up, back everything out and re-approach the assembly with all fasteners loose. And if your furniture is wobbling on the surface rather than at the joint, address the leveling issue separately with shims or adjustable feet.
Sometimes the real answer is that a pure clip connection isn't enough for your situation, especially on a deck or in a windy area. If you're finding that your clipped sections keep shifting despite good clips and a level surface, it may be worth combining clip connectors with a secondary anchoring approach. If you need to stop the whole piece from sliding or tipping, you may also want to bolt down patio furniture using appropriate hardware for your surface. For decks, a secondary anchoring method helps keep the furniture from shifting when people move around or when wind gusts hit secondary anchoring approach. This is where learning how to anchor patio furniture correctly can help, especially for windy or deck locations secondary anchoring approach. The same goes for tables and chairs in high-wind spots: clips hold sections together, but they don't anchor the furniture to the ground. A simple way to handle that is to secure patio furniture to concrete with anchors or brackets rated for outdoor use. If you need to anchor patio furniture to a deck, use proper deck-mount hardware or strap-based anchoring instead of relying only on clips anchor the furniture to the ground. Those are two separate problems that need two separate solutions.
| Connection Type | Best For | Typical Hardware | Approximate Cost | DIY Difficulty |
|---|---|---|---|---|
| Modular snap clips | Wicker/rattan sectional sofas | C-shaped or U-shaped plastic clips | $8–$15 per 12-pack | Easy |
| E-clips / S-clips | Vinyl strap chairs and loungers | Metal crimp clips sized to frame tube | Under $1 each | Easy to moderate |
| Click-catch table connectors | Joining table sections/leaves | Zinc-plated steel male/female pairs | $5–$15 per pair | Moderate |
| Cam-lock connectors | Knockdown frame assemblies | Plastic cam housing plus bolt pin | $0.50–$2 each | Moderate |
| Positive-lock leg clicks | Table base to leg assemblies | Proprietary manufacturer part | Varies by brand | Easy if part is available |
The comparison above should help you zero in on which hardware you need before you spend any money. If you're not sure which one matches your furniture, take a photo of the underside frame and the existing connector (or where one used to be) and either search by image or bring it to a local patio furniture repair shop. Most will identify it for free in under a minute.
FAQ
Can I clip patio furniture together while it’s right-side up, or do I need to flip it upside down?
Flipping it exposes the underside frames so you can align the mating surfaces precisely and verify the clip seats flat. If your design allows access from the side, you still need to confirm engagement by feel, and you may miss a partially caught clip that looks aligned but wobbles under load.
What should I do if the clip clicks once but still feels loose afterward?
A single click can mean the clip is partially engaged. Re-check that the two frames are fully flush before pressing again, then press with steady force (or use a rubber mallet as the guide suggests). If it still shifts, stop, inspect for debris, and verify tube size and clip channel width, since repeated re-clipping can fatigue the plastic.
Is it safe to reuse old plastic snap clips that look fine but are older than a season or two?
If they are uncracked and not brittle, reuse may be acceptable, but UV aging can make clips weaker even when they appear intact. Do a seat test by rocking at the joint after assembly, and replace any clip that shows whitening, hairline cracks, or any looseness during the rocking check.
How can I tell the difference between a sizing problem and a bent frame problem?
Sizing issues usually show up as the clip not gripping the tube (it won’t seat fully, or it pops back off). A bent frame often causes misalignment where holes or mating edges never become flush even when you reposition by hand. If you can get the joint flush with hand alignment but the clip still won’t catch, suspect sizing or cleanliness first; if flush alignment is impossible, suspect frame damage.
What’s the correct way to clean the clip and frame before trying again?
Remove dirt, dust, and any oxidation from both the clip contact surfaces and the frame channel where the clip grips. Use a dry wipe to start, then wipe dry after any cleaner you use, since moisture or residue can prevent a clean snap and can worsen corrosion once assembled.
How tight should I seat connectors that use a cam-lock or bolt?
Snug gradually and use a crisscross approach rather than tightening one side fully first. If you have to force the cam or turn bolts with resistance early, stop and re-align with all fasteners left loose, because over-tightening can cross-thread, strip holes, or create the misalignment that later prevents proper seating.
If multiple clips fail during assembly, should I replace all of them or just the broken ones?
Replace any clip that cracked, deformed, or will not fully seat. Also consider replacing adjacent clips of the same age if they were exposed to repeated failed attempts, since forcing clips into a bad alignment can weaken them even if they still “catch” later.
What if my sectional clips are missing, but the replacements look similar to the originals?
Do not rely on visual similarity alone. Confirm tube size and clip type, since E-clips and S-clips (and table connectors) are dimension-specific. Take a photo of the underside frame and the existing connector area, then match by clip channel width and frame dimensions before ordering.
Do I need to level the patio surface even if the joint looks properly clipped?
Yes. Clips hold sections together, but they cannot compensate for an uneven surface. If the assembled piece rocks more than slight flex, fix the surface with shims or adjustable feet first, because forcing the clip to compensate can crack plastic and create future looseness.
How often should I re-check the clips after the furniture is assembled?
Check at the start of each season and mid-season if the furniture is heavily used. Also re-check after moving the furniture across pavers or concrete, since dragging can partially pop clips loose without obvious signs.
Should I detach clips when storing sectional furniture for winter, even if the pieces are dry and indoors?
For winter storage, detach or remove snap connections before stacking to avoid compression stress and temperature-driven fatigue. If you cannot detach, at least avoid stacking in a way that keeps joints under load, and store clips separately in a labeled bag so you can verify correct placement at reassembly.
When is it better to bolt down or anchor patio furniture instead of relying on clips?
Use clips for joining sections, but choose anchoring when the furniture slides, tips, or shifts in wind or on decks. If a properly leveled setup still moves despite fully seated clips, add a secondary anchoring method appropriate for your surface, since clips alone do not prevent ground-level movement.