The most reliable way to keep patio furniture from flying away is to combine anchoring with smart threshold decisions: use rated tie-down straps or bolt-down anchors for pieces you leave out, add real dead weight (concrete pavers or filled sandbags) to heavy items, and move lightweight pieces inside whenever sustained winds are forecast above 35 mph. No single fix works for every piece in every storm, so this guide walks through each method in order from 'five-minute emergency fix' to 'permanent installation', with honest notes on what actually holds and what will fail you when a gust hits. For a step-by-step checklist and product recommendations on how to keep patio furniture from blowing away, see this practical guide.
How to Keep Patio Furniture From Flying Away: DIY Fixes

Maren Grady
30 Jul 2026
Why wind sends patio furniture airborne (and what actually stops it)
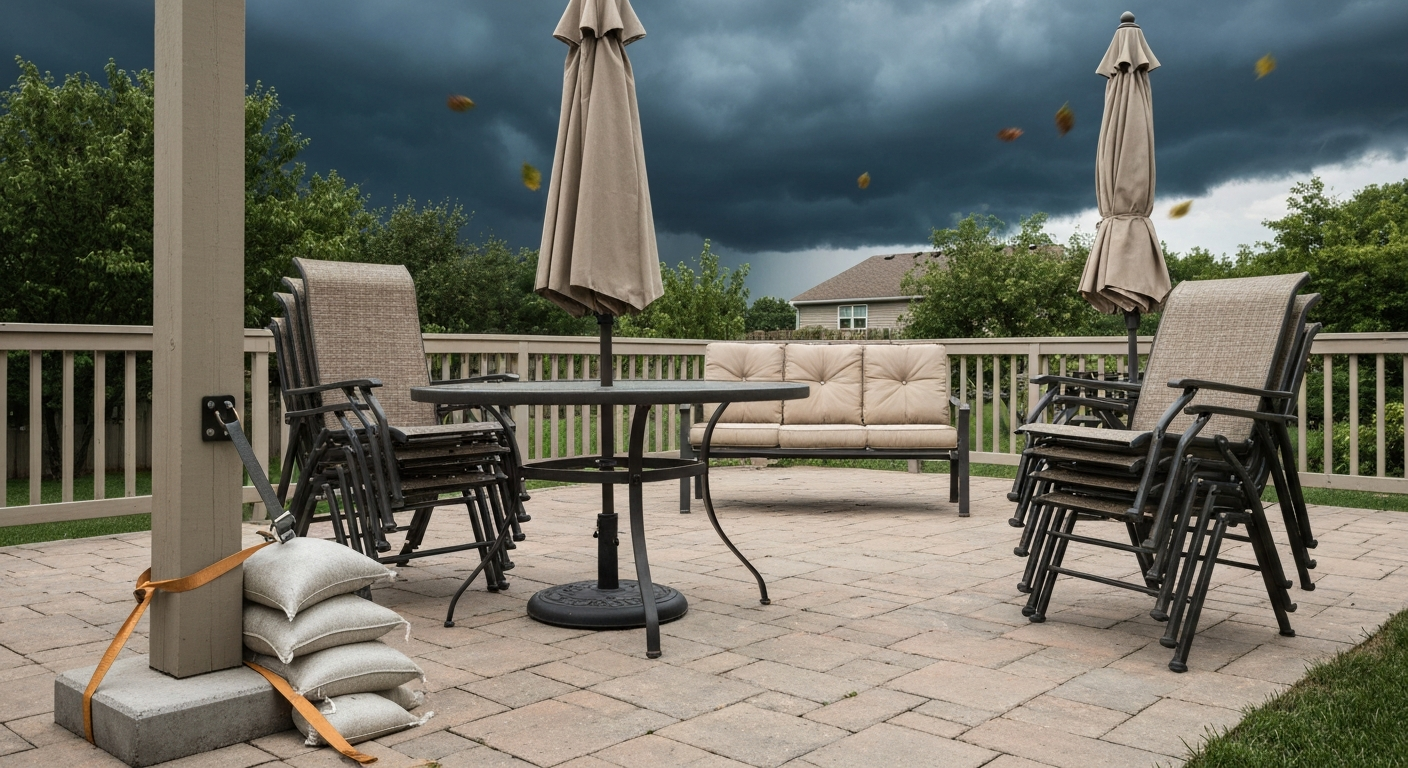
Wind doesn't just push furniture sideways. It gets underneath flat surfaces like tabletops and seat cushions, creating lift the same way it does under a wing. A standard 48-inch round patio table can catch enough upward force at 40 mph to become a projectile. Chairs tip because their center of gravity is high relative to their base width, and lightweight aluminum or resin pieces are especially vulnerable because they lack the mass to resist even moderate gusts. Understanding this is the first step: you're not just fighting a push force, you're fighting lift, tip, and tumble simultaneously.
Basic prep comes down to three principles. First, reduce surface area exposed to wind when possible (folding chairs flat, stacking pieces, removing cushions and pillows). Second, lower the center of gravity or increase base weight so tipping requires more force. Third, physically restrain the piece to a fixed anchor point. The methods in this article work through all three of these, and most can be stacked together for better results in serious weather.
Tools, materials, and what things actually cost
Before you run to the hardware store, here's everything you might need across all the methods below, with honest price ranges. You don't need to buy all of this at once, start with what matches your most vulnerable pieces and your typical local weather.
| Item | What it's for | Approx. cost | Where to find it |
|---|---|---|---|
| Ratchet tie-down straps (WLL-rated, 1" or 2" webbing) | Anchoring furniture to deck railings, posts, or anchor rings | $8–$20 for a 4-pack | Hardware store, online |
| Bungee cords (heavy-duty, 36–48") | Quick, temporary bundling of stacked chairs | $6–$12 for a pack | Hardware store, dollar store |
| Sandbags (woven polypropylene, unfilled) | Fill on-site for portable leg weights | $15–$25 for a 10-pack | Hardware store, landscape supplier |
| Play sand or all-purpose sand (50-lb bag) | Filling DIY weight bags | $5–$8 per bag | Hardware or garden center |
| 12"x12"x2" concrete pavers | Dead-weight base for table legs | $1.50–$3 each | Home improvement store |
| Deck anchor plates (surface-mount) | Bolt-down anchor points on wood decks | $15–$30 each | Hardware store, online |
| Concrete wedge anchors (3/8" or 1/2") | Permanent anchoring into concrete pads | $10–$20 per box of 25 | Hardware/masonry store |
| Stainless steel eye bolts or D-rings (Type 316) | Corrosion-resistant attachment points, especially coastal | $3–$8 each | Marine/hardware store |
| Carabiner clips (rated, aluminum) | Quick-connect points on strap systems | $5–$15 for a pack | Hardware or outdoor store |
| Hammer drill + masonry bit (3/8" or 1/2") | Drilling into concrete pads for anchors | $40–$80 (buy or rent) | Hardware store; rent ~$20/day |
| Socket wrench set | Tightening anchor bolts and ratchet straps | $15–$30 | Hardware store, thrift store |
| Tape measure and pencil | Marking anchor positions | Usually already owned | Any hardware store |
| Zip ties (heavy-duty, UV-resistant) | Bundling lightweight chairs and securing loose parts | $5–$10 for a bag | Hardware or dollar store |
| Outdoor Velcro strip (heavy-duty, weatherproof) | Attaching cushions to chair frames | $8–$15 per roll | Hardware or fabric store |
A word on bungee cords: they're fine for bundling a stack of folded chairs so they don't scatter, but they are not a rated load restraint. They stretch, they age under UV, and their breaking strength is low. I'll explain exactly where they belong and where they fall short in the emergency methods section below. For actual wind-load restraint, always use ratchet straps with a visible Working Load Limit (WLL) tag.
When to secure vs. when to just bring it inside
This is the decision most people skip, and it's where injuries and property damage happen. Not every wind event is the same, and anchoring lightweight resin furniture in a 60-mph gust is asking a lot of a $12 ratchet strap. Here's a practical framework based on National Weather Service thresholds.
| Wind condition | Sustained speed | Gusts | Recommended action |
|---|---|---|---|
| Light-moderate breeze | Under 20 mph | Under 25 mph | Normal use; no action needed for most solid furniture |
| Fresh breeze (Beaufort 5) | 25–35 mph | Up to ~40 mph | Secure cushions and pillows; fold and stack lightweight chairs; consider storing umbrellas |
| Wind Advisory threshold | 30–39 mph sustained | Gusts common | Anchor or store all loose furniture; NWS advises securing loose objects at this level |
| High Wind Warning | 40+ mph sustained | Gusts 58+ mph | Store everything you can bring inside; anchor only heavy, bolt-down pieces that can't be moved |
| Tropical storm / hurricane threat | Any | Potentially extreme | NOAA and NWS explicitly advise bringing all patio furniture inside — no anchor is a substitute |
Check the forecast the night before if possible. The NWS issues Wind Advisories for sustained winds roughly 30–39 mph, and High Wind Warnings for sustained 40 mph or gusts above 58 mph. See National Weather Service Glossary, Wind Advisory / High Wind definitions for official thresholds and local variations National Weather Service Glossary — Wind Advisory / High Wind definitions. When you see either of those products in your area, that's your trigger to act, not to wait and see. I've learned the hard way that 'it probably won't be that bad' is how you end up with a chair through a window screen.
A practical personal rule: if gusts are forecast above 35 mph, lightweight aluminum chairs and any pieces under about 20 pounds come inside. Medium-weight pieces (cast iron, heavy resin) get anchored. Anything that can't be moved and can't be anchored gets stacked, nested, and bungeed into a low-profile bundle against a wall or fence.
Quick emergency methods: what to do when a storm is hours away
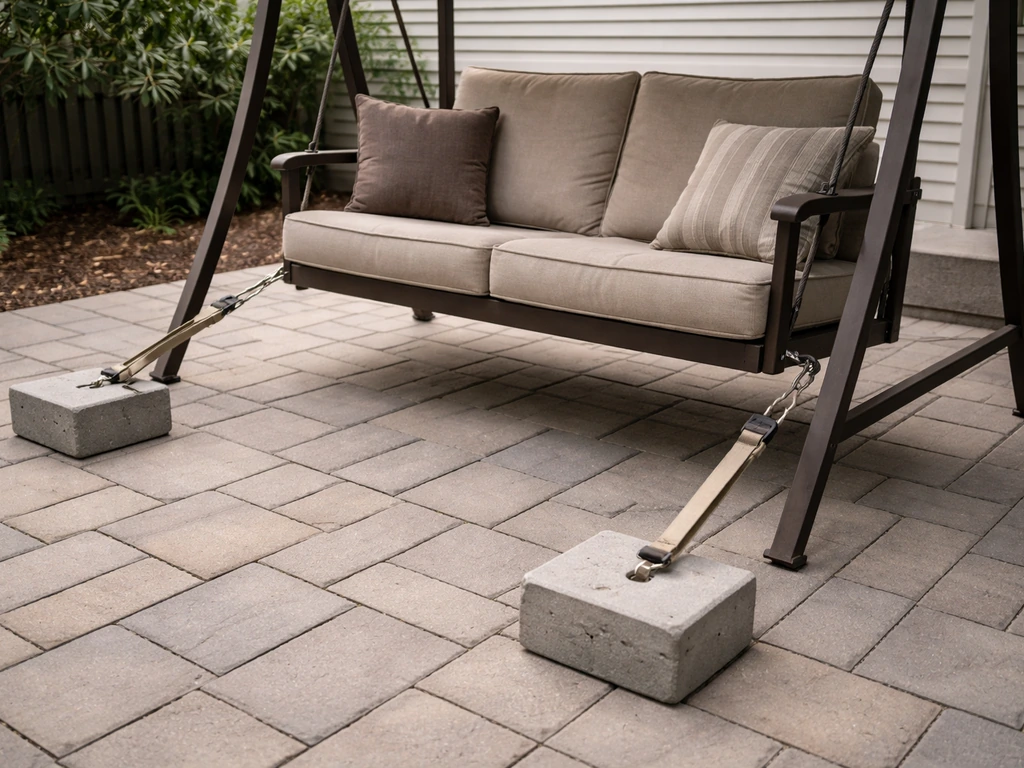
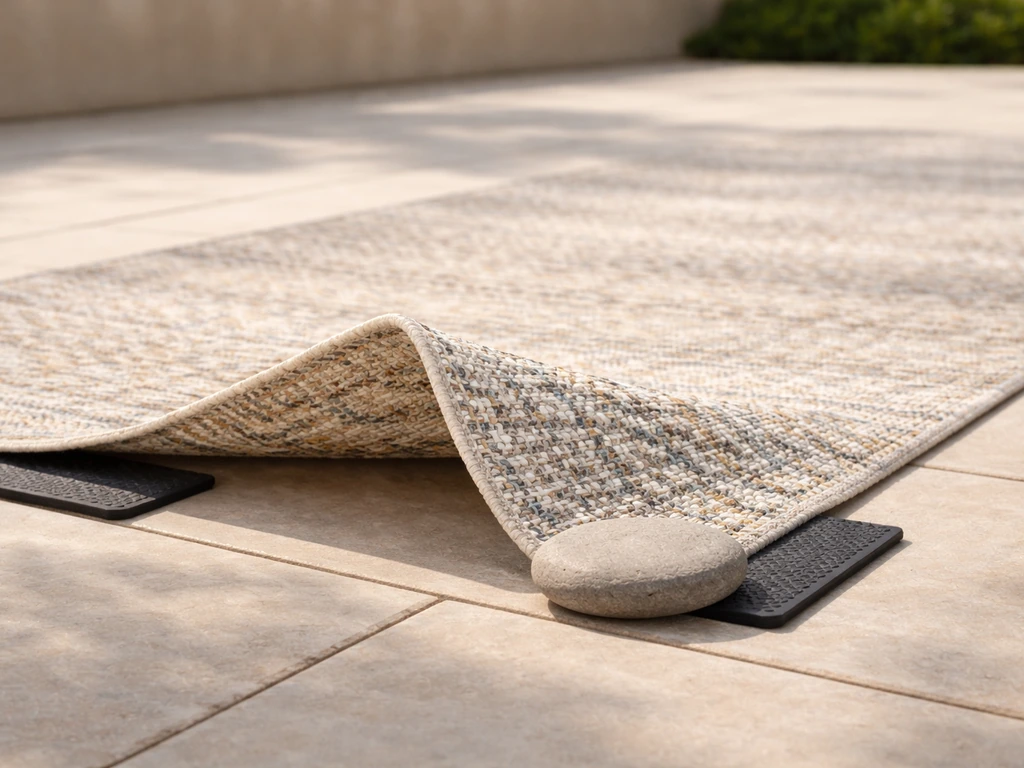
Sometimes you don't have two days to install deck anchors. You need something that works this afternoon. The two fastest emergency methods are strap-and-tie systems and portable dead weight. If you need specific steps for a hanging patio swing, see our guide on how to keep patio swing from blowing over. Both can be deployed in under 30 minutes with supplies from a hardware store or things already in your garage. Neither replaces a permanent anchor for serious storms, but both can save your furniture in a typical fast-moving weather system. If you also need tips on preventing lightweight outdoor textiles from lifting in gusts, see our short guide on how to keep patio rugs from blowing away.
- Ratchet straps and tie-downs: fast, reusable, effective when anchored to a solid fixed point like a deck post or railing
- Bungee cords: useful only for bundling stacked or nested pieces — not for holding furniture against wind load
- Portable weights (sandbags, pavers, water containers): add mass to heavy pieces that can't be moved; especially effective on table bases
- Stacking and nesting: reducing surface area exposed to wind is free and often overlooked — stack chairs face-to-face, nest tables inside larger ones
- Moving against a wall or solid fence: even a few feet into a sheltered corner can dramatically reduce the effective wind force on a piece
Emergency method 1: ratchet straps, tie-downs, and bungee cords
What you need
- 1" or 2" ratchet tie-down straps with WLL rating (look for WLL marked on the label — use the WLL number, not the break strength, which is typically 3x higher)
- Carabiner clips or S-hooks rated for outdoor use
- Bungee cords (for stacking/bundling only, not primary restraint)
- Heavy-duty zip ties as secondary bundling
- A fixed anchor point: deck post, steel railing, lag-screwed eyebolt, or patio fence post
Step-by-step anchoring with ratchet straps
- Identify your anchor point. It must be fixed and structurally sound — a deck railing post, a lag-screwed eyebolt in a wall stud, or a ground anchor. A flimsy fence picket is not adequate.
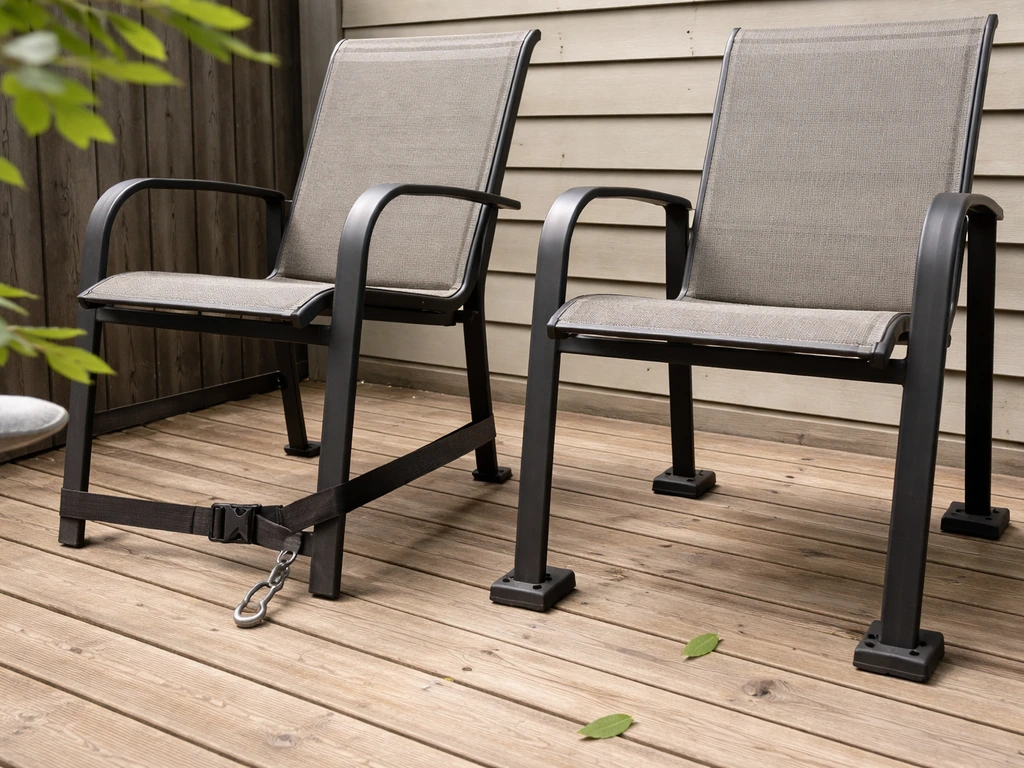
- Decide what you're securing. Heavy tables work best — wrap the strap around a leg or the base frame. For chairs, loop through the frame at the lowest point possible to resist tipping force.
- Thread the strap. Run the hook end around or through the furniture frame, then clip it back to the strap body or to a carabiner attached to your anchor point. The strap should run low and roughly horizontal to resist lateral movement.
- Add a second attachment point if possible. One strap prevents sliding in one direction; two straps at different angles resist tipping and lateral movement much better.
- Ratchet to firm tension. You want the furniture to feel like it has resistance when you push it — but don't crank so tight you bend thin aluminum tubing. Snug, not crushing.
- Check that the WLL of your strap exceeds what you'd expect the furniture to weigh plus a safety margin. A 150-lb patio table in a 40-mph gust can generate surprising lateral and lift forces — a strap rated at 500 lb WLL gives you real margin.
- For chairs, stack them face-to-face in pairs first, then strap the bundle to the anchor point. This reduces surface area and means one strap secures multiple pieces.
Where bungee cords actually help
Use bungee cords to keep a stack of nested chairs from separating, or to hold cushions flat against a bench seat while you move furniture indoors. For specific tips on cushions and pillows, see our guide on how to keep patio pillows from blowing away. That's it. Bungee cords stretch, degrade under UV, and have no rated load capacity. I've watched a bungee cord fail at about 20 mph, it simply stretched until the furniture slid out from under it. For anything you're relying on to hold against actual wind load, use rated webbing straps.
Pros, cons, and troubleshooting
| Factor | Ratchet straps | Bungee cords |
|---|---|---|
| Cost | $8–$20 for a 4-pack | $6–$12 for a pack |
| Rated load restraint? | Yes — check the WLL tag | No — not a rated restraint |
| Speed of setup | 5–10 minutes per piece | Under 2 minutes |
| Reusable? | Yes, many seasons if stored dry | Yes, but degrade faster outdoors |
| Best use | Anchoring furniture to fixed points against wind load | Bundling stacked/stored pieces only |
| Main failure mode | Anchor point pulls out; strap routes around thin tubing that bends | Stretches under load; UV aging causes snap failure |
The most common mistake I see with strap systems is routing the strap around a thin part of the furniture frame that bends or distorts under tension. Always find a structural crossmember or the main leg. If your furniture has hollow aluminum legs, loop around the base frame rather than a single leg to distribute the force. Also check that your anchor point is truly fixed, a deck railing post that isn't through-bolted will pull loose well before the strap does.
Emergency method 2: portable weights and sandbags
Adding mass to furniture is one of the most underrated quick fixes. Physics works in your favor here: a heavier piece requires more force to tip or slide. Concrete pavers weigh about 25 lb each (a 12x12x2-inch paver runs around 25 lb based on normal concrete density of roughly 140–150 lb per cubic foot). Stack two under a table base and you've added 50 lb without any drilling. Sandbags work on the same principle, a standard 50-lb contractor sandbag adds real resistance to leg bases.
DIY weight bag: the simplest option
- Buy a woven polypropylene sandbag (unfilled) — typically $1.50–$2.50 each at hardware stores.
- Fill it with all-purpose sand or play sand. A 50-lb bag of sand fills one sandbag to a workable density. Dry sand has a bulk density of roughly 100 lb per cubic foot, so a 0.5-cubic-foot bag gives you about 50 lb.
- Tie or zip-tie the top closed tightly. Doubled-up duct tape over the seam helps prevent slow leakage.
- Place one sandbag over each furniture leg base, or drape two over the crossbar of a table base. For chairs, one sandbag over the back leg crossbar lowers the center of gravity and resists backward tip.
- For longer-term use, slide the filled sandbag into an old pillowcase or a small canvas tote to reduce UV degradation of the polypropylene bag.
Water-filled containers as ballast
If you don't have sand on hand, water works. One gallon of water weighs about 8.34 lb, so a 20-gallon container (like a sturdy trash can or a collapsible water storage bag) filled to the top weighs roughly 167 lb. That's serious ballast for a table base. The downside is that water containers can tip or spill in high winds unless they're placed very low and wide. Use flat, wide containers rather than tall narrow ones, and set them directly around the base frame rather than on top of it.
Pros, cons, and troubleshooting for portable weights
| Factor | Concrete pavers | Sandbags | Water containers |
|---|---|---|---|
| Cost | $1.50–$3 per paver | $15–$25 for bags + $5–$8 for sand | $5–$20 depending on container |
| Weight per unit | ~25 lb per 12x12x2" paver | ~50 lb per filled bag | ~8.34 lb per gallon |
| Setup time | Immediate — just place them | 5–10 min to fill and tie | 5–10 min to fill |
| Reusable? | Yes, indefinitely | Yes; sand can be dried and reused | Yes; empty to store |
| Best for | Table bases, heavy furniture | Chair legs, table bases | Larger furniture bases with flat access |
| Main failure mode | Can slide if not placed snugly; don't prevent lift force | Leakage if seams fail; bags degrade in UV | Spills if tipped; tall containers become a hazard themselves |
One thing weights don't do well: they resist lateral sliding and tipping, but they don't prevent a table from being picked up by a gust that gets under the top and creates upward lift. For that, you need a strap or anchor running from the furniture frame to a fixed point. The best emergency setup combines both: weights at the base to resist tipping, plus a single ratchet strap to an anchor to resist uplift and lateral movement.
Semi-permanent and permanent anchors: the bigger picture
If your area gets regular high winds or you just want a seasonal set-it-and-forget-it solution, permanent or semi-permanent anchors are worth the installation time. The right approach depends almost entirely on your surface type: wood deck, concrete or paver patio, or soil/grass.
| Surface type | Anchor options | Difficulty | Estimated cost | Considerations |
|---|---|---|---|---|
| Wood deck | Surface-mount plate anchors, lag-screwed eyebolts, post-mount straps | Beginner–Intermediate | $15–$50 per point | Must hit a joist or structural post, not just decking; use stainless hardware to prevent wood staining |
| Concrete patio or slab | Wedge anchors, concrete screws (Titen HD type), adhesive/epoxy anchors | Intermediate | $20–$60 per point plus tool rental | Requires hammer drill; minimum edge distances matter; adhesive anchors need full cure time before loading |
| Interlocking pavers | Paver anchor systems, screw-down rings, or weight anchors between joints | Beginner | $10–$30 per point | Many paver systems allow removal — avoid adhesive unless you own the space permanently |
| Soil or grass | Helical/screw-in ground anchors, auger-style tent anchors | Beginner–Intermediate | $10–$40 per anchor | Capacity depends heavily on soil type; wet or loose soil reduces holding power significantly |
Before you install anything permanent, think about whether you're renting or own, whether you want to move furniture seasonally, and whether your HOA has rules about structural modifications. Plate anchors on a wood deck are reversible, remove them in spring, fill the holes. Concrete wedge anchors are not reversible without patching. For renters, portable weight systems and strap-to-railing methods are usually the smarter call.
One more thing worth knowing about straps before you buy them: the WLL (Working Load Limit) printed on the tag is the number you plan around, not the break strength. Industry standard applies roughly a 3:1 safety factor, so a strap with a 1,500-lb break strength carries a WLL of about 500 lb. Always use the WLL for your load calculations. When you're combining multiple straps, you can add their WLLs together, two 500-lb-WLL straps give you 1,000 lb aggregate rated restraint.
Installing bolt-down and plate anchors on a deck or patio
For wood decks: surface-mount plate anchors
Surface-mount anchor plates are steel or stainless plates with a welded D-ring or eye that lag-bolt flat to your deck surface. They're the most DIY-friendly permanent option and fully reversible. Here's how to install them properly.
- Find your deck joists using a stud finder or by tapping — hollow sound means no joist, solid thud means you found one. Anchor plates must be screwed into joist wood, not just through the decking surface.
- Mark your anchor position at least 6 inches from any board edge to avoid splitting the decking.
- Pre-drill pilot holes slightly smaller than your lag bolt diameter (typically 1/4" or 5/16" lag bolts for furniture anchor plates). Pre-drilling is essential in hardwood decking and prevents splitting in any wood.
- Position the plate, align holes over your pilot holes, and drive lag bolts in with a socket wrench. Do not use a power drill on final installation — you need to feel the torque and avoid over-driving.
- For hardware near the coast, use Type 316 stainless steel lag bolts and plates. Type 304 stainless will work inland but will develop rust staining faster in high-humidity or salt-air environments.
- Test by pulling the ring firmly with your hand after installation. There should be zero movement. If the plate lifts even slightly, your lag bolts are not in solid joist wood — reposition.
- Clip your ratchet strap or a rated carabiner to the D-ring and run it to your furniture frame.
For concrete patios: wedge anchors and concrete screws
Anchoring into concrete requires a hammer drill, which you can rent for about $20–$25 a day if you don't own one. This is not a job for a regular drill, the rotary hammering action is what actually cuts through concrete without damaging the bit or wearing out the motor.
- Mark your anchor location. Keep at least 6 full anchor diameters from any edge of the slab and at least 10 diameters between anchors — closer than this and you risk cracking the concrete edge. For a 3/8" anchor, that means at least 2.25" from the edge.
- Fit your hammer drill with a masonry bit matching your anchor diameter (3/8" for a 3/8" wedge anchor). Drill to the required embedment depth — typically 2.5" to 3.5" for a 3/8" anchor. Mark the bit with tape at your target depth so you don't drill too shallow or too deep.
- Clean the hole thoroughly. Blow out dust with a can of compressed air, then brush with a wire brush, then blow again. This step is critical and most people skip it: dust left in the hole dramatically reduces anchor holding strength, especially for adhesive anchors.
- For wedge anchors: insert the anchor bolt through your anchor plate (with the nut and washer run to the bottom of the threads), drop it into the hole, and tap with a hammer until the plate sits flat on the concrete. Then tighten the nut clockwise with a socket wrench — tightening draws the wedge sleeve up and expands it against the concrete wall. Follow the manufacturer's torque specification.
- For concrete screws (like Simpson Titen HD): thread them directly into the cleaned hole with an impact driver or socket wrench. These are removable, which makes them good for semi-permanent installations.
- For adhesive/epoxy anchors: inject the adhesive per the manufacturer's instructions, insert the threaded rod, and wait the full cure time listed on the product sheet before loading. In warm weather this may be 1–2 hours; in cold weather it can be much longer. Loading an adhesive anchor before it cures is one of the most common installation mistakes and it will fail.
- Attach your anchor plate, D-ring, or eyebolt to the installed anchor and test with firm manual pull before trusting it to hold furniture in a storm.
Safety notes for homeowners doing this for the first time
- Always wear safety glasses when drilling into concrete — chips and dust fly at eye level
- Check for buried utilities before drilling into a ground-level slab that's adjacent to your house — a misdrilled hole can hit conduit
- Never load a concrete anchor the same day you drill it unless the product datasheet explicitly allows it — cure time matters for both adhesive anchors and for concrete that was recently poured
- Use the WLL from the manufacturer's data, not an estimate — anchor ratings vary by anchor type, diameter, embedment depth, and concrete strength
- If your slab is less than 3.5 inches thick (common in some older patio pours), wedge anchors may not achieve full embedment — use concrete screws or surface-mounted weights instead
- When in doubt, consult a local hardware store professional or a structural contractor before drilling into anything load-bearing
One final note on this whole project: even the best anchor system doesn't replace good judgment about when a storm is simply too severe for outdoor furniture to survive intact. NOAA and the National Weather Service are direct on this point for tropical systems and hurricanes: bring patio furniture inside. An anchor bolt in concrete is no match for a 100-mph gust, and no DIY restraint system should be treated as a substitute for moving furniture indoors when a serious storm approaches. The methods in this guide are for the vast majority of wind events, the gusty afternoons, the fast-moving thunderstorms, and the seasonal wind advisories that are a normal part of owning outdoor furniture. For the truly severe stuff, the garage or living room is the right place for your chairs.
FAQ
What wind speeds should make me secure or store patio furniture?
Use NWS guidance and common practice: begin securing loose items when sustained winds approach ~25–35 mph or frequent gusts in the mid‑30s. Treat Wind Advisories and High Wind Warnings seriously (NWS: Wind Advisory ~30–39 mph; High Wind Warning ≥40 mph or gusts ≥58 mph). For hurricane/tropical threats, bring loose outdoor items inside (NOAA/NWS). If in doubt, store items indoors when sustained wind or gust forecasts exceed ~30–35 mph or if furniture is lightweight or on an exposed site.
What general strategy should I follow to keep patio furniture from blowing away?
Follow three tiers: 1) Immediate: quick fixes and ballast to stop movement (weights, bungees, temporary tie‑downs). 2) Semi‑permanent: rated straps, ground/deck anchors, anchor plates or screw‑in anchors for seasonal use. 3) Permanent: bolting to deck/patio or installing professional anchors. Steps: survey exposure and furniture types, choose appropriate method per weight and material, assemble materials and rated hardware, secure following WLL and manufacturer instructions, inspect periodically and before storms, and store when forecast exceeds safe thresholds.
What immediate emergency fixes work when a storm is approaching?
Quick, same‑day options: - Move lightweight items (cushions, side tables, flower pots) indoors. - Group and stack heavy pieces; nest chairs under tables. - Use rated ratchet straps or cam straps to tie grouped furniture to a fixed structure (house, heavy grill, deck post). - Add ballast: fill water/sand bags, concrete pavers or cinder blocks on table bases or chair seats. - Tie cushions with fabric ties or bungee cords to prevent liftoff (caveat: bungees are not rated for high loads). Materials/tools: ratchet straps (with WLL tag if possible), water bags or sandbags, heavy pavers, gloves, utility knife. Pros: fast and inexpensive. Cons: less reliable for very high gusts; bungees age/elongate; temporary ballast can spill.
How do I make and use DIY weight bags for furniture ballast?
Materials: heavy-duty weed block or outdoor fabric, sewing machine or heavy‑duty needle, webbing handles, contractor sand or gravel (or water). Steps: 1) Cut fabric to desired size (e.g., 18"×24" for ~40–60 lb when filled). 2) Sew seams and attach webbing handles. 3) Fill with sand or gravel and double‑stitch closure; for water fill use sealed commercial water ballast sacks. 4) Place on chair seats, table bases, or tie to legs with straps. Pros: low cost and customizable. Cons: sand can leak; wet sand is heavier; water bags can burst or freeze; less neat than manufactured options. Troubleshooting: add an inner liner for sand, bind seams with seam sealer, replace after prolonged UV exposure.
What are reliable semi‑permanent anchors for patios and how do I install them?
Common options: screw‑in helical ground anchors, concrete adhesive anchors, wedge anchors, and deck‑mounted anchor plates. Basic installation principles: 1) Select anchor type for substrate (screw‑in for soil, mechanical or adhesive anchors for concrete/pavers, through‑bolting for wood decks). 2) Follow manufacturer installation steps: correct drill size, hole cleaning (blow/brush), embedment depth, torque or cure time. 3) Use stainless‑steel hardware (316 in coastal areas). 4) Attach rated tie points (pad eyes, D‑rings) and use rated straps with adequate aggregate WLL. Pros: high capacity, reusable. Cons: requires tools and correct installation; improper spacing/installation reduces capacity. If unsure, consult product datasheet or pro.
How do I bolt furniture to a wooden deck safely?
Materials/tools: carriage bolts or structural lag screws (hot‑dip galvanized or stainless, choose 316 for coastal), washers, drill/driver, socket set, wrench, shim/level. Steps: 1) Position furniture or anchor plate and mark hole locations. 2) Pre‑drill pilot holes sized per fastener manufacturer. 3) Use carriage bolts through the top and secure with washers and nuts underneath or use lag screws with protocol for minimum edge distances. 4) Tighten to recommended torque without over‑driving. Pros: strong and tidy. Cons: compromises deck boards if improperly installed; fasteners corrode if wrong material. Troubleshooting: use blocking under deck for thin boards or mount to rim joist; use 316 stainless in salt air.