The fastest fix for a patio swing that keeps blowing over is to add weight low on the frame and get the base in better contact with the ground. That handles most cases immediately. But if the frame is already wobbly, the hardware is stripped, or the swing sits in a wind tunnel on your patio, you need a slightly more targeted approach. This guide walks through every real cause, from the too-light base to a poorly angled swing seat, and gives you fixes at every effort level from a five-minute weight addition to a proper ground anchor installation.
How to Keep a Patio Swing From Blowing Over in Wind

Maren Grady
29 Jun 2026
Why your patio swing is blowing over in the first place
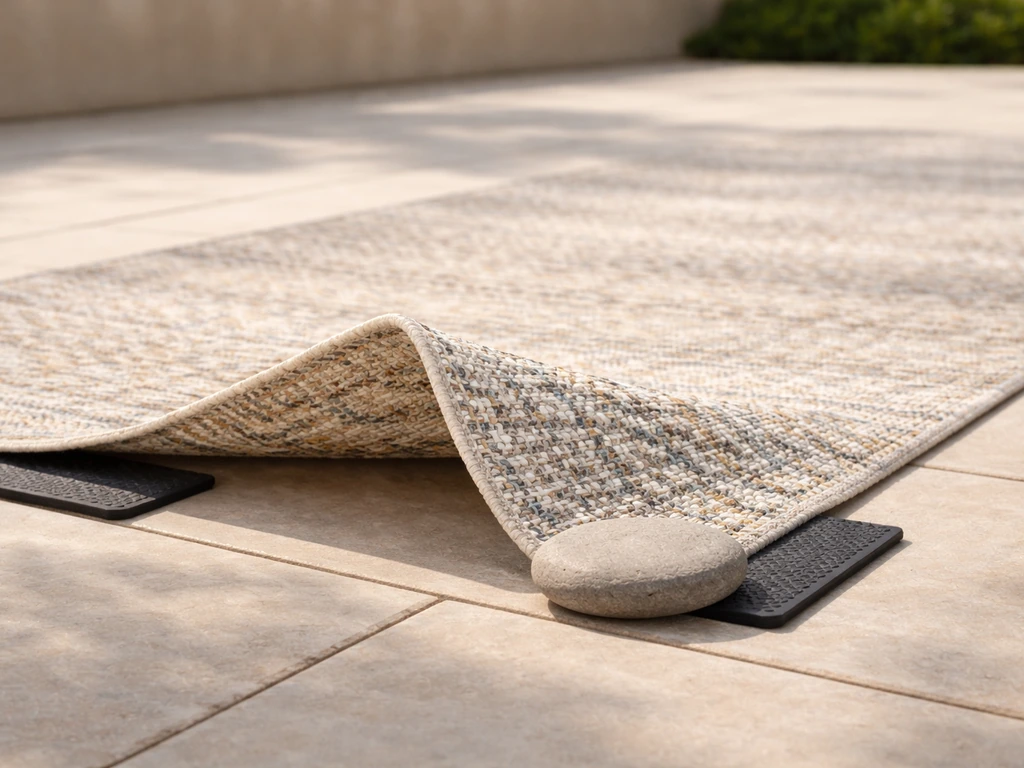
Before you buy anything or start drilling, it helps to know what's actually failing. Most patio swing tip-over problems come down to one of six causes, and each one points to a different fix. If you are trying to stop patio rugs from blowing away, you can use similar strategies like adding weight, improving grip on the surface, and using tie-downs or anchors when winds are strong patio swing.
- The base is too light for your yard's wind exposure. Many entry-level swing frames weigh under 50 lbs assembled. That's not nearly enough resistance against a sustained 30 mph gust.
- The feet aren't gripping the surface. Powder-coated metal feet on a smooth concrete patio or composite deck are basically sitting on a skating rink. Any lateral force sends the whole thing sliding before it even tips.
- The swing is placed in a wind tunnel. Gaps between your house and a fence, open corners of a deck, or the space at the end of a pergola funnel and accelerate wind—you may have twice the wind load at your swing compared to the middle of the yard.
- The swing seat is at the wrong angle. A seat left in mid-swing catches wind like a sail. Parked flat, it presents much less resistance.
- Hardware has loosened or worn out. Bolts that were snug two seasons ago back themselves out over time. Loose joints allow the frame to rack side to side, and a racking frame is much easier to tip.
- The frame itself is compromised. Bent legs, cracked welds, or heavily rusted steel at the base joints reduce structural integrity well beyond what you can see from the outside.
Run a quick check before moving on: grab the top crossbar and push side to side. The frame should feel stiff, not spongy or delayed. Then look at every bolt connection, especially where the legs join the base and where the hanger arms meet the top. If anything moves that shouldn't, tighten it before you try any other fix. You'll get more stability from snug hardware than from any weight you add over a loose frame.
Weight, base contact, and placement changes you can do today
These are the easy wins that cost almost nothing and work immediately. If your goal is specifically to keep patio furniture from flying away, the same weight, grip, and anchoring steps help secure chairs and tables too. Start here.
Add weight to the base
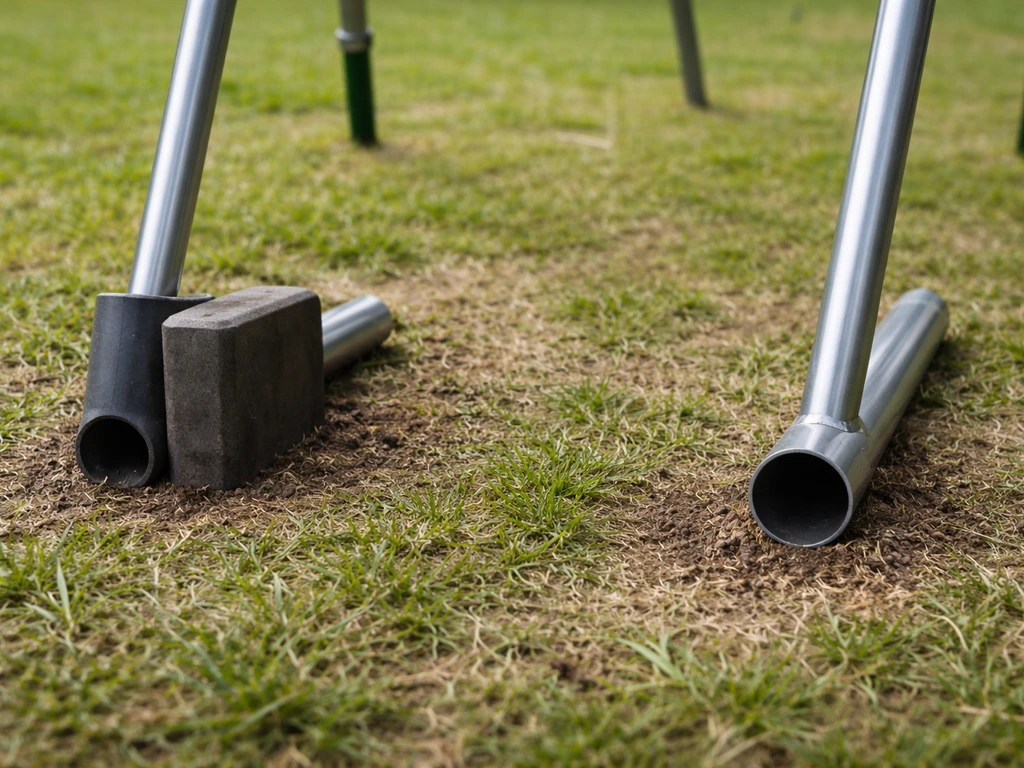
The goal is to lower the center of gravity and increase the total mass the wind has to move. Most manufacturers actually include hollow base tubes for exactly this purpose. If your frame has hollow horizontal base tubes (the feet that run along the ground), fill them with sand. Use a funnel and dry play sand from any hardware store, about $5 for a 50 lb bag.
Cap the ends with rubber stoppers or wrap them with duct tape if no plug came with the frame. A 50 lb bag poured into both base tubes will noticeably change how the swing responds to wind. If the base tubes are solid or already filled, you can add sandbags or flat paving stones directly on top of the base tubes.
Lay them flat so they don't affect foot clearance, and secure them with a bungee cord or zip tie so they don't rattle off. A pair of standard 40 lb sandbags runs about $15 total at a home improvement store.
Improve ground contact and grip
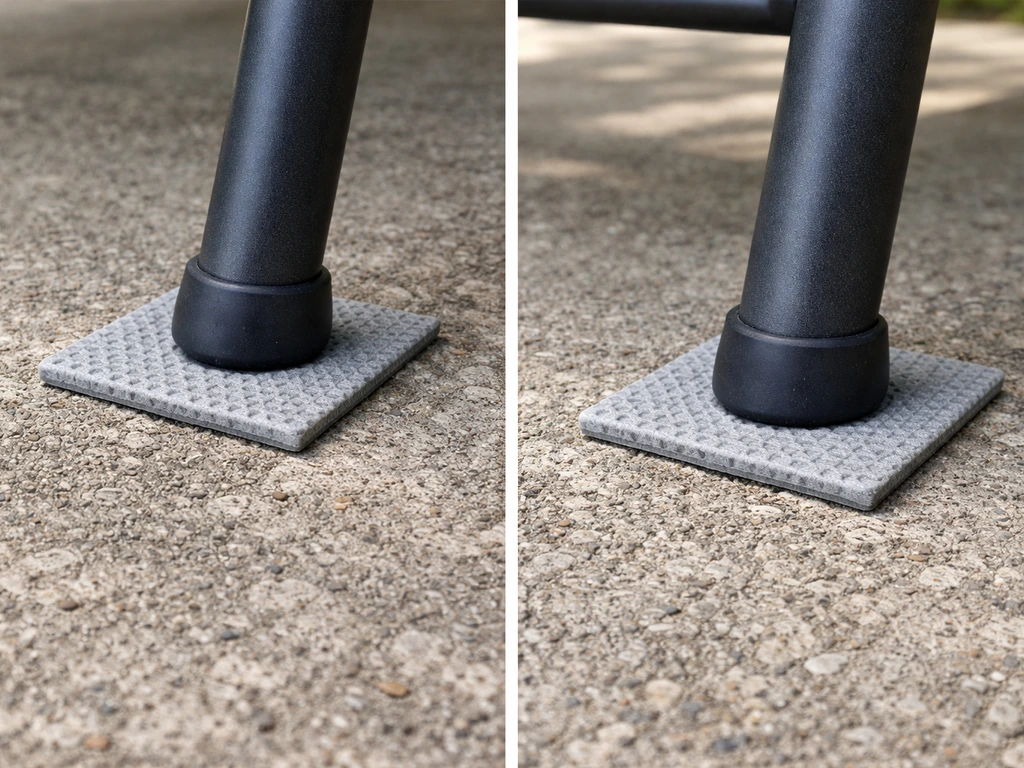
If your swing is on concrete, tile, or a composite deck, put rubber non-slip pads under each foot. Cut them from a rubber shelf liner sheet (about $8 at any dollar store or hardware store) or buy pre-cut furniture feet with a rubber base. These grip the surface and dramatically reduce the chance of the base sliding rather than tipping. On grass or dirt, the problem is the opposite: the narrow metal feet sink in and become unstable. Slip a flat paving stone or a piece of treated plywood under each foot cluster to spread the load. This also keeps the feet from rusting where they contact wet soil.
Relocate away from wind tunnel spots
This is the fix most people skip because it feels like too much work, but it makes everything else easier. Move the swing at least a few feet away from gaps between structures. The opening between a house wall and a fence is the biggest culprit, followed by the corners of decks and open pergola ends. Even shifting 3 to 4 feet toward the center of a patio or positioning the swing with its narrow side facing the prevailing wind direction can cut the effective wind load significantly. If you're not sure which direction your wind comes from, check your area's wind rose data from the National Weather Service or just pay attention for a week.
Tie-down and anchoring options for more reliable security
Weight and placement help, but if you're in an area with frequent strong winds, you want a positive connection between the swing frame and the ground. Here are your options from simplest to most permanent.
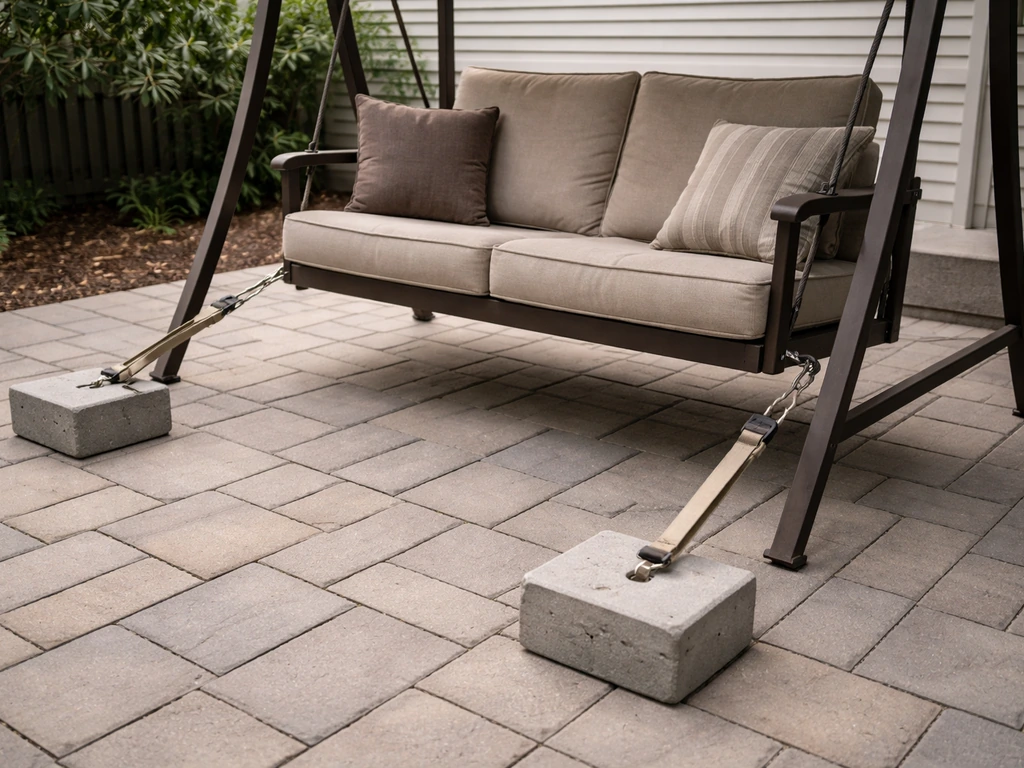
Ratchet straps to a fixed anchor point
If you have a fence post, deck post, or exterior wall nearby, run a ratchet strap from the top crossbar of the swing frame down to the fixed point at a downward angle. Keep the strap as low as you can on the anchor side while still keeping it taut. This works well for short-term storm prep. A basic ratchet strap set costs about $12. The downside: straps at an angle can pull the swing slightly out of position over time, and they need to be retightened after every wind event since the UV exposure weakens the webbing faster than you'd expect.
Auger-style ground anchors (the best all-around option)

Auger anchors are screw-shaped metal stakes that you twist into the soil until just the loop or strap attachment point sits at ground level. They use soil friction and resistance to stay put, which means they get harder to pull out the deeper and more fully they're set. A four-pack kit (the same style used for swing sets and canopies) typically includes the auger stakes, metal straps, lag bolts, flat washers, and lock nuts. You'll find them at most hardware stores or online for $25 to $40 for a four-pack.
- Choose your anchor spots: one near each rear leg and one near each front leg of the base, slightly outside the footprint.
- Push the anchor tip into the soil at the chosen spot and twist clockwise using a bar or the handle of a large screwdriver slipped through the loop. Keep going until only the strap loop is exposed above the ground.
- Thread the included metal strap through the anchor loop and up to the swing's base tube or leg.
- Attach the strap to the base tube using the included lag bolt, flat washer, and lock nut. Tighten until snug but not so tight you deform the tube.
- Check each anchor and strap after the first rain, since soil settles and straps can loosen slightly.
These work in most lawn soil. Rocky ground or very sandy soil (like in coastal areas) reduces their holding power. For sandy soil, go deeper and use a longer anchor if available. For rocky ground, you may need to use concrete anchors instead. Always follow the manufacturer's installation instructions rather than guessing at depth. A partially installed anchor is actually worse than no anchor because it gives false confidence while providing minimal real resistance.
Concrete anchors for patios and hard surfaces
If your swing lives permanently on a concrete patio, you can drill and install concrete anchor bolts at the base of each leg. This is the most secure option available, but it is also the most permanent. You'll need a hammer drill, masonry bit, concrete anchor bolts (sleeve anchors work well), and a wrench.
Drill into the concrete at each corner of the frame's footprint, insert the sleeve anchors, and use a flat strap or custom bracket to connect the anchor to the frame leg. One important note: seal around each drilled hole with concrete sealant after installation to prevent water intrusion and cracking. Some homeowners are hesitant to drill their patio, which is a fair concern.
If that's you, the auger-in-grass option combined with rubber feet is usually sufficient unless you're in a very high wind area.
Stabilizing the frame itself: brackets, hardware, and anti-tip upgrades
A swing frame that racks or flexes under side loads is going to be hard to secure no matter how many anchors you add. Getting the frame rigid first makes every other fix work better.
Tighten and replace all hardware first
Grab a wrench and go through every bolt on the frame. Not just a hand-snug tighten, but a real quarter-turn or more past where it starts to resist. You'll often be surprised how loose they've gotten. Any bolt that spins freely without tightening has stripped threads and needs to be replaced. Take the bolt to the hardware store and match it exactly (thread pitch, diameter, and length all matter). Use stainless steel replacement hardware if possible, since galvanized bolts rust and seize up in outdoor conditions, making future maintenance a nightmare. Add a lock washer or a drop of medium-strength thread locker (like blue Loctite) to any bolt that tends to vibrate loose.
Add corner brackets and anti-tip braces
Where the frame's legs meet the base, you can add L-brackets or gusset plates to reinforce the joint. These are available at any hardware store for $3 to $8 each and attach with self-tapping screws (for aluminum frames) or bolts (for steel frames). They add triangulation to what is usually a simple butt joint, which dramatically reduces racking. For wooden swing frames, metal corner brackets are even more straightforward: just screw them into the inside corners of every joint.
Some swing owners also add a cross-brace across the top A-frame by connecting a flat steel strap diagonally from one upper leg to the opposite lower leg. It looks industrial but it works extremely well on frames that are prone to spreading under load.
Leg stops and anti-slide feet
For swings on hard surfaces, you can add rubber-tipped end caps to the bottom of each leg. These come in standard tube sizes (most swing frames use 1-inch or 1.5-inch tube) and cost about $1 to $2 each. They reduce sliding significantly. If you want a more positive stop, attach a low-profile wood stop block to the deck surface near each leg so the leg literally cannot move horizontally. Use exterior deck screws to attach the block and position it just touching the outside of the leg.
Wind-proofing the rest of the swing setup
The swing frame itself is only part of the wind load. Cushions, canopies, and covers all catch wind and transfer force into the frame. Dealing with those pieces cuts the effective wind load on your anchoring system significantly.
Cushions and seat angle
If high winds are expected, bring your cushions inside. This isn't optional advice. Cushions are both a significant sail surface and extremely susceptible to rain damage that leads to mold. A soaked outdoor cushion stuffed back into a case will mildew within 48 hours, and that's a replacement cost you don't need.
Beyond cushion removal, park the swing seat in the full-down position (hanging straight vertical) or pull it forward and rest it against the front bar if your model allows. This removes the seat as a wind-catching surface. Leaving a swing seat at mid-angle, especially with a cushion on it, essentially gives the wind a ramp to push against. The same logic applies to patio pillows, which act as small but surprisingly effective sails.
Canopy and cover management
Most patio swing canopies are the number one source of unexpected tip-over forces. They have a large surface area and are positioned high on the frame, which maximizes the overturning moment when wind hits. During any storm or sustained high-wind event, remove the canopy entirely if possible. If you are dealing with patio cushions instead of a swing, use the same “reduce catch-and-surface-area” idea to help with how to keep patio pillows from blowing away.
Most fabric canopies are held by a handful of clips or bolts and take 10 minutes to pull off. If you can't remove it, fold it down flat against the top bar and secure it there with bungee cords. A folded canopy presents much less surface area than a fully deployed one. If you use a cover over the whole swing, choose one with integrated straps or buckles that loop under the base tubes rather than over the top.
Covers that only drape over the frame without a tie-down can act as a wing and make tipping worse. Re-tighten any cover straps after a windy day since they relax over time.
What to do right before a storm

The National Weather Service advises securing outdoor items as soon as a high wind watch is issued, not once the storm is already arriving. That means when you see a watch in the forecast, act that day.
Remove the canopy, bring in cushions and pillows, snug up your ground anchor straps, and if the storm is going to be severe, seriously consider moving the swing itself into a garage or shed. The Hanover also recommends moving items inside or otherwise securing outdoor equipment and furniture that could blow around during high winds to help prevent damage and injury.
If you want a long-term fix for patio chairs, use a secure tie-down or ground anchor so they can stay put even in strong gusts move the swing itself into a garage or shed. A patio swing frame might seem too big to move, but most collapse or fold down to a manageable size. If you can't move it, flip it face-down on the grass so the legs point up.
It looks silly but it removes all the wind-catching geometry and keeps it from rolling.
Seasonal storage and protection to stop this problem repeating
Most patio swings take real wind damage not from a single major storm but from repeated small exposures over a season. Hardware vibrates loose a little more each time. Welds crack slightly. Rust develops at scuff marks. Managing this over the season keeps the swing stable and extends its useful life significantly.
- At the start of the season: tighten all hardware, touch up any rust spots with a rust-converting primer and outdoor paint, and lubricate the hanger hooks with a dry lubricant or white lithium grease to prevent squeaking and corrosion.
- After every major wind event: re-check and retighten your anchor straps and frame hardware. Ground anchors can shift slightly after heavy rain loosens soil.
- Mid-season: inspect welds and paint at all stress points, especially where legs meet the base. Rust at these spots is a structural warning, not just a cosmetic one.
- Before the end of the season: remove the canopy and store it flat inside to prevent UV degradation. Bring cushions indoors entirely, not just to a shed where they'll still be exposed to humidity.
- Storing the frame: if you're in a region with heavy snow or ice, store the frame either in a garage or under a ground-hugging cover with positive tie-downs. A cover that inflates and catches wind in winter is worse than no cover at all.
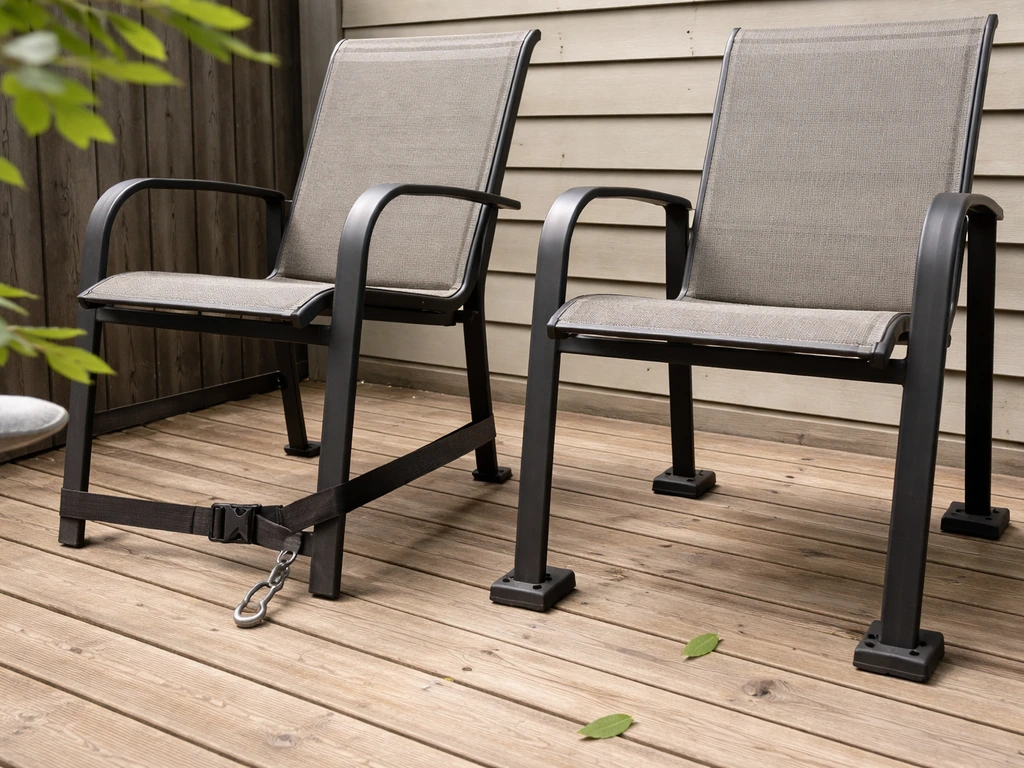
The same core logic applies to other patio furniture pieces. A simple way to keep patio furniture from blowing away is to anchor it to the ground using ratchet straps or ground anchors, depending on your surface. If you're dealing with chairs, rugs, or cushions blowing around separately, the approach to weighting, placement, and storm prep mirrors what works for the swing, though each piece has its own quirks worth addressing directly.
Safety checks and when to replace hardware or the frame
Securing a swing that's structurally compromised is like putting a new lock on a rotting door. It doesn't actually solve the problem. Here's what to look for, and how to decide whether you're repairing or replacing.
Signs the hardware needs replacing now
- Any bolt that you can turn more than a quarter turn by hand when it should be tight: replace it.
- Hanger hooks that have bent open even slightly: these are working against the design load. Replace them with matching-spec hooks, not a hardware-store substitute.
- S-hooks or C-rings that have gaps: they should be fully closed. Squeeze them shut with pliers if they're just slightly open, but replace them if there's any deformation.
- Any fastener that shows red rust streaks, not just surface rust: deep pitting means the bolt's cross-section has been reduced and it can't carry its rated load. Replace immediately.
- Chains that have stretched links or any bent link in the chain: the whole chain section should be replaced, not just the individual link.
Signs the frame needs replacing or professional inspection
- Bent legs that don't sit flat: a bent leg means the frame has already been overloaded. It will fail again under less force than it originally took.
- Cracked or separated welds: visible cracks in the weld bead around any joint mean the structural integrity of that joint is gone. This is not a DIY repair unless you have welding skills.
- Rust that has eaten through the metal wall at any point along the base tubes or legs: poke gently with a screwdriver. If the metal flexes or punches through, the wall thickness is too compromised to be safe.
- Any frame that tips with light pressure even after anchoring: something structural is wrong and adding more anchors will just transfer the load to a different failure point.
Replacement hardware for most major swing brands is available directly from the manufacturer or through outdoor furniture parts suppliers online. Get the exact model number off your frame tag before ordering, since hanger geometry and load ratings vary significantly between models. If the frame itself is too compromised, replacement is the right call. A damaged patio swing that tips or drops a person is a liability no amount of anchoring should be asked to manage. A basic replacement swing frame runs $150 to $300, which is a much better outcome than an injury.
Quick reference: effort levels and expected outcomes
| Fix | Effort Level | Cost Estimate | Best For |
|---|---|---|---|
| Add sand to base tubes or sandbags to base | Beginner, 15 min | $5–$15 | Too-light frame on any surface |
| Non-slip rubber feet or pads | Beginner, 5 min | $5–$10 | Sliding on hard surfaces |
| Relocate away from wind tunnels | Beginner, 30 min | $0 | Consistently gusty placement |
| Ratchet strap to fixed anchor point | Beginner, 15 min | $10–$15 | Short-term storm prep |
| Auger ground anchors with straps | Intermediate, 1–2 hrs | $25–$40 | Permanent install in soil |
| Concrete anchor bolts into patio | Intermediate, 2–3 hrs | $30–$60 | Permanent install on concrete |
| Tighten and replace all hardware | Beginner, 30–60 min | $10–$25 | Wobbly or racking frame |
| Add corner brackets and gusset plates | Intermediate, 1 hr | $15–$30 | Structurally flexible frame joints |
| Remove canopy and bring in cushions | Beginner, 10 min | $0 | Before any storm or high wind |
FAQ
How heavy should I add to stop a patio swing from blowing over?
Aim for enough added weight so the swing cannot noticeably shift when you push the top crossbar. As a rule of thumb, start by filling hollow base tubes with about one 50 lb bag total, then reassess. If your frame still rocks under a moderate push, add flat weight on the base rather than stacking more weight higher up, which can increase the tipping moment.
Will rubber pads under the feet help on concrete only, or also on pavers and composite decking?
They help on any hard, smooth surface where the feet can slide. On pavers, check that the pad fully contacts the foot area, not just the edges, because partial contact can still allow micro-sliding. If the pad causes rocking, use a thin shim like a small rubber block to even out uneven paver heights.
What’s the fastest way to tell if the swing is tipping due to slipping versus racking?
Do a two-step test. First, with the area cleared, push side to side and watch whether the whole frame translates (slips) or the joints distort (racks). Slipping usually happens on smooth surfaces and improves with non-slip pads or surface grip. Racking feels like delayed flex under side load and improves with reinforcement brackets or corner gussets before you anchor.
Do I need to anchor the swing even if it’s already heavy with sandbags?
Not always, but you should anchor if you get frequent high gusts or if the base cannot get enough grip. Sandbags and low weight help with tipping resistance, but they do not stop horizontal movement if wind can translate the swing’s base. If you see the swing “walking” a few inches after storms, add an anchor or positive mechanical stop.
Can I use furniture covers to protect the swing, or do covers make tipping worse?
Covers can make tipping worse if they act like a sail. Avoid covers that drape over the frame without secure tie-downs that pull tightly to the base. If you use a cover, choose one with integrated straps that attach underneath or otherwise eliminate fabric tension that can lift or lever the frame.
How should I position the swing relative to wind direction?
If you can, rotate the swing so the narrower profile faces the prevailing wind, and move it away from wall-fence gaps where wind funnels. If you do not know the wind direction, observe for a week or use local wind rose data, then note the most common gust approach before deciding the placement.
When using ratchet straps, where should the straps attach, and how tight should they be?
Attach the straps low on the fixed anchor side so they are taut, but do not over-tension in a way that twists the frame. The goal is to prevent tipping and translation, not to bend the legs. Recheck after wind events because UV and repeated flex can reduce strap tension, and angled straps can slowly pull the swing out of square.
What if my swing’s base tubes are solid and I cannot add sand?
Use a two-part strategy: improve grip and add low, flat ballast on the base. Place flat paving stones or sandbags directly on the base tubes, then secure them so they cannot rattle or shift. Pair that with rubber non-slip pads on hard surfaces to reduce sliding that leads to tipping.
Are auger anchors safe for any soil type, or can they fail?
They work best in typical lawn soil with adequate depth and consistent moisture. In very sandy or rocky ground, holding power can drop, so consider deeper installation or longer anchors if available. For rocky soil, concrete anchors often provide more reliable resistance. Also, do not partially install augers, because reduced embedment can give a false sense of security.
If I anchor into concrete, do I need to seal the holes?
Yes. After drilling and installing sleeve anchors, seal around each drilled hole with concrete sealant to prevent water intrusion. Without sealing, water can enter around the sleeve anchor area, contributing to cracking and corrosion in outdoor conditions.
How often should I re-check bolts and hardware to prevent tip-overs over a season?
Do a quick inspection at least once early in the season, then after any storm that included sustained high winds. Look for bolts that have loosened, stripped threads, or hanger-arm movement. If you routinely get gusty weather, make it a monthly check during peak wind months.
When is it better to replace a swing rather than keep anchoring it?
Replace if the frame cannot be made rigid after tightening, bolts spin freely due to stripped threads that do not hold replacements, or you see cracks at welds or structural members. If the swing tips or drops a person when unanchored, anchoring alone is not an acceptable safety solution.