The fastest fix for cushions that keep blowing away is to layer a rubberized shelf liner or non-slip rug pad between the cushion and the seat frame, then add cushion ties or hook-and-loop strips to physically connect the cushion to the furniture. Do both and you've solved about 90% of wind problems in under 20 minutes, for less than $15. If your cushions are flying across the yard in every gust, keep reading, because the right method depends on what's actually causing the movement.
How to Keep Patio Cushions From Blowing Away DIY Fixes

Maren Grady
17 May 2026
Why your patio cushions are blowing away
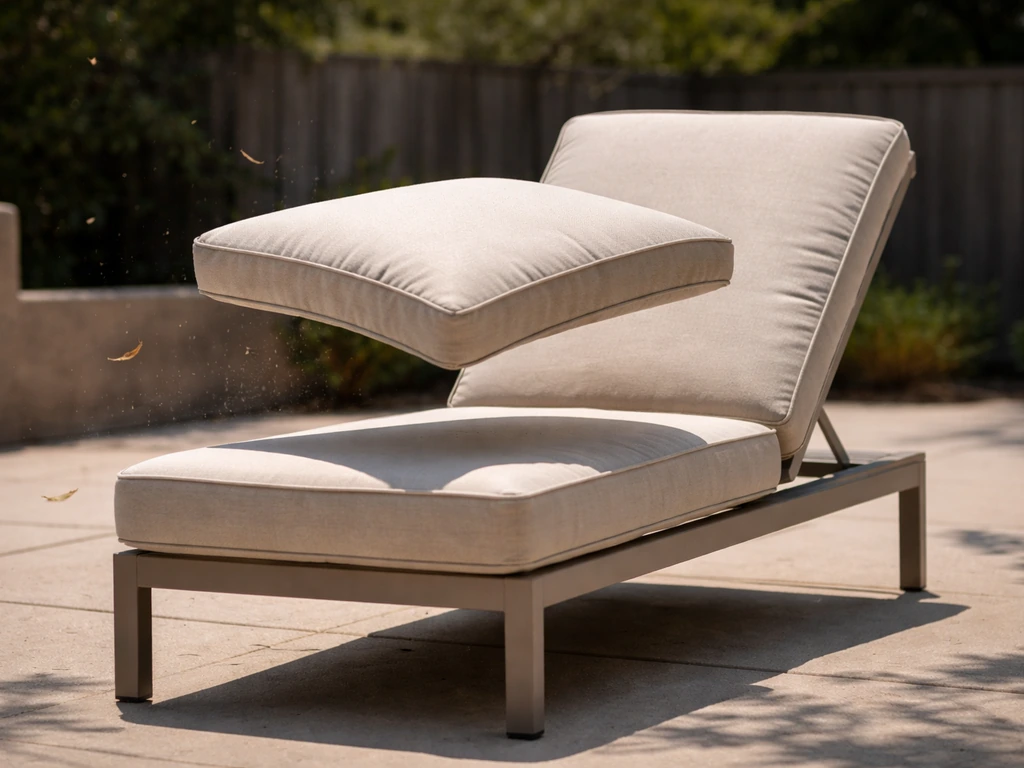
Before you buy anything, it helps to figure out exactly why your cushions are moving. The fix for a cushion that's too small is different from the fix for one that's just slippery. Here are the most common culprits.
- No ties or attachment points: A lot of budget cushions ship with zero attachment hardware. Wind gets under the edge, lifts it, and off it goes.
- Lightweight foam fill: Thinner, cheaper cushions weigh almost nothing. Even a 10 mph breeze can shift them. Higher-density foam cushions are naturally harder to move.
- Slippery cover fabric: Polyester and olefin covers are smooth on both sides. Put one on a metal or resin chair frame and it's basically sitting on ice.
- Wrong cushion size: If the cushion is undersized, it doesn't make full contact with the seat, so wind can get underneath easily. A cushion that's too large will overhang, catch more wind, and slide off the edge.
- Open furniture layout: Chairs and sofas positioned with no wind break, no walls, and no overhead coverage are fully exposed to gusts from every direction.
- Missing or broken ties: Ties that were sewn on can fray and snap. If you had ties and they stopped working, the cushion is effectively unanchored.
Take a quick look at your specific situation before you start buying stuff. If you also want to stop patio rugs from blowing away, the same approach of using grip and physical anchoring works well for rugs too quick look at your specific situation. If the cushion fits badly, no amount of Velcro will fully compensate. If it fits fine and just has no attachment points, adding ties or hook-and-loop will solve it cleanly.
Quick fixes you can do today
These are the two methods you can implement right now with materials that are easy to find at any hardware store or big-box retailer. Neither requires sewing or any special tools.
Add weight to the cushion
Adding weight won't anchor the cushion, but it raises the threshold of wind speed needed to move it. The easiest approach is to place small sandbag weights or weighted pouches on top of the cushion when it's not in use, then remove them when you sit down. Some people use decorative items like heavy lanterns or small potted plants on side tables positioned close to the cushion. This works better as a supplementary method combined with friction or ties rather than as a standalone fix.
Non-slip grip liner under the cushion
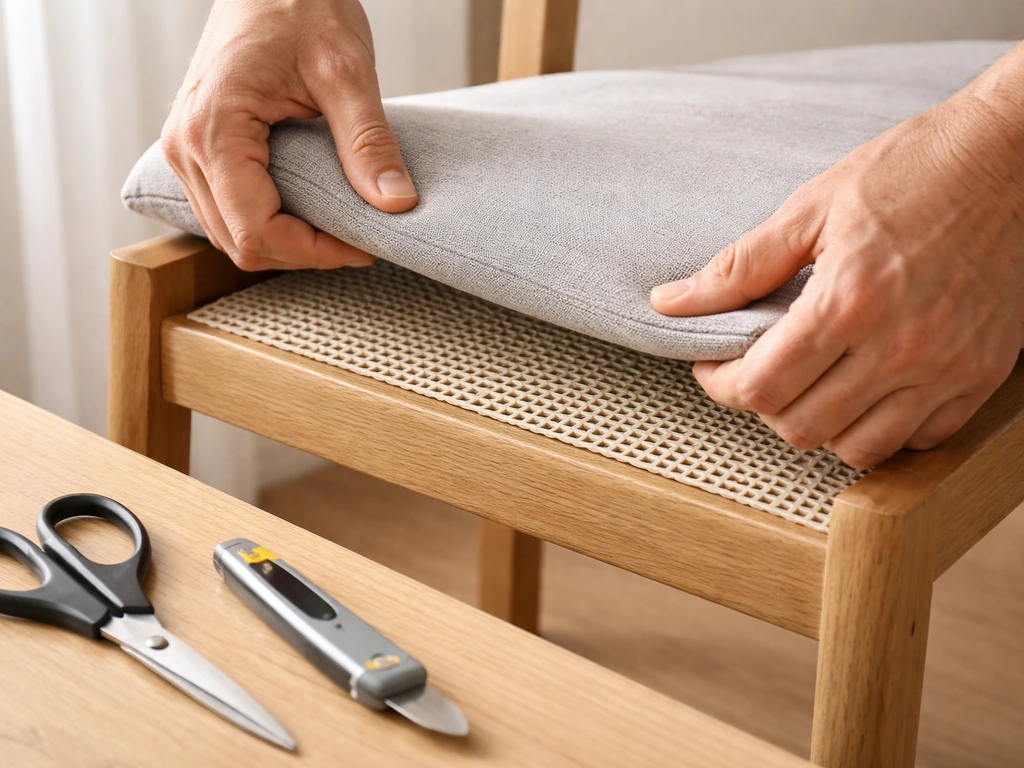
This is my go-to first step. Cut a piece of rubberized shelf liner or non-slip rug pad to match the seat size of your furniture, then lay it between the chair seat and the cushion. The rubber grips both surfaces and dramatically reduces sliding. A roll of Con-Tact grip shelf liner costs around $8 to $12 and gives you enough material to cover 4 to 6 seat cushions. Cut it with regular scissors, no adhesive needed. If you want something more durable outdoors, look for rubber-based outdoor rug pads rated for moisture exposure. The grip on these is stronger than standard shelf liner and holds up better through rain and humidity.
Securing methods that actually hold
Friction helps, but in a real windstorm, nothing beats physically connecting the cushion to the furniture frame. If you want the simplest way to keep patio swings from blowing over, use physical anchors like strap or tie systems so wind has nothing to push against physically connecting the cushion to the furniture frame. Here are the main methods, ranked roughly from easiest to most involved.
Hook-and-loop (Velcro) strips
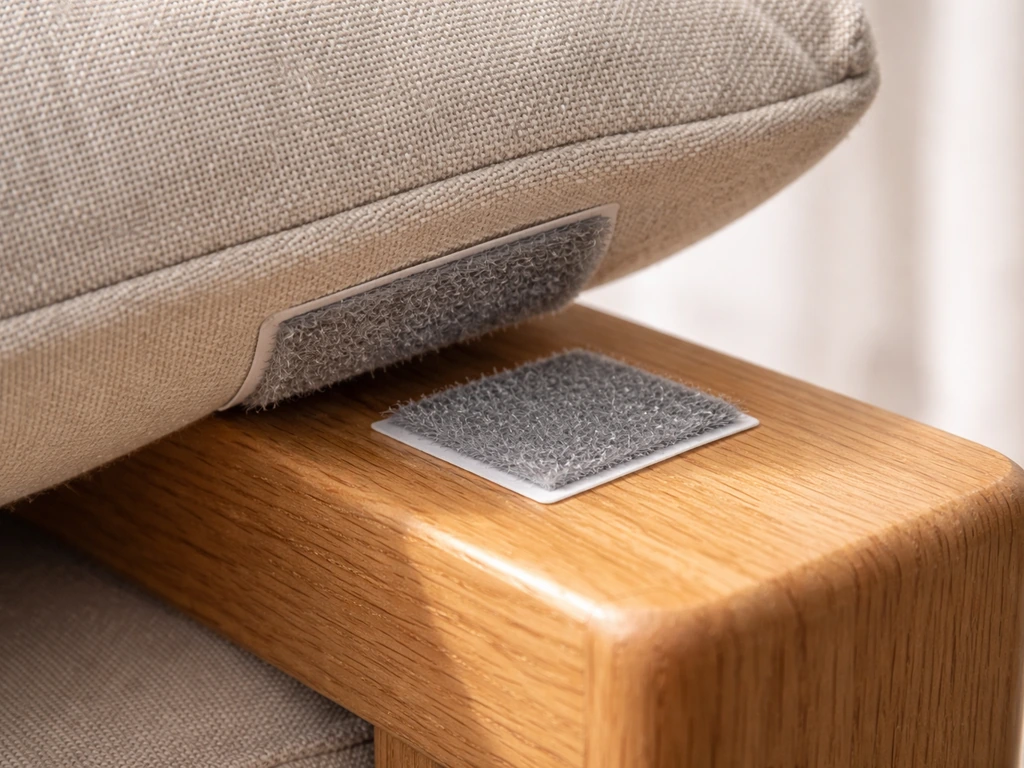
Adhesive-backed hook-and-loop fasteners are probably the fastest DIY solution out there. Buy a pack of hook-and-loop adhesive coins or strips (Velcro brand or generic, both work). Press the hook side onto the bottom corners of the cushion and the loop side onto the corresponding spots on the chair seat. Press firmly and hold for about 30 seconds per piece.
Let the adhesive cure for a couple of hours before using. For outdoor use, make sure you buy hook-and-loop rated for outdoor or marine use, because standard indoor adhesive can fail in heat and moisture. Outdoor-rated hook-and-loop adhesive costs a few dollars more but stays bonded through sun, rain, and temperature swings. Place strips at all four corners of the seat cushion for the best hold.
Cushion ties
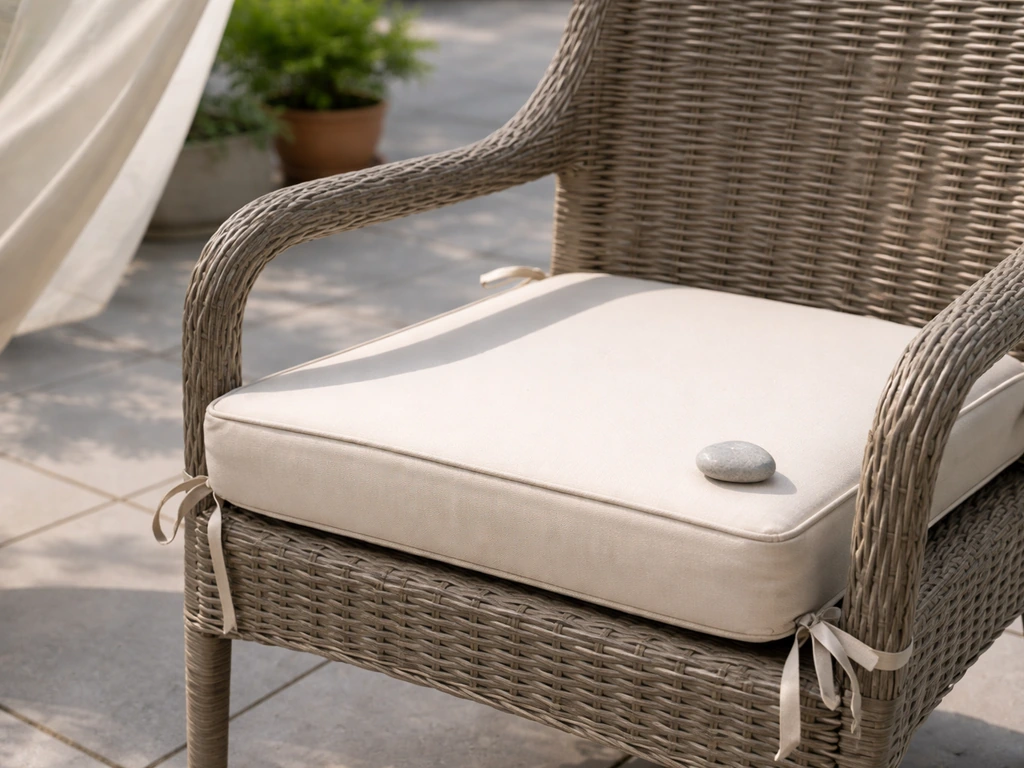
Cushion ties are fabric strips sewn to the cushion that you physically knot around the chair frame. If your cushions came with ties and they're broken, you can replace them yourself. Cut strips of outdoor-rated nylon webbing or heavy cotton ribbon (about 18 to 24 inches long), fold them in half, and hand-stitch or use an awl and outdoor thread to attach them at the back corners of the cushion.
Tie them around the chair's back uprights or rungs with a secure bow or square knot. If you've never sewn before, this is genuinely a beginner-level repair and takes about 15 minutes per cushion. If sewing isn't your thing, fabric glue rated for outdoor use can work as an alternative, though it won't be quite as durable.
Adjustable straps and buckle systems
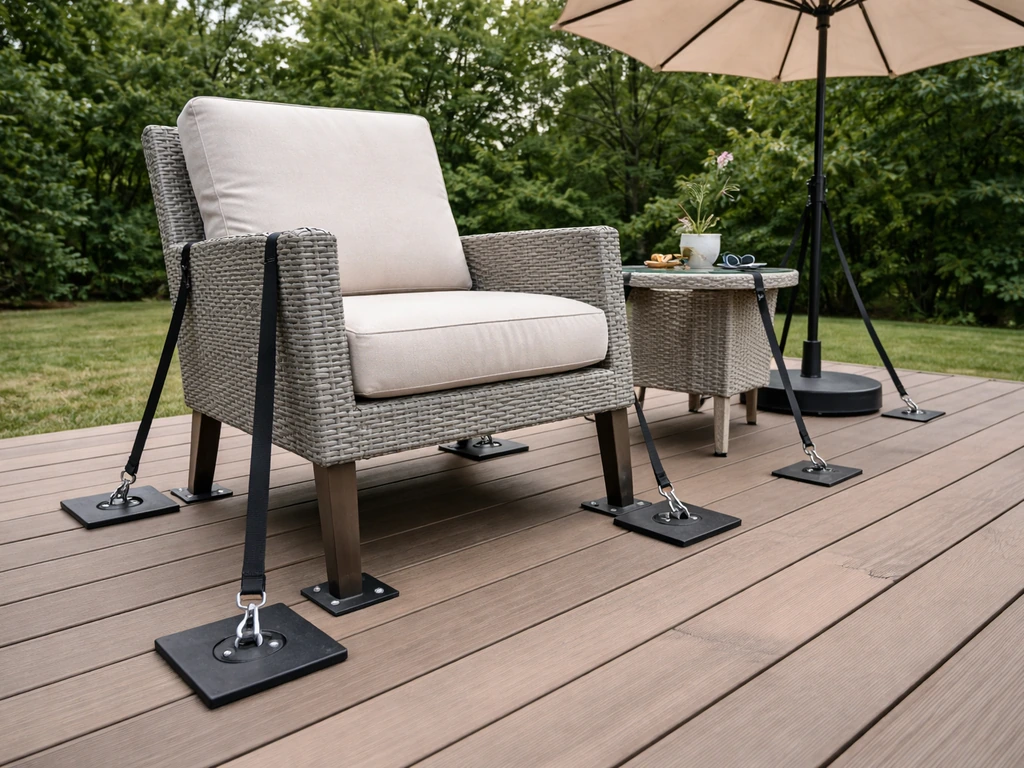
For cushions on benches, chaises, or large sectional pieces where ties aren't practical, adjustable buckle straps work well. These are elastic or nylon straps with small clips that loop under the furniture frame and clamp to the cushion or a D-ring sewn onto it. When you install strap-based systems, keep tension consistent across all attachment points so the cushion sits flat. A loose strap on one side and a tight one on the other will cause the cushion to shift at an angle. You can find outdoor furniture cushion strap kits online for around $10 to $20 for a pack that handles multiple cushions.
Anchor clips and furniture hardware
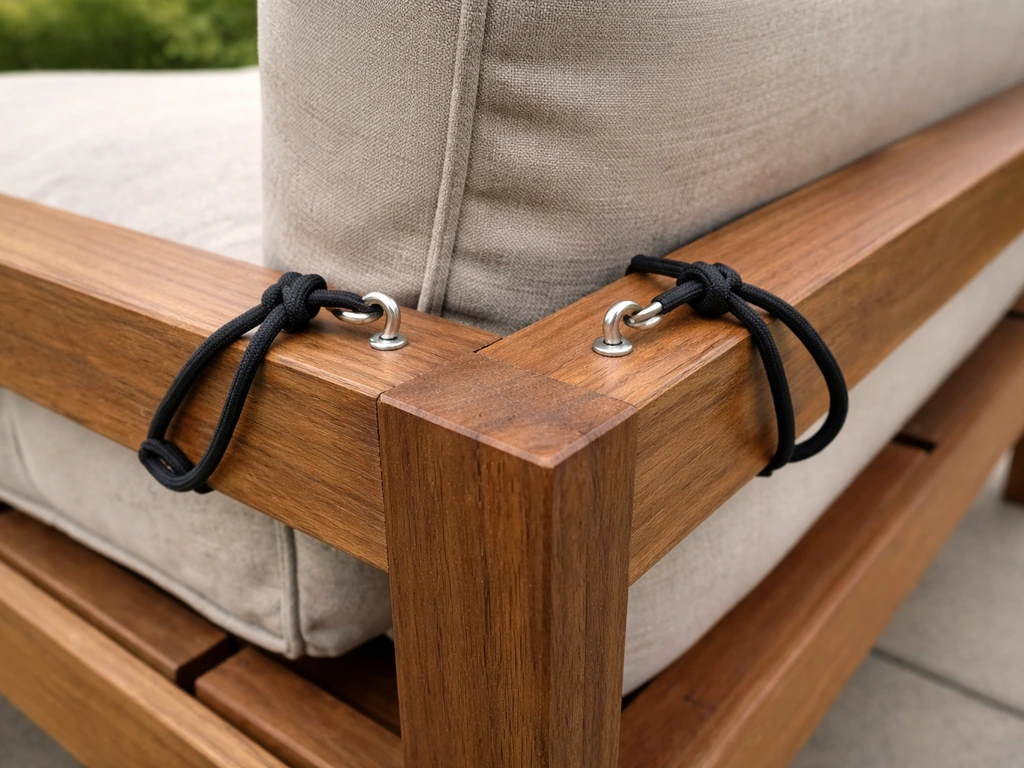
For serious wind exposure, you can install small screw-in or clip-on hooks directly into the furniture frame (if it's wood or thick resin) and use cord or bungee loops to hold the cushion down. This is more involved and not reversible on all furniture types, so it's best suited for situations where you've tried the lighter methods and they're still not enough. On metal or resin furniture, skip the screws and use clip-on cable hooks instead.
Preventing slipping at the source
Sometimes the real issue isn't wind resistance, it's that the cushion was never sitting right in the first place. Fixing the fit and positioning removes the root cause instead of just compensating for it.
Get the cushion size right
Measure your seat before buying replacement cushions. The cushion should cover the seat surface with no more than about half an inch of overhang on any side. If it's significantly smaller than the seat, wind can slip underneath. If it's much larger, it'll shift and slide at the edges. Replacement cushions are sold in standard sizes (16x16, 18x18, 20x20 inches are common), so you can usually find a close match without going custom.
Furniture placement and layout
Position furniture close to walls, fences, or planters that act as a windbreak. Chairs facing into the prevailing wind direction are more exposed than chairs angled away from it. If you're setting up a dining set on a fully open patio, consider adding a privacy screen or trellis on the windward side. This doesn't just help cushions, it also helps keep the rest of your furniture from shifting in storms (a topic worth exploring separately if you're dealing with chairs and tables moving, not just cushions).
Choose cushions with built-in attachment features
When it's time to replace old cushions, look for ones that already have integrated tie loops, hidden Velcro straps, or attachment points built into the design. These are standard on mid-range and higher-end outdoor cushion lines and make the whole problem much easier to manage from day one. Seat cushions and dining chair cushions almost universally offer tie options at the back corners. Box cushions for sofas and loveseats sometimes include interior Velcro panels that grip the furniture fabric.
Weatherproofing and seasonal storage
The best long-term strategy combines keeping cushions secure during use with protecting them properly when you're not using them. Cushions left out through wind, rain, and temperature swings wear out faster, and worn-out cushions are even lighter and more likely to blow around.
Bring them in before the storm hits
This sounds obvious, but it's worth saying: if a windstorm is forecast, the simplest solution is to pull the cushions inside or stack them in a sheltered spot. Most modern weather apps give you at least a few hours of warning. Stacking cushions flat in a garage, shed, or under a covered porch during high winds prevents damage and saves you from fishing them out of a neighbor's yard.
Use a weatherproof storage chest or bag
A dedicated outdoor cushion storage chest is worth the investment if you're tired of hauling cushions in and out of the house. Look for chests that are described as breathable or vented rather than fully sealed, because trapped moisture causes mildew. Products like the KoverRoos-style cushion storage chests are designed with airflow in mind specifically for this reason. If you're using a closed plastic bin instead, toss a few DampRid or silica gel packets inside to absorb moisture and reduce the chance of mildew forming during storage.
Winter storage done right
Before storing cushions for the off-season, clean them thoroughly and let them dry completely. Allow cushions to dry completely before winter storage, and if moisture is a concern, use breathable storage and moisture absorbers to prevent mildew.
Storing even slightly damp cushions is the number one way to end up with mildew come spring. Once they're dry, store them in breathable fabric bags or a vented chest rather than sealed plastic, and if possible, keep them off bare concrete floors. Elevating them on a shelf or pallet reduces moisture wicking from the ground.
This seasonal care routine directly extends the life of your cushions and keeps them from becoming the kind of lightweight, frayed fabric that turns into a projectile in the first spring wind.
Choosing the right solution for your cushion type and budget
Not every fix works equally well for every situation. Here's a straightforward breakdown to help you pick what actually makes sense for your setup.
| Method | Best For | Approx. Cost | Skill Level | Wind Resistance |
|---|---|---|---|---|
| Non-slip shelf liner | Smooth-cover cushions on flat seats | $8-$12 per roll | Beginner | Light to moderate wind |
| Hook-and-loop (Velcro) strips | Most seat cushions, quick install | $6-$15 per pack | Beginner | Moderate wind |
| Cushion ties (existing or DIY) | Chair seat and dining cushions | $0-$10 for materials | Beginner to intermediate | Moderate to strong wind |
| Adjustable buckle straps | Bench, chaise, and sectional cushions | $10-$20 per kit | Intermediate | Strong wind |
| Anchor clips with cord | Permanent setups in very exposed areas | $15-$30+ | Intermediate | Very strong wind |
| Liner + ties combined | Any cushion in regularly windy areas | $10-$20 total | Beginner | Strong wind |
For most people, the combination of a non-slip liner underneath plus ties or hook-and-loop at the corners is the sweet spot. It costs under $20, takes less than 30 minutes to set up across a full patio set, and handles the wind conditions most backyards actually see. If you're in a genuinely exposed location (coastal, hilltop, or wide-open yard with no windbreak), go straight to adjustable straps or anchor clips and skip the lighter methods. And if your cushions are pillow-back style or loose back cushions rather than seat cushions, those behave differently and may need their own approach since they're more prone to lifting off vertically than sliding horizontally.
The bottom line is this: pick one method from the friction column and one from the physical attachment column, combine them, and your cushion problems will be solved for the season. Don't rely on just friction or just ties alone if you live somewhere windy. Together they work far better than either one on its own. For patio chairs specifically, the best results usually come from combining a non-slip grip layer with a physically attaching method like Velcro strips or cushion ties how to keep patio chairs from blowing away.
FAQ
Will rubber shelf liner or a rug pad damage my patio furniture finish or upholstery?
Usually no, but test first. Choose a liner with a smooth, rubber-coated backing and avoid rough-edged foam pads that can abrade fabric or paint. If your seat is fabric-covered, put the liner only on the seat surface, not on stained or delicate cushion covers.
How do I stop cushions from blowing away if the cushion cover is removable and I do not want to attach anything to it?
Attach to the cushion bottom or use an attachment system that works through the cover’s seams. For removable covers, you can sew or glue webbing ties to the underside base layer so they do not rely on the cover fabric, or install hook-and-loop on the cushion backing where it is less likely to peel during removal.
Outdoor hook-and-loop is failing, what’s the most common reason?
Heat and moisture weaken indoor-rated adhesive. Make sure you are using outdoor or marine-rated hook-and-loop, press firmly for the full hold time, and clean both surfaces with rubbing alcohol so dust and sunscreen residue do not prevent bonding.
Can I use adhesive hook-and-loop on cushions that are slightly curved or not perfectly flat?
It will be weaker. For curved seats or rounded cushions, choose wider hook-and-loop pieces placed where the cushion flattens when sat on, or use ties or buckle straps that tension the cushion down evenly. Uneven pressure causes one side to lift first in strong gusts.
What’s the difference between cushions that slide and cushions that lift up vertically?
Sliding is handled best with friction (non-slip liner) plus corner attachments. Vertical lifting typically needs physical anchoring that resists upward pull, such as ties around the frame, buckle straps, or anchor clips with cord or bungee loops.
How many tie points or straps do I need for best wind resistance?
Corners are the priority. For most seat cushions, use attachments at all four corners to prevent twist. If the cushion is larger or has a loose fit, add a center attachment or additional strips along the sides so gusts cannot rotate the cushion.
Is it safe to use sandbags or weights on top of cushions?
It helps as a temporary measure but only when you are not using the cushions, because it can create pressure points and flatten foam over time. Use small, breathable weighted pouches instead of heavy piles, and remove weights before sitting so the weight does not shift and strain someone’s balance.
How do I keep cushions from blowing away when they are stored but still left outside under a cover?
Use the same securement idea, but also block wind exposure. Stack cushions flat, keep them sheltered from direct gusts, and use straps or storage bands to keep the stack from shifting. If rain gets in, dry them completely after storage to prevent mildew growth.
What should I do if my cushion is the right size but the seat frame is uneven?
Add a grip layer that fills gaps, and avoid relying on thin liners alone. Consider an outdoor rug pad that offers slight thickness and cushioning, then pair it with corner ties or straps so the cushion is held in the correct position even on a wavy or slatted frame.
Can I combine methods, like liner plus screw-in hooks, without making removal difficult?
Yes, but choose carefully. Use a liner for friction, and choose reversible attachment methods first (hook-and-loop, ties, buckle straps). Save screw-in or clip-on hooks for cases where you have confirmed the cushion still escapes after reversible methods, because they can complicate future cushion replacement.
What maintenance should I do so attachment systems keep working each season?
Clean liner surfaces and cushion attachment points before summer use. Replace worn hook-and-loop, especially if fibers are matted, and re-check straps for stretch after long storage. If you notice peeling at the edges, re-clean with alcohol and let everything dry fully before reattaching.