To cover patio chairs properly, you need to measure all three dimensions (width including armrests, depth front-to-back, and height to the tallest point), pick a breathable water-resistant cover that fits snugly, clean and dry the chairs completely before covering, and secure the cover with leg straps or a drawstring hem so it doesn't lift in the wind. Do all of that, and your chairs will come out of the season looking the same as they went in. Skip any one of those steps and you'll likely end up with mold, a cover halfway across the yard, or both.
How to Cover Patio Chairs: Step-by-Step Guide

Maren Grady
27 Jun 2026
Choosing the right cover type for patio chairs
The biggest mistake people make is grabbing whatever cover looks like it might fit without thinking about chair shape or material. There are a few meaningful differences that actually matter in practice.
Breathable water-resistant vs. fully waterproof
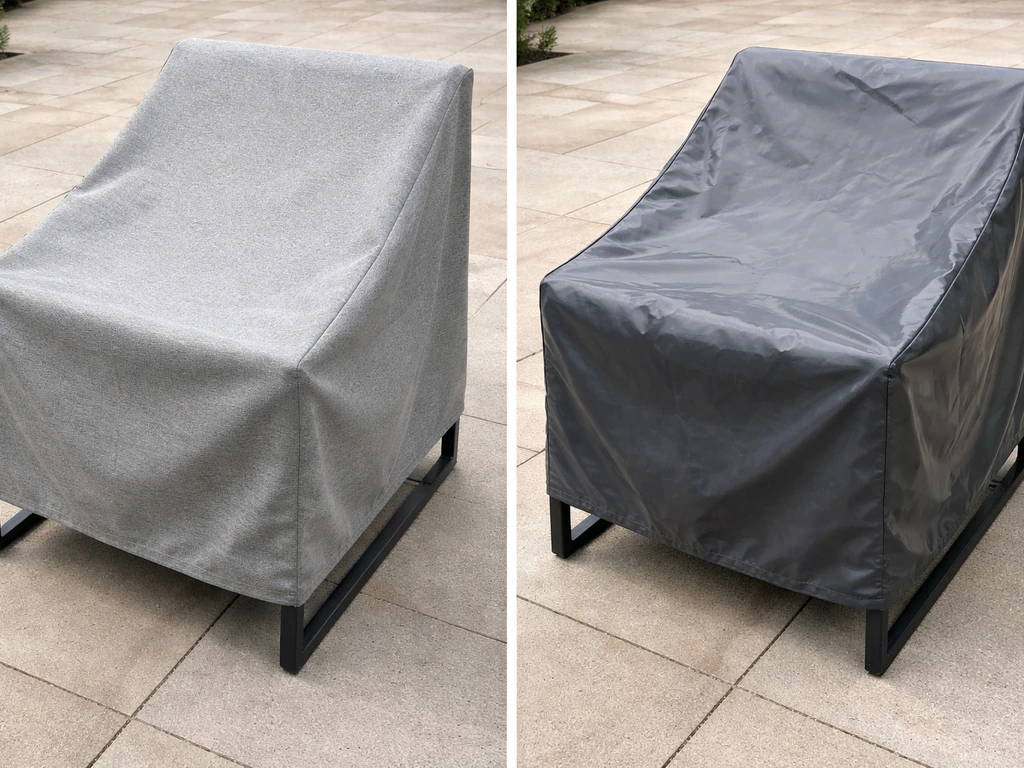
This is where I see people go wrong most often. Fully waterproof covers sound like the obvious choice, but they trap condensation underneath, which is exactly the environment mold and mildew love. A breathable, water-resistant cover lets precipitation run off while still allowing moisture to evaporate from underneath. blank" rel="noopener noreferrer">For teak or wood chairs especially, an airtight cover can cause mold and fungus to develop even when the wood looked dry when you put the cover on. Stick with water-resistant and breathable unless you're covering for a very short stretch during a specific storm.
Cover style: slip-on, fitted, and stretch
Slip-on covers are the most common and easiest to use. They drop over the chair from the top and are secured at the bottom with a drawstring, Velcro, or straps. Fitted covers are cut specifically for a chair shape (like a high-back Adirondack or a round papasan) and tend to stay put better. Stretch covers use an elastic fabric that hugs the chair closely, which works well for dining chairs but can tear over time if the fit is tight on a bulky chair. For most people covering standard dining or lounge chairs, a good slip-on cover with a hem strap is the right call.
Chair type affects cover shape
| Chair Type | Cover Shape to Look For | Key Fit Note |
|---|---|---|
| Dining chair (no arms) | Standard chair cover, shorter height | Measure height carefully if back is tall |
| Dining chair with arms | Wider profile cover | Width must span full armrest-to-armrest span |
| Lounge/reclining chair | Deep seat cover or chaise cover | Depth dimension matters most here |
| Adirondack / high-back | Tall chair cover | Height is the critical measurement |
| Stacking chairs (multiple) | Stack cover or multi-chair cover | Measure stacked height and total width |
| Rocker or glider | Oversized or rocker-specific cover | Add a few inches for rocker overhang |
If your chairs are unique in shape, like a deep-seated rocking chair or a curved barrel chair, it may be worth looking into custom covers made from outdoor fabric. That's a separate project in itself, but if you've already been thinking about making your own furniture covers, the same measuring principles below apply. If you're planning to make your own patio furniture covers, start by measuring each chair and choosing outdoor fabric that can handle rain and sun making your own patio furniture covers.
How to measure and fit (with cushions and armrests)

Measuring feels tedious but it's the one step that determines whether everything else works. A cover that's too small won't go on, and a cover that's too large will sag, collect water in the dips, and blow off in the first decent wind. You need three numbers: width, depth, and height. If you are trying to DIY covers for patio cushions, measure your cushions and choose a breathable, water-resistant fabric that fits snugly how to make covers for patio cushions.
- Width: Measure side-to-side at the widest point of the chair. For chairs with armrests, that means armrest tip to armrest tip. Don't measure at the seat, measure at whatever point sticks out the furthest.
- Depth: Measure front-to-back at the deepest point. For lounge chairs with a footrest, include that full length. For recliners, measure in the reclined position if you plan to cover them that way.
- Height: Measure from the ground (or from the leg base) up to the tallest point of the chair, whether that's the top of the back or the top of a headrest pillow.
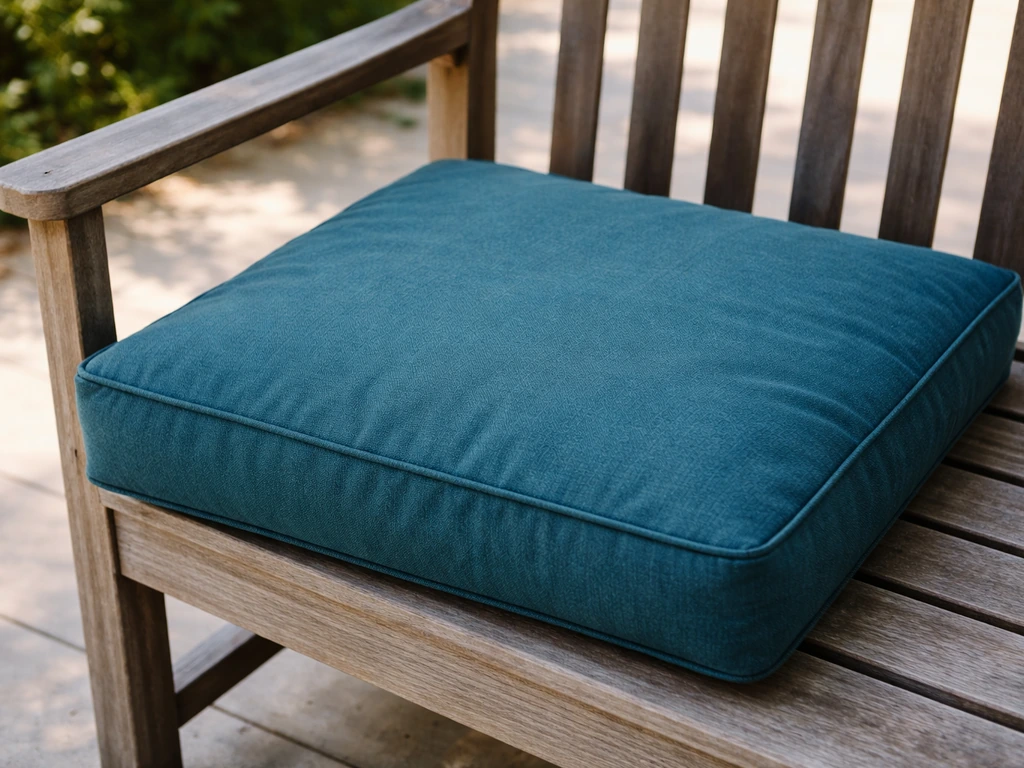
- Cushion adjustment: If the cushions are staying on the chair under the cover, add the cushion thickness to your depth and height measurements. A 4-inch cushion on the seat adds 4 inches to effective height.
- Round up: Always round up to the nearest inch and then size up if you're between cover sizes. A slightly roomy cover secured with a strap is far better than one that barely fits.
One thing worth knowing: cover product dimensions refer to furniture dimensions, not to the cover's own dimensions. So if a cover is listed as fitting a chair up to 30 inches wide, your chair (at its widest point) should be 30 inches or less. Don't get tripped up thinking the number describes the cover fabric itself.
For chairs with unusual features like an umbrella hole through the seat, a curved reclined back, or a swivel base, take an extra measurement at those points and note any protrusions. The cover doesn't need to accommodate the umbrella pole, but you need to make sure the hole won't cause the cover to bunch or leave a gap.
Prep steps before covering to prevent damage and mildew
Here's where I've made the most expensive mistakes: putting a cover on dirty or damp chairs and finding a science experiment underneath when spring arrived. Prep takes maybe 20 minutes per chair and it makes the difference between chairs that last a decade and ones you're replacing every few years.
- Clean the chair thoroughly: Wipe down or wash the frame, seat, and any crevices where dirt and debris collect. Bird droppings, sap, and pollen all hold moisture and can cause staining or surface damage under a cover.
- Let it dry completely: This is non-negotiable. Covering a chair that's even slightly damp traps moisture inside with no way to escape. On a sunny day, an hour of air drying is usually enough after wiping down. In humidity, give it longer. When in doubt, wait.
- Inspect for damage: Look for rust spots on metal frames, cracks in wood, loose screws, or torn weave on wicker. Covering damage doesn't fix it, it just hides it while it gets worse. A small rust spot treated now costs nothing; one ignored for six months can mean a new chair.
- Decide on cushions: You have two options here. Either remove the cushions and store them separately (best for long-term storage), or leave them on and account for them in your cover sizing. Leaving cushions on under a breathable cover works fine for short seasonal gaps; for winter or extended storage, removing them is smarter. If you're interested in protecting or refreshing the cushion covers themselves, that's its own process worth exploring separately.
- Apply protective treatment if needed: Metal chairs benefit from a quick coat of spray wax or protective oil on frame joints before covering for winter. Wood chairs, especially teak, benefit from a light oiling. These treatments work better going into storage than coming out.
One optional step for very long storage periods or extreme winter conditions: wrap leg joints and any bare metal hardware in a layer of plastic wrap before putting the cover on. This adds a moisture barrier at the most rust-prone points without making the whole setup airtight. It's a bit fussy but worth it for cast iron or older wrought iron chairs.
Securing covers so they don't blow off in wind
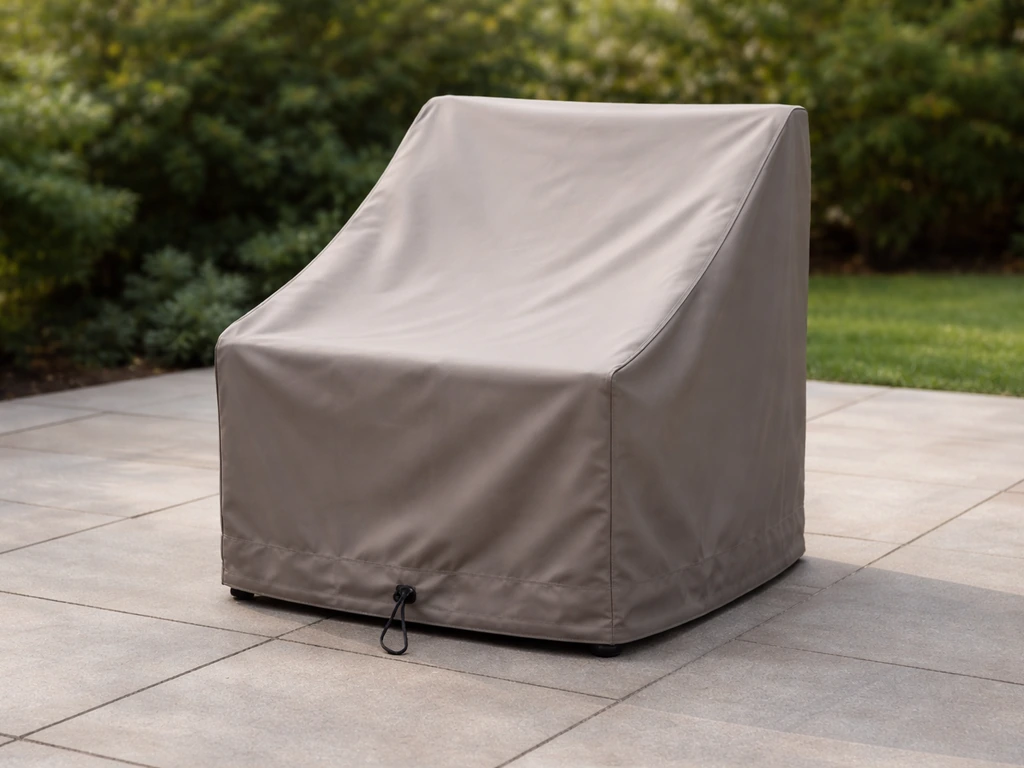
A cover that blows off at the first gust is worse than no cover at all, because now you have to go find it, and the chairs sat exposed anyway. Wind is the number one complaint with patio furniture covers and the fix is straightforward: the cover needs to be anchored at the bottom.
Built-in securing options
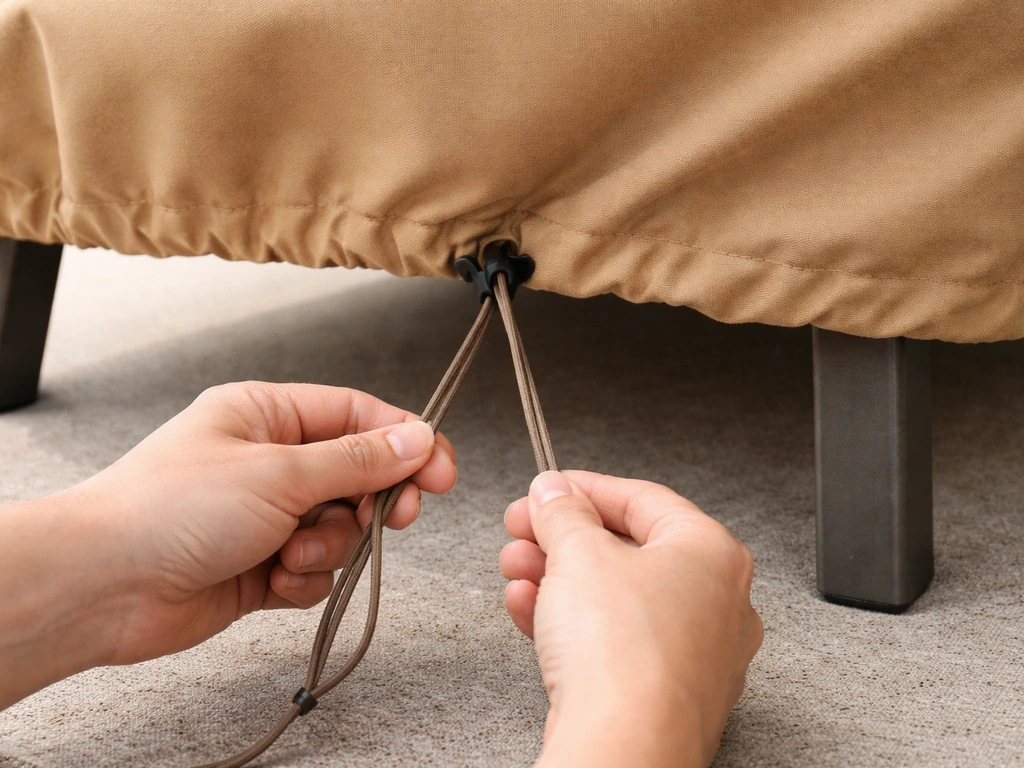
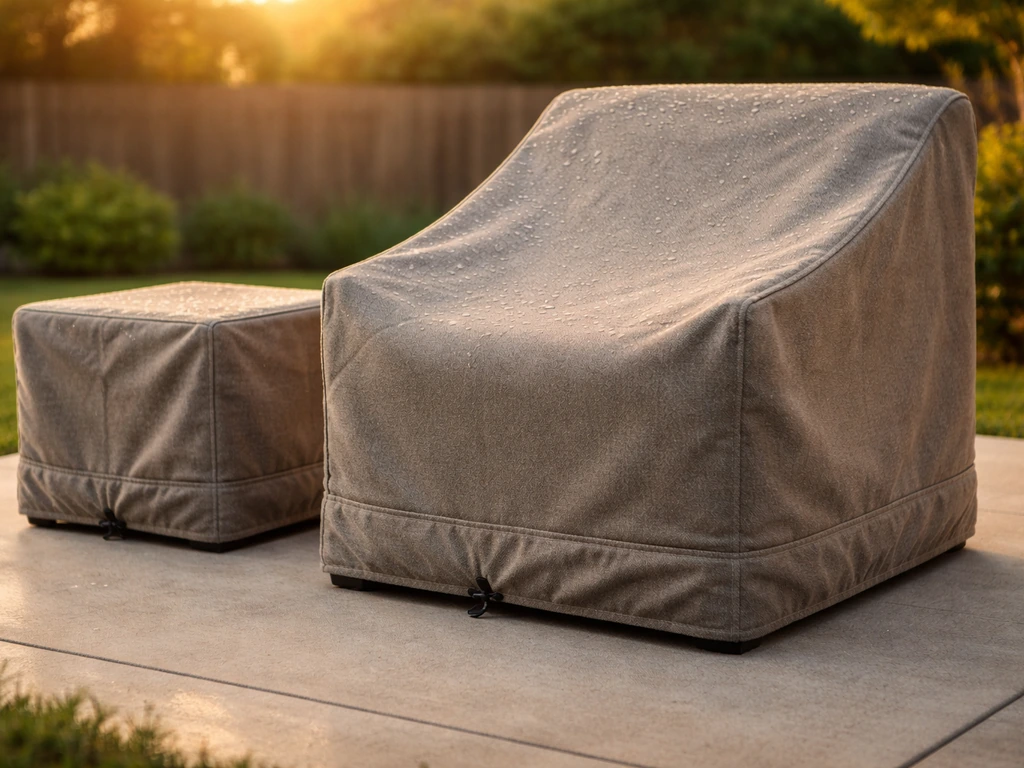
Most quality covers come with at least one of these: a drawstring hem you tighten under the chair, buckle straps that loop around the legs, or Velcro tabs at the corners. When shopping for a cover, look for all three if possible. A drawstring alone will hold in moderate wind. In high-wind areas or on exposed decks, you need straps.
Add-on securing methods
- Bungee cords: Loop them under the chair frame at multiple points. This is the cheapest and most flexible option and works surprisingly well on oddly-shaped chairs where straps don't sit right.
- Patio cover clips: These clip onto the cover hem and anchor to the chair leg or frame. Available at most hardware stores for a few dollars. Great for chairs with thin legs that straps can't grip.
- Tie-down straps with buckles: Run them under the seat rail and across the front, snugged down firmly. If your cover didn't come with these, aftermarket straps made for patio covers are widely available.
- Weight bags or sandbags: Placed over the corners of a cover on flat surfaces like table chairs. Useful when straps aren't practical, but not a substitute for proper leg anchoring on a chair.
One thing to watch: route straps around sturdy frame sections, not across decorative surfaces or thin woven panels. Straps that pull across wicker or resin weave can leave marks or wear through the material over a whole season. Run them under the cover against the legs where possible, not over the top of the cover fabric.
Weather-specific tips (rain, snow, sun, year-round storage)
Rain
For rain protection, the biggest issue is pooling. If a cover sags in the middle (which happens when the chair back is taller than the chair seat, creating a low valley), water collects there and the weight can eventually pull the cover off or stretch it. Look for covers with a slightly raised center or stiffen the peak yourself by placing a foam pool noodle or rolled towel on the seat surface before covering. It creates a gentle slope so rain runs to the sides instead of pooling in the middle.
Snow and winter
Snow is heavier than rain and the rules are slightly different. You want a cover that maintains its shape at below-freezing temperatures (cheaper covers get brittle and crack). A dome or tent-like shape helps snow slide off rather than build up. If snow does accumulate, brush it off gently rather than letting it sit and refreeze. Also: elevate the chairs off the ground if possible, even just setting them on small rubber pads or wooden blocks. Legs sitting directly in snow or standing water are the first things to rust or rot.
Sun and UV
UV damage is slower than you think but it adds up. Even under a cover, chairs can absorb heat during summer days if the cover itself heats up. Look for covers with UV-resistant fabric (usually rated as UV50+ or similar) and lighter colors that reflect rather than absorb heat. If you live somewhere with harsh summer sun, a vented cover with eyelets on the sides is worth the extra few dollars.
Year-round or long-term storage
For chairs you're storing through an entire winter or moving to a garage or shed, covering them before moving is overkill. Instead, clean and dry thoroughly, do any repairs, and then cover them loosely with an old sheet or breathable storage bag. Full patio covers are designed for outdoor use; inside a dry storage space, all you really need is dust protection. Save your good covers for outdoor use.
Common problems and fixes (mold, pooling water, wear and tear)
Mold and mildew under the cover
This almost always means one of three things: the blank" rel="noopener noreferrer">chair wasn't dry before you covered it, the cover is fully waterproof with no breathability, or the cover fit is too loose and rain is getting in around the edges. After you’ve covered the chair frame, use the same breathable, water-resistant approach to protect patio chair cushions too. Fix the first problem by never covering a wet chair. Fix the second by switching to a breathable water-resistant cover. Fix the third by sizing down or using straps to keep the cover edge tight to the chair frame. If you already have mold on the chair, clean it off with a diluted white vinegar solution or an outdoor furniture cleaner before re-covering.
Pooling water on top of the cover
This is a cover shape problem. The low point of the chair (usually the seat) becomes a bowl when the cover drapes over a high back. The fix is to create a peak under the cover. A foam noodle laid across the seat, a folded towel, or even a small bucket placed upside down on the seat before covering will lift the center and let water run off to the sides. Some covers have a built-in frame or stiffened panels for exactly this reason.
Cover keeps blowing off
If your cover is blowing off despite drawstrings and straps, check the fit first. An oversized cover will catch wind like a sail no matter how many straps you add. If the cover is the right size, add a second anchor point with bungee cords criss-crossed under the seat. In particularly exposed spots, stacking chairs together and covering them as a group also reduces wind catch.
Cover wear and tearing
Covers wear out at stress points: around the strap holes, at the hem, and anywhere the fabric rubs against a sharp corner of the chair frame. Protect sharp metal edges with a wrap of pipe insulation foam before covering. For small tears in the cover itself, a patch of outdoor fabric and waterproof fabric glue or iron-on repair tape can extend the cover's life by another season or two. It's a five-minute fix and much cheaper than a new cover.
Fading and UV degradation
Covers fade and weaken with sun exposure over time, which is unavoidable. Using a UV-resistant cover helps. After a couple of seasons, if the cover fabric feels thin or brittle, it's time to replace it before it fails and leaves your chairs unprotected during a storm. A cover that's lasted three seasons has done its job.
Care and storage for your covers season to season
Covers need maintenance too, and the ones that get it last two to three times longer. At the end of the season when you take covers off, don't just fold them up and shove them in a bin. Take an extra 30 minutes and do this:
- Shake off debris: Leaves, dirt, and insects collect in folds and seams. Shake or brush the cover out thoroughly before washing.
- Hand wash or gentle machine wash: Use a soft brush on seams, corners, and strap hardware. Pay extra attention to areas where mold or algae might have started. Rinse thoroughly since detergent residue can attract mildew.
- Dry completely before storing: This is the same rule as for the chairs themselves. A damp folded cover in a storage bin will be a mold ball by spring. Hang it on a line or drape it over a railing in the sun until it's bone dry, especially in humid climates.
- Reproof if needed: If water is no longer beading on the cover surface, a spray-on DWR (durable water repellent) reproofing treatment will restore the water resistance. It costs around $10 and is applied after washing and drying.
- Fold loosely and store in a breathable bag: Don't compress covers tightly in a plastic bin. A loose fold in a mesh laundry bag, fabric storage bag, or pillowcase allows air to circulate and prevents creases from becoming cracks in the coating.
- Store in a cool, dry location: A garage shelf, a dry shed, or an indoor closet all work. Avoid damp basements or outdoor storage boxes that aren't waterproofed themselves.
At the start of each new season, inspect your covers before putting them back on. Look for tears, cracked coating, broken strap hardware, or mold spots. A five-minute inspection now means you catch problems before the chair is sitting under a failing cover during the first rainstorm of summer.
If you're finding that covering your chairs every season still leaves the cushions looking worn or faded, that's usually a cushion cover problem rather than a chair cover problem. If you want to refresh the look, you can dye patio cushion covers, but you will need to use fabric-safe dye and make sure the covers are clean and fully dry first cushion cover problem. Protecting the chair frame and protecting the cushion fabric are two different tasks, and both are worth tackling. The same goes for chairs where the cushion shape itself needs attention: a cover over a flat, deflated cushion won't restore the comfort or the look.
The bottom line is that covering patio chairs well isn't complicated, but it does require doing several small things right. Measure carefully, start with a clean and dry surface, pick a breathable cover that fits, anchor it properly, and maintain the cover itself between seasons. Do that consistently and your chairs will outlast the ones belonging to neighbors who just grabbed whatever cover was on sale and called it a day.
FAQ
Can I cover patio chairs immediately after rain or washing, or do they have to dry first?
Yes, but only if the cover is truly breathable water-resistant. If the chair has any trapped moisture, heat and airflow under a breathable cover can still help it dry, but a fully airtight waterproof cover will often accelerate mildew. If you covered already and you see a musty smell or dark spots, remove it, let the chair dry with airflow, then re-cover with a breathable option.
Is it okay to put plastic under the chair cover to improve water protection?
In most cases, avoid wrapping furniture in plastic directly under the patio cover. Plastic can block evaporation and create a condensation layer, even if the outside stays dry. If you need extra moisture protection for winter rust, use a barrier only on leg joints and hardware (as a local wrap), not over the whole chair.
What’s the best way to cover chairs for a quick storm, not long-term storage?
If you need to cover only for storms, you can switch to a lighter, breathable water-resistant cover that you take off as soon as weather clears. Leave the cover on longer only when the material is designed for outdoor seasons, because shorter-use covers often lack UV resistance and may not vent well.
How do I stop water pooling on the seat so the cover stays in place?
For chairs with seats that collect water, create drainage before covering. A foam noodle or folded towel on the seat is effective, and for very uneven seats you can add a second small wedge under one side to prevent a continuous low valley. Avoid overstuffing, because it can distort the cover fit and create new gaps for water entry.
What should I do if I find mold under the patio chair cover?
If mold appears after covering, don’t re-cover on top of it. Brush off loose growth, clean with an outdoor furniture cleaner or a diluted vinegar solution, then dry completely in a breezy spot. After re-covering, use a breathable water-resistant cover and check that the cover edge is tight so rain isn’t getting under.
Can I cover multiple patio chairs together to save time?
Yes, but it can wear through fabric faster. If you stack chairs, make sure the top chair cover has bottom anchoring and that straps are routed around sturdy frame areas, not over thin woven panels. Using an oversized cover on a stack can act like a sail, so size for the stack height and widest point.
What’s the most effective way to keep patio chair covers from blowing off in high wind?
Do not rely on the cover edges alone for windy decks. Add bottom anchors that loop under or around the legs, and if your cover still lifts, add a second anchor point or criss-cross bungee cords under the seat. Also position chairs so prevailing wind hits the narrowest side of the back.
How do I interpret the cover size chart if my chairs have arms or a rounded back?
Use the chair’s widest real measurement point, including armrests, and the tallest point including any back shape. Then choose a cover rating that matches or exceeds that width, depth, and height. If you’re between sizes, pick the smaller size with straps, because too much slack sags and collects water.
Do vented covers really make a difference, or is “breathable” enough?
Eyelets and vents help reduce condensation buildup, especially in humid climates or during long covers. If your cover doesn’t have vents, you can still reduce trapped moisture by ensuring the chair is completely dry and the cover has good edge tension, which limits the amount of humid air that stays trapped inside.
How can I tell when my patio chair cover is near the end of its life?
Replace covers when the coating feels brittle, the fabric tears easily at strap holes, or seams have gaps you can see from the outside. A practical rule is to check before the first big storm of the season, especially after sun exposure, because weak covers can fail suddenly under rain and wind.
Should I still use the same patio cover if the chairs are stored indoors?
In a garage or shed, a full outdoor cover is often unnecessary. Instead, clean and dry thoroughly, then use a breathable storage bag or loosely drape an old sheet to protect from dust while allowing airflow. Keep in mind that stored chairs can still rust if any metal hardware is damp, so drying matters most.
Can I dye patio chair covers to refresh faded fabric instead of replacing them?
Yes, but dyeing is only for cushion covers, not the chair frame fabric. If you dyed cushions previously, make sure the covers are still fully dry before re-installing, and avoid dyeing if the fabric has mildew or stains embedded in it. For chair-frame covers, use UV-resistant material instead of trying to re-dye the cover.