To cover patio chair cushions, measure the cushion length, width, and thickness, add 1 inch of seam allowance to each measurement, cut your outdoor fabric to size, and either sew a fitted envelope-style cover with a zipper or tie closure, or go no-sew using iron-on hem tape and Velcro strips. Either way, use a fabric rated for UV and water resistance (like solution-dyed acrylic or olefin), wrap the foam insert in a waterproof liner before stuffing it inside, and add ties or Velcro to keep the cover from shifting on the chair. When shaping thick foam into contours, Sailrite notes that the foam ridge heights change how the cover is assembled, so seam planning needs to follow the contour shape blank" rel="noopener noreferrer">thick-foam shaping/contouring changes how the cover is pulled together. That is the whole job in a sentence, the sections below walk you through every step. If you want the full walkthrough for how to make covers for patio cushions, start with measuring your cushions and choosing UV and water-resistant outdoor fabric.
How to Cover Patio Chair Cushions No-Sew and Sewing


Choosing the Right Cover Material and Style
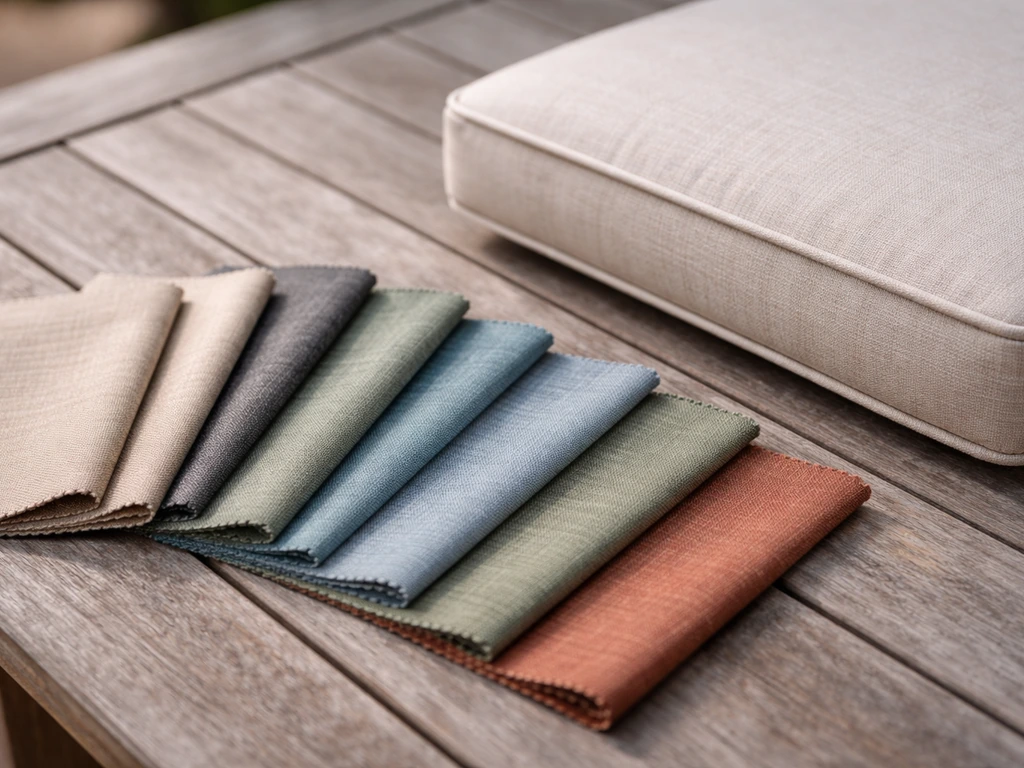
Material choice is the decision that will make or break this project. Most people grab whatever fabric looks nice at the craft store, sew a cover, and then watch it fade to a sad beige by mid-August. Outdoor cushions live in a brutal environment, UV rays, rain, humidity, bird droppings, sunscreen, so the fabric has to be purpose-built for it.
The three fabrics worth your time for patio chair cushion covers are solution-dyed acrylic (Sunbrella is the most recognized brand), olefin, and solution-dyed woven polyester. If you are trying to dye patio cushion covers, you will want to start with the right fabric type and follow the dyeing instructions for outdoor upholstery so the color holds up. Here is how they compare:
| Fabric | UV Resistance | Water Resistance | Bleach Safe | Relative Cost |
|---|---|---|---|---|
| Solution-Dyed Acrylic (e.g. Sunbrella) | Excellent — color lives in the fiber | Excellent — repels water | Yes, with diluted solution | Higher ($15–$30/yd) |
| Olefin | Good — fade resistant, warranted | Good — weather and rain resistant | Generally yes | Mid-range ($8–$18/yd) |
| Solution-Dyed Woven Polyester (e.g. Suntastic) | Good — colors won't crock or fade | Water washable, moderate repellence | Yes | Budget-friendly ($6–$14/yd) |
| Standard Cotton Canvas | Poor — fades quickly outdoors | Poor — absorbs moisture | No | Low ($4–$8/yd) |
| Vinyl | Good — waterproof surface | Excellent — fully waterproof | Yes | Mid-range ($10–$20/yd) |
If you want covers that will last more than one season with minimal babying, spend the extra money on solution-dyed acrylic. The reason it resists fading so well is that the color is baked into the yarn itself during manufacturing, not applied as a surface dye, so there is nothing for the sun to bleach away. Sunbrella runs about 9 oz. per square yard, which is heavy enough to hold shape but still easy to work with by hand or machine. Olefin is a solid budget-friendly middle ground and is marketed with a limited warranty against premature color fading. ARDEN’s olefin patio cushion set is described as using 100% woven olefin outdoor fabric that resists fading and is suited for weather limited warranty against premature color fading. Vinyl is worth considering if you want zero water absorption and do not mind a slightly stiffer, shinier look.
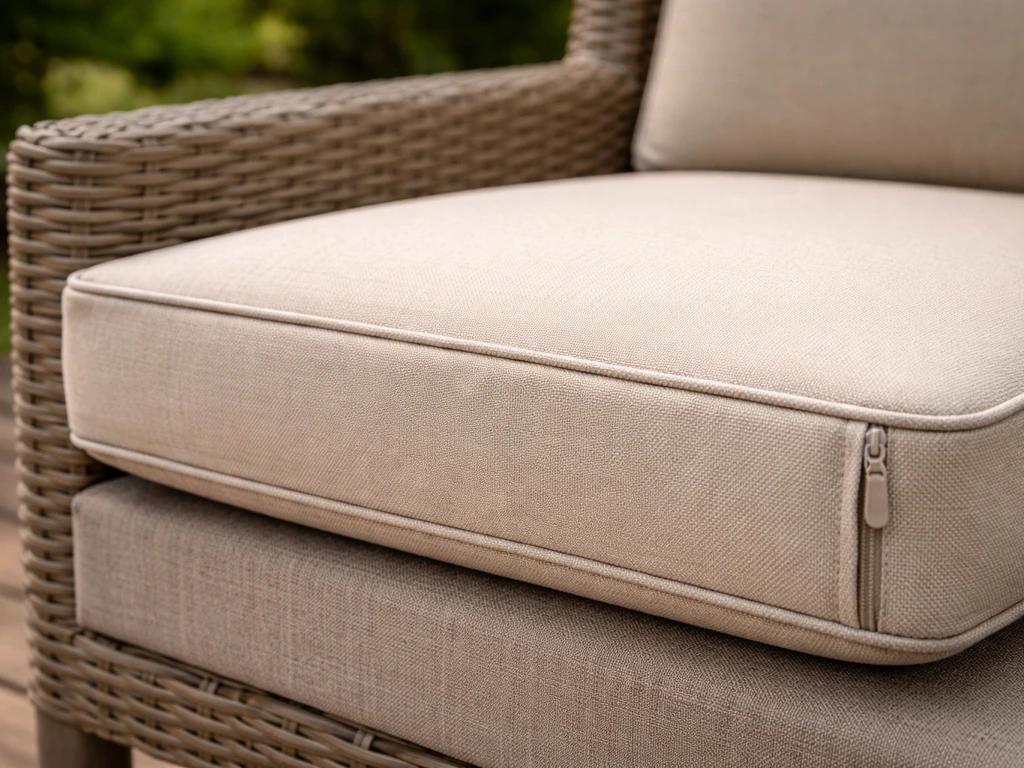
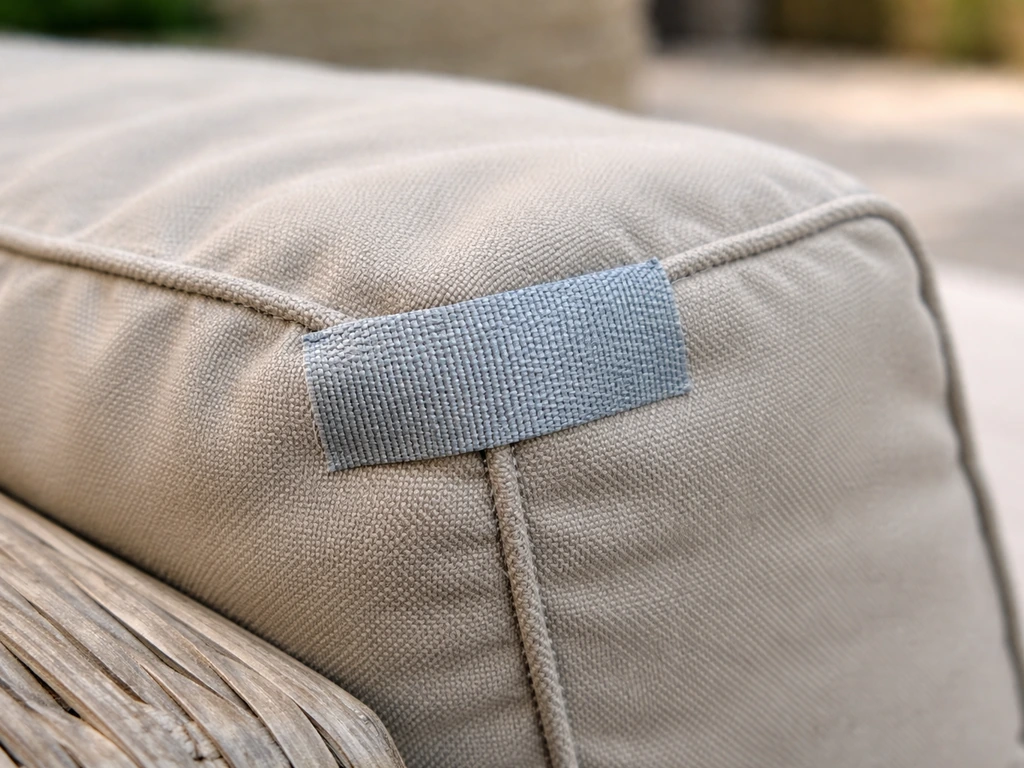
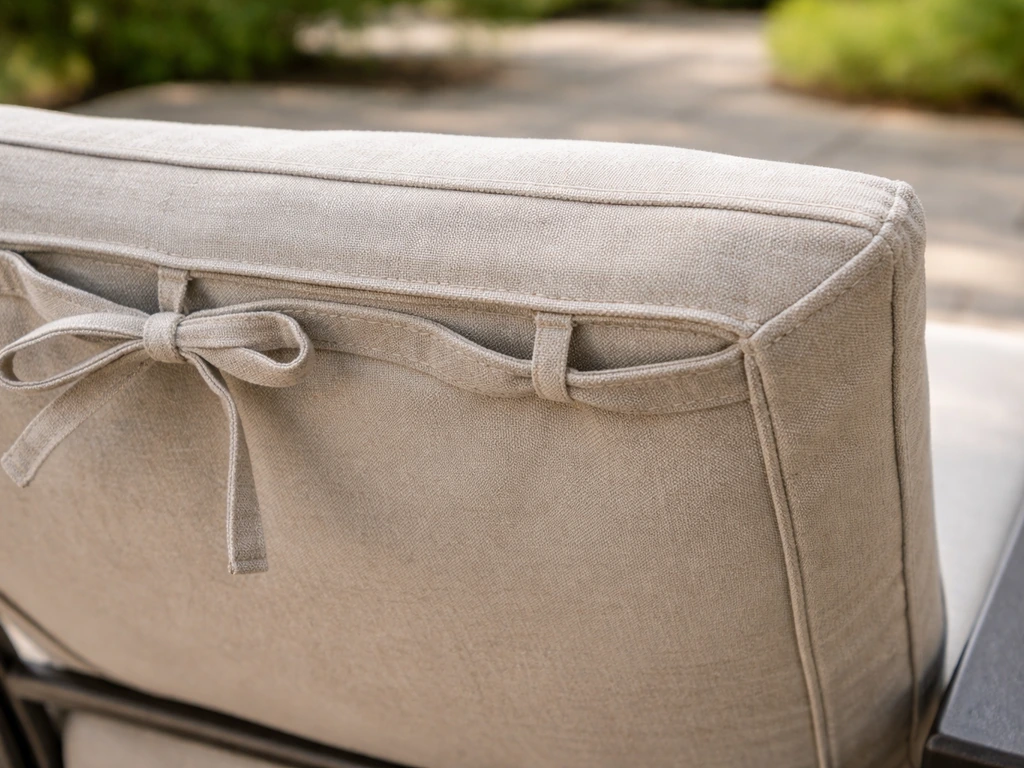
For closure style, you have three real options: a zippered cover (most durable, easiest to remove for washing), an envelope-back cover (no zipper needed, fabric overlaps at the back), or a tied slipcover (fabric panels secured with sewn fabric ties or velcro straps at the chair rails). Retail outdoor covers often combine a zipper with two ties for good reason, the zipper keeps the cover sealed and the ties stop it from blowing off in the wind. That combination is worth copying whether you sew or go no-sew.
Preparing Patio Chair Cushions for a Clean, Snug Fit
Before you cut a single piece of fabric, the cushion itself needs some attention. Covering a dirty, mildewed, or compressed foam pad is a waste of good fabric. Here is the prep sequence I follow every time.
Clean the existing cushion
If there is mildew, and on most old outdoor cushions there will be, mix 1/4 cup of dish soap with 1 cup of bleach per gallon of water. Scrub the cushion with a stiff brush, let the solution soak in for 15 minutes, then rinse thoroughly and let it dry completely in the sun. Do not rush the drying step; putting a damp foam core inside a new fabric cover is exactly how mildew comes back within weeks.
Assess the foam
Press down on the center of the cushion. If it does not spring back to more than half its original height, the foam is shot. A new cover on dead foam still looks lumpy and feels terrible. Replacement open-cell foam for outdoor cushions is inexpensive (around $10–$20 for a standard seat pad) and makes a much bigger difference than the fabric does. If the foam is in decent shape, wrap it in a waterproof cushion wrap (sometimes sold as Cushion Wrap Silk Film) before you start. This liner traps moisture and channels it away from the foam core. With breathable fabric on the outside, water drains through and out rather than sitting inside the foam and causing rot.
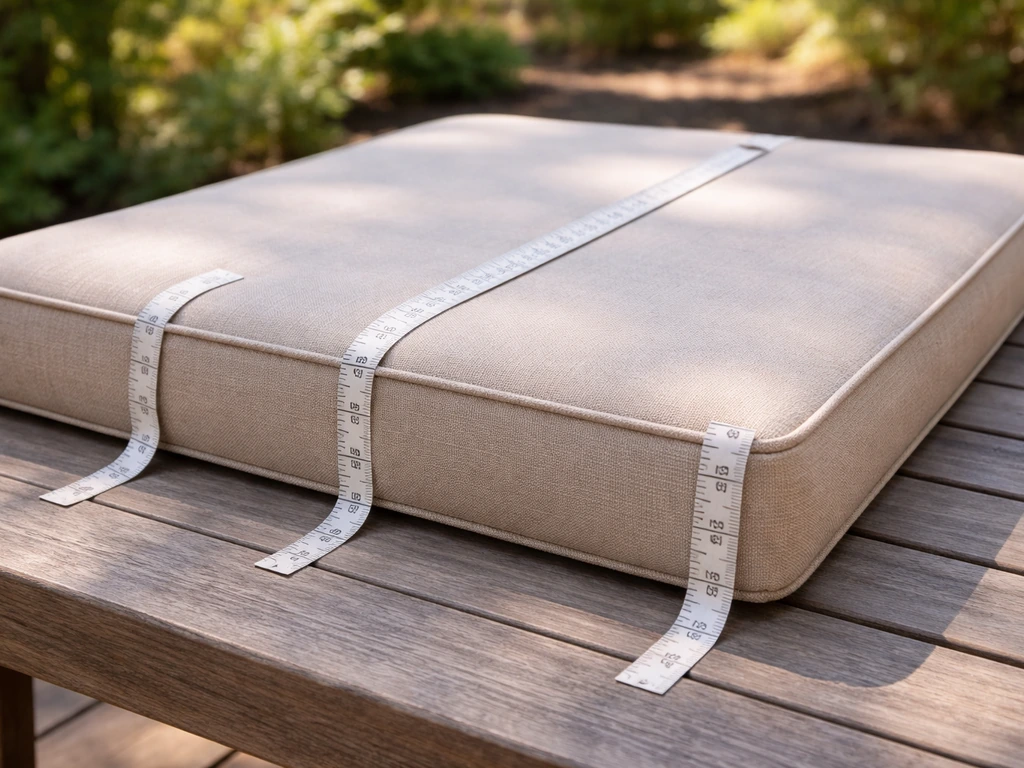
Measure carefully
This is where most first-timers go wrong. Measure the cushion in three places: length (front to back), width (side to side), and thickness (depth, measured at the thickest point). Write these down. For a sewn cover, add 1 inch to each measurement to account for seam allowance (1/2 inch per seam, two seams). For a no-sew cover, add about 3–4 inches all around so you have enough fabric to fold and bond cleanly. If you are installing a zipper, you also need to add extra width to the zipper panel to account for the zipper tape, typically another 1/2 to 3/4 inch on each side of the zipper plaque. Getting this wrong means a cover that either gaps open or does not close at all, so double-check before you cut.
How to Cover Cushions with Sewing (Step-by-Step)
This method gives you the most durable, professional-looking result. You do not need an industrial sewing machine, a basic home machine with an upholstery or denim needle handles most outdoor fabrics fine. Budget about 2–3 hours for your first cover, less once you have done one.
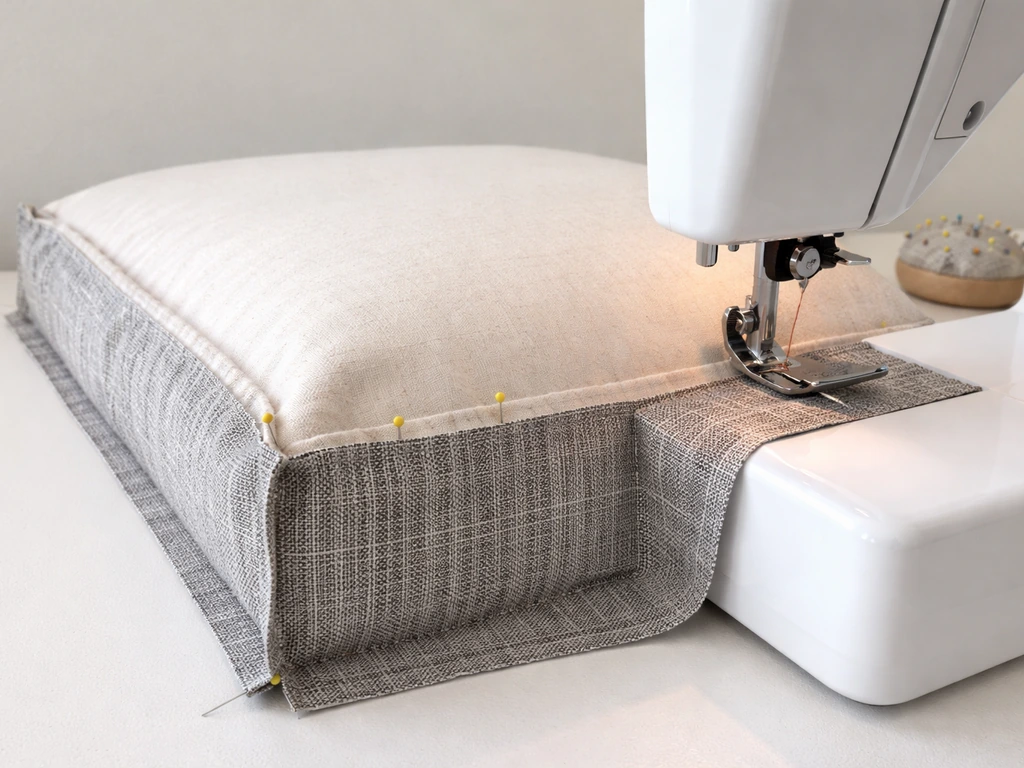
- Cut your fabric panels. You need a top panel, a bottom panel, and a boxing strip (the band that wraps around the sides and gives the cover its thickness). For a standard seat cushion that is 20 inches wide, 20 inches deep, and 4 inches thick, your top and bottom panels are each 21 x 21 inches (adding 1 inch for seam allowance). Your boxing strip is 4 inches + 1 inch (for seam allowance) = 5 inches tall, and long enough to wrap the full perimeter of the cushion.
- If using solution-dyed acrylic, use heat-cutting scissors or briefly run the edges through a lighter to minimize fraying. This is especially helpful with Sunbrella-weight fabrics at around 9 oz. per square yard, which can fray at the cut edge during sewing.
- Sew the boxing strip into a loop. Join the two short ends of the boxing strip together with a 1/2-inch seam, right sides facing. Press the seam open if your fabric allows. This loop will form the 'walls' of your cover.
- Install the zipper on the back portion of the boxing strip before assembling the rest. Cut a 3-inch section of the boxing strip at the back, fold each raw edge under 1/2 inch, and stitch the zipper tape to each folded edge. The zipper should sit flush and close cleanly. This is fiddly the first time — sew slowly and use a zipper foot.
- Attach the top panel to the boxing strip. Pin the top fabric panel to the top edge of the boxing strip, right sides together, matching corners carefully. Clip the corners of the boxing strip at each corner of the top panel so it turns the 90-degree angle without bunching. Sew around the full perimeter with a 1/2-inch seam.
- Attach the bottom panel the same way, leaving the zipper portion open. Unzip the zipper before closing this seam — if you forget and sew it shut, you will not be able to turn the cover right-side out.
- Clip the corner seam allowances diagonally to reduce bulk, then turn the cover right-side out through the open zipper. Use a blunt tool (a chopstick works well) to push the corners out fully.
- Insert the foam (wrapped in its waterproof liner), zip the cover closed, and sew or attach tie straps at the back corners. To make ties, cut four strips of fabric 2 inches wide and 18 inches long, fold them in half lengthwise, sew along the open edges, turn them right-side out, and hand-stitch or machine-stitch them to the bottom corners of the cover. These tie around the chair rail to keep the cushion from sliding.
If the thought of a zipper feels like too much for a first project, an envelope-back cover is a great shortcut. Instead of a zipper panel, make the bottom panel in two overlapping pieces. Cut each piece to full width but only 60% of the depth. The two pieces overlap by about 4 inches at the center back, so the cover can slip on and off without any hardware at all. It is not quite as wind-proof as a zipped closure, but it works beautifully for cushions that sit in a protected spot.
How to Cover Patio Cushions Without Sewing (Quick DIY Options)
No sewing machine? No problem. No-sew methods are genuinely useful and not just a compromise, for simple seat pads they can look just as neat as sewn covers. The key is using the right adhesive products rated for outdoor conditions.
Iron-on hem tape method
Heat-bonding fabric tape (sometimes called hem tape or fabric bond tape) fuses two layers of fabric together with an iron, eliminating thread entirely. Use a tape rated for permanent outdoor hold. Cut your fabric panels as described above, fold the raw edges under by 1/2 inch, and iron the tape along each folded seam. Hold the iron in place for 10–15 seconds per section and let the seam cool fully before handling. For outdoor use, stitch-through tape (a tape designed for permanence rather than just tacking) holds longer than basic iron-on tape when the fabric is repeatedly stressed by removal and re-installation. Do not wash heat-bonded seams in a hot dryer, moderate heat is the enemy of most bonding tapes.
Outdoor cloth tape for quick repairs and edges
For reinforcing edges or patching, look for tape with a UV-treated backing and synthetic rubber adhesive, some outdoor cloth tapes are rated for at least one year of outdoor resistance after application. This is more of a short-term fix than a full cover method, but it works well for reinforcing hem tape seams on the corners where stress concentrates.
Velcro and tie-on slipcover method
This is the easiest no-sew approach for most people. Buy a pre-made outdoor slipcover close to your cushion size, or cut fabric panels slightly larger than your cushion. Fold and bond the edges with hem tape. Then use adhesive-backed Velcro strips (two strips on the bottom panel, corresponding strips on the underside of the cushion itself) to hold the cover in place. For chairs with exposed rails, add fabric ties made from ribbon or pre-cut webbing, knotted through grommets you press into the fabric at the corners. This is essentially the same system commercial cushion manufacturers use, it works.
Slipcover with a fitted sheet technique
For square or rectangular bench cushions, an oversized piece of outdoor fabric can simply be pulled taut over the foam, folded like a gift wrap at the corners, and secured on the underside with large safety pins or heavy-duty snap clips. It is not the most polished look, but it takes under 20 minutes, costs almost nothing, and works fine for covered patios where the bottom of the cushion is never seen.
Securing and Finishing Techniques for Outdoor Durability
A cover that looks great on the first day but bunches up, blows off, or traps moisture underneath is not really a solution. These finishing steps are what separate a cover that lasts three seasons from one that gets replaced every summer.
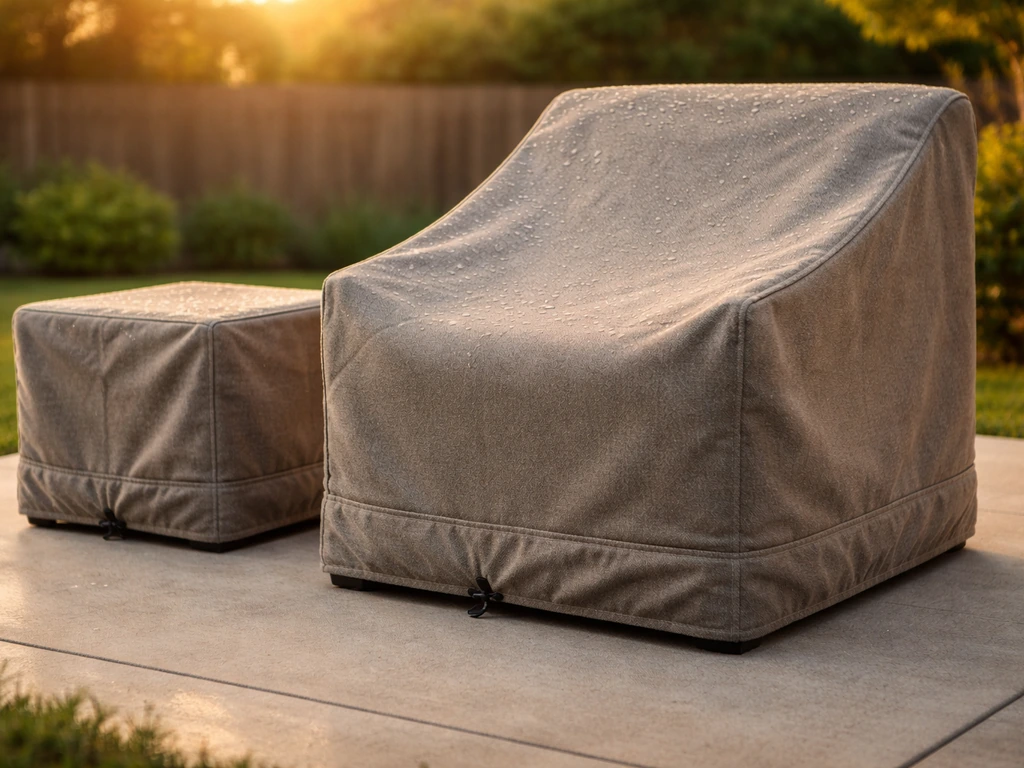
- Add ties or Velcro at the back and underneath. Even a zippered cover benefits from two fabric ties at the back corners that loop around the chair rail. Retail outdoor covers with zipper closures regularly include exactly two ties for this reason — the zipper seals the cushion in, the ties stop wind uplift.
- Wrap the foam in a waterproof liner before inserting it into the cover. This keeps the foam dry even if the outer fabric gets wet, which dramatically extends the life of the cushion. With breathable outdoor fabric, water moves through the fabric and the liner channels it out rather than letting it pool inside the foam.
- Apply fabric guard (like 303 Fabric Guard or similar products) to the outside of your finished cover. This restores or adds water repellency to the fabric and is especially important if you are using a fabric that is not inherently solution-dyed. Important: apply it only to the outside of the fabric and keep it away from any zippers, plastics, or rubber components — contact with these materials can degrade them.
- Reinforce corners and stress points with a second line of stitching or an extra layer of hem tape if going no-sew. Corners take the most strain when cushions are slid on and off chairs, and that is exactly where covers fail first.
- For very windy locations, add non-slip gripper pads (the same rubber mesh used under area rugs) between the cushion bottom and the chair seat. This is a $3 fix that eliminates most of the sliding problem without any additional sewing.
Maintenance, Seasonal Removal, and Protection Tips
The covers you just made will only last if you treat them right between uses. The most common mistake is leaving cushion covers on through winter or storing them damp, both lead to mildew that even bleach eventually cannot fix.
Regular cleaning during the season
For everyday dirt and bird droppings, brush the fabric dry first (brushing wet debris drives it deeper into the weave), then rinse with a garden hose. For stubborn stains or early mildew, use a diluted solution of 1/4 cup dish soap and 1 cup bleach per gallon of water. Let it soak into the fabric for 15 minutes, scrub gently, and rinse thoroughly. This method works specifically for solution-dyed acrylic fabrics like Sunbrella, always check the manufacturer's cleaning code for whatever fabric you used, since some fabrics cannot tolerate bleach. Do not dry clean any solution-dyed acrylic fabric, and avoid hot machine dryers for most outdoor fabrics, which can degrade the weave or any bonded seams.
End-of-season removal and storage
Before storing covers for the off-season, wash them fully, rinse out all soap residue, and let them air dry completely in the sun. Even slightly damp fabric stored in a bag will mildew. Once dry, store covers in breathable fabric bags or pillowcases, not sealed plastic bins, which trap humidity. Keep them in a cool, dry place out of direct sunlight. Store the foam inserts separately, standing upright if possible so they retain their shape rather than compressing under their own weight.
Re-treating the fabric each season
If your covers are made from a fabric that benefits from a water repellency treatment, reapply fabric guard at the start of each season. Do this after the cushion covers are clean and fully dry. Apply evenly to the outside only, avoiding zippers and any plastic or rubber hardware. Let the treatment cure per the product instructions before exposing the covers to rain. This step is optional for inherently water-repellent fabrics like solution-dyed acrylic, but it is a good habit and adds a meaningful layer of protection to any fabric type.
When to remake versus repair
Covers made from quality outdoor fabric with proper care should last three to five seasons. If you notice the fabric thinning or developing pinholes at stress points, it is worth replacing the cover before the foam gets exposed and damaged, foam replacement costs more than fabric. If you want to experiment with color changes or update the look without making a full new cover, dyeing the existing cover fabric is also an option worth exploring.
If you are ambitious and want to take this further, building custom-sized covers from scratch, including shaped seat backs and armrest pads, the principles are the same, just scaled up. And if your chair frames themselves need covering (not just the cushions), that is a slightly different project involving wrapping techniques and weather-resistant hardware, but the same fabric choices apply. If you want to cover patio chairs beyond just the cushions, the same material and fit principles apply, then you add the right wrapping techniques for frames and armrests.
FAQ
Can I skip the waterproof liner if I just use water-resistant fabric?
Yes, but keep the directions straight. For a cushion wrap, use a waterproof wrap/liner that is breathable on the outside and fully covers all sides of the foam before you slide it into the new cover. The goal is to stop liquid from soaking into the foam, not to seal the cushion so tightly that moisture has nowhere to go.
What if my cushion thickness varies in different spots?
Measure thickness at the thickest point and also check the “compressed” height you get when you sit on it. If the cushion is very springy, add a little extra for thickness (up to 1 inch on sewn covers) so the cover does not pull tight and split at seams after a few weeks of use.
How long should cushions be dried before putting a new cover on?
Don’t. If a cushion cover gets damp, the adhesive bond and the fabric guard performance can both degrade. Wash, then air-dry completely, ideally in direct sun, before installing. If you must re-cover urgently, dry with airflow first and wait until the foam and liner are dry to the touch.
How do I choose the right zipper length and placement?
For zipper covers, use zipper tape that matches the fabric weight and line up the zipper pull so it clears chair back hardware when the cushion is in place. If the cushion sits low or close to a rail, you may need a shorter zipper than you think, otherwise the cover will snag or not fully close.
Can I use the bleach cleaning method on any outdoor fabric?
Solution-dyed acrylic is usually the easiest to clean with the mild bleach method described, but not all outdoor fabrics tolerate bleach. If you used a different fabric, check its care code first, test-clean a hidden corner, and avoid bleach if the code says “chlorine” or “bleach not allowed.”
My cover bunches at the corners, what should I adjust?
If you see bunching, it is usually caused by one of three issues: inaccurate seam allowance, cover too tight at thickness, or closure that is not pulling the cover flat at the underside. Re-check your measurements in three places, loosen the fit by letting out seams, or add one more tie or Velcro pair closer to the center to keep tension even.
What if my iron-on hem tape separates after a few weeks?
If your no-sew seams start to lift after removal cycles, the most common cause is that the iron-on tape was not rated for long-term outdoor permanence or was bonded to fabric that was not completely cool and dry. Re-bond with a stitch-through outdoor tape, and clamp or press longer during the bond window, then let it cool fully before stressing.
How should I store covered cushions for winter to prevent mildew?
For storage, avoid sealed plastic bins and also avoid compressing foam under heavy items. Use breathable bags or pillowcases for covers, and store foam standing upright if possible. If you must lay foam flat, keep it on a ventilated surface so air can circulate.
Do I need a zipper if my patio is rainy?
If your cushion sits in heavy rain exposure, consider adding an extra water-shedding step: use a drip edge style overlap at the closure (envelope-back) or rely on the zipper with ties. Also, confirm the underside is getting venting, because trapped moisture under the cushion is what leads to mildew and odors.
How do I know when foam replacement is better than making a new cover?
If the foam is permanently dented or does not spring back to at least half its original height, replace the foam rather than trying to force a new cover to fit. A new cover can make the issue look better temporarily, but it will pull seams and create permanent strain points once the cushion keeps collapsing.
Which closure style is easiest to maintain long-term?
Choose the outer fabric first, then pick the closure style based on maintenance. Zippers make washing easiest, envelope-back is fastest for protected areas, and ties are reliable if your chair has exposed rails. If you frequently remove cushions for cleaning, a zipper typically saves time in the long run.
Will dyeing an existing outdoor cover affect its water repellency?
Yes, but test for colorfastness and texture after dye. Many dyed outdoor fabrics fade unevenly if the dye does not penetrate evenly or if the fabric is not suited to outdoor upholstery dyeing. Plan on reapplying a fabric protectant after dyeing once it is fully cured.