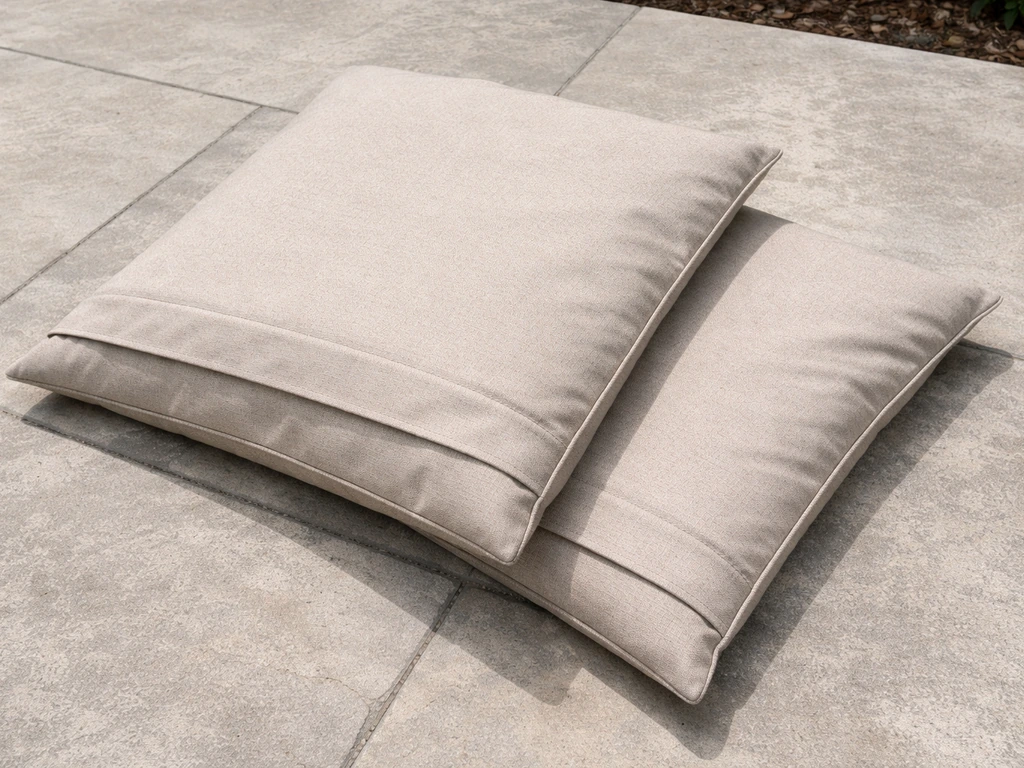
You can make your own patio cushion covers with basic sewing skills, about $20–$40 in outdoor fabric, and a few hours of time. The process comes down to four things: measuring your cushions accurately (including thickness), picking the right outdoor fabric, cutting and sewing the cover with a simple envelope or zippered closure, and finishing the seams so they hold up through rain and UV. Whether you're covering a basic box cushion or making separate seat and back pieces for a patio chair, the same core method applies. Here's exactly how to do it.
How to Make Covers for Patio Cushions Step by Step

Maren Grady
5 May 2026
Choosing the right fabric and measurements
Fabric: what actually works outdoors
This is the single most important decision you'll make. Regular quilting cotton or home-dec fabric will fade, mildew, and fall apart within one season outside. You need outdoor-rated fabric, and the gold standard is 100% solution-dyed acrylic. The term 'solution-dyed' means the color is baked into the fiber itself rather than printed on top, which is why these fabrics resist UV fading so well.
Sunbrella is the most well-known brand and genuinely earns its reputation. It's 100% solution-dyed acrylic, weighs around 9 oz. per square yard (heavy enough to feel sturdy), and is rated for water resistance, UV resistance, and mold and mildew resistance. With regular rinsing it won't grow mold on the fabric itself, though dirt that sits on it can still harbor mildew if you never clean it. Outdura and DuraSuntex are solid alternatives with similar solution-dyed acrylic construction and mildew/fade resistance at slightly lower price points. Ottertex makes a waterproof canvas version that's also solution-dyed acrylic if you want the extra water-shedding layer.
For budget-conscious projects, look for outdoor canvas or marine fabric by the yard at fabric stores or online. Expect to pay $8–$15 per yard for budget outdoor fabric and $20–$35 per yard for Sunbrella. Most standard patio cushions need 1.5–3 yards depending on size. Buying a slightly heavier weight (8–10 oz.) gives you better durability without making the cover too stiff to sew.
| Fabric Type | Water Resistance | UV/Fade Resistance | Mildew Resistance | Approx. Cost/Yard | Best For |
|---|---|---|---|---|---|
| Sunbrella (solution-dyed acrylic) | High (water resistant) | Excellent | Excellent | $20–$35 | Long-term, premium covers |
| Outdura / DuraSuntex acrylic | High | Excellent | Excellent | $15–$28 | Quality covers on a budget |
| Ottertex waterproof canvas (acrylic) | Very high (coated) | Good–Excellent | Good | $10–$18 | Wetter climates, extra protection |
| Budget outdoor canvas/polyester | Moderate | Moderate | Fair | $8–$15 | Short-term or test projects |
How to measure your cushions correctly
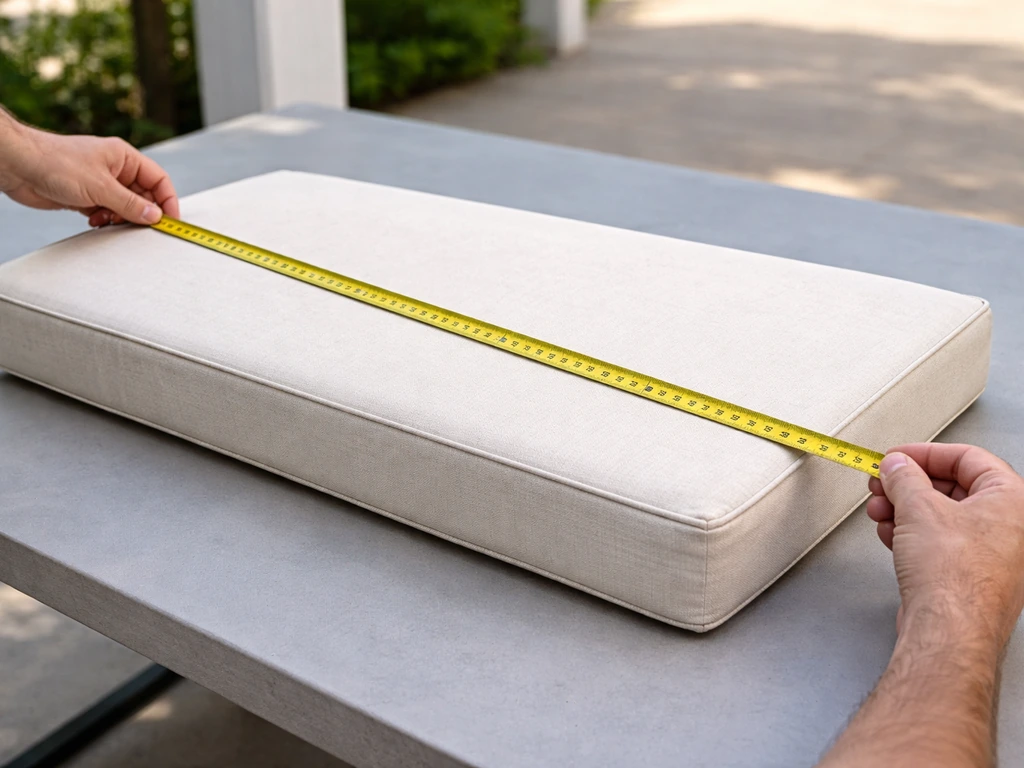
Bad measurements are the number one reason homemade covers don't fit. Here's the rule: measure the cushion itself, not the old cover. Cushions compress and covers stretch, so always measure the foam or cushion pad directly.
For a standard box cushion, you need three measurements: length, width, and thickness. Measure the thickness at the center of the cushion (not the edge, which is often tapered). Then add your seam allowance to each dimension. A 1-inch seam allowance is the most forgiving standard for beginners because it gives you room to correct mistakes. So if your cushion is 20 inches wide x 24 inches long x 4 inches thick, your fabric panels need to account for all of that plus seams.
For the front and back face panels of a box cushion cover, cut each panel to: cushion length + 1 inch (for seam allowances) x cushion width + 1 inch. For the boxing strip (the band that wraps around the sides and creates the 3D shape), cut it to: the cushion perimeter (add all four sides together) + 2 inches x cushion thickness + 1 inch. If you're skipping the boxing strip and making a simple flat envelope-style cover instead, add the full thickness to the panel dimensions: face panel height = cushion length + cushion thickness + 1 inch seam allowance.
For chair cushions, you're almost always dealing with a seat cushion and sometimes a separate back cushion. Measure seat width from seam to seam across the center (not front to back), and measure the back cushion height and width separately. Add 1 inch for seam allowances on all sides. If the back cushion sits against the chair frame, also note whether it has curved or angled bottom corners, because you'll need to trim those from your fabric too.
Supplies and tools you'll need
You don't need a fancy sewing setup to do this well. Here's a realistic list of what's actually required versus what's nice to have.
Must-have supplies
- Outdoor fabric (solution-dyed acrylic recommended): 1.5–3 yards depending on cushion size
- Heavy-duty thread rated for outdoor/UV use (polyester thread, not cotton, which rots outside)
- Sharp fabric scissors or a rotary cutter and cutting mat
- Measuring tape and a fabric marker or tailor's chalk
- Straight pins or wonder clips (clips work better on heavier outdoor fabric)
- Sewing machine with a heavy-duty or denim needle (size 90/14 or 100/16)
- Iron for pressing seams (even outdoor fabric benefits from pressed seams during construction)
Closure options: zipper, envelope, or buttons

You have three main closure choices, and each has real tradeoffs outdoors. Zippers give the cleanest look and the most secure closure, but they're harder to install and must be rated for outdoor use. Look for blank" rel="noopener noreferrer">YKK AquaGuard coil zippers (water resistant, not waterproof but great for patio use) or YKK Marine Mates UV VISLON zippers if the zipper will be exposed to direct sun and moisture, since these are designed for UV and corrosion resistance. VISLON® UV with weather-resistant elements and tape from YKK Digital Showroom is designed to resist damage from sunlight and other weather exposure (UV/weather-resistant elements and tape) blank" rel="noopener noreferrer">UV and corrosion resistance. The envelope back is the easiest method: two overlapping fabric panels create a no-hardware opening that's easy to remove for washing. Buttons and ties are a middle ground: they look nice but require more finishing work. For beginners, start with the envelope back. For anything that will stay outside year-round, a zipper is worth the extra effort.
- For zippered covers: a 20–24 inch zipper for most standard cushions, seam ripper, zipper foot for your machine
- For envelope covers: no extra hardware needed, just additional fabric for overlap (about 4–5 inches of overlap)
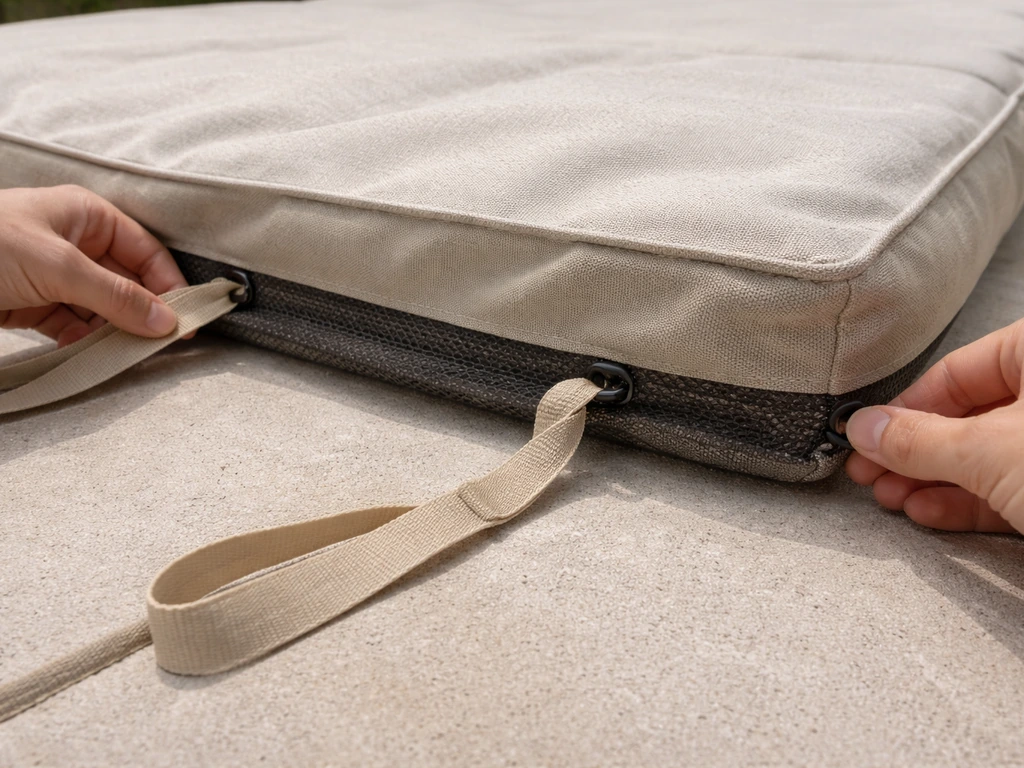
- For ties/straps: 1-inch-wide nylon webbing or fabric strips cut on the straight grain, D-rings or buckles if desired
Optional but genuinely useful
- Seam sealant (like Gear Aid Seam Grip WP, a urethane-based sealant) for extra waterproofing on seams
- Iron-on seam tape for fully sealing sewn seams on water-resistant coated fabrics
- Walking foot attachment for your sewing machine (helps feed heavy outdoor fabric evenly)
- Beeswax or thread conditioner to help thread glide through thicker fabrics
- Fabric water-repellent spray (like Scotchgard Outdoor) for post-construction weatherproofing
Step-by-step: how to make a patio cushion cover
This method covers a standard box cushion with an envelope back opening. It's the most beginner-friendly approach and the easiest cover to remove for washing. Once you've done this once, you can adapt it to any cushion shape.
- Measure and cut your panels. You need a front panel, two back panels (for the envelope overlap), and a boxing strip. Front panel: cushion length + 1 inch x cushion width + 1 inch. Boxing strip: cushion perimeter + 2 inches x cushion thickness + 1 inch. For the envelope back, cut two back panels each equal to the front panel width, but with the height equal to about 60–65% of the front panel height (they'll overlap in the middle to create the opening).
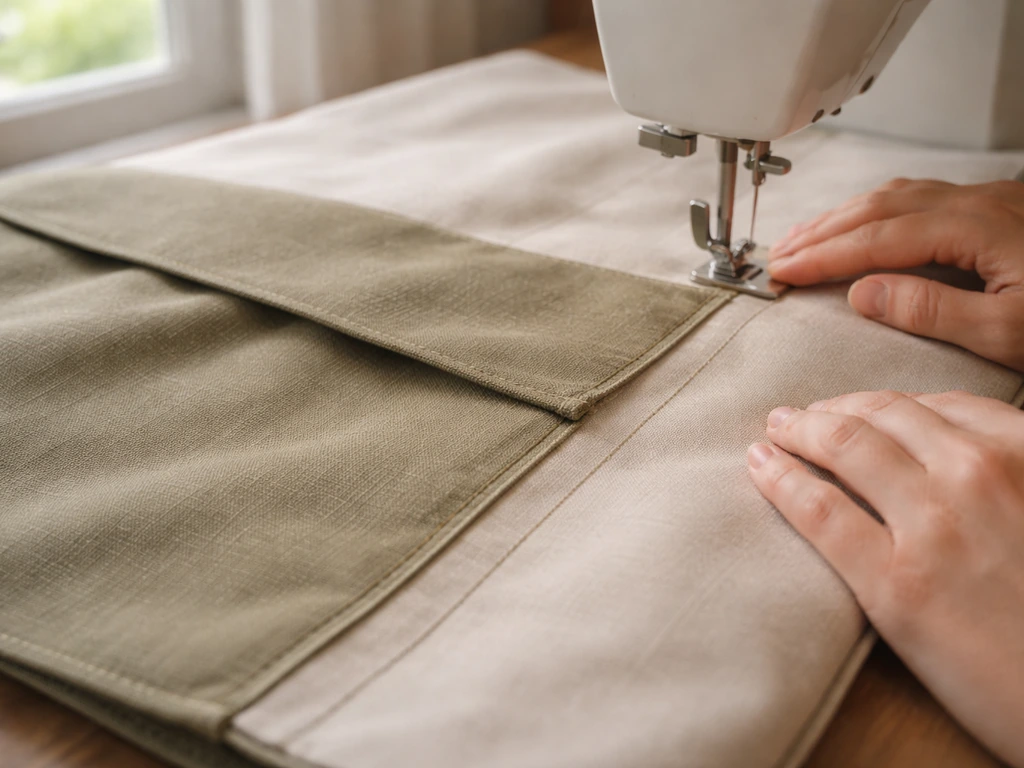
- Hem the inner edges of both back panels first. Fold the edge that will form the envelope opening twice (a double-fold hem): fold 1/2 inch in, then fold another 1/2 inch and press with an iron. Stitch close to the fold. This gives you a clean finished edge on the overlap.
- Lay both back panels on top of the front panel, right sides together, overlapping the hemmed edges in the center so the back is the same overall size as the front. Pin or clip all the way around the outer edges.
- Sew around the outer perimeter of the cover with a 1/2 inch seam allowance if you want a closer fit, or 1 inch if you want extra room to correct. Backstitch at the start and end of every seam.
- Attach the boxing strip. If you're making a true box cushion (not a flat pillow-style cover), sew the boxing strip to the front panel first (right sides together), clipping the strip at each corner so it can turn without puckering. Then sew the back panels to the other long edge of the boxing strip, again clipping corners. This creates the 3D box shape.
- Trim the seam allowance at corners to reduce bulk, clip curves if your cushion has rounded corners, then turn the cover right side out through the envelope opening.
- Press lightly with a cool iron if the fabric allows it (check the manufacturer's label, since some outdoor fabrics can't take high heat). Insert the cushion through the back opening, overlapping flap over flap to close it.
One thing I'd stress: use a French seam or an overcast/zigzag stitch on all raw edges before assembling if you can. Outdoor fabric ravels surprisingly fast when it gets wet repeatedly. If your machine has an overlock/overcast stitch, run every cut edge before you start sewing panels together. It takes 10 extra minutes and saves the cover from fraying at the seams within a season.
Step-by-step: making patio chair cushion covers (seat and back)
Chair cushion covers are a little different from plain box cushions because you're often dealing with awkward shapes (tapered seat fronts, curved corners) and the need to secure the cover to the chair frame so it doesn't slide or blow off. Here's how to approach both the seat and back cushion covers separately.
Seat cushion cover
- Trace the cushion onto paper or cardboard to get a template of the exact shape. Most chair seat cushions have a wider front edge and a narrower back, and sometimes notches where the chair legs or back posts sit. Transfer all of these details to your fabric template, adding 1 inch all around for seam allowance.
- Cut two panels from the template: one for the top face and one for the bottom. If the seat cushion has thick piping or rounded top edges, add an extra 1/2 inch to your seam allowance.
- For a zippered seat cover, sew the zipper into the back seam (the narrowest edge of the seat shape) before closing the rest of the cover. Pin the zipper face-down onto the right side of the back edge of the bottom panel and stitch with the zipper foot. Then attach the top panel and sew the remaining three sides closed.
- For an envelope-style seat cover, cut the bottom panel in two pieces instead of one. Create a double-fold hem on the inner edges and overlap them, then proceed the same as the box cushion method above.
- If the original cushion had a boxing strip (vertical side walls), replicate this. Cut the boxing strip to the cushion's perimeter measurement plus 2 inches x the seat cushion thickness plus 1 inch, and sew it between the top and bottom panels.
- Trim corners, clip curves at the notches where the back posts sit, and turn right side out. Insert the cushion and close the zipper or tuck the envelope flap.
Back cushion cover
- Measure the back cushion width and height. A key detail: if the back cushion rests on top of the seat cushion, you need to account for the seat cushion's thickness in your height measurement so the back cover doesn't ride up. Add the seat cushion thickness to the back cover's bottom edge measurement, or simply let the back cover hang slightly longer at the bottom.
- Cut panels using the same method as the seat: trace the shape, add 1 inch seam allowance all around. Back cushions are usually rectangular, which makes them easier to cut than shaped seat cushions.
- Sew using a zipper or envelope closure on one long side (usually the bottom edge or back face for a chair back cushion). A zipper along the bottom edge of a chair back cushion is the most practical since you can slide the cushion out downward.
- For chair backs with ties already attached to the cushion, replicate those tie points on your cover by adding loops or openings at the correct locations so the existing ties can thread through and still attach to the chair frame.
If you're covering individual chair cushions rather than removable pads, the approach is similar to how you'd cover patio chairs more broadly: you're essentially building a fitted slipcover for just the seat or back pad. The key difference is ensuring the cover fits snugly enough that it doesn't bunch up when someone sits on it. Cutting on the tighter side (using 1/2 inch seam allowance instead of 1 inch) and adding ties keeps things tidy.
Adding closures, straps, and weatherproofing so covers stay put
Tie straps and anchor points
If your patio cushions are constantly sliding or blowing off the chair, you need physical attachment points. Cut 1-inch-wide strips of your outdoor fabric (or use nylon webbing for more strength) to about 12–18 inches long. Fold each strip in half and sew the folded end into the seam at the back corners of the seat cushion cover. These loops then tie around the chair slats or back legs. For cushions on flat surfaces like benches or loveseats, sew a strip near each back corner of the bottom panel so they can tie to the furniture frame. Nylon webbing is the most durable option outdoors because it won't rot or stretch like fabric strips can.
For an elastic hem on the bottom of a chair seat cover, cut the bottom panel to include a 1.5-inch channel along the lower edge and thread 1/2 inch elastic through it. This works like a fitted sheet and keeps the cover from shifting without any tying. It's a great approach if your cushion sits on a seat pan with no obvious tie-off points.
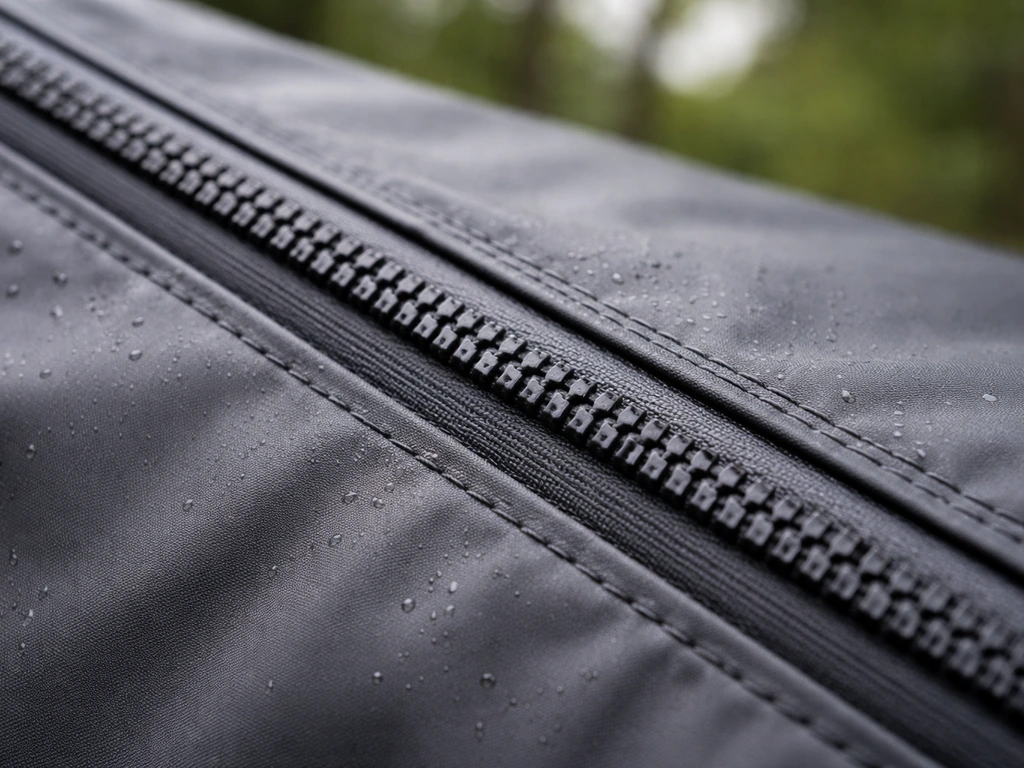
Outdoor zippers: what to look for
Regular zippers rust, corrode, and seize up within a season outdoors. The YKK AquaGuard coil zipper is water resistant (not fully waterproof, but more than adequate for most patios) and is widely available. If the zipper will be fully exposed to rain and intense sun, the YKK Marine Mates UV VISLON is the better choice: it's specifically rated for UV resistance and corrosion resistance for outdoor applications. Position zippers so they face down or inward when the cushion is in place, which reduces direct water contact.
Seam sealing for true water resistance
Here's something most beginner tutorials skip: even if you use waterproof outdoor fabric, your sewn seams are needle holes, and water will wick right through them. If you want covers that genuinely repel water rather than just shedding light mist, you need to seal those seams after sewing. Gear Aid Seam Grip WP is a urethane-based sealant that bonds to polyurethane-coated and polyester fabrics, which covers most outdoor upholstery fabrics. Apply a thin layer to the inside of every seam after sewing and let it cure fully (usually 24 hours). Focus especially on corners and the seam where the boxing strip meets the face panels, since those spots collect and direct water.
If you're using a PU-coated fabric (common with budget waterproof canvas), you can also use iron-on seam tape on the inside of every seam. The tape melts slightly under heat and bonds into the needle holes, creating a layer that blocks moisture. Match the seam tape chemistry to your fabric coating: PU tape for PU-coated fabrics, silicone sealant for silicone-coated fabrics. Using the wrong type won't bond properly.
Finishing details, sizing tweaks, and keeping covers looking good
Getting the fit right before you cut a lot of fabric
Before cutting into your good outdoor fabric, make a test cover out of cheap muslin or an old bedsheet. Seriously. The 30 minutes it takes to mock up the cover will save you from cutting expensive Sunbrella incorrectly. Check the fit on the actual cushion, note where it's too tight or too loose, then adjust your pattern before moving to the real fabric. This is especially important for shaped chair seat cushions with cutouts or rounded front corners.
When cutting your final panels, pay attention to fabric direction. Outdoor fabrics often have a subtle grain or pattern, and you want all panels oriented the same way. Mark the 'top' of each panel before cutting so you don't accidentally sew one face panel upside down. If your fabric has a stripe or geometric pattern, line up the repeat across panels before pinning, otherwise the seams will look misaligned.
Seam allowance options and their tradeoffs
Different projects suggest different seam allowances and they all work, you just need to be consistent. A 1/2 inch seam allowance gives a tighter fit and wastes less fabric, but leaves little room to correct a sewing error. A 1 inch seam allowance is more forgiving and easier to press flat. Some tutorials use metric measurements like 1 cm or 2 cm, which is fine if your measuring tape reads in centimeters. The most important thing is that you use the same seam allowance on every edge of the same piece. Mixing a 1/2 inch and 1 inch seam allowance on the same panel will make the panels different sizes when sewn together.
Caring for your covers through the seasons
Solution-dyed acrylic covers (Sunbrella, Outdura, and similar brands) are genuinely easy to maintain if you stay on top of it. Rinse them off with a hose at least once a month to remove dirt, pollen, and airborne debris before it works into the fabric weave. For spot cleaning, use a mild soap and lukewarm water. For mildew (which shows up as dark or gray spots), Sunbrella's recommended cleaning approach is a mixture of 1 cup bleach plus 1/4 cup mild soap per gallon of water. Apply it to the affected area, let it sit for 15–20 minutes, scrub lightly with a soft brush, and then rinse thoroughly, completely. Bleach residue left in the fabric will degrade the fibers over time even on solution-dyed acrylic.
Always air dry outdoor covers. Avoid putting them in a dryer or leaving them bunched up wet, since trapped moisture leads to the very mildew you're trying to avoid. If you're storing cushions over winter, remove the covers, wash them, dry them completely, and store them inside or in a breathable storage bag. A damp cover stored in a bin through winter will come out smelling like a problem.
One last thing worth knowing: once you've made basic covers like these, dyeing them to refresh a faded color or match new furniture is a real option with the right dye for synthetic outdoor fabrics. If you want step-by-step instructions, see our guide on how to dye patio cushion covers for best color results dyeing them. And if you want to go further with the sewing side of things, the same measuring and cutting principles here apply when making full patio chair cushion covers with piping, attached ties, or more complex shapes. The fundamentals are identical, just scaled up in complexity.
FAQ
What should I do if my patio cushion is thicker in the middle than at the ends?
If your cushion has a tapered edge or a plump center, measure thickness at multiple points (usually center plus both ends). Use the largest thickness for cutting, then trim tiny amounts after the test-fit instead of trying to “stretch” a finished cover.
Can I use my old cushion cover as a pattern instead of measuring from scratch?
Yes. If the old cover was accurate, you can trace it as a starting pattern, but you still need to verify dimensions against the cushion itself. Old covers often shrink slightly or stretch over time, so use tracing to save layout work, not to set final sizes.
How do I adjust measurements if my cushion has a foam insert or extra padding layer?
Measure the foam plus any removable inserts, and decide whether you want the cover to be snug or slightly loose. If you add a little loft (like extra batting or a foam topper), include that thickness in your thickness measurement so the cover does not pull at the seams.
What type of thread should I use for sewing outdoor patio cushion covers?
Use an outdoor-rated polyester thread, ideally bonded polyester. Standard all-purpose cotton or cheap thread can weaken with UV and repeated wetting, even if the fabric is solution-dyed acrylic.
How can I prevent fraying if my sewing machine stitches don’t seem to “sit” cleanly in the outdoor fabric?
Before committing to the final fabric, test your seam finishing with a couple of scraps. Outdoor acrylic can behave differently on different machines, so do a short seam sample to check thread tension and whether the fabric ravels along your stitch line.
Can I use a zipper instead of an envelope back opening on a box cushion?
Yes, but plan for bulk. If you want a zip closure on a box cushion envelope, add a zipper placket, and keep the zipper side edges aligned by sewing panels in the exact order you cut them. The biggest mistake is installing the zipper before you confirm seam allowance consistency.
How do I position a zipper so it won’t seize up quickly outdoors?
If your zipper must be fully exposed, pick an appropriate zipper type and also angle the zipper so the teeth face inward when installed. Even with a water-resistant zipper, precipitation that pools on the teeth and slider can still accelerate corrosion and sticking.
What’s the right elastic length for a bottom channel so the cover fits but doesn’t strain seams?
For an elastic hem, ensure the bottom panel includes enough fabric to form a stable channel, and cut elastic slightly shorter than the cushion perimeter (about 10 to 20 percent less) for a fitted-sheet effect. If you cut elastic too tight, the cover can pull at seams when you sit down.
When should I seal seams, and how do I know which product type will actually bond to my outdoor fabric?
Sealant should be applied after sewing, once the seam is complete and pressed the way you want. Also, confirm the sealant is compatible with your fabric coating, because some fabrics accept urethane bonding, while others need seam tape chemistry matched to the coating type.
How should I dry and store covers when they get rained on but I’m not ready to wash them yet?
If seams get wet between uses, air-drying matters. Shake out cushions, then let covers fully dry before re-stacking. A covered cushion that stays damp in a closed tote or corner even for a day or two can develop mildew spots.
What are common mistakes that cause the cover to be too small or too big even when I measured correctly?
If you’re sewing while the fabric is slightly damp or you rush cutting, outdoor fabric can shift. To prevent measurement drift, pin lightly, cut slowly, and mark “top” edges clearly. The next best fix is to do a quick mock-up and adjust pattern width, not just seam allowance.
My chair cushion cover keeps sliding or tangling, should I switch from fabric ties to webbing or add elastic?
Your plan depends on whether the cushion rotates and how much wind hits it. If ties are tangling or loosening, switch to nylon webbing loops and add them at corners where movement is greatest. If the cover slides even with ties, consider adding an elastic channel or more tie points.
Why do some outdoor cushion covers still leak at the corners even after finishing seams?
If your seams are taking on water, focus on the highest-stress junctions: corners and any area where a boxing strip meets face panels. Apply sealant or seam tape to the inside only, then let it cure fully so the barrier sets before the first rain.
How often should I rinse and spot-clean solution-dyed acrylic covers?
Yes. For outdoor acrylic, most benefit comes from monthly rinsing and immediate cleaning of pollen or bird droppings. Avoid leaving bleach cleaner residue by rinsing thoroughly after mildew treatment, and never store covers damp after cleaning.
Can I dye newly sewn replacement covers to match older cushions without looking uneven?
Sometimes color mismatch happens when dye lots vary or when sunlight fades panels unevenly. If you plan to dye for refresh, pre-wash the covers to remove any dirt or residue, then dye all pieces at once to reduce patchiness.