If you have found bugs in your patio cushions, the first move is to get those cushions away from your other outdoor furniture and into a sealed plastic bag before you do anything else. Ants, carpet beetles, clothes moth larvae, fleas, ticks, and even bed bugs can all take up residence in outdoor cushions, and each one spreads differently, damages cushion material differently, and responds to different treatments. This guide walks you through identifying exactly what you are dealing with, containing it immediately, cleaning every fill type safely, and then deciding whether to repair, restuff, recover, or replace your cushions once the bugs are gone.
Bugs in Patio Cushions: Identify, Remove, Clean & Prevent

Maren Grady
29 Jul 2026
Why bugs in patio cushions are worth taking seriously
Most people spot a couple of ants crawling across a chair and chalk it up to the usual summer annoyances. I thought the same thing until I pulled the cushion off my loveseat one August and found a full carpet beetle infestation eating through the natural-fiber cover from the inside out. By the time visible damage appears, the insects have often been active for weeks. What makes outdoor cushions particularly vulnerable is the combination of warmth, moisture retention, and organic material, foam, polyester fiberfill, cotton ticking, or wool blend covers, all crammed together in a spot that rarely gets inspected closely. Add a bit of food residue or pet dander and you have what is essentially a five-star hotel for fabric-feeding and nesting pests.
Beyond the cushion itself, the real risk is spread. Carpet beetles and clothes moths will happily migrate from patio cushions to the fabric furniture inside your home. Fleas and ticks hitch rides on pets and people. Bed bugs brought home on used cushions or picked up at a rental property can establish themselves indoors almost invisibly. This guide is designed to stop that chain at the source.
How to identify what is living in your cushions
Before you reach for any cleaner or spray, you need to know what you are actually dealing with. Treating for ants when you have carpet beetles, or scrubbing when you need heat, wastes time and money and can make the problem worse. The good news is that most pests leave very specific clues. Here is what to look for, using your eyes, nose, and fingertips.
Visual clues: holes, skins, spots, and webbing
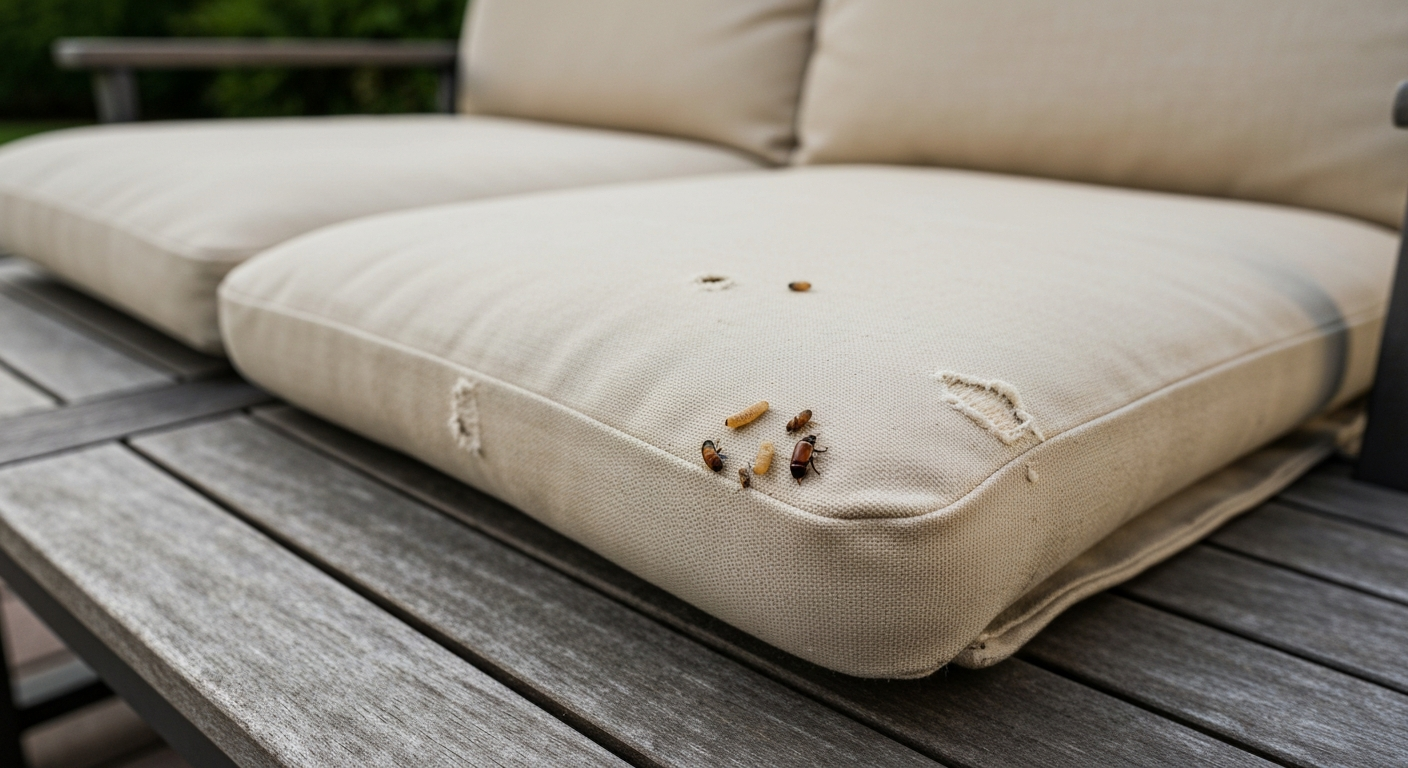
Carpet beetle larvae (Anthrenus spp. and Attagenus spp.) are the most common culprits I see on outdoor cushions with natural-fiber covers. You will find irregular holes in cotton, wool, or linen fabrics, tiny shed larval skins that look like dry, translucent husks, and small dark pepper-grain fecal pellets concentrated around the damage. The larvae themselves are banded brown-and-cream, roughly 5mm long, and bristly. Clothes moth damage looks similar but comes with more webbing, tiny silken cases or cocoons pressed into seams and folds, and the holes tend to be in a more concentrated patch rather than scattered. Both target animal fibers first, so a wool-blend cover is at far higher risk than a solution-dyed acrylic one.
Bed bug signs are distinctive once you know them: look for rust-colored or dark ink-like fecal spots along seams and piping, tiny cream-colored eggshells that look like grains of salt, shed skins at multiple life stages, and the bugs themselves (flat, reddish-brown, about the size of an apple seed). In a heavy infestation you may notice a sweet, musty odor. Rodents leave rice-shaped droppings, gnaw marks, and actual nesting material (shredded fabric, foam chunks, dry plant matter) tucked inside or under cushions. Ants usually cluster around food residue and leave fine soil or frass near cushion seams. Fleas and ticks are easiest to detect with a fine-toothed comb run through pet-adjacent cushion fabric or by placing a white paper towel underneath the cushion and brushing the surface.
| Pest | Fabric Damage | Key Physical Evidence | Smell Clue | Most Active Season |
|---|---|---|---|---|
| Carpet beetles | Irregular holes in natural fibers | Shed larval skins, fecal pellets | None typical | Late spring through summer |
| Clothes moths | Patchy holes in wool/silk/fur | Webbing, silken cases, cocoons in seams | Musty if dense | Late spring through summer |
| Bed bugs | None (they feed on blood) | Rust fecal spots, shed skins, eggs | Sweet/musty in heavy infestations | Year-round indoors; summer outdoors |
| Fleas | None (feed on blood) | Flea dirt (reddish-black specks), live insects | None typical | Warm months, pet activity peaks |
| Ants | Occasional gnawing of foam | Soil/frass near seams, ant trails | Formic acid in some species | Spring through fall |
| Rodents | Gnaw marks, torn foam/fabric | Rice-shaped droppings, nesting material | Strong ammonia-like odor | Fall/winter for nesting, year-round |
| Cockroaches | Rare fabric damage | Dark fecal smears, shed skins, egg cases | Oily, musty | Year-round; worse in warm weather |
| Silverfish | Surface grazing on fabric/paper liners | Scales, irregular surface erosion | None typical | Year-round in humid areas |
| Ticks | None (feed on blood) | Live insects on surface or seams | None | Spring through fall |
Smell and tactile checks
Unzip the cover if possible and press your nose close to the foam or fill. A sharp ammonia smell almost always means rodents. A sweet, slightly fermented odor points toward bed bugs or mold starting to form. A musty, stale smell with no other obvious cause usually means moisture has been trapped long enough for mildew to colonize the fill, not always insects at all, but worth treating seriously. Run your fingers along all seams, piping, and zipper tape. Bed bug fecal spots feel slightly waxy or raised, shed skins feel papery, and flea dirt dissolves into a red-brown smear if you wet your fingertip (that is digested blood). If anything is uncertain, take a clear photo or collect a sample in a small zippered bag and contact your local cooperative extension office or a licensed pest professional for confirmation before treating.
Immediate containment: stop the spread before anything else
Here is where I made my big mistake the first time: I carried the infested cushion straight through my living room to the backyard. I spread whatever was on it to every surface I walked past. Do not do that. The moment you suspect an infestation, treat the cushion as a biohazard until proven otherwise. Follow these steps in order.
- Put on gloves before handling the cushion — nitrile or rubber work gloves are fine.
- Slide the cushion directly into a large, heavy-duty plastic bag (contractor-grade bags are ideal) without carrying it through the house. Seal it with tape if there is no zip closure.
- Remove any nearby cushions, throw pillows, or fabric items from the same furniture set and bag those separately for inspection.
- Vacuum the chair or sofa frame, paying close attention to seams, joints, and any hollow tubing. Immediately remove the vacuum bag or empty the canister into a sealed plastic bag and dispose of it in an outdoor trash can.
- Wipe down the furniture frame with a cloth dampened with isopropyl alcohol (70% concentration), focusing on seams and crevices.
- Keep the bagged cushions outside or in a garage, away from indoor living spaces, until you have identified the pest and chosen your treatment method.
- Wash your gloves and clothing at the hottest temperature the fabric allows after handling suspect cushions.
If you suspect bed bugs specifically, EPA guidance is clear: seal items in plastic bags before transporting them anywhere, and do not skip the quarantine step after treatment. Quarantine means keeping cleaned items in fresh sealed bags until you are confident the infestation is resolved, not just shoving them back on the furniture immediately.
Tools and materials you will need
Getting organized before you start saves a lot of frustrated backtracking. Here is everything you should have on hand before you open that first bag. Most of this you already own, and the rest costs under $20 total at a hardware or big-box store.
- Heavy-duty plastic bags (contractor-grade, at least 3 mil thick) and zip-lock bags for samples
- Nitrile or rubber gloves (multiple pairs)
- N95 or P100 respirator mask (not a cloth face covering — needed for diatomaceous earth and chemical treatment steps)
- Safety glasses or goggles
- Vacuum cleaner with hose attachment and crevice tool (a disposable bag model is easier for disposal)
- Stiff-bristle scrub brush
- Soft brush or lint roller for surface debris removal
- Laundry detergent (standard or enzyme-based)
- White distilled vinegar (for odor and mold pre-treatment)
- Oxygen bleach (color-safe bleach, such as sodium percarbonate formula) for washable covers
- Rubbing alcohol (70% isopropyl) in a spray bottle
- Baking soda
- Food-grade or EPA-registered diatomaceous earth (if using a desiccant treatment)
- Handheld or upright steam cleaner (or rental from a hardware store, roughly $30–$50/day)
- Clean white towels and paper towels
- Thermometer (oven-safe or digital probe) to verify dryer or heat-treatment temperatures
- Fabric-safe enzyme cleaner (such as those sold for pet odors)
- Replacement zipper or seam-repair tape if covers need resealing after treatment
- Plastic drop cloth for working area
- Outdoor drying rack or clean line
Safety first: protecting yourself, your pets, and your household
A lot of DIY pest guides skip straight to the treatment products without spending much time on safety. That is a mistake. Some of the most effective treatments involve heat, chemical irritants, or dusts that can harm you, your kids, or your pets if used carelessly.
Personal protection during inspection and treatment
Always wear gloves and eye protection when handling infested cushions. If you are applying diatomaceous earth (DE) or any powder-based desiccant, wear an N95 respirator minimum. DE is a mechanical insecticide that works by abrading an insect's exoskeleton, but the fine silica dust is a respiratory irritant for people and animals if inhaled. University extension sources caution that variable field efficacy and inhalation risk are the two biggest drawbacks of DE, it is not a miracle product, and you must keep it dry for it to work at all. Apply it only in targeted, ventilated areas, and keep children and pets out of treated zones until the dust has settled and you have wiped away excess.
Pesticide label rules you must follow
Pesticide labels are legal documents, not suggestions. This is the part that trips up a lot of DIYers: a product registered for treating clothing or outdoor gear (like a permethrin spray) is not automatically legal or safe to use on upholstered cushion fabric unless the product label explicitly lists upholstery or furniture as an approved treatment site. Permethrin consumer products, for example, are registered for clothing and gear treatment only. CDC Yellow Book: Permethrin and clothing treatment (guidance), CDC states that permethrin consumer products are specifically registered for treating clothing and gear, instruct users not to apply them to skin, and detail approved application methods and retreatment frequency CDC Yellow Book: Permethrin and clothing treatment (guidance) — CDC. Do not apply them to skin or to surfaces not listed on the label. Before using any spray, dust, or fogger on your cushions, read the label to confirm the product is approved for that specific use, note the required PPE and re-entry interval, and follow the disposal instructions exactly.
Pet-safe practices
Keep cats and dogs away from any area where DE, insecticide sprays, or freshly steamed surfaces are present. Many essential-oil-based sprays marketed as natural pest repellents are toxic to cats in particular, check any product with your vet before applying it near pet-accessible surfaces. Flea treatments on cushions should always be coordinated with veterinary flea treatment for your pets; treating the cushions alone without addressing the pet will just result in re-infestation within a few weeks.
When to call a professional instead of going DIY
I am a big advocate for handling things yourself, but there are situations where calling a licensed pest management professional is the genuinely smarter and cheaper long-term move. Call a pro if: you have confirmed bed bugs (they require precise heat treatment equipment and/or licensed pesticide applications that consistently outperform DIY methods); you see rodent droppings, gnaw marks, or nesting inside multiple cushions (rodents mean structural entry points that need exclusion work beyond cushion treatment); you have a persistent cockroach presence that keeps returning after cleaning; or any DIY treatment has failed twice without a clear explanation of why. NPMA guidance is direct on this: bed bug and rodent infestations are the top two cases where DIY measures routinely fail and professional treatment is warranted. See How to Know When to Hire a Pest Professional, PestWorld (NPMA) for guidance recommending professionals for confirmed bed‑bug and visible rodent infestations, persistent cockroach problems, and when DIY measures have failed How to Know When to Hire a Pest Professional — PestWorld (NPMA).
Cleaning removable covers and machine-washable fills
If your cushion has a zippered cover and a polyester fiberfill interior that can be squeezed into a washing machine, you are in the easiest scenario. Most modern outdoor cushion covers made from solution-dyed acrylic, polyester, or canvas are machine washable on a cold or warm cycle, and polyester fiberfill inserts can generally be laundered on a gentle warm cycle. The key is temperature: to reliably kill bed bugs and their eggs, both the wash cycle and the dryer cycle need to reach the hottest temperature the fabric safely allows. A full dryer cycle at the highest heat setting the label permits is the standard recommendation from EPA and university extension sources for eliminating bed bugs on washable items.
- Unzip the cover outside or over a plastic bag. Shake off any visible debris into the bag and seal it.
- Check the care label on the cover and on the fill insert. Note the maximum wash and dry temperature for each.
- Load the cover and fill separately into the washing machine — do not overcrowd. Add a standard dose of laundry detergent. For suspected carpet beetle or moth contamination, add an enzyme-based detergent that targets protein stains; it helps break down fecal residue and larval debris.
- Run the hottest wash cycle the care label allows. For most outdoor acrylic or polyester covers, warm (105°F / 40°C) is safe; hot (120°F / 49°C) is fine for cotton and canvas.
- Transfer immediately to the dryer on the highest heat setting safe for the fabric. Run a full 45-to-60-minute cycle. For bed bug situations, the goal is to sustain interior fabric temperatures at or above 118°F (48°C) for at least 72 minutes — a standard full cycle at high heat typically achieves this for most residential dryers, but verify with a probe thermometer if you have any doubt.
- Remove items from the dryer promptly and fold them into a clean plastic bag. Do not place them back on furniture until you are certain the frame and fill are also pest-free.
- Inspect the washed cover thoroughly under bright light before reinstalling it. Look for remaining stains, fecal spots, or structural damage to the fabric before deciding whether to repair or replace it.
One thing I learned the hard way: if the cover has a musty smell even after washing, do not assume the wash fixed it. Mold spores are tougher than most insects. Pre-soak the cover in a solution of one cup of oxygen bleach per gallon of warm water for 30 minutes before the wash cycle, then launder as usual. On white or light-colored covers you can use a small amount of chlorine bleach if the label allows, but on colored outdoor fabrics, stick with oxygen bleach to avoid fading the UV-resistant dye.
Cleaning foam, wrapped foam, and non-washable fills
Foam inserts and wrapped-foam cores (foam wrapped in a layer of polyester batting) cannot go in the washing machine without degrading and tearing apart. This is where the process takes more patience, but it is very doable. The two most effective non-machine methods are steam treatment and thorough surface cleaning followed by extended drying.
Vacuuming the foam first
Before any wet treatment, vacuum every surface of the foam insert using a crevice tool or upholstery attachment. Go slowly. The goal is to mechanically remove eggs, shed skins, fecal debris, and live insects from the surface. After vacuuming, seal the vacuum bag or canister contents in a plastic bag immediately and put them in an outdoor trash can.
Steam treatment for foam and wrapped cores
A handheld or upright steam cleaner (not a clothes steamer, which does not get hot enough or deliver enough volume) is one of the most effective non-chemical tools for pest control on foam cushions. Steam kills bed bugs, their eggs, and many other surface insects on contact when it reaches lethal temperatures at the surface. Move the steam nozzle slowly over all surfaces and seams, holding it about 1–2 inches from the surface and moving at roughly one inch per second. Work in overlapping passes. Do not rush this step, quick passes leave cold spots where eggs survive.
The critical caution with steam on foam: moisture. Foam is extremely slow to dry, and a wet foam core left in a cover or laid flat will grow mold within 24 to 48 hours. After steaming, stand the foam insert upright or prop it on its edge on a clean surface in full sun or in a well-ventilated area. Do not cover it. Do not lay it flat on concrete, which traps moisture underneath. Depending on the thickness of the foam and the ambient temperature, full drying can take 6 to 24 hours. If you have a fan, point it directly at the foam. The foam must be completely dry, all the way through, before going back inside a cover.
Surface treatments for non-washable fills
For light pest activity or as a follow-up after steam treatment, spray the surface of dried foam lightly with 70% isopropyl alcohol. It evaporates quickly and has a desiccant effect on many insects. Let it dry fully. You can also apply a very thin layer of food-grade diatomaceous earth to the outer surface of the foam (not inside a cover) in targeted areas like seam edges, but only if the foam will remain dry and uncovered for several hours while the DE does its work. Wet DE is completely ineffective. Once the treated foam goes back into a closed cover, the DE loses effectiveness anyway, so think of it as a short-term barrier rather than a long-term solution.
Heat treatment without a machine
If your foam insert is small enough (think chair seat pad rather than sofa cushion), you can use a black plastic bag left in direct summer sun to raise interior temperatures. On a 90°F day, interior bag temperatures can reach 120°F or higher, which is above the minimum threshold for bed bug kill. The challenge is sustaining that temperature throughout the mass of the foam for long enough, at least 72 minutes at 118°F (48°C) as a baseline. Use a probe thermometer inside the bag to verify the temperature, not just the exterior. Larger cushion cores need professional-grade heat treatment equipment to reach lethal temperatures uniformly. Home freezers are not a reliable option: reaching and maintaining −18°C (0°F) uniformly for at least 4 days is required to kill bed bugs through freezing, and many residential freezers do not hold that temperature consistently enough to guarantee results.
Tackling mold, mildew, and deep-set odors
Mold and bug infestations often go hand in hand on outdoor cushions, because the same conditions that attract pests, moisture, warmth, organic material, also feed mold. I have pulled cushions apart that had a full mold colony inside the foam even though the exterior cover looked fine. Before you assume a smell is pest-related, check for mold.
Testing for mold before you start
Unzip the cover and look at the inner surface and the foam surface in bright daylight or with a flashlight. Mold typically appears as fuzzy gray, green, black, or white patches. It can also show up as a surface discoloration on foam that has been compressed against a wet cover. If you see gray or black spotting on the inside of a cotton or polyester cover lining, that is almost certainly mildew. A musty, damp basement smell confirms it. Light pink or orange staining on foam is sometimes bacterial rather than fungal, especially if there has been standing water inside the cover.
Cleaning mold from removable fabric covers
Take the cover outside and use a stiff brush to remove loose mold from the surface before laundering (do this outdoors to avoid releasing spores inside). Pre-soak in a solution of one cup of white vinegar per gallon of cool water for at least 30 minutes, or in an oxygen-bleach solution as described earlier. Then launder on the hottest safe cycle with an enzyme detergent. Add half a cup of white vinegar to the rinse cycle as an additional odor neutralizer. Line dry in full sun when possible: UV exposure is a genuine mold inhibitor, not just a drying aid. Do not machine dry a mold-affected cover without first laundering it, as the heat can set remaining stains.
Cleaning mold from foam and non-washable fills
Mix a solution of one part white vinegar to one part water in a spray bottle. Lightly spray the affected areas of the foam, do not saturate it. Let it sit for 10 minutes. Wipe gently with a clean white cloth. For stubborn patches, you can use a diluted oxygen bleach solution (follow product directions for foam-safe use and test an inconspicuous spot first). After any wet application, the foam must be dried completely and thoroughly, standing upright in a well-ventilated space with airflow. Skip this step and you trade one mold problem for a worse one.
For deep odors baked into foam after a long infestation or mold colony, baking soda is your best budget tool. Sprinkle a generous layer over the dry foam surface, press it lightly in with your palm, and let it sit for at least 4 hours (overnight is better). Vacuum it off thoroughly. Repeat on the other side. If the odor persists after two rounds of this, the mold or pest contamination has likely penetrated deeper than surface treatment can reach, and the honest call is to replace the foam insert rather than continuing to chase the smell. Replacement foam is relatively inexpensive, a standard 4-inch-thick high-density foam cut to cushion size typically costs $15 to $40 depending on size and density, and if you are already at the stage of pulling foam out and treating it extensively, it may be faster and cheaper to just start fresh with new fill.
Odor neutralizing for different fill types
| Fill Type | Best Odor Neutralizer | Application Method | Drying Time Needed |
|---|---|---|---|
| Polyester fiberfill | Enzyme detergent + white vinegar rinse | Machine wash | Dryer cycle or line dry, 2–4 hours |
| Standard foam | Baking soda (dry) | Sprinkle, press, vacuum after 4+ hours | Must be fully dry first — 6–24 hours |
| Wrapped foam (foam + batting) | Baking soda on batting layer; enzyme spray lightly on foam | Dry application on batting; light spray on foam edges | 12–24 hours in ventilated space |
| Down or down-alternative fill | Enzyme detergent, tennis balls in dryer | Machine wash cold, low-heat tumble dry | Multiple dryer cycles, 90+ minutes total |
| Cotton batting | Oxygen bleach pre-soak + enzyme wash | Machine wash or hand wash | Line dry in sun, 4–8 hours |
Repairing or reupholstering after a pest infestation
Once the cushion is clean and dry, you face the real question: is this worth putting back together, or is it time to start fresh? I want to be honest here because a lot of guides just say 'repair it!' without acknowledging that some cushions are genuinely past saving. Here is how to think through it clearly. For step-by-step instructions on repairing, restuffing, and recovering damaged pads, see how to fix patio cushions.
Repair vs replace vs upcycle: a practical decision guide
| Condition After Cleaning | Recommended Action | Approximate Cost | Time Required |
|---|---|---|---|
| Cover intact, foam firm and odor-free | Deep clean and return to use | $0–$10 (cleaning supplies) | 2–4 hours |
| Cover damaged (holes, seam failure), foam good | Replace or re-cover just the cover; keep foam | $15–$50 for fabric + supplies | 3–6 hours for sewing |
| Cover fine, foam soft/flat/odor-persistent | Replace foam insert only | $15–$40 for replacement foam | 1–2 hours |
| Both cover and foam damaged or odor-saturated | Full reupholstery or replace entirely | $40–$100+ DIY; $150–$300 pro | Half day to full day DIY |
| Structural damage from rodent gnawing | Replace cushion entirely or repurpose frame | $60–$150 for new cushion | 30 minutes to source replacement |
| Minor pest damage, sentimental or expensive set | Repair seams, patch fabric, restuff as needed | $10–$30 in materials | 2–5 hours depending on extent |
Patching seams and repairing covers
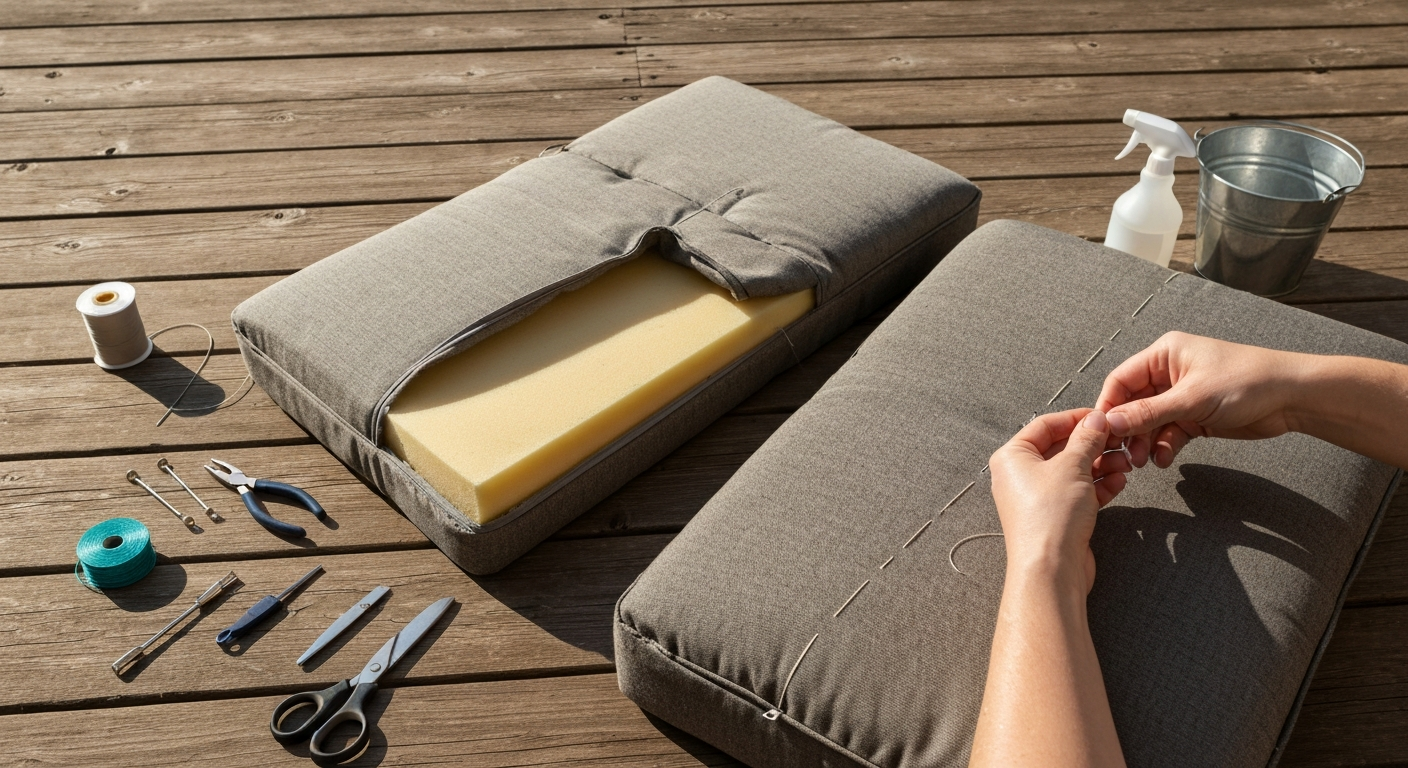
Moth or carpet beetle damage to a cover is often limited to a patch a few inches across. You can repair this with an iron-on fabric repair patch (available at fabric stores for $3 to $8) on the inside of the cover, or by cutting a matching piece of fabric and sewing it over the damage with a tight zigzag stitch. For seam failures along piping or zipper tape, common after heavy cleaning, re-sew with a heavy upholstery thread (V-69 or V-92 weight) and a size 16 or 18 upholstery needle. A basic zipper replacement costs about $5 to $10 in materials and takes about 45 minutes even for a beginner.
Restuffing and measuring for new fill
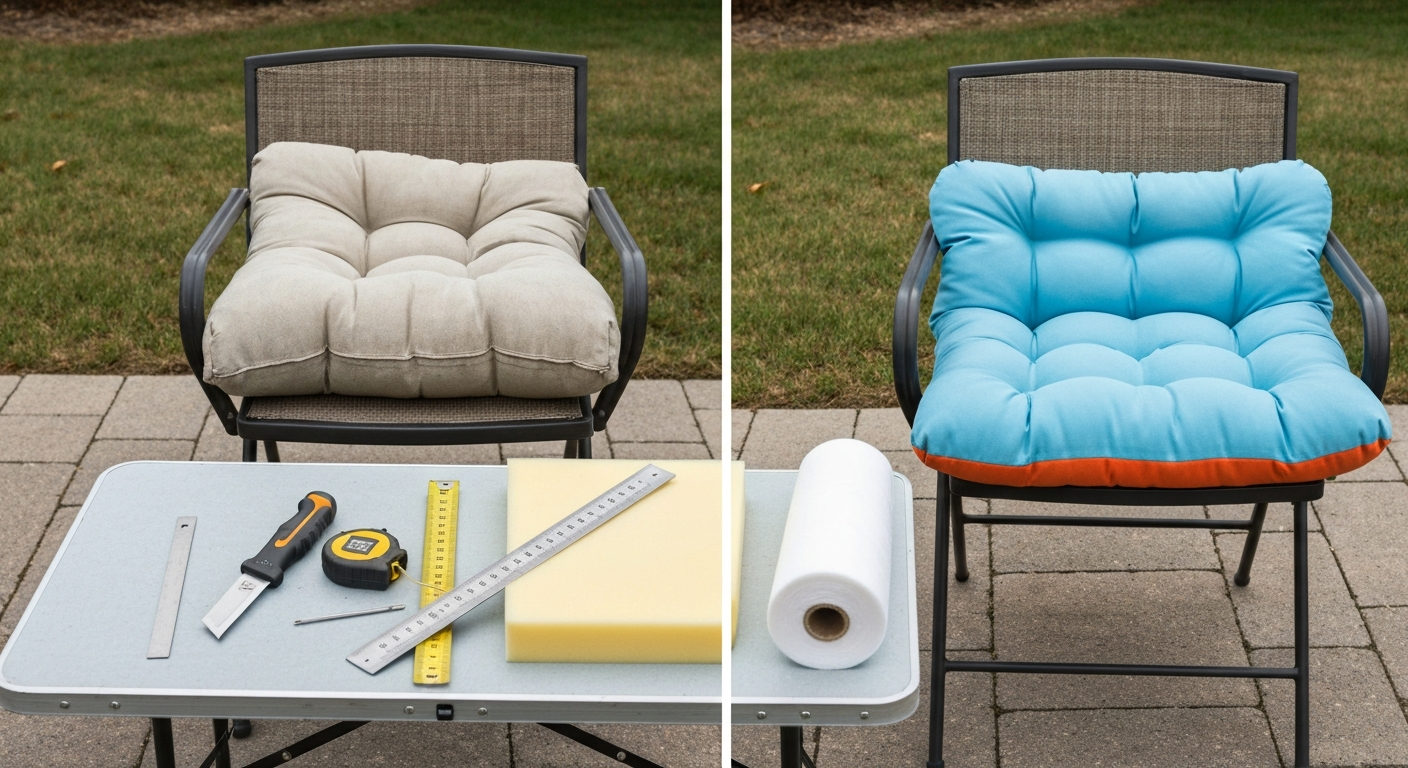
If you are replacing foam, measure the interior dimensions of the cover, length, width, and depth, with the cover lying flat and unstuffed. Cut foam 0.5 to 1 inch larger than each measured dimension so the final cushion fills the cover firmly without gaps (compression is what gives a cushion its shape). For a standard chair seat cushion measuring roughly 20 by 20 by 4 inches, a 21 by 21 by 4.5-inch foam block cut to size will produce a properly firm result. For step-by-step guidance on cutting, measuring, and filling cushions, see how to restuff patio cushions. For a chaise or sofa cushion, the same principle applies, measure twice and order or cut once.
Full reupholstery: fabric yardage basics
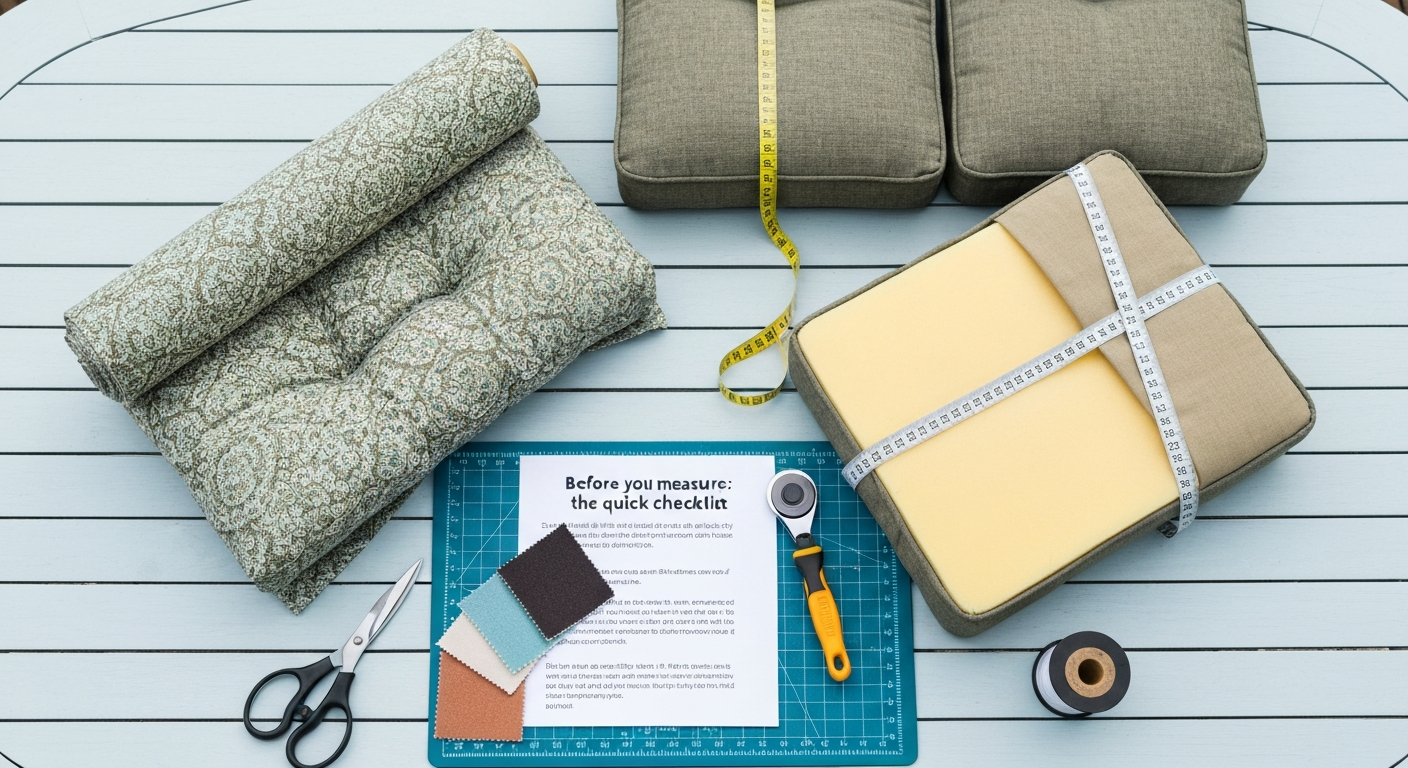
If the cover needs full replacement, you will need to calculate fabric yardage before buying material. A simple box cushion cover requires fabric for the top, bottom, and side boxing strip, plus seam allowance. For a 20 by 20 by 4-inch cushion: the top and bottom panels are each 21 by 21 inches (adding 0.5-inch seam allowance on all sides), and the boxing strip is 4.5 inches wide by the full perimeter (about 80 inches). On a standard 54-inch-wide fabric, two such cushions can typically be cut from about 1.25 yards. For larger cushions or sets of four or more, plan on roughly 0.5 to 0.75 yards per standard seat cushion. Always add 10 to 15 percent for pattern matching, cutting errors, and zipper allowance. Guides focused specifically on fabric quantity calculations and cushion measuring can help you dial in the exact numbers for your specific furniture. For a quick calculator and step-by-step examples on measuring and converting cushion dimensions to yardage, see our guide on how much fabric do I need to recover patio cushions. For step-by-step instructions on taking accurate dimensions, see our guide on how to measure patio cushions.
Preventing re-infestation: storage, covers, and seasonal habits
Cleaning up an infestation once is exhausting. Cleaning it up twice because you skipped the prevention step is genuinely demoralizing. Here is what actually works based on what I have done and what the research backs up.
Smart storage habits
At the end of each season, wash or thoroughly clean all covers before storage. Dry completely, foam and fills must be bone dry, not just surface-dry. Store cushions in sealed, breathable storage bags (not unvented plastic bags that trap humidity) or in a dry, elevated location off concrete floors. Cedar blocks or sachets placed inside storage containers deter clothes moths and carpet beetles without chemicals. Replace them annually as the cedar scent fades over time. Keep stored cushions away from known rodent entry points in garages or sheds, and inspect for gnaw damage or droppings each time you open storage.
Using furniture covers year-round
A well-fitted patio furniture cover does more than protect against rain, it reduces the open-air exposure that allows flying insects (moths, carpet beetles, wasps looking to nest) to reach cushion surfaces. Covers also deter rodents from nesting in and around cushions left outdoors during shoulder seasons. For maximum effectiveness, the cover should fit snugly at the base so it cannot be pushed up by wind or animals. Weighted hem cords or drawstring closures make a significant practical difference here.
Seasonal inspection schedule
- Early spring (when bringing cushions out of storage): full visual inspection of both cover and fill before reinstalling; look for any evidence of winter nesting or insect activity in storage
- Late spring through summer (peak ant, flea, tick, and moth season): monthly quick check of seams and piping for fecal spots, webbing, or larval debris
- After any outdoor event where food or pets were present near cushions: wipe down covers promptly and allow to dry before covering or storing
- End of season (before returning to storage): full wash or clean of all covers and visual inspection of foam; repair any seam damage before storing so it does not worsen over winter
- Any time you bring second-hand or used cushions home: full inspection and heat treatment or laundering before placing near other cushions or taking indoors
End-of-life choices: when repairing is not the answer
Sometimes a cushion has had it. If foam is crumbling, covers have been structurally compromised by rodent damage, or the infestation was severe enough that you cannot confidently confirm eradication after two rounds of treatment, the honest advice is to let it go. That does not mean throwing it in the trash if you can help it.
Polyester fiberfill from clean, pest-free cushions can be repurposed as stuffing for craft projects or donated to animal shelters (call ahead to confirm). Intact foam that is clean but just misshapen or sized wrong for your furniture can be recut for use as kneeling pads, packaging material, or pet bed filler. Fabric covers with good material but unfixable seam damage can be cut into cleaning rags, tote bag panels, or outdoor table runner material. When none of these are practical and the cushion genuinely cannot be salvaged, check your municipal waste guidelines for foam disposal, some areas have textile recycling programs that accept foam, and large foam pieces are sometimes accepted at mattress recycling centers. For more ideas and step-by-step options on what to do with old patio cushions, see our guide on what to do with old patio cushions.
If you are considering replacing an entire set of cushions rather than just one, that is also a natural point to reassess whether the furniture frame itself is worth keeping. A well-maintained aluminum or teak frame with new cushions and a fresh cover can look essentially new at a fraction of replacement cost, which is what this whole approach is about.
FAQ
How do I accurately identify which pests are in my patio cushions?
Look for species-specific signs: bed bugs — live bugs, rusty/brown fecal spots on seams, shed skins, eggs, sweet/musty odor; carpet beetles — irregular holes in natural fibers, shed larval skins (bristly caterpillar-like), tiny fecal pellets; clothes moths — cocoons, webbing, casemaking tubes, holes in animal-fiber fabrics; ants/fleas/ticks — visible insects, bites on people/pets, or movement at night; rodents — gnaw marks, rice-shaped droppings, nest material inside cushions. Use a bright flashlight and a magnifier to inspect seams, zippers, piping, and inner fill. Preserve a specimen in a sealed bag or take clear photos for extension or pest professional ID. Follow your state land‑grant extension resources for photo guides and local species timing.
What are immediate containment steps when I discover bugs in cushions?
1) Isolate: move suspect cushions outdoors (if safe) or to a well-ventilated, contained area. 2) Seal: place removable covers or small cushions in large heavy-duty plastic bags and seal. 3) Remove nearby fabrics and vacuum the seating area and crevices; empty vacuum contents into a sealed trash bag immediately. 4) Quarantine: do not mix clean and suspect items; label sealed bags and keep them closed until treated. 5) Protect yourself: wear gloves and a dust mask when handling infested items. These steps follow EPA/extension containment guidance to stop spread.
How do I safely remove and launder different cushion covers and fills?
Tools/materials checklist: heavy-duty trash bags, gloves, N95 mask, mild detergent, enzyme cleaner (for odors), color-safe bleach if label allows, fabric-safe disinfectant, soft brush, vacuum with crevice tool, thermometer for dryer, clothesline/air-drying area. Steps: 1) Check care labels. 2) Removable fabric covers: unzip and launder on the hottest safe temperature per label; use hottest dryer setting for a full cycle (heat kills many pests and eggs). 3) Non-removable covers: vacuum seams thoroughly; use a steamer rated for upholstery (slow passes) focusing on seams and folds; allow to dry fully. 4) Foam/closed-cell fills: avoid saturating — surface steam or wipe with disinfectant; replace if heavily infested. 5) Polyester fiberfill/down/wrapped foam: if covers are washable and fill is removable, launder covers and machine-dry fill on low (check manufacturer). For down, use dryer with tennis balls to re-fluff; ensure fully dry to prevent mold. 6) For suspected bed bugs, heat-treat at ≥118°F (48°C) for the recommended time (consult extension guidance) or use professional heat treatment.
Can I use my home freezer to kill pests in cushions?
Freezing may work for some pests but only if the freezer reliably reaches −18°C (0°F) or colder and maintains that temperature for multiple days (commonly ~4 days). Many home freezers are inconsistent and may not kill all life stages, especially eggs. Always verify freezer temperature with a thermometer before relying on freezing; when in doubt, use high-heat dryer cycles or professional heat treatment instead.
When and how should I use heat, steam, or desiccant dusts (DE/silica) to treat cushion infestations?
Heat/steam: Effective against bed bugs, ticks, and many fabric pests when lethal surface temperatures and contact time are reached. Use a clothes dryer on the hottest safe setting for machine-washable items. For non-washables, use a commercial steamer slowly along seams and folds, then dry thoroughly to avoid mold. Desiccant dusts: food-grade diatomaceous earth or silica can reduce crawling insects if applied to dry, sheltered harborage sites (under frames, inside crevices). Wear an N95 mask and gloves, avoid placing dusts on surface fabrics where people sit, and expect slower kill times. Desiccants are supplemental — not a standalone quick fix for heavy infestations.
Which chemical options are safe for treating patio cushions, and when should I call a professional?
Always read pesticide labels — labels are the legal instruction. Many consumer permethrin products are labeled only for clothing/gear, not upholstery; only use products explicitly labeled for cushions/upholstery. Non-chemical options (laundering, heat, steam, desiccants) are preferred for cushions. Call a licensed pest-management professional for: confirmed bed bug infestations, visible rodent nesting/entry, persistent or large cockroach infestations, or when DIY methods fail. Professionals can perform heat treatments, targeted insecticide applications per label, and structural exclusion.