Restuffing patio cushions is worth doing when the covers are still in decent shape and the cushions have simply gone flat or lumpy. You pull out the old foam or batting, cut and fit a new insert, close it back up, and your chairs look and feel like new. The whole job on a standard seat cushion takes about 30 to 60 minutes once you have your materials, and a single foam insert typically costs $10 to $25, compared to $40 to $150 or more for a replacement cushion from a furniture retailer. For most outdoor cushions that are just sagging or flat, DIY restuffing is the right call.
How to Restuff Patio Cushions: Complete DIY Guide, Measure, Repair & Store

Maren Grady
13 Jul 2026
Why bother restuffing instead of just buying new?
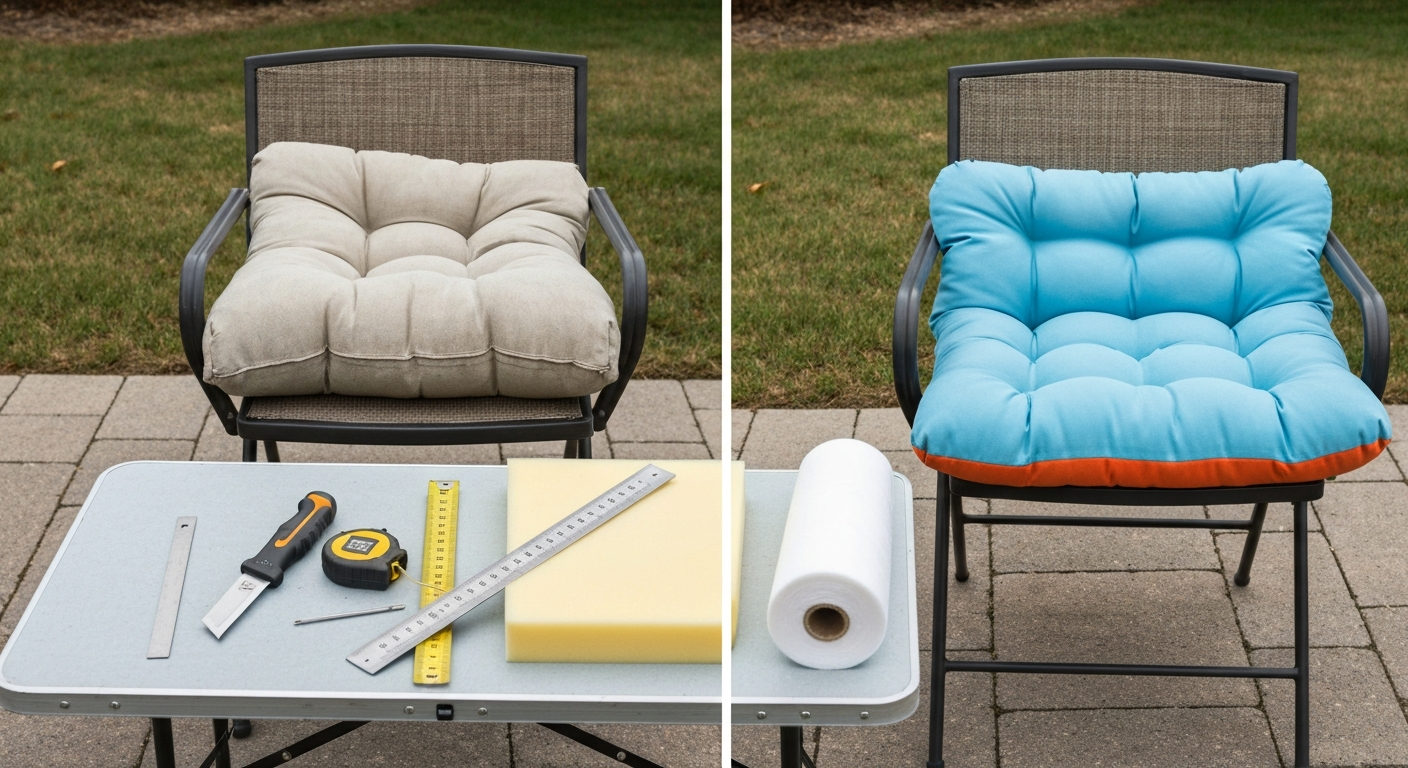
The most common reason patio cushions fail is not the fabric, it's the fill. Standard polyurethane foam that ships inside most patio furniture breaks down faster outdoors than indoor upholstery foam, especially when it absorbs moisture repeatedly. Within two to four seasons you can end up with cushions that bottom out the moment you sit down, or that clump and shift every time you move. The cover can look perfectly fine. Tossing the whole cushion because of a foam failure is wasteful and expensive, and that's exactly why restuffing has become such a popular repair.
This guide walks through the entire process, from deciding whether your cushions are worth saving, to measuring and cutting new foam, to closing everything back up. For more general troubleshooting and step-by-step advice on how to fix patio cushions, see our detailed guide on how to fix patio cushions (internal resource). Whether you plan to hand-sew, use a machine, or skip the sewing entirely with a no-sew method, there's a path here for you. I'll also cover what to do if you open a cushion and find mold, mildew, or bugs, because that happens more often than people expect, and it's important to handle it safely before you start shoving in new fill.
Repair or replace: how to decide before you spend a dime
Before you buy anything, go through every cushion and be honest about its condition. Restuffing only makes sense if the cover and the structure of the cushion are still fundamentally sound. Here's the checklist I use before committing to a restuff project.
Condition checklist
- Fabric: check for fading, fraying, and thin spots. Hold the fabric up to light. If you can see through it or the weave is visibly broken, the cover will fail soon after restuffing.
- Seams: run your finger along every seam. Minor thread breaks can be resewn, but if the fabric itself is tearing away from the seam, the cover is structurally compromised.
- Zipper: test it. A zipper that sticks, jumps the track, or has a broken slider can usually be repaired or replaced for under $5. A zipper that has pulled the surrounding fabric apart is a bigger job.
- Mold and mildew: check both the inside of the cover and the foam. Surface mildew on the cover can be treated. Mold that has penetrated deep into the foam and produced a persistent smell means the foam must be discarded.
- Pest damage: look for chewed or burrowed areas in the foam and any signs of insect nesting. Minor surface damage can be trimmed away, but extensive tunneling means the foam goes out.
- Structural piping or boxing strips: if the piping cord is rotted or the boxing (the side strip of the cushion) has shrunk or distorted the shape, decide whether repairing it is within your skill level.
- Overall shape: if the cover has permanently distorted from years of compression and washing, new fill alone won't fix the appearance.
Decision checkpoints
| Condition | Recommended Action |
|---|---|
| Flat or lumpy foam only, cover in good shape | Restuff — best ROI |
| Minor seam splits, good fabric | Restuff and resew seams |
| Sticky or broken zipper slider, fabric intact | Replace zipper, then restuff |
| Surface mildew on cover, foam dry | Clean cover, replace foam as a precaution |
| Deep mold in foam, cover salvageable | Discard foam, clean and treat cover, restuff |
| Fabric faded but structurally sound | Restuff and accept the look, or recover |
| Fabric torn, fraying, or threadbare | Recover or replace the whole cushion |
| Persistent mold smell after cleaning | Discard entire cushion, start fresh |
Tools and materials you'll need
You don't need a professional upholstery studio to do this. I've restuffed cushions on a folding table in the garage with a basic toolkit. That said, having the right tools makes a real difference, especially when cutting foam. Here's what to gather before you start.
- Electric carving knife or serrated bread knife (an electric carving knife is the single best tool for cutting foam cleanly without tearing)
- Tape measure and a long metal ruler or straightedge
- Permanent marker or chalk for marking foam
- Sharp fabric scissors or a rotary cutter with a cutting mat
- Seam ripper for opening existing seams without cutting the fabric
- Heavy-duty hand-sewing needle (curved upholstery needle is ideal) and upholstery thread
- Sewing machine with a zipper foot and heavy-duty needle, if machine sewing
- Spray adhesive rated for foam (3M Hi-Strength 90 or equivalent foam-safe aerosol)
- Polyester batting (Dacron wrap) in the appropriate weight
- Replacement foam insert cut to size (details in the foam section below)
- Replacement zipper if needed (YKK AquaGuard or AquaSeal water-resistant zipper for outdoor use)
- Pins or binder clips to hold fabric during sewing
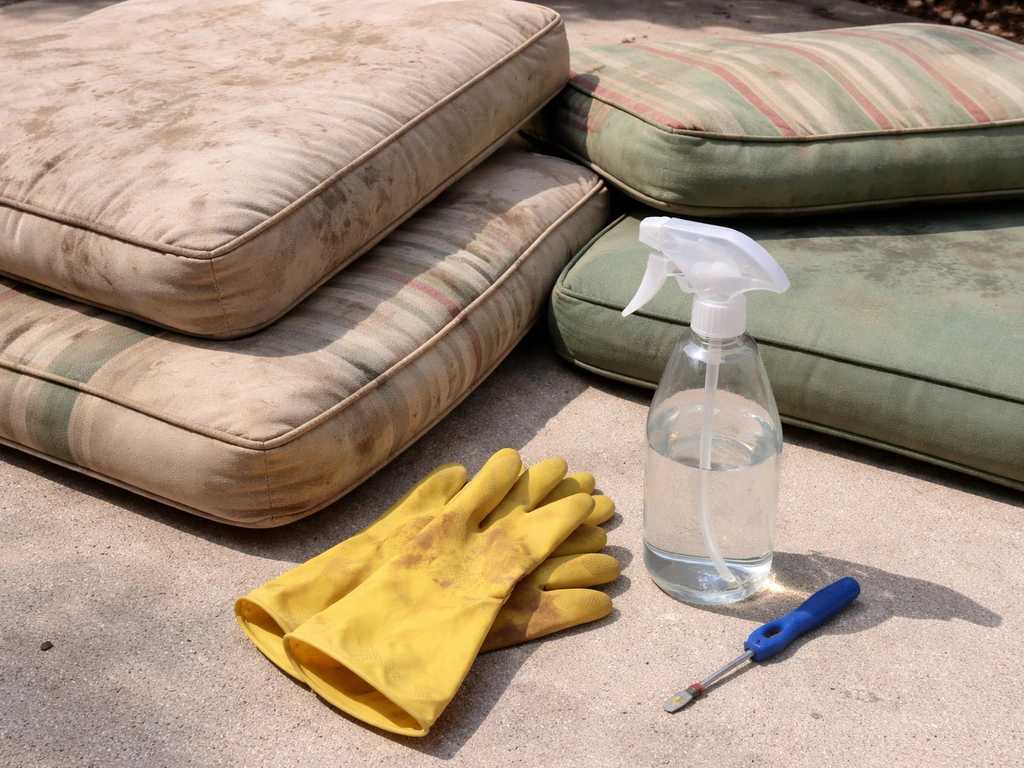
- Mild dish soap, white vinegar, and a spray bottle for cleaning
- Rubber gloves and a dust mask when handling moldy material
Measuring your cushions and covers correctly
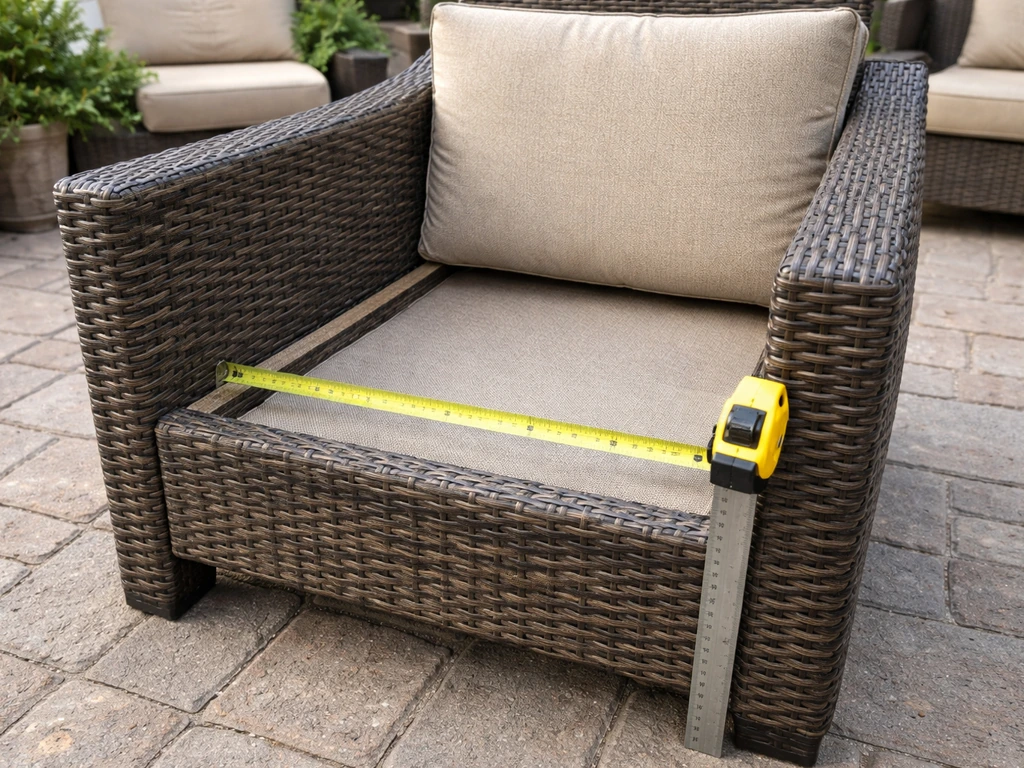
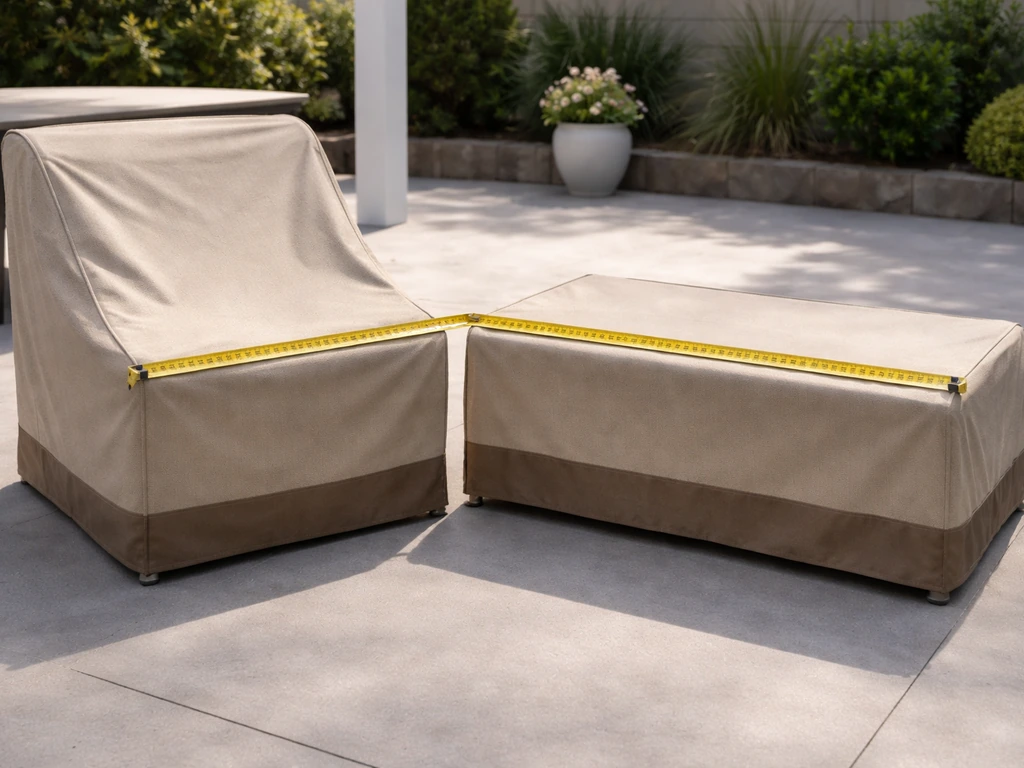
Getting the measurements right before you order or cut foam is the step most beginners rush and then regret. A foam insert that's even half an inch too small will shift around inside the cover and look deflated. One that's too large will make the zipper impossible to close without a wrestling match. Here's how I measure every time. For detailed, step-by-step instructions on how to measure patio cushions, see our guide on how to measure patio cushions. For a step-by-step walkthrough on how to measure patio furniture covers, consult this measuring guide.
- Measure the finished cushion cover, not the old foam insert. Lay the empty cover flat and measure length, width, and depth (the side height) at the fullest point. Write all three dimensions down.
- For length and width: measure from seam to seam on the inside of the cover, not across the outside. This gives you the usable interior space the foam needs to fill.
- For depth/thickness: measure the boxing strip (the side panel of the cover) from seam to seam. If the cover has no boxing strip (some thin throw-style cushions don't), measure the thickness of the old foam.
- Add 1/2 inch to each dimension when ordering or cutting foam. A snug fit fills the cover properly and prevents shifting. This is called cutting to a 'compressed fit.'
- For replacement covers: measure the new foam insert itself, then add your seam allowance (typically 1/2 inch per seam) to get your cut dimensions for the fabric panels.
If your cushion is a non-standard shape (L-shaped, curved front edge, wedge), trace the cover panel directly onto kraft paper or newspaper to make a template before cutting foam. Lay the cover panel flat, pin it lightly to the paper, and trace around the seam line. That template becomes your cutting guide for the foam and, if you're recovering, your fabric pattern piece. This approach saves expensive mistakes when working with irregular shapes.
Calculating fabric yardage and planning your cuts
If you're recovering the cushion at the same time as restuffing it, you'll need to calculate how much fabric to buy. If you need a quick way to estimate yardage, see my guide on how much fabric do I need to recover patio cushions for step-by-step examples and a handy calculator. The basic method is to figure out the cut size of every panel (top, bottom, and boxing strip), then add those up and convert to linear yards based on your fabric's width.
Here's the formula I use: for each panel, add the finished panel dimension plus 1 inch for seam allowances (1/2 inch on each side). Multiply the number of identical panels by the cut length. Sum the totals for all panels. Divide that total in inches by 36 to get yards, then round up to the next quarter yard and add one extra yard as a buffer, especially for patterned fabrics that require matching. For a standard 20-inch-wide by 24-inch-long by 4-inch-deep seat cushion on 54-inch-wide fabric, a typical calculation works out like this:
| Panel | Finished Size | Cut Size (+ 1" SA) | Qty | Total Inches |
|---|---|---|---|---|
| Top | 20" x 24" | 21" x 25" | 1 | 25" |
| Bottom | 20" x 24" | 21" x 25" | 1 | 25" |
| Front/back boxing | 4" x 24" | 5" x 25" | 2 | 50" |
| Side boxing | 4" x 20" | 5" x 21" | 2 | 42" |
| Piping strip (optional) | 2" wide x total perimeter | Approx. 90" perimeter | 1 | 90" |
| Total | ~232" / 36 = ~6.5 yards |
That example lands at roughly 6.5 yards for a set of four seat cushions, before the waste buffer. On a 54-inch-wide fabric, you can often cut two panels side by side, which significantly reduces yardage. If your fabric has a large pattern repeat, add the length of one full repeat per panel to account for matching. For a first-time project or a bold pattern, buy an extra yard. It is always better to have leftover fabric than to run short mid-project.
Choosing the right foam and filling
This is where most people get it wrong. They buy whatever generic foam is on the shelf at a craft store and wonder why their cushions feel stiff as a board or bottom out in a year. Outdoor cushions have specific needs, and the foam type you choose determines both comfort and how long the cushion lasts.
Foam density and firmness explained
Two numbers matter when you're buying foam: density and ILD. Density is measured in pounds per cubic foot (lb/ft³) and tells you how durable the foam is. A 1-cubic-foot cube of high-density foam weighs more because there's more material per unit volume, which means it holds up to repeated compression better. ILD (Indentation Load Deflection) measures firmness, specifically how many pounds of force it takes to compress a 4-inch foam sample by 25 percent. A higher ILD means firmer foam.
| Foam Type | Density (lb/ft³) | Typical ILD | Best For | Outdoor Use |
|---|---|---|---|---|
| Standard polyurethane | ~1.8 | 24–44 | Indoor general use | Not ideal, absorbs moisture |
| High-density (HR) polyurethane | 2.6–2.9 | 34–54 | Heavy-use indoor seating | Better, still can retain moisture |
| Reticulated open-cell foam | ~1.8 | 25–45 | Outdoor/marine/pool cushions | Best — drains and dries fast |
| Polyester fiberfill (Dacron) | N/A | N/A (loft-based) | Back cushions, throw pillows | Good as supplement, not seat support |
For exposed patio seat cushions, reticulated foam is the best choice. The reticulation process removes the closed-cell membranes inside the foam structure, which means rainwater drains straight through instead of pooling in the center. Suppliers like FoamOrder specify outdoor reticulated foam at roughly 1.8 lb/ft³ density with ILD options from Soft (25) to Medium (33) to Firm (45). For typical dining chair cushions, a Medium 33 ILD is a comfortable all-around choice. For lounge chairs or chaise cushions where people sit for longer periods, a Soft to Medium range (25 to 33 ILD) is more appropriate. If the cushion is in a covered outdoor space that stays mostly dry, a high-density HR foam (2.6 to 2.9 lb/ft³) is a good, often cheaper alternative.
Dacron batting: the finishing layer
Dacron (bonded polyester batting) wraps around the outside of the foam insert before it goes into the cover. It does two things: it softens the hard edges of the foam so the cushion has a rounded, tailored look instead of boxy foam-block corners, and it creates a smooth layer between the foam and the fabric that prevents the foam from gripping and distorting the cover when you sit. For standard patio cushions, a 1/2-oz to 1-oz Dacron wrap is plenty. Cut it to wrap around all four sides of the foam and either spray-adhere it or hand-tack it at the underside seam.
Picking outdoor fabric and hardware
Not every fabric belongs on outdoor cushions. Regular cotton and linen will fade, rot, and mildew within a season. Solution-dyed acrylic fabrics like Sunbrella are the gold standard for outdoor use: the color goes all the way through the fiber rather than being applied as a surface dye, which is why they resist fading far longer than printed fabrics. Sunbrella and comparable brands (Outdura, Dickson Constant) are also treated with water-repellent coatings and are specifically designed to resist mold and mildew. Outdura's own care and cleaning guide (Outdura, Care and Cleaning Instructions (PDF)) documents cleaning recommendations for their outdoor fabrics, including machine‑washing guidance for some lines, air‑drying, and precautions for mildew and stains to protect coatings and finishes Outdura — Care and Cleaning Instructions (PDF). They cost more, typically $15 to $40 per yard, but they'll outlast bargain fabric by years.
For a budget-conscious approach, look for polyester outdoor fabric rated for outdoor UV resistance. It won't last as long as solution-dyed acrylic but costs roughly $5 to $12 per yard and performs acceptably for covered or semi-covered spaces. Avoid anything labeled simply 'decorator fabric' or 'home décor cotton' for cushions that will be regularly wet.
For zippers on outdoor cushions, the hardware matters too. A standard brass or steel zipper will rust within one season when exposed to rain and condensation. YKK's AquaGuard and AquaSeal lines are designed specifically for outdoor and marine applications, with a PU-laminated tape that resists moisture. AquaGuard is water-repellent (not fully waterproof) and is available in sizes from #3 to #8, which covers most cushion applications. Size #5 is the most versatile choice for standard patio cushions. Note that YKK advises against storing AquaGuard zippers in direct contact with vinyl or PVC, which is worth knowing if you store cushions in vinyl bins.
Opening covers and inspecting what's inside
Before you order foam, open the cushion and see what you're actually dealing with. This step will inform every purchase decision that follows.
- If the cushion has a zipper, open it fully. If it doesn't open far enough to extract the insert, use a seam ripper to open a few inches of the nearby seam rather than forcing and breaking the zipper.
- For sewn-shut cushions, use a seam ripper along the bottom seam or the least visible seam. Work slowly to avoid cutting the fabric.
- Slide the foam insert out. If the foam is bonded to the cover fabric with adhesive, work gently and use a butter knife to separate it rather than tearing.
- Lay the foam on a flat surface and inspect it in daylight. Look for discoloration (black, green, or gray spots indicate mold), crumbling edges, compressed-flat areas, and any sign of insect activity.
- Check the inside of the cover: sniff it (musty smell indicates mold), look at the seams from the inside for any fraying or stress pulling, and examine the zipper tape and teeth.
- Test each seam by pulling gently. Note any that feel weak or have loose threads so you can reinforce them before inserting new fill.
Inspection checklist
- Foam: flat, crumbling, or compressed beyond recovery
- Foam: visible mold growth or persistent smell
- Foam: insect damage, tunneling, or nesting material
- Cover interior: mildew staining on the lining
- Cover: seam integrity on all four sides plus boxing strips
- Zipper: tape condition, tooth alignment, slider function
- Piping: cord intact and not rotted or pulled loose
- Boxing strips: shape retention and fabric integrity
Cleaning for mold, mildew, and bugs, do this before restuffing
If you find mold, mildew, or evidence of pests, deal with them before anything else goes inside the cushion. Skipping this step and stuffing fresh foam into a contaminated cover guarantees the problem comes back within weeks.
Treating mold and mildew
Sunbrella's official guidance for mildew removal calls for a solution of 1 teaspoon (4 ml) of mild dish soap plus 1 teaspoon (4 ml) of bleach per 1 cup (250 ml) of water. Apply it to the affected area, let it sit for 15 minutes, scrub gently with a soft brush, then rinse thoroughly and air dry. This is the same formula I use as a starting point for any solution-dyed outdoor fabric. Important caveat: bleach can discolor or damage non-Sunbrella fabrics, especially those with printed surface patterns. If your fabric is not a premium solution-dyed acrylic, test on a hidden seam before treating visible panels. For oil-based stains combined with mildew, Sunbrella recommends their Extract oil-based remover first, followed by the bleach-and-soap solution.
Always work in a well-ventilated area or outdoors. Wear rubber gloves and, if the mold is extensive, a dust mask. Bag and seal any moldy foam in plastic before disposing of it so you're not spreading spores around your workspace.
When to discard rather than clean
- Foam with deep mold penetration (green or black growth throughout, not just on the surface) cannot be safely cleaned and must be discarded.
- Covers with fabric that has deteriorated to the point of tearing during cleaning should be discarded or used as pattern templates for replacement.
- Any material with an odor that persists after thorough cleaning and 24 hours of open-air drying should be discarded.
- Foam with extensive insect tunneling or nesting should be bagged and discarded, not brushed off and reused.
Dealing with bugs
Earwigs, silverfish, and ants are the most common culprits in outdoor cushions, and they're attracted to the damp, dark environment inside stored or wet cushions. For more on identifying and preventing bugs in patio cushions, see bugs in patio cushions. If you find live insects or nesting material, take the cushion outside, shake out the foam, and vacuum the inside of the cover thoroughly. Treat the cover interior with a fabric-safe insecticide spray or a solution of white vinegar and water (1:1 ratio), let it dry completely in direct sunlight, and leave it flat for 24 hours before restuffing. The sun exposure alone kills many eggs and discourages re-infestation. Going forward, the best prevention is ensuring cushions dry fully before storage and keeping them off damp ground.
Step-by-step restuffing procedure
Once your cover is clean and your foam is cut, the actual restuffing process is straightforward. Budget about 30 minutes per cushion if you're doing it for the first time, and about 15 to 20 minutes per cushion once you have a system going.
- Lay the cleaned, dry cover on a flat work surface. Open the zipper or seam access fully.
- If wrapping the foam in Dacron: cut a piece of batting large enough to wrap around all four sides of the foam insert and overlap slightly on the bottom face. Spray a light coat of foam-safe spray adhesive (like 3M Hi-Strength 90) on the top and sides of the foam, let it tack up for 30 seconds, then press the Dacron onto it. Wrap the sides down and either glue or hand-tack the overlap at the bottom.
- Insert the foam (with Dacron attached) into the cover. Work it in corner-first, guiding the foam so the corners align with the cover corners before pushing the center in.
- If the foam is tight in the cover, which is correct when you've cut to a snug fit, lay a plastic dry-cleaning bag over the foam before inserting it. The bag lets the foam slide in easily, then you grip the bag and pull it out from under the foam once it's positioned inside. This trick alone saves 10 minutes of fighting.
- Work the foam into all four corners. Push firmly from the outside of the cover to seat the foam completely flush with each corner and edge.
- Close the zipper or resew the seam. If resewing, use a ladder stitch (invisible from the outside) with upholstery thread for a clean finish.
- Stand the cushion on its edge and press down gently to check that the foam fills the cover evenly with no gaps or bulges.
Estimated time: foam cutting (10 to 15 minutes per cushion), Dacron wrapping (5 minutes), insertion (5 to 10 minutes), closing (5 minutes). A full set of four dining chair cushions can realistically be completed in under three hours including prep.
Cutting and fitting foam and batting
Foam cutting is where a lot of first-timers make their biggest mistake. A regular utility knife drags and tears foam instead of slicing cleanly, leaving ragged edges that bunch up inside the cover. An electric carving knife (the kind used for Thanksgiving turkey) is the best $20 to $30 investment for this project. It slices through foam the way a hot knife goes through butter, and gives you straight, clean edges. A sharp serrated bread knife works as a backup for thinner foam under 2 inches. Mark your cut lines with a permanent marker and a metal ruler, then cut in one smooth, confident pass rather than sawing back and forth.
For Dacron batting, cut with regular sharp scissors. There's no trick here except to cut it slightly larger than you think you need. You can always trim excess batting back, but you can't add it back once you've cut too short. When adhering Dacron to foam with spray adhesive, work in a ventilated space, hold the can about 8 to 10 inches from the surface, and apply a light, even coat. Follow the ventilation and safety instructions on the can. 3M Hi-Strength 90 and similar foam-safe aerosols bond quickly, so position your batting before pressing it down. One thing to double-check: confirm the adhesive you're using is compatible with the foam type. Some solvent-based adhesives will dissolve open-cell foam on contact.
Sewing and finishing: no-sew, hand sewing, and machine options
You don't necessarily need to sew anything to restuff a cushion. If the original seams are intact and the cushion has a working zipper, you open it, swap the foam, and close it again. But if seams have split or the zipper needs replacing, you'll need to do at least a little hand sewing or zipper work.
No-sew options
For minor seam splits, iron-on fabric tape (like HeatnBond or similar hem tape) can close a straight seam gap from the inside of the cover without a single stitch. It works reasonably well on flat seam areas but is not reliable on high-stress corner seams or piping seams. Fabric glue (such as Fabri-Tac) is another option for small repairs on seams that don't bear much pull force. These are genuinely useful quick fixes, not just beginner shortcuts, but they have limits: they won't hold a seam that's under regular tension the way thread does.
Hand sewing
A ladder stitch (also called a slip stitch or blind stitch) is the technique to know for closing cushion seams by hand. It's the stitch that becomes nearly invisible from the outside when done neatly. Thread a curved upholstery needle with a doubled length of heavy upholstery thread, knot the end, and alternate small stitches in each folded seam allowance, pulling the thread snug every few stitches. For seam reinforcement on split boxing corners, a simple whip stitch from the inside of the cover is faster and adds strength. You don't need to be a seamstress to do either of these, just patient.
Machine sewing
If you're recovering the cushion with new fabric, a sewing machine makes the job dramatically faster and neater. Use a heavy-duty needle (size 16 or 18 for heavier outdoor fabric) and a heavy polyester or nylon thread. A walking foot attachment helps feed thick fabric layers evenly and is particularly useful when sewing over multiple layers near zipper ends or piping seams. Stitch length should be set to 3 to 3.5mm for outdoor fabric. For piping: sew the piping to the top panel first, clipping the piping seam allowance at corners so it curves smoothly, then sew the boxing strip onto the same seam, sandwiching the piping between the two layers.
Replacing a zipper
To replace a zipper, use a seam ripper to remove all the stitching holding the old zipper tape to the cover. Keep the stitching lines intact as a guide for reinstalling the new one. Pin the new zipper tape face-down on the right side of the fabric, with the zipper teeth aligned along the seam edge. Stitch close to the teeth using a zipper foot. Flip the zipper open (right side up) and topstitch for a clean finish. A YKK AquaGuard size #5 is the right spec for most standard outdoor cushion zippers. Buy it slightly longer than the seam opening and stitch a bar tack across the tape at each end to stop the slider.
Troubleshooting the most common problems
Cushion looks lumpy after restuffing
Usually caused by foam that was cut unevenly or Dacron that shifted during insertion. Take the foam back out, check that all four edges are straight and square, and re-wrap the Dacron more securely. If the foam insert is a piece you had to piece together from smaller sections, the seam between pieces will show as a ridge. Use a single piece of foam wherever possible, and if piecing is unavoidable, stagger the joints and wrap with a thick layer of Dacron to bridge the gap.
Foam doesn't fill the corners
This is a fit issue. The foam is cut too small. Add a layer of Dacron in just the corners of the cover before inserting the foam, or use a slightly larger foam insert. When measuring for replacement foam, remember: cut 1/2 inch larger than the interior cover dimensions in each direction so the foam fits snugly.
Zipper won't close after restuffing
The foam insert is too thick or too wide for the cover. Double-check your depth measurement. If the foam is correct, the issue may be Dacron bulk. Try a thinner Dacron wrap (1/2 oz instead of 1 oz) or trim just the edge of the foam that runs along the zipper seam by 1/4 inch. The plastic bag insertion trick (described above) often resolves this problem without any trimming.
Stubborn stains that won't clean out
Oil-based stains (sunscreen, food grease, body oil) are the most common culprits and respond best to a dedicated oil-based remover before you attempt bleach or soap. Sunbrella recommends their Extract product for this purpose. If you're working with a non-Sunbrella fabric and Extract isn't an option, a small amount of dish soap directly on the stain, worked in with a soft brush, left to sit for 10 minutes, and rinsed with cool water, is a solid first approach. Avoid hot water on outdoor fabrics as it can set stains. If a stain doesn't come out after two attempts, it likely won't, and your best option is recovering the cover.
Mildew smell that won't go away
If the smell persists after cleaning, the mold has likely penetrated the foam or the backing of the fabric. A second treatment with the bleach-and-soap solution (1 teaspoon each per 1 cup water) followed by a full day of drying in direct sunlight sometimes resolves it. If the smell is still there after that, the foam must be replaced, and the cover should be given another cleaning cycle before new foam goes in.
What to do with the old foam and cushion material
Before you bag the old foam for the trash, think about whether any of it is salvageable or can find a second life. For ideas on disposing or repurposing them, see our guide on what to do with old patio cushions. Old patio cushion foam that isn't moldy has plenty of uses.
- Floor cushions and meditation cushions: large pieces of foam that are still somewhat firm can be cut to new dimensions, wrapped in Dacron, and covered with fabric to make floor pillows.
- Pet bed filling: crumbled or shredded foam pieces work well as fill for a dog or cat bed cover, especially if you layer them inside a duvet cover for easy washing.
- Kneeling pads: a 2-inch-thick remnant of outdoor foam makes an excellent garden kneeling pad. No sewing needed, just cut to size.
- Packing and shipping material: clean, dry foam offcuts are useful for packing fragile items.
- Donation: some theater groups, community centers, and schools accept clean foam donations for set construction or prop-making.
- Textile recycling: check your local municipal waste site or retailers like Tempur-Pedic and certain IKEA locations for foam recycling programs. Standard polyurethane foam is recyclable but not accepted in curbside recycling bins.
Old covers that are too far gone to restuff can still be used as pattern templates if you ever plan to make replacement covers, and clean fabric remnants can become outdoor throw pillow inserts or patch material. For covers that are genuinely beyond use, check whether your municipality's textile recycling program accepts coated outdoor fabrics, as these are typically not accepted by standard clothing donation bins.
Seasonal care and storage to make this repair last
Restuffing is a once-every-several-seasons job if you take care of the cushions between projects. The biggest enemies of patio cushion fill are moisture, UV exposure, and compression from long-term storage in the wrong position.
End-of-season cleaning routine
- Brush off loose debris with a dry brush before any water cleaning.
- Spot-clean any stains with mild soap and water using a soft-bristle brush. For Outdura and similar fabrics, follow the manufacturer's specific cleaning code: 'W' means water-based cleaners, 'S' means solvent-based only, and 'WS' means both are acceptable.
- Rinse cushions thoroughly with a garden hose. Soap residue left in the fabric encourages mildew.
- Stand cushions on their edges in a sunny, breezy spot to dry completely, ideally 24 to 48 hours. Do not store them while damp.
- Check zippers and seams one more time before storing.
Storage best practices
- Store cushions in a breathable container or bag, not sealed plastic bins that trap moisture. Canvas storage bags are ideal.
- If plastic bins are your only option, leave them slightly ajar or drill a few small ventilation holes in the sides.
- Store cushions flat or on their long edges, not compressed under heavy objects. Long-term compression speeds up foam breakdown.
- Keep storage locations off concrete floors if possible, since concrete wicks moisture. Use pallets, shelving, or a dedicated deck box with drainage.
- Place a silica gel desiccant pack or two in the storage area to help manage humidity.
- If cushions must stay outside through mild winters, use breathable outdoor furniture covers that are sized properly to allow airflow. A cover that is too tight traps condensation.
What this project actually costs and how long it takes
| Item | Budget Option | Mid-Range Option | Notes |
|---|---|---|---|
| Reticulated outdoor foam (per cushion) | $10–$18 | $18–$30 | Prices vary by thickness and custom cut |
| Dacron batting (per yard) | $3–$5 | $6–$10 | 1 yard covers 2–3 standard cushions |
| Spray adhesive | $8–$12 | $12–$18 | One can does 6–10 cushions |
| Outdoor fabric (per yard) | $5–$12 (polyester) | $15–$40 (Sunbrella) | Fabric is the biggest cost variable |
| Replacement zipper (YKK AquaGuard) | $2–$4 each | $4–$7 each | Only needed if replacing zippers |
| Electric carving knife | $15–$25 | $25–$40 | Reusable across many projects |
| Total per cushion (restuff only, no new cover) | $15–$30 | $25–$50 | Compared to $40–$150 retail replacement |
First-timers should expect to spend about 45 to 60 minutes per cushion on the first attempt, including measuring, cutting, and closing. By your third or fourth cushion in a set, you'll be down to 20 to 25 minutes each. The learning curve is real but short. The single best time investment is making one test cut on a scrap piece of foam before you cut your final insert, just to confirm your electric knife is calibrated and your measurements are right.
Pro tips for beginners
- Do one cushion start to finish before you process the whole set. You'll catch any sizing or technique issues before multiplying them across four or six cushions.
- Label each cover with a piece of masking tape on the inside (Chair 1 Front, etc.) before you open anything. It sounds unnecessary until you're staring at five identical covers and can't remember which was which.
- Order foam online from a specialty foam supplier rather than a craft store. The grade and density options are far wider, the prices are often lower, and you can get custom cut-to-size pieces that eliminate all the cutting work.
- Buy an extra half yard of Dacron. You'll use it for fixing uneven corners.
- Don't skip the plastic bag insertion trick. It works every time.
Pro tips for experienced makers
- Layer foam types: a firm base layer (2.9 lb HR foam) with a softer top layer (1.8 lb reticulated, lower ILD) gives a cushion that doesn't bottom out but feels plush on contact.
- Use a hot-wire foam cutter for complex shapes. It produces cleaner edges than an electric knife and is essential for curved or bevel-cut cushions.
- Sew a second zipper stop from a scrap of matching fabric at the closed end of the zipper to prevent the slider from ever jumping the track.
- Treat new outdoor covers with a fabric protector spray (like 303 Fabric Guard) after washing and before first use. It restores the water-repellent finish that manufacturing and washing gradually depletes.
Final checklist and ongoing maintenance schedule
Before you call the project done, go through this final check on each cushion.
- Foam fills all four corners completely with no gaps
- Zipper closes smoothly along the full length with no catching or pulling
- All seams are closed, resewn, or reinforced where needed
- Dacron wrap is smooth with no bunching visible through the cover
- Cushion surface is free of lumps when you press it evenly across the top
- No residual moisture or odor before the cushion is returned to use
Ongoing maintenance schedule
| Frequency | Task |
|---|---|
| After each rain event | Stand cushions on edge or bring inside to allow full drying |
| Monthly during season | Brush off debris and check for any new staining |
| Mid-season (once) | Spot-clean with mild soap and water, rinse and air dry fully |
| End of season | Full clean per fabric manufacturer instructions, inspect seams and zippers, dry fully before storage |
| Before first use each spring | Inspect for winter moisture damage, re-treat with fabric protector if needed |
| Every 3–5 seasons | Assess foam compression and consider restuffing if cushions compress more than 30% under normal sitting weight |
Restuffing patio cushions is genuinely one of the higher-value DIY repairs you can do on outdoor furniture. The cost savings over replacement are significant, the skills transfer directly to recovering and resewing projects, and once you've done a set, the process is fast and repeatable every few seasons. The main thing is getting the foam type right and giving the covers a thorough inspection and cleaning before the new fill goes in. Do those two things well, and your cushions will come out looking and sitting like new.
FAQ
What are the essential technical topics a comprehensive DIY restuffing guide must cover?
Step‑by‑step restuffing procedure (remove cover, measure, select foam/fill, add batting, insert foam, close seam or reinstall zipper), tools and materials lists, measurement and yardage calculations for all cover panels, foam type/density/ILD recommendations for seat/back/toss cushions, batting/wrap use (Dacron) and attachment methods, zipper types and replacement options (water‑resistant outdoor zippers like YKK AquaGuard), no‑sew and machine‑sew finishing techniques (piping, blind stitch, topstitch), cutting and trimming foam (hot‑wire, electric carving knife, serrated knife), adhesive use (foam‑safe spray adhesives) and stapling/anchoring for fixed cushions.
What safety and cleaning information is required for handling mold, mildew and bugs in cushions?
Manufacturer‑recommended cleaning solutions for outdoor fabrics (e.g., Sunbrella: 1 tsp mild dish soap + 1 tsp bleach per 1 cup water for mildew, with caution that bleach can discolor non‑Sunbrella fabrics), identification of mold vs mildew, PPE (gloves, eye protection, N95 or better mask when scrubbing moldy foam), working outdoors or in ventilated area, methods to clean fabric (soap/water, approved commercial cleaners, test in an inconspicuous spot), drying thoroughly in sun/air to prevent regrowth, replacing contaminated foam if saturated/odorous, treating insect evidence by vacuuming, freezing small inserts (if feasible) or discarding heavily infested foam, and safe disposal options for biohazardous material if mold is extensive.
What foam types and specifications should the guide explain and recommend?
Closed‑cell polyfoam vs open/reticulated outdoor foam: recommend reticulated/open‑cell outdoor foam for exposed patio cushions because it drains and dries faster; provide density (lb/ft³) and ILD (firmness) guidance — typical ranges: outdoor/reticulated foam density ~1.8 lb/ft³, upholstery poly 1.8–2.9 lb/ft³, high‑density HR ~2.6–2.9 lb/ft³; ILD examples: Soft ~24, Medium ~34, Firm ~44. Seat cushions for frequent/heavy use: medium‑high density (≈2.0–2.8 lb/ft³) with ILD ~30–44; back cushions: lower ILD (softer) ~24–34; toss pillows: polyester fiberfill or shredded foam. Explain density vs ILD (density→durability, ILD→feel) and provide sources for custom cut foam (retailers like FoamOrder, Foam Factory).
How should readers measure cushions and calculate fabric yardage?
Provide a panel‑by‑panel method: measure finished cushion dimensions (length × width × thickness) and list panels required (top, bottom, side/band, end strips). Add seam allowances (commonly 1/2"–1" per seam) and any flap for zipper closure. For piping add circumference plus seam allowance. Give hand formula: for each panel compute (panel finished length + seam allowance + pattern‑repeat allowance) × number of cuts, sum all panel lengths in inches, divide by 36 to convert to yards, round up and add 10–20% waste buffer (larger if pattern matching). Note fabric width matters — compute layout for the fabric width you plan to buy and include examples and a recommendation to order an extra yard for first‑time projects or patterned fabrics. Suggest using online yardage calculators or retailer field guides (Joann) for verification.
What materials, tools, and adhesives should be listed in the guide?
Tools: tape measure, marker/chalk, heavy‑duty scissors/rotary cutter, utility/serrated or electric carving knife (or hot‑wire cutter) for foam, staple gun, upholstery needles (curved and long), heavy‑duty sewing machine with walking foot, zipper foot, piping maker, clamps, tarp or work surface. Materials: replacement foam (reticulated or upholstery foam to specs), Dacron/polyester batting (wrap), outdoor upholstery fabric (Sunbrella/Outdura or similar), heavy‑duty thread, outdoor-rated zipper (YKK AquaGuard or VISLON for water resistance), upholstery piping (optional), spray adhesive (foam‑safe, e.g., 3M Hi‑Strength 90 or recommended alternative), fabric protectant if desired. Safety supplies: gloves, eye protection, respirator (for mold/adhesive fumes), trash bags. Include compatibility warnings for adhesives on coated fabrics.
What decision checkpoints should the guide include to help readers choose repair vs replace?
Condition checklist: foam crushed/flat but not moldy → restuff/replace foam; foam wet, moldy, odorous or degraded into crumbs → replace and strongly consider disposal; cover fabric faded but intact and seam/zipper good → recover; cover torn in many places, badly sun‑degraded or mildew‑stained beyond cleaning → replace cover; zippers broken but fabric good → replace zipper or install new closure; overall cost/time: compare material and labor cost to buying replacement cushions; consider expected remaining life and warranty; recommend replacement when structural frame of built‑in seating is failing or when multiple elements (foam + cover + springs) need replacement.