Most old patio cushions can be saved, and the fix is usually cheaper and faster than buying new ones. The real question is which path makes sense for your specific cushions: a deep clean and dry, a quick repair, a full fabric swap, or just tossing them and starting fresh. Run through the triage section below first, then follow the path that matches what you find. You'll know in about five minutes whether your cushions are worth saving and exactly what to do next.
What to Do With Old Patio Cushions: DIY Options

Maren Grady
11 Jul 2026
Step 1: Triage your cushions before doing anything else
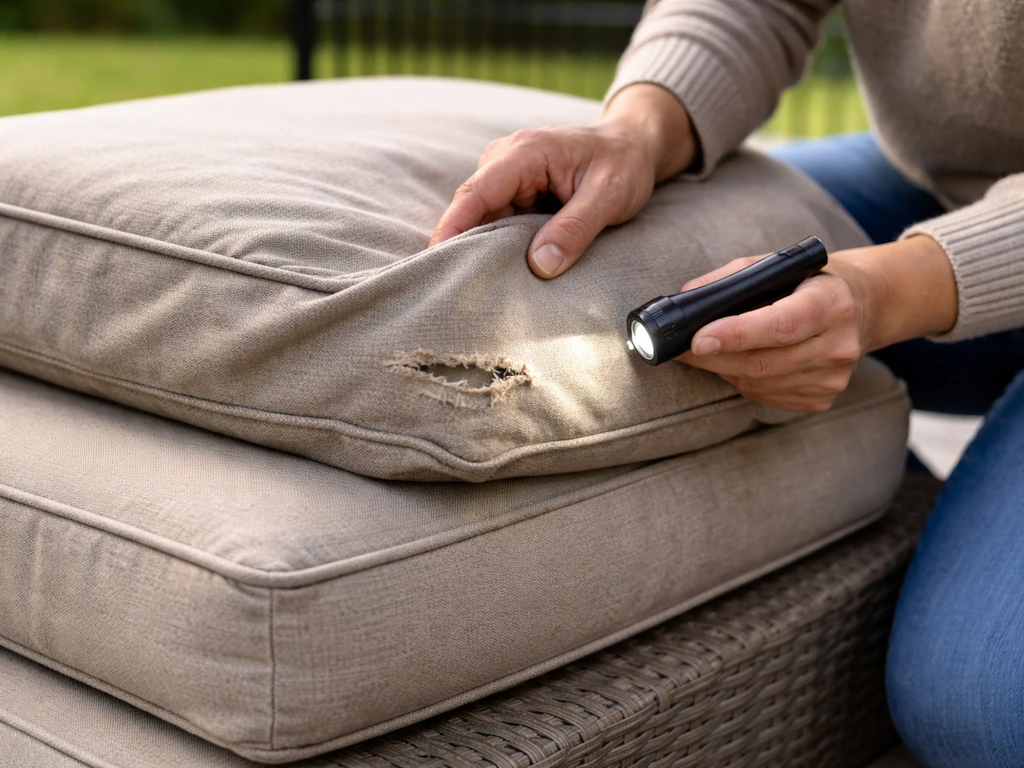
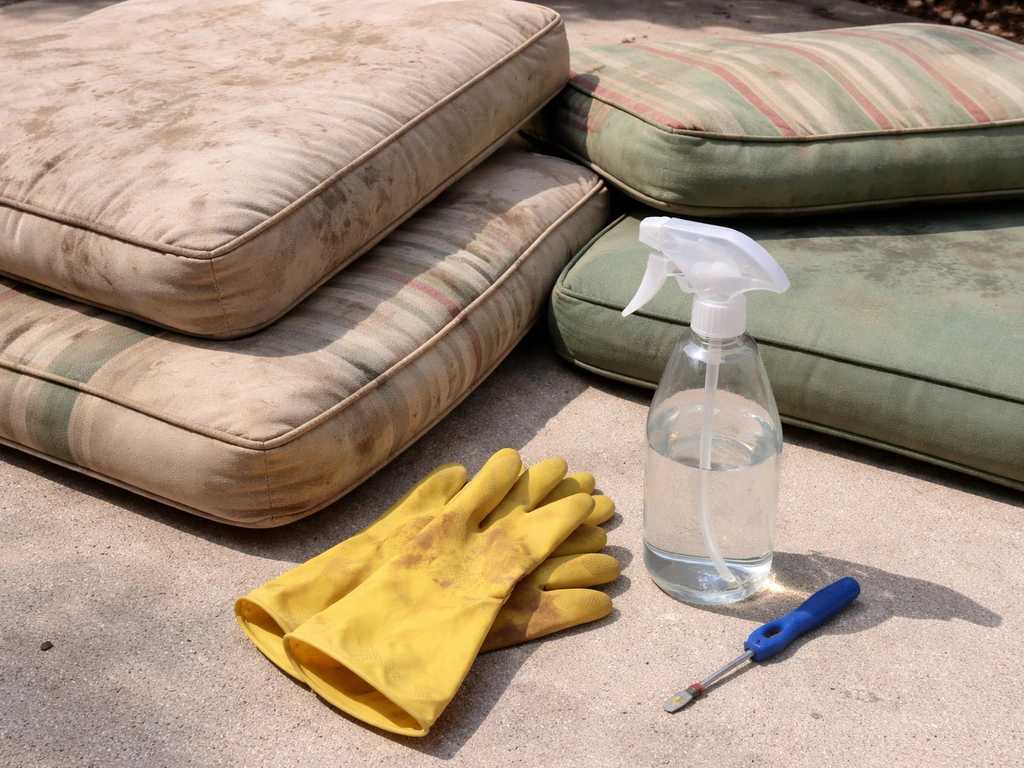
Before you drag out the hose or start ripping seams, take five minutes to honestly assess what you're working with. Doing this first saves you from wasting time cleaning cushions that are past saving, or throwing out cushions that just need a wash.
Take each cushion outside into good light and check three things: the fabric surface, the seams and closures, and the foam inside. Press on the foam through the cover. If it rebounds and holds its shape, the foam is still good. If it stays compressed, feels crumbly, or has completely flattened to under an inch thick, it's gone and no amount of cleaning will fix that.
For mildew: look for spots (black, green, gray, or white patches) and smell the cushion. A faint musty smell usually means surface mildew that cleaning can resolve. A strong, deep musty odor that seems to come from inside the cushion even after airing it out is a warning sign that mildew has worked its way into the foam itself. According to upholstery cleaning guidance, a persistent musty smell after thorough cleaning almost always means the foam is internally compromised, not just the cover. That changes your plan significantly.
Check the fabric for UV fade, tears, and seam integrity. Surface fading is cosmetic and not a reason to toss cushions. But fabric that's brittle, crumbling, or tearing along fold lines has broken down structurally and won't hold up to reuse or even a hard scrub. Seams that are fraying or unraveling are very fixable. Broken zippers are a 15-minute fix. Missing tie straps are even easier.
| What you find | What it means | Path forward |
|---|---|---|
| Surface dirt, light staining | Normal weathering | Deep clean (Section 2) |
| Surface mildew spots, mild odor | Mold on fabric/surface | Deep clean with mildew treatment (Section 2) |
| Strong musty smell even after airing out | Mildew in foam | Rebuild or replace (Sections 4 or 6) |
| Foam flat/compressed but cover is fine | Foam is dead | Restuff/rebuild (Section 4) |
| Torn seam, broken zipper, fraying cover | Cover wear only | Repair (Section 3) |
| Fabric brittle, crumbling, or shredding | Fabric structurally failed | Recover or replace (Sections 4 or 6) |
| Everything structurally fine, just ugly | Cosmetic issues | Clean, repair, or recover (Sections 2–4) |
Deep cleaning and mildew removal the right way
This is the fastest and cheapest fix, and it works surprisingly well on cushions that look rough but are structurally fine. If your cushions are only having cleaning or mildew issues, start with the deep cleaning and drying steps before moving on to repairs deep cleaning and mildew removal. The key is using the right cleaner for your fabric type and making sure the cushions dry completely afterward, because trapping moisture is what caused the problem in the first place.
Basic cleaning for general dirt and stains
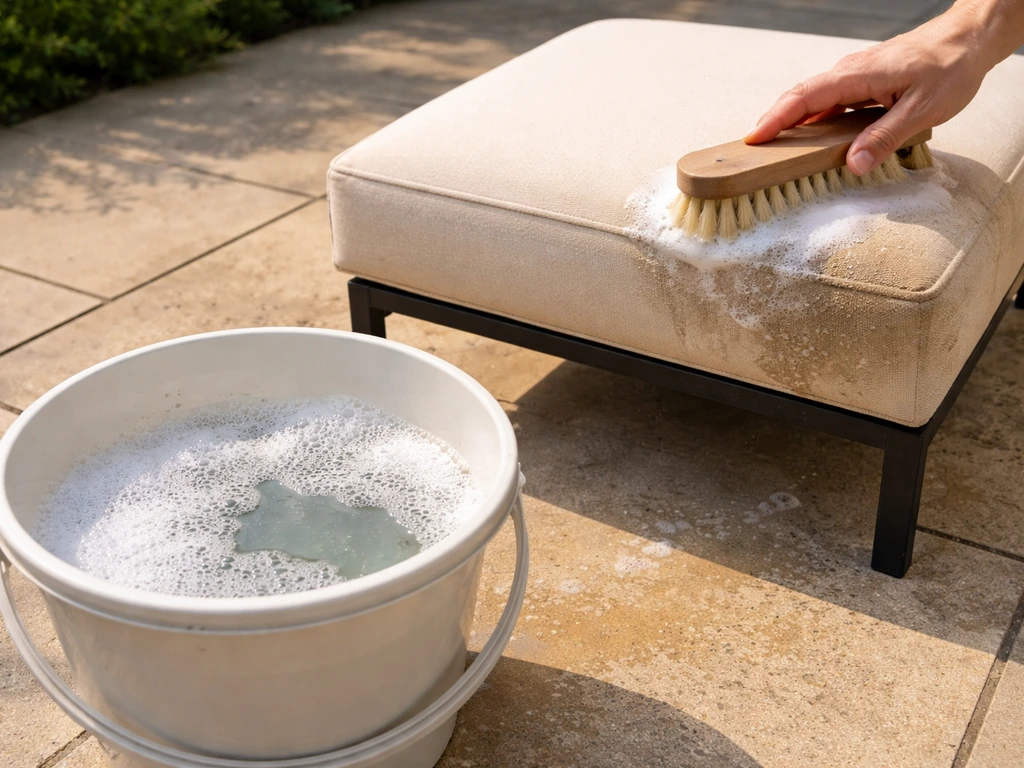
Start with mild dish soap and warm water. Scrub with a soft brush, rinse thoroughly, and let the cushions air dry in the sun. Sunlight helps kill surface mold and bacteria. For tougher stains, a mix of baking soda and dish soap works well as a paste: apply it, let it sit for 15 minutes, then scrub and rinse. You can also use Borax dissolved in water as a step up from dish soap for grimy outdoor cushions.
Tackling mold and mildew
First, brush off any visible mold growth outdoors (not inside, and wear a mask if you're sensitive to mold spores). Then blank" rel="noopener noreferrer">apply a 1:1 white vinegar and water solution from a spray bottle. Let it sit for 10 to 15 minutes before scrubbing and rinsing. Vinegar is effective on surface mildew and safe for most outdoor fabrics. For stubborn mildew, you can spray full-strength white vinegar directly on the affected area. Hunker recommends spraying full-strength vinegar on mildewed outdoor cushion surfaces while airing them out outdoors, and for stubborn mildew using a bleach solution soaked on the surface for about 15, 20 minutes on color-fast cushions blank" rel="noopener noreferrer">full-strength white vinegar on the affected area.
If your cushions are made from solution-dyed acrylic (like Sunbrella or similar), diluted bleach is an option. Mix about 1/4 cup of bleach per gallon of water, apply it, let it sit for a few minutes, then rinse thoroughly. Always test any bleach solution on a small hidden spot first. For printed fabrics or less colorfast materials, stick with vinegar or oxygen bleach instead, since standard bleach can strip printed designs and damage fibers.
For really persistent surface mildew, a bleach solution soaked on the surface for 15 to 20 minutes can break down what vinegar couldn't, but only do this on cushions you've confirmed are colorfast. Rinse extremely well afterward because bleach residue will continue degrading fabric fibers over time.
Drying is not optional. Cushions must be completely dry before you store them or put covers back on. Stand them upright or prop them at an angle to allow airflow on all sides. On a warm day, most cushions dry fully within 4 to 6 hours in direct sun. Squeezing them periodically while drying helps push moisture out of the foam core. Never store them even slightly damp. That is exactly how you end up with the same mildew problem three months later.
Quick repairs that can buy your cushions years more life
If your triage showed torn seams, a broken zipper, worn tie straps, or fabric starting to fray at the edges, these are all beginner-level fixes that take an hour or less and cost next to nothing. Don't replace cushions over problems like these.
Fixing seams and tears
Small tears in the fabric can be fixed with iron-on outdoor fabric repair tape (found at most fabric or hardware stores). For seam failures, thread a needle with outdoor-rated polyester thread (Tex 70 to Tex 90 is a good range for cushion work) and restitch the seam using a strong whip stitch or backstitch. Outdoor cushion seams take a lot of stress, so go back over your repair twice. If the seam keeps pulling open, that usually means the original seam allowance was too small. When you restitch, try to pull a bit more fabric into the seam (about 1/2 inch is the standard allowance) to give the stitching more material to hold.
Replacing a zipper
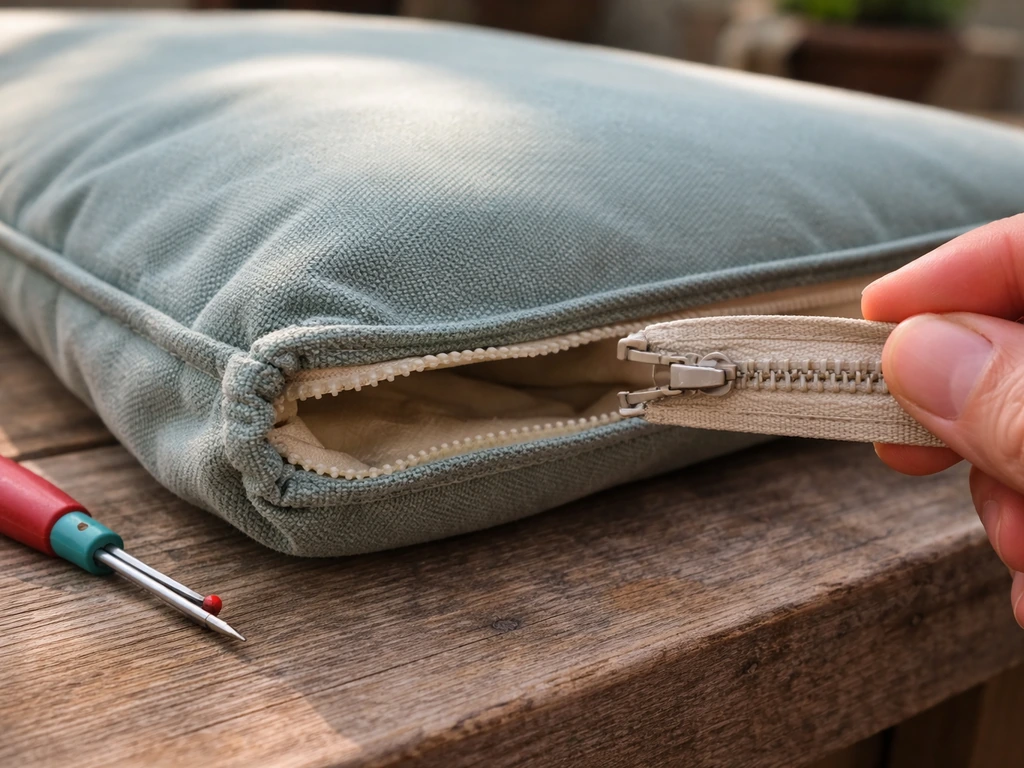
This is one of the most underrated repairs. A broken or corroded zipper makes a cushion completely unusable even when everything else is fine. Use a seam ripper to carefully remove the stitching holding the old zipper in place, peel it out, and sew the new one in. Buy a nylon or polyester outdoor zipper (metal zippers rust outdoors). Match the length as closely as possible and use the same stitch line as the original. The whole job takes about 15 to 20 minutes once you've done it once.
Tie straps and attachments
Missing or torn tie straps are a 10-minute fix. Cut a strip of outdoor fabric or nylon webbing about 12 to 14 inches long, fold it in half, and stitch it firmly to the underside of the cushion at the back corners. Use a box stitch pattern (sew a rectangle, then an X inside it) because this is the strongest attachment method for fabric straps.
Adding water resistance to an existing cover
If the fabric itself is still solid but has lost its water resistance, spray it with a water-repellent fabric treatment designed for outdoor use. Apply it to a clean, dry cushion, let it cure fully before use (usually 24 to 48 hours), and reapply once a season. You can also seal the seams from the inside using seam tape or seam sealer to close up any needle holes that are letting water in. This is a great step to add after any sewing repair.
How to reupholster or rebuild old patio cushions
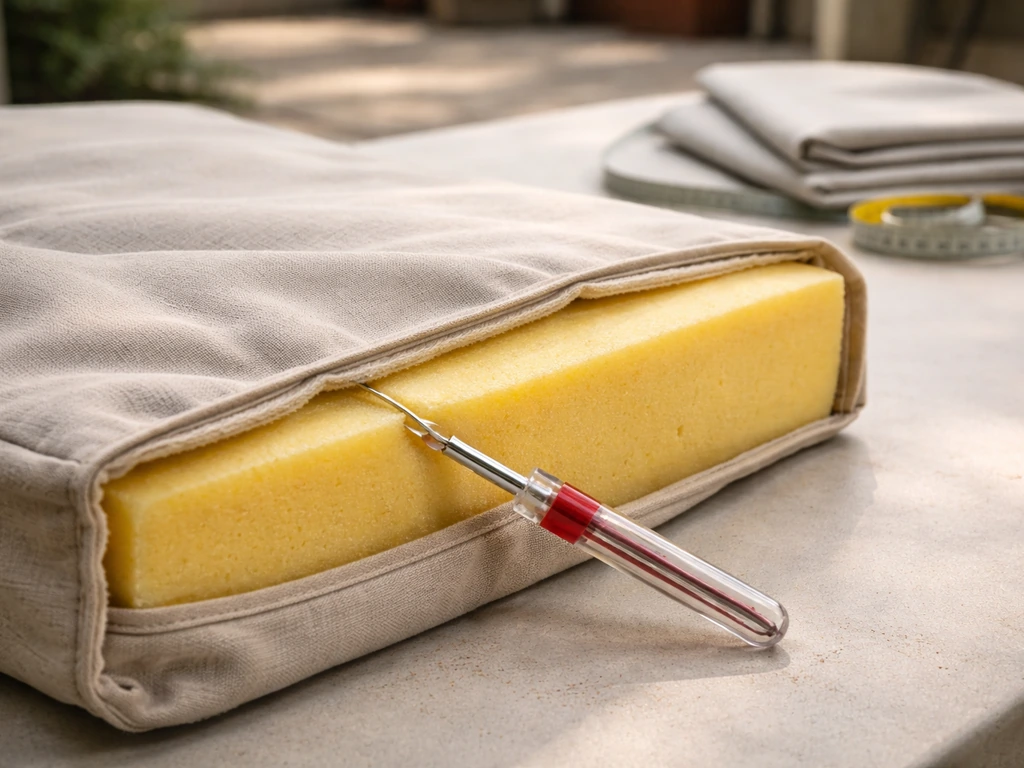
This is the intermediate-to-advanced path, and it's genuinely satisfying when it comes together. You're essentially building a replacement cushion that fits your existing furniture perfectly. If you've never done this before, budget a full afternoon for your first cushion. By the third one you'll be moving a lot faster. The steps below cover both recovering (new fabric, same foam) and rebuilding (new fabric and new foam). If your triage shows the foam is dead or the cover is beyond repair, you’ll likely need to restuff patio cushions with new filling.
Step-by-step: removing the old cover
- Use a seam ripper to open one seam of the old cover, ideally at the back or bottom where the zipper is.
- Pull the old cover off carefully. Don't yank, especially if you want to use it as a cutting template.
- If the foam looks and smells fine (no mildew odor, still holds its shape when compressed), set it aside for reuse.
- If the foam is flat, crumbling, or smells musty, this is where you replace it. More on foam selection below.
Step-by-step: replacing the foam
For outdoor seat cushions, look for foam with a density of 1.5 to 1.8 lb/ft³. Higher density means firmer support and longer life. For a comfortable outdoor seat, you want foam in the medium-firm range, which at those densities usually means an ILD (Indentation Load Deflection) rating in the 35 to 45 range. Don't buy cheap craft foam from a dollar store for this, it will flatten in one season. Outdoor-rated or high-resiliency foam from a foam supplier or fabric store will last years longer.
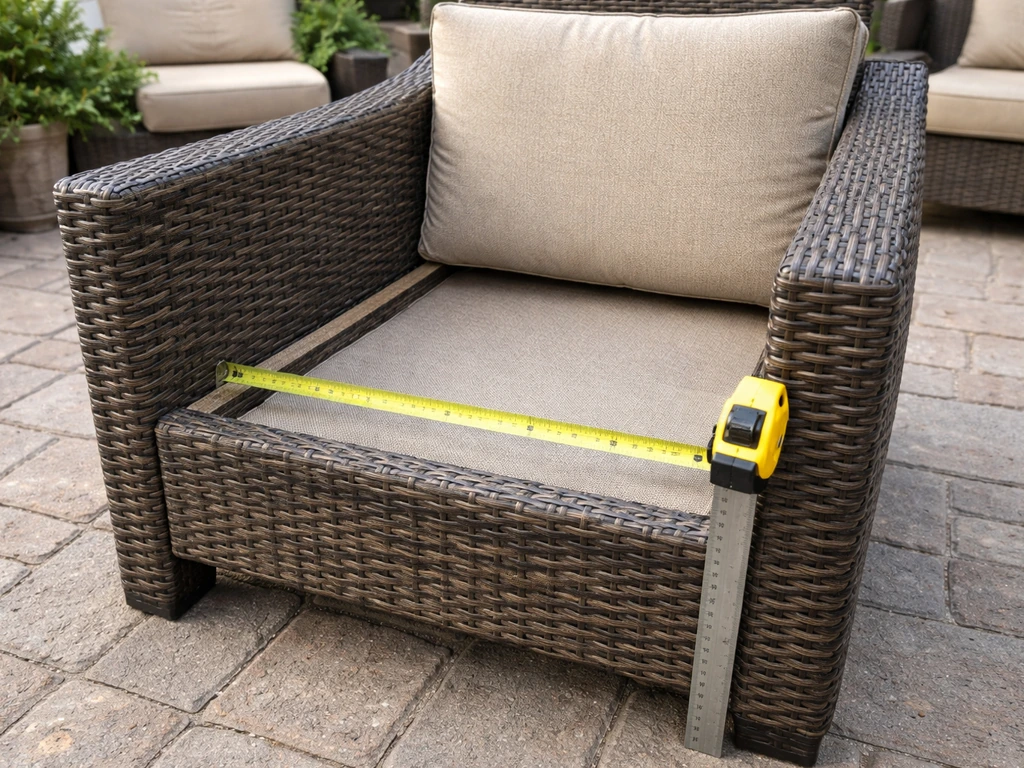
Measure the old foam or the seat frame opening (width, depth, and thickness) before ordering. If you're unsure what size to buy, measure the cushions and the seat opening first so your covers and foam fit correctly. Standard patio chair seat cushions are typically 2 to 4 inches thick. If you want a little extra plush feel, wrap the foam in a thin layer of polyester batting before covering it. This adds softness without changing the structural support much, and it fills out the cover nicely so it doesn't look boxy.
Step-by-step: cutting and sewing the new cover
- Lay the old cover flat and use it as a pattern, or measure the foam directly: width, depth, and thickness from the side.
- Add 1/2 inch seam allowance on all edges when cutting your fabric panels. For the front and back panels, the cut size equals the cushion dimension plus about 1 inch total (1/2 inch per side).
- Cut a boxing strip (the band that goes around the sides of the cushion) to a width equal to the foam thickness plus 1 inch for seam allowances.
- Sew the front panel to the boxing strip first, clipping corners so the fabric lays flat.
- Sew the back panel to the boxing strip, leaving one side open for the zipper.
- Install the zipper in the open seam. Nylon coil zippers are the best choice for outdoor use.
- Turn the cover right-side out, press the seams, and apply seam sealer or seam tape to the inside seams to close up needle holes.
- Stuff the foam inside (use the zipper opening), zip it closed, and check the fit.
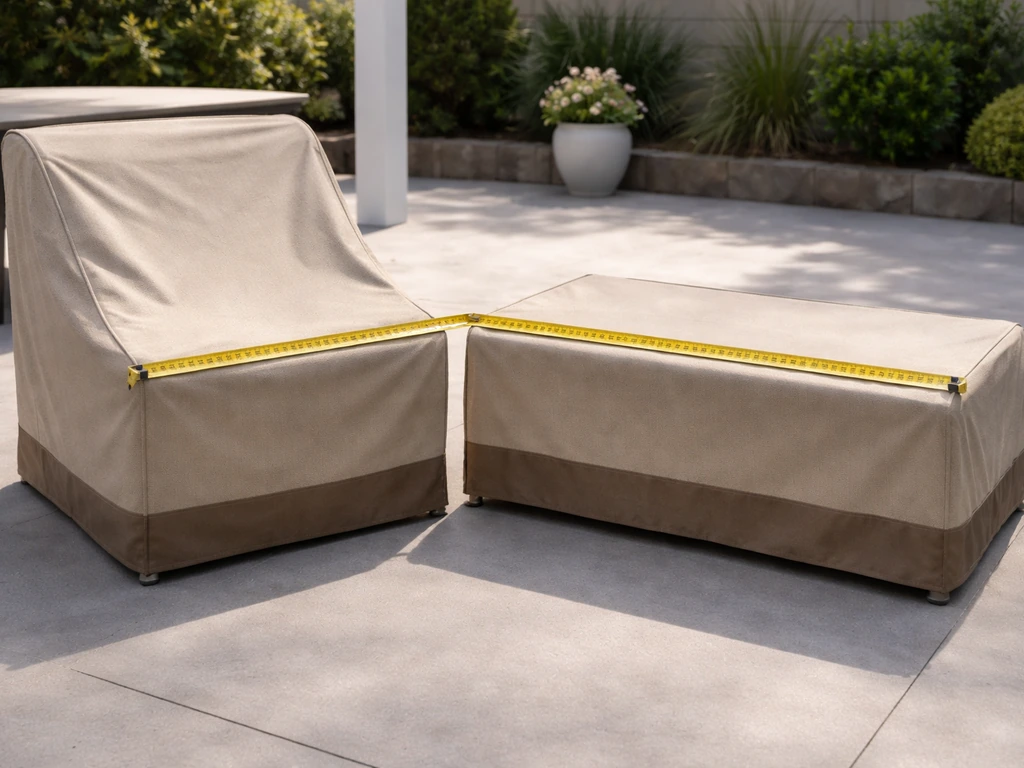
Here's where beginners usually struggle: cutting the boxing strip too short or not clipping corners tightly enough, which causes puckering at the edges. Take your time at the corners and clip the seam allowance diagonally before turning. It makes a big difference in how clean the final cushion looks. After you decide to reupholster, you can estimate how much fabric you need by measuring each cushion’s size and adding extra for seams and boxing how much fabric you need to recover patio cushions.
Choosing the right materials: fabric, foam, and closures
The materials you pick here determine how long your work lasts. Go cheap and you'll be doing this again in two seasons. Spend a little more on proper outdoor-rated materials and these cushions can last five to ten years with basic care.
Outdoor fabric comparison
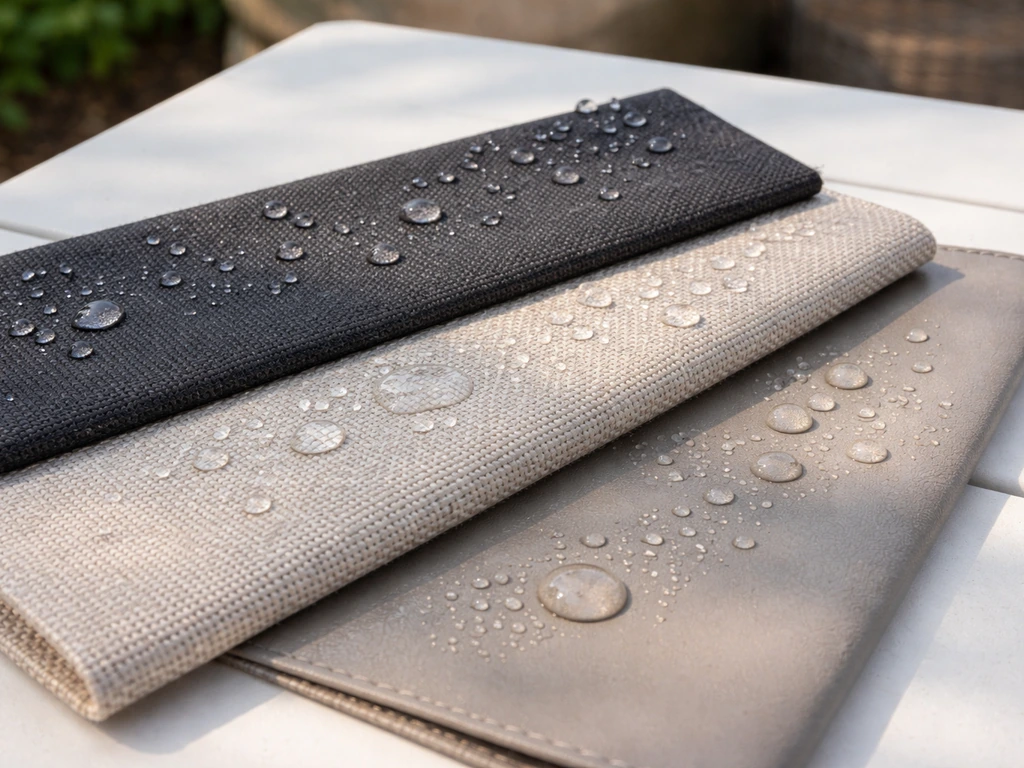
| Fabric type | UV resistance | Mildew resistance | Cleanability | Cost | Best for |
|---|---|---|---|---|---|
| Solution-dyed acrylic (e.g., Sunbrella) | Excellent | High | Diluted bleach safe | $$–$$$ | High-use cushions, wet climates |
| Solution-dyed polyester | Good | Good | Mild soap, oxygen bleach | $–$$ | Budget-conscious projects with moderate use |
| Olefin (polypropylene) | High | High | Mild soap | $–$$ | Poolside, high-moisture areas |
| Printed polyester | Moderate | Low–Moderate | Gentle only, no bleach | $ | Low-use, covered/sheltered areas |
If you're investing the time to reupholster, spend the extra money on solution-dyed acrylic or a quality solution-dyed polyester. The dye goes all the way through the fiber instead of sitting on the surface, which is why it resists fading and mildew so much better than printed fabrics. Olefin is a great budget alternative for areas that get a lot of water exposure, like pool decks.
Measuring correctly before you cut anything
Measure the cushion itself, not the furniture frame. You need three measurements: width (left to right), depth (front to back), and thickness (measured from the side, not estimated). If you're cutting new foam to fit, also measure the frame opening to confirm the foam will fit the seat. Write all three numbers down before you do anything else. A mistake here costs you a full yard of fabric. If you want a deeper dive on cushion measuring, the guide on how to measure patio cushions covers this in detail.
Closures and thread
Use nylon or polyester zippers, not metal. Metal corrodes outdoors. For thread, use UV-resistant polyester outdoor thread in a Tex 70 to Tex 90 weight for general cushion sewing. Heavier thread (Tex 92 or Tex 138) is better if you're sewing boxing strips on thick foam or double-stitching seams on high-stress areas. Match your needle size to your thread weight: a size 16 or 18 needle works well for most outdoor fabric at those thread weights.
When it's not worth restoring: honest signs to replace instead
I'll be straight with you: not every old cushion deserves saving. Sometimes the math just doesn't work, and the honest call is to let them go. Here are the real signs that replacement makes more sense than restoration.
- Deep, persistent musty odor that stays even after cleaning and airing: this means mildew is in the foam, and that foam can't be fully cleaned out. Both health guidance from the CDC and the California Department of Public Health note that porous materials with significant mold intrusion generally can't be effectively cleaned and should be discarded.
- Foam that's completely flat, crumbled, or disintegrated inside the cover: there's nothing structural left to save. If you're replacing the foam anyway, evaluate whether the cover fabric is worth keeping too.
- Fabric that's brittle, tears at the fold lines, or crumbles when handled: UV degradation has broken the fiber structure down. This fabric won't hold seams, won't survive cleaning, and will fail quickly even if you manage to repair it.
- Visible mold covering large areas, especially if it's recurred after previous cleaning attempts: for porous upholstered materials, health guidance from the NC Department of Public Health recommends discarding rather than cleaning when mold coverage is extensive.
- The total cost of foam plus fabric plus your time exceeds what comparable replacement cushions cost: sometimes (especially for basic polyester cushions on an older set) new cushions from a discount retailer are cheaper than the materials to rebuild. Run the numbers.
- The furniture frame itself is failing: don't invest in new cushions for a chair that's rusting through or has broken welds. Fix the frame first, or direct that budget toward a new set.
What to do with cushions you're not keeping: disposal, donation, and repurposing
If you've decided some cushions are past saving, don't just send them straight to the landfill. There are better options depending on the condition, and even beat-up cushion covers can have a second life.
Donating cushions in usable condition
Cushions that are structurally sound, clean, and mold-free can often be donated. The Salvation Army accepts household items including furniture accessories, though what individual locations take varies, so call ahead. Habitat for Humanity ReStores accept furniture and home goods in good condition. Local Buy Nothing groups and Facebook Marketplace are also worth posting to. The key rule: don't donate something you wouldn't give to a friend. Mold-affected, badly stained, or structurally failed cushions shouldn't be passed on.
Repurposing ideas for old covers and foam
- Cut clean sections of old cushion covers into indoor throw pillow covers (wash the fabric first and use it for lower-stakes indoor projects where UV resistance matters less).
- Use clean, mold-free foam scraps as knee pads for gardening or kneeling on hard floors in workshops.
- Turn old patio cushion covers into tote bags or storage pouches by sewing a simple top seam and adding handles.
- Use old cushions temporarily as floor seating in a garage, workshop, or camping setup while they're still functional enough for that purpose.
- Check with local animal shelters: some accept clean, gently used cushions and bedding for animal kennels.
Disposal for cushions that can't be saved
Most curbside pickup will take bagged cushions as regular trash. For large quantities, a junk removal service or a trip to your local transfer station is the most straightforward route. Foam is generally not recyclable through standard municipal programs, but some specialty foam recyclers (search 'foam recycling near me') will accept upholstery foam. It's worth a quick search before tossing a large pile.
Keeping your new or restored cushions in good shape longer
The number one reason patio cushions fail prematurely is not UV exposure or hard use. It's being stored or left damp. If you are noticing small bugs in patio cushions, start by checking for moisture and food debris that can attract them. Everything else is secondary. Fix that one habit and your cushions will last two to three times as long.
Seasonal storage done right
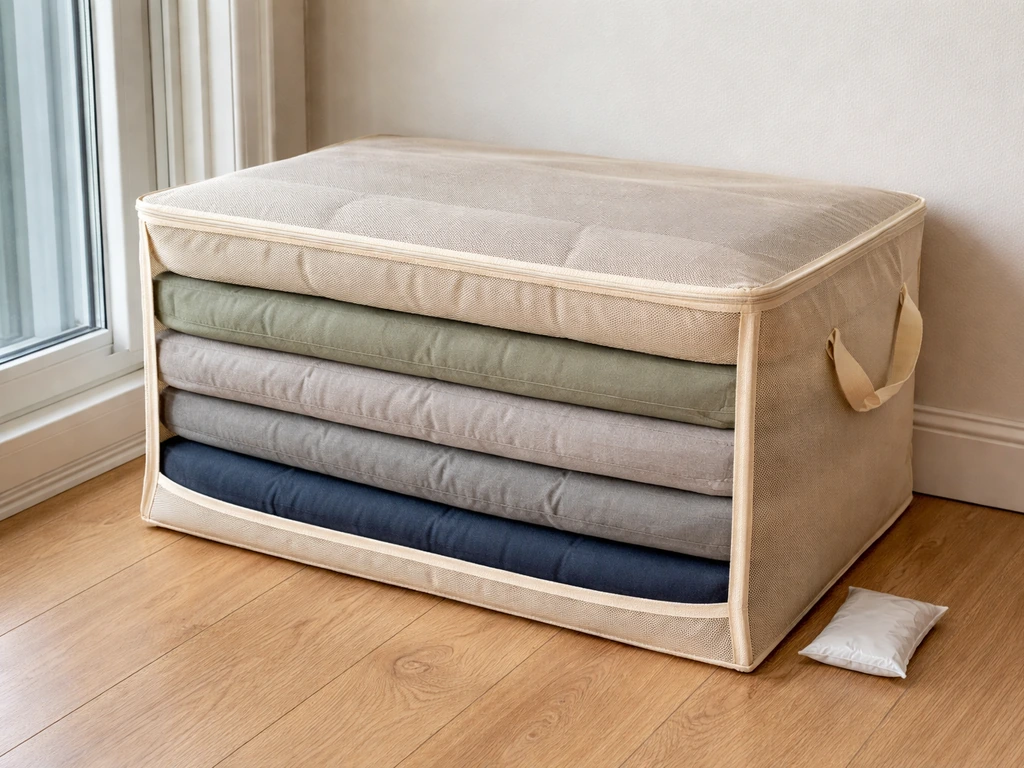
Before you put cushions away for the winter (or even for a rainy week), they must be completely dry. Not mostly dry. Completely dry. Press on the foam in several spots to check for hidden moisture. Store cushions in waterproof but breathable storage bags or a ventilated deck box. Fully sealed plastic bags trap any remaining humidity and create the exact conditions mold loves. Waterproof, breathable bags are the right balance, and they're widely available at home improvement stores.
Clean cushions before storing, not just before bringing them back out in spring. Mold spores love organic debris (pollen, bird droppings, food residue) and will colonize over winter on a cushion that was put away dirty. Two hours of cleaning in the fall prevents a day of scrubbing in spring.
In-season protection habits
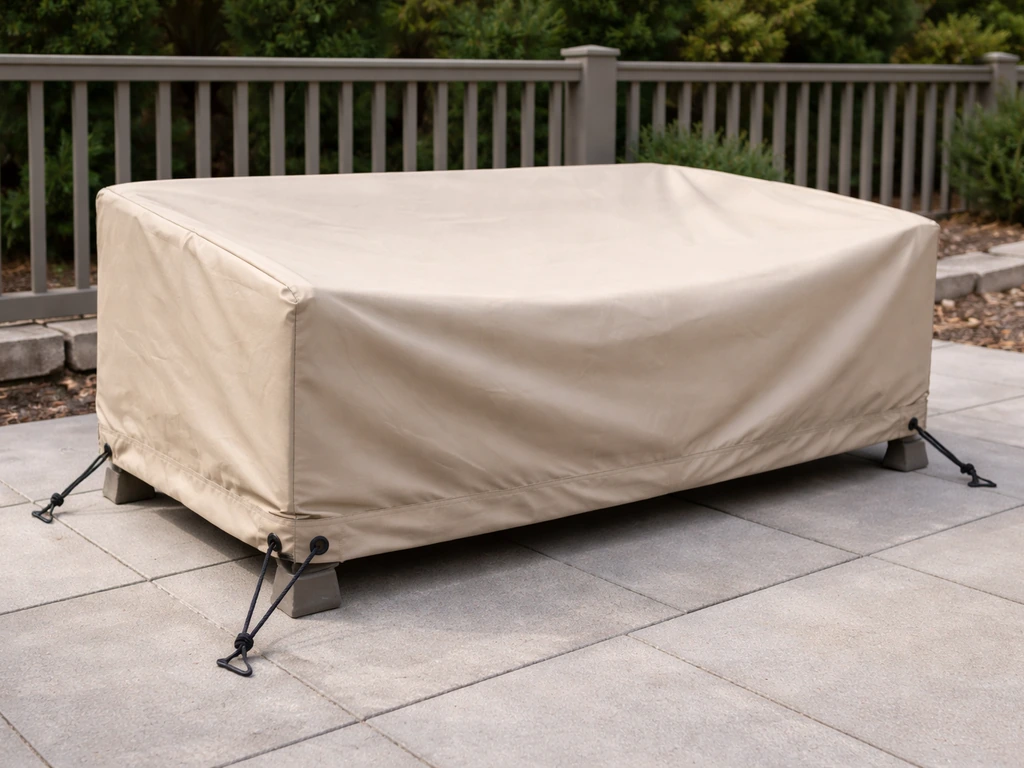
- Use patio furniture covers when cushions aren't in active use, especially overnight. This single habit dramatically reduces UV fade, water saturation, and debris accumulation.
- Stand cushions on their edges after rain to let them drain and dry faster. Don't leave them lying flat and waterlogged.
- Reapply water-repellent spray to cushion covers once per season, especially on less premium fabrics.
- If you notice mildew starting to form, treat it immediately with the vinegar spray method. Catching it early is a 10-minute fix. Ignoring it for a month turns it into a half-day project or a replacement decision.
- For cushions that sit directly on the furniture frame, check that the frame isn't trapping water underneath. Pooled water between the cushion and the frame is a common mildew trigger that has nothing to do with the cushion itself.
Getting the most out of restored or new cushions comes down to a few consistent habits. Clean them, dry them fully, store them protected, and treat problems early. Do those things and a good set of outdoor cushions built with quality fabric and proper foam should give you many seasons of comfortable use.
FAQ
What should I do with old patio cushions if the foam still feels okay but the cover smells musty after cleaning?
That usually means moisture is trapped deeper than the fabric, or the foam absorbed odor. Let the cushions dry longer with airflow on all sides, press the foam in multiple spots to verify no lingering dampness, then re-wash the cover and rinse again (residue can smell too). If the odor returns quickly after reassembly, plan on replacing the foam or restuffing rather than reusing the same core.
Can I use a pressure washer to clean old patio cushions faster?
Usually no. High-pressure spray can force water into the foam and worsen mildew, and it can also stress seams, zippers, and piping. Stick to hand scrubbing with mild soap or vinegar solutions, then rinse thoroughly and dry completely with ventilation.
I found mold spots. Should I throw the cushions away right away?
Not necessarily. If the foam rebounds and you only have surface mildew, cleaning plus thorough drying can salvage them. If the odor is deep and persistent even after airing, or the foam feels crumbly or permanently compressed, then replacement is the safer decision.
How do I tell whether a stain is just cosmetic or a sign of fiber damage?
Try a spot test with your cleaning method, then check how the fabric behaves when wet and after drying. If color loss is mainly on the surface but the fabric stays flexible, it is often cosmetic. If the fabric turns brittle, develops small tears along folds, or the threads look weakened, it will likely fail after reuse.
What is the best way to dry cushions if I do not have direct sun?
Dry them indoors near moving air (fans or an open window) with the cushions standing upright or angled so water can drain and air can circulate. Expect longer drying time, check repeatedly by pressing the foam, and only re-cover when the cushion feels completely dry throughout, not just at the top.
Can I store cushions in outdoor totes or deck boxes over winter without cleaning again first?
If you store them dirty, mold spores and organic debris can keep developing during the damp season. Clean before storage, then ensure the cushions are fully dry. Use ventilated storage options, not sealed plastic, and keep cushions slightly spaced so they can breathe.
If I repair seams and zippers, how can I prevent the same water problem from coming back?
After any stitching work, treat the seams. Use seam tape or seam sealer on needle holes and stitch lines that may leak, then apply an outdoor water-repellent fabric treatment to the cleaned, dry cover (and let it cure fully). This is especially important for cushions that get frequent rain exposure.
Is it worth restuffing if the cover looks okay but the foam is flattened?
Yes, if the fabric is structurally sound (no fraying, no splitting at seams, and the zipper and closures work). Flattened foam usually cannot be restored by cleaning, so restuffing typically gives a bigger quality upgrade than trying to reuse the same core.
What foam density should I choose if my cushions get heavy daily use?
Use medium-firm outdoor foam in the range discussed in the article, and aim toward the higher end of the density range for higher traffic seating. If your cushions are frequently sat on, avoid very soft or low-density foam, it tends to collapse quickly even if the cover is new.
Can I donate old patio cushions with minor damage or light stains?
Only donate items that you would feel comfortable giving to a friend. If there is mildew contamination, significant staining, or seam and strap failures, it is better to recycle, repair, or discard. If you donate, call ahead because acceptance rules vary by location.
What is the easiest way to handle a large batch of old cushions?
Sort first by condition: donateable covers, repairable items, and foam that should be trashed or potentially recycled through specialty routes. For bulk quantities, a transfer station or junk removal service is often faster than trying to coordinate multiple drop-offs and can be safer than storing damp cushions while you decide.
I see small bugs in the cushions. Should I clean or fumigate first?
Start by removing food residue and checking moisture, bugs in patio cushions are commonly associated with dampness and debris. Clean thoroughly, dry completely, and then address storage practices. Fumigating without fixing the moisture and debris problem usually does not solve the root cause.