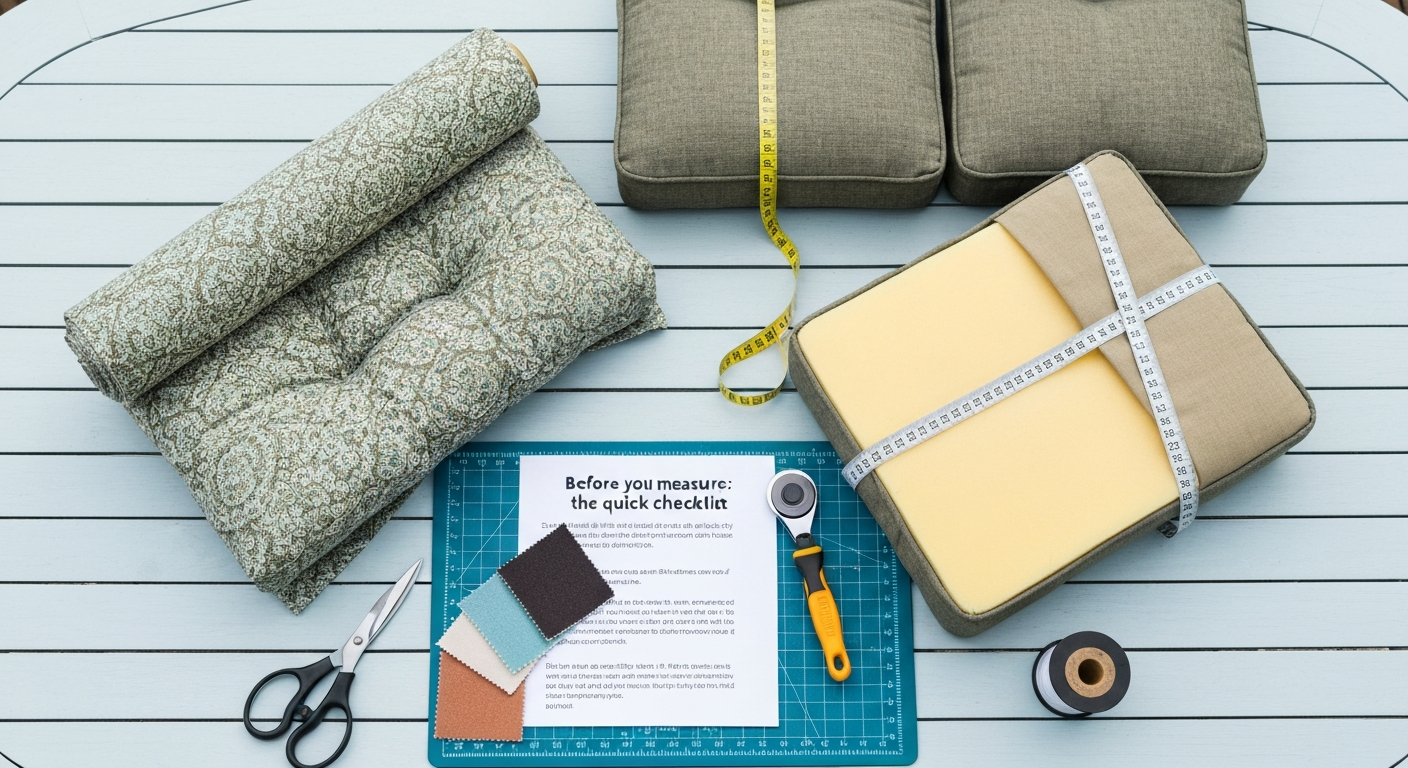
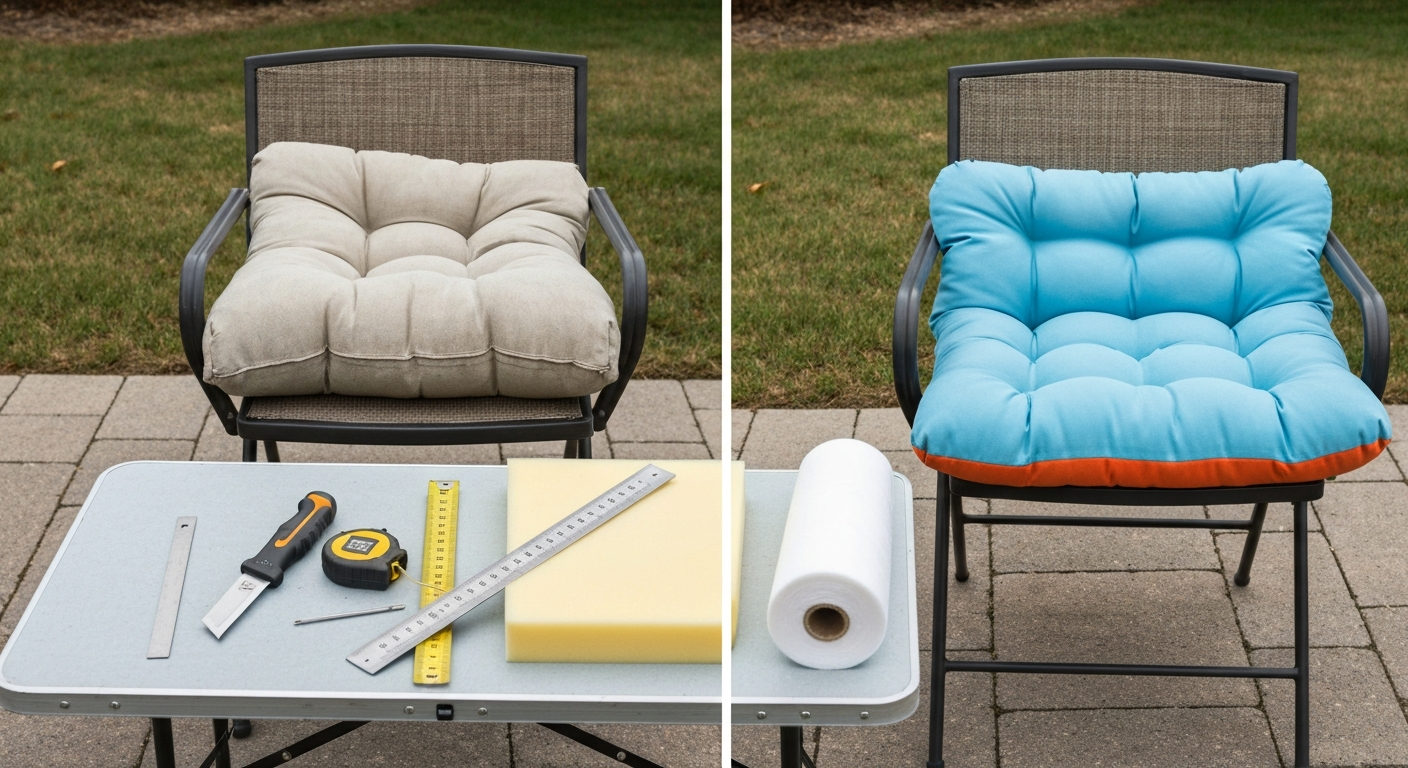
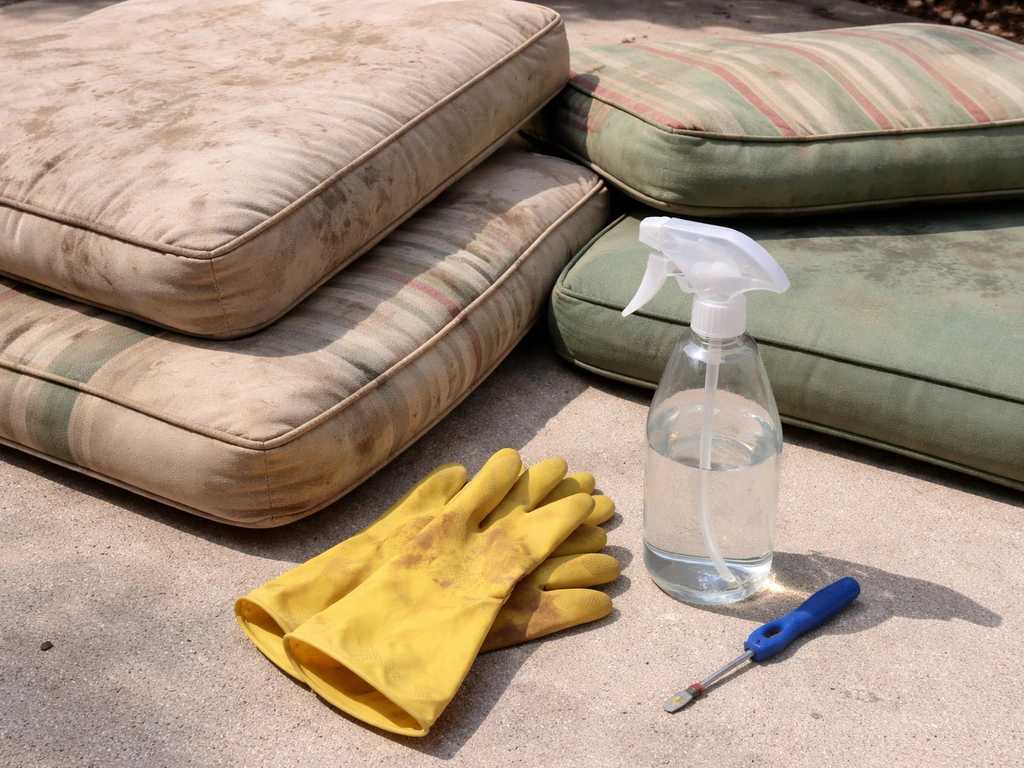
Most patio cushion problems, flat foam, grimy fabric, blown seams, broken zippers, even mildew, are completely fixable at home for $10 to $60 in materials and a few hours of your time. The key is knowing exactly what you're dealing with before you buy anything or reach for the scissors. This guide walks you through every fix in order: inspect and diagnose, decide whether to repair or replace, deep-clean and treat stains and mold, then repair seams and zippers, restuff or swap foam, and fully recover cushions when everything else has been tried. I've done all of these repairs myself, made plenty of expensive mistakes along the way, and I'll flag every one of those so you can skip them.
How to Fix Patio Cushions: Clean, Repair, Restuff & Recover

Maren Grady
19 Jul 2026
Who this guide is for
If you're a homeowner staring at a set of saggy, stained, or falling-apart patio cushions and wondering whether it's worth saving them, this is for you. You don't need sewing experience, a fancy machine, or a big budget. Every section is written for genuine beginners, with definitions for tools and techniques as they come up. If you're more experienced, the advanced tips scattered throughout will give you cleaner finishes and longer-lasting results. What this guide won't cover is building patio furniture from scratch, it stays focused entirely on cushion repair, recovery, and care.
Step 1: Assess the damage before you do anything else
The single biggest mistake I see people make is jumping straight to buying new foam or fabric without understanding what actually caused the damage. Spend five minutes on a proper inspection and you'll avoid wasting money on the wrong fix. Lay the cushion flat on a clean surface in good light and work through the checklist below.
Inspection checklist
- Press firmly on every section of the cushion. Note whether it bounces back (foam still viable) or stays compressed (foam has broken down).
- Check all seams by running your fingers along every sewn edge. Feel for gaps, pulled threads, or sections where the seam has separated entirely.
- Inspect the zipper: try opening and closing it fully. Note whether the slider jams, skips teeth, or has come off the track.
- Look at the fabric surface in direct light. Identify stains (ring-shaped, brown, green/black spots), surface fading, brittleness, or small holes.
- Smell the cushion. A musty or sour odor almost always means mildew inside the fill, not just on the surface.
- Check the underside and any vents or mesh panels for dark spotting—that's mold or mildew growth.
- Look for irregular small holes or shed insect skins, which can indicate fabric pest damage (carpet beetles or clothes moths).
- Check ties, buttons, and any attachment loops for fraying or missing hardware.
Severity levels
| Severity | What you find | Likely fix |
|---|---|---|
| Minor | Surface stains, light mildew, a single open seam, stiff zipper | Clean, re-seam, or lubricate zipper — no sewing machine needed |
| Moderate | Flat or lumpy foam, multiple open seams, small tears, persistent odor | Restuff or replace foam insert, re-seam, spot repair fabric |
| Major | Fabric brittleness/cracking, large tears or holes, extensive mold through fill | Full recover or replace cushion — fabric is past repair |
| Replace | Frame-level rot under cushion, pest infestation in foam, structural foam collapse | New cushion is safer and more cost-effective |
Step 2: Repair vs. replace, making the call
Here's the honest decision framework I use. Repair wins when the fabric is still structurally sound (it doesn't crack when you fold it), the damage is isolated (one seam, one stain, one flat spot), and the cushion would cost more than about $30 to replace. Replacement wins when you'd spend more than 60–70% of the replacement cost on materials, when the fabric has UV-degraded to the point of being brittle, or when mold has penetrated all the way through the foam fill. A full recover, new fabric over existing or new foam, lands in between and makes sense when the foam is still good but the cover is wrecked, or vice versa.
| Situation | Estimated repair cost | Estimated time | Verdict |
|---|---|---|---|
| Single open seam | $0–$5 (thread, needle) | 15–30 min | Repair |
| Stain or mildew cleaning | $5–$15 (cleaners) | 1–2 hrs including drying | Repair |
| Zipper replacement | $5–$12 (zipper tape + slider) | 30–60 min | Repair |
| Foam restuff (existing cover) | $15–$40 (foam) | 45–90 min | Repair |
| Full recover (new fabric + foam) | $30–$80 per cushion | 2–4 hrs per cushion | Repair if cushion > $80 new |
| Brittle, cracked, or heavily mold-damaged fabric | Not repairable | — | Replace |
One more factor: safety. If mold covers more than roughly 10 square feet of material (that's a lot of cushions together), EPA guidance recommends treating it as a larger remediation project rather than a straightforward DIY clean. For a single cushion or small set with surface mildew, you're well within DIY range.
Tools, materials, and PPE you'll need
Below is a full shopping list organized by task. You won't need everything for every repair, use the severity assessment from Step 1 to pull only what applies to your project. I've noted where you can substitute cheaper alternatives without sacrificing results.
Cleaning and mildew treatment
- Soft-bristle scrub brush (an old dish brush works fine)
- Two buckets (one for solution, one for rinse water)
- Mild dish soap (Dawn or equivalent)
- Household bleach (5.25–6.15% sodium hypochlorite) for mildew
- White vinegar — useful for light mildew and odor
- Spray bottle for applying solutions
- Clean white cloths or paper towels for blotting
- Rubber or nitrile gloves
- Safety glasses or goggles
- N95 respirator or half-face respirator if working with bleach or adhesives indoors
Seam, zipper, and tear repair
- Heavy-duty upholstery hand-sewing needles (size 16–18)
- UV-resistant polyester thread — GORE TENARA ePTFE thread is the gold standard for outdoor use; UV-bonded polyester is a budget-friendly alternative
- Seam ripper (about $2 at any fabric or craft store)
- Sewing machine with a denim/upholstery needle if re-seaming long runs (optional but faster)
- Fabric glue rated for outdoor/marine use as a no-sew alternative for small tears
- Iron-on repair tape for quick surface tears (Tear-Aid Type A for fabric, Type B for vinyl/vinyl-coated fabrics)
- Replacement zipper tape and slider — look for continuous #5 molded coil chain, which is the standard for outdoor cushion covers
- Needle-nose pliers for zipper slider removal
Restuffing and foam replacement
- Replacement foam — reticulated (open-cell) outdoor foam for any cushion that gets wet; look for at least 1.8 lb/ft³ density and 35 ILD firmness for seat cushions
- Electric carving knife or serrated bread knife for cutting foam to size
- Tape measure and felt-tip marker
- Foam adhesive or contact cement if layering foam pieces
- Batting (polyester fiberfill wrap) if you want a softer, rounded look over the foam
Full cover recovery
- Outdoor-rated upholstery fabric (Sunbrella, Outdura/Sattler, or Tempotest are the three main performance-fabric brands)
- Fabric scissors or rotary cutter and cutting mat
- Straight pins or pattern weights
- Fabric marker or tailor's chalk
- Sewing machine (a basic machine with a zipper foot handles most cushion work)
- 3M Hi-Strength 90 or Super 77 spray adhesive for foam-to-fabric bonding (read the SDS first — more on this in the safety section)
- Staple gun and 3/8-inch staples if making a non-zippered slip-on cover
- Fabric water-repellency spray (303 Aerospace Protectant or equivalent) to restore DWR coating after bleach cleaning
Safety notes, read before you start
None of the tasks in this guide are extremely dangerous, but a few have real hazards that are easy to underestimate. Here's what I always tell people before they reach for the bleach or the spray adhesive.
Bleach and chemical cleaners
Bleach is effective on mildew, but it's corrosive to skin and eyes and produces irritating fumes in enclosed spaces. Always wear nitrile gloves and safety glasses. Never mix bleach with ammonia or vinegar, the combination produces chloramine or chlorine gas, both of which are toxic. Work outside or with the garage door fully open. Rinse surfaces thoroughly after any bleach treatment because residual bleach plus UV exposure degrades fabric fibers and coatings over time, and Sunbrella specifically notes this in their cleaning instructions.
Mildew and mold handling
Disturbing dry mold releases spores into the air. Lightly mist the affected area with water before scrubbing so you're not kicking spores into your face. Wear an N95 respirator, not just a paper dust mask. If you open a cushion and find the foam is completely saturated with black or green mold growth, treat that foam as waste, it's not worth trying to salvage, and the EPA recommends disposing of heavily mold-infested porous materials rather than cleaning them.
Spray adhesives
Products like 3M Super 77 and Hi-Strength 90 are flammable aerosols and respiratory irritants. The 3M SDS lists them as requiring eye protection, chemical-resistant gloves, and adequate ventilation or a respirator if ventilation is insufficient. Per OSHA's hierarchy of controls, your first move is engineering: work outside or in a space with strong airflow before you consider relying on a respirator alone. Never spray near an open flame or pilot light.
Cutting tools
Foam cutting with an electric carving knife or sharp serrated blade is faster than it looks, and so are accidents. Always cut away from your body, keep fingers behind the blade line, and use a straight-edge guide clamped to the foam rather than freehand cutting. Cut slowly through thick foam, rushing creates jagged edges that look bad and glue poorly.
Fabric pest disposal
If you find evidence of carpet beetles or clothes moths, irregular holes in natural fibers, shed larval skins, or actual larvae, bag the affected cushion in a sealed plastic bag immediately before bringing it inside. For identification and treatment of bugs in patio cushions, see the companion guide on bugs in patio cushions. University extension guidance (UC IPM, NMSU) recommends laundering infested items in hot water, dry-cleaning, or freezing at 0°F (minus 18°C) for 48 to 72 hours in a sealed polyethylene bag. Do not spray cushion fabric or foam directly with insecticides, use any chemical treatment only in cracks, crevices, and structural areas per label directions.
Quick-reference troubleshooting: what's wrong and what to do first
Use this as your first stop. Find the symptom, follow the immediate fix, then come back to the detailed sections below for the full process.
| Symptom | Likely cause | Immediate fix | Full fix section |
|---|---|---|---|
| Cushion stays flat after sitting | Foam breakdown or compression | Check if foam bounces back at all; if not, restuff | Restuff / foam replacement |
| Green or black spots on fabric | Surface mildew | Move cushion to sunlight; don't scrub dry | Mildew treatment section |
| Musty smell even after washing | Mildew inside foam fill | Open cover, inspect foam, treat or replace fill | Mildew treatment + restuff sections |
| Zipper won't close or skips teeth | Bent teeth, worn slider, or debris | Rub a pencil (graphite) along teeth; try re-running slider slowly | Zipper repair section |
| Seam coming apart at corners | UV-degraded thread or stress failure | Temporary fix: fabric glue or iron-on tape; permanent: re-seam | Seam repair section |
| Small holes in natural-fiber fabric | Fabric pest damage (carpet beetle/moth) | Bag cushion immediately, inspect foam | Safety notes — fabric pests |
| Ring-shaped brown water stains | Mineral deposits from rain pooling | Blot with 1 tsp dish soap per cup of water; escalate if needed | Deep cleaning section |
| Fabric faded and brittle | UV degradation | Test fold — if it cracks, recover; cleaning won't help | Full recover section |
| Ties or loops torn off | Thread failure at attachment point | Re-sew with doubled UV-polyester thread using a bar-tack stitch | Seam repair section |
Deep cleaning patio cushions
Before you do any structural repair, get the cushion clean. I've re-sewn seams on dirty cushions before and regretted it, you end up sewing grime into the repair and the area still looks bad afterward. Clean first, dry completely, then fix.
General washing process
- Remove the cover if it has a zipper. Shake out loose debris outside.
- Pre-treat any visible stains before the full wash (see the stain chart below).
- Mix 1/4 cup mild dish soap in one gallon of cool or lukewarm water in a bucket.
- Dip your soft-bristle brush into the solution and scrub the fabric in circular motions, working from the edges of a stain toward the center to avoid spreading it.
- For machine-washable covers (Tempotest fabrics, for example, are machine-safe on a gentle cycle up to 85°F — close all zippers before washing), launder per the label and skip to drying.
- Rinse the cover thoroughly with clean water from a garden hose. Soap residue left in the fabric attracts dirt faster and can degrade coatings.
- For cushions you can't remove from the cover, work section by section and rinse well between areas.
- Squeeze (don't wring) excess water and stand the cushion on edge to allow water to drain out of the fill through the bottom vent or mesh.
- Air-dry completely in a sunny spot with good airflow — this can take 4 to 8 hours for thick cushions. Never store or zip a damp cushion.
Stain-by-stain solutions
The most important rule in stain removal: always start with the mildest option and escalate only if it doesn't work. Scrape or blot solids and liquids first before applying any solution, and always test on a hidden spot to check that the fabric's dye is stable. Here's what works for the most common outdoor stains, based on Sunbrella's and Outdura's published cleaning charts.
| Stain type | First response | Escalation if needed | Notes |
|---|---|---|---|
| General dirt/grime | 1/4 cup dish soap per gallon of water, scrub and rinse | Repeat; add 1/2 cup white vinegar to solution | Rinse very thoroughly |
| Food/organic (wine, juice) | 1 tsp dish soap per cup of water, blot and rinse | Outdura formula: 2 oz detergent + 4–8 oz ammonia + 3 oz vinegar per gallon | Never mix ammonia with bleach |
| Oil or grease | Sprinkle cornstarch or baking soda, let sit 15 min, brush off, then dish soap | 100% volatile solvent (acetone) applied sparingly with a cloth | Test acetone on hidden area first — can affect some dyes |
| Rust | Lemon juice + salt paste, let sit and rinse | CLR rust remover applied per label, then rinse thoroughly | Don't let CLR sit longer than directed |
| Mildew/mold | 1 cup bleach + 1/4 cup mild soap per gallon water; soak up to 15 min, scrub, rinse | Stronger bleach concentration for severe cases per Outdura: 1 cup bleach + 2 oz detergent per gallon | Apply 303 Protectant after bleach treatment to restore water repellency |
| Bird droppings | Scrape dry solids off first, then dish soap solution | Enzyme cleaner if stain remains | Don't scrub dry droppings — mist first |
| Sunscreen/lotion | Dish soap scrub; degreaser if oily residue remains | Small amount of acetone if fabric-safe | Pre-treat before full wash |
Drying, the step everyone rushes
Incomplete drying is the number-one reason mildew comes back after cleaning. The foam core holds water long after the outer fabric feels dry to the touch. Stand thick cushions on their edge (not flat) so water can drain and air can circulate on both sides. On a sunny day with a light breeze, a standard 4-inch seat cushion needs a minimum of 4 hours; a thick 5- or 6-inch boxed cushion can take 8 hours or overnight. I prop mine against a deck railing at an angle. If you're in a hurry, a box fan aimed at the cushion cuts drying time roughly in half.
Treating mildew and mold
Mildew (surface fungal growth) and mold (deeper penetration into material) look similar but behave differently in cushions. Mildew appears as flat gray, white, or greenish patches on the fabric surface and usually responds well to bleach-based cleaning. Mold that has penetrated into the foam fill is a different problem, it's darker (often black or deep green), may have a fuzzy texture, and the cushion will smell musty even after the surface is cleaned.
How to tell which one you have
- Surface mildew: discoloration only on the fabric surface; foam smells neutral or slightly musty; spots bleach out with treatment.
- Deep mold: persistent musty odor even after surface cleaning; unzipping the cover reveals spotted or discolored foam; foam may feel slimy in spots.
- Severe mold: foam is heavily discolored throughout, cover interior is stained, odor is strong even outdoors. This foam should be replaced, not treated.
Safe mildew removal, step by step
- Put on your gloves, safety glasses, and N95 respirator before handling visibly moldy cushions.
- Lightly mist the affected surface with plain water before brushing — this prevents spore dispersal.
- Prepare the Sunbrella-recommended solution: 1 cup household bleach (5.25–6.15% sodium hypochlorite) plus 1/4 cup mild dish soap per gallon of water.
- Apply the solution to the affected area and allow it to soak for up to 15 minutes.
- Scrub with a soft-bristle brush. You should see the mildew spots lighten and disappear.
- Rinse extremely thoroughly with clean water. Bleach residue plus UV sunlight is a documented way to damage outdoor fabric coatings.
- Allow to dry completely in sunlight — UV exposure is genuinely helpful at killing remaining surface spores.
- Once fully dry, apply a water-repellency restorer such as 303 Aerospace Protectant, because bleach strips the DWR (durable water repellent) finish from performance fabrics like Sunbrella and Tempotest.
When the foam itself has mold
Open the cover via the zipper and inspect the foam directly. Light surface spotting on open-cell (reticulated) outdoor foam can sometimes be treated by soaking the foam in the same bleach-soap solution, squeezing it through the foam, then rinsing and drying the foam completely before re-inserting it. However, if the foam is heavily discolored throughout, has structural breakdown, or has a persistent odor after treatment and drying, replace it. Trying to rehabilitate deeply mold-saturated foam rarely works and leaves the odor behind. The EPA's guidance on porous mold-contaminated materials is clear: when in doubt, dispose and replace. Replacing the foam is not expensive, a standard seat cushion insert runs $15 to $35 depending on size.
Anti-mildew prevention after cleaning
- Always store cushions completely dry — even slightly damp foam will grow mildew within 24–48 hours in a closed storage bin.
- Apply a fabric protectant spray (303 Aerospace or similar) at the start of each outdoor season and after any bleach cleaning to restore water-shedding ability.
- Choose cushions with mesh or perforated bottoms and reticulated (open-cell) foam cores — the open, interconnected cell structure allows water to drain and air to circulate, which dramatically reduces mildew growth compared to solid closed-cell foam.
- Keep cushions off the ground when not in use so air can move underneath them.
- If storing seasonally, use breathable storage bags or a ventilated deck box rather than sealed plastic bags that trap moisture.
Repairing seams, zippers, and surface tears
Re-sewing open seams
Seam failures on outdoor cushions are almost always caused by UV-degraded thread, not damaged fabric. The fabric is fine, the stitching just gave out. The fix is straightforward. Use a seam ripper to remove any remaining loose or fraying thread from the failed section, then re-sew the seam with heavy UV-resistant thread. By hand, use a backstitch (the strongest hand stitch) with doubled thread. On a machine, a straight stitch at 8–10 stitches per inch with a size 16 upholstery needle works well. Use UV-bonded polyester thread at minimum; GORE TENARA ePTFE thread is worth the extra cost ($12–$20 per spool) if this cushion sees heavy use, because it's guaranteed to outlast most outdoor fabrics and is completely bleach-resistant, meaning you can clean the cushion aggressively without worrying about the thread degrading.
Fixing a stuck or failed zipper
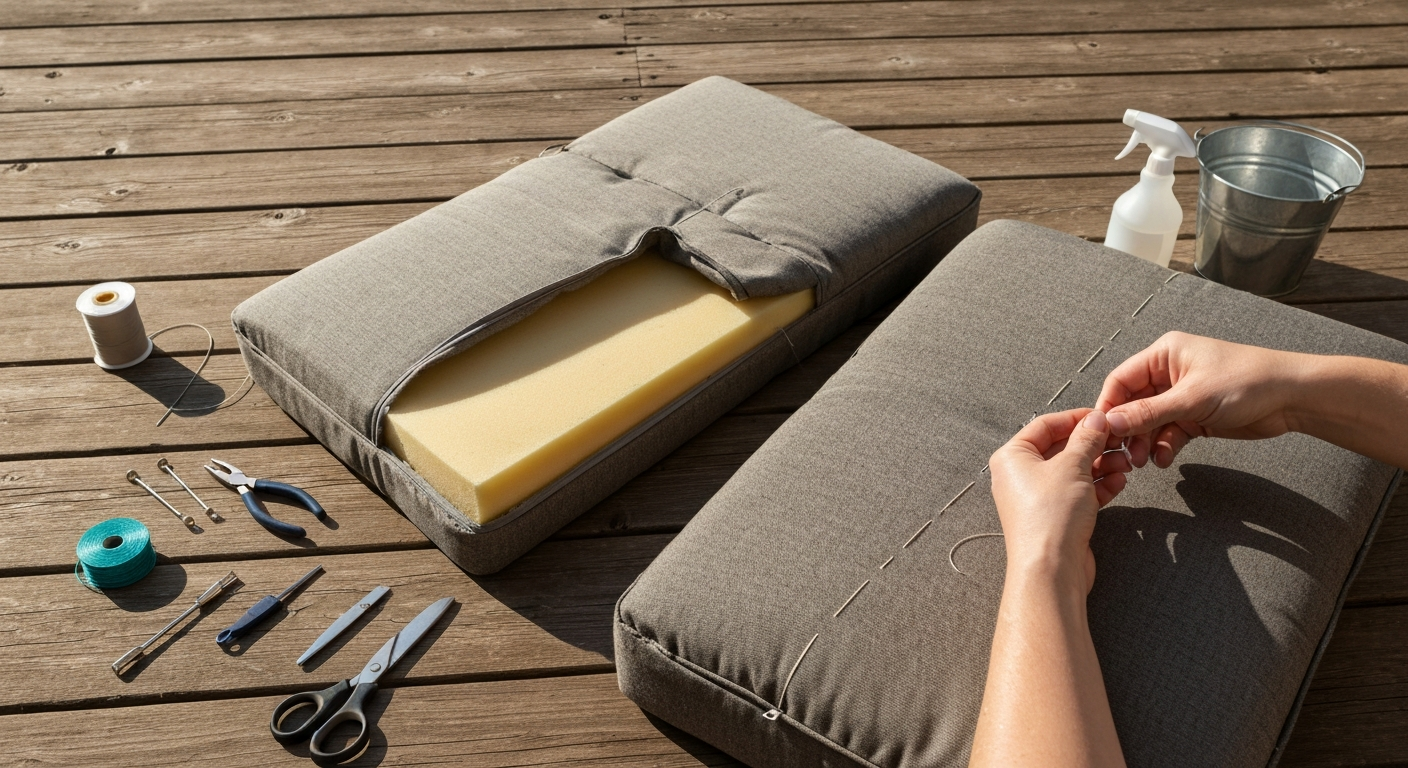
- If the slider moves but skips teeth: rub a pencil tip (graphite is a dry lubricant) along both sides of the teeth, then work the slider back and forth slowly. This fixes about 80% of stiff zippers.
- If the slider has come off one side of the track entirely: use needle-nose pliers to gently squeeze the slider body slightly tighter around the tape, then re-thread the tape through the bottom stop and work the slider upward.
- If a tooth is bent or missing: that section is damaged permanently. Replace the zipper. Cut the old zipper tape out with a seam ripper, buy replacement #5 continuous coil zipper tape and a new slider (Sailrite and other marine suppliers sell this by the yard for about $1.50–$2.50 per foot), cut to length, and sew the new tape in by machine or by hand using a zipper foot.
- Always close zippers before machine-washing any cover — open zipper pulls damage both the fabric and the zipper itself in the wash.
Patching surface tears and small holes
For small tears (under about 2 inches), iron-on repair tape is the fastest fix. Tear-Aid Type A handles woven outdoor fabric; Type B handles vinyl-coated or PVC-coated surfaces. Cut the patch with rounded corners (square corners peel up faster) about an inch larger than the tear on all sides. Press firmly for the full time specified on the package. For a more durable, invisible repair on woven fabric, cut a patch from matching fabric, apply a thin bead of outdoor fabric glue (Beacon Fabri-Tac or similar) to the patch edges, and press it over the tear from the inside of the cover. Smooth flat, weight it, and let it cure fully before using. For larger tears, re-seaming by machine with a flat-felled seam gives the strongest result.
Restuffing or replacing the foam
Flat, lifeless cushions are one of the most common patio furniture complaints, and they're one of the easiest fixes. The foam has simply broken down from use and UV exposure. You don't need to replace the whole cushion, just the fill. For a detailed walkthrough on measuring your existing cushion and calculating the exact foam dimensions you need, the companion guide on how to restuff patio cushions covers that process step by step. For step-by-step measuring, cutting, and fit tips, see the companion guide how to restuff patio cushions. For a step-by-step walkthrough on measuring your cushion and calculating exact foam dimensions, see the companion guide how to measure patio cushions. For step-by-step measuring instructions for cushion covers, see how to measure patio furniture covers (companion guide).
Choosing the right foam
Outdoor foam is not the same as indoor upholstery foam. The critical difference is reticulation: reticulated (open-cell) foam has an interconnected pore structure that allows water to drain out and air to flow through. Closed-cell or standard indoor foam traps moisture, which leads directly to mold and mildew. Always use reticulated open-cell foam for any outdoor cushion that may get wet.
| Foam spec | What it measures | What to look for in outdoor seat cushions |
|---|---|---|
| Density (lb/ft³) | Weight of foam per cubic foot — higher = longer-lasting | 1.8 lb/ft³ minimum; 2.0+ for heavy-use chairs |
| ILD (Indentation Load Deflection) | Firmness — force (in lbs) to compress foam 25% | 35 ILD is medium-firm, good for most seat cushions; 45+ for firmer feel |
| Foam type | Cell structure | Reticulated open-cell only for outdoor use — drains water, resists mold |
| High-Resilience (HR) rating | Bounce-back quality | HR foam returns to shape faster and lasts longer than standard foam at same density |
Cutting and inserting new foam
- Measure the interior of the cover (not the outside of the old foam) in length, width, and depth. Add about 1/2 inch to each dimension — slightly oversized foam gives a tighter, fuller look and holds its shape better.
- Mark the foam with a felt-tip marker and a straight edge. Use a straight-edge clamped to the foam as a cutting guide.
- Cut with an electric carving knife or sharp serrated bread knife using long, smooth strokes. Don't saw back and forth in short strokes — you'll get jagged edges.
- Test-fit the foam in the cover before committing. It should slide in with gentle pressure and fill the cover without lumps.
- If adding a polyester batting wrap for a softer look, wrap the foam loosely and secure it with a few strips of spray adhesive before inserting.
- Rezip the cover and press down on the cushion to redistribute the fill evenly.
Fully recovering cushions with new fabric
A full recover is the most time-intensive fix in this guide, but it's also the most satisfying, and it costs a fraction of replacing a quality cushion set. I'm going to be honest about time: your first boxed seat cushion cover will take 2 to 3 hours. By your third, you'll be under 90 minutes. This Old House provides a practical DIY reupholstery workflow and time/cost benchmark: simple chair reupholstery typically takes about 1 hour for an experienced DIYer and costs roughly $50–$200 in materials, while more complex pieces take longer and cost more This Old House reupholstery benchmark. Don't expect perfection on the first one.
Choosing outdoor fabric
The three performance fabric brands you'll see most are Sunbrella (acrylic, solution-dyed, bleach-cleanable, widely available), Outdura by Sattler (similar acrylic construction, 5-year warranty on color and strength under normal exposure), and Tempotest (machine-washable up to 85°F, good for removable covers). All three are UV-stabilized, mildew-resistant, and designed to handle outdoor cleaners including diluted bleach. Budget alternatives exist, look for solution-dyed acrylic or marine-grade polyester at fabric retailers, but they won't have the same longevity or cleanability. For fabric quantity calculations, the guide on how much fabric you need to recover patio cushions walks through the exact yardage math by cushion shape.
The recovery workflow
- Remove the old cover carefully (use a seam ripper to open it rather than cutting) and use it as a pattern. If it's too damaged, measure the foam and add seam allowances: 1/2 inch on all sides for standard upholstery seams.
- Lay the old cover flat on your new fabric and trace around it with tailor's chalk, adding 1/2 inch seam allowance if the old cover was tightly sized.
- Identify the fabric's pattern repeat (if any) and align it across pieces before cutting. Misaligned stripes or patterns are the most visible beginner mistake.
- Cut all pieces using fabric scissors or a rotary cutter on a cutting mat for cleaner edges.
- Sew the boxing strips (the side panels of a boxed cushion) to the top panel first, right sides together, using a 1/2 inch seam allowance and UV-resistant thread.
- Install the zipper in the back/bottom panel before sewing it to the boxing. This is much easier than trying to add the zipper later.
- Attach the bottom panel, leaving the zipper end open and accessible.
- Clip corners (cut a small notch at each 90-degree corner, being careful not to cut the stitching) so the corners lie flat when turned right-side out.
- Turn the cover right-side out, press corners out with a blunt object, and test-fit the foam before finishing.
- Apply 303 Protectant to the finished cover before putting it into regular use.
Thread and hardware choices matter outdoors
Standard polyester thread will degrade in UV light within a season or two on an outdoor cushion, you'll be back re-sewing seams by next summer. UV-bonded polyester thread is the minimum for outdoor work and costs about the same as standard thread at any fabric store. GORE TENARA ePTFE thread is the professional standard for marine and outdoor upholstery because it resists UV, bleach, saltwater, and chemical cleaners and is documented to outlast most fabrics. A spool runs $15 to $20, which is worth it if you're recovering a full cushion set. For zippers, use a continuous #5 molded coil chain, the same type used in marine and patio furniture manufacturing, rather than standard garment zippers, which fail quickly outdoors.
Cost and time summary
| Repair type | Materials cost (per cushion) | Time estimate | Skill level |
|---|---|---|---|
| Deep clean (surface stains) | $5–$15 | 1–2 hrs including drying | Beginner |
| Mildew treatment | $10–$20 | 2–3 hrs including drying | Beginner |
| Seam repair (hand sewing) | $2–$8 | 20–45 min | Beginner |
| Zipper replacement | $5–$15 | 30–60 min | Beginner-intermediate |
| Tear patch (iron-on) | $5–$10 | 15–20 min | Beginner |
| Foam restuff (reticulated) | $15–$40 | 45–90 min | Beginner |
| Full recover (new fabric + foam) | $30–$80 | 2–4 hrs | Intermediate |
| Full recover (fabric only, existing foam) | $20–$50 | 1.5–3 hrs | Intermediate |
Preventive care and seasonal storage
Everything above is reactive, fixing problems that already happened. Preventive care is how you avoid doing these repairs again next year. The maintenance list below takes about 30 minutes per season and will easily double the life of your cushions.
- Apply a fabric protectant spray (303 Aerospace or Scotchgard Outdoor) at the start of every outdoor season, not just after cleaning. This restores the DWR coating that repels water and prevents stains from penetrating.
- Brush off debris (pollen, leaves, bird droppings) regularly — don't let organic material sit on fabric, as it accelerates mildew growth.
- Bring cushions inside or store in a deck box before extended rainy periods. Occasional rain is fine; days of continuous soaking is not.
- Make sure cushions stand on edge in storage (never stacked flat and wet) with airflow on all sides.
- Cover the entire seating set with breathable furniture covers during off-seasons. Properly fitting covers make a significant difference — the guide on how to measure patio furniture covers explains how to get the dimensions right.
- Inspect cushions at the start of each season using the inspection checklist from Step 1 — catching a small seam failure in spring costs 20 minutes; catching it after a summer of use costs an afternoon.
- Store foam inserts separately from fabric covers in cool, dry conditions if you live in a humid climate.
What to do with cushions that can't be saved
Even the best repairs have limits. When a cushion is genuinely beyond saving, brittle fabric, collapsed foam, deep mold through the fill, don't just toss everything. Outdoor fabric scraps are useful for patching other cushions, lining storage bins, or making small weather-protective wraps. Foam offcuts can be used as knee pads for garden work. If the cover is intact but the foam is gone, the cover becomes a storage bag or a weather sleeve for small items. For creative ideas on repurposing cushion materials rather than sending them to landfill, the companion guide on what to do with old patio cushions covers the options in detail. For anything that truly needs to go, check whether your local recycling center accepts upholstery foam, some do, and foam is not biodegradable in a landfill.
FAQ
How do I decide whether to repair or replace a patio cushion?
Inspect fabric, seams, zipper, foam core and odor/mildew. Repair when damage is limited (small tears, seam split, zipper issue, soiled cover, compressed but intact foam). Replace when fabric is brittle/faded through, mildew has penetrated foam widely, foam is crumbling or compressed beyond recovery, or repair costs approach replacement. Quick checklist: (1) surface stains/mildew — try cleaning; (2) small tears/seams/zipper — repairable; (3) foam soggy/odorous/molded — replace; (4) multiple components failing or replacement cheaper than parts — replace.
What safety and health precautions should I take before cleaning or repairing cushions?
Work outdoors or in a well‑ventilated area. Wear nitrile/rubber gloves, eye protection and an N95 or respirator if sanding foam, using solvents, adhesives or bleach. For suspected mold covering >10 sq ft or heavily infested porous foam/fabric, consult a professional (EPA guidance). Follow product SDSs for cleaners/adhesives and OSHA hierarchy of controls—use ventilation and PPE. Never mix bleach with ammonia or acids and avoid spraying bleach indoors.
How do I deep‑clean stains and mildew on outdoor fabric (step by step)?
1) Remove loose debris—vacuum or brush. 2) Test colorfastness in an inconspicuous spot. 3) Blot/absorb fresh liquids; scrape solids. 4) Start with mild soap + lukewarm water (dish soap: ~1 tsp per cup water) and a soft brush. 5) For mildew/stubborn organic stains, use a bleach solution per fabric maker guidance (example: Sunbrella recommends ~1 cup household bleach + 1/4 cup mild soap per gallon; Outdura suggests 1 cup bleach + 2 oz detergent per gallon). Allow a short soak (up to ~10–15 minutes), scrub gently, rinse thoroughly and air‑dry in sun. 6) For oil/grease, sprinkle absorbent (cornstarch) then use degreaser/dish soap; for rust use a rust remover (follow label). 7) After bleach, re‑treat with a water‑repellent/protectant spray (303 or similar) if fabric repellency is reduced. Follow manufacturer stain‑removal order: solids → blot liquids → mild soap → escalate to specialty cleaners. Always rinse thoroughly and test first.
How should I handle cushions with insect infestation (carpet beetles or clothes moths)?
Don PPE (gloves, mask). Remove covers and launder if safe (hot cycle) or dry‑clean. For foam or large infestations: seal cushion in plastic and freeze at 0°F (−18°C) for 48–72 hours, or heat to ≥140°F for sufficient time to kill larvae (follow extension guidance). Vacuum seams and crevices, discard vacuum bag outdoors. Avoid spraying insecticides directly on cushions; if chemical control is needed, treat cracks/crevices per label or consult pest pros (UC IPM/NMSU guidance). Inspect and store cleaned cushions in sealed containers.
How do I repair small tears, seams and zippers on outdoor cushion covers?
Tools: heavy needle, UV/bleach‑resistant thread (GORE TENARA or polyester), sewing machine capable of heavy fabric, seam ripper, zippers (marine/outdoor grade), heavy scissors, pins. Steps: (1) Clean and dry area. (2) For small tears, tuck raw edges and hand‑stitch with a ladder or slip stitch or use machine with reinforced zigzag; double‑stitch stress points. (3) For split seams, unpick adjacent stitches, realign fabric and restitch with 3/8" seam allowance and bar‑tack ends. (4) Replace zipper: remove old zipper, measure length, pin new outdoor/marine #5 zipper, baste, then sew with appropriate needle and thread. (5) Use seam sealers sparingly on cut edges; for heavy wear use patch pieces of same fabric sewn on or bonded with outdoor‑grade adhesive. Advanced tip: use topstitching and UV‑stable thread, and reinforce corners with bias‑cut fabric patches.
How do I restuff or replace foam cores, and how do I measure for new foam?
Choose outdoor reticulated (open‑cell quick‑dry) foam or high‑resilience (HR) foam with appropriate density/ILD for comfort. Measure each cushion: Length (L), Width (W), Depth/thickness (D) in inches. Foam cubic feet needed = (L × W × D) / 1728. Example: one 24"×24"×4" cushion = (24×24×4)/1728 = 1.333 ft3. Ordering: round up to supplier sheet sizes; many foam suppliers sell by sheet (e.g., 24×75). For yardage/bulk foam, convert cubic feet and choose desired thickness—order slightly oversized to allow trimming. For replacement: (1) remove cover and measure core; (2) cut foam with an electric carving knife or hot wire to size; (3) test fit, trim for snugness; (4) wrap foam with Dacron/polyester loft wrap if desired for softer edges and seam shaping; (5) insert into cover and zip closed. For outdoor cushions use reticulated or quick‑dry foam; for long life select higher density (e.g., 1.8–2.8 lb/ft3) and appropriate ILD per seating preference.