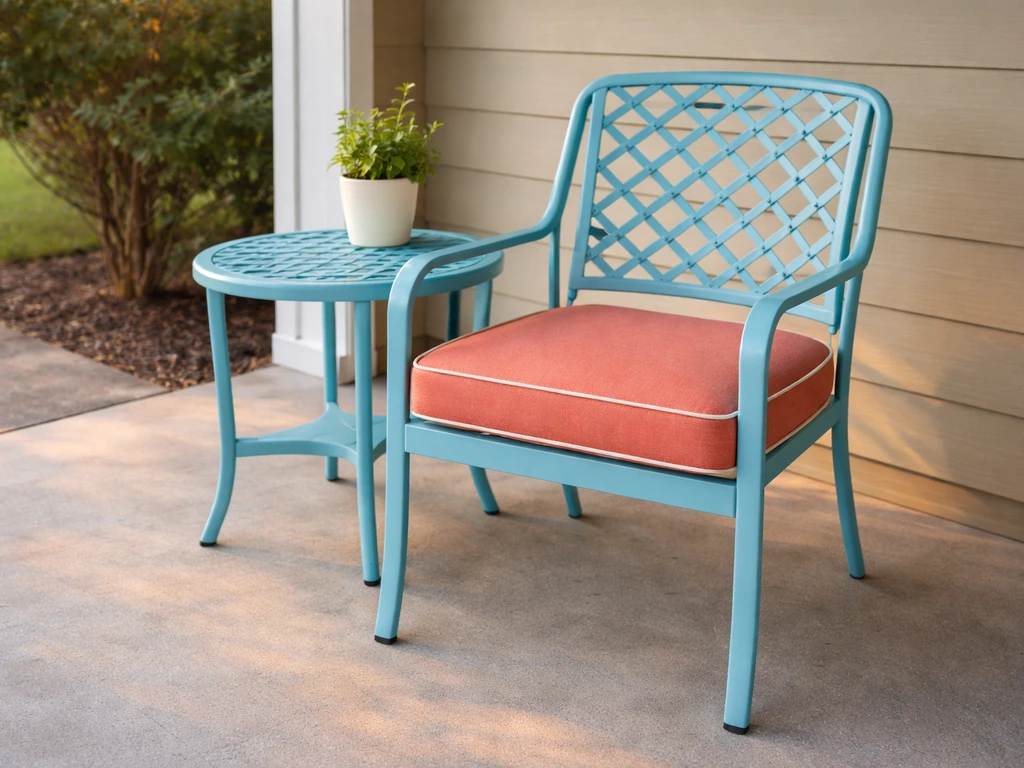
Styling patio furniture comes down to four things done in the right order: measure your space honestly, choose a layout that fits how you actually use the patio, build a color and material palette that holds together, then layer in accessories to make it feel finished. Skip any one of those steps and you end up with a patio that looks like a furniture showroom floor or, worse, a cluttered storage area. I've made both mistakes, and this guide is the one I wish I'd had before dragging a sectional through a gate that was three inches too narrow.
How to Style Patio Furniture: Practical Plans & DIY Tips

Maren Grady
20 Jul 2026
Who this guide is for (and what you'll walk away with)
Whether you're starting from a bare concrete slab or trying to fix a patio that just never came together, this guide is written for homeowners and DIYers who want a practical, budget-conscious roadmap. You don't need design experience. You need a tape measure, a willingness to sketch a rough floor plan, and the patience to read through the planning section before buying anything. By the end, you'll know how to measure and zone your space, pick furniture that fits the scale, choose a color palette that won't look dated in two years, mix materials without creating visual chaos, and add accessories that pull the whole look together. See the step-by-step guide on how to patio furniture for practical, illustrated instructions. I'll also cover DIY upgrades, seasonal protection, and a troubleshooting checklist for the problems that almost every patio owner eventually hits.
Measure first, shop second: planning rules that save you from costly mistakes
The single most common patio styling mistake I see is buying furniture before measuring the space. A sofa that looks reasonable in a warehouse store can eat an entire 10x10 patio once it's outside. Good planning means thinking about four things: scale, traffic flow, sun and wind exposure, and the primary function of each zone.
Scale: fill the right amount of space
On a small patio or balcony, aim to fill roughly 50 to 60 percent of the usable floor area with furniture. That sounds like a lot, but once you account for circulation gaps it's actually fairly conservative. The mistake most people make is filling 80 percent and then wondering why the patio feels cramped. Before you measure, note the location of every door, gate, railing post, built-in grill, and appliance. These eat into your usable footprint more than you expect.
Traffic flow: the 36-inch rule
Allow a minimum of 36 inches (about 91. Guidelines recommend allowing a minimum of 36 inches (91.5 cm) for main walkways on patios and decks, increasing to 48 inches (122 cm) where two people must pass comfortably or on primary circulation routes. 5 cm) for any walkway or path on your patio. If two people need to pass each other comfortably, or if it's a primary route from the back door to the yard, bump that to 48 inches (122 cm). For dining areas, plan at least 36 inches from the table edge to any fixed obstruction like a wall or railing so chairs can be pulled out freely. If that same space doubles as a circulation route, go 42 to 48 inches. I underestimated this on my first patio build and spent an entire summer squeezing past the table every time I walked to the grill. Don't do that.
Sun and wind exposure: assess before you arrange
Spend a weekend tracking sun movement across your patio at 9 a.m., noon, and 4 p.m. A free tool like SunCalc lets you model the sun path for your exact location and season so you can predict where harsh afternoon sun will land. Use that information to orient seating away from low-angle late-afternoon glare, and to choose UV-stable fabrics for spots that get six or more hours of direct sun. For wind, check NOAA's local wind rose data for your area. If you have a prevailing wind direction, place your main seating on the leeward side of any windbreak you have (a fence, a hedge, a planter grouping). Close and store umbrellas whenever sustained winds hit 25 mph (40 km/h) or higher. Consumer testing consistently shows that repeated exposure to high winds accelerates structural failure in umbrella ribs, even heavy-duty ones.
Function: decide what the space needs to do
Before you sketch a layout, write down the one or two primary activities the patio needs to support. Dining with four to six people is a different design problem than a quiet two-person reading corner or a kid-friendly play-adjacent lounge. Mixed-use patios are common, but they require zoning (more on that in the layout section). Knowing your function first prevents you from buying a giant dining set when what you actually wanted was a conversation pit.
Pre-shopping measuring checklist
- Measure the total patio length and width in inches, then sketch it on graph paper (1 square = 1 foot works well).
- Mark every fixed obstruction: doors, steps, gates, built-in features, and utility access points.
- Measure the narrowest point of entry (gate or door) so you know the maximum furniture width you can physically move in.
- Mark sun exposure zones using your morning/afternoon observations or SunCalc.
- Note the prevailing wind direction and any existing windbreaks.
- Identify the primary function of each intended zone (dining, lounging, cooking adjacent).
- Calculate usable floor area (total area minus obstructions) and aim for 50 to 60 percent furniture coverage.
- Write down minimum clearance requirements: 36 in. walkways, 36 in. dining clearance, 14 to 18 in. coffee table gap in lounge zones.
Quick measurement reference and space-planning templates
Use this table as a quick sanity check while you're planning. These are practical minimums and comfortable targets for common outdoor furniture arrangements. If your space can't accommodate the minimum, size down to the next category rather than cramming furniture in.
| Zone / Furniture Type | Minimum Footprint | Comfortable Target | Key Clearance Notes |
|---|---|---|---|
| Bistro / 2-seat set | 4 × 4 ft (1.2 × 1.2 m) | 4 × 5 ft (1.2 × 1.5 m) | 36 in. walkway on at least two sides |
| 4-person dining table (36 × 36 in.) | ~10 ft wide × 8 ft deep (3.0 × 2.4 m) | 12 × 10 ft (3.7 × 3.0 m) | 36 in. chair pull-out clearance all sides; 42–48 in. if also circulation route |
| 6-person rectangular dining table (36 × 72 in.) | 12 × 10 ft (3.6 × 3.0 m) | 14 × 12 ft (4.3 × 3.7 m) | 24 in. min. table width per diner; 30 in. preferred |
| Lounge sofa + coffee table | 6 × 8 ft (1.8 × 2.4 m) | 8 × 10 ft (2.4 × 3.0 m) | 14–18 in. sofa-to-table gap; 30–36 in. circulation around perimeter |
| Conversation pit / sectional | 10 × 10 ft (3.0 × 3.0 m) | 12 × 12 ft (3.7 × 3.7 m) | 30–36 in. access on open sides |
| Primary walkway / path | 36 in. (91.5 cm) min. | 48 in. (122 cm) | 48 in. wherever two people pass or on primary routes |
| Dining chair pull-out clearance | 36 in. (91.5 cm) min. | 42–48 in. (107–122 cm) | Measure to nearest fixed wall, railing, or built-in |
A practical template for a medium patio (roughly 12 × 16 ft / 3.7 × 4.9 m): place a 36 × 72 in. dining table with four to six chairs along the longest wall or centered under a pergola, leaving 36 to 42 inches between the table and the railing. Use the remaining 6 to 8 feet of depth for a two-seat lounge grouping angled toward the yard. That gives you two clear zones without the patio feeling divided. On smaller patios (under 10 × 10 ft), go single-zone and commit: either a compact bistro set or a loveseat with a side table, not both.
Layout options: from simple dining sets to multi-zone arrangements
Once you have your measurements, you need to decide on a layout strategy. For step-by-step placement tips, see our guide on how to place patio furniture. The four most common approaches are the dining-forward layout, the lounge-forward layout, the conversation pit, and the multi-zone arrangement. Each works best for a specific type of patio and use pattern.
Dining-forward layout
Center your dining table in the space and keep it as the visual anchor. Push chairs in when not in use so the patio still feels open. This works best when outdoor eating is your primary use and the patio is 10 × 12 ft or larger. A rectangular table parallel to the house creates a natural flow from the back door. A round table works better in a square patio because it opens up the corners for planters or a side console.
Lounge-forward layout
Build around a sofa or loveseat and coffee table, with accent chairs completing the grouping. The classic arrangement is a sofa facing the yard with two chairs angled in at 45 degrees, creating an inward-facing conversation area. Keep the coffee table 14 to 18 inches from the sofa so drinks and books are within easy reach without the table blocking leg room. This layout works beautifully on deeper patios (8+ feet from house to railing) and on covered porches.
Conversation pit arrangement
A conversation pit groups seating on three or four sides of a central coffee table or fire feature, creating an enclosed, cozy feel. It requires at least 10 × 10 ft of open space to work without feeling claustrophobic. Use a mix of a small sofa, two chairs, and a bench or ottomans to complete the square. The fire table or coffee table should be 14 to 18 inches from each seat. This arrangement naturally becomes a social anchor at evening gatherings.
Multi-zone layout for larger patios
On patios 14 × 16 ft and larger, you can run two zones side by side: a dining zone on one end and a lounge zone on the other. The key is defining each zone clearly so the space doesn't look scattered. Use a large outdoor rug to anchor the lounge zone (more on rug sizing below). A change in flooring material, a planter row, or even a difference in furniture height between zones signals the visual separation without needing a physical barrier. Keep your 36-inch walkway running between the two zones as the spine of the layout.
Choosing a color palette that actually holds together
Color is where a lot of DIY patios go wrong, not because of bad taste but because of too much variety bought over time. The fix is a simple framework: pick one neutral base, one or two accent colors, and limit your decorative textures to three or fewer. That's it. Everything you buy, from the cushion fabric to the umbrella to the planter pots, should fit into that system.
Building your neutral base
Your furniture frames almost always become your neutral base by default. Natural teak or cedar reads as warm and earthy. Black powder-coated metal is graphic and modern. Gray or sand-colored wicker is soft and coastal. Work with what you have rather than fighting it. If you're buying new, warm neutrals (teak tones, greige wicker, warm white) are the most forgiving base because they pair with almost any accent color and age gracefully.
Adding accent colors without overdoing it
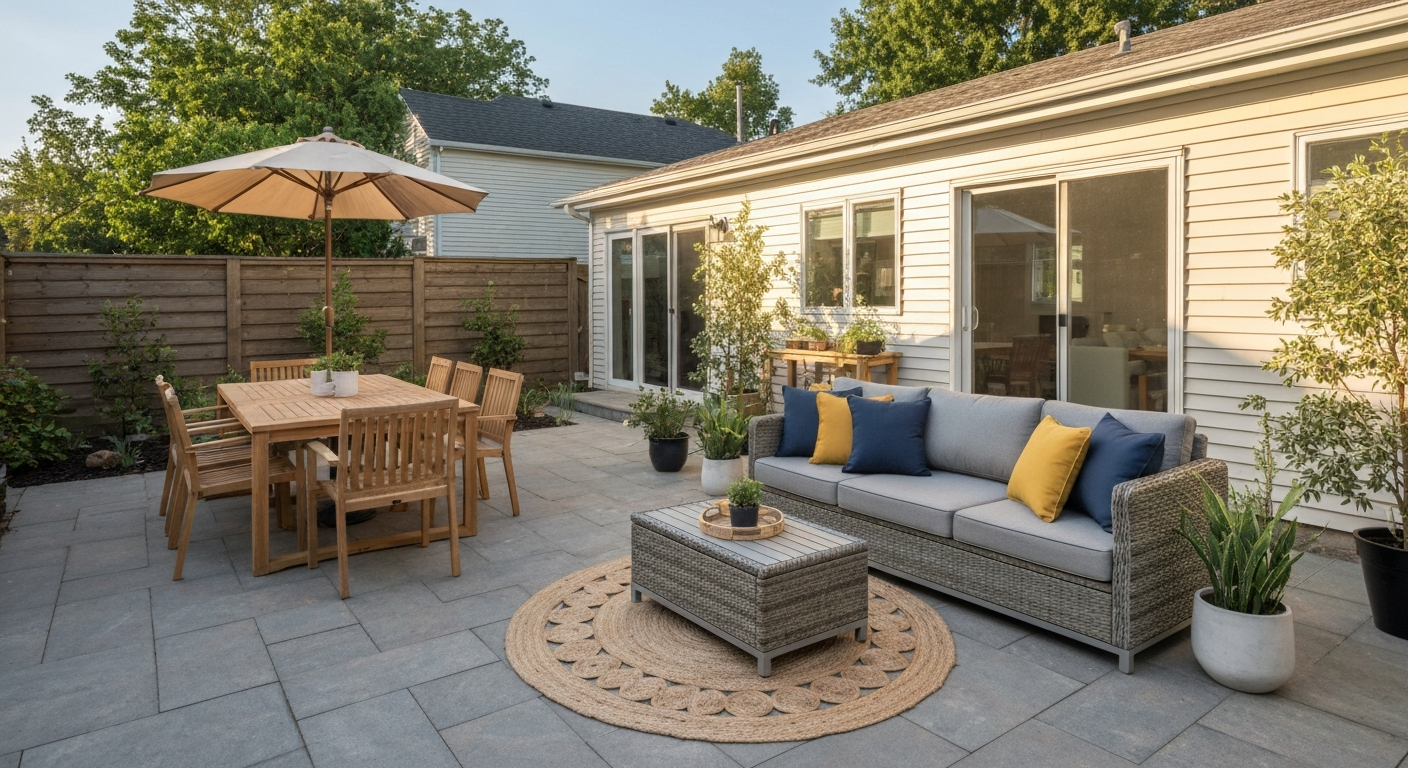
Limit accent colors to one dominant and one supporting shade. Classic outdoor combinations that hold up year after year: navy and white with natural wood tones, terracotta and sage green on a neutral wicker base, or soft gray with mustard yellow accents. Avoid using more than two accent colors in cushions, rugs, and accessories simultaneously. The fastest way to fix a patio that feels chaotic is to remove every accessory and add back only items in your chosen palette. I've done this twice and it's always the right call.
Mixing textures the right way
Texture adds depth and keeps an all-neutral palette from looking flat, but three textures is the practical limit before it reads as messy. A good outdoor texture mix might be: smooth powder-coated metal frames (sleek), woven PE wicker seat (organic), and a solid-color solution-dyed acrylic cushion fabric (soft and matte). Add a jute-effect or braided outdoor rug and you've hit three distinct textures without crossing into clutter. Repeating a texture in more than one piece (two wicker elements, for example) actually helps unify the space.
Mixing materials: wood, metal, wicker, and plastic
You almost never have all the same material across a patio, and that's fine. For a practical walkthrough on how to mix patio furniture materials and colors, see our guide on how to mix patio furniture. The goal isn't matching, it's coordinating. Here's what you need to know about each common material so you can pair them intelligently and maintain them properly.
| Material | Outdoor Performance | Maintenance Requirements | Best Paired With | Budget Notes |
|---|---|---|---|---|
| Teak | Excellent. Naturally oily, highly rot-resistant. Long service life with minimal care. | Annual cleaning; oil once a year to retain honey color, or let it silver naturally. No sealing required. | Powder-coated metal, natural rope, linen-look cushions | Premium cost upfront; very low long-term cost per year of use |
| Western red cedar | Good. Naturally decay and insect resistant. Softer than tropical hardwoods; expect 10–20 years with maintenance. | Seal or stain every 1–2 years; clean off mildew promptly. | Wicker, galvanized metal, earthy-toned cushions | Mid-range cost; widely available at lumber yards. Good DIY-build material. |
| Powder-coated aluminum | Very good. Doesn't rust, lightweight, holds up in most climates. Heats up in direct sun. | Wipe down periodically; touch up scratched powder coat with spray paint to prevent corrosion. | Wicker, teak, all-weather cushions | Mid-range. Often the most affordable framed furniture option. |
| Galvanized / stainless steel | Excellent with correct grade. Use 316 stainless in coastal/salt environments; 304/305 for standard exterior use. | Inspect fasteners annually; never mix stainless and non-stainless hardware (galvanic corrosion risk). | Wood tops, concrete, industrial-style accessories | Mid to high range. Heavier than aluminum. |
| Synthetic wicker (PE/PVC) | Very good. UV and moisture resistant. Far outlasts natural rattan outdoors. | Wash with soap and water; rinse well. Inspect weave for cracks seasonally. | Powder-coated aluminum frames (often paired at factory), cushions, woven rugs | Affordable to mid-range. Best bang for budget in moist climates. |
| Resin / molded plastic | Fair to good depending on quality. UV degradation is the main failure mode. | Clean with mild soap; treat with UV-protectant spray annually to slow fading and brittleness. | Works as accent pieces; limit to one or two items in a set to avoid cheap aesthetic | Lowest cost. Best used for accent chairs, side tables, or temporary seating. |
The most successful material mix I've used is a powder-coated aluminum frame sofa with PE wicker weave and solution-dyed acrylic cushions, paired with a teak side table. The combination is low maintenance, weathers well, and looks intentional rather than mismatched. The key pairing rule: keep your frames in the same tonal family (warm or cool) even if the materials differ. A warm teak table next to cool gray metal chairs creates visual tension. Warm teak next to warm bronze powder coat? That reads as curated.
A note on fasteners when you're building or repairing
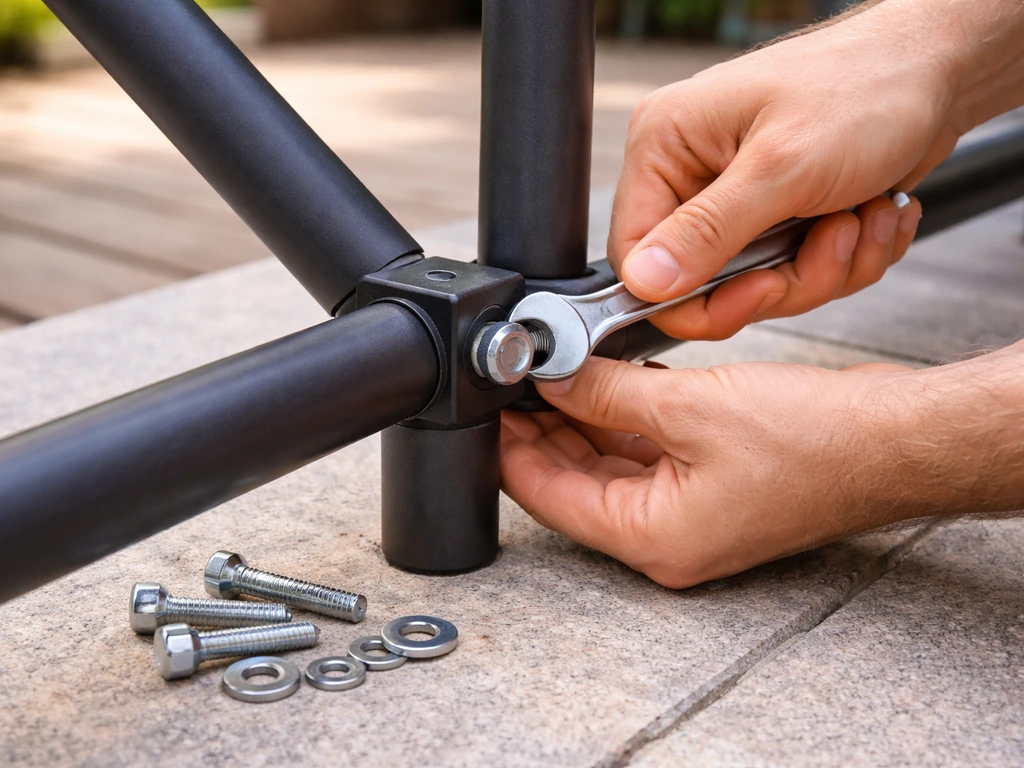
If you're building or repairing any patio furniture, fastener choice matters more than most beginners realize. For standard exterior environments, use Type 304 or 305 stainless steel fasteners throughout. In coastal or high-salt environments, upgrade to Type 316 stainless or hot-dip galvanized hardware rated to ASTM A153 Class C (sometimes labeled ZMAX). The critical rule: never mix stainless with non-stainless hardware in the same connection. Dissimilar metals create galvanic corrosion, where the weaker metal deteriorates rapidly. Use matching stainless connectors and stainless fasteners together.
Coordinating modular and connected pieces
Modular and sectional patio sets are popular because they're flexible, but they're also easy to arrange badly. The most common mistake is spreading the pieces out to fill a large space, which destroys the cohesive look the set was designed for. Modular furniture is meant to be close together. Here's how to handle it well.
How to link and lock sectional pieces
Most quality sectional sets include connector clips, alignment pins, or furniture straps that keep pieces locked together so they don't drift apart during use. If your set didn't come with connectors, or if they've broken, outdoor furniture strap connectors and S-hooks are available at most hardware stores for under $10. Thread them through the frame legs to link adjacent sections. For heavier sets on smooth surfaces like tile, add non-slip furniture pads or outdoor rubber feet under each section to prevent gradual drift without damaging the patio surface.
Arranging sectionals to define space, not fill it
Think of a sectional as a room boundary, not a room filler. The L-shape or U-shape of a sectional should face inward toward a coffee table or fire feature, with the open side facing the yard or the primary view. On a 12 × 14 ft patio, a three-piece sectional (two-seat sofa, corner, and one-seat) works well along two walls, leaving the center and front open. Resist the urge to add extra chairs inside the L; instead, place one or two moveable ottomans that can be pulled in when you need extra seating and pushed to the edges otherwise. This keeps the arrangement flexible without looking temporary.
Styling modular sets for visual cohesion
When all cushions are the same color, a modular set looks unified and intentional. Where DIYers often go wrong is replacing a damaged cushion in a slightly different shade, or adding mismatched throw pillows. If you're mixing cushion colors intentionally, keep the base cushions (seat and back) all one neutral color and limit patterned or colored throw pillows to two or three per arrangement. This gives you visual variety without undoing the cohesion of the set. For more detail on linking pieces physically and planning around modular layouts, the guide on how to connect patio furniture goes deeper into hardware options and alignment techniques.
Accessories and textiles: finishing the look without blowing the budget
Accessories are where a patio goes from 'furniture sitting outside' to 'outdoor room.' The good news is that this is also where budget alternatives have the biggest visual impact per dollar spent. Here's how to approach each category.
Cushions and throw pillows
For seat cushions, prioritize solution-dyed acrylic fabric (Sunbrella is the brand name most people know, but store-brand equivalents exist) over polyester fabric. Solution-dyed acrylic resists UV fading and mildew because the color is locked into the fiber at the manufacturing stage rather than printed on top. Polyester cushions look fine when new but often fade noticeably within one to two seasons in full sun. For filling, closed-cell foam wrapped in polyester batting holds its shape and drains faster than open-cell foam when rained on. Budget alternative: buy plain, UV-resistant cushion covers from a discount home goods store and make your own inserts from closed-cell foam cut to size (most fabric stores will cut it for you). You'll spend about half the price of name-brand cushions and get a custom fit.
Outdoor rugs: sizing and material
An outdoor rug anchors a furniture grouping and defines a zone visually. The rule of thumb: for a lounge grouping, choose a rug large enough that at least the front two legs of every piece sit on it. For a dining area, the rug should be large enough that chairs remain on the rug even when pulled out from the table. Common practical sizes: 5 × 8 ft for a bistro or small lounge grouping, 8 × 10 ft for a four to six person dining set, 9 × 12 ft for a full sectional arrangement. For material, polypropylene (olefin) outdoor rugs are the best budget choice: they're UV-resistant, dry quickly, resist mildew, and can be cleaned with a hose. Avoid natural fiber rugs like jute outdoors. They look beautiful for about one season and then begin to deteriorate, especially in humid climates.
Umbrellas and shade structures
For a standard 4-seat dining table (36 × 48 in.), a 9-foot market umbrella provides adequate coverage. For a 6-seat table or a lounge grouping, size up to an 11-foot umbrella or consider a cantilever (offset) umbrella, which can cover a larger footprint without a center pole in the way. Make sure the base weight matches the umbrella size: a 9-foot umbrella needs at minimum a 50-pound base on a calm site; a windy site warrants 75 to 100 pounds or ground anchoring. As noted above, close umbrellas at sustained winds of 25 mph or more. Budget tip: end-of-season umbrella sales (August through September) typically offer 40 to 60 percent discounts. A $120 umbrella in September is often the same product as a $240 umbrella in May.
Outdoor lighting
Lighting transforms a patio for evening use at very low cost. String lights (bistro lights) are the most cost-effective option: a 48-foot strand with 15 bulbs covers most medium patios and costs $20 to $50. For permanent installation, run the strand between two eye-bolt anchors at about 8 to 9 feet high (low enough to feel intimate, high enough to avoid head-bumping). Solar-powered string lights have improved significantly but still underperform in shaded patios or during consecutive cloudy days. For those situations, low-voltage plug-in LED string lights are more reliable. Add a few solar stake lights along the perimeter or in planter pots for ground-level depth.
Planters: sizing and placement
Planters do double duty as decoration and functional windbreaks. Tall planters (24 inches or higher) at the corners of a patio define the boundary and add vertical interest. Medium planters (12 to 16 inches) work well as table centerpieces or grouped on steps. For wind protection, a row of large planters along the windward edge of the patio can reduce wind speed noticeably at seated height. Use lightweight plastic or fiberglass planters if you need to move them seasonally, and ceramic or concrete if they'll stay in place as permanent anchors. Budget alternative: paint inexpensive plastic nursery pots with spray-on stone-effect paint for a fraction of the cost of decorative ceramic planters.
DIY upgrades and repairs: refreshing what you have
One of the best things about patio furniture is that most of it is repairable and upgradeable with basic tools, even if you've never done it before. Here are the most common fixes and improvements, in rough order of difficulty.
Repainting or respraying metal and plastic frames
Faded or chipped metal frames look worse than they are. Wire-brush off any loose paint or rust, sand smooth with 120-grit sandpaper, wipe down with a tack cloth, and apply two to three light coats of rust-inhibiting spray paint formulated for outdoor metal. The most common beginner mistake here is applying one thick coat instead of two to three light coats. Thick coats run and peel. Light coats build a durable, smooth finish. Total time: about two hours of working time plus drying. Cost: $8 to $15 for spray paint. For plastic frames, use spray paint specifically formulated for plastic (the label will say 'bonds to plastic' or 'for PVC and plastic'). Standard spray paint will flake off plastic within weeks.
Removing rust from steel frames
Surface rust (orange staining, no pitting) is easy to address. Scrub with a wire brush or coarse steel wool, then apply a rust converter product (available at any hardware store for about $10). Rust converter chemically neutralizes remaining rust and creates a base layer for paint. Let it cure per the product instructions (usually 24 hours), then prime and paint as above. Deep pitting means the steel has lost structural integrity in that section. At that point, assess whether the piece is worth repairing or replacing.
Refreshing wood with stain or oil
Weathered teak or cedar that has gone gray can be restored to a warmer tone. Clean with a wood cleaner or a diluted oxalic acid deck wash (follow all label safety instructions), let dry completely (at least 48 hours), then apply teak oil for teak or an exterior penetrating stain for cedar. Avoid film-forming finishes like varnish or polyurethane on outdoor wood. They trap moisture under the film, leading to bubbling and peeling within one season. Penetrating oils and stains let the wood breathe and are far easier to reapply. Reapply annually or when water stops beading on the surface.
Replacing cushion covers and reupholstery
If your cushion foam is still structurally sound but the fabric is faded or stained, a slipcover-style replacement cover is the easiest fix. Measure your existing cushion (length, width, and depth), then search for replacement outdoor cushion covers in those dimensions on Amazon or through fabric retailers. If the shape is non-standard, sewing your own cover from outdoor fabric requires basic straight-stitch sewing skills and takes about one to two hours per cushion. Outdoor fabric (like Sunbrella or similar) typically costs $15 to $30 per yard. A standard seat cushion takes about 1 to 1.5 yards.
Fixing wobbly frames and replacing hardware
Wobbly chairs and tables are almost always a fastener issue: bolts have loosened, or the hardware has corroded. Tighten all bolts first with the correct size wrench or Allen key. If a bolt spins freely (stripped threads), replace it with the next size up or use a thread insert (helicoil). For wooden frames where the joint itself has loosened, inject exterior-rated wood glue into the joint with a glue syringe, clamp for 24 hours, then re-fasten with a new stainless screw at a slightly different angle than the original hole. When replacing any hardware, use stainless steel of the appropriate grade (304 for most environments, 316 for coastal or poolside settings).
Anchoring furniture against wind
Lightweight furniture on exposed patios is a genuine safety hazard in storms. Options for anchoring: heavy planters placed behind lightweight chairs act as ballast. Furniture anchor straps (similar to RV tie-downs) thread through frame legs and anchor to deck cleats or eye bolts set in the patio. For decks, you can install furniture anchors between deck boards. For concrete patios, adhesive-mount anchor points rated for outdoor use can be applied without drilling. When a storm is coming, stack chairs and bring in lightweight side tables. A chair that becomes a projectile in 50 mph gusts is a hazard to neighboring property.
Seasonal protection and storage
How you close down your patio in fall and prep it in spring has a bigger effect on furniture lifespan than almost any other variable. Here's the practical sequence.
End-of-season close-down steps
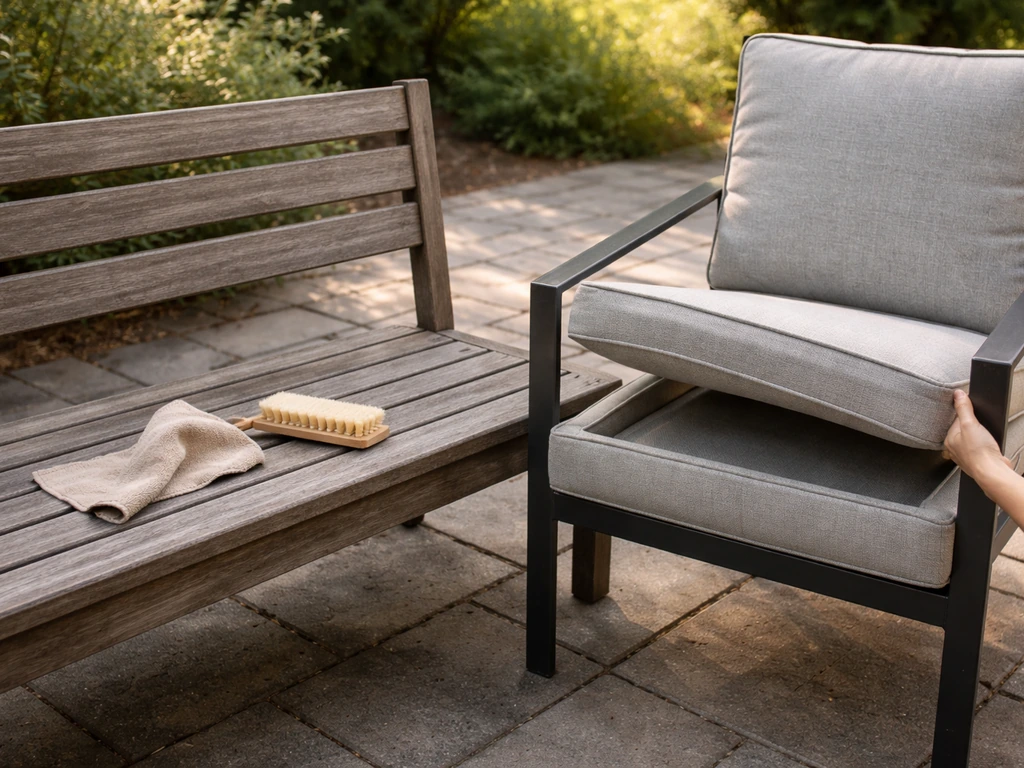
- Clean all furniture thoroughly. Use mild soap and water on metal, wicker, and plastic. Use a dedicated wood cleaner on teak or cedar. Let everything dry completely before covering or storing, ideally two days of good weather.
- Remove and store all cushions and fabric accessories indoors or in a waterproof cushion storage box. Even 'weather-resistant' cushions last significantly longer when stored dry over winter.
- Apply a protective coat: touch up any chipped powder coat on metal, apply a fresh coat of teak oil or stain on wood, spray UV protectant on plastic frames.
- Fold and store umbrellas in their bags or in a dry garage or shed. Leaving them assembled but closed outdoors over winter still exposes the fabric to UV and the mechanism to moisture.
- Cover furniture that stays outside with fitted, breathable outdoor furniture covers. Avoid non-breathable plastic tarps, which trap condensation and accelerate mildew and rust.
- Bring in or anchor any furniture that would become a wind hazard in winter storms.
Spring prep checklist
- Inspect all frames for rust, cracks, or wobbly joints before reassembling.
- Check all hardware and tighten or replace as needed using grade-appropriate stainless steel fasteners.
- Wash off any mildew that developed under covers with a diluted white vinegar solution (1 part vinegar, 4 parts water) or a commercial outdoor cleaner.
- Bring out cushions, check for mildew or structural deterioration, and air them in the sun for a few hours before use.
- Check umbrella ribs and mechanism; replace any bent or cracked ribs before the season gets going.
- Reapply protectants as needed before heavy use begins.
Troubleshooting the most common patio furniture problems
Before you buy a replacement or call it a loss, run through this checklist. Most of these problems are fixable in an afternoon.
| Problem | Likely Cause | DIY Fix | Difficulty |
|---|---|---|---|
| Cushion fabric fading | UV breakdown, especially in polyester fabrics | Replace covers with solution-dyed acrylic fabric; apply UV fabric protectant spray to existing covers as a delay tactic | Easy |
| Mildew on cushions or frame | Moisture trapped under covers or in storage | Scrub with diluted white vinegar or OxiClean outdoor; dry fully in sun; store cushions dry in future | Easy |
| Wobbly chair or table | Loose or stripped fasteners; dried-out wood joints | Tighten all hardware; replace stripped bolts; re-glue and re-clamp wood joints | Easy to moderate |
| Rust on steel frame | Surface rust: moisture + scratched coating. Deep rust: prolonged exposure | Surface: wire brush + rust converter + repaint. Deep pitting: structural repair or replacement | Easy (surface) / Moderate (deep) |
| Peeling or bubbling paint on metal | Film applied too thick, or applied over rust | Strip to bare metal, treat rust, apply thin coats of rust-inhibiting spray primer and paint | Moderate |
| Powder coat scratches on aluminum | Impact or abrasion damage | Touch up with matching spray paint; not a structural issue | Easy |
| Furniture drifting or separating (sectionals) | No connectors, or worn connectors | Add furniture strap connectors or S-hooks through frame legs; add non-slip rubber feet | Easy |
| Umbrella tilting in wind | Base too light for umbrella size | Add weight to base (fill with sand or water if hollow); stake base to deck; close umbrella at 25+ mph winds | Easy |
| Wood turning gray or cracking | Lack of protective oil or stain; UV weathering | Clean with wood cleaner or deck wash, let dry 48 hours, apply penetrating oil or exterior stain | Easy to moderate |
| Plastic becoming brittle or chalky | UV degradation over time | Apply automotive UV protectant or plastic restorer annually; replace heavily degraded pieces | Easy |
Putting it all together: where to go from here
Good patio styling isn't about spending more money. It's about measuring before you buy, choosing materials that match your climate and maintenance reality, building a simple and repeatable color palette, and maintaining what you have instead of replacing it prematurely. The patios that look the best in my experience are rarely the ones with the most expensive furniture. They're the ones where someone thought carefully about the layout, made consistent choices about color and texture, and invested 30 minutes twice a year in basic maintenance.
If you're starting from scratch or reworking an existing layout, begin with the measuring checklist, sketch two or three layout options on paper before moving any furniture, and commit to one palette before buying a single accessory. If you're dealing with damaged or tired furniture before the season starts, the repair steps in this guide will take you further than a new purchase will. For more detail on specific aspects of building out your outdoor space, the guides on how to place patio furniture, how to mix patio furniture, and how to decorate patio furniture go deeper into each of those areas.
FAQ
What are the basic measuring and planning rules before choosing patio furniture?
Measure usable patio area (exclude door swing, railing, HVAC units). Map fixed features and note sun/wind directions or use SunCalc. Leave at least 36 in (91.5 cm) for main walkways (48 in/122 cm where two people pass). Dining: allow 36 in (91.5 cm) from table edge to obstruction (42–48 in if also a circulation route); plan 24–30 in (61–76 cm) width per diner. Lounge: sofa to coffee table 14–18 in (35–45 cm); allow 30–36 in (76–91 cm) circulation around seating. For small patios target filling ~50–60% of usable area to preserve flow. Use zoning footprints: bistro ~4×4 ft (1.2×1.2 m), dining zone min ~10 ft (3.0 m) wide for table + clearance, lounge depth 6–8 ft (180–240 cm).
How do I assess sun and wind so furniture lasts and sits comfortably?
Track sun path (SunCalc or a sun‑path app) for seasonal direct sun hours and place seating to avoid low‑angle late‑afternoon glare. Note prevailing wind (local weather or wind rose) and locate seating/shade on the leeward side or add planters/screens as windbreaks. Close umbrellas when sustained winds approach 25 mph (40 km/h). Choose UV‑stable fabrics and sturdy, anchored pieces for high‑wind sites.
How should I mix materials (wood, metal, wicker, plastic) and pick color palettes?
Start with one primary material and color family (e.g., warm wood + neutral cushions) and add one contrasting accent material (metal or synthetic wicker) and one accent color. For example: teak frames + off‑white cushions + navy accent pillows; or powder‑coated aluminum + gray cushions + bright coral accent. Keep metals consistent in finish (e.g., all black/bronze) to unify. Use textures (woven wicker, slub linens, matte metal) to add depth. Match cushion tones to large pieces and reserve brighter colors for accessories.
What are sample layout options and simple measurement table for common patios?
Sample arrangements: 1) Small balcony bistro: 2‑seat round table (24–30 in) + 2 chairs, leave 36 in circulation to door. 2) Compact lounge: 2‑seat sofa + coffee table (30 in) + single chair, zone depth ~6 ft. 3) Dining + lounge combo: 6‑seat dining (36–48 in table) with 36 in clearance + adjacent lounge zone 6–8 ft depth. Simple measurement table (min. clearances): - Main walkway: 36 in (91.5 cm) - Dining clearance from table edge: 36 in (91.5 cm) - Table width per diner: 24–30 in (61–76 cm) - Sofa to coffee table: 14–18 in (35–45 cm) - Lounge circulation: 30–36 in (76–91 cm) Include diagram suggestions: overhead plan with zone rectangles, scaled furniture blocks, and circulation arrows; before/after photos showing scale.
What accessories and textiles should I prioritize on a budget?
Prioritize seat cushions (weather‑resistant fabric), an umbrella or shade option, a durable outdoor rug to define zones, and lighting (string or solar lanterns). Budget swaps: use fade‑resistant indoor/outdoor fabric remnant for pillows, choose polypropylene rugs instead of natural fiber, pick solar string lights instead of wired fixtures, and use plastic or resin planters instead of ceramic. Tools/materials list: measuring tape, chalk/marker for layout, level, drill, outdoor fabric, exterior cushion foam or inserts, UV spray (optional).
How do I coordinate modular or 'connected' patio pieces?
Choose modular systems with consistent seat height and cushion depth for swap‑and‑match flexibility. Anchor modules visually with matching cushions or a unifying rug. Use clips or connector brackets recommended by the manufacturer when assembling; if customizing, use stainless steel fasteners (304 or 316 in coastal zones) and refer to the manufacturer’s load limits. Sketch layouts on a grid to ensure modules form desired configurations and allow 30–36 in circulation around assembled pieces.