Patio furniture lasts years longer when you know how to pick the right pieces for your space, assemble them correctly, clean them on a schedule, fix problems before they get worse, and store them properly each season. Whether you just dragged a rusty metal chair out of the garage or you're shopping for a whole new set, this guide walks you through every stage hands-on, with material-specific advice so you're not guessing.
How to Patio Furniture: Setup, Repair, Restore, and Care

Maren Grady
3 Jul 2026
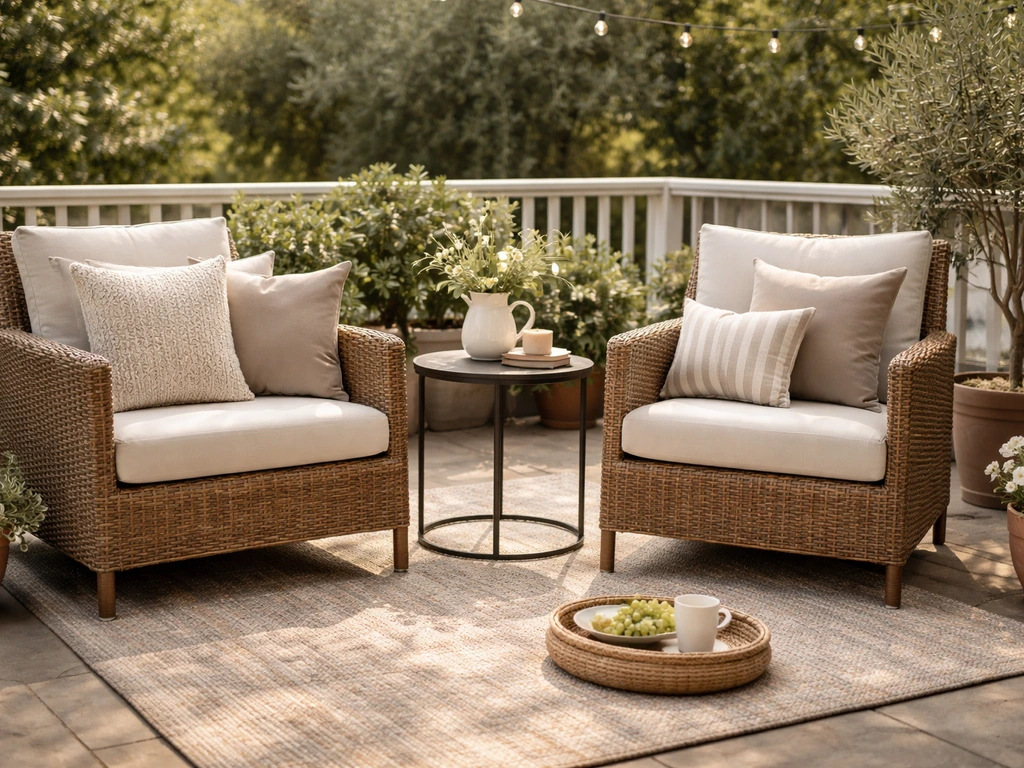
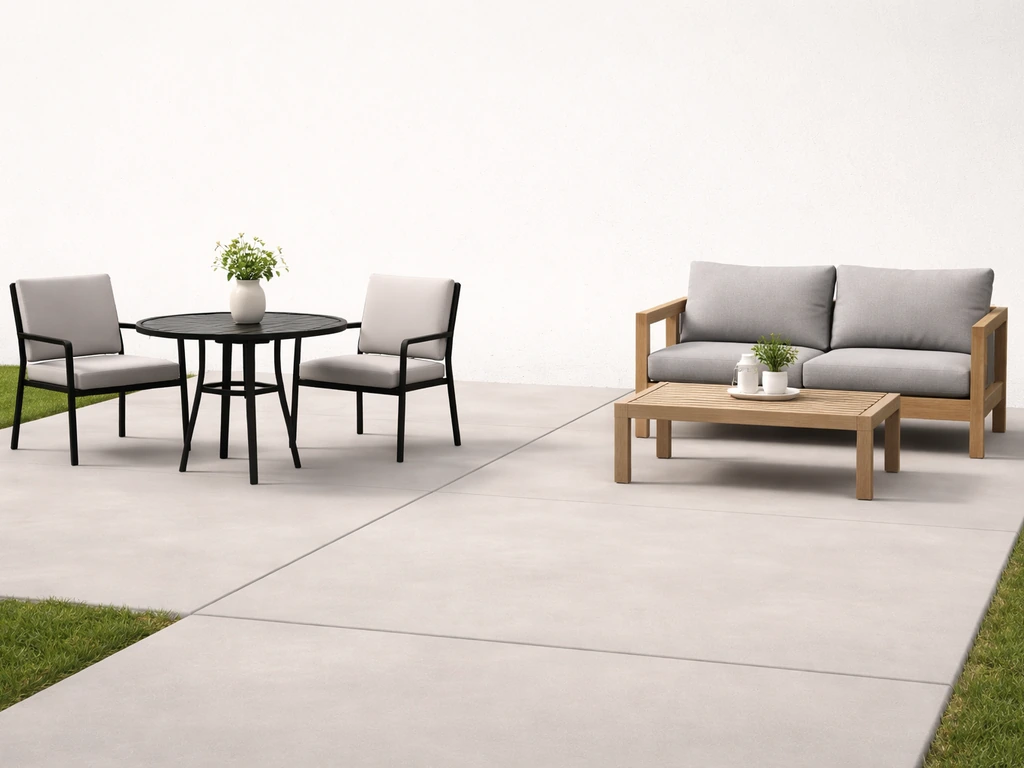
Choosing the right patio furniture for your space
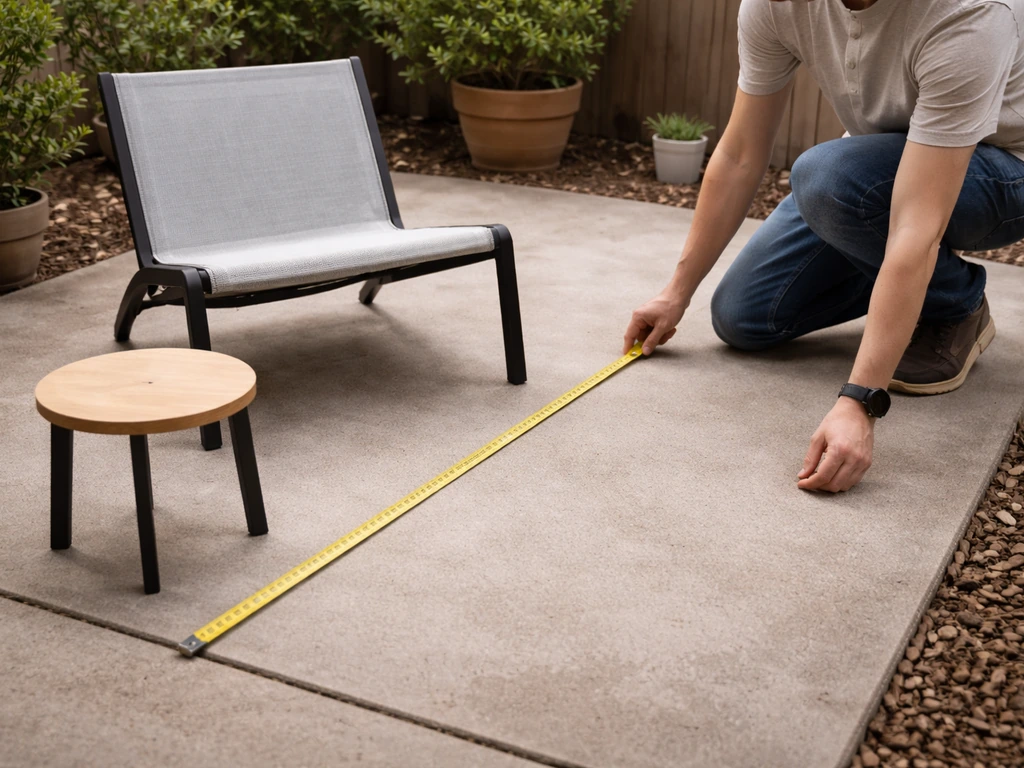
Before you buy anything, measure your space and think hard about how you actually use it. After you have the right pieces picked out, the next step is to learn how to place patio furniture so the space works well for walking, seating, and everyday use. A dining set that seats six sounds great until you realize you can't walk around the table without squeezing sideways. A practical rule: leave at least 36 inches of clear walking path around furniture for comfortable movement, and aim for 48 inches if possible, especially near doors or main walkways. That 12-inch difference feels enormous in real life.
Material choice matters more than style, because it directly affects how much work you'll do every season. Here's a realistic breakdown of the most common options:
| Material | Best For | Maintenance Level | Biggest Weakness |
|---|---|---|---|
| Aluminum | Most climates, especially humid or coastal | Low | Coating damage can lead to corrosion over time |
| Wrought Iron | Shaded patios, dry climates | Medium-High | Prone to rust if exposed or left uncovered in winter |
| Teak (solid hardwood) | Long-term investment pieces | Low-Medium | Grays without oiling; can't cover when damp |
| Synthetic Wicker (resin) | Covered porches, casual use | Low | UV fading, cracking over many years |
| Natural Rattan/Wicker | Covered or indoor-outdoor spaces only | High | Cannot get wet; warps and molds easily |
| Steel with powder coat | Budget sets, shaded areas | Medium | Chips allow rust to start quickly |
If you're on a budget, aluminum and resin wicker give you the best combination of low maintenance and durability for the price. Teak is worth the investment if you want pieces that last decades, but you have to commit to the upkeep. Wrought iron looks incredible and feels incredibly solid, but if you live somewhere with wet winters and forget to cover it, you will be sanding rust by spring. After you pick the right materials, you can use these care and setup tips as a guide for how to style patio furniture with confidence.
Also think about cushions before you buy the frames. Replacement cushions for off-brand sets can be nearly impossible to find in a few years. Sticking with brands that use standard cushion sizes, or sets that use Sunbrella-style solution-dyed acrylic fabric, gives you a much longer runway before you're stuck reupholstering or settling for ill-fitting replacements.
Basic setup and assembly (DIY-friendly checklist)
Most patio furniture assembly is straightforward, but there are a handful of mistakes that cause problems later. The biggest one I see is overtightening bolts. It feels like the right thing to do, but overtightening can strip bolt threads and crack powder-coated finishes, leaving bare metal exposed to moisture. Snug is correct. Torqued-down-as-hard-as-you-can is not.
Before you start, read the entire instruction sheet. I know that sounds obvious, but most assembly errors happen because someone skipped ahead. Lay out all the hardware and match it to the parts list so you catch missing pieces before you're halfway through. Most sets use hex bolts and require a hex wrench (usually included), plus sometimes a standard adjustable wrench for umbrella stand bases or other accessories.
Here's the assembly checklist I follow every time:
- Clear a flat surface and unbox everything before starting
- Inventory all hardware against the parts list; contact the manufacturer immediately if anything is missing
- Read the full instruction sheet once before touching a bolt
- Do a dry fit first: loosely connect major frame pieces before tightening anything
- Tighten bolts finger-tight first across all connections, then go back and snug them up with the wrench
- Never overtighten: stop when resistance increases, not when you've maxed out your strength
- For modular connectors (like minifix or cam-lock fittings on aluminum sets), align pieces carefully before locking them in, since they're hard to undo without damage
- For umbrella stands, rinse the base area after placement if on tile, and confirm the drain hole is unobstructed
- Check all joints for wobble before sitting in any chair; tighten or reassemble any connection that moves
- Wipe down the finished piece with a damp cloth to remove handling oils and assembly debris
If you're assembling with a partner, one person should handle the hardware while the other holds pieces in alignment. A lot of stripped bolts happen because someone is holding a frame awkwardly and rushing to get it tightened before the other person's arms give out. Take your time. The whole setup for most sets takes 45 minutes to two hours, not 15 minutes like the box suggests.
Outdoor cleaning and routine maintenance to prevent damage
Regular cleaning is the single cheapest thing you can do to extend the life of patio furniture. Dirt, pollen, bird droppings, and mildew don't just look bad, they trap moisture against surfaces and break down finishes over time. The good news: most patio furniture only needs mild soap and cool or warm water. You do not need specialty cleaners for routine cleaning.
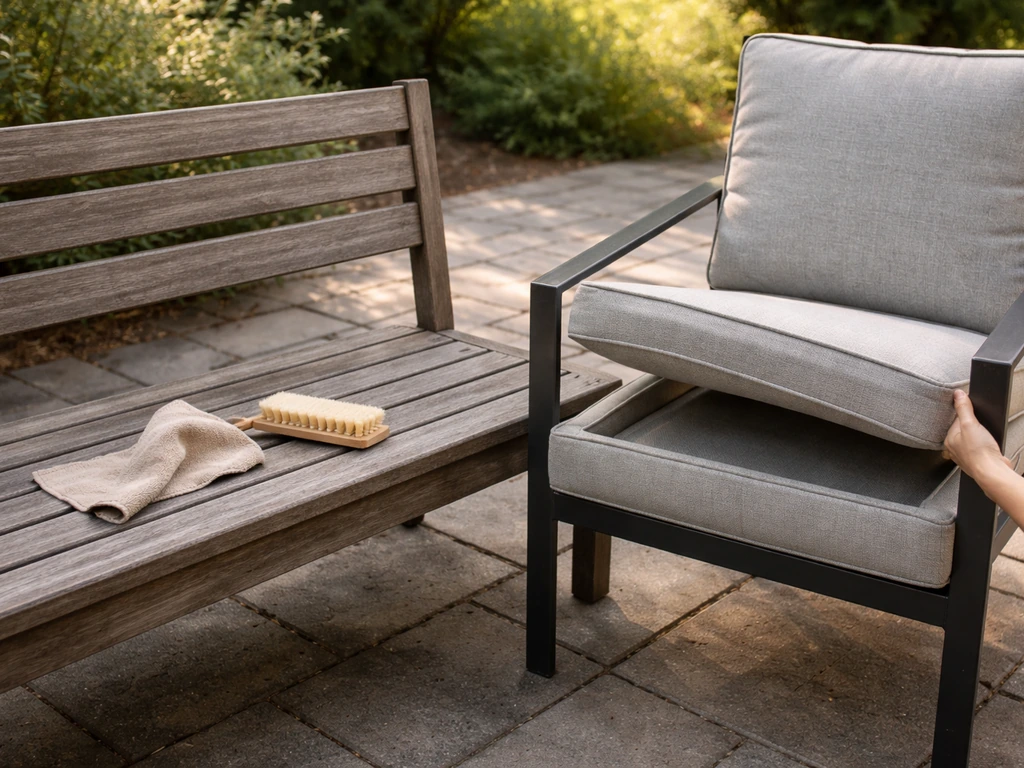
Cleaning by material type
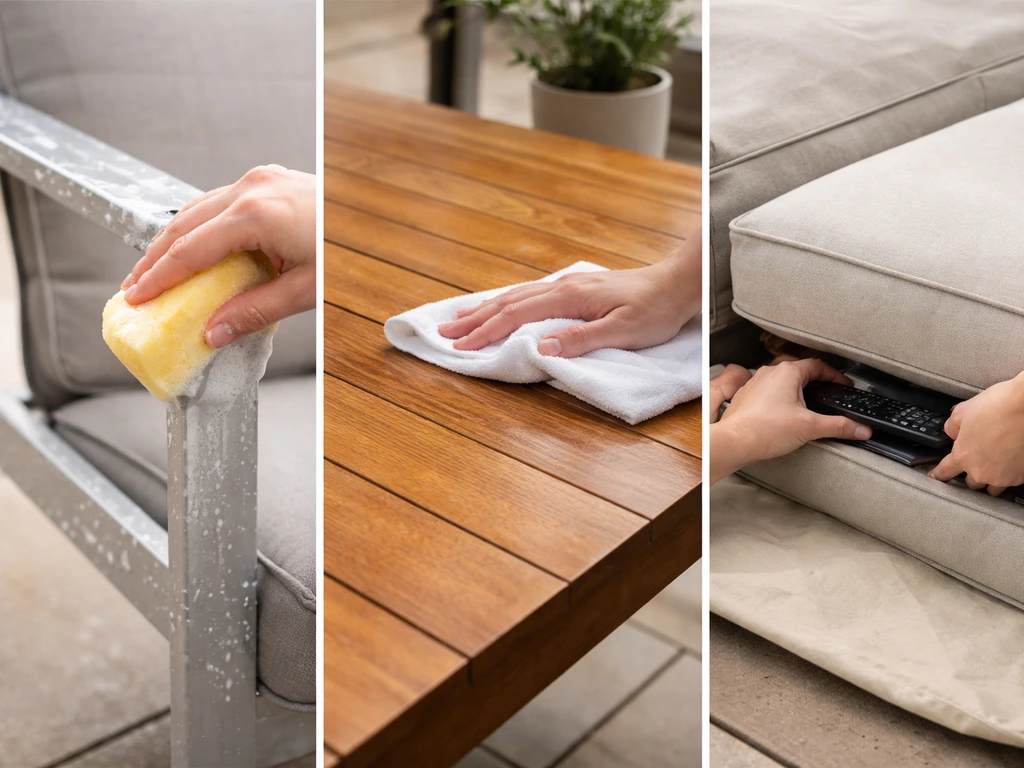
Metal frames (aluminum, steel, wrought iron): Remove any cushions or accessories before you start so moisture doesn't get trapped underneath. Wash with mild soap and warm water using a soft cloth or sponge, then rinse thoroughly and let the piece dry completely before replacing cushions. Avoid abrasive scrubbers that scratch protective coatings, especially on powder-coated steel, where a scratch is the beginning of a rust spot.
Teak and hardwood: Use a mild detergent and a soft cloth only. No pressure washing, no soaking. Teak has natural oils that protect it, and aggressive cleaning strips them out. After cleaning, check whether the wood needs oiling by dropping a small amount of water on the surface: if it beads up, the oils are intact; if it soaks in immediately, it's time to apply a name-brand teak or hardwood oil designed for outdoor use.
Synthetic wicker (resin): A mild detergent with warm water on a cloth is all you need. Get into the weave with a soft brush for stubborn debris. Synthetic wicker handles moisture fine, unlike natural rattan, which should never be submerged or soaked because it warps, molds, and the fibers break down.
Cushions and fabric: This is where I see the most mistakes. Unless the manufacturer explicitly says machine-washing is fine, don't do it. For Sunbrella and solution-dyed acrylic fabrics, handwash with about 1/4 cup of mild soap per gallon of warm water, scrub gently with a soft brush, rinse thoroughly, and air dry completely before storing or using again. Outdoor Textiles’ cleaning and care guidance for outdoor upholstery notes [solution-dyed acrylic fabrics](https://www.
outdoortextiles. com/pages/cleaning-care) often benefit from brush-attached vacuuming and care methods similar to Sunbrella. For mold or mildew, a diluted bleach and mild soap solution works well on Sunbrella fabrics specifically, since the color is dyed all the way through the fiber and won't fade from a careful bleach treatment. Always check your fabric's care label first.
A cleaning schedule worth keeping: quick wipe-down monthly during the season, deeper cleaning twice a year (spring and fall), and a thorough cushion wash once a season or when you see mildew forming. That's maybe two hours of work per year total, and it prevents repairs that could cost hundreds of dollars.
Repairing common issues: rust, wobble, broken parts, and loose hardware
Most patio furniture problems are very fixable at home. The key is catching them early, because a small rust spot or a slightly loose bolt becomes a much bigger problem after one more season of neglect.
Rust on metal frames
Wrought iron and steel frames are the most rust-prone. Aluminum develops a natural oxide layer that actually resists corrosion, but if the coating gets scratched or you have mixed-metal connections, corrosion can still develop over time. For surface rust on steel or iron, start by removing loose rust and flaking paint with a wire brush or 100-grit sandpaper. For deeper rust, a product like Rust-Oleum Rust Reformer converts active rust into a non-rusting, paintable surface chemically, which is much easier than trying to grind it all off. For badly rusted areas, a direct-to-rust primer (the kind labeled for use over rusting surfaces) can go right over the prepared area after you've removed loose scale and dirt.
Wobbling frames and loose hardware
A wobbly chair is usually just a loose bolt, and the fix takes two minutes. Flip the chair over, find all the bolt connections, and snug them up with the appropriate hex wrench or adjustable wrench. If a bolt spins freely and won't tighten, the threads are stripped, and you'll need to replace that bolt (and possibly the nut) with a hardware store equivalent of the same size. Bring the old bolt with you to match the thread pitch correctly. For joints that loosen repeatedly, a small amount of thread-locking fluid (like Loctite) on the bolt threads before reassembly keeps them from vibrating loose.
Broken slats and sling fabric replacement

Broken wooden slats on a bench or chair are a straightforward replacement: measure the original, cut a new piece of the same wood species and dimensions (cedar and teak are good choices outdoors), and attach with stainless steel screws so you don't reintroduce a rust problem. Pre-drill to prevent splitting.
Replacing a worn-out sling chair seat is more involved but very doable. The basic workflow: pry off the plastic end caps (carefully, they get brittle with sun exposure), loosen the sling rails on the chair frame, remove the old fabric, slide the new sling fabric into the rails using the spline (the rubber cord that locks fabric into the channel), reinstall the end caps, and adjust tension.
Always use new spline when replacing the sling fabric since reusing worn spline causes poor tension and support. Keep all the end caps and bolts organized as you remove them so reassembly is accurate. One person can do this job, but having a helper to hold the frame steady while you work the rails is much easier.
Restoring and refinishing: paint, stain, and upholstery refresh
If your furniture looks rough but is structurally sound, refinishing is almost always worth doing instead of replacing. I've brought back chairs that looked ready for the trash with a few hours of work and $30 in supplies.
Repainting aluminum
For aluminum frames, rough the surface with 100-grit sandpaper to give paint something to grip, then smooth with 220-grit. Wipe clean. Apply an exterior-grade acrylic enamel spray paint designed for metal. Some guidance skips primer on aluminum when using acrylic enamel, but if you want extra adhesion (especially on raw or etched sections), an acid-based etching primer first is a solid move. Apply thin, even coats and keep the spray can 10 to 12 inches from the surface. Two to three coats with dry time between them beats one heavy coat that drips and peels.
Repainting or treating iron and steel
After addressing any rust (wire brush, rust reformer, or direct-to-rust primer as described above), apply a metal-rated exterior spray paint in your chosen color. Rust-Oleum makes a wide range, and their products designed for metal outdoor use hold up well. Multiple thin coats are always better than one thick one. Let each coat dry fully before the next.
Refreshing teak and wood
Teak that has gone gray just needs cleaning and oiling to look good again. Clean first, let it dry completely for 24 to 48 hours, then apply teak oil with a cloth in the direction of the grain. Wipe off excess after 15 to 20 minutes so it doesn't get tacky. Don't use household oils like linseed or olive oil; use a name-brand outdoor teak or hardwood oil. For painted or stained wood furniture, sand lightly, clean off dust, and apply an exterior-rated stain or paint. Pressure-treated lumber or cedar takes stain beautifully for a natural look.
Refreshing cushions and upholstery
If your cushion covers are faded or worn but the foam inside is still good, replacing just the covers is a very budget-friendly move. Many outdoor fabric retailers sell replacement covers by dimension, and you can also sew your own if you're comfortable with basic sewing. Sunbrella fabric is available by the yard and is one of the most durable options you can use for outdoor cushion covers. If the foam is flattened or lumpy, outdoor-grade foam (rated for moisture exposure) is sold in sheets at fabric stores and can be cut to size with an electric carving knife or serrated bread knife. This is a project that takes an afternoon but saves you from buying a whole new set.
Seasonal storage and protection: winterizing and cover strategy
How you handle the off-season determines how much repair work you face in spring. Skipping winterizing isn't just about looks, it's about structural damage that accumulates quietly all winter under rain, freeze-thaw cycles, and constant moisture.
Covers: the right way to use them
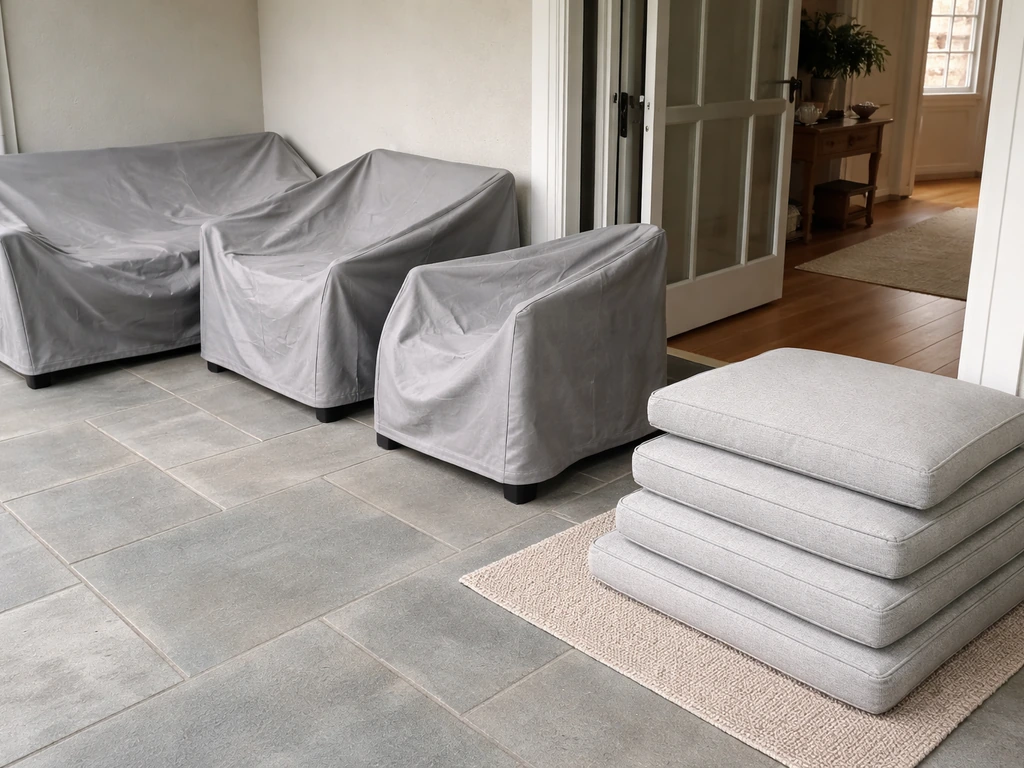
Covers are a great tool, but they cause damage when used wrong. The single biggest mistake is covering damp or dirty furniture. Moisture trapped under a cover has nowhere to go, and what you get is mold, mildew, and accelerated rust or wood rot. Always clean and dry furniture completely before covering. For teak specifically, most experts don't recommend covering it at all; if you choose to, the wood must be completely dry and free of dirt first.
When shopping for covers, look for waterproof fabric (420D polyester is a common and solid choice) and, critically, a built-in air vent. Vented covers allow air circulation that prevents condensation from building up underneath, which solves the trapped-moisture problem even on days when humidity is high. Covers without vents can trap as much moisture as they block, especially in climates with temperature swings.
Wrought iron furniture left uncovered through winter is almost guaranteed to develop rust on exposed areas. Covering or bringing it inside is not optional if you want to skip a full refinishing job every spring.
Winterizing step by step
- Clean all furniture thoroughly (frames and cushions) and let everything dry completely, ideally 24 to 48 hours in good weather
- Remove cushions from frames and store them indoors in a dry location, either in breathable bags or covered containers that aren't airtight
- Touch up any paint chips or rust spots on metal before storage so bare metal isn't exposed all winter
- Apply teak oil to any wood furniture that needs it, then let it cure before covering
- Stack or nest chairs where possible to reduce the number of covers needed
- Place covers over clean, dry furniture with the air vents unobstructed
- If you have space (a garage, shed, or basement), bringing metal furniture indoors entirely is the most reliable protection, especially for wrought iron
- Check on covered furniture mid-winter after any major storm to confirm covers are secure and not pooling water
Customization upgrades to improve comfort and longevity
Once your furniture is in solid shape, a few targeted upgrades make a noticeable difference in how comfortable and durable it is going forward. These are all realistic DIY projects with real payoff.
- New cushions with solution-dyed acrylic fabric (like Sunbrella): this is the single biggest comfort and durability upgrade you can make. Standard cushions fade and mold within a couple of seasons; quality outdoor fabric lasts many years longer with basic care.
- Furniture feet and floor glides: rubber or felt caps on chair and table legs prevent scratching on decks and patios, reduce wobble on uneven surfaces, and slow corrosion at the frame ends where moisture collects on bare metal.
- Waterproofing spray for cushion fabric: a fabric protector spray (look for products designed for outdoor textiles) adds a hydrophobic layer that helps water bead off instead of soaking in, buying time between deep cleanings and reducing mildew risk.
- Replacement hardware kits: stainless steel bolts and hardware are worth swapping in when you're already doing a repair. They won't rust and they match the weight and strength of the originals. A full hardware replacement for a chair costs a few dollars at the hardware store.
- Outdoor furniture anchors or sandbag weights: if you're in a windy area, anchor kits or weighted bases keep lightweight aluminum and resin furniture from blowing around and getting damaged. This is especially worth doing for umbrella bases and side tables.
- Lumbar and seat cushion add-ons: standalone outdoor throw pillows and lumbar cushions (in weather-resistant fabric) transform the comfort of basic sling chairs and wooden benches without replacing the whole piece.
If you're thinking about how the furniture is arranged, mixing pieces together, or adding decorative touches to tie the space together visually, those are separate but closely related questions worth exploring on their own, since layout, mixing styles, and decorating choices all affect how practical and enjoyable your outdoor space ends up being day to day. If you're also trying to figure out how to mix patio furniture, the material choices and layout tips above will help you pull it together smoothly.
The bottom line: patio furniture is not disposable, even the budget stuff. With the right material choice upfront, a basic cleaning routine, prompt repairs, and smart seasonal storage, most sets will last a decade or more. Start with whatever problem you have right now, whether that's rust, a broken sling, faded cushions, or just figuring out what to buy, and work through the relevant section. You don't have to do everything at once. One good repair this weekend is better than a perfect plan that never happens.
FAQ
Can I cover patio furniture if I’m not sure it’s completely dry?
If your patio furniture is in storage and you are unsure it is fully dry, wait until cushions and any interior surfaces feel completely dry to the touch before covering or reassembling. For metal frames, also check for trapped moisture around joints, then wipe and let air circulate for a few hours before putting cushions back on.
Is pressure washing ever okay for patio furniture?
In general, avoid pressure washing painted or powder-coated surfaces, because it can force water into seams and chip coatings. Stick to mild soap and soft tools, and if you have stubborn buildup, do it by cleaning in sections with gentle brushing rather than using a high-pressure approach.
What should I do when powder coating is scratched or chipped?
If you have a scratch on powder-coated steel or mixed-metal connections, treat it sooner rather than waiting. Clean the area, remove any loose coating or rust, then apply a rust-prevention step (converter or direct-to-rust primer) and top with metal-rated exterior spray paint to seal the exposed section.
How can I tell whether a wobbly chair has a loose bolt or stripped threads?
For a bolt that spins but the threads are not obviously stripped, test with a second connection point first, because misalignment can make it feel “stuck.” If the bolt truly will not tighten after snugting attempts, replace the bolt (and nut if applicable) using the old bolt in the store to match thread pitch.
When is refinishing worth it, and when should I replace the furniture instead?
Yes, you can often refinish instead of replace, but check for structural failure first. Look for cracks in frames, severely delaminated or rotted wood, or sling/rail damage that causes sagging beyond fabric replacement, then focus refinishing on the parts that are still solid.
What should I do if cushions smell musty after winter?
If your cushions smell musty after storage, do not just re-cover them. Wash or spot-clean according to the fabric care instructions, rinse thoroughly, then air dry fully in a well-ventilated area before use, since trapped mildew will return quickly if you store them again while still damp.
How do I measure cushions correctly when buying replacement covers?
When choosing replacement cushion covers, measure the exact cushion width, depth, and thickness, and confirm whether the cover has a zipper or a slip-on style. Also confirm fabric type and care instructions so you buy covers that match how the set’s foam is shaped and vented.
Should I use thread-locking fluid on every outdoor furniture bolt?
Thread-locking fluid is most helpful on joints that loosen from vibration, but it should not be used to “fix” stripped threads. Clean the bolt threads, apply a small amount to the bolt, reassemble snugly, and recheck after the first couple of uses.
How do I know whether teak needs cleaning only, or cleaning plus oiling?
For teak, do a water test before oiling: if water beads, oils are likely still present and you may only need cleaning. If water soaks in quickly, apply outdoor teak oil in the grain direction, then wipe off excess so the surface is not tacky.
Do vented patio furniture covers actually matter, or is waterproof fabric enough?
If the cover does not have a built-in vent, adding ventilation is important, especially in humid climates. Use a cover that allows air movement, or cover only after everything is clean and completely dry, because a non-vented cover can create the same trapped-moisture problem it is meant to prevent.
What is the right repair approach for different levels of rust?
For rust on steel or iron, prioritize removing loose scale first, then choose a product strategy based on how deep the rust is. Light surface rust can often be prepped and painted after removing loose rust, deeper rust benefits from a rust converter, and badly rusted spots typically require a direct-to-rust primer step before topcoat.