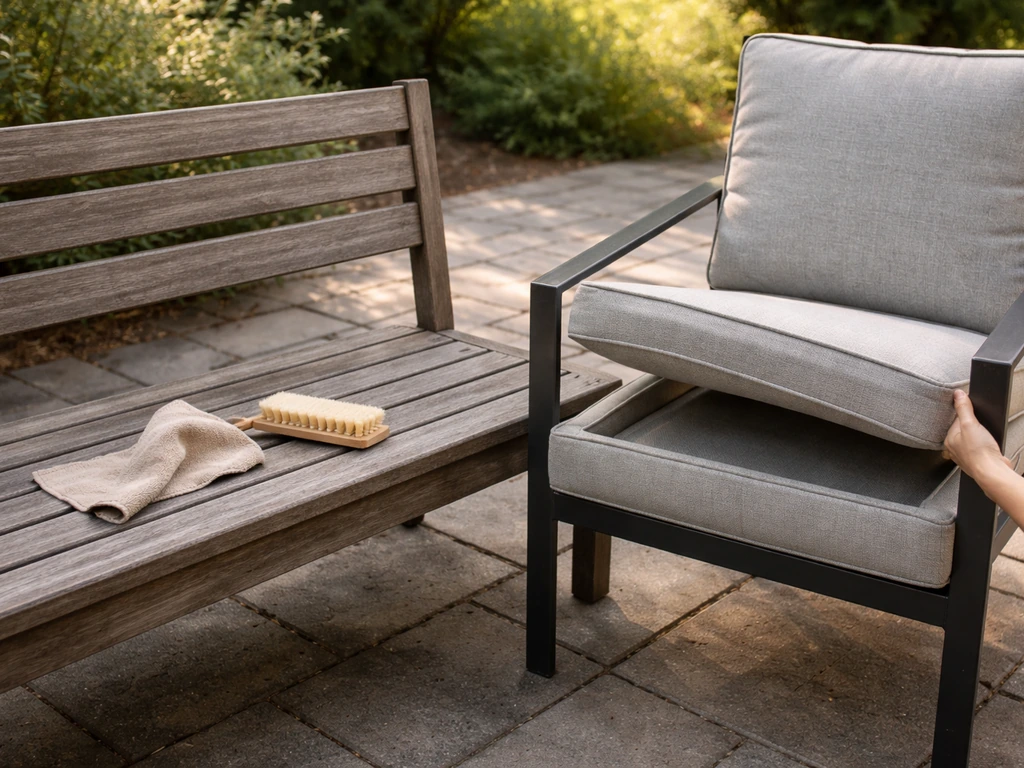
Connecting patio furniture usually means one of four things: assembling knock-down pieces fresh out of the box, reattaching a leg or frame joint that has worked itself loose, reconnecting modular sectional pieces so they stay put, or reattaching a sling or strap to a chair frame. If you need a quick refresher on the overall process, see this guide on how to mix patio furniture connection methods assemble knock-down pieces. Each of those is a different job with different hardware, but none of them are beyond a beginner with the right approach. This guide walks through all of them, from picking the correct fasteners to weatherproofing the finished joints so they hold up through rain, heat, and cold.
How to Connect Patio Furniture: DIY Steps for Secure Joints

Maren Grady
3 Jul 2026
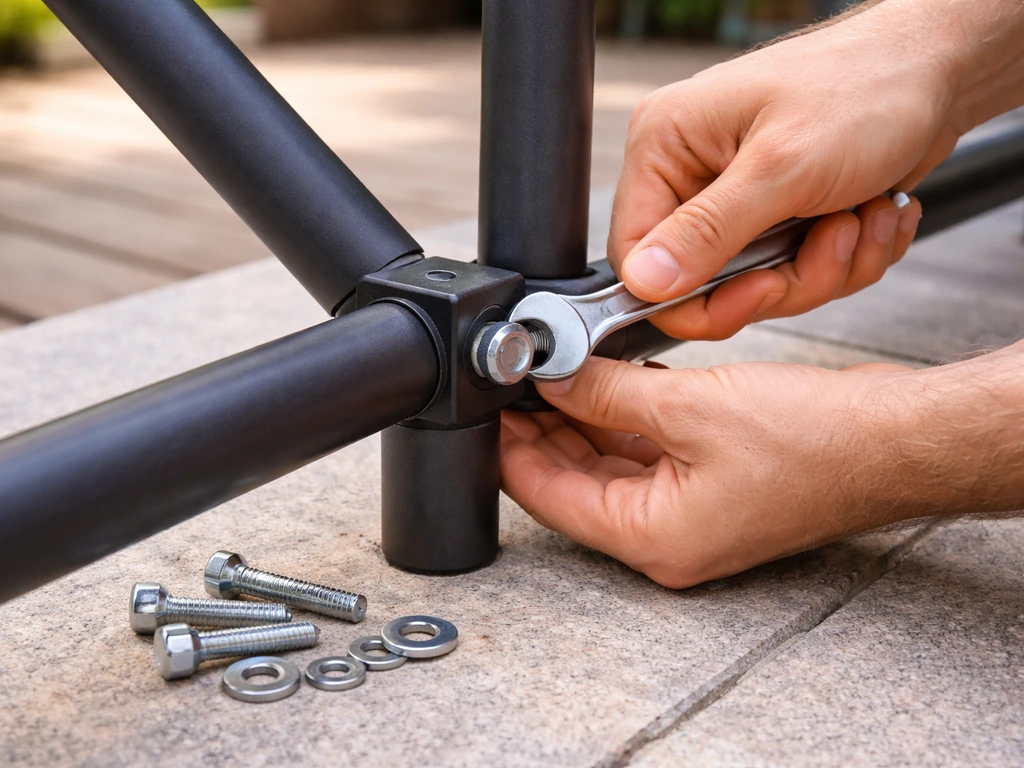
Figure out what 'connect' actually means for your furniture
Before you grab a wrench, spend two minutes identifying your actual task. The word 'connect' covers a lot of ground with patio furniture, and misreading the job is the number one reason people grab the wrong hardware or skip a step they needed.
- New assembly from a box: Knock-down (KD) furniture arrives with pre-drilled holes and a bag of hardware. Your job is to bolt legs to frames and attach the tabletop or seat in the correct order.
- Reattaching a loose or separated joint: A leg has pulled free from a table base, or a chair arm has come unbolted. The joint existed before and needs to be reset or replaced.
- Connecting modular sectional pieces: Sectional sofas and L-shaped sets use clips, ties, or linking brackets to keep individual pieces from drifting apart.
- Reattaching a sling or strap: The fabric sling on a chair has slipped out of its rail track, torn loose, or needs full replacement after the old one wore out.
- Seasonal reassembly: You stored the set disassembled over winter and are now putting it back together for summer use.
Knowing which category you are in changes everything. A stripped bolt on a reassembly job needs a different fix than a modular clip that snapped off a sectional. Take a photo of the problem area before you start so you can reference it if you need to look up replacement parts.
Tools and materials by furniture type
The tools you need depend almost entirely on what your furniture is made of. Here is a breakdown by material and frame style so you can gather everything before you start, which saves a lot of back-and-forth trips to the garage.
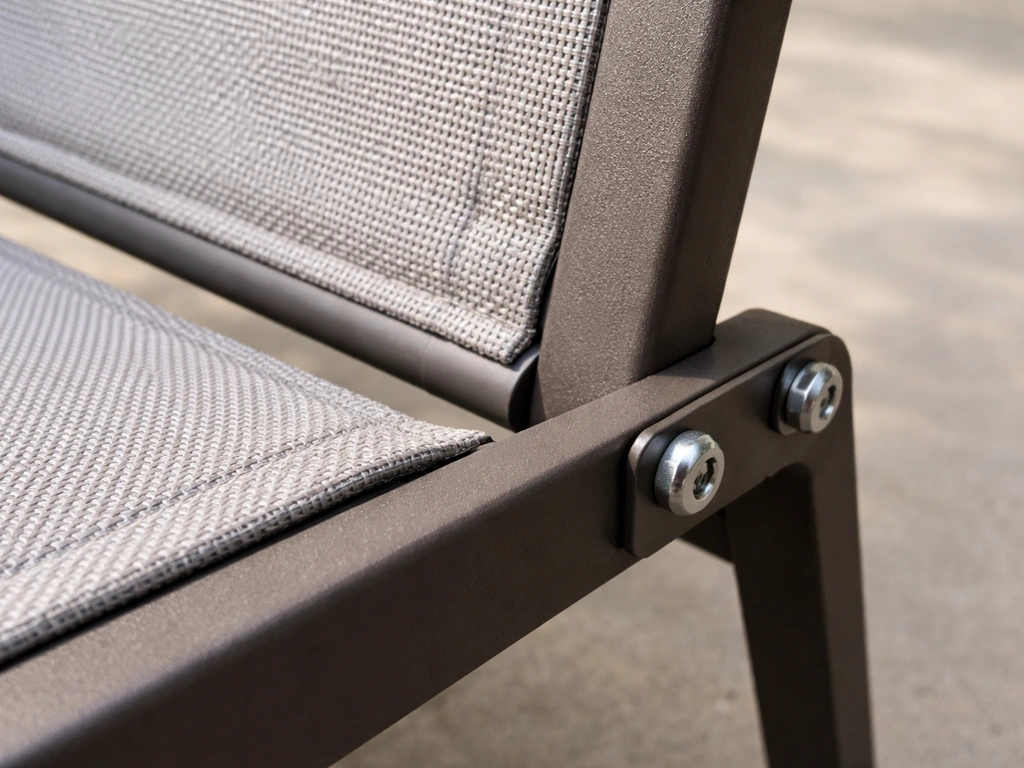
Aluminum and steel frames

Most modern patio sets are powder-coated aluminum or tubular steel. They connect with hex bolts, carriage bolts, or machine screws paired with locking nuts (also called nylock nuts). You will need a socket set or adjustable wrench, a Phillips or flathead screwdriver, and in most cases an Allen key (hex wrench) set because many contemporary frames use Allen-head bolts. Pick up stainless steel or zinc-plated replacement hardware if anything is missing. Standard zinc hardware from a big-box store works fine and costs almost nothing, usually less than two dollars per bolt, washer, and nut set. Avoid bare steel hardware outdoors because it rusts within one season.
Wood frames
Teak, eucalyptus, acacia, and cedar furniture typically use wood screws, lag bolts, or carriage bolts with large flat washers. You need a drill/driver with a Phillips or square-drive bit, a mallet for tapping tenon joints, and exterior-grade wood glue for any mortise-and-tenon connections. If you are reattaching a leg that has a wood-to-wood joint, Titebond III or a similar waterproof wood glue is the right adhesive. Do not use regular interior PVA glue outdoors: it softens when wet and the joint will fail again within weeks.
Resin and plastic frames
Resin furniture connects with machine screws into molded bosses (threaded plastic seats inside the frame), or with snap-fit clips. The main risk here is overtightening, which cracks the boss and strips the thread permanently. Use a hand screwdriver rather than a power drill on resin connections, and stop as soon as you feel resistance. If a molded thread is already stripped, a stainless M5 or M6 threaded insert pressed or epoxied into the hole is a cheap and durable fix.
Sling chairs
Sling chairs use a retained-rail system where the sling material slides into a groove along a removable side rail, and the rail is then bolted back onto the chair frame. After you remove the side rail hardware, slide the new sling into the rails or tracks evenly, then re-bolt the rail back onto the chair frame to keep the sling aligned and reduce skew and wear [keeping the sling even to avoid skew/wear. ](https://www. patiocchairsupplies.
com/install-slings. html). To work on these you need a socket wrench or nut driver to remove the rail bolts, a flat-head screwdriver or plastic spudger to pop end caps, and optionally a rubber mallet to tap the rail back into position without denting it. Replacement slings from the original manufacturer or an aftermarket supplier are sold by chair model and rail length, so measure the rail length and rail groove width before ordering.
| Furniture Type | Typical Fastener | Key Tool | Replacement Hardware Cost |
|---|---|---|---|
| Aluminum frame | Hex/Allen bolt + nylock nut | Allen key set, socket wrench | $1–3 per bolt set |
| Steel frame | Carriage bolt + flat washer + nut | Adjustable wrench, socket set | $1–4 per bolt set |
| Wood frame | Lag bolt or carriage bolt + washer | Drill/driver, mallet | $2–5 per bolt set |
| Resin/plastic | Machine screw into molded boss | Hand screwdriver | $0.50–2 per screw |
| Sling chair | Rail bolt + spacer + end cap | Nut driver, flat spudger | $5–15 for rail hardware set |
Step-by-step: connecting and detaching hardware and joints
I will walk through the two most common scenarios in detail: assembling or reassembling a standard bolt-together frame set, and reattaching a sling rail. If your job is reconnecting a loose joint rather than fresh assembly, start at step 3.
Assembling a bolt-together frame (tables, chairs, and bases)
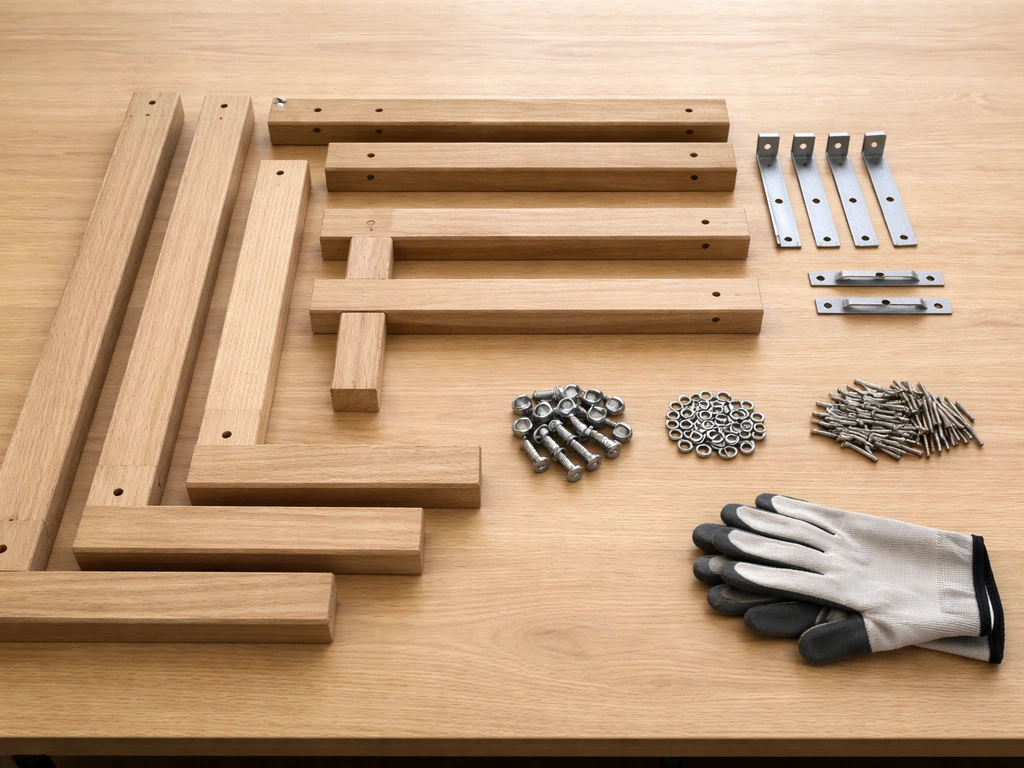
- Lay all the parts on a clean flat surface and match them to the assembly diagram before you insert a single bolt. Identify every piece and sort the hardware by type.
- Start with the largest subassembly first, usually the base or main frame. Insert bolts finger-tight only at this stage so you can adjust alignment before anything is locked in.
- Add washers in the order shown: a flat washer under the bolt head, then the joint, then a flat washer on the nut side, then the lock washer (split ring washer), then the nut. This sandwich distributes load and prevents loosening from vibration.
- Work in a star pattern when tightening multiple bolts on the same component, similar to how you tighten lug nuts on a car. This keeps the joint from racking out of square.
- Tighten to snug plus a quarter turn on aluminum. On steel or wood, you can go slightly firmer, but stop before you see the material deforming around the bolt hole.
- Attach smaller components (arms, leg caps, crossbars) after the main frame is set, and follow the same finger-tight-first rule.
- For a tabletop, position it centered on the base before tightening any of the apron-to-base bolts. Have someone hold it steady or use clamps to keep it from shifting while you work.
Reattaching a sling chair rail
- Pry off the plastic end caps at each end of the side rail using a flat-head screwdriver or spudger. Set them somewhere safe because they are easy to lose.
- Remove the bolts or screws holding the rail to the chair frame and carefully slide the rail free. Note which edge of the sling faces outward before the old one comes out.
- If replacing the sling, slide the new sling's hemmed edge into the rail groove starting from one end. Pull it through evenly so neither side is tighter than the other. An uneven sling will sag and wear out on one side much faster.
- Slide the rail back into its slot on the chair frame. Align the bolt holes before applying any pressure, and tap gently with a rubber mallet if it is stiff.
- Re-insert the rail bolts with their spacers and washers, tighten snugly, and snap the end caps back on. Give the sling a tug from both sides to confirm it is evenly tensioned.
Connecting modular sectional pieces
Most sectional patio sets use one of three linking systems: plastic click-clips that snap onto the frame legs, hook-and-loop furniture straps (basically heavy outdoor velcro), or small metal S-hooks that loop through frame holes. For another common join type, see how modular sectional pieces connect so you can match the right clips or straps.
If your original clips are missing or broken, universal sectional furniture clips (sold for about five to eight dollars for a pack of four) fit most tubular aluminum frames. Position your sections first, then clip them together from the inside so the hardware is not visible. If your set came with straps, thread them through the legs at the bottom of the frame where they will not catch clothing or feet.
Stabilizing, aligning, and getting rid of the wobble
A wobbling table or rocking chair is almost always caused by one of three things: the surface is uneven, the joints are loose, or the legs are not set at matching heights. Experts also note that knock-down patio-furniture wobble commonly comes from bolt and locknut assemblies, washers, and top or apron fasteners that are assembled incorrectly or on uneven surfaces How to Fix Wobbly Outdoor Furniture? Here's How Experts Do It. Here is how to diagnose and fix each one.
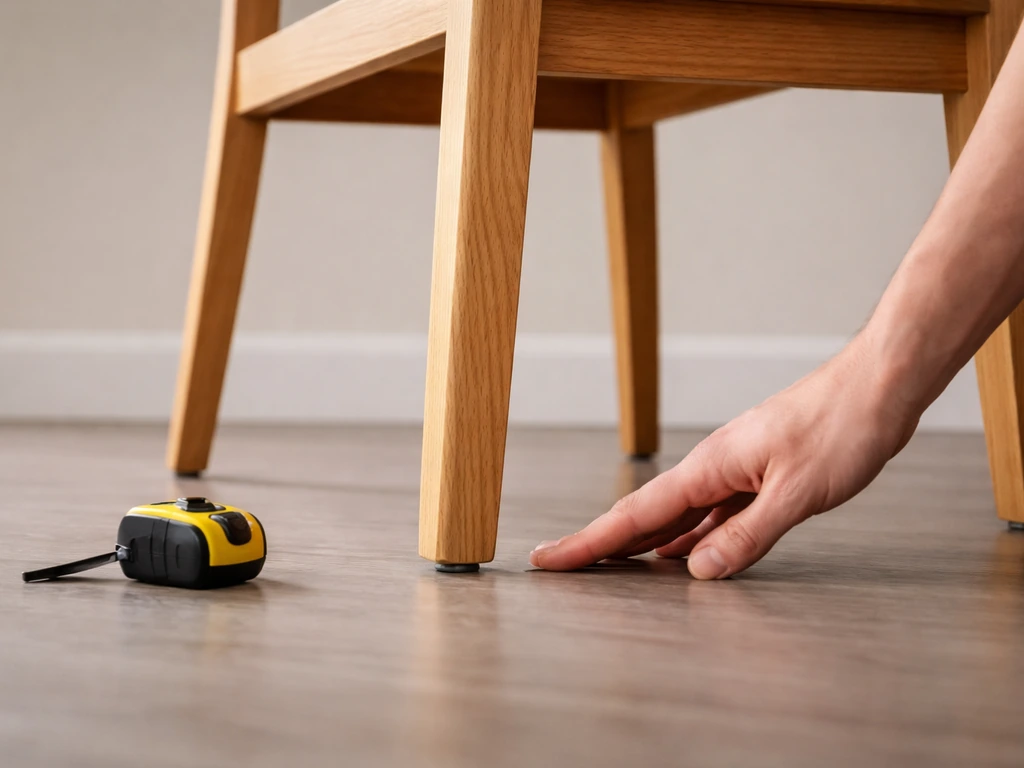
Check the surface first
Before you assume the furniture is the problem, put a small torpedo level on the table surface. If the patio itself is off, no amount of tightening will fix the wobble. Adjustable leveling glides on the feet (they thread up and down like a screw) are the cleanest fix, and most cost about three dollars each. Look for nylon-tip glides rated for outdoor use.
Tighten and check all hardware
Go around every bolt on the piece and snug it up. Loose or missing small parts, including washers, end caps, and lock washers, are one of the most common causes of wobble in assembled patio furniture. If the bolt turns freely and does not tighten, the nut may have fallen out or the thread is stripped. Replace that bolt completely rather than trying to tighten something that has no grip.
Squaring the frame
If a chair or table still rocks after tightening, place it on a known-flat surface (a garage floor or driveway works) and look at it from the side. If one leg is clearly shorter or not plumb, loosen all the joints on that leg assembly, press the frame flat against the floor to square it, and retighten in that position. On wood frames, you can use a bar clamp to hold the frame square while the glue or bolts set.
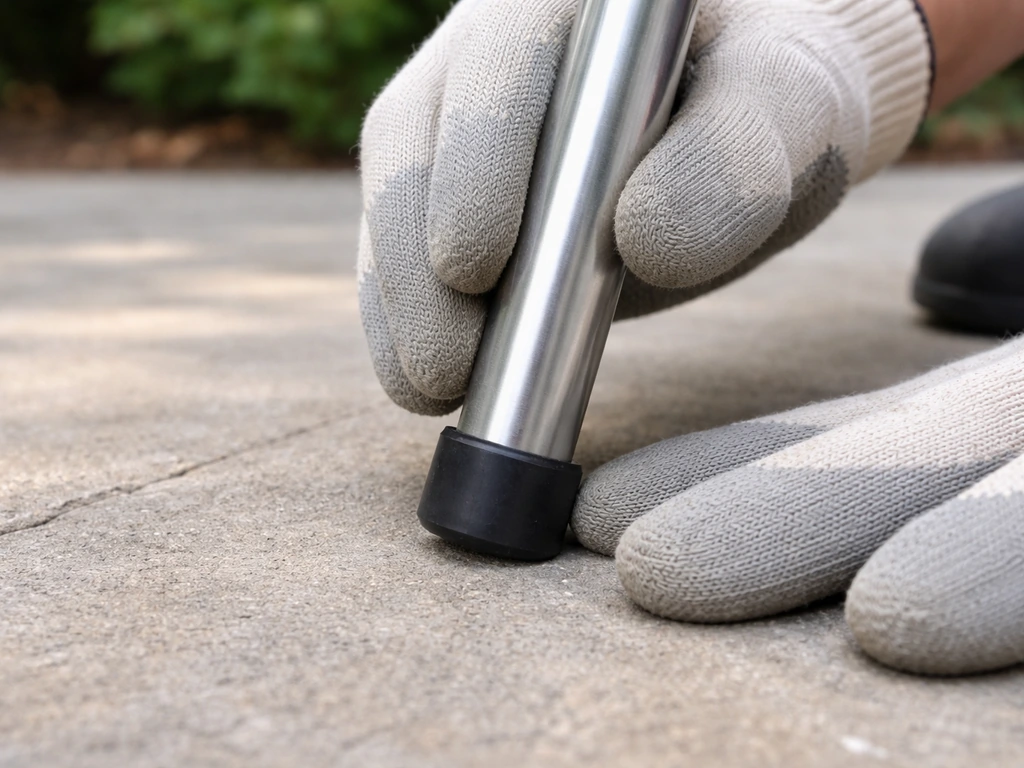
Leg caps and rubber feet
Missing leg caps are surprisingly common on older patio furniture and they directly cause rocking because the raw tube edge is uneven. Replacement rubber or plastic leg caps for tubular aluminum frames are sold by inside tube diameter, typically 7/8 inch, 1 inch, or 1-1/4 inch. A pack of four costs about four to six dollars and fixes the wobble instantly. Rubber feet also protect decking from scratches, which is worth it if your patio is wood or composite.
Weatherproofing and protecting connections after assembly
This is the step most people skip, and it is the reason they end up doing the whole job again two years later. Outdoor connections fail from moisture getting into joints, causing rust, wood rot, or galvanic corrosion between dissimilar metals. A few minutes of protection here extends the life of those joints by years.
Use the right hardware to begin with
If you are replacing any fasteners, use stainless steel (grade 304 or 316 for coastal environments), hot-dipped galvanized, or zinc-plated hardware. Never use bare steel bolts outdoors. On aluminum frames specifically, avoid plain steel hardware because of galvanic corrosion: where steel and aluminum touch in a wet environment, the aluminum corrodes at an accelerated rate. Stainless steel is the correct pairing with aluminum.
Add anti-seize or thread locker where appropriate
On aluminum frames, apply a small amount of anti-seize compound (a silver-gray paste sold at auto parts stores for about six dollars) to bolt threads before assembly. This prevents galling (where the threads cold-weld together over time) and makes future disassembly much easier. On joints that vibrate loose frequently, a drop of medium-strength blue thread locker (Loctite 243 is the standard) on the bolt threads keeps the nut from backing off on its own. Do not use red thread locker on patio furniture because it is designed for permanent bonds and you will likely never get the bolt out again.
Seal exposed wood joints
On wood furniture, the area around bolt holes is where moisture penetrates deepest. After assembly, brush a thin coat of exterior spar varnish or teak oil (depending on the wood type) around each bolt head and into any gap between wood components. This does not need to be a full refinishing job, just enough to seal the entry points for water.
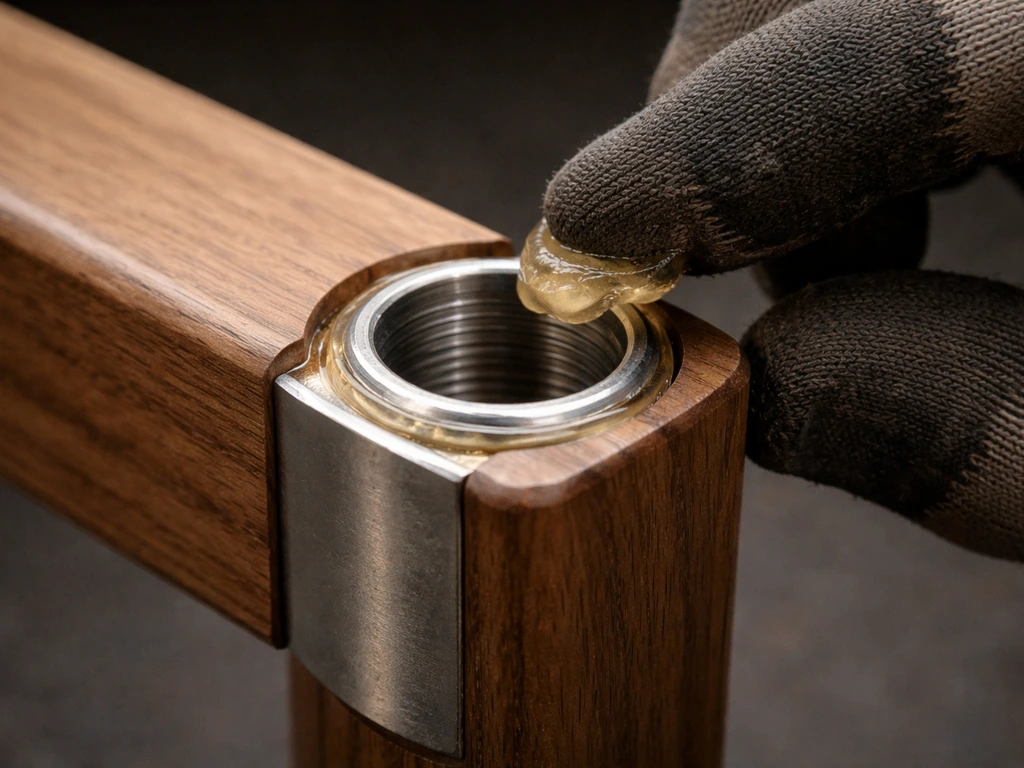
Protect metal-to-metal contact points
Wherever two metal surfaces meet (like where a leg sleeve fits over a crossbar), a thin coat of marine-grade grease or even petroleum jelly on assembly acts as a moisture barrier and makes seasonal disassembly much easier. Wipe off any excess so it does not attract dirt.
Troubleshooting real-world problems
Here is where I will be honest: connecting patio furniture rarely goes perfectly, especially on older sets or secondhand pieces. Once your connections are secure, you can move on to how to decorate patio furniture so it looks polished and feels comfortable outdoors. These are the problems you are most likely to hit and how to get past them.
Missing or mismatched parts
If your set is missing hardware, start with the manual (most brands post PDFs on their website) for the exact bolt spec: diameter, thread pitch, and length. A bolt that is 2mm too long can bottom out before it clamps the joint. If the manual is gone, take one of the existing bolts to a hardware store and use their thread gauge to match it. For mismatched parts on secondhand furniture, a hardware store's bolt and nut bins are far cheaper than ordering from a furniture retailer. Bring the original piece to match size and thread.
Stripped threads
A stripped thread in metal means the bolt spins freely without gripping. On thin aluminum, a thread repair insert (a Helicoil kit, about twelve to eighteen dollars) is the cleanest fix: you drill the hole slightly larger, tap new threads, and install a stainless coil insert that gives the bolt fresh material to grip. On thicker steel, you can often run a slightly larger bolt through a new hole drilled just next to the stripped one. On resin, an epoxy-anchored stainless threaded insert works well. Do not try to just overtighten a stripped thread, it will break the surrounding material.
Rusted or seized hardware
If a bolt will not budge, soak it with penetrating oil (PB Blaster or Kroil are the best options) and wait at least 20 minutes, ideally overnight. Tap the bolt head lightly with a hammer before trying to turn it, because vibration helps the oil wick into the threads. If it still will not move, use a bolt extractor set with an impact driver. As a last resort, cut the bolt with a rotary tool and replace the whole fastener. Replacement hardware costs almost nothing, so do not damage the frame trying to save a two-dollar bolt.
Cross-threading
Cross-threading happens when a bolt is started at an angle and the threads engage incorrectly, feeling tight but not actually seated. The fix is to back the bolt out completely, hold it perfectly perpendicular to the hole, and start it by hand with zero downward pressure until you feel it drop slightly into the threads. That small drop is the bolt catching correctly. Only then apply turning force. If you have already cross-threaded and damaged the nut, replace the nut before the joint is used under load.
Loose joints that keep coming undone
If you tighten a joint and it works loose again within a week, the issue is usually one of three things: a missing lock washer, a missing nylock nut (standard hex nuts back off easily under vibration), or a bolt that is too short and not getting enough thread engagement. Replace standard hex nuts with nylock nuts throughout and add a split lock washer under the bolt head. If the bolt is the right length but still backs off, blue thread locker on the threads will solve it permanently.
Keeping connections tight season after season
The best time to check and maintain patio furniture connections is twice a year: once when you bring it out for the season (usually spring) and once before you store or cover it for winter. This routine takes about fifteen minutes for a full set and prevents the kind of progressive loosening that leads to a joint failing mid-use.
Spring setup check
- Wipe down all hardware with a dry cloth to remove any surface moisture or salt residue from storage.
- Go around every bolt and nut with the appropriate wrench and snug each one. You are not trying to retorque to spec, just confirm nothing is obviously loose.
- Check all leg caps and end caps and replace any that are cracked or missing.
- Look for rust spots on steel hardware and treat them immediately with a rust converter product before they spread.
- On wood furniture, check the wood around bolt holes for swelling, cracking, or soft spots that indicate rot, and address those before loading the joint.
End-of-season teardown
- Clean all metal hardware with a damp cloth and dry thoroughly before storage to prevent rust forming over winter.
- Store loose hardware in a labeled zip-lock bag taped to the furniture or kept with the assembly manual so nothing goes missing.
- Apply a light coat of metal protectant spray (like WD-40 specialist long-term corrosion inhibitor) to exposed bolt heads and rail hardware on chairs.
- On wood furniture, apply a fresh coat of teak oil or exterior finish to any bare wood around bolt holes before storing.
- If you disassemble for storage, photograph the set before you take it apart so spring reassembly is faster and you catch missing pieces before you need them.
Ongoing cleaning around connections
Dirt and debris packing into bolt holes and rail tracks is a slow killer of outdoor hardware. When you clean the furniture surface (which should be at least once a month during the season), hit the hardware too: a stiff brush and a rinse with a hose clears debris from rail grooves, bolt recesses, and joint gaps. Avoid pressure washing directly at bolt heads or rail tracks because the force pushes water deeper into joints than normal rain ever would. Once clean and dry, a spray of silicone lubricant on rail tracks keeps slings sliding smoothly and prevents the squeaking that comes from dry metal-on-metal contact.
Getting the placement and arrangement of the set right before you finalize your connections can save you from having to reassemble things after the fact. That same mindset helps you learn how to place patio furniture so it sits comfortably and stays stable once everything is connected Getting the placement and arrangement of the set right. It is also worth thinking about how pieces mix and match if you are combining frames from different sets, since not all modular systems are cross-compatible. Both of those considerations come before the wrench comes out, and getting them right upfront makes the whole connecting process much faster.
FAQ
How tight should patio furniture bolts be when I connect the joints?
Use a nylock nut and a properly matched bolt length, then check that the bolt is clamping the joint, not just bottoming out. If the furniture has adjustable leveling glides, set the height first, then reconnect, because forcing an out-of-plumb joint can keep loosening even after you tighten.
What should I do if a bolt turns freely after I connect patio furniture?
If you can rotate the bolt by hand and it does not “bite,” do not keep tightening. That usually means a missing nut, a stripped thread, or cross-threading. Back it out, inspect the mating hole, and replace the bolt and/or nut or install a thread insert, depending on the material (metal versus resin).
Can I use stainless bolts on aluminum patio frames without causing corrosion issues?
For exposed aluminum-to-metal contact points (like where a leg sleeve meets a crossbar), use stainless hardware plus a thin moisture barrier (marine grease or petroleum jelly) and, if the manufacturer does not specify otherwise, anti-seize on the bolt threads. Avoid bare steel anywhere it touches aluminum in wet conditions to prevent accelerated galvanic corrosion.
Is thread locker safe to use on all patio furniture connections?
Do not use red thread locker on patio furniture. If you need a vibration-resistant connection, use medium-strength blue thread locker (on bolt threads) and still ensure the correct bolt length and presence of a locking nut. Red can make future disassembly impractical, especially outdoors where rust can already make bolts difficult.
Why does my chair still wobble after I connected all the bolts?
If your pieces wobble after you reconnect, confirm the patio surface is level first, then re-square the leg assembly by loosening that leg’s joints, pressing the frame flat on a known-flat surface, and retightening. Also inspect for missing leg caps, end caps, washers, and lock washers, since these cause rocking even when bolts are fully tightened.
How do I connect resin patio furniture without cracking the plastic?
For resin, overtightening is the main failure mode, and cracks can happen even if it feels “tight.” Use a hand screwdriver, stop as soon as you feel resistance, and replace any cracked molded boss. If the thread is stripped, install an epoxy-anchored or pressed-in threaded insert rather than forcing the original screw.
What’s the correct way to reinstall a sling rail so the sling doesn’t twist?
If you are attaching a sling rail, remove and reinstall end caps carefully so you do not tear the sling edge. When bolting the rail back on, keep the rail centered in the groove before you tighten fully, then tighten gradually while checking that the sling sits evenly along the track.
My sectional connectors seem to click in, but the pieces separate. What am I likely missing?
If your set uses click-clips or S-hooks, position the sections first, then install the connector hardware from the inside so it can’t work loose against clothing or feet. When snapping clips, ensure the clip fully seats, a partially engaged clip often looks “on” but releases under use.
How do I know the replacement bolt size is correct for a patio furniture connection?
For secondhand sets with missing bolts, match by bolt diameter, thread pitch, and length, not just diameter. A bolt that is slightly too long can bottom out before clamping, and a bolt that is too short gives poor thread engagement, both lead to loosening.
Should I pressure wash patio furniture joints before I connect or reconnect them?
Clean debris from bolt holes and rail tracks before reconnecting, and avoid pressure washing directly at the bolt heads or into joint gaps. After cleaning, fully dry the hardware, then apply silicone lubricant to rail tracks so slings slide smoothly and metal surfaces do not squeak from dry contact.
What are the most common mistakes that cause patio furniture joints to fail again quickly?
Run a quick pre-check at each connection point: verify washers are present where required, check that nuts are not missing or cross-threaded, and confirm the joint closes flush without forcing. If anything resists during assembly, stop and realign before tightening, because forcing misalignment can permanently damage threaded plastic bosses or wood joinery.
Can I connect patio furniture from different brands or sets together?
Yes, if you mix sets, assume connectors may not be cross-compatible by design. Even when tube sizes look similar, clip geometry, rail groove dimensions, and strap anchor locations often differ, so verify connector type and dimensions before ordering replacement hardware. If unsure, measure the rail groove width and end-to-end rail length for sling systems.