Place your patio furniture by working in this order: decide whether the space is for dining or lounging first, measure your patio and mark out clearances (at least 30 inches for walkways, 24–36 inches behind dining chairs, and a 3–5 foot open landing zone at every door), then orient your layout around shade, wind, and views before setting anything down permanently. Once the big pieces are anchored, layer in the accessories and check every leg for wobble. That sequence sounds obvious until you skip a step and end up with a sectional blocking the back door or a dining chair that swings into the main path every time someone sits down.
How to Place Patio Furniture: Layout, Spacing, and Leveling Tips

Maren Grady
25 Jun 2026
Decide your layout goal first: dining or lounging
This is the one decision that shapes everything else, and a lot of people skip it. Before you drag a single piece of furniture outside, answer this honestly: is this space primarily for eating meals, or for relaxing and entertaining? The reason this matters so much is that dining chairs are not comfortable for long-term lounging. If you try to make one set of furniture do both jobs on a single patio, you usually end up with a space that does neither particularly well.
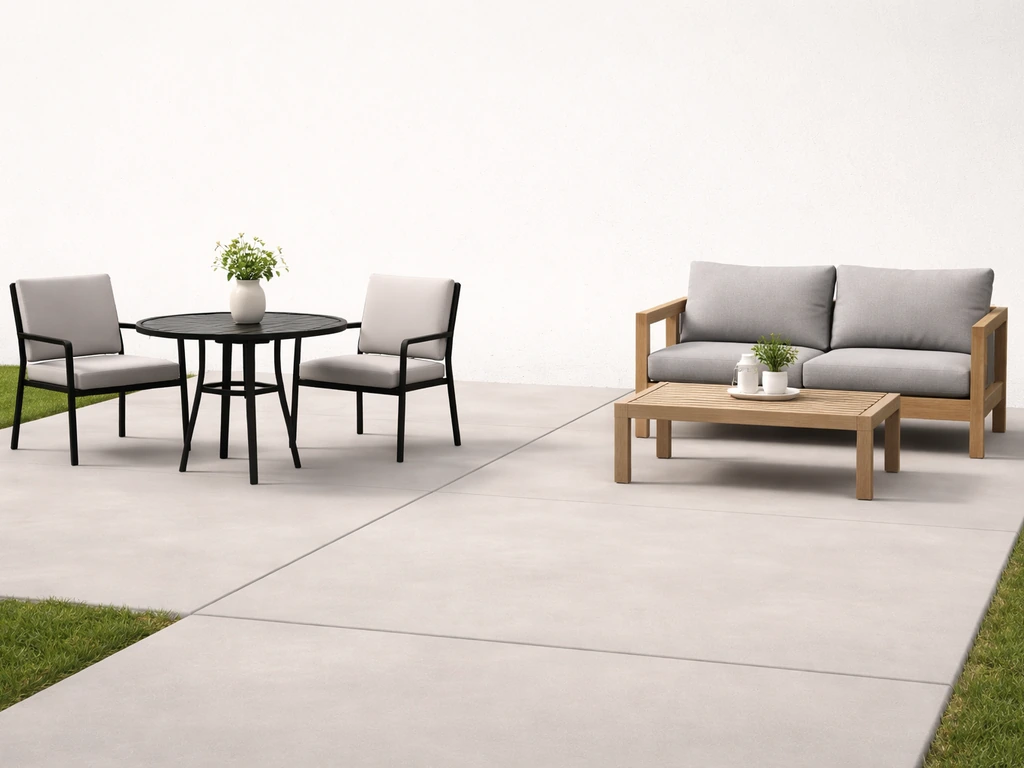
A dining-first layout centers around a table and chairs with tight, efficient clearances. A lounge-first layout centers around a sofa or sectional, a coffee table, and enough open space to sprawl. If your patio is under 12 by 12 feet, pick one core function and commit to it. Trying to squeeze a full dining set and a full lounge grouping into that footprint will choke every walkway and make the space feel like a furniture warehouse. On a small patio, a compact 32–36 inch round dining table beats an oversized rectangle every time.
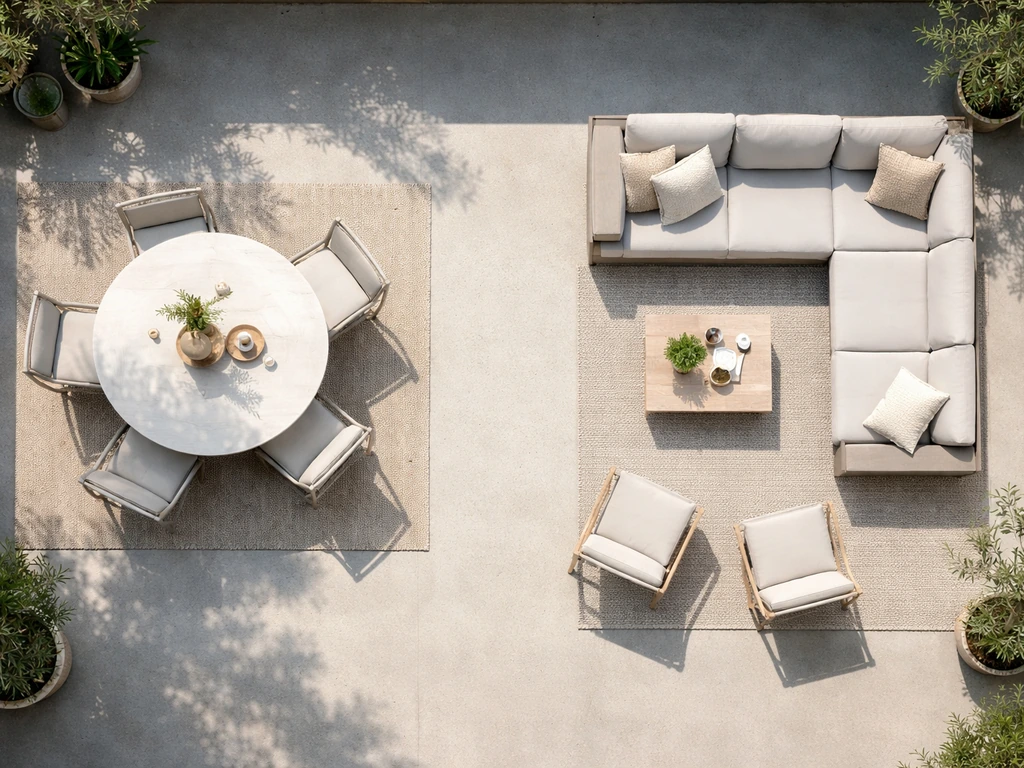
If you have enough square footage to do both, split the space into distinct zones and treat each one like its own mini room. Think of it less as 'patio furniture' and more as two separate arrangements that happen to share the same slab. If you want inspiration beyond layout, you can also look at how to decorate patio furniture with coordinating colors, textures, and accessories. That mindset change makes the measuring and layout steps much easier to follow.
Measure the space and confirm clearances before moving anything
Get a tape measure and write down your patio dimensions. Then measure your furniture frames. Here is where most people make the classic mistake: they measure the furniture frame only and ignore the clearance space each piece needs to actually function. A facility furniture requirements guide also notes loose furniture should not reduce an aisle to less than a blank" rel="noopener noreferrer">36-inch clearance, and that door-opening areas require a 48-inch by 48-inch clear zone. A dining chair frame might be 18 inches wide, but the chair needs another 24–36 inches of clear space behind it for someone to pull it out and sit down. Accessibility guidance for outdoor picnic tables calls for 36 inches of clear ground space on all usable sides of the picnic table measured from the back edge of seats or benches blank" rel="noopener noreferrer">36 inches of clear ground space on usable sides of a picnic table measured from the back edge of seats/benches. If you only plan for the frame, you will run out of room the first time you host dinner.
Use this as your planning baseline and sketch it out on paper before moving any furniture. It saves you a lot of hauling.
| Clearance Type | Minimum | Comfortable |
|---|---|---|
| Main walkway width | 30 inches | 36 inches |
| Behind dining chairs (pull-out) | 24 inches | 36 inches |
| Pass-behind dining chairs (traffic route) | 36 inches | 42–48 inches |
| Sofa to coffee table gap | 14 inches | 18 inches |
| Door landing zone (inside to patio) | 36 inches | 48–60 inches |
| Around fire pit (all sides) | 36 inches | 48 inches |
Pay special attention to your door clearance. A good rule of thumb is to keep the first 3 to 5 feet outside any patio door completely open as a landing and traffic zone before any furniture starts. This sounds like a lot of wasted space until the first time a guest tries to step out carrying a tray of food and has to navigate around a lounge chair. For covered patios with support posts, map those posts and door swings on your sketch first. If the tightest path between two obstacles is under 30 inches, you need to either remove a piece of furniture or choose smaller pieces before anything else.
Choose your anchor points: sun, wind, and views
Before you start sliding furniture around, spend about 20 minutes on your patio at the time of day you use it most. Note where the sun hits, where the wind comes from, and what you actually want to look at (or away from). These three factors should drive your orientation far more than whatever looks symmetrical in a bird's-eye sketch.
For a dining area, you generally want the table oriented so the main seating positions are not staring directly into the afternoon sun. West-facing patios are the hardest to work with in summer because the late-afternoon sun is brutal and low. If you cannot avoid it, your umbrella placement (more on that below) becomes your primary tool. For a lounge area, face the seating toward the best view, whether that is a garden, a fire pit, or just the open yard. If there is an ugly view (a fence, a neighbor's wall), back the seating against that side and look away from it.
Wind matters more than people expect. If you have a consistently windy side of your property, placing a sofa with its back to the wind gives seated guests a natural windbreak. Lightweight accessories like cushions and small planters should go on the sheltered side, not the windward edge where they will blow off regularly.
Create workable zones and protect your walking paths
Once you know your layout goal and orientation, it is time to mark out zones on the actual patio surface before moving furniture. I use painter's tape or chalk to outline each zone directly on the patio. This takes about 10 minutes and saves hours of moving heavy pieces back and forth.
The most common mistake at this stage is furniture drifting into the path from the house to the yard. A chair that looks fine in place will suddenly block the main route the moment someone pulls it back to sit down. Always trace the full pulled-out or swung-open position of every piece, not just where the frame rests at rest. That means tracing chair pull-back arcs, recliner footrest extensions, and even where someone would step when getting up from a lounge chair.
For most patios, the traffic flow runs something like this: door to yard, and door to grill or side gate. Those two corridors need to stay clear no matter what. Once you have protected those paths at a minimum 30-inch width (36 inches is better), the remaining space is what you actually have to work with for furniture. Do not start furniture placement until those paths are physically marked.
If you have a larger patio and want two distinct zones, a low visual divider like a planter row, a small outdoor rug edge, or even a change in furniture orientation signals the boundary without blocking anything. Decorating and styling the zones so they feel intentional is a separate but related step worth exploring once the placement is locked in. Once you have the layout locked in, you can build on that by learning how to style patio furniture with rugs, pillows, and thoughtful color choices styling the zones.
Leveling and stability on real patio surfaces
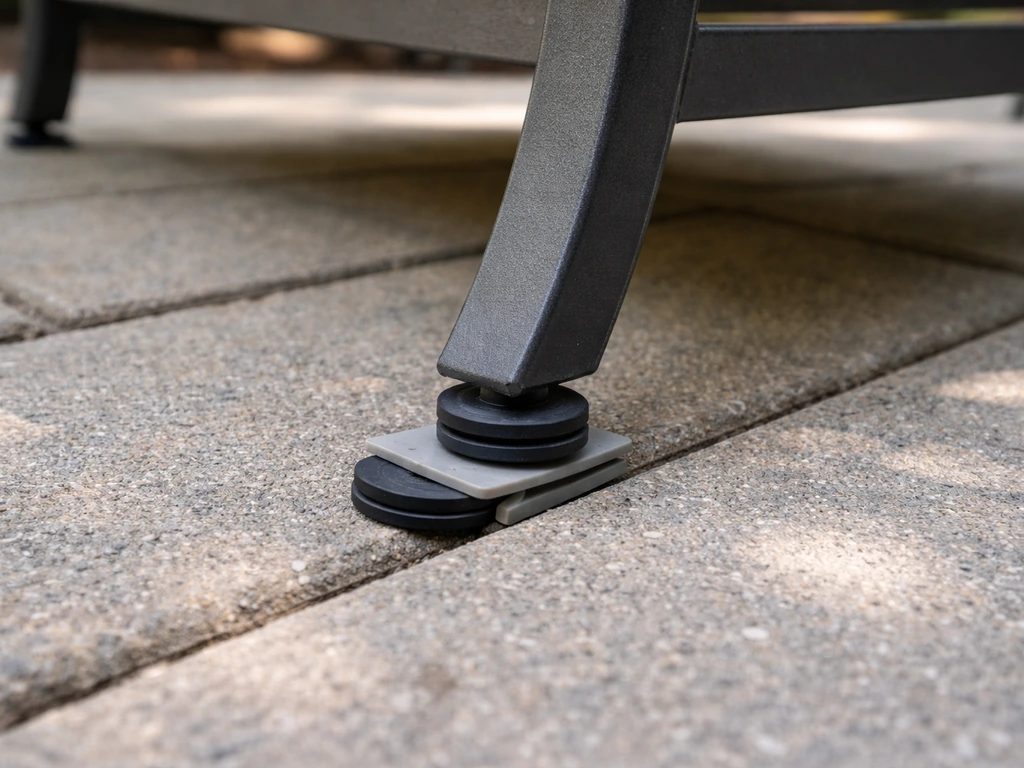
Here is something the furniture placement guides usually skip: most patios are not perfectly level. Concrete slabs, pavers, and decks all have minor slopes (intentionally, for drainage) and surface irregularities that make furniture wobble. A wobbly dining chair is annoying. A wobbly side table with a full drink on it is a problem. Deal with this before you finalize any arrangement.
Start by setting each piece in its planned position and testing it with your hand. Rock it front-to-back and side-to-side. For minor wobble on a light piece, adhesive felt pads or rubber furniture feet can be shimmed to compensate. For heavier pieces like a dining table on pavers, furniture leveling feet (the kind with an adjustable screw post) work well and are inexpensive. If one leg is hanging in the gap between two pavers, either reposition the furniture slightly or fill the gap with a thin rubber pad before relying on a leveling foot alone.
On a sloped patio, be thoughtful about where you place rocking chairs and lightweight side tables. Rocking chairs want to travel downhill over time. Lightweight pieces on a slope will slide under wind pressure. Non-slip rubber furniture coasters and heavier base weights (like a filled planter as an anchor near the downhill edge) are your best practical tools here. For lounge chairs and sectionals, locking glides are worth the small investment if your patio surface has any slope at all.
Place the details: tables, umbrellas, rugs, and planters
With your big pieces locked in, now you finish the layout with the supporting details. These elements do a lot of the visual and functional work, so placement here actually matters quite a bit.
Dining tables and chairs
Center the table within the zone you marked out, leaving at least 24 inches (preferably 30–36 inches) behind each chair position for pull-out clearance. If one side of the table is against a wall or railing, the chair on that side only needs enough space for someone to slide in from the end, so you can save clearance there. Do not push the table against a wall to gain room elsewhere and then wonder why two chairs have nowhere to go.
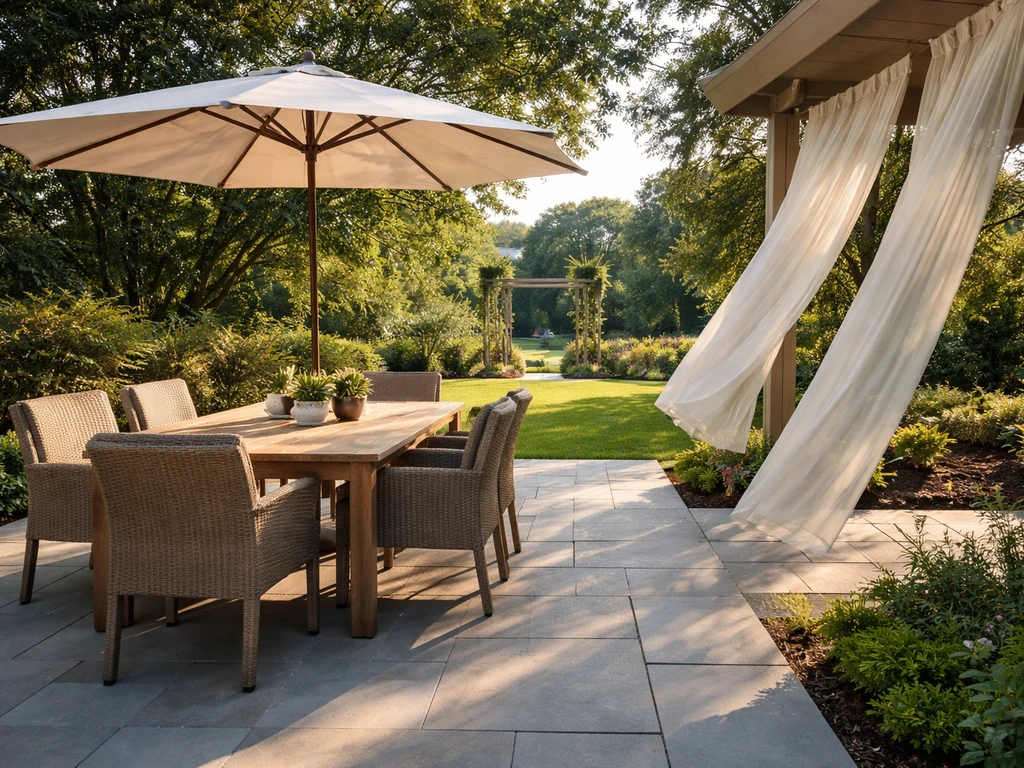
Umbrellas
A center-pole umbrella needs to be sized so its canopy footprint actually covers the table. Measure your table's longest dimension and match the umbrella diameter so it extends at least 2 feet beyond the table edge on all sides. Then check overhead: if you have a pergola, a roof overhang, or tree branches above, those will limit how far you can open or tilt the canopy. It is frustrating to buy the right umbrella and then find it cannot open fully because of a beam overhead. Confirm clearances above and around before purchasing, not after.
Outdoor rugs
An outdoor rug is one of the best tools for visually anchoring a furniture zone and making the arrangement feel intentional. For a lounge grouping, the rug should be large enough that at least the front legs of every seating piece rest on it. For a dining grouping, the rug should be large enough that chairs remain on the rug even when pulled out. A rug that is too small makes furniture look like it is floating. The rug also adds grip on smooth patio surfaces, which helps with furniture stability. Once you know your rug size and placement, you can use the same clearances and layout steps to plan how to connect patio furniture so it all fits comfortably.
Planters
Planters are incredibly useful for defining zone edges, blocking wind on open patios, and filling awkward corners without adding more seating. Place them at the outer corners of your furniture groupings to visually contain the space, or use a row of them to create a soft boundary between two zones. Just make sure they are not sitting inside a clearance path. A planter in a walkway is a tripping hazard the moment it gets dark outside.
Common placement mistakes worth avoiding
- Measuring only the furniture frame and ignoring the clearance each piece needs to function (the most common mistake by far).
- Placing a large sectional or lounge chair too close to the patio door, blocking the landing zone and creating an immediate traffic conflict.
- Putting dining chairs so close together that pulling one out forces the person behind to stand up.
- Buying an umbrella before confirming overhead clearance from roof overhangs or pergola beams.
- Ignoring a slight patio slope until the wobbly table ruins the first dinner on it.
- Trying to fit full dining and full lounge furniture sets onto a patio under 12x12 feet instead of choosing one primary function.
- Placing lightweight pieces (cushions, side tables, small planters) on the windward edge where they will blow over or drift.
Once your layout is solid and stable, the next natural steps are figuring out how to mix furniture styles and materials so the grouping looks cohesive, and thinking through how to decorate and style the space around the arrangement you have built. Both of those are worth separate attention once the placement fundamentals are locked in, because styling choices are a lot easier to make when you are not still second-guessing whether the sofa is in the right spot.
FAQ
Can I place patio furniture so it works for both dining and lounging on a small patio?
Yes. If your patio has both dining and a grill path, treat them as separate clearances and keep the “door to grill” corridor closest to the door route. When space is tight, use a smaller dining footprint (round or drop-leaf) and pull seating only during meals, so the daily traffic flow stays unobstructed.
How do I measure clearance if my dining chairs swing or get pulled out?
For dining chairs, you need room for the full pull-out motion, not just the chair parked position. A quick check is to sit on the chair (or simulate the motion) and confirm you still have at least about 24 inches behind the chair plus enough side space to pivot without nudging the chair into the main walkway.
What’s the best way to keep patio furniture from shifting on pavers or smooth concrete?
Don’t rely on the rug or furniture alone for stability. On smooth pavers or stamped concrete, use rug grippers and non-slip feet, and verify the furniture rocks before you buy the rug. If a table wobbles even after leveling feet are installed, add a thin rubber pad under any leg that lands on a gap or uneven paver.
Where should I place rocking chairs and lightweight tables if my patio is slightly sloped?
If your patio surface slopes, avoid placing rocking chairs where the downhill direction lines up with the rocker’s travel. For lightweight side tables, place them on the sheltered, uphill side when possible, and consider adding a weighted base or strap to the main seating if it tends to slide in wind.
How do I place patio furniture when there’s a fire pit, grill, or outdoor kitchen in the middle of the space?
Yes, but you need to plan for your everyday access. If you have a fire pit, grill, or outdoor kitchen, keep a heat-safe buffer and make sure the most direct route from the door does not require crossing the zone closest to the heat source. Position seating so guests are oriented toward the feature, while the traffic corridor stays clear behind or beside it.
Why does my layout look fine at first but feels blocked when people sit down?
Start by outlining your furniture using painter’s tape on the patio and then test the “real world” motion points: chair pull-out arcs, recliner footrest extensions, and the step a guest takes when standing up. If you can’t trace these motions comfortably at planning time, it will usually fail during an actual gathering.
How wide should the walkway be if I host more than 4 people?
Aim for clearances based on how many people you expect, not just how many seats the set claims. As a practical rule, keep at least the minimum walkway width (around 30 inches) for the busiest corridor, then increase to about 36 inches if two people commonly move past each other while carrying items like drinks or plates.
Can I create two patio furniture zones without blocking the walkway?
Yes, if you keep it functional. Use a planter row, an outdoor rug boundary, or a furniture orientation change to signal the split between zones. Just make sure the divider does not intrude into the traced door-to-activity paths, and keep small planters out of the clearance area where guests step during entry or exit.
Do umbrellas change furniture spacing and how should I account for that?
It depends on the umbrella type. If you use a center-pole umbrella, match the umbrella diameter so it extends roughly 2 feet beyond the table on all sides, then confirm the roof, pergola beams, or tree branches do not limit opening or tilt. If you have side-swing umbrellas, map their swing radius too, because they can encroach on chair pull-out space.
How do I pick the right outdoor rug size for dining vs lounging?
Rugs should be chosen to support the seating motion. For dining, pick a rug size that still keeps chair legs on the rug even when pulled out, and avoid tiny rugs that can shift. For lounge, ensure at least the front legs of each seating piece rest on the rug, then add rug grippers to prevent creeping on smooth surfaces.
What should I do if leveling feet don’t fully fix the wobble?
If furniture feels unbalanced after leveling feet are installed, the likely issue is uneven support under the legs. Reposition so each leg lands on a more stable surface, or fill a paver gap with a thin rubber pad before relying on leveling feet. Don’t tighten leveling feet to the limit, since that can reduce stability and make rocking return over time.
How do I place patio furniture near doors and make sure people can enter and exit easily?
If any part of the layout blocks a door swing or creates a dead zone right at the threshold, switch furniture first before you “work around” it with smaller items. Trace door swing arcs on your sketch and keep the landing zone outside the door fully clear, typically 3 to 5 feet, so guests can step out without navigating around furniture.