The fastest way to make patio furniture more comfortable is to add a correctly sized cushion or seat pad with a non-slip bottom, tuck a lumbar pillow against the backrest, and make sure nothing is sagging or broken underneath you. That alone fixes 80% of patio comfort complaints in under an hour, with zero tools. From there, you can go deeper: replace dead foam, repair sagging sling fabric, recover worn cushions with outdoor-rated materials, and set up a cleaning and storage routine so everything stays comfortable season after season. This guide covers all of it, from the five-minute wins to the full DIY reupholstery path.
How to Make Patio Furniture More Comfortable Fast

Maren Grady
21 Jun 2026
Quick comfort wins you can do today
Before you spend money or break out any tools, run through these no-tools fixes. They work on almost every furniture type and make an immediate difference.
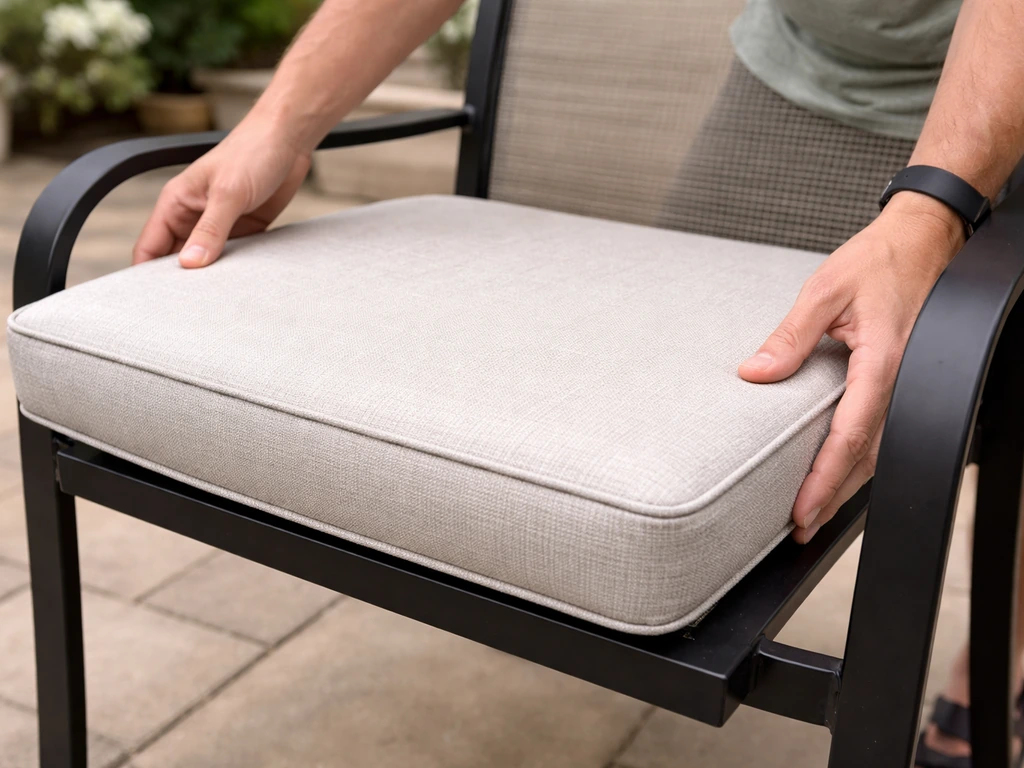
- Add a seat pad or cushion. Place a cushion that fits the seat deck fully, so there are no bare frame edges contacting your legs. If it's too small, you'll feel the frame rails—which is one of the most common comfort complaints and a surprisingly easy fix.
- Stop the cushion from sliding. Flip your cushion over and check the bottom. If it's plain fabric, it will migrate every time you sit down. Grab a roll of non-slip rug gripper mat from any hardware store, cut it to fit, and place it between the cushion and the seat frame. Problem solved for under $5.
- Add lumbar support. Patio dining chairs in particular offer almost no lower-back support. A small outdoor pillow or even a rolled-up towel placed against your lower back at the lumbar curve makes a dramatic difference for longer meals or gatherings.
- Check for loose hardware. Wobbly chairs and loose bolts create an unsettling feeling that reads as 'uncomfortable' even when the cushioning is fine. Tighten every bolt and screw before assuming you need new cushions.
- Prop up seat height with a thicker cushion. If you feel like you're sitting too low (common with older lounge chairs), a thicker replacement cushion raises your seat height. Just keep in mind that going too thick can throw off the chair geometry and make you feel like you're perched rather than supported—more on that below.
These five steps cost almost nothing and take less than 30 minutes total. If your furniture still feels uncomfortable after this, keep reading, the problem is usually in the cushion itself, the support structure beneath it, or the furniture frame.
Choosing the right cushions, pads, and materials
This is where most people make expensive mistakes. They buy a cushion that looks about right, it arrives too thin or too thick, and the chair ends up less comfortable than before. Here's how to get it right the first time. If you're planning to re-cover or sew new patio cushions, use this guide to estimate how many yards of fabric you need for a proper fit how many yards of fabric for patio cushions.
Thickness: the number that actually matters
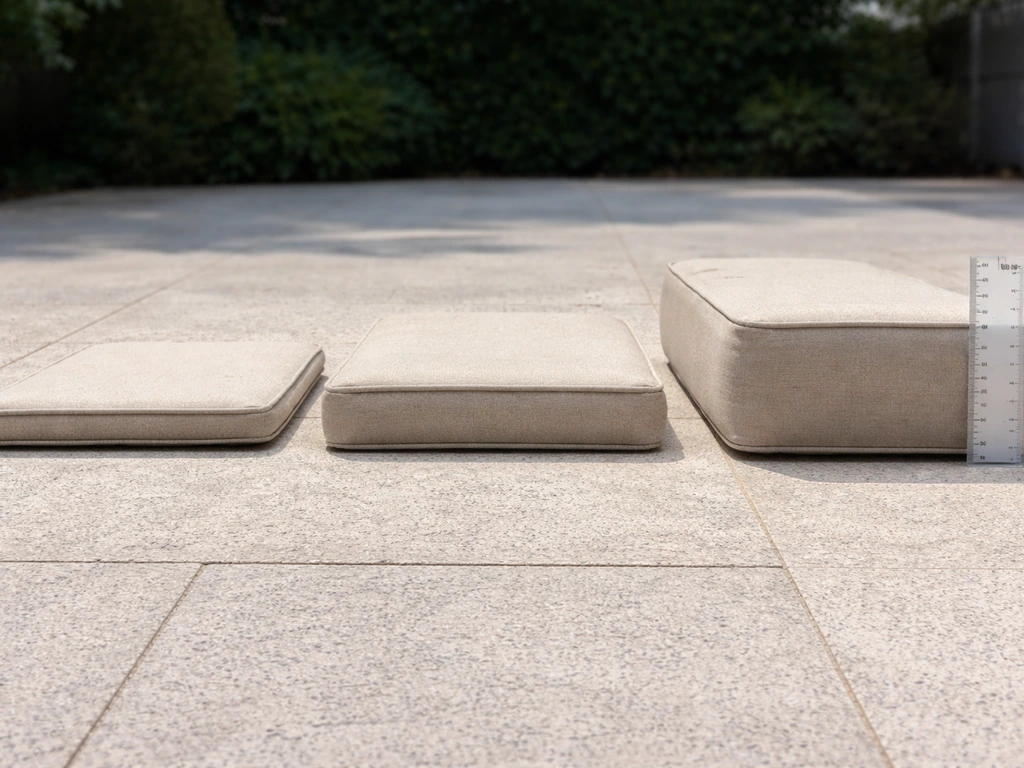
Outdoor cushion thickness typically runs from 1 inch to 8 inches. For dining chairs, you generally want something in the 2-to-3-inch range: thick enough to feel the padding, thin enough that you're not sitting awkwardly high at the table. For loungers and deep-seating sofas, 4 inches is widely considered the practical sweet spot, it feels genuinely plush while still drying out faster after rain than a 6-inch cushion would. If you go thicker than 4 inches on a lounger, expect the cushion to take 2 to 5 days to fully dry after a heavy rain, even with good ventilation. That leads directly to mildew, which we'll address in the cleaning section.
Here's the mistake I see constantly: people pick thickness by feel at the store rather than measuring their chair. The cushion needs to match the chair's seat geometry. If your dining chair sits 18 inches from the ground and you add a 4-inch cushion, you're now sitting at 22 inches, which may put your knees above table height. Measure your seat height first, then work backward to figure out how thick you can go.
Foam type: what's inside the cushion matters more than the cover
Standard indoor polyurethane foam soaks up water like a sponge and stays wet for days. Outdoors, that means mildew, odor, and a soggy seat. The right material is reticulated open-cell foam, often sold as 'Dry Fast' or 'flow-through' foam. It's engineered with an open-cell structure that lets water drain and air flow through, so it dries dramatically faster after rain.
Look for a density around 1. 5 to 1. 8 lb per cubic foot, that range gives you a good balance of support, comfort, and longevity. At 1.
8 lb/ft³ with a medium-firm rating, the foam holds its shape under body weight without bottoming out onto the frame. Softer or lower-density foam may feel fine in the store but collapses quickly under regular use, especially outdoors where UV and heat accelerate foam breakdown.
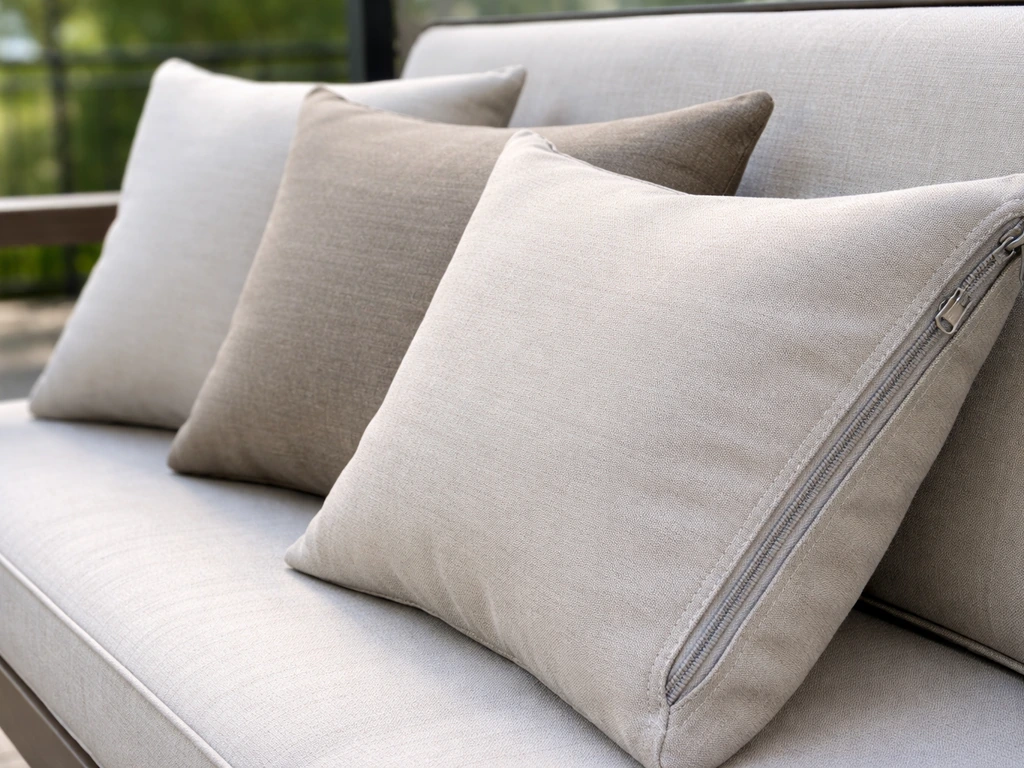
Cover fabric: what holds up outdoors
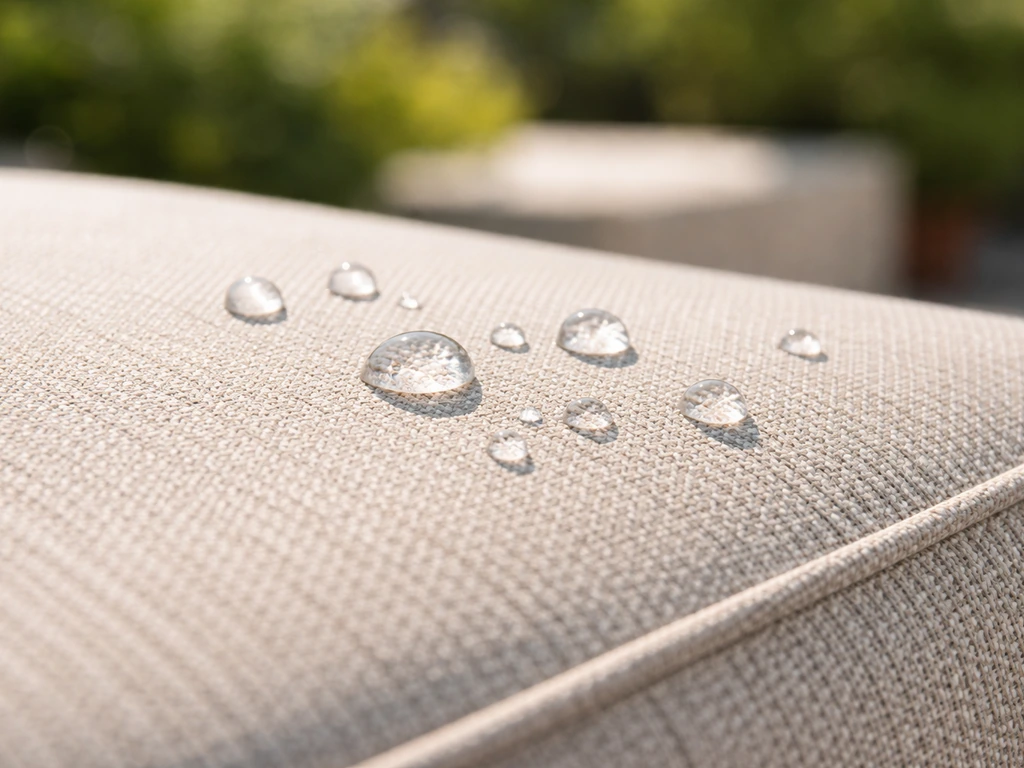
Outdoor cushion covers need to resist UV fading, repel moisture, and resist mildew. Solution-dyed acrylic fabrics, Sunbrella being the most recognized brand, are the gold standard. The color is baked into the fiber during manufacturing rather than printed on top, so UV rays can't bleach it out. Sunbrella and similar fabrics don't inherently promote mildew growth, though mildew can still develop on dirt and debris left on the surface, so keeping covers clean matters.
Sunbrella’s global guidance says its fabrics resist mold and mildew, but mildew may still develop on dirt or foreign substances left on the surface if they are not removed mildew can still develop on dirt and debris left on the surface. If you're on a tighter budget, look for any polyester outdoor fabric with a water-repellent finish, it won't last as long as solution-dyed acrylic but it's far better than regular fabric.
| Material | UV Resistance | Moisture Handling | Relative Cost | Best For |
|---|---|---|---|---|
| Solution-dyed acrylic (e.g., Sunbrella) | Excellent | Water-repellent, dries fast | Higher | Long-term outdoor seating |
| Polyester with DWR coating | Good | Repels light rain, can soak in heavy rain | Moderate | Covered patios, seasonal use |
| Reticulated (Dry Fast) foam fill | N/A (internal) | Drains and dries quickly | Moderate | Any outdoor cushion fill |
| Standard indoor polyurethane foam | N/A (internal) | Absorbs and holds water | Lower | Not recommended outdoors |
| Regular cotton or linen cover | Poor | Absorbs moisture, mildews fast | Low | Not recommended outdoors |
If you're making cushions from scratch or recovering existing ones, the sibling guides on how to make patio cushions and how to make cushions for patio furniture go deep on measuring, cutting, and sewing outdoor-rated covers. If you want to build cushions from scratch, follow the step-by-step process in our guide on how to make cushions for patio furniture. Worth reading before you buy materials.
Improving support: seat height, lumbar, and sagging
Cushions fix surface hardness. Support is a different problem, it's about whether your body is actually held in a position that isn't straining your back, hips, or legs. Here's how to diagnose and fix support issues.
When the cushion feels fine but you still hurt
If a cushion feels firm when you press it with your hands but you sink into it uncomfortably when seated, the frame is likely the problem, not the foam. This happens when the seat deck has no solid base, just open slats with wide gaps, or a frame with a mesh or webbing base that's lost its tension. The cushion compresses until it's essentially sitting on the gaps in the frame.
The fix is to add a rigid support layer underneath: a piece of 1/4-inch plywood or a cushion support insert cut to the seat dimensions. Place it on the frame, then lay your cushion on top. The cushion will now compress evenly instead of sinking into voids. This is a 15-minute fix with a hand saw and costs about $10 to $15 in materials.
Lumbar support for dining and side chairs
Dining chairs are designed for upright posture during a meal, which means they typically don't curve to support your lower back. For shorter meals that's fine. For a two-hour dinner party, it's miserable. Adding a small outdoor lumbar pillow between your lower back and the chair back is the simplest fix. For a more permanent solution, look for tie-on lumbar pads with straps that fasten to the chair rungs, these stay put and don't require you to re-position them every time you sit down. Deep-seating sofas and loungers with seat depths over about 26 inches also benefit from lumbar support because the depth pushes you away from the backrest.
When foam has permanently collapsed
Foam doesn't bounce back forever. Over time, faster outdoors due to UV exposure, heat cycles, and moisture, the internal cell structure of polyurethane foam permanently loses its ability to spring back. This is called cushion collapse, and no amount of fluffing or drying will fix it. If your cushion looks full but feels like you're sitting on a thin layer over a hard surface, the foam is done.
The only real fix is replacing the foam core. This is easier than it sounds: open the zipper (most outdoor cushions have one), pull out the old foam, take measurements, and order a cut-to-size replacement from an online foam supplier.
Total cost for a seat cushion replacement is usually $20 to $50 depending on size.
Fixing common comfort killers by furniture type
Different furniture types fail in different ways. Here's a quick guide to diagnosing and fixing the most common issues by material and style.
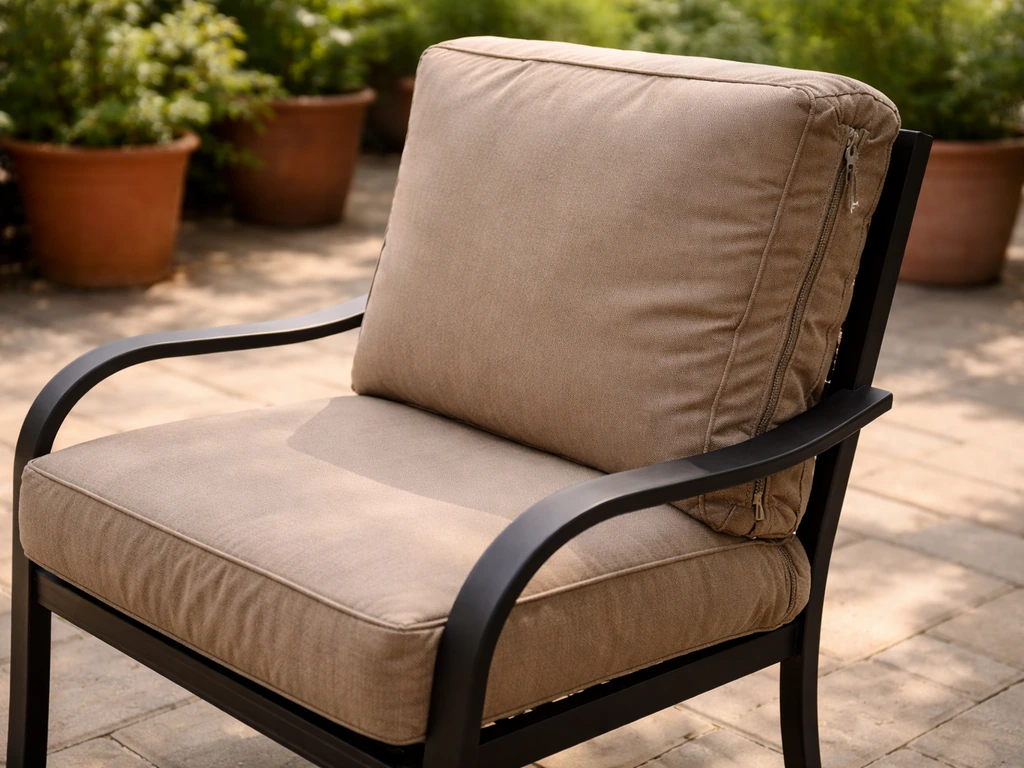
Metal and wrought iron chairs
Metal chairs are rigid and conduct heat in the sun, making bare metal surface temperatures surprisingly uncomfortable in summer. The fix is straightforward: add a cushion with a breathable cover fabric so air can circulate between you and the seat surface. If the metal frame has sharp edges or the paint has chipped and left rough spots, sand those down and touch up with outdoor spray paint before adding cushions. Cushions on metal chairs also slide more than on other materials, so the non-slip mat trick from the quick wins section is especially important here.
Sling and mesh chairs
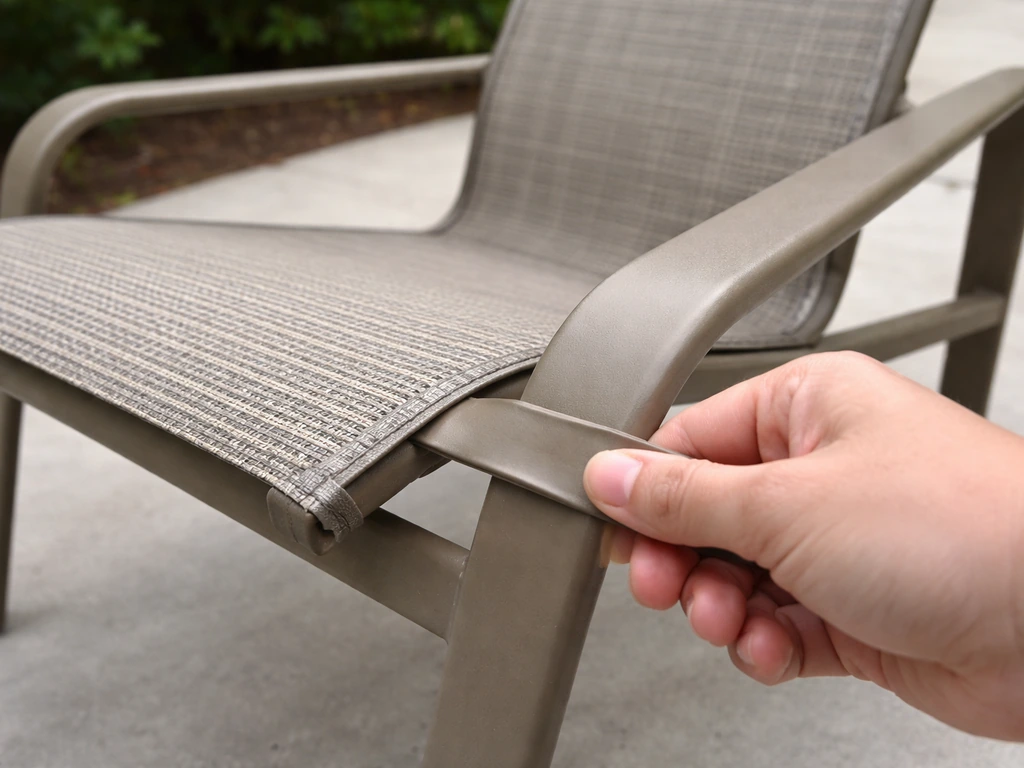
Sling chairs are comfortable when the sling is taut and in good shape. Once the vinyl straps or woven mesh stretches out or tears, the chair sags in the middle and you end up sitting in a hammock-like curve that strains your lower back and makes it hard to get up. First try tightening the bolts that hold the sling to the frame rails, a sagging sling is sometimes just a loose connection, not a stretched material.
If the material itself has stretched or torn, replacement slings are available for most major chair frames. Measure carefully before ordering: a stretched sling will be longer than its original size, so take measurements from the frame, not the old sling. Installing a replacement sling requires threading it through aluminum channels and may need a sling installation tool (a flat wedge tool available from patio suppliers), which makes this a moderate-difficulty DIY project rather than a beginner one.
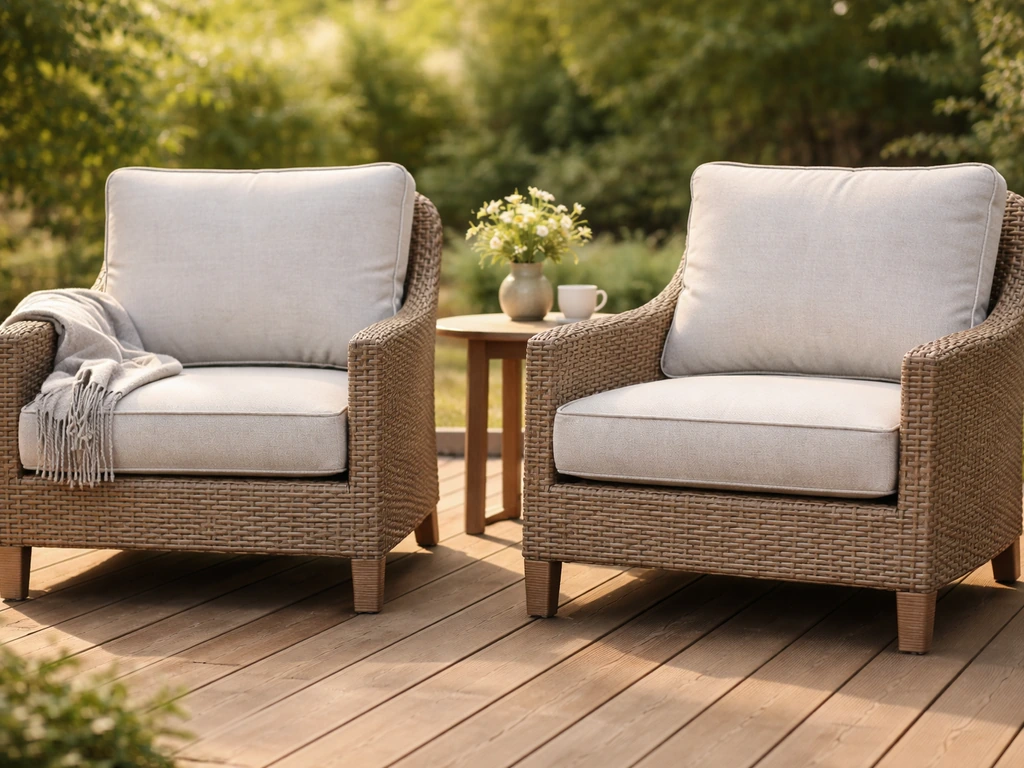
Wicker and rattan
Synthetic resin wicker is common on modern patio sets and is generally durable, but the woven surface can be uncomfortable against bare skin without cushions. Natural rattan that's been left exposed to weather can dry out, crack, and develop rough patches that snag clothing. For natural rattan, conditioning the material with linseed oil or a dedicated rattan conditioner can help, and adding seat pads is essential. For both wicker types, comfort usually means adding a well-fitted cushion, focus on getting the seat deck dimensions right so the cushion covers the entire weave area.
Plastic and resin chairs
Stacking plastic chairs have a molded seat that's designed for economy, not ergonomics. The hard surface and flat seat angle means extended sitting is uncomfortable almost by design. A simple tie-on seat pad in 2 to 3 inches of thickness transforms them. The bigger problem with aged plastic chairs is that UV exposure makes them brittle and the surface develops a rough texture. Check the legs and frame for cracks before adding cushions, a cracked plastic chair isn't worth investing in for comfort if it's going to fail structurally.
Wooden patio furniture
Solid wood is comfortable relative to metal or plastic, but years outdoors without sealing or oiling leaves it rough, splintered, or warped. Before adding cushions, run a hand over the seat surface. Any rough grain or raised splinters needs sanding with 120-grit sandpaper, followed by a coat of exterior-grade teak oil, tung oil, or wood sealer. Then add cushions. Warped boards in a seat deck create uneven support that no cushion fully masks, so check whether any boards need re-fastening or replacing before you go further.
Outdoor dining chairs vs. lounge seating
Dining chairs need firmer support and thinner cushioning (roughly 2 inches) so the seat height stays appropriate for the table. Lounge seating is where you can go thicker (3 to 4 inches) and softer because sitting height matters less. The comfort goal is also different: dining chairs should keep you upright and supported through a meal, while lounge seating should allow you to recline and relax for longer periods. Use lumbar support on dining chairs; focus on cushion depth and softness for loungers.
DIY cushion and seat repair and reupholstery options
If your cushion covers are faded, torn, or stiff but the foam inside is still good, recovering them is genuinely one of the best-value DIY projects you can do. You're essentially getting a brand-new-looking cushion for the cost of fabric and thread rather than a full replacement. If you want to go beyond recovering covers, you can also learn how to make patio pillows from outdoor-ready fabrics and foam brand-new-looking cushion.
What you need to get started
- A seam ripper (costs about $3 at any fabric store)
- Scissors or a rotary cutter
- Outdoor-rated fabric (solution-dyed acrylic is ideal; budget around 1 to 1.5 yards per seat cushion)
- UV-resistant, mildew-resistant polyester thread—this is important. Regular thread will rot outdoors within one season.
- A sewing machine (or a heavy-duty hand needle for small repairs)
- Replacement foam if needed, cut to the measured dimensions of your original cushion
- A zipper or hook-and-loop closure for the opening
Use a seam ripper to carefully open the existing cover at one seam. Lay each fabric panel flat and use them as templates to cut your new fabric pieces. This saves you from having to draft a pattern from scratch. If the foam inside is still springy and holds its shape, keep it.
If it's compressed and lifeless, measure the length, width, and thickness to the nearest 1/4 inch and order a cut-to-size piece of reticulated outdoor foam as a replacement. When sewing the new cover, use UV-treated bonded polyester thread throughout, this specific detail is where a lot of DIY outdoor cushion projects fail within a year. Regular polyester or cotton thread breaks down from UV exposure and goes brittle, causing seams to split.
If you want ventilation built into the cushion so it dries faster, add a small zipper vent panel on the bottom rather than drilling holes through the foam.
If full reupholstery feels like too much right now, a cheaper intermediate option is to buy a replacement cushion cover only (many outdoor furniture suppliers sell covers separately) and just swap the outer shell. This takes about 10 minutes and no sewing at all.
Repairing webbing and straps on older chairs
Woven vinyl webbing on lawn chairs and pool-side seating eventually cracks, stretches, or snaps. Replacement webbing kits are widely available and designed as a DIY repair, you typically thread the new webbing through the chair frame, fold the end over a clip or rivet, and repeat across the frame. A full webbing replacement on a standard lawn chair takes about an hour and costs $15 to $30 in materials. The result is usually a firmer, more supportive seat than the original because new webbing has the correct tension that years of use has stretched out of the old material.
Weatherproofing, cleaning, and seasonal storage to keep it comfy
All the comfort improvements you've made will degrade faster than they should if you skip maintenance. The biggest comfort killers over time are moisture trapped in foam, mildew on fabric, and UV-hardened or faded covers. Here's how to prevent all three.
Regular cleaning routine
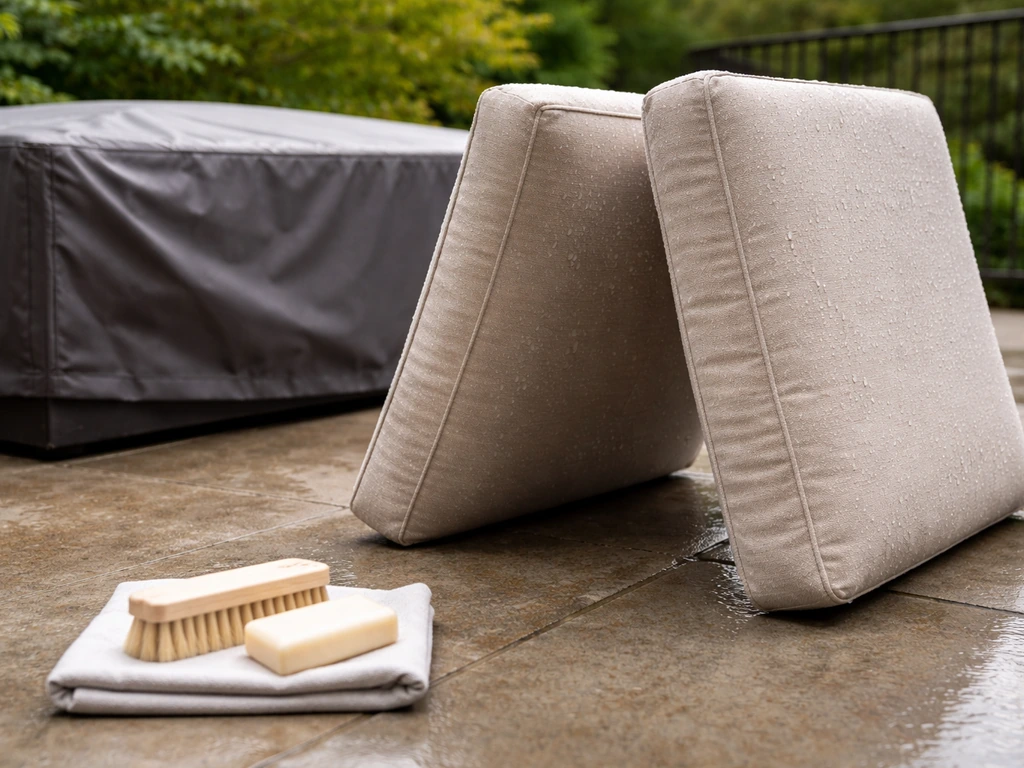
For solution-dyed acrylic covers (Sunbrella and similar), brush off loose dirt first, then spot-clean with a mild dish soap and water solution using a soft brush. For mildew, which shows up as dark spots on the fabric surface, a diluted bleach solution works on acrylic outdoor fabrics, roughly 1/4 cup bleach mixed with 1/4 cup mild soap in a gallon of water. Apply, let it sit for 15 minutes, then scrub and rinse thoroughly.
Always rinse the full cushion, not just the treated spot, to remove all bleach residue. Important: mildew on these fabrics is almost always growing on dirt and debris sitting on the surface, not on the fiber itself, so staying ahead of the cleaning is far more effective than treating mildew after it appears.
After every rain: what to actually do
If you have reticulated open-cell foam cushions, they drain quickly on their own, but 'quickly' still means standing them on edge in a well-ventilated spot to allow airflow through the foam core. Don't just leave them lying flat on the chair after a rain. If you have standard foam cushions, expect a longer dry-out period (potentially 2 to 5 days in humid weather) and the same vertical-storage approach is even more important. A cushion that goes back on a chair while still even slightly damp on the inside will start growing mildew within days.
Seasonal storage done right
Before storing cushions at the end of the season, do three things: clean them thoroughly, dry them completely, and inspect every seam and zipper for damage. Storing a damp cushion is the single most reliable way to ruin it over winter. Store cushions in a breathable bag or a deck box with ventilation holes, airtight plastic storage traps any remaining moisture and creates perfect mildew conditions.
If you notice any rips, split seams, or broken zipper pulls at this point, repair them before storage so they're ready to go in spring without extra work. For furniture frames, a quick wipe-down and a cover or indoor storage during freeze-thaw cycles extends the life of the frame so your cushion upgrades don't end up on a deteriorated chair.
Taking care of the cushion surface extends to the pillow accessories too. Any outdoor throw pillows you've added for lumbar support or décor need the same cleaning and storage treatment. And if you're ready to go further with making your own cushions and pillows from scratch, including getting exact dimensions and fabric yardage right, the related guides on making patio pillows and calculating how many yards of fabric you need for patio cushions are worth bookmarking for your next project. If you want to start with a DIY patio cushion project, this guide on how to make a patio cushion walks you through the full process.
FAQ
What’s the easiest way to stop a cushion from sliding around on a patio chair?
Use a thin non-slip mat under the cushion, and if the chair has smooth slats or vinyl surfaces, add two small anti-slip strips at the front corners of the seat instead of one large sheet (they stay put better). Check fit again after the first rain, since damp mat materials can shift if they are oversized.
How do I choose the right cushion thickness if my chair has an angled seat or curved frame?
Don’t base thickness only on seat height from the floor. Measure seat height at the front and back of the chair, then aim for a thickness that keeps your thighs at a comfortable angle when seated. If the back of the seat is higher, slightly thinner cushions can prevent knee-overlap at dining tables.
Should I prioritize softness or support first when I’m trying to make patio furniture more comfortable?
Prioritize support first, especially on metal, sling, or plastic chairs. If you use a very soft cushion on a weak frame, you may end up sinking until your hips and lower back strain. A good check is whether the cushion compresses evenly across the whole seat area without you feeling the hard frame underneath.
Can I use indoor foam or memory foam outdoors to improve comfort?
Usually no for long-term comfort. Indoor polyurethane foam and memory foam trap moisture and stay damp, which leads to mildew and odor. If you love the feel, consider using a small topper rather than replacing the entire core with outdoor-incompatible foam, and always use a cover that dries quickly.
How can I tell whether my cushion problem is foam collapse or a broken support deck?
Press down by hand in multiple spots (near the front edge, center, and near the back). If the foam feels firm by hand but you sink sharply while seated, the support deck or frame gaps are likely the issue. If it feels thin and dead even when you press with your hands, the foam core is probably collapsed.
Is it safe to use bleach on all patio cushion covers?
Only for the fabric types you can confirm are compatible. Solution-dyed acrylic can tolerate the diluted bleach spot-clean approach described in the article, but many other outdoor fabrics can fade or lose water repellency. Test on a hidden corner first, then rinse the entire cushion cover thoroughly to remove residue.
What’s the best way to dry cushions after rain so they don’t develop mildew?
Stand reticulated open-cell cushions on edge in a well-ventilated area so water can drain through the core. Avoid returning them to the chair while any part feels cool or damp inside. For standard foam, increase drying time, rotate their position occasionally, and make sure airflow is coming from multiple directions.
How often should I clean and inspect cushions if I leave them outdoors year-round?
Do a quick clean and dry inspection every 2 to 4 weeks during wet seasons, and check zippers and seams after heavy storms. If cushions stay uncovered, dirt accumulation speeds up mildew risk, even on fabrics that resist UV fading. Spot-treat small stains early rather than waiting for grime to become embedded.
Can I replace only the cushion cover instead of the foam if my cushion feels uncomfortable?
You can, but only if the foam core still holds its shape and feels supportive. If the cushion feels thin or you sink too far, replacing the cover alone will not fix the underlying support and may make the chair feel worse because the new cover may look fuller while the foam remains collapsed.
When recovering cushions, why does thread type matter so much?
Outdoor cushions spend months exposed to UV, heat, and moisture cycling, which makes weak or non-UV-rated thread brittle. Using UV-treated bonded polyester thread helps prevent seam splitting, especially along high-stress areas like corners and zipper seams. If you sew with regular cotton or standard indoor thread, seams often fail within a season.
What should I check on my chair frame before buying replacement cushions or slings?
Check for movement and cracks where the seat deck attaches to the frame, confirm bolt tightness, and inspect for sharp edges or chipped paint that can damage new covers. For sling chairs, measure from frame to frame for ordering, because a stretched sling will not match the original length and ordering from the old sling can lead to incorrect tension.
Are lumbar pillows effective for dining chairs, and where should they sit?
They help most when placed between your lower back and the chair back so they support the natural curve without forcing you to slump. If your dining chair back is flat and you feel pressure in your lower back, the pillow is likely too high or too thick. Adjust height so your pelvis stays level while you sit upright.
How do I store patio cushions to avoid winter mildew and damage?
Clean thoroughly, dry completely, then store in a breathable container (vented deck box or breathable bag). Avoid airtight plastic storage because it traps remaining moisture and accelerates mildew growth. Before closing the storage, inspect the zipper tracks and seams, repair small rips immediately, and replace missing zipper pulls so covers stay closed.
What’s a practical compromise if I want comfort now but can’t replace cushions yet?
Add a tie-on seat pad or a thin rigid support layer first. A 1 to 2 inch pad can boost comfort immediately, while the support layer underneath can eliminate uneven sinking from frame gaps. This can buy time until you measure correctly and order the right thickness foam or a full replacement cushion.