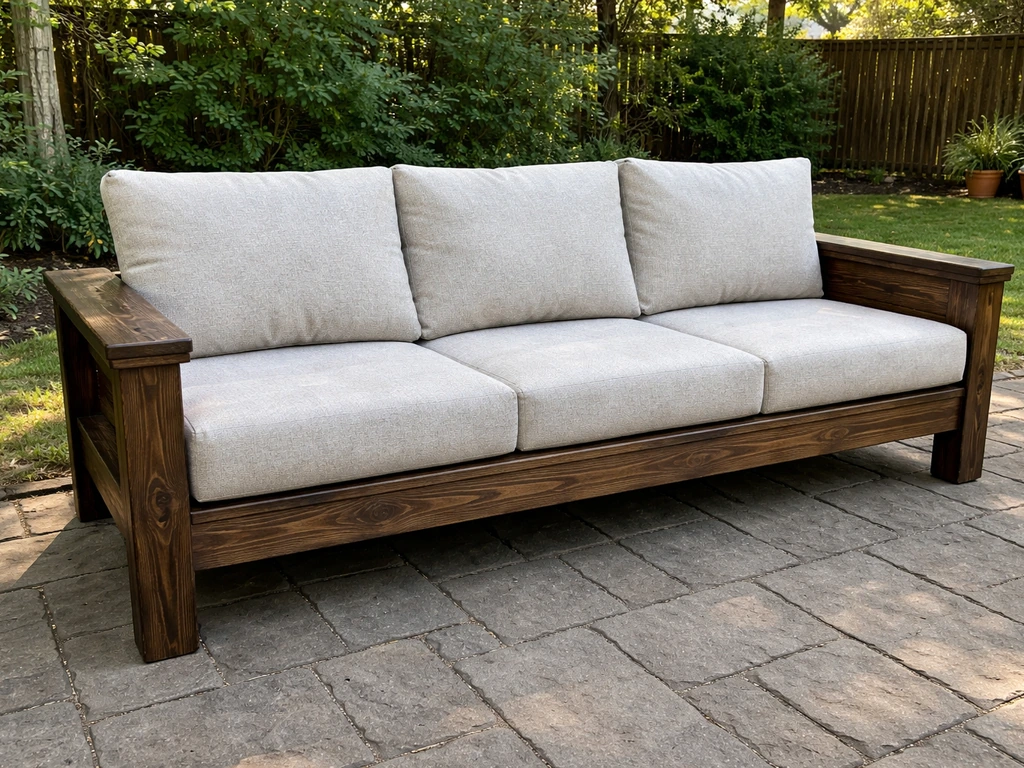
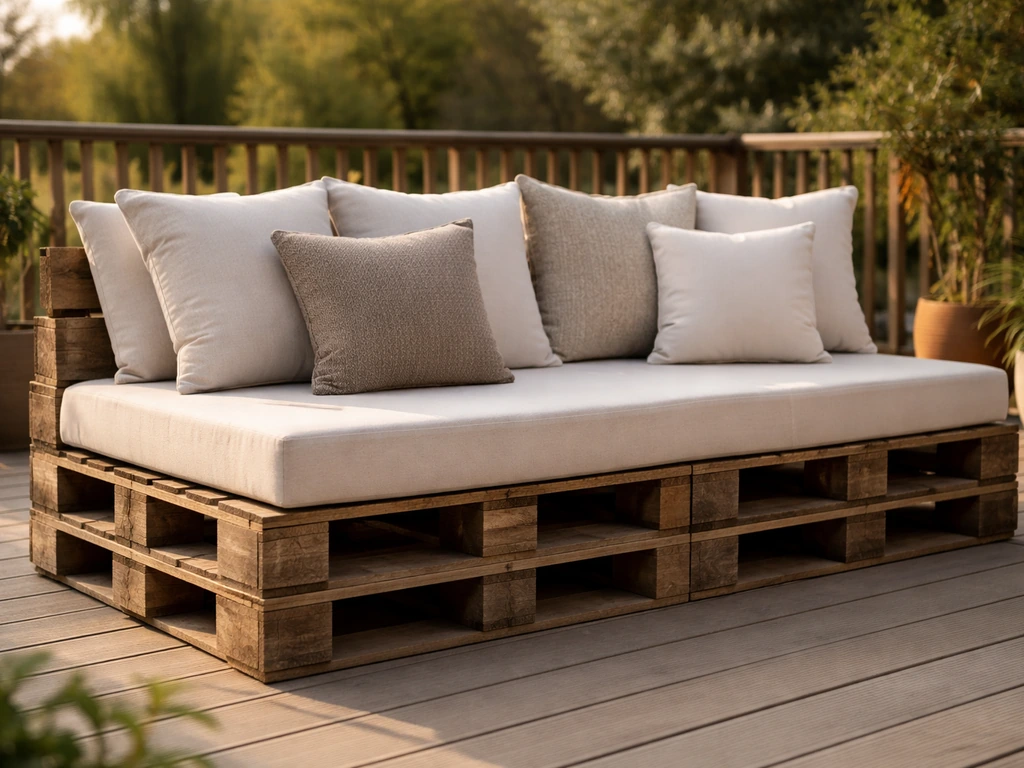
You can build a solid, comfortable pallet patio couch in a weekend using two to four shipping pallets, some basic hardware, exterior wood finish, and outdoor cushions. The finished piece will seat two to three people, cost a fraction of store-bought patio furniture, and last for years if you choose the right pallets, use corrosion-resistant fasteners, and seal the wood properly before it ever sees rain. Here is the full process from pallet selection through cushioning and troubleshooting, so you can actually finish this project today.
How to Make a Pallet Patio Couch Step by Step

Maren Grady
13 Jun 2026
Choosing the Right Pallets for an Outdoor Couch
This is the step most people rush, and it is where the whole project can go wrong before you even pick up a tool. Not every free pallet behind a warehouse is safe or structurally sound, and a few minutes of inspection here saves you hours of frustration later.
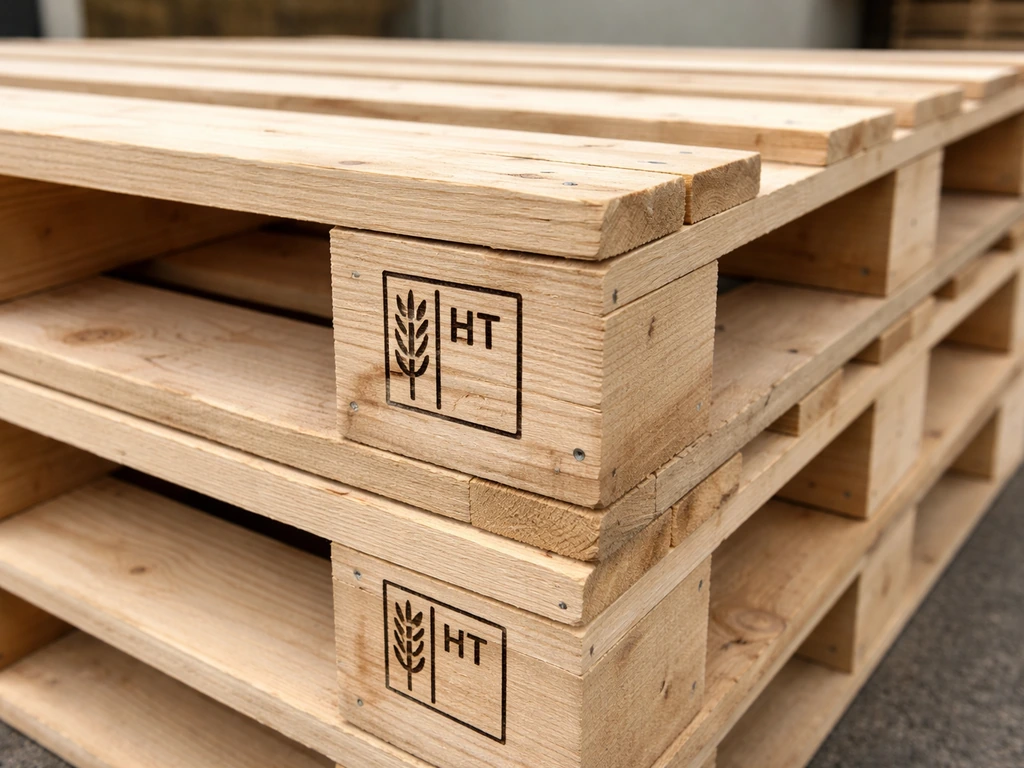
Look for the HT stamp, avoid MB
Every internationally traded pallet that complies with ISPM-15 standards carries a stamp showing the IPPC symbol plus a treatment code. You want 'HT,' which means heat treated (the wood core was brought to at least 56°C for 30 minutes). You absolutely want to avoid 'MB,' which stands for methyl bromide fumigation. The EPA classifies methyl bromide as a hazardous chemical, and using MB-treated wood for furniture you will sit on and touch regularly is not worth the risk. If there is no stamp, or the stamp is unreadable, skip that pallet entirely.
Check for structural problems before you commit
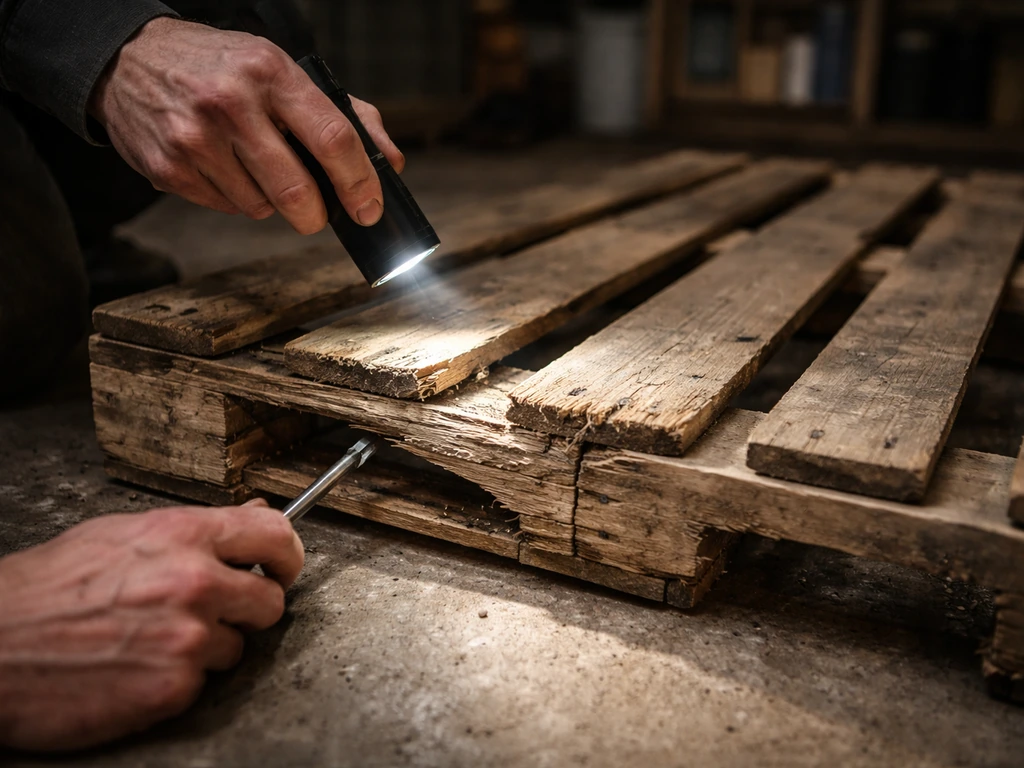
Damaged, poorly repaired pallets create real hazards during handling and after you build with them. Look for cracked or split deck boards, missing or broken stringers (those are the thick supporting boards running lengthwise), signs of rot or dark discoloration, and any boards that have been reattached with random nails at odd angles. Michigan State University EHS guidance specifically flags improperly repaired pallets as a handling hazard. If a pallet feels soft, bouncy, or smells musty, walk away. You want pallets that are dry, uniformly colored, and still square when you set them on a flat surface.
How many pallets do you need?
For a two-to-three person couch, plan on three to four standard GMA pallets (each 48 x 40 inches). Two pallets placed side-by-side form the seat base, one stacked on the back half of those becomes the backrest support, and one more can be cut apart to build armrests and fill gaps. Grab an extra pallet or two if you can, because you will want spare boards for patching and reinforcement. Many grocery stores, garden centers, and hardware stores give pallets away free. Call ahead and ask.
Tools, Materials, and Safety Prep
What you need before you start
- 3 to 4 heat-treated (HT) pallets in good condition, plus 1 spare for parts
- Circular saw or jigsaw (a handsaw works too, just slower)
- Drill and driver bits
- Pry bar and hammer (for disassembly if needed)
- Oscillating multi-tool or reciprocating saw (optional but useful for cutting flush nails)
- 80-grit and 120-grit sandpaper, plus a random orbital sander if you have one
- Pressure washer or stiff scrub brush and a hose
- Galvanized or stainless steel screws (2.5-inch and 3.5-inch deck screws), exterior-grade
- Heavy-duty angle brackets and washers
- Exterior wood stain or paint and a penetrating sealer/end grain sealer
- Paintbrushes or foam rollers
- Measuring tape, pencil, and speed square
- Safety glasses, heavy work gloves, and a dust mask
Safe disassembly and cleaning
If you are using whole pallets for the seat and back, you may not need to fully disassemble anything. But you will almost certainly need to break down at least one pallet for extra boards, armrest pieces, or fill strips. The safest way to do this is to insert a reciprocating or oscillating blade between the deck boards and the stringer to cut the nails flush, rather than prying boards apart and launching nails or splitting wood. A pry bar and hammer work if you go slowly. Wear gloves. Splinters from rough pallet wood are a genuine OSHA-documented hazard, and dry pallet wood loves to throw sharp fragments when you least expect it.
Once you have the pallets you plan to use, clean them thoroughly. A pressure washer is ideal. Scrub off dirt, mold, staining, and any residue, then let the wood dry completely before you sand or finish it. In humid conditions, plan for at least two full days of drying time. Wet wood will not hold stain or sealant properly, and it will warp as it dries if you have already assembled the couch.
Sanding: start rough, finish smooth
Pallet wood is rough, splintery, and uneven. Start with 80-grit sandpaper to knock down the worst surface fuzz, sharp edges, and any raised grain from cleaning. Then move to 120-grit to get to a smooth, splinter-free surface. Pay extra attention to the top surface of the seat area and any board edges that will be at skin level. Running your bare hand across every board after sanding is the real test. If it snags anywhere, keep sanding.
Design and Measurements Before You Build
One of the most common mistakes in pallet couch builds is skipping the planning phase and then ending up with a seat that is either so low it is hard to get out of, or so shallow that no one actually wants to sit on it. Spend 20 minutes on measurements first.
Target seat height
Comfortable outdoor deep-seating sofas land at about 15 to 18 inches from the ground to the top of the seat surface. A standard GMA pallet is 5.5 to 6 inches tall. If you stack two pallets for the seat base, you are at roughly 11 to 12 inches, which is too low for most people to sit and stand from comfortably. The common solutions are to add furniture legs (4x4 posts cut to 4 to 6 inches work well), use three pallets stacked for the seat, or add a thick frame underneath. For most builds, two stacked pallets plus 4- to 6-inch legs gets you into that comfortable 15 to 18 inch range.
Seat depth and length
A comfortable outdoor sofa seat depth is roughly 20 to 24 inches (about 50 to 60 cm). A standard 40-inch pallet depth is actually a bit much for most people to sit on without their feet dangling, which is why many builders either trim the back of the seat pallet or rely on a big cushion to bring the sitting surface forward. For length, two 48-inch pallets placed side by side give you a 96-inch (8-foot) couch, which seats three comfortably. One pallet across makes a compact loveseat. Mark your final dimensions on paper or on the ground with tape before you cut anything.
Backrest angle and height
A straight vertical back is the simplest to build but the least comfortable for lounging. Most people are happy with a slight recline of about 10 to 15 degrees. You can achieve this by shimming the base of the backrest pallet forward at the bottom, or by cutting the support legs at an angle. A back height of about 20 inches above the seat surface gives solid support for most adults. A full extra pallet standing behind the seat base gives you more than enough height and you can trim it down.
| Dimension | Target Range | Notes |
|---|---|---|
| Seat height from ground | 15–18 inches | Add legs if stacked pallets fall short |
| Seat depth | 20–24 inches | Trim pallet or use cushion to adjust |
| Couch length (2 pallets) | ~96 inches (8 ft) | One pallet = compact loveseat |
| Backrest height above seat | ~20 inches | A full pallet gives extra to trim |
| Backrest angle | 10–15 degree recline | Shim or cut support posts to angle |
Building the Pallet Couch Frame and Assembling the Base
Here is where you actually start putting things together. Work on a flat surface if at all possible, because it makes squaring everything up much easier. If you are building on your patio, check the surface with a level first.
- Cut your leg posts from 4x4 lumber at your target height (typically 4 to 6 inches). You need at least four posts, one for each corner of the seat base.
- Position your two seat pallets side by side on a flat surface. Check that the tops are flush. If one sits higher, shim the low one or sand down a high spot.
- Attach the legs to the bottom corners of the seat pallets using 3.5-inch exterior deck screws driven up through the pallet stringers into the post tops. Add angle brackets at each leg-to-pallet joint and run a washer under every lag screw head so it does not sink into the wood.
- Once the legs are on, flip the base right-side up and set it on the ground. Check for wobble. If it rocks, the legs are not all the same length. Trim the long one rather than shimming.
- Screw the two seat pallets together by driving 3.5-inch screws horizontally through the abutting stringers where they meet in the middle. Do this in at least three places along the joint. This is the step most people skip and then wonder why their couch shifts.
- Add diagonal cross-bracing if the frame still feels flexible. A simple approach is to screw a spare pallet board diagonally from one leg to another on the back and sides. This prevents the racking motion that makes furniture wobble side to side.
At this point your seat base should feel solid. Adding diagonal cross-bracing to a rectangular wood frame helps prevent racking and wobble by increasing overall rigidity add rigidity to rectangular frames. Sit on it. Put your weight at the corners and in the middle. If anything creaks dramatically or flexes, add more fasteners before moving on. It is much easier to reinforce now than after the backrest is attached.
Adding the Backrest, Armrests, and Making the Seat Comfortable
Backrest construction
The simplest backrest approach is to stand a pallet vertically against the back of the seat base and screw it in place. Set the backrest pallet so its bottom edge rests on the seat surface of the rear seat pallet (not behind the couch entirely). This means the back pallet is sitting inside the footprint of the seat. Drive 3.5-inch screws through the back pallet's bottom stringer down into the seat pallet stringers below. Add angle brackets at the connection points for extra strength. If you want that slight recline, slip a 1 to 1.5 inch shim under the bottom front edge of the backrest pallet before you drive the final screws. It sounds small, but it makes a real difference in comfort.
If the backrest feels flimsy at the top, cut two short vertical support posts (about 10 to 12 inches of 2x4) and attach them to the outside back corners of the couch, bridging from the seat base up to the backrest pallet. These act as buttresses and eliminate almost all wobble at the top of the back.
Armrests
Armrests are optional but they make a pallet couch feel much more finished and comfortable. The easiest method is to cut two pieces of pallet stringer or a 2x6 board to about 24 to 28 inches long and attach them horizontally to the outside of each seat corner, level with or just slightly above the seat surface. A flat armrest surface at about 22 to 25 inches from the ground works well for most adults. Screw them into the side stringers of the seat pallets and add a bracket underneath for support. Some builders add a small vertical post under each armrest end for extra support, which looks cleaner and prevents the armrest from sagging over time. Sand any armrest edges thoroughly since hands and arms rest there constantly.
Filling gaps in the seat surface
Pallets have gaps between deck boards, and those gaps are uncomfortable to sit on without thick cushions. The practical fix is to rip boards from your spare pallet and fill in the gaps by screwing additional boards between the existing deck boards. You do not need to fill every gap, especially if you are using cushions, but any gap wider than about an inch that a cushion will not bridge should be filled. This also gives the cushions a flatter, more stable base.
Weatherproofing and Finishing for Outdoor Durability
This is the part that determines whether your couch looks great for years or turns gray and fuzzy after one season. Do not rush it, and do not skip it.
Timing your finish application

Apply stain or sealant only when the wood is fully dry. After any rain or cleaning, Sherwin-Williams advises waiting about two to three days in moist conditions before staining exterior wood. If you apply finish to damp wood, it will not penetrate, it will peel, and you will be redoing the whole thing in a month. Check the wood by pressing a piece of plastic wrap against the surface for an hour. If moisture collects under it, keep waiting.
Seal the end grain first
The cut ends of boards absorb moisture far faster than face grain, and this is where rot and cracking start. The USDA Forest Products Laboratory specifically calls out blank" rel="noopener noreferrer">end grain sealing as critical for exterior wood durability. Use a dedicated end grain sealer on every cut end before you apply your main finish. It is a small extra step that dramatically extends the life of your couch.
Stain, seal, or paint: which to choose
For pallet wood outdoors, a penetrating exterior oil stain followed by a polyurethane or spar urethane topcoat is the most durable approach. The oil penetrates and conditions the dry wood, while the topcoat creates a surface barrier. Rust-Oleum's Watco Exterior Wood Finish, for example, recommends letting the first coat dry for 72 hours before applying a polyurethane topcoat. Solid exterior paint also works and hides the roughness of pallet wood well, but it can trap moisture if applied over damp wood or if the topcoat cracks, which leads to peeling. Avoid finishes marketed as 'interior only.' They will fail outdoors within one season.
Use the right fasteners
Outdoor wood furniture should never be assembled with standard zinc or uncoated steel screws. They rust within months, stain the wood, and weaken the joints. Use hot-dipped galvanized or 304 stainless steel deck screws for most patio environments. If you are near the coast or in a very humid climate, step up to 316 stainless steel for maximum corrosion resistance. Yes, stainless screws cost more, but they are the difference between a couch that stays tight and one that starts rattling apart in year two.
Ventilation under the couch
Moisture trapped under any wood structure causes rot, and the bottom of a pallet couch sitting flat on a patio surface is a prime candidate. Adding small rubber feet, furniture feet, or even small wooden spacer blocks under the legs lifts the couch slightly and lets air circulate underneath. Even a quarter inch of clearance helps drainage and airflow enough to meaningfully extend the life of the wood.
Cushioning, Placement, and Troubleshooting Common Build Problems
Choosing cushions for a pallet couch
Standard outdoor cushion thickness for deep-seating sofas runs from 4 to 5 inches. A 4-inch cushion is workable for occasional seating. A 5-inch cushion is noticeably more comfortable for lounging, and it also bridges minor surface gaps and unevenness in the seat boards. Look for cushions with outdoor fabric (solution-dyed acrylic like Sunbrella is the benchmark) and a removable cover for washing. Make sure the cushion ties to the pallet frame so it does not slide. You can add small screw eyes to the pallet board edges and tie the cushion cords to those if the cushion does not have its own attachment method.
Where to place the couch outdoors
Avoid placing the couch directly on bare soil or grass, where the wood will wick moisture from the ground. A patio, deck, or gravel surface is ideal. Keep it out of spots where standing water collects after rain. If you have to place it in a partially exposed spot, consider moving it under cover or using a fitted furniture cover during extended rain or winter. A UV-resistant furniture cover during peak sun will also dramatically slow the breakdown of both the wood finish and the cushion fabric.
Troubleshooting: the problems that actually come up
| Problem | Likely Cause | Fix |
|---|---|---|
| Couch wobbles side to side | No diagonal bracing, joints not tight | Add cross-bracing boards diagonally across the back and sides; re-drive loose screws |
| Splinters keep appearing | Insufficient sanding, wood continues to dry and raise grain | Re-sand with 80-grit then 120-grit; apply a penetrating oil finish to stabilize the grain |
| Pallets are uneven or not flat | Warped boards or uneven pallets from the start | Replace warped boards; shim under low corners; never stack two warped pallets hoping they will cancel out |
| Finish is peeling after one season | Wood was too damp when finished, or wrong product used | Strip, let wood dry fully, re-apply exterior-rated penetrating stain with a proper topcoat |
| Seat surface has uncomfortable gaps | Pallet board spacing too wide for thin cushions | Fill gaps with ripped boards from spare pallet; use a 5-inch cushion to bridge minor gaps |
| Joints are creaking or loosening | Wood has dried and shrunk post-assembly, fasteners loosening | Check and re-drive all screws annually; replace with longer screws if original holes have stripped |
| Rust stains appearing on wood | Uncoated or low-grade steel screws used | Remove affected screws, treat rust stains with oxalic acid wood brightener, replace with stainless or hot-dipped galvanized screws |
One thing worth saying plainly: if a pallet board feels soft, punky, or shows actual rot after you have built the couch, do not just sand it and cover it with finish. Remove and replace it. A structurally compromised board in a seat frame is a safety issue, not a cosmetic one.
Seasonal maintenance to keep it going year after year
Once a year (spring is ideal), go over the entire couch with a quick inspection. Tighten any screws that have worked loose, check the finish for cracks or peeling, and re-apply a coat of exterior sealant to any areas that look dry or dull. Sand lightly with 120-grit before re-coating if the surface feels rough. Bring cushions inside for winter storage if you want them to last. Outdoor cushion fabric handles moisture, but repeated freeze-thaw cycles shorten the life of the foam fill noticeably.
If this build has you interested in expanding your outdoor setup, the same techniques here scale naturally to building a full patio sectional or a pallet loveseat sized for a smaller space. Once you know how to turn a couch into patio furniture using pallet builds, you can expand the idea to sectional and loveseat layouts for different outdoor spaces. If you want a true sectional patio couch, you can use the same pallet planning and joinery, then add extra bays for longer, modular seating. If you want to scale this down, you can follow the same frame and weatherproofing steps to build a patio loveseat sized for a smaller space. If you want to build a patio couch like this from scratch, follow the same steps for picking pallets, assembling the base, and finishing the wood how to build patio couch. The planning and joinery principles carry over directly, so your second build will go significantly faster than the first.
FAQ
Can I use any pallet I find, or should I reuse parts from damaged pallets?
Yes, but keep it limited to boards that are genuinely sound. You can reuse pallets for extra trim and armrest pieces after disassembly, but for the main seat and back supports, prioritize intact, dry boards with no soft spots. If you find rot on any load-bearing stringer or deck board, replace that piece rather than sanding and finishing it.
How do I know my pallet couch base is strong enough before I finish it?
For a couch that will be sat on outdoors, test the boards before you commit. After sanding, run a bare hand over every seat contact surface, check for rocking when you press down at corners, and do a weight test for a few minutes. If a board flexes excessively or makes new creaks after you tighten fasteners, reinforce or replace that area before you add cushions.
What’s the best way to seal cut ends if I don’t want to use a separate end-grain product?
If you do not want to buy specialty sealers, use a two-part approach: an end grain sealer on every cut end first, then a full exterior finish when the wood is fully dry. Skip the end grain step only if you are using pre-finished wood, or you are leaving all cuts to a non-exposed part of the structure. Cut ends are where most early rot starts outdoors.
What screws or bolts should I use, and do I really need stainless in my climate?
Use stainless or hot-dipped galvanized fasteners, and pre-drill to prevent splitting and cracking. Standard zinc screws can rust behind the wood finish, which weakens joints and can stain around the screw heads. If you are assembling near the coast or in very humid weather, choose 316 stainless for the highest corrosion tolerance.
Can I put the pallet couch on grass or soil to make it easier to place?
You can place the couch on a deck or patio, but avoid bare soil or grass. If your patio surface is slightly uneven, add clearance spacers under the legs so air can circulate underneath and water does not pool at the bottom boards. Even about a quarter inch lift helps reduce rot risk.
My cushions slide around, how can I keep them from moving on a pallet frame?
To prevent cushion sliding, tie the cushion to the frame. If your cushions have no attachment cords, add small screw eyes to the pallet board edges and secure cords or straps to keep the cushion from drifting as people sit and stand.
How do I fix a pallet couch that’s too low or too hard to get out of?
For most two-person to three-person builds, aim for a seat top height around 15 to 18 inches from the ground. If your current layout feels too low, add 4x4 legs (cut to about 4 to 6 inches), or stack an additional pallet for the seat, but then verify that the back support is still stable and correctly braced.
What should I do if the backrest is wobbly after assembly?
If the back feels wobbly, add buttress supports at the outer corners rather than relying only on screws at the base. Cut short 2x4 support posts and bridge from the seat base up to the backrest pallet, then re-tighten after a test sit. This stops top wobble and keeps the recline you tuned.
Do I need to fill every gap between pallet boards, or only some?
A thick outdoor cushion is helpful, but it is not a substitute for structural stability. Fill seat gaps that are wider than about an inch when a cushion cannot span them, and fill more gaps on the seat surface than on the back where you are often less directly seated over the voids.
How long should I wait after rain or cleaning before staining and sealing?
In general, fully cure time depends on temperature and humidity, but if the wood is still damp, finishes can peel or fail to bond. Do your plastic wrap moisture check, wait until there is no condensation under the wrap, then apply finish. If weather is unpredictable, plan drying and finishing on the driest multi-day window you have.
Can I use a spray finish instead of brushing on stain or polyurethane?
Yes, especially for finishes on uneven pallet surfaces, but do it carefully. First, pre-fill and level any rough areas with additional sanding, then apply stain or penetrating oil, and finally add the polyurethane or spar urethane topcoat. If you spray without proper preparation, you may get patchy coverage and early peeling.
How should I store the cushions to keep them from molding or degrading?
If your cushions get wet frequently, store them properly. Bring cushions inside for winter storage to prevent repeated freeze-thaw damage to the foam and reduce mold growth, then let cushions fully dry before returning them outdoors.
What maintenance should I do each year to keep the pallet couch looking good?
Do a yearly maintenance pass even if the couch looks fine. Tighten hardware that has worked loose, inspect for finish cracks or dull areas, and recoat exterior sealant where needed. Sand lightly (around 120-grit) only if the surface is rough before recoating.
If a pallet board feels slightly soft, is sanding it enough?
If any structural board is soft, punky, or shows visible rot, sanding and refinishing will not fix the strength problem. Remove and replace the compromised board, then re-secure with corrosion-resistant fasteners. A safe load path matters more than a smooth appearance.