You can build a sturdy, weather-ready patio loveseat in a weekend using pressure-treated or cedar lumber, exterior-rated screws, and a handful of common tools. The project costs roughly $80–$150 in materials depending on wood choice, and the result is a solid piece that outlasts most budget store furniture because you control every joint, every fastener, and every finish coat. It is genuinely beginner-friendly, but I want to be upfront: the cutting and squaring steps take patience, and rushing them is how you end up with a wobbly seat. Give yourself a full Saturday for the frame and a Sunday for finishing, and you will be sitting on it by evening.
How to Build a Patio Loveseat Step by Step DIY Guide

Maren Grady
23 Jun 2026
Pick your design, dimensions, and materials first
Before you cut a single board, decide on the overall size and style. A real-world reference point: the IKEA Bondholmen outdoor loveseat sits at about 28.75 inches tall, 54.75 inches wide, and 31.875 inches deep. That is a great target for a two-person seat. For cushion planning, common loveseat seat widths run 48–72 inches and seat depths 24–36 inches, so a 54-inch-wide by 26-inch-deep seat area is a comfortable, buildable middle ground. The back height on most outdoor loveseats lands around 15–18 inches above the seat surface. Lock in your numbers before you shop for lumber so you know exactly how many linear feet you need.
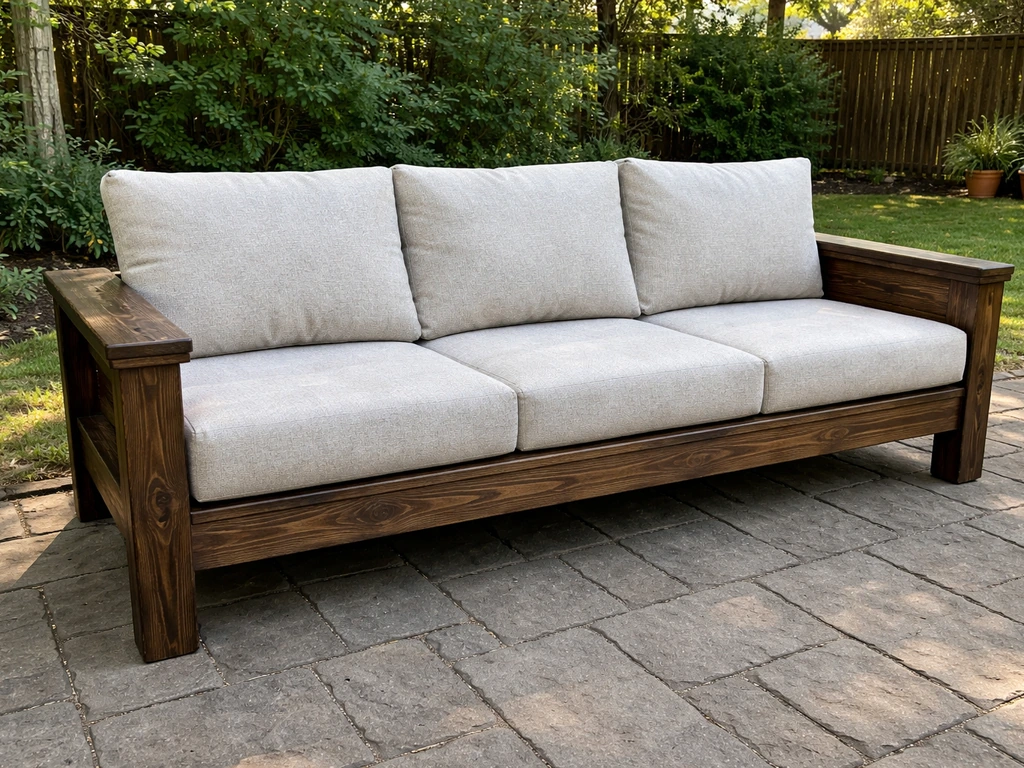
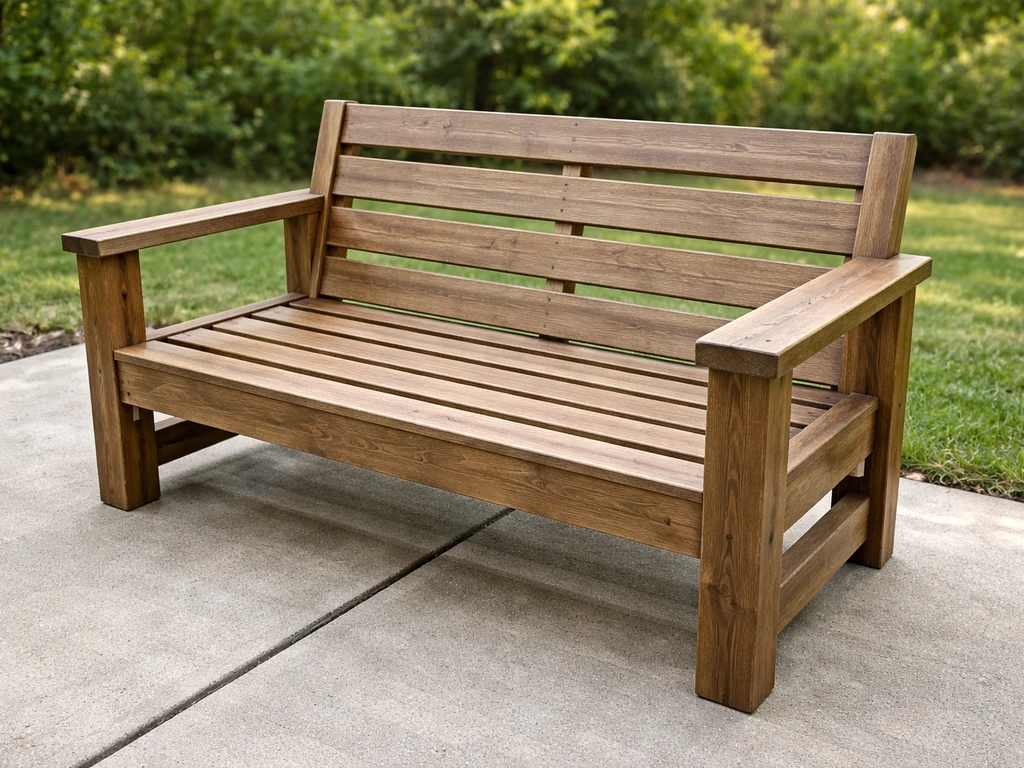
For the frame style, you have two practical options: a simple slatted bench-style loveseat with visible seat and back slats, or a panel-style loveseat with a more enclosed look using wider boards. The slatted version is easier to build and dries faster after rain, making it the better first-timer choice. If you want something closer to a full outdoor sofa, the how to build a patio couch guide covers that scaled-up version, and the how to build a sectional patio couch guide goes even further. If you want to scale this loveseat into a full patio couch, follow the step-by-step approach in our how to build patio couch guide for the right sizing and framing how to build a patio couch.
Choosing outdoor-ready lumber

The two most practical choices for backyard furniture are pressure-treated pine and cedar. Pressure-treated lumber is cheaper (often half the price of cedar) and highly rot-resistant, but it comes with one big caveat: freshly treated boards hold a lot of moisture. The American Wood Protection Association grades treated lumber by use category. For an outdoor loveseat sitting on a patio (above ground, uncoated), you want UC3B-rated lumber at minimum.
If any leg will sit directly on soil or concrete that stays wet, bump up to UC4A. Cedar costs more but is naturally rot-resistant, lighter, and much easier to work with hand tools. It also takes stain and sealer right away without a long drying wait. Whatever you choose, look for kiln-dried stock.
Lumber dried below 19% moisture content is far more stable and less likely to warp after you build.
| Material | Cost (rough) | Rot Resistance | Ready to Finish | Best For |
|---|---|---|---|---|
| Pressure-treated pine (UC3B/UC4A) | Low ($) | Excellent | After drying period (weeks) | Budget builds, wet climates |
| Cedar | Medium ($$) | Very good | Right away | Beginners, staining, lighter weight |
| Redwood | High ($$$) | Excellent | Right away | Premium look, long-term investment |
| Standard pine (untreated) | Very low ($) | Poor | Right away | Only with full paint/seal system |
My honest recommendation: go with cedar if you can stretch the budget. You will spend maybe $30–$40 more, but you avoid the drying wait before finishing, the boards smell great, and they are noticeably easier to cut and screw without splitting.
Tools and supplies checklist
Here is everything you need to gather before you start. Missing something halfway through a build is frustrating, and some of these items (like exterior glue or the right screws) make a real difference to long-term durability.
Lumber cut list (for a 54-inch wide loveseat)
| Part | Size | Qty | Notes |
|---|---|---|---|
| Front/back legs | 2x4 x 18 in | 4 | Seat height ~17 in finished |
| Side stretchers (low) | 2x4 x 26 in | 2 | Connect front/back legs each side |
| Front/back stretchers | 2x4 x 54 in | 2 | Full-width frame top and bottom |
| Seat frame supports | 2x4 x 22 in | 2 | Interior cross supports |
| Back uprights | 2x4 x 18 in | 2 | One each side, above armrest |
| Armrests | 2x6 x 28 in | 2 | Overhang front and back slightly |
| Seat slats | 2x4 x 54 in | 5 | Spaced with 1/4–3/8 in gaps |
| Back slats | 1x4 x 54 in | 4 | Thinner stock is fine for the back |
| Top back rail | 2x4 x 54 in | 1 | Caps the back frame |
Hardware and fasteners
- Exterior-rated screws: 2.5-inch and 3-inch lengths (coated or stainless steel, ACQ-compatible if using pressure-treated lumber)
- Pocket-hole screws: Kreg Blue-Kote exterior pocket-hole screws work well here — they have three anti-corrosion layers and are rated for pressure-treated lumber
- Exterior wood glue: a D4-rated waterproof adhesive for any glued joints
- Carriage bolts (3/8 x 3.5 in) with washers and nuts: 8 total for leg-to-frame connections
- Joist hanger screws if you use metal joist hangers for seat supports (optional but strong)
Tools
- Miter saw or circular saw (a circular saw with a speed square guide works fine for beginners)
- Drill/driver with bits
- Pocket-hole jig (Kreg Mini or standard — this is the single best $25–$40 investment for this project)
- Tape measure and pencil
- Speed square or framing square
- Clamps: at least four bar clamps or F-clamps (6-inch minimum)
- Pilot hole bit (matching your screw diameter)
- Sander or sanding block (80 grit and 120 grit)
- Safety glasses and hearing protection
Finishing supplies and cushions
- Exterior stain, paint, or clear UV-resistant polyurethane sealer
- Paintbrush or foam roller
- Outdoor loveseat cushion set sized to your seat area (measure the actual seat width and depth, then subtract cushion thickness from overall back height to get back cushion height)
- Outdoor fabric or waterproof cushion covers if you are making your own cushions
- Furniture feet or rubber feet pads for the legs (keeps legs off standing water)
Build the frame: layout, cutting, joining, and keeping it square
This is the most important phase. A frame that is even slightly out of square will create a wobble you can feel every time you sit down, and gaps in the slats will be uneven. Do not rush this section.
Step 1: Mark and cut all your parts
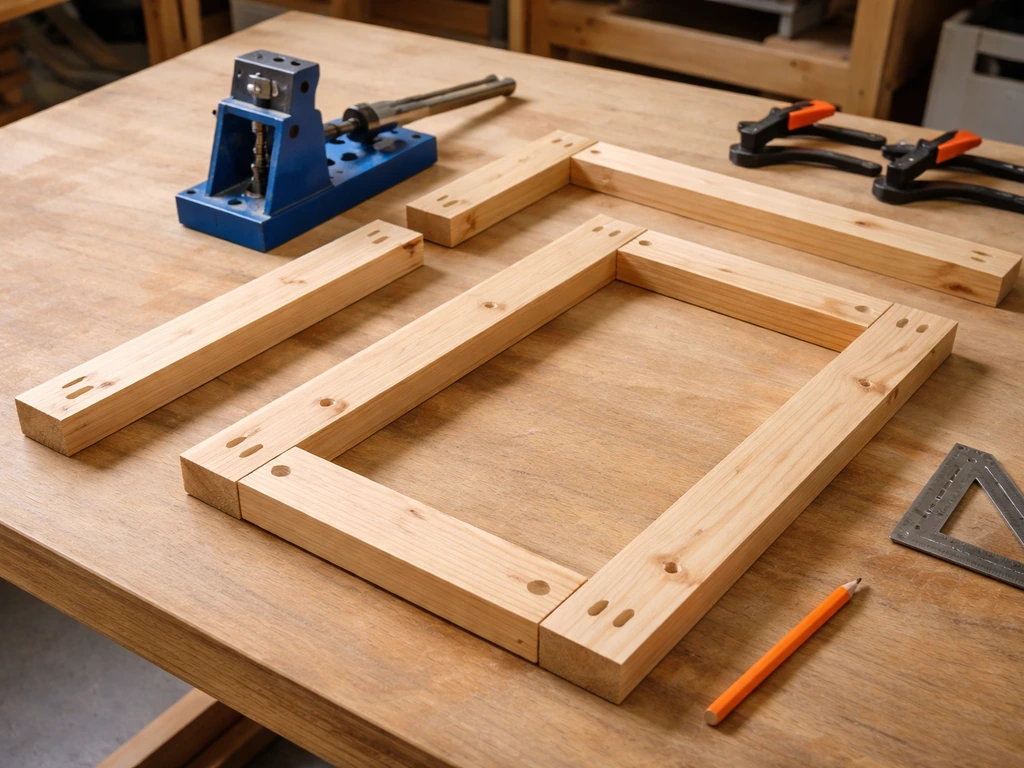
Use the cut list above and mark every board with a pencil before making a single cut. Measure twice, cut once is not just a cliche, I once cut four legs at different lengths because I grabbed the wrong measurement. Use a speed square to draw a crisp cut line across the face of the board so your circular saw has a clear line to follow. Cut all pieces before you start joining anything. Having all parts laid out lets you dry-fit the whole assembly and catch mistakes before glue or screws are involved.
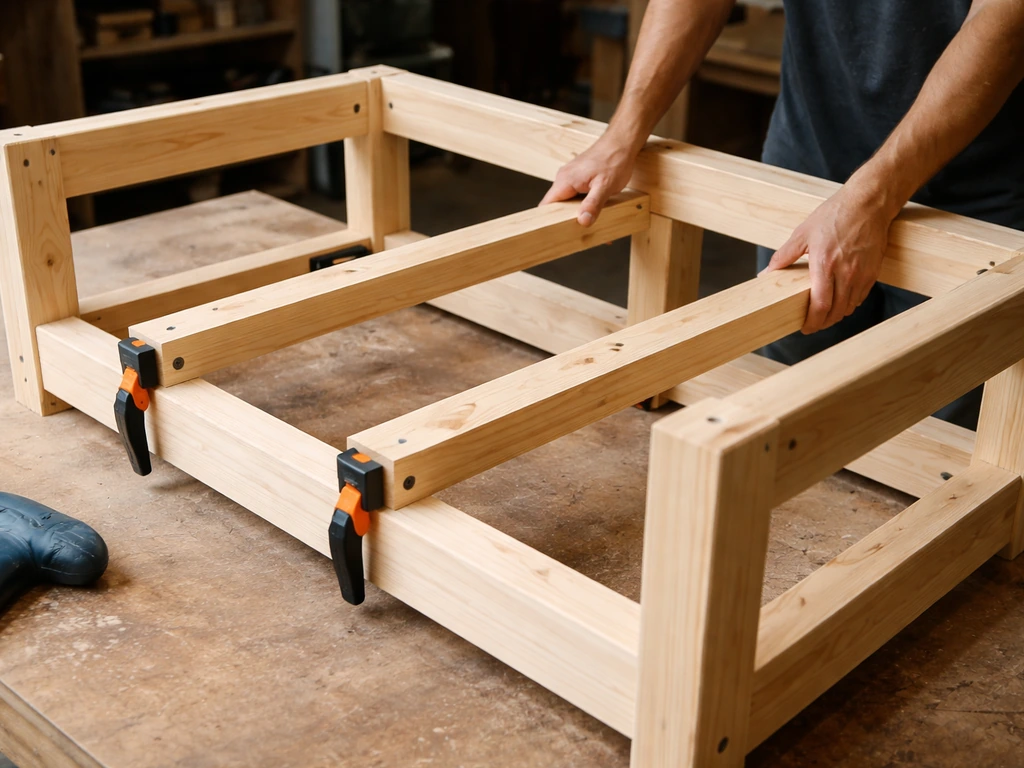
Step 2: Build the two side frames
Each side frame is a simple rectangle: two legs connected by a low stretcher (near the bottom) and a top stretcher (at seat height, about 17 inches up). Drill pocket holes in the ends of your stretchers using the pocket-hole jig. Apply a thin bead of exterior wood glue to the joint face, position the stretcher between the legs, and drive your Blue-Kote pocket-hole screws. Clamp the assembly flat on your work surface while screws go in.
Before the glue sets, check for square using the 3-4-5 rule: measure 3 feet along one side, 4 feet along the other, and the diagonal between those two points should be exactly 5 feet if the corner is 90 degrees. If it is off, adjust your clamps by shifting one corner diagonally (a technique called cocking the clamps) until both diagonal measurements across the rectangle are equal.
Cocking clamps, described by Woodcraft as shifting the bars so they align with the assembly’s longer diagonal, is a technique you can use to square rectangular assemblies cocking the clamps. Build both side frames this way and let them sit for at least 30 minutes.
Step 3: Connect the side frames with front and back stretchers
Stand both side frames upright and connect them with your 54-inch front and back stretchers. These stretchers sit at seat height on the front and back, creating the main box of the loveseat. Again, use pocket holes or pre-drill and drive 3-inch exterior screws through the stretcher ends into the legs.
For extra strength at these high-load joints, drill through the leg and into the stretcher with a 3/8-inch bit and run a carriage bolt through with a washer and nut on the back. This is a significant upgrade over screws alone and prevents racking over time. Once all four corners are connected, check squareness again by measuring both diagonals across the top of the frame box. They should match within 1/8 inch.
If they do not, loosen one corner slightly and adjust before tightening.
Add seat and back supports and assemble the loveseat body
Installing the interior seat supports
A 54-inch seat span needs interior support to prevent slat flex when someone sits. Add two cross supports (22-inch 2x4s) running front to back inside the frame, evenly spaced across the width. These can be attached with pocket-hole screws or by toenailing with pre-drilled pilot holes. Pilot holes are important here: driving screws into the end grain of a 2x4 without pre-drilling almost always splits the board. Use a drill bit that matches the shank (not the threads) of your screw.
Building the back frame
The back frame sits on top of the rear stretcher. Attach two back uprights (2x4s at about 18 inches tall) to the back corners of the seat frame using pocket holes and carriage bolts. Then attach a top back rail across the top of both uprights. This creates an open rectangle that will hold your back slats. Make sure this back frame is also square before fastening it permanently. A back that is out of plumb (leaning forward or back) is uncomfortable and hard to fix after the fact.
Attaching the armrests
The 2x6 armrests cap the top of each side frame, overhanging the front by about 2–3 inches and the back by 1 inch. Pre-drill from the top of the armrest down into the leg/upright below with a pilot hole, then countersink so the screw head sits below the surface. Drive 3-inch screws. You can fill the countersink holes with exterior wood filler later for a cleaner look. Round the front corners and top edges of the armrests with a sander or a router with a roundover bit, sharp corners on armrests are uncomfortable and chip finish quickly.
Finish for weather resistance
A beautiful frame will rot in two seasons if you skip the finishing step. This is where a lot of DIY outdoor furniture falls apart, and it is almost always because someone skipped the prep or used the wrong product.
Drying and sanding before you apply anything
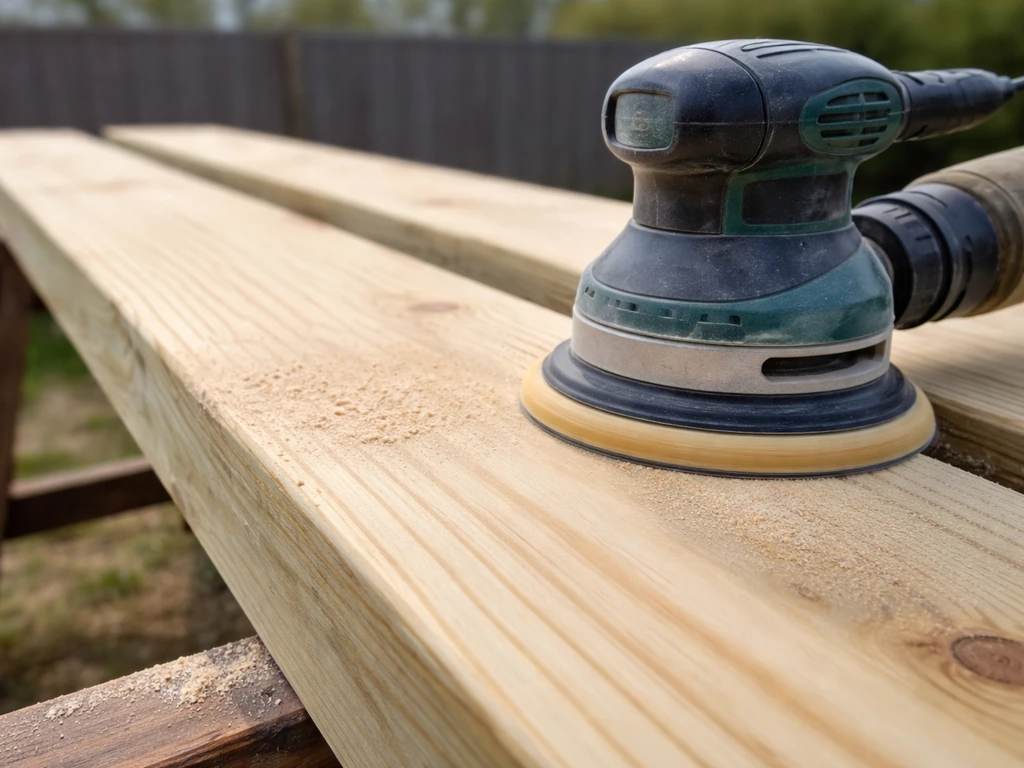
If you used pressure-treated lumber, do not stain or paint it right away. Freshly treated boards are wet, and finish applied to wet wood peels within months. The better move is to use a moisture meter and wait until the wood reads below 19% moisture content before finishing. Kiln-dried-after-treatment (KDAT) lumber is pre-dried and can be finished sooner, which is worth the slight price premium if you want to finish the same weekend. Cedar and redwood can be finished right after the build. Before applying any finish, sand the entire loveseat with 80-grit paper to remove mill marks and fuzz, then follow up with 120-grit for a smooth surface that accepts stain or sealer evenly.
Sealer, stain, or paint: which should you use?
A clear exterior UV polyurethane sealer is the easiest option for a natural wood look. Products in this category are typically recoatable in about 2 hours, so you can apply two or three coats in a single day. Apply in dry weather and plan for a run of at least two consecutive days without rain while it cures.
A penetrating exterior oil stain is a great middle ground: it soaks into the wood, highlights the grain, and is very easy to touch up in future seasons. Exterior paint gives the most protection and the most color options but hides the wood completely. Whatever you choose, do not use an indoor product outdoors. Exterior finishes contain UV inhibitors and mold-resistant additives that indoor finishes lack.
Hardware choices that will not rust
This matters more than most beginners realize. The right fastener choice depends on your environment. For most backyard loveseats, hot-dipped galvanized or coated exterior screws (like the Kreg Blue-Kote) are sufficient and affordable. If you live near the coast where salt air is a factor, upgrade to stainless steel hardware.
For marine-adjacent environments, SAE 316 stainless is the preferred grade because it resists chloride pitting far better than the more common 304 grade. One practical warning: some hardware marketed as stainless is actually 304, not 316. If rust spots appear in the first year near the coast, that is usually why. For ACQ pressure-treated lumber specifically, make sure every screw and bolt is explicitly rated as ACQ-compatible, the chemicals in treated wood are highly corrosive to standard hardware.
Comfort options: slats vs panels, cushion attachment, and customization
Slats vs solid panels
Slats win for outdoor use. Gaps between slats let rain drain away and allow air circulation underneath, which is the single biggest factor in preventing rot on seat surfaces. For a sectional patio couch, the same slat-spacing principles help prevent rot while keeping the seating surface comfortable and draining well. Space seat and back slats between 1/4 and 3/8 inch apart.
Wider than 3/8 inch creates pinch points and the seat feels oddly open; narrower than 1/4 inch does not drain well and traps debris. The easiest way to get consistent spacing is to cut a scrap piece of 1/4-inch plywood or use a stack of coins as a spacer between each slat as you screw them down. Attach slats with pre-drilled pilot holes and two exterior screws per slat end.
If you prefer a solid panel look for the back, use a single wide cedar board or two narrower boards with a small gap between them.
Adding cushions and keeping them in place
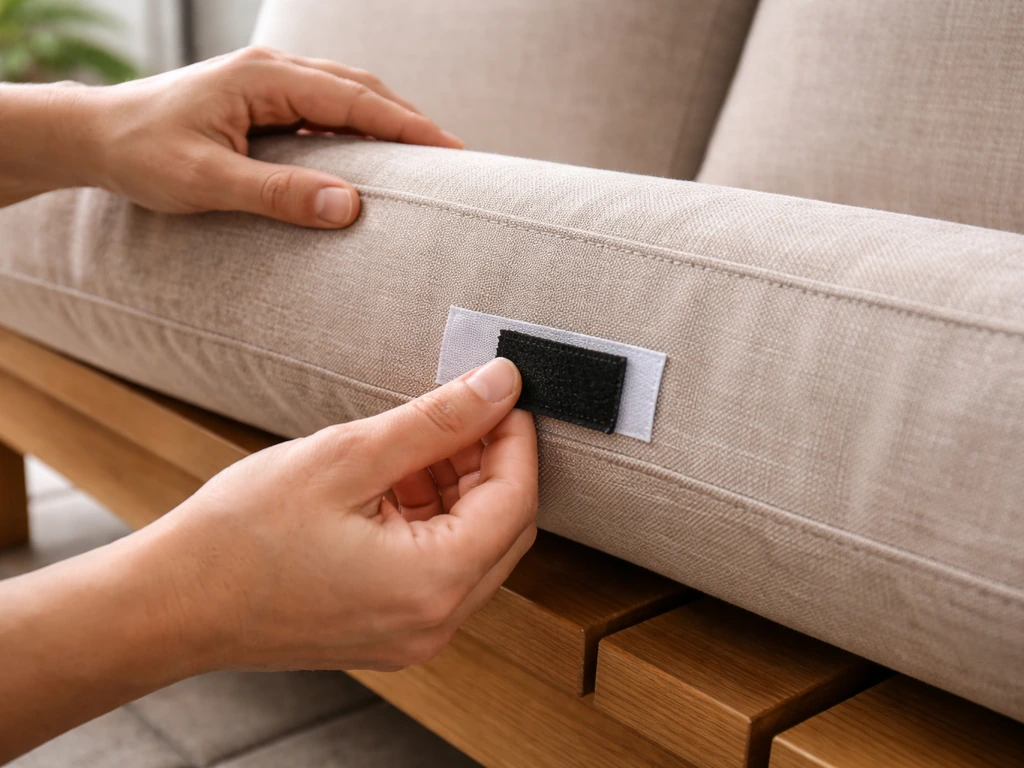
Outdoor loveseat cushions shift around constantly if you do not secure them. The simplest fix is to attach Velcro strips to the back of the cushion and the top of the seat slats. Outdoor-rated hook-and-loop tape holds well and releases easily for washing or storage. For tie-on cushions, drill small holes through the back slats and run nylon ties through.
When sizing your cushions, measure the actual finished seat area, not your overall frame. A common mistake is ordering a cushion the full 54-inch width, forgetting that the armrests eat into the usable seat space. Measure the inside width between the arm panels, then measure seat depth from front edge to back frame. To determine back cushion height, measure the full back height and subtract the seat cushion thickness.
Easy customization ideas
- Paint the frame a bold color and use neutral cushions for a pop of personality without expensive fabric
- Add a lower shelf between the front and back legs on each side (a simple 1x6 between the low stretchers) for a convenient storage ledge
- Round the front of all seat slats with a sander for a more finished look and to reduce splintering
- Add caster wheels to two of the four legs so the loveseat can be rolled easily for cleaning
- Build a matching end table at the same seat height for a cohesive set — the frame construction is nearly identical on a smaller scale
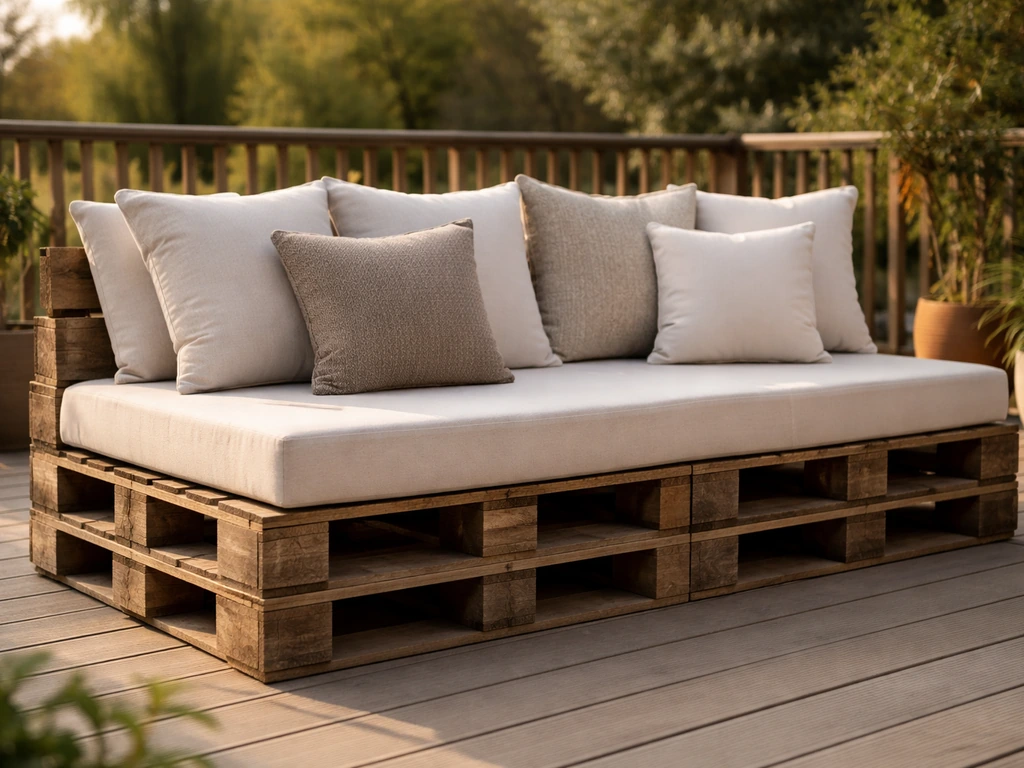
If you want to go bigger and build out a full seating set, the how to make a pallet patio couch and how to build a sectional patio couch guides share a lot of the same framing logic and are worth reading alongside this one.
Troubleshooting common problems and a long-term protection plan
The frame wobbles or racks
A racking frame (one that twists under load) almost always means at least one joint is loose or at least one corner is not square. Start by sitting on it and watching which corner lifts. Then check the diagonal measurements across the base: if they are unequal, the frame is not square. For a minor wobble, loosen the bolts on the affected corner, re-clamp to square, and re-tighten. For a severe rack, you can add a diagonal brace inside one of the side frames, a 2x4 cut at 45 degrees and screwed in from the low stretcher to the top stretcher adds enormous stiffness. This is sometimes called a knee brace and is worth adding proactively on any large frame.
Gaps between slats are uneven
This is a cosmetic issue but it is annoying to look at. The fix is always to use a consistent spacer every single time. If you already installed the slats without one, your options are to remove and reinstall (tedious but correct) or to accept it and focus on making the remaining slats consistent. Going forward, always use a physical spacer. Uneven gaps usually also mean some slats are not parallel to each other, sight down the length of the seat from one end to check. A slat that is even slightly angled will look wrong.
Screws are splitting the wood
This happens when you drive screws without pilot holes, especially near the ends of boards. Always pre-drill a pilot hole sized to the screw shank (the smooth part under the threads) before driving any screw within 2 inches of a board end. If a split has already happened, apply exterior wood glue, clamp the split closed, and wipe away the squeeze-out immediately with a damp rag.
Before you sit on it: a quick safety check
- Sit on the finished loveseat and shift your weight to each corner — no leg should lift or flex visibly
- Check that all screws and bolt heads are fully recessed or flush with the surface (exposed sharp hardware is a safety hazard)
- Push laterally on both armrests — they should not creak or move at all
- Check that all slat ends are smooth and free of splinters before you or anyone else sits down
- Look at the base from ground level to confirm all four legs contact the ground evenly; shim with rubber feet if needed
Seasonal protection to make it last
Even a perfectly finished loveseat needs seasonal care. If you want a faster DIY starting point, you can also turn an existing couch into patio furniture by stripping it down and replacing any weather-damaged padding outdoor season. At the end of the outdoor season, clean it thoroughly with a mild soap and water scrub to remove mildew and debris before storing or covering. If you are leaving it outside, a fitted outdoor furniture cover is worth every penny.
When sizing the cover, add 1–2 inches of leeway on both the width and depth measurements so the cover slides on and off easily without forcing it. Store cushions indoors or in a sealed deck box during winter. Every two to three years, lightly sand the wood surfaces and apply a fresh coat of exterior stain or sealer, this is the single most impactful maintenance step you can do.
A loveseat built with cedar or UC3B pressure-treated lumber, finished properly, and covered seasonally can last 10 to 15 years without structural issues.
FAQ
Can I stain or seal pressure-treated wood right away after building the loveseat?
Yes, but do it with a plan. If you want to finish the same weekend, choose KDAT lumber and still verify readiness with a moisture meter. Pressure-treated boards that are below about 19% moisture content can be finished sooner, while wetter boards usually cause finish to peel or blotch even if they look dry on the surface.
How do I know when the wood is dry enough to finish if I do not have time to measure moisture?
Use a moisture meter reading as your go/no-go, not the calendar. Dry-looking wood can still be above target moisture inside, especially for thicker 2x stock. If you cannot measure moisture, wait longer than you think (and test your finish on a hidden scrap first) to avoid uneven absorption and poor adhesion.
If I use UV polyurethane sealer, do I still need oil stain or an extra clear coat?
Most patio loveseats do not need a separate protective top coat if you use exterior-grade UV polyurethane, but you do need enough film thickness and coverage. Plan for multiple coats, keep the wood surface clean before each coat, and avoid wiping wet polyurethane into corners where it can pool and cure unevenly.
What is the best way to protect the legs and bottom of the frame from standing water?
If your chair will sit on a patio slab or ground that stays damp, add a small clearance and a barrier where wood contacts moisture. For the legs, use metal shoes or a sacrificial spacer pad so water does not wick directly into the end grain. Also ensure the bottom slats and lower stretchers have the same drainage-friendly slat gaps so water can evaporate quickly.
My slat gaps are uneven, how do I tell if it is spacing error or slats not parallel?
For slat spacing, consistent gaps matter as much as the initial measurement. If you notice one area consistently tighter or wider, stop and recheck your spacer setup and that the slats are parallel. A single out-of-parallel slat can make the rest look wrong even when all screws are correct.
Is pocket-screw joinery alone strong enough for the armrest and stretcher joints?
Do not rely only on pocket screws for the high-load stress points. The armrests and front-to-back box joints benefit from through-bolts or at least reinforced fastening. If you skip the carriage bolt upgrade, expect more racking risk over time, especially if the loveseat gets used by heavier people or is moved outdoors often.
What changes if I am building with ACQ pressure-treated lumber?
Yes, but pre-drill and select the right hardware. ACQ-treated lumber requires corrosion-resistant fasteners rated for ACQ, otherwise you can see early rust staining and eventual loss of strength. Even with the right screws, keep all cut edges and drilled holes finished (or sealed) so treated chemicals are less likely to leach at the edges.
My loveseat rocks on one corner, should I adjust the slats or fix the frame first?
If the loveseat rocks, first confirm squareness by comparing both diagonals, then check which corner is lifting. Only after the frame is square should you correct arm or slat issues. Fixing slats to “pull it level” usually creates long-term tension and can loosen joints.
When is it worth adding a diagonal knee brace on a smaller patio loveseat?
You can add a diagonal knee brace, even on a loveseat, when your design is longer, you expect heavy use, or you see any racking during a test sit. A simple way to decide is to apply body weight and gently twist, if the frame visibly twists, add the brace rather than tightening hope.
How can I tell if my patio loveseat hardware is failing early in a salty environment?
Yes, and it often prevents a lot of future maintenance. Install stainless or properly coated hardware for coastal areas, then also plan periodic inspection. Look specifically for rust spots around washers, bolt heads, and the first year after rainstorms, because corrosion often starts at crevices and fastener interfaces.
How should I measure for cushions if my armrests reduce usable width and my seat slats sit unevenly?
Order cushions based on the built interior clearances, but also account for the cushion’s thickness and any deck clearance you want. If your seat slats sit slightly proud or you plan a higher mounting method, measure from the finished slat surface to the back frame for back cushion height, then add a small tolerance for how far cushions compress.