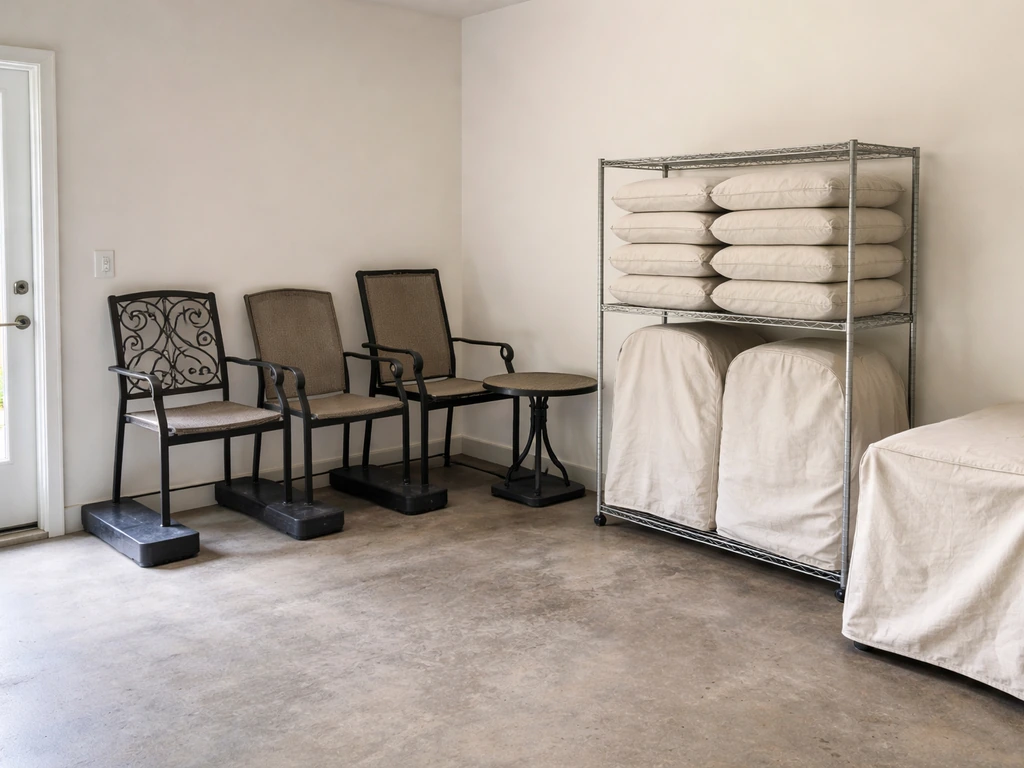
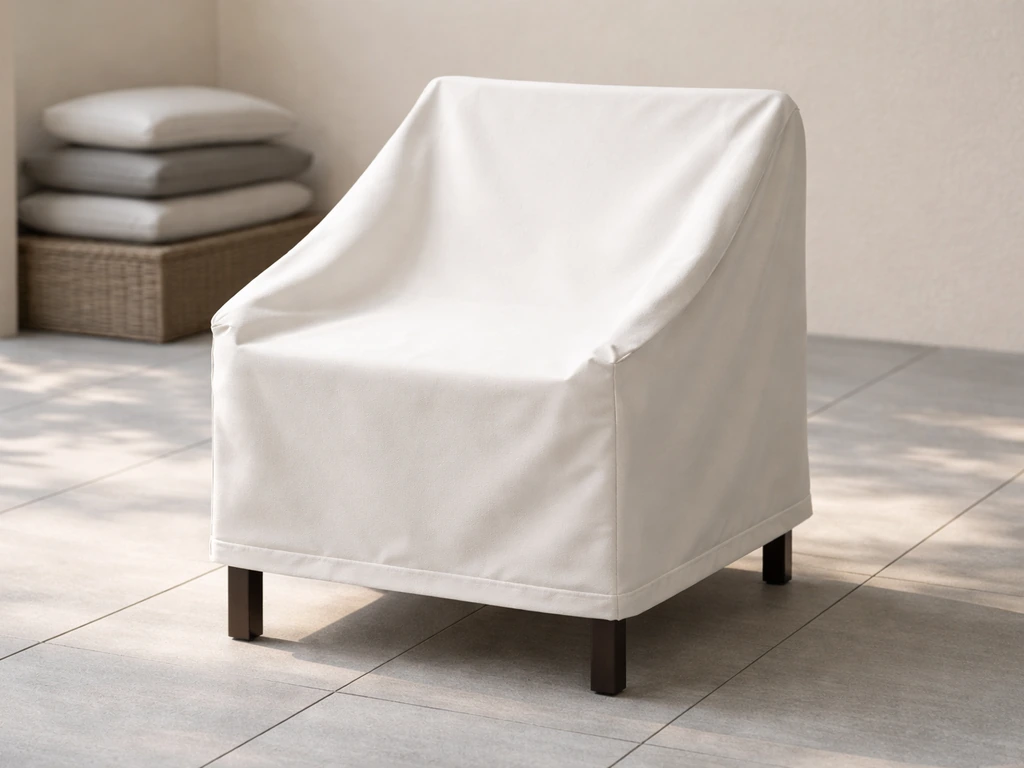
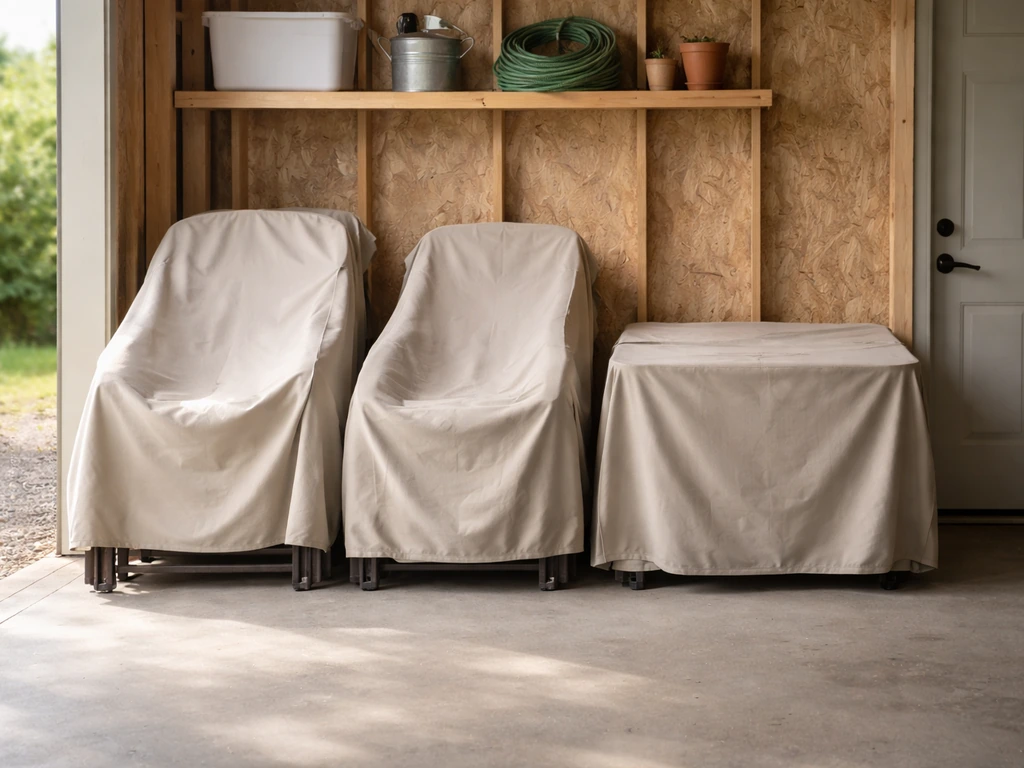
The best way to store patio furniture outside is to clean and fully dry every piece, treat surfaces with a material-appropriate protectant, raise furniture off the ground on pallets or risers, and cover it with a breathable (not fully waterproof) cover that is anchored so wind cannot trap moisture underneath. That combination handles rain, UV, pests, and humidity far better than just throwing a tarp over everything and walking away, which is the mistake I made my first season and paid for with rust spots and mildew-stained cushions.
Best Way to Store Patio Furniture Outside: 10 Smart Methods

Maren Grady
25 Jul 2026
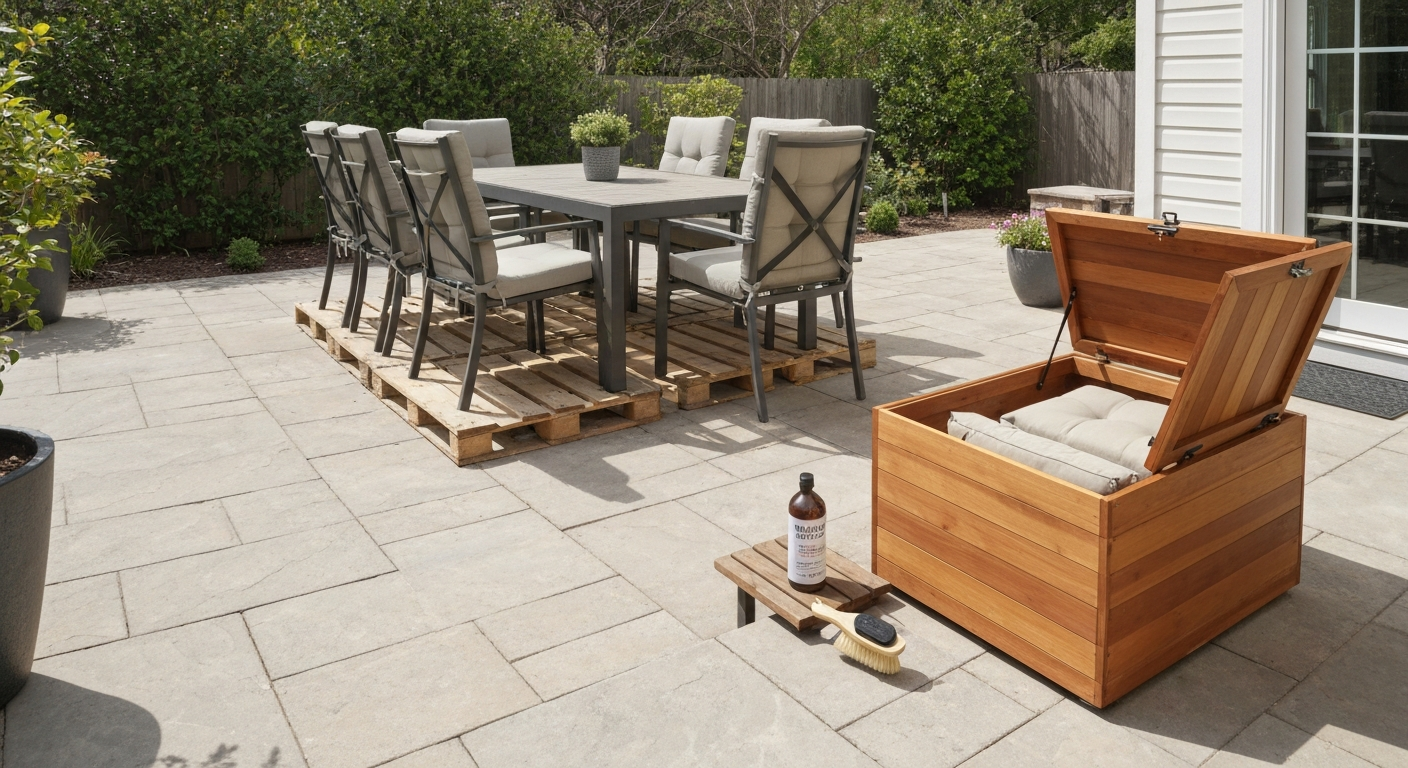
Quick decision guide: pick the right strategy for your climate, budget, and space
Before you buy a single cover or desiccant pack, figure out what you are actually dealing with. Your climate, how much covered space you have, and what your furniture is made of will drive every decision below.
| Your situation | Best storage strategy | Budget range |
|---|---|---|
| Mild climate, no hard freezes, dry summers | Leave outside with breathable covers + elevation | $20–$80 in covers and risers |
| Moderate climate, occasional freezes, average humidity | Outside under cover + cushions moved inside or to a storage box | $50–$150 |
| Harsh winters, heavy snow, or coastal salt exposure | Move frames to garage/shed; store cushions indoors separately | $0–$200 depending on garage space |
| No indoor or garage space at all | Outdoor storage chest or DIY deck box + breathable cover on frames | $80–$250 for a deck box |
| Budget under $30 | DIY pallet platform + repurposed moving blankets under a vented tarp | $10–$30 in materials |
| High humidity year-round (Gulf Coast, Pacific Northwest) | Prioritize mildew prevention: breathable covers, desiccants, elevation; move cushions inside | $40–$120 |
If you are in a zone that gets consistent snow loads or sustained temperatures below 20°F, moving metal frames and especially wicker or rattan pieces indoors is not a luxury, it is the difference between furniture that lasts a decade and furniture that cracks, rusts, or unravels in three years. Everything else on this page applies whether you are storing pieces outside, under a covered patio, or in a garage.
Where should your furniture actually go? Prioritized storage options
Think of storage as a spectrum from best to acceptable, not a single right answer. Here is how I rank the options, and why.
- Garage or shed (best): Full protection from UV, temperature swings, moisture, and pests. Even an unheated garage keeps furniture dry and blocks the freeze-thaw cycles that crack finishes and wicker. The catch is space, which is why the garage storage guide on this site is worth a read before you assume it won't work.
- Covered patio or pergola with breathable covers (very good): If the furniture stays under a solid roof overhang, a well-fitted breathable cover does most of the protective work. Rain doesn't pool, UV is blocked, and air still circulates.
- Open yard with breathable covers + elevation (acceptable): This works in mild, dry climates. In wetter regions it becomes a maintenance chore because you must check for pooled water and moisture buildup under covers after every rain.
- Outdoor storage chest for cushions + covers on frames (good hybrid): Frames stay outside covered; cushions go into a ventilated deck box. This is the most practical solution for most homeowners without extra indoor space.
- Unsecured tarp over everything (last resort only): A plain tarp traps moisture, creates condensation, and gives pests a cozy hiding spot. If this is your only option, prop the furniture so air moves underneath and use bungee cords to keep the tarp from sagging.
Step-by-step prep before you store anything
Skipping prep is how you open up a cover in spring and find a rust farm. I learned this the hard way with a wrought-iron bistro set I covered without cleaning or drying one October. Here is the sequence I follow now, and it takes about two to three hours for a full dining set.
Step 1: Clean every surface
Mix about 1/4 cup of mild dish soap into a gallon of lukewarm water. Scrub all frame surfaces, including the undersides of crossbars and the inside of any hollow legs where debris collects. For mildew, step up to a bleach solution (1 cup household bleach plus 1/4 cup mild soap per gallon of water). Test bleach solutions on a hidden area first, especially on colored powder-coated finishes or any fabric.
Step 2: Rinse thoroughly and let everything fully dry
This step is not optional. Non-breathable covers trap moisture against surfaces and accelerate both mold and corrosion. Give frames a full day of sun drying, and flip cushions at least once. If the weather is not cooperating, bring cushions inside and stand frames on end so air reaches every surface. Do not cover anything until it passes the touch test: run your hand into every joint, under armrests, and across fabric surfaces. If anything feels even slightly damp, wait. The manufacturer's cover instructions state to clean and allow all surfaces and cushions to dry completely before covering Northern Tool — Patio furniture cover instructions (manufacturer manual advising to dry furniture before covering).
Step 3: Address any minor repairs before covering
Small problems that go into storage come out bigger in spring. Check for surface rust on metal frames and address it now (see the materials section below). Look for loose wicker strands, cracked resin, or splintered wood edges. Tighten any loose bolts. A 20-minute repair session before storage saves a two-hour repair job in April.
Step 4: Apply surface protection
Once everything is clean and dry, apply whatever protective treatment suits your material: teak sealer on wood, a thin coat of car wax on painted metal frames, or a UV-protectant spray on plastic or resin. These coatings act as a barrier during storage and make spring cleaning dramatically easier.
Quick prep checklist
- Brush off loose dirt and debris from all surfaces and joints
- Wash frames and tabletops with mild soap solution
- Treat mildew spots with diluted bleach solution (rinse and dry after)
- Sand and treat any rust spots on metal; touch up with rust-inhibiting primer
- Check and tighten all hardware
- Apply material-appropriate protectant (sealer, wax, UV spray)
- Fully dry all pieces before covering or moving to storage
- Remove and store cushions and pillows separately
Material-specific care and storage tips
Different materials fail in different ways, and the prep and storage approach needs to match. Here is what actually works for each common patio furniture material.
Teak and cedar wood
Teak is structurally tough and will survive outdoors without any treatment, but it will gradually weather to a silver-gray patina. That is not damage, just natural oxidation. If you want to preserve the warm golden color, apply a dedicated breathable teak sealer (not teak oil) once a season or every one to two years after cleaning. High-end teak manufacturers specifically warn against linseed-based teak oils because they attract dirt and encourage mildew, which is the opposite of what you want going into storage. Use a teak-specific cleaner first, rinse well, let it dry completely (at least 24 to 48 hours), and then apply sealer. Cedar is more vulnerable to moisture than teak; store cedar pieces in a covered or indoor space if possible, and always seal end-grain cuts.
Aluminum and powder-coated steel
Aluminum is the lowest-maintenance outdoor frame material, but powder-coated finishes can chip and scratch, exposing the metal underneath. Clean aluminum with mild soap and water, avoid abrasive scrubbers, and skip the pressure washer (it strips the topcoat). For coastal environments, rinse frames after any salt exposure because salt accelerates corrosion at screws and joints even on aluminum. Steel frames are heavier and far more rust-prone. If you find rust, the sequence is: remove loose rust with a wire brush or 80-grit sandpaper, apply a phosphoric-acid rust converter (products like Ospho or similar rust reformers neutralize remaining rust chemically rather than just painting over it), then prime with an exterior rust-inhibiting primer and finish with matching paint. Rust-care guides recommend removing loose rust (wire brush or sandpaper), neutralizing remaining rust with a phosphoric‑acid rust converter (for example Ospho or commercial rust reformers), then priming and touching up with an exterior rust‑inhibiting primer and paint to protect the metal remove loose rust (wire brush/sandpaper), neutralize/convert remaining rust, then prime and touch‑up with exterior rust‑inhibiting primer and paint. Do this before storage, not after, because bare metal can re-rust within hours in humid conditions.
Synthetic wicker and natural rattan
Most modern outdoor wicker is HDPE or polyethylene resin woven over a powder-coated aluminum frame. This stuff is genuinely weather-resistant: clean it with mild soap and a soft brush, rinse, and it dries quickly. It resists mildew and unraveling far better than natural rattan. Natural rattan and wicker are a different story entirely. Use as little water as possible when cleaning (damp cloth rather than a hose), dry thoroughly, and never leave natural wicker outside in rain or prolonged humidity. If strands are unraveling or cracking, a dab of exterior-grade wood glue or two-part epoxy can reattach them. Natural wicker really should come inside or go into a shed for winter storage.
Plastic and resin furniture
Plastic and resin pieces are the most forgiving to store outside. Mild soap and water handles most cleaning, and a UV-protectant spray (the same kind used on car dashboards) slows the chalking and brittleness that UV exposure causes over time. Stack resin chairs seat-to-seat with a cloth between them to prevent scratching. The main failure mode for plastic furniture is UV degradation, so even a basic cover makes a significant long-term difference.
| Material | Biggest storage risk | Best protective treatment | Store outside OK? |
|---|---|---|---|
| Teak | Mildew if sealed with oil-based products | Breathable teak sealer every 1–2 years | Yes, with cover |
| Cedar | Moisture absorption, end-grain cracking | Exterior wood sealer, keep covered | Mild climates only |
| Powder-coated aluminum | Chipping exposing bare metal | Car wax or paste wax on finish | Yes |
| Steel/iron | Rust at any chip or scratch | Rust converter + primer + paint before storage | With thorough prep and cover |
| Synthetic HDPE wicker | UV fading over many years | UV-protectant spray | Yes |
| Natural rattan/wicker | Cracking, mildew, unraveling | Minimal water, dry thoroughly, interior storage | Not recommended |
| Plastic/resin | UV chalking and brittleness | UV-protectant spray | Yes, with cover |
Cushions, fabric, and pillows: keeping them mildew-free
Cushions are the most time-consuming part of patio furniture storage, and they are also the most commonly ruined. The two killers are moisture and compression. Here is how to handle both.
Cleaning cushions before storage
For solution-dyed acrylic fabrics like Sunbrella, brush off loose dirt first, then scrub with 1/4 cup mild dish soap per gallon of lukewarm water using a soft brush. Rinse thoroughly because soap residue left in fabric attracts mildew during storage. For mildew stains, use 1 cup household bleach plus 1/4 cup mild soap per gallon, test on a hidden area first, scrub, and rinse very well. If your cushion covers have zippers, they are almost certainly machine-washable on a delicate, cold cycle (close all zippers first). After washing, Sunbrella and similar performance fabrics may need a fabric protector reapplication (303 Aerospace Protectant or equivalent) to restore water repellency.
Drying is non-negotiable
This is where most people rush and regret it. Open-cell foam cushion cores can hold moisture for 24 hours or more even when the fabric surface feels dry. Stand cushions on edge in the sun, and press them with your palm across the full surface. If you feel any coolness or give that suggests trapped moisture, flip them and wait. Quick-dry foam cores with drainage grommets in the cover are dramatically better here: they can dry in a few hours instead of a full day. If you are shopping for replacement cushions or rebuilding them, this is worth specifying.
Storing cushions: breathable containment
Do not store cushions in plastic bags or airtight bins. Any residual moisture turns a plastic bag into a mildew greenhouse. Use breathable cotton storage bags, a ventilated deck box, or a DIY cushion storage box made from cedar (cedar has natural mold-inhibiting properties). For extra insurance, tuck a few silica gel packets into the storage container. If you're storing cushions in a garage or shed alongside the frames, adding a calcium-chloride moisture absorber like DampRid to the space significantly reduces ambient humidity. The related guide on how to store patio cushions goes deeper on this specific topic if you want more options.
Mildew prevention recap
- Never store cushions in airtight plastic; use breathable bags or ventilated boxes
- Dry cushions completely before storage, including the foam core
- Add silica gel packets or a DampRid unit to any enclosed storage space
- Treat mildew with diluted bleach before storage, not after it has had months to set
- Do not stack cushions tightly; leave air space between them
Covers and how to choose them
A cover is the easiest upgrade you can make to your outdoor storage setup, but the wrong cover can actually make things worse. For step-by-step instructions and best practices specifically on how to store patio furniture covers, see our guide on how to store patio furniture covers. Here is what actually matters when picking one.
Breathable vs. waterproof: which do you actually need?
This is the most common cover mistake. Fully waterproof covers (think solid plastic tarps) keep rain out but trap any moisture that was already inside, including condensation from temperature swings. Breathable covers use materials like polypropylene or 300D polyester with vents that allow moisture vapor to escape while still blocking rain and UV. For furniture that is already dry and stored under a covered patio, a breathable cover is almost always the better choice. For furniture stored in the open where heavy rain is a real risk, look for covers that combine a water-resistant outer layer with fabric vents near the base.
Fit and anchoring
A cover that is too large is almost as bad as no cover. Loose cover fabric sags and creates water-holding pockets. Look for covers with elastic hems, drawstrings, or strap-and-buckle systems that pull the cover tight to the furniture profile. For windy areas, cross-strap systems that run under the furniture are worth the few extra dollars. Most quality covers include these; budget covers often don't. I add adhesive velcro strips to the legs on cheaper covers I already own to solve this without buying new ones.
Low-cost cover hacks
- Old moving blankets draped over furniture and secured with bungee cords: excellent UV and light rain protection, costs nothing if you have them
- Breathable landscape fabric (sold by the roll at home improvement stores) cut to fit and stapled into a simple cover: under $15 for enough to cover a loveseat
- Canvas drop cloths: more breathable than plastic tarps, cheap, and durable enough to last a few seasons
- Repurpose a fitted king-size bedsheet as a quick-fit chair cover for light seasons; two bedsheets cover most loveseats
- For small individual chairs, cotton pillowcases secured with a rubber band over the back legs keep dust and light moisture off and cost nothing
Ventilation, elevation, and moisture control
Moisture is the common enemy of every storage strategy, whether you are leaving furniture outside or tucking it into a shed. Ground contact accelerates moisture absorption, temperature swings cause condensation, and trapped air with nowhere to go breeds mildew. Here is how to fight all three.
Get furniture off the ground
Concrete and wood decking both wick moisture upward. Raising furniture just two to four inches creates enough airflow to make a real difference. The cheapest option is a standard wood pallet: free from hardware stores, lumber yards, or large retailers, and perfect for sitting a full dining set on. For individual pieces, rubber furniture risers (the kind sold for bed frames) cost a few dollars each. In a garage or shed, this one step prevents the musty smell and surface staining that comes from furniture sitting on cold concrete all winter.
Desiccants for enclosed spaces
If cushions or furniture are going into a garage, shed, or storage chest, a desiccant is a low-cost insurance policy. Calcium-chloride moisture absorbers (DampRid and equivalents) work fast by pulling ambient moisture into a liquid reservoir. DampRid product labeling / usage notes (calcium‑chloride moisture absorbers) advise following manufacturer instructions: avoid contact between collected liquid/crystals and metal or leather, and replace or refill per product directions (many disposable units last weeks–months; refillable units often instruct refill every 30–60 days). In a typical garage or shed, a refillable unit needs its crystals replaced roughly every 30 to 60 days during humid periods. Keep the collected liquid away from metal surfaces because the calcium chloride solution is corrosive. Silica gel packets are better for smaller enclosed spaces like cushion storage boxes or deck boxes: they absorb quietly, are non-corrosive, and can be regenerated by baking in an oven at 250°F for about an hour instead of being thrown out. Avoid older cobalt-chloride silica gel (the blue-turning-pink type) for home use because of toxicity concerns; look for orange or white indicating gels instead.
Ventilation basics
Even a well-covered piece of outdoor furniture benefits from occasional uncovering on dry, sunny days to air out. For enclosed storage, a louvered vent panel in a shed wall makes a noticeable difference in ambient humidity. For a covered patio, keep the perimeter open rather than blocking all sides with privacy screens, which stagnates air and promotes mildew on anything stored nearby.
DIY pallet platform: a 30-minute build
- Source two to three matching wood pallets (standard 40x48 inch size works for most dining sets)
- Inspect for broken boards and nail protruding fasteners back down with a hammer
- Optional: sand the top surface lightly with 80-grit sandpaper and apply a coat of exterior wood sealer to slow rot
- Arrange pallets flat on your storage surface and place furniture on top
- If using in a garage, add rubber feet under the pallet corners to protect the floor and prevent sliding
Pest control and critter-proofing
Spiders love covered patio furniture. Wasps and hornets treat hollow furniture legs and open chair crevices as prime real estate. Mice target cushion foam as nesting material in garages and sheds. None of this is catastrophic if you plan for it, but ignoring it means spring surprises that range from annoying to requiring a hazmat-level cleanup.
Block nesting spots
Before covering furniture for the season, plug open hollow legs with cork stoppers, rubber furniture tips (sold in the hardware aisle for under $5 for a pack), or even wadded aluminum foil as a temporary fix. Wasps and hornets favor protected hollow spaces, and a sealed leg takes away one of their favorite options. For outdoor storage chests and deck boxes, check that lid seals are intact and that drain holes are not large enough to admit mice (anything over about 1/4 inch is a potential entry point).
Repellents that actually work outdoors
- Peppermint oil on cotton balls placed under covers and in storage boxes repels spiders and rodents; refresh every four to six weeks
- Cedar blocks or cedar sachets in storage areas deter moths and some insects; effective for cushion storage boxes in particular
- Diatomaceous earth sprinkled around the base of covered furniture or along garage storage walls works against crawling insects without chemicals
- Sticky traps placed along garage or shed walls catch rodents early before they reach furniture
- For wasps in outdoor storage areas, hang a fake paper wasp nest (available for a few dollars online) near the storage area: wasps are territorial and typically avoid areas where they believe another colony is established
After finding a nest
If you open a cover and find an active wasp or hornet nest, do not pull the cover back further. Wait until nightfall when wasps are inactive, wear long sleeves and eye protection, and use a foam or spray wasp killer rated for use in enclosed spaces. Treat from a safe distance, retreat immediately, and return the next day to confirm activity has stopped before removing the nest. If the nest is inside a hollow leg or tight space, a blast of compressed air first can dislodge it so the spray can reach the interior.
Troubleshooting common storage problems
Rust appeared under the cover
This almost always means the furniture was either not fully dry when covered, or the cover trapped condensation against the metal. Remove loose rust with a wire brush or sandpaper, apply a phosphoric-acid rust converter to neutralize what remains, prime with a rust-inhibiting exterior primer, and paint to match. Then fix the root cause: improve ventilation under the cover, switch to a breathable cover, or add a desiccant to the covered space.
Mold or mildew on frames or cushions
Diluted bleach solution (1 cup bleach plus 1/4 cup mild soap per gallon of water) handles mildew on most hard surfaces and on bleach-tolerant performance fabrics. Rinse thoroughly after treatment and, critically, do not re-cover until everything is completely dry. Iowa State University Extension recommends this bleach-and-rinse approach specifically for outdoor furniture mildew, and it works. For sensitive fibers or natural wood, use an oxygen-bleach alternative (like OxiClean dissolved in water) instead.
Cracked or sagging wicker strands
For synthetic HDPE wicker, individual strands rarely crack; if one does, trim it flush and use a heat gun on low to soften the end and press it flat against the adjacent weave. For natural rattan, cracked strands can be reattached with exterior-grade wood glue or two-part epoxy. Sagging strands that have lost tension usually need to be replaced with a matching rattan reed purchased from a craft or caning supply store; this is a beginner-level repair with online tutorials for nearly every weave pattern.
Cushions came out of storage flat and misshapen
Compressed cushions during storage is the most common cause. Stand them on edge instead of stacking, and leave a small gap between each one. If the foam core has permanently compressed, the cover is likely fine but the insert needs replacing. Foam replacement is a straightforward DIY task: measure the original insert, order quick-dry reticulated or closed-cell foam cut to size (sold online by specialty foam suppliers), and swap it in through the zipper. This costs a fraction of buying new cushions and is one of the more satisfying repairs on a budget.
Winterizing and storm-proofing: a seasonal checklist
Whether you are heading into winter or bracing for hurricane season, the prep process is the same core routine with a few additions for severity. The guide on how to store outdoor patio furniture in winter covers cold-climate specifics in more detail, but here is the core checklist to work from. See the full guide on how to store patio furniture (resource ID 8a8c17ad-45d3-4d45-b7a6-ebcd2dd40b85) for cold‑climate specifics. For specific tips on storing pieces in a garage, see how to store patio furniture in garage. For broader guidance on routine maintenance, see our guide on how to care for patio furniture.
- Complete the full cleaning and drying sequence at least two weeks before first expected freeze or storm season
- Apply surface protectants (sealers, wax, UV spray) while temperatures are still above 50°F for proper curing
- Move cushions and pillows to indoor storage before the first freeze
- Plug hollow legs and open frame cavities to block nesting
- Place desiccants in any enclosed storage spaces
- Elevate all furniture on pallets or risers
- Use fitted, anchored, breathable covers and cross-strap any pieces in wind-exposed areas
- For severe storms: move lightweight pieces like chairs and side tables indoors or into a shed; heavy tables can stay with cross-straps added under the cover to prevent wind lift
- Check and tighten all bolts and hardware before winter; cold temperatures make frozen fasteners much harder to address in February
DIY storage projects worth the afternoon
If you enjoy building things almost as much as sitting on them, a few low-cost DIY projects make outdoor furniture storage dramatically better.
Simple cedar cushion storage box
A basic deck box made from 1x10 cedar boards can be built in about three hours with a circular saw, drill, and exterior screws. Cedar's natural oils inhibit mold and insects, making it ideal for cushion storage. A 48x20x20-inch box holds six to eight standard chair cushions and costs roughly $60 to $80 in lumber, compared to $150 to $250 for a comparable commercial deck box. Add a piano hinge on the lid and a simple hasp latch and you have a weatherproof, pest-resistant cushion home that will outlast most plastic alternatives.
PVC cover frame for a dining set
A simple PVC pipe frame built to sit over a dining table keeps the cover off the furniture surface entirely, which improves airflow dramatically. Use 3/4-inch PVC pipe and T-fittings to build a rectangular frame about 4 inches taller than the highest point of the set; drape a breathable cover over it. The whole frame costs about $25 in pipe and fittings. This approach prevents the sag-and-pool problem that ruins flat covers on table umbrellas and chair backs. For another relevant comparison, see how to store outdoor patio furniture in winter.
FAQ
What’s the best first step before storing patio furniture outside or in a garage/shed?
Clean, dry, and inspect everything. Step‑by‑step: 1) Remove cushions, pillows, and loose fabric. 2) Brush off loose dirt and debris. 3) Wash frames and fabrics: use mild dish soap (about 1/4 cup per gallon warm water) and a soft brush; rinse thoroughly. 4) Treat mildew on fabrics with a bleach solution only if the fabric manufacturer permits (example: 1 cup household bleach + 1/4 cup mild soap per gallon; test a hidden area). 5) Dry completely in sun or a well‑ventilated area—no damp parts allowed before covering or storing. 6) Inspect and make minor repairs (tighten fasteners, sand/prime rust spots, glue broken wicker). Drying and inspection are essential because covers trap moisture and promote mold/rust.
How do I choose between leaving furniture outside vs moving it to a garage/shed?
Use a simple decision guide: - Climate: in wet/humid or freeze/thaw climates, prioritize indoor storage (garage/shed). In mild/dry climates, outdoor options with breathable covers and elevation are acceptable. - Material: teak and powder‑coated aluminum tolerate outdoors better; natural wicker, iron, and untreated steel prefer indoor storage. - Budget & space: if you lack indoor space but need low cost, use DIY elevation (pallets), breathable covers, desiccants, and frequent inspections. - Value: expensive upholstered sets or cushions should go indoors. If unsure, move smaller cushions and fabric to indoor storage and leave frames outside with protection.
What are prioritized, budget‑friendly methods for storing patio furniture outside?
Ranked, practical options: 1) Best low‑cost outdoor: clean/dry, elevate on a pallet platform, use breathable covers with vents and tie‑downs, add silica‑gel or calcium‑chloride packs in cushions/boxes. 2) Mid‑cost: build simple cover frames (PVC or lumber) to prevent cover sagging and pooling; add pallet base and chest for cushions. 3) Best long‑term if affordable: move to garage/shed on shelving or wall racks with desiccants and airflow. Always keep cushions and fabrics indoors or in sealed breathable containers if possible.
What material‑specific care and storage tips should I follow for wood (teak, painted wood, softwoods)?
Teak: clean with a teak cleaner, allow to dry, and if you want to preserve golden color apply a breathable teak sealer once a season to once every 1–2 years. Avoid linseed‑type oils that attract dirt. Painted or sealed hardwoods: clean with mild soap/water, sand/spot‑prime any bare spots, touch up with exterior paint; store under breathable cover. Softwoods: treat exposed end grain, keep elevated from ground, and store inside or under ventilated shelter in wet climates.
How should I handle metal furniture (steel, wrought iron, aluminum, powder‑coated frames)?
Aluminum/powder‑coated: rinse salt after coastal exposure, clean with mild soap, avoid abrasives. Steel/wrought iron: remove loose rust with wire brush/sandpaper, apply rust converter where needed, prime with rust‑inhibiting primer, then paint with exterior metal paint. Immediately protect any bare metal after rust removal. For all metals, keep off wet ground, provide airflow, and cover with breathable covers; inspect fasteners and joints annually.
What about wicker — synthetic (HDPE) vs natural rattan?
Synthetic resin wicker (HDPE): clean with mild soap and soft brush; it resists mildew and can stay outside with breathable covers. Natural wicker/rattan: much more sensitive—keep dry, avoid power washing, use minimal water when cleaning, allow thorough drying, and store indoors for long‑term. Repair natural wicker splints with glue or splint replacement; for frayed synthetic wicker use epoxy or weave repair kits.