To weatherproof metal patio furniture, you need to clean and degrease the surface, remove any rust, apply a rust-inhibiting primer suited to your metal type, and then topcoat with a weather-resistant paint or sealant. If you want a complete, step-by-step approach that covers choosing products and fixing moisture problem spots, see our guide on how to waterproof patio furniture weatherproof metal patio furniture. Do the joints, fasteners, and undersides too, or moisture will find those spots first. Done right, one solid weekend of work will protect your furniture for three to five years before it needs a touch-up.
How to Weatherproof Metal Patio Furniture: DIY Steps
Maren Grady
29 Apr 2026
I've ruined a set of cast-iron chairs by skipping the primer and going straight to spray paint. Two months later the paint was peeling in sheets. So before we get into the steps, let me be direct: the prep work is 80% of this job. The coating is almost secondary. Rush the prep and you will redo this in one season.
Start here: figure out what metal you have and what shape it's in
Not all metal patio furniture is treated the same way, and choosing the wrong primer for your metal type is one of the most common reasons coatings fail early. Take five minutes to do a proper assessment before you buy anything.
Identify the metal
The two metals you'll almost always encounter in patio furniture are aluminum and steel (which includes wrought iron and cast iron). Here's the easy way to tell them apart: hold a magnet to it. Steel and iron are magnetic. Aluminum is not. Aluminum is lighter, tends to feel somewhat hollow when you knock on it, and won't have reddish-brown rust (it forms a whitish, chalky oxidation instead). Steel and iron are heavier and will show the classic orange-red rust at any bare or scratched spot.
Assess the current condition
Walk around every piece and look for these four conditions, because each one calls for a slightly different approach:
- Bare metal (no coating): raw aluminum or steel that was never painted or powder-coated, or a surface that has been fully stripped. This is the easiest starting point.
- Lightly rusted: surface rust you can scratch off with your fingernail or a wire brush, with solid metal underneath. Very common on steel chair legs and table frames.
- Heavily rusted or pitted: deep rust that has eaten into the metal, leaving pitting or soft spots. This needs more aggressive treatment and may involve some structural repair.
- Previously painted or powder-coated: paint or factory coating that is still mostly intact but chalky, faded, or showing chips. You don't always need to strip this entirely.
Also check every joint, weld seam, bolt hole, and underside of legs. These are the places water sits and rust starts, even when the visible surfaces look fine. Run your finger under each crossbar and along every tube end. If you feel loose scale or soft metal, mark it with painter's tape so you don't miss it during prep.
Clean and prep the surface properly
This is the step people rush, and it's the reason most DIY weatherproofing jobs fail within a year. Primer and paint need a clean, slightly abraded surface to bond to. Grease, oxidation, or flaking old paint underneath will cause anything you apply on top to peel.
Degrease first, always
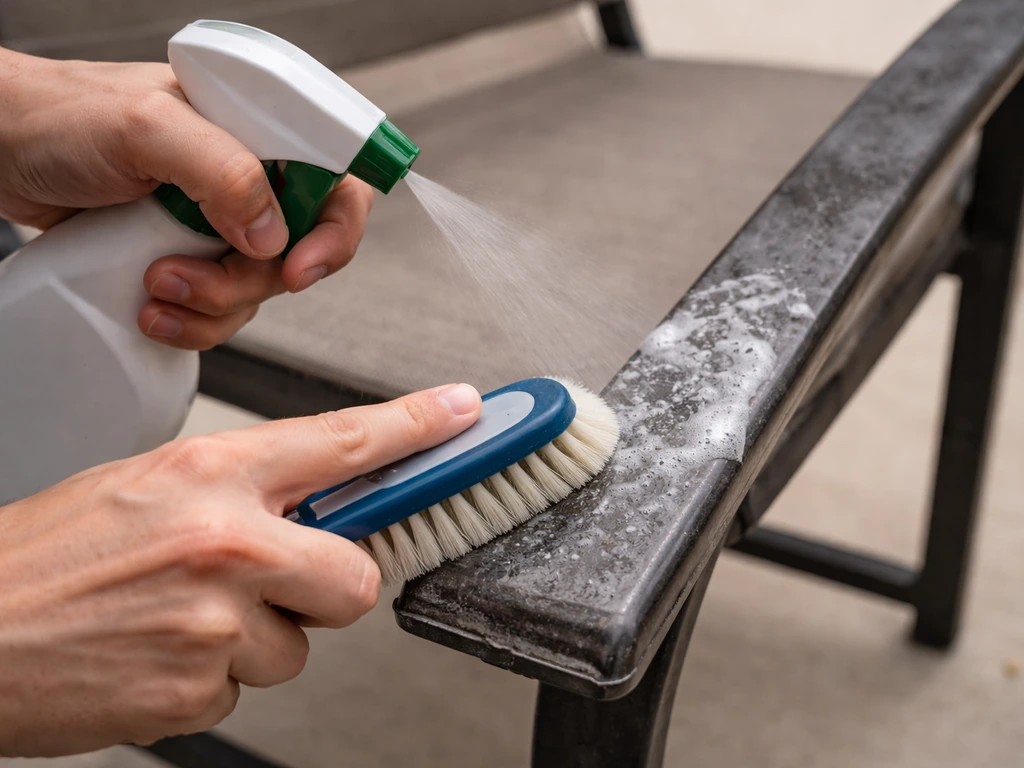
Before you do anything else, wash every surface with a degreaser. Dish soap and warm water works for light contamination, but if the furniture has any sunscreen, cooking grease, or silicone residue on it (common on pieces that were ever treated with a spray protectant), use a dedicated degreaser like Simple Green or a mineral spirits wipe-down. Rinse thoroughly and let it dry completely. Applying primer to damp metal is another way to trap moisture under the coating and cause early rust.
Remove rust from steel and iron
For light rust, a wire brush (hand brush or drill attachment) and 80-grit sandpaper will get you there. Scrub until you've removed all loose scale and the surface looks dull and uniform. For moderate rust, naval jelly (a phosphoric acid gel) is your best friend: brush it on, let it sit for 15 minutes, wipe it off, and it converts the rust chemically rather than just scraping it off. For heavy pitting, you may need an angle grinder with a flap disc. Be honest with yourself here: if the metal is so pitted that it feels soft or you can push through it with a screwdriver, that section may need to be welded or the piece retired.
Sand and scuff existing coatings
If the existing paint or powder coat is still well-bonded (doesn't flake off when you press tape on it and pull), you don't have to strip it. Sand it with 120-grit sandpaper until the sheen is gone and the surface feels matte and slightly rough to the touch. This gives the new primer something to grip. If the old coating is peeling, bubbling, or lifting at the edges, strip it completely with a chemical paint stripper or by sanding/grinding down to bare metal. Trying to paint over a failing coating is always a losing battle.
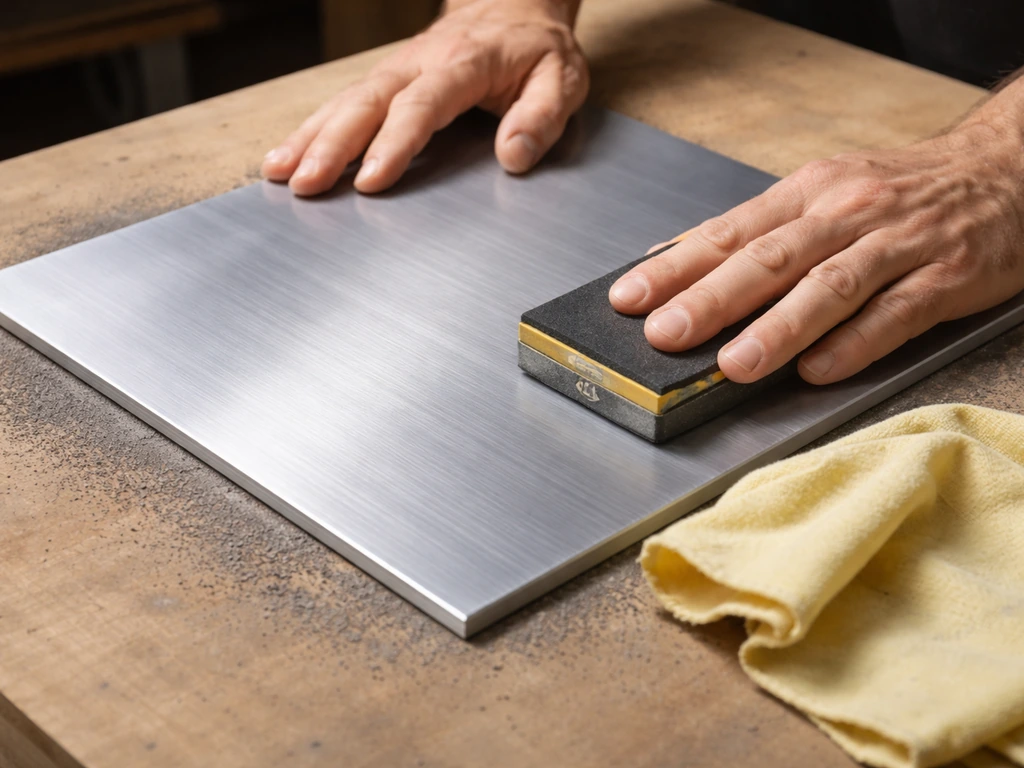
Handle aluminum oxidation
Aluminum doesn't rust but it does oxidize, forming a chalky white layer that prevents good adhesion. Scrub it off with a Scotch-Brite pad or fine (220-grit) sandpaper, then wipe with a clean rag dampened with acetone or denatured alcohol. That last wipe removes any residue and micro-etches the surface so primer sticks. Skip this on aluminum and your coating will peel within weeks.
Choose the right protection system for your metal and condition
There's no single product that works perfectly for all metal furniture in all conditions. The table below lays out what I'd recommend based on metal type and current surface condition. Think of it as a primer-plus-topcoat system, not just one product.
| Metal & Condition | Primer Recommendation | Topcoat Recommendation | Notes |
|---|---|---|---|
| Aluminum, bare or oxidized | Rust-Oleum Clean Metal Primer or self-etching primer (aerosol) | Rust-Oleum Painter's Touch 2X or any acrylic enamel | Self-etching primers bond better to aluminum than standard metal primers |
| Steel/Iron, bare or lightly rusted | Rust-Oleum Stops Rust Clean Metal Primer or Sherwin-Williams UNIFLEX Acrylic Rust Inhibitive Metal Primer | Rust-Oleum Stops Rust oil-based topcoat or acrylic enamel | Two coats of primer on bare steel is worth it |
| Steel/Iron, moderate rust (surface only) | Krylon Automotive Rusty Metal Primer or Sherwin-Williams Pro-Line 801 Rust Conversion Primer | Oil-based or acrylic enamel topcoat rated for metal | Rust conversion primer chemically bonds to rust residue, no need to remove every trace |
| Steel/Iron, heavy rust or pitting | Strip to bare metal first, then use rust-inhibiting primer | Oil-based topcoat, 2–3 coats | No primer can fully protect deeply pitted metal without full removal first |
| Previously painted, coating intact | Light sand, then spot-prime bare areas with rust-inhibiting primer | Repaint full surface with acrylic enamel or oil-based metal paint | Matching sheen (gloss vs. satin) matters for appearance |
| Powder-coated, fading or chalking | Sand until matte, spot-prime chips, no full strip needed | Spray with acrylic enamel to seal | Powder coat is very durable; stripping it is usually unnecessary unless it's flaking |
A quick note on aluminum versus steel: aluminum naturally resists rust, so the main goal there is adhesion and UV protection, not corrosion resistance. Steel and iron are the opposite: corrosion resistance is everything, and skipping a dedicated rust-inhibiting primer is what causes early failure on those pieces. If you're working on wood furniture and want a comparison, sealing teak or sealing wood patio furniture involves different prep and product choices, but the same underlying logic applies: match your product to your material. If you're working on a wood patio set instead, the goal is sealing the surface to block water and UV, with prep and product choices tailored to wood type and condition sealing teak. If your patio furniture is teak instead of metal, you can follow a similar prep routine and focus on sealing teak with an appropriate exterior oil or sealer.
When to use a clear sealant instead of paint
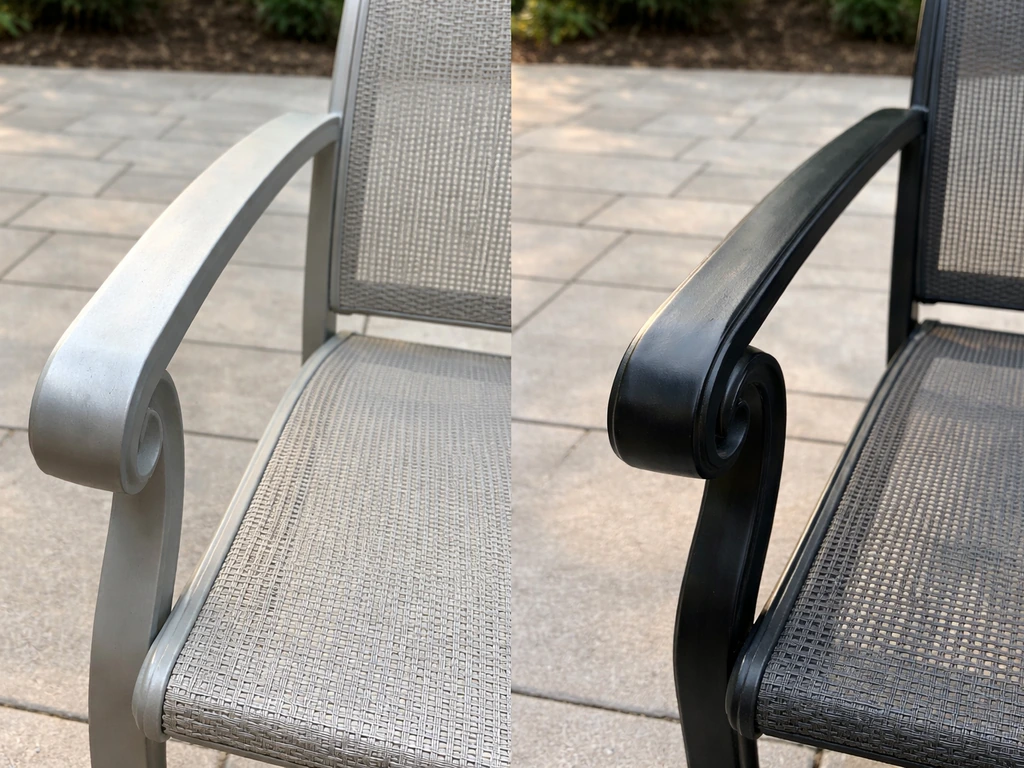
If the furniture has a factory finish you want to preserve (like a brushed aluminum or galvanized look), a clear exterior metal sealant like Rust-Oleum Crystal Clear Enamel or a clear acrylic spray gives you water and UV protection without changing the appearance. It won't hold up as long as a full primer-plus-paint system, so plan to reapply every one to two years. This is also a good option for touch-up maintenance between full recoat cycles.
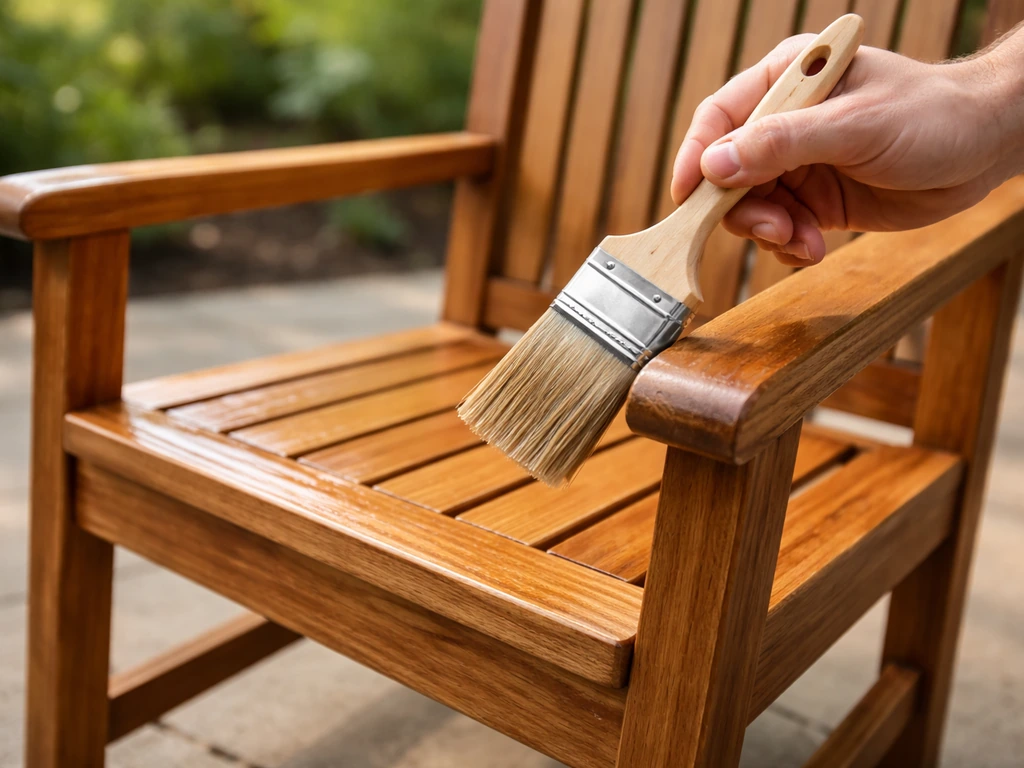
How to apply the coating so it actually lasts
Application technique matters almost as much as product selection. Here's how to do it properly.
- Work on a dry day with temperatures between 50°F and 90°F. Humidity above 70% slows drying and can cause primer to bubble or blush. Avoid windy days if spraying: overspray wastes product and gives you an uneven finish.
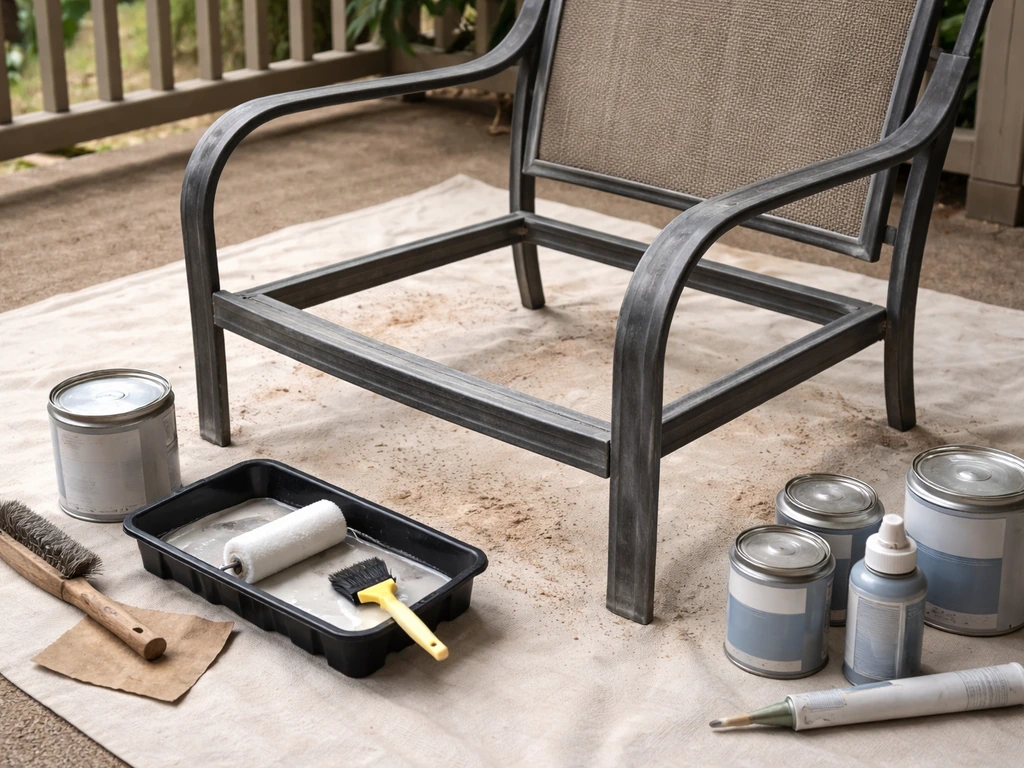
- Lay the furniture on a drop cloth or work table so you can get to the undersides. Don't skip the undersides. That's where moisture collects and where rust always starts.
- Start with joints, seams, and fasteners. Use a small brush to work primer into every crevice, bolt hole, and weld seam before you spray or roll the broader surfaces. These tight spots get missed by aerosol spray alone, and they're your highest-risk areas.
- Apply the first coat of primer in thin, even passes. For aerosol, hold the can 10–12 inches from the surface and keep moving. For brush-applied primer, work it into the surface with the grain of the metal. Thin coats dry faster and bond better than thick ones.
- Let the first coat dry fully before applying the second. Read your product's label: most metal primers need 30–60 minutes between coats, but some rust-conversion primers need 24 hours before topcoating. Rushing this is one of the most common DIY mistakes.
- Apply a second coat of primer on steel and iron pieces, especially around joints and legs. One coat is minimum; two coats is the standard for anything that sits outdoors year-round.
- Let the primer cure fully (usually 24 hours, check your product) before applying the topcoat. Apply the topcoat in two thin coats as well, letting each coat dry per the label. For spray paint, two light coats beats one heavy coat every time.
- Allow the final topcoat to cure before using the furniture. Most metal paints reach full hardness in 48–72 hours, not just the surface-dry time shown on the can. Setting something heavy on a chair cushion the next morning can leave impressions.
If you're using a brush, a 1-inch angled sash brush is ideal for getting into tight spots, and a 2-inch flat brush covers flat rails and tabletops faster. Foam rollers leave fewer brush marks on flat surfaces if appearance matters to you. For aerosol, shake the can for a full two minutes before starting and every few minutes while spraying.
The moisture trouble spots you can't afford to ignore
Even with a perfect coating, water finds its way into specific areas over time. Knowing where those spots are lets you focus your protection and do faster, more targeted touch-ups later.
Legs and feet
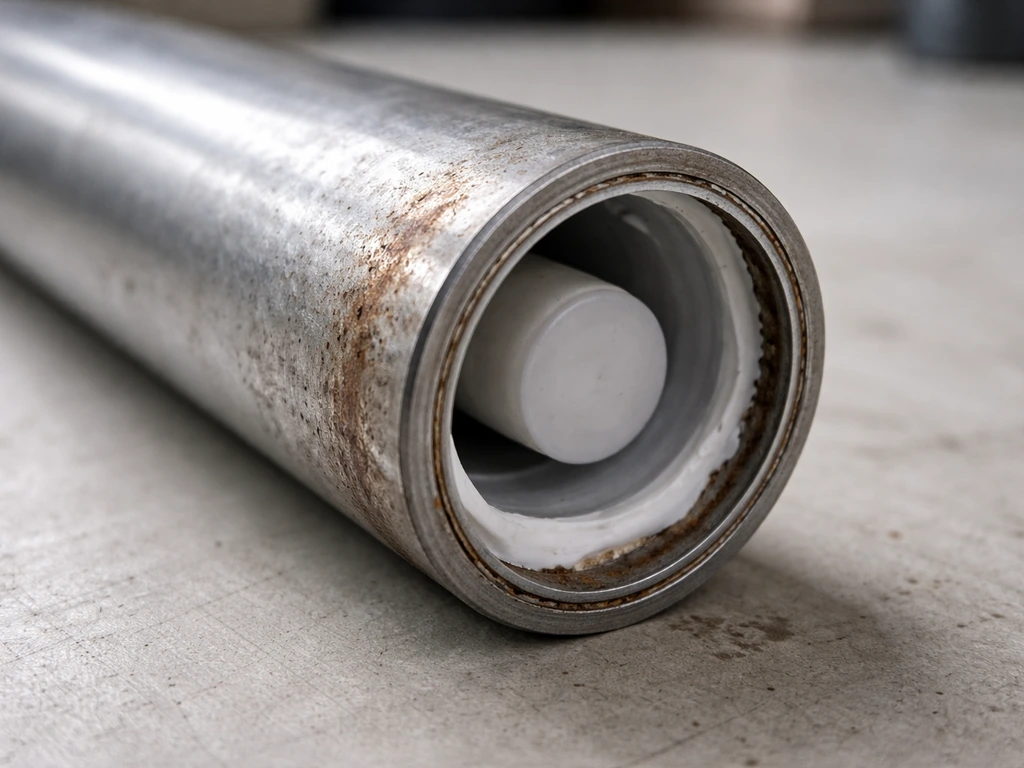
Hollow tube legs trap moisture inside when the bottom end is open. Water gets in, can't get out, and rusts the inside of the tube where you can't see it. The fix is simple: plug open tube ends with rubber caps (sold at hardware stores for a dollar each) or fill them with clear silicone caulk. Make sure the outside of every leg bottom gets extra primer and paint attention, since that's where the leg contacts pooled water on wet surfaces.
Joints, welds, and fasteners
Wherever two pieces of metal meet, water can wick into the gap and sit there. Before painting, run a thin bead of clear exterior silicone caulk into any open gaps at joints. Let it cure before priming over it. For bolts and screws, use stainless steel fasteners if you're replacing them (they won't rust even if the coating chips), and dab a small amount of primer directly onto each bolt head and nut.
Drainage and flat surfaces
Tabletops and flat horizontal surfaces hold standing water after rain. If your table has a small drainage hole in the center (many do), keep it clear. If it doesn't and the water pools noticeably, you can drill a small 1/4-inch drain hole in a low point and touch up the drilled edge with primer immediately. Tipping furniture slightly at a 2–3 degree angle using furniture feet shims is another simple way to let water run off rather than sit.
Touch-up strategy
Keep a small can of the same primer and topcoat you used. At the start and end of each outdoor season, do a ten-minute walk-around looking for chips, scratches, and any spot where the coating looks thin. Touch those up immediately with a small brush. A chip the size of a quarter that gets touched up takes two minutes. That same chip left through a wet winter will be a rust spot the size of your palm by spring, requiring a full strip-and-recoat.
Seasonal maintenance to keep your weatherproofing working
Weatherproofing isn't a one-and-done project. Think of it as a system you maintain, not a permanent fix. Here's a realistic annual routine that takes very little time but adds years to the life of your furniture.
Spring: inspect and touch up
At the start of the season, pull the furniture out and inspect every surface in good daylight. Look for rust spots, chips, bubbling paint, and any hardware that has worked loose over winter. Touch up any damage (clean, spot-prime, paint) before the outdoor season starts. Tighten any loose bolts. If you use rubber foot caps on the legs, check that they haven't cracked and replace them if they have.
Summer: clean regularly and watch for damage
Wash the furniture with mild soap and water every four to six weeks during heavy use. This prevents surface grime from trapping moisture against the metal. Don't use abrasive scrubbers on painted surfaces; they'll scratch through your topcoat. If you notice a new chip or scrape during the season, touch it up within a week before moisture gets into the bare metal.
Fall: prep for storage or winter exposure
If you're in a climate with wet winters or freezing temperatures, bring your furniture inside or cover it. Use breathable furniture covers rather than plastic tarps: plastic traps condensation underneath, which is worse than leaving the furniture uncovered. If you do store pieces in a garage or shed, make sure they're dry before they go in, and leave some airflow around them so moisture doesn't build up.
If the furniture stays outside through winter, apply a fresh coat of clear exterior metal sealer in the fall as an extra layer of protection on top of your painted finish. This is optional but worthwhile in wet or coastal climates. Plan a full recoat (primer plus topcoat) every three to five years on steel and iron, or every four to seven years on aluminum, depending on your climate and how well the furniture has held up.
When the coating fails: troubleshooting peeling, bubbling, and returning rust
Sometimes you do everything right and the coating still gives you trouble. Here are the most common problems and what's actually causing them, so you can fix the right thing instead of just repainting over the same issue.
Paint peeling in sheets
This almost always means the surface wasn't properly prepped before priming: either it wasn't degreased, wasn't sanded enough, or had a slick factory coating the new paint couldn't bond to. The fix is to strip the peeling areas back to bare metal, degrease thoroughly, sand until matte, and start the primer-topcoat system over. There's no shortcut here. Painting over peeling paint just delays the inevitable.
Rust bubbling under the paint
Bubbles or raised bumps in the paint surface usually mean rust formed underneath the coating, often because the prep didn't get all the rust off, or moisture got in through a chip or joint. Scrape and sand through the bubbled area, treat the rust with naval jelly or a rust conversion product, let it dry fully, and then spot-prime and repaint. If you find the rust has spread under a large area of seemingly intact paint, press gently on the surface: if it feels hollow or crinkly, the rust is spreading underneath and you'll need to strip that section completely.
Paint not adhering at all (fisheyeing or beading up)
If primer or paint is beading up and refusing to stick, there's contamination on the surface, most often silicone, oil, or wax. Wipe the entire surface down with acetone or mineral spirits, let it dry completely, and try again. On aluminum specifically, adhesion failures almost always come from skipping the acetone wipe after sanding. The oxide layer reforms within hours on bare aluminum, so wipe and prime the same day.
Rust coming back in the same spots every year
Persistent rust in the same area means there's a structural reason moisture keeps getting in: an open tube end, a gap in a joint, or a flat surface that holds standing water. Fix the structural issue (cap the tube, caulk the joint, improve drainage) before recoating, or you'll be fighting it again next year. A rust conversion primer like Sherwin-Williams Pro-Line 801 is especially useful in these recurring spots because it chemically bonds to any remaining rust residue and creates a more durable base than standard primer alone.
If you're ever working on wicker or wood furniture alongside your metal pieces, the prep logic is similar but the products and failure points are different. Weatherproofing wicker often depends on cleaning, protecting from UV, and choosing the right sealer for the material and finish. Weatherproofing wicker and sealing wood both have their own quirks worth looking into separately, but for metal, the principles here will serve you well across aluminum chairs, steel dining tables, and cast-iron bistro sets alike.
FAQ
Can I weatherproof metal patio furniture without repainting, using only clear sealant?
Yes, but only if the current finish is still tightly bonded and you mainly need UV and water shielding. Clear sealants usually fail sooner than a full primer plus topcoat system, so treat it as a maintenance option and plan to reapply every 1 to 2 years (longer only in dry climates). If you see chips down to bare metal or any peeling, do primer and paint instead of relying on clear coating.
What’s the best way to handle powder-coated furniture that has scratches?
Test first. If you can press painter’s tape onto the scratched area and it doesn’t lift the surrounding coating, sand just the damaged spots until matte, then degrease, spot-prime with a primer compatible with powder-coated surfaces, and topcoat. If the scratch area has spreading lifting or you see flaking around it, strip that section back to bare metal and redo as a full primer and topcoat patch to prevent underfilm rust.
Do I need to remove rust completely, or can I prime over small rust spots?
For small, stable surface rust, you can remove loose material until the metal is dull and uniform, then prime. If rust has converted into pitting, scales keep expanding under coatings, so scrape deeper until you reach sound metal. When the rust is stubborn in seams or pits, a rust conversion gel can help as long as you still remove loose scale and let it fully cure before priming.
How long should I wait between cleaning, rust treatment, primer, and topcoat?
Use drying time as a rule, not a guess. After degreasing and rinsing, let the metal dry completely, ideally until no cool dampness remains in joints or underside edges. After naval jelly or rust conversion, follow the cure and wipe steps exactly, then allow full dry time before priming. If you prime and topcoat on the same day, ensure the primer film is dry-to-touch and not tacky, especially in humid weather.
Is primer required on aluminum if it doesn’t rust?
Primer is still important because aluminum oxidizes and that oxide layer can prevent adhesion. A proper aluminum prep (scrub and an acetone or denatured alcohol wipe) plus an adhesion-promoting primer or compatible topcoat is what prevents peeling. Skipping the acetone or alcohol wipe after sanding is a common cause of early failure.
What should I do with open ends of tube legs and joints, if I’m not stripping the whole piece?
You can still address the moisture entry points before you paint. Plug open tube ends with rubber caps or seal with clear exterior silicone, then apply extra primer and topcoat at the leg bottoms and at any joint gaps before reassembling. If you leave a tube end open or an untreated gap at a joint, rust can restart underneath a coating that looks perfect from the outside.
Can I use stainless screws and bolts, and do I still need to prime over them?
Stainless hardware helps prevent future rust on the fastener itself, but it does not stop moisture from getting into surrounding crevices. Dab primer over bolt heads and nuts where the coating might chip, then topcoat. If the surrounding metal is bare after you remove old hardware, prep and prime that area first for adhesion.
What if the paint beading problem is caused by silicone from furniture polish, what’s the safest fix?
Degrease thoroughly and remove any silicone residue using acetone or mineral spirits, then let it fully evaporate before sanding and priming. Don’t rely on soap-and-water alone, and don’t recoat until the surface passes a quick “wetting” test (paint should spread rather than form droplets). If beading returns after sanding, stop and re-clean, because once silicone is trapped under a coating it can keep causing adhesion failure.
How do I choose between brushing, rolling, and spraying for best durability?
Brushing is great for joints, weld seams, and underside details. Foam rolling can reduce visible brush marks on flat surfaces. Spraying provides coverage but requires careful technique, including adequate can shaking and multiple light coats to avoid runs, especially on vertical legs. Regardless of method, don’t skip edge coverage, and make sure coats cure between layers.
What’s the quickest touch-up method that won’t turn into a bigger rust job?
Touch up at the first sign of a chip. Clean the spot, sand just enough to remove any loose or shiny edges, degrease if needed, spot-prime, then topcoat. If the chip exposes bare metal through a wet winter, rust can expand under intact paint, which forces stripping and recoating a much larger area.
Should I cover metal patio furniture with plastic tarps during winter?
Avoid plastic that traps condensation against the metal surface. Use breathable covers instead, and if storing in a shed or garage, ensure the furniture is dry before placing it inside and leave some airflow so moisture does not build up. If you must cover temporarily, loosen the cover so moisture can escape, and never store sealed while damp.
How often should I recoat, and what climate factors change the schedule?
A common baseline is every 3 to 5 years for steel and iron, and about 4 to 7 years for aluminum, but coastal air, wet winters, and frequent rain increase wear. If you see chips, thinning in flat horizontal areas, or recurring rust near tube ends and joints, recoat sooner in those spots rather than waiting for the full cycle.