To seal teak patio furniture, clean the wood thoroughly (or use a teak cleaner to restore gray, weathered surfaces), let it dry completely for at least 24 hours, sand lightly with 220-grit paper along the grain, then apply a penetrating teak sealer with a brush or cloth, wipe off any excess after 20–30 minutes, and add a second coat a couple of hours later. That's the core process. Everything else in this guide is about doing each of those steps right so the sealer actually bonds, lasts, and protects your furniture through sun, rain, and humidity instead of peeling off or turning tacky after a few weeks. This same weatherproofing mindset also helps metal patio furniture hold up to moisture and corrosion protects your furniture through sun, rain, and humidity.
How to Seal Teak Patio Furniture: Step-by-Step DIY Guide

Why teak needs sealing (and what type of sealer to pick)
Teak has a reputation for being the toughest outdoor wood you can buy, and that reputation is earned. It's naturally dense, oily, and resistant to rot. But that doesn't mean it takes care of itself. Left unprotected outdoors, teak will gray out from UV exposure, collect dirt and mildew in its grain, and slowly start to look dull and weathered. Sealing doesn't make teak indestructible, but it does two important things: it slows UV-driven color change and surface breakdown, and it creates a barrier that limits how much moisture, dirt, and mildew get into the wood.
Here's where people get confused: not every product marketed for teak actually seals it. Teak oil, for example, is popular and cheap, but it soaks in quickly and needs to be reapplied very frequently (sometimes every couple of months depending on sun exposure) because it doesn't form a true protective layer. A penetrating teak sealer, like Semco or TotalBoat Danish Teak Sealer, goes deeper and lasts significantly longer. If you want even more durability and don't mind occasional sanding between coats, a spar urethane or exterior varnish gives a harder film finish, but it takes more prep and care to maintain. For most people doing DIY maintenance on chairs, tables, or loungers, a quality penetrating sealer is the sweet spot.
| Product Type | How It Works | Recoat Frequency | Best For |
|---|---|---|---|
| Teak Oil (e.g., TotalBoat Teak Oil) | Penetrates surface, conditions wood | Every 1–2 months | Furniture with high handling; quick-touch maintenance |
| Penetrating Teak Sealer (e.g., Semco, TotalBoat Danish Teak Sealer) | Soaks in and seals from within | Every 6–12 months | Most outdoor teak furniture; best everyday choice |
| Spar Urethane / Exterior Varnish | Forms a hard film on the surface | Every 1–3 years (with sanding) | High-end pieces; furniture kept in covered areas |
| Water-based Exterior Finish | Film finish, lower VOCs | Every 1–2 years | Furniture where fumes are a concern; easier cleanup |
My recommendation for most DIYers: start with a penetrating teak sealer. You get solid protection, a natural wood look, and a forgiving application process. Teak oil is fine for quick touch-ups, but if you're doing the job properly once or twice a year, a sealer will do more for less work over time. Save the spar varnish for a future project if you want to level up.
Assess your furniture first: new, weathered, or previously sealed
Before you buy anything or crack open a can, look closely at what you're working with. The prep process and sometimes the product choice changes depending on the current state of the wood.
Brand-new or unfinished teak
If your furniture just came out of the box or has never been treated, you're in the best possible position. New teak is golden-brown, smooth, and clean. Even so, don't skip the cleaning and drying steps, because new wood can carry sawdust, handling oils from the factory, or moisture from shipping. A light sand with 220-grit paper along the grain is enough, and you'll need 2 coats of sealer on bare wood.
Weathered or gray teak
Gray teak isn't ruined, but you need to restore it before sealing. That gray color is oxidized wood fiber and surface contamination, and sealing over it just locks the problem in. Use a dedicated teak cleaner to pull the gray out and bring the warm golden color back. Once the wood looks right and feels smooth and open-grained, you can move to sealing. Don't try to skip this step with extra sanding alone, since a cleaner does a better chemical job of opening the grain and removing embedded grime.
Previously sealed or oiled teak
This is where things get tricky. If you applied teak oil before and want to move to a sealer, know that residual indigenous oils or old product layers can prevent the new sealer from bonding properly. Some manufacturers explicitly state that old oils must be removed from the surface before their product will adhere. The safe move: clean with a teak cleaner, scuff-sand with 220-grit, and wipe down with a solvent (like mineral spirits or the manufacturer's recommended prep solvent) before applying anything new. If the old finish is peeling or flaking, you'll need to sand more aggressively to get down to bare wood before you seal.
Prep work: the part most people rush (and regret)
Here's where I've seen the most DIY sealing jobs go wrong, including my own early attempts. Skipping or shortcutting prep leads to sealers that peel, streak, or go tacky because they never bonded to clean, dry wood. Take your time here. The application itself is fast once the surface is ready.
Step 1: Clean off dirt, grease, and mildew
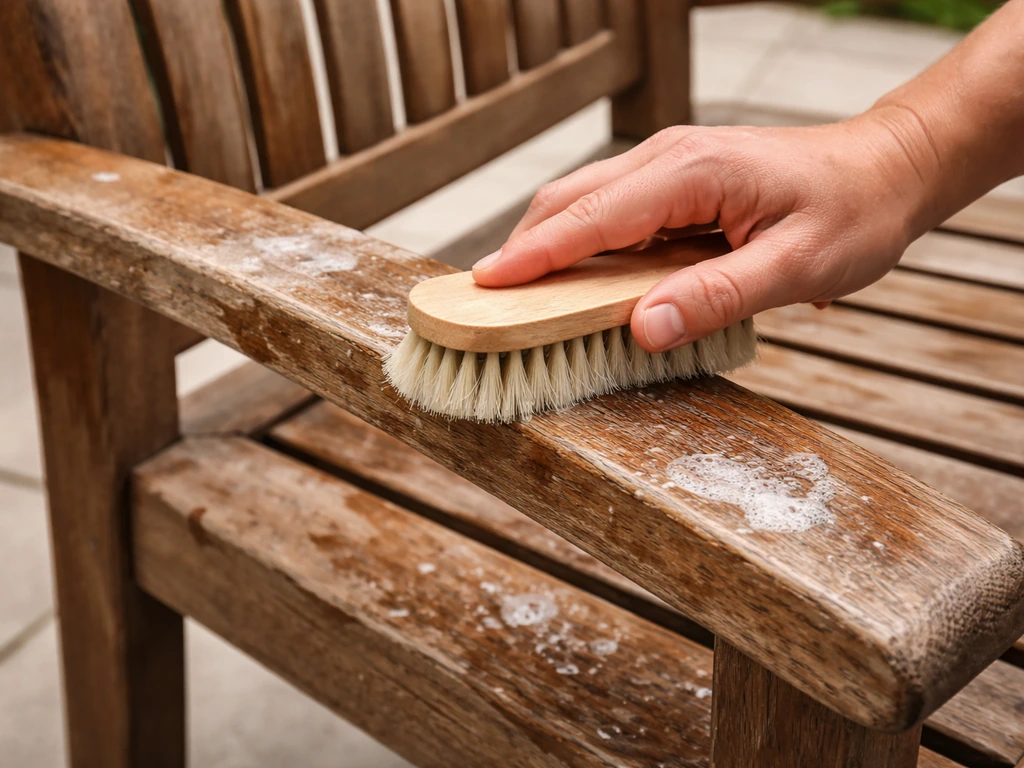
Start with a good scrub using a teak cleaner product or a mild solution of dish soap and warm water. Work along the grain with a soft-bristle brush, paying close attention to slats, crevices, and areas where water pools. Those spots hold mildew and trapped moisture that won't come out with a rinse alone. For visible mildew, a diluted oxygen bleach solution (follow label directions) is effective without being as harsh as chlorine bleach. Rinse thoroughly with clean water and don't let soap residue dry in the grain.
Step 2: Sand lightly along the grain
Once clean and dry, sand the entire surface with 220-grit sandpaper (or 320-grit for a finer finish). Always go with the grain, never across it. This opens the wood fibers so the sealer can penetrate instead of sitting on top, and it removes any surface fuzz left after cleaning. On previously sealed furniture, this scuff-sanding also creates mechanical adhesion for the new coat. Wipe away all sanding dust with a tack cloth or a clean rag slightly dampened with mineral spirits.
Step 3: Let it dry completely
This is the step people most often skip when they're eager to get started, and it will ruin your results. The wood must be completely dry before you apply any sealer. Semco’s instruction guide also advises applying Semco Teak Sealer after the wood is completely dry, including first-time guidance to start with a single fresh coat after initial treatment or cleaning blank" rel="noopener noreferrer">Semco Instruction Guide. Moisture trapped under a sealer coat leads to bubbling, adhesion failure, and a finish that looks cloudy or peels within weeks. After cleaning, wait at least 24 hours in dry conditions before sealing. Star Brite’s Teak Cleaner & Brightener also instructs you to blank" rel="noopener noreferrer">apply it to dry, weathered grey or black teak and then proceed only after the wood is allowed to dry completely. If the weather has been rainy or humid, wait longer. A dry, sunny day around 65–80°F is ideal application weather.
Choosing the right sealer for your teak project
You've got options at every price point. Here's how to think through the choice without getting paralyzed by the aisle at the hardware store.
- Penetrating teak sealer (Semco, TotalBoat Danish Teak Sealer): Best all-around choice for outdoor furniture. Soaks in, protects from within, doesn't form a film that can peel. Reapply every 6–12 months depending on climate.
- Teak oil (TotalBoat Teak Oil, Watco Teak Oil): Good for quick maintenance coats and conditioning. Less durable than a true sealer. Works well if you enjoy a more hands-on maintenance routine and apply every 1–2 months.
- Spar urethane or exterior varnish: Hard film finish that resists scuffs and water very well. Requires sanding between coats and more careful prep. Best for furniture in covered areas or for people who want a glossy, furniture-grade look.
- Water-based exterior finish: Lower VOCs and easier cleanup with soap and water. Slightly less penetrating than oil-based sealers, but a good choice if you're working indoors or in a tight space with ventilation concerns.
One thing worth knowing: if you ever want to apply a spar varnish over a teak sealer later, you can't just layer it on top. You'll need to clean with a teak cleaner, sand thoroughly, and solvent-wipe the surface for both mechanical and chemical adhesion. Plan your finish system before you start if you think you might want to upgrade later.
How to apply the sealer: tools, coats, and dry times
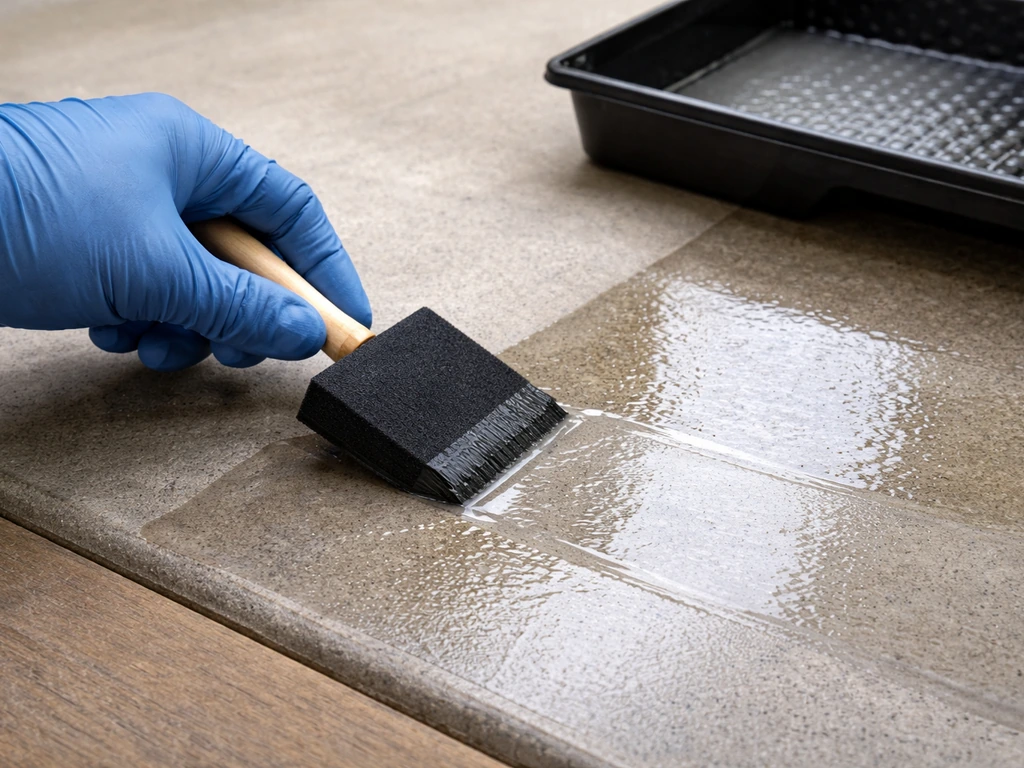
Application is honestly the easiest part of this whole job once the prep is done right. You don't need fancy equipment. A clean natural-bristle brush, a foam brush, or even a lint-free cloth all work well for penetrating teak sealers and teak oils. Avoid foam rollers on slatted furniture because they'll trap air bubbles in crevices and leave an uneven finish.
- Work in a shaded area if possible. Direct sun during application causes the sealer to dry too fast on the surface before it can fully penetrate, leading to sticky or streaky results.
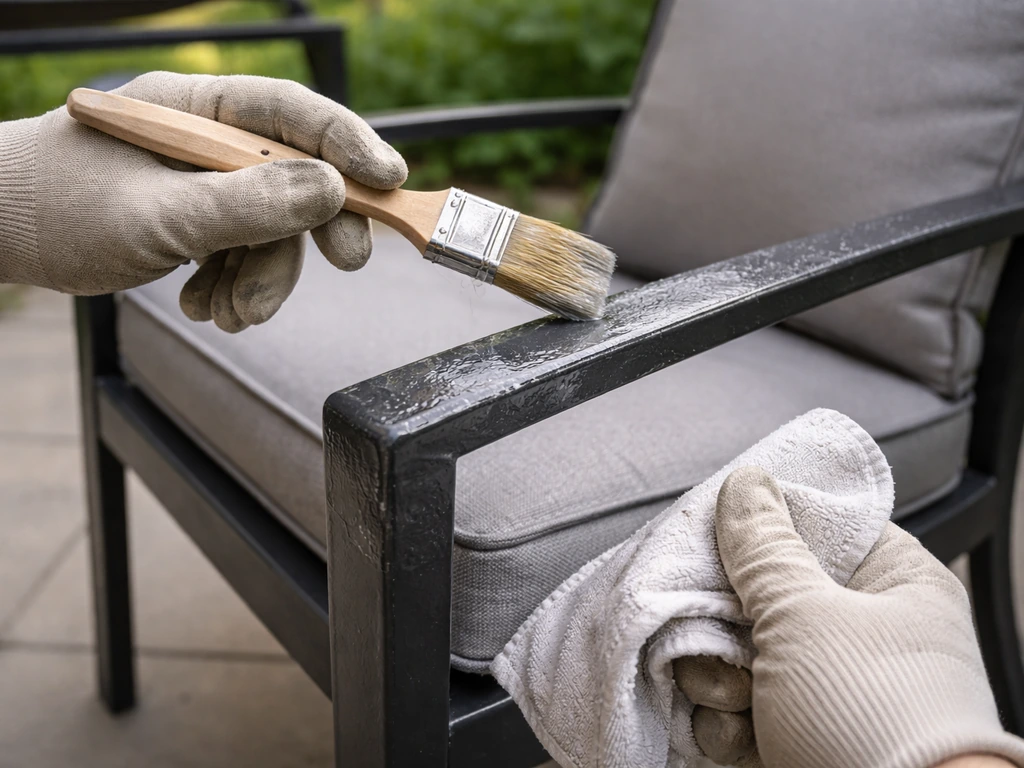
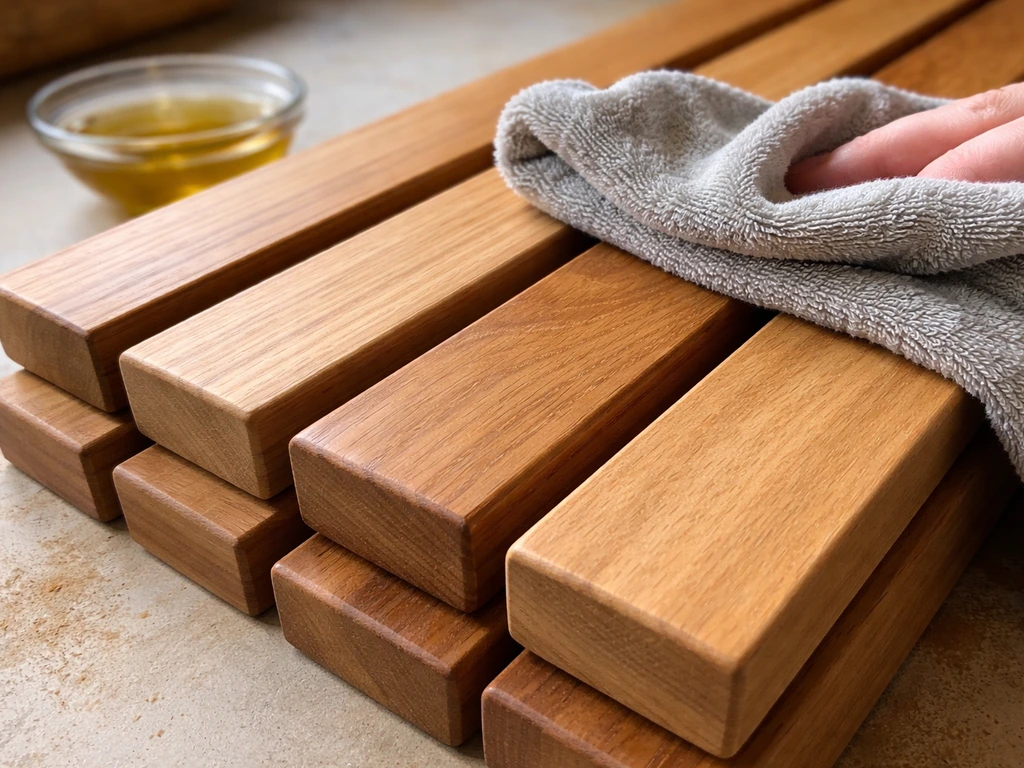
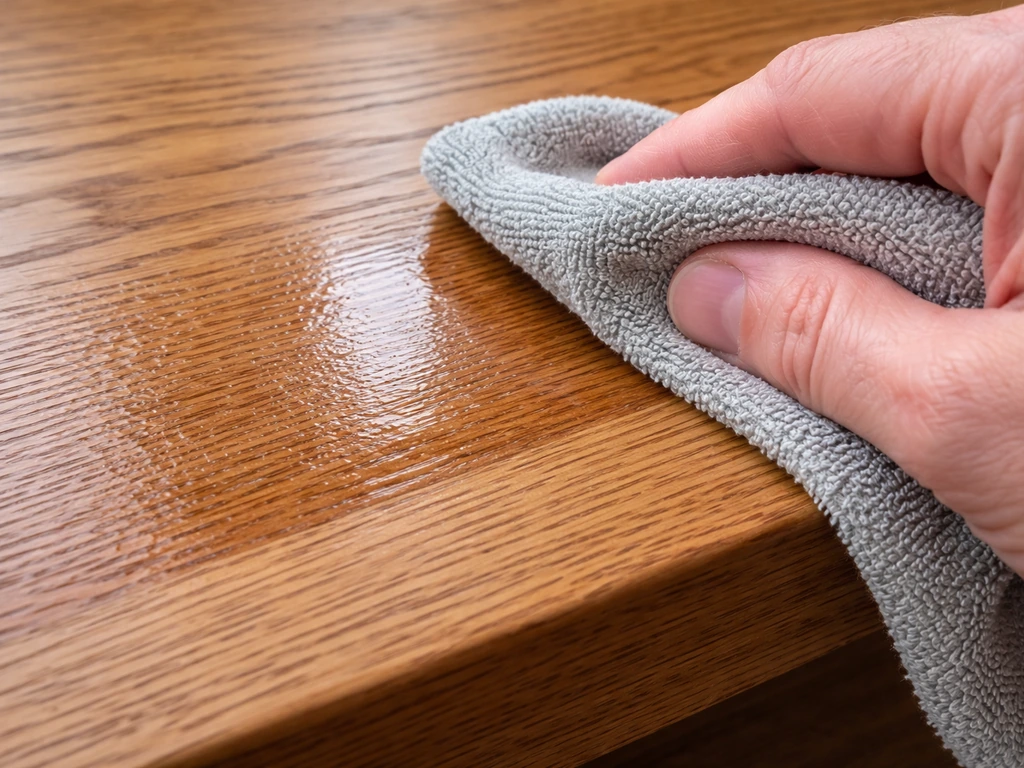
- Apply the first coat with a brush or cloth, working along the grain. Don't glob it on. A thin, even coat penetrates better than a heavy one.
- After 20–30 minutes, wipe off any excess sealer that hasn't absorbed into the wood. This is critical. Pooled or excess sealer that dries on the surface becomes tacky and never fully cures. Don't skip the wipe-off.
- Let the first coat dry. At 80°F, most penetrating sealers are ready for a second coat in about 1 hour. At 65°F, expect 3 hours. At 50°F, you may need to wait 8 hours or overnight before recoating. Cooler and more humid conditions always mean longer wait times.
- Apply the second coat the same way as the first, working along the grain. For bare or new wood, 2 coats is the standard. For maintenance recoating on already-sealed wood, 1 coat is usually enough.
- Wipe off excess again after 20–30 minutes.
- Let the furniture cure fully before use. Most penetrating sealers are dry to the touch within about an hour but aren't ready for full outdoor service until the next day. Some products, especially thicker spar finishes, need 24 hours or more to fully cure before you set items on the surface.
For slatted chairs and benches, pay close attention to the gaps between slats and the undersides of horizontal surfaces. These are exactly the spots where water sits and mildew establishes itself, so they need sealer coverage as much as the visible tops. A thin brush makes it easier to work sealer into tight spaces without over-applying.
Troubleshooting common sealing problems
Even when you follow the process carefully, things can go sideways. Here's how to diagnose and fix the most common issues.
The finish feels sticky or tacky even after drying
This almost always means one of two things: you applied too thick a coat and didn't wipe off the excess, or the temperature or humidity was too high during application and the sealer skinned over before it could absorb. To fix it, lightly sand the tacky area with 220-grit paper to break up the surface, wipe clean, and reapply a thinner coat followed immediately by the wipe-off step. Don't try to apply another full coat over a tacky surface, as it'll only make it worse.
Streaks or blotchy color
Streaking usually happens when the sealer is applied unevenly or when one section starts to dry before you work back into it. Always maintain a wet edge by working in sections and not letting any area fully dry before moving to the next. If you're already seeing streaks on a cured coat, a light scuff-sand and a fresh thin coat applied evenly can usually blend them out.
Peeling or flaking after a few weeks
Peeling means the sealer didn't bond to the wood surface, which points back to prep. Either the wood wasn't fully dry when you applied the sealer, there were old oils or residues on the surface that prevented adhesion, or you skipped sanding. There's no shortcut fix here: you'll need to strip off the peeling material by sanding down to bare wood, go through the full prep process again, and reapply.
Wood still looks gray after sealing
A sealer doesn't reverse existing gray color, it only prevents future graying. If the wood looked gray before you applied the sealer, it will still look gray after. You need to use a teak cleaner to restore the warm golden color before sealing, not after. Strip the current sealer with sanding, clean and restore with a teak cleaner product, and then reseal.
Maintenance and recoating to keep the protection going
Sealing teak isn't a one-and-done job, but the maintenance schedule for a penetrating sealer is genuinely manageable. After that, you can maintain the finish by cleaning, letting it dry fully, and recoating on the schedule for your climate. For most climates, plan to recoat once every six months. In hot, sunny, or coastal environments where UV and humidity are more intense, you may need to recoat closer to every three to four months. Teak oil formulations need attention even more frequently, sometimes every couple of months depending on exposure.
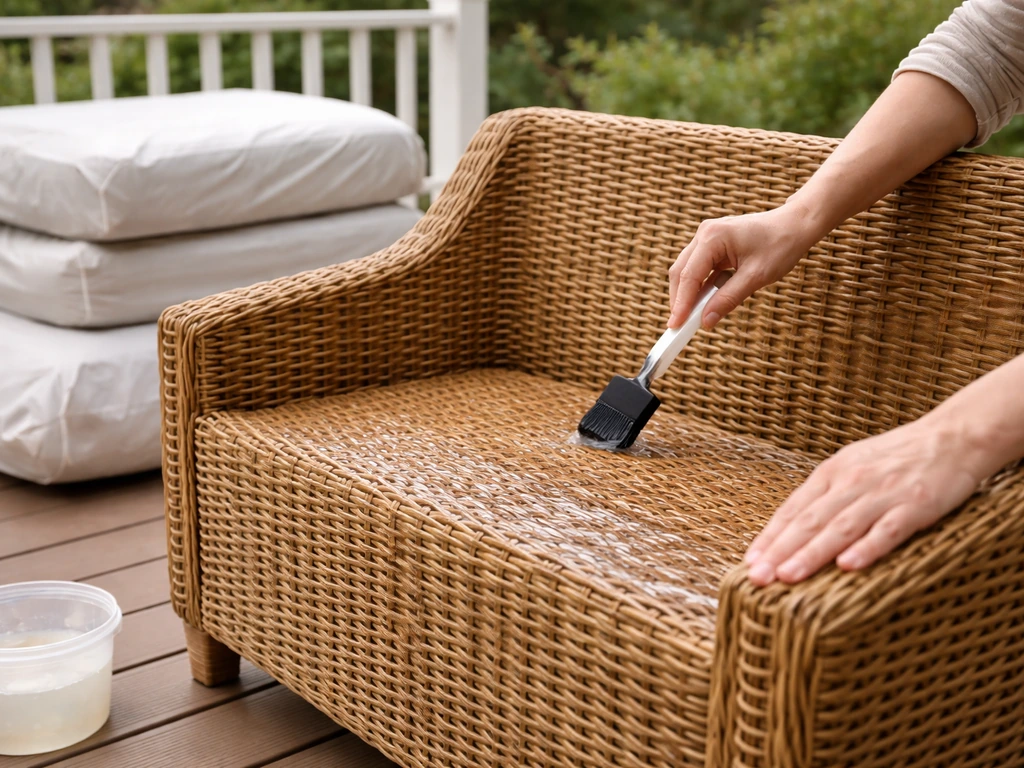
The simplest way to know when it's time to reseal: pour a small amount of water on the surface. If it beads up and rolls off, you still have sealer protection. If it soaks in and darkens the wood, the sealer is depleted and it's time for a fresh coat. If you own other kinds of patio furniture too, the same waterproofing approach applies: clean, dry, then apply a protective outdoor finish weatherproof patio furniture. You don't always need to do a full strip and reseal for maintenance. Usually a good clean with a teak cleaner or mild soap, a light scuff-sand on any rough spots, and one fresh coat of the same sealer is all it takes to get back to full protection. For wicker patio furniture, weatherproofing works the same way: clean thoroughly, dry completely, then apply a breathable protective finish designed for outdoor use weatherproof wicker patio furniture.
For seasonal maintenance, build a simple routine: clean the furniture at the start of spring before the furniture comes out of storage, inspect for any spots where the finish looks dull or the wood feels rough, lightly sand those areas, and apply a maintenance coat. At the end of the season before storage, do a quick wipe-down and another once-over to catch any spots where moisture or mildew got a foothold during the summer. Doing this twice a year takes maybe an afternoon and keeps teak furniture in genuinely great shape for years without professional help.
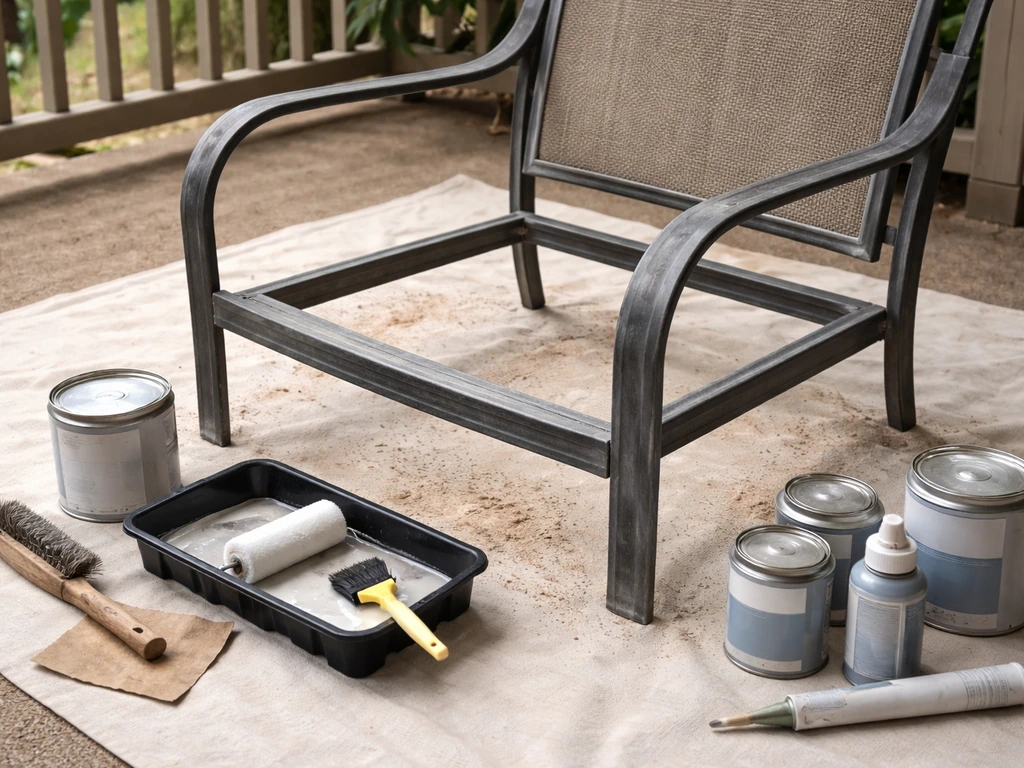
If you're also maintaining other types of outdoor furniture alongside your teak, the same general principle applies across wood and metal pieces: cleaning, prep, and consistent recoating are what actually extend the life of outdoor finishes. The same idea applies to metal pieces: clean off rust and grime, let the surface dry, then apply an appropriate protective sealer or coating to prevent corrosion. The specific products and intervals change depending on the material, but the discipline is the same.
FAQ
Can I use teak sealer in direct sun, or should I wait for shade?
Shade is safer. Direct sun can cause the sealer to skin over before it penetrates, which increases the risk of streaking and a shorter service life. If you must work outdoors, aim for early morning or late afternoon and keep an eye on the wood surface temperature (cool enough to comfortably touch).
How long should I wait between coats for a penetrating teak sealer?
The article mentions a “couple of hours” for the second coat, but the real limiter is dryness and tack level. Recoat when the first coat feels dry and has stopped being tacky to the touch, not just when the clock says so. If humidity is high, you may need more time than usual to avoid trapping moisture.
Do I need to sand every time before recoating, or can I just clean and reapply?
Often you can clean and recoat without sanding if the surface is smooth and the sealer is still accepting product. However, if water stops beading, the surface feels rough, or you see dull patches that look “dry,” do a light scuff-sand (220 to 320 grit) on those areas to restore adhesion.
What’s the best way to remove old teak oil before sealing?
Clean with a teak cleaner first, then scuff-sand, then solvent-wipe before applying the new sealer. The key is removing lingering oily residue that can prevent bonding. If you notice the surface feels slick or unevenly wet after cleaning, assume oil residue remains and repeat the cleaner step before sanding and solvent wiping.
Can I seal teak that has mildew, or do I need to treat it first?
Treat it first. Mildew can sit in grain pores and behind slats, and sealing over it often leads to recurring staining or musty buildup. Use an oxygen bleach solution as directed, rinse thoroughly, and allow extra drying time before sanding and sealing.
Why does my teak look darker or blotchy after sealing?
Blotchiness usually comes from uneven absorption, contaminated areas, or applying on partially dried wood. Make sure the wood is fully dry, keep coats thin, and wipe off excess consistently. If the blotch is already cured, lightly scuff-sand and reapply a thinner, evenly applied coat rather than trying to “build it up.”
Is wiping off excess always required with penetrating teak sealers?
For many penetrating sealers, yes, excess on the surface can remain tacky and reduce performance. If your specific product label says to allow a dwell time and then wipe, follow that exactly. If the sealer is truly “penetrating” and doesn’t leave surface film after the wipe, you generally reduce the chance of tack and streaking.
Should I strip and reseal completely if the teak is still golden but water stops beading?
Not necessarily. If the wood looks okay and only the water behavior changed, you can usually start with a clean, a light scuff-sand, and a fresh maintenance coat of the same type of sealer. Consider sanding back to bare wood only when the finish is peeling, flaking, or repeatedly failing adhesion.
Can I mix different brands or types of teak sealers (for example, oil then sealer)?
It’s risky. Different chemistry and residual oils can prevent bonding. Stick to the same product type if you want predictable results. If you want to switch, plan on removing residues (cleaner, sanding, and solvent-wipe) and test on an inconspicuous area first.
What temperature and humidity range is safest for sealing teak?
Cool to moderate, dry conditions work best. The article cites 65 to 80°F, and high humidity or damp weather can extend drying and increase adhesion problems. If condensation is likely overnight, postpone until you can keep the furniture dry long enough for full cure.
Do I need to seal the undersides and inside corners, or just the visible top surfaces?
Seal the “wettest” areas, including undersides of horizontal slats, crevices, and inside corners. Water pools and debris accumulates in those zones, so they also get the fastest breakdown. A thin brush that reaches gaps often matters more than an extra-thick coat on flat surfaces.
How can I confirm the sealer is fully cured before putting cushions back on?
Use the tack and odor check. The surface should feel dry to the touch, not tacky, and there should be no persistent wet-chemical smell. Even if it looks dry, placing cushions too early can trap moisture and leave impressions, so wait at least a full day or follow the product’s cure guidance.
If the sealed surface feels sticky after curing, what should I do?
Treat it as an application issue. Lightly sand the tacky areas (220 grit), wipe clean to remove sanding dust, then reapply a thinner coat and follow the wipe-off step promptly. Avoid layering a thick second coat on top, it usually worsens stickiness.