To waterproof patio furniture, you clean each piece thoroughly, let it dry completely (at least 48 hours for wood), then apply a material-appropriate sealer or repellent spray in thin coats: a penetrating wood sealer for bare wood frames, a rust converter plus topcoat for metal, a fabric guard spray like 303 Fabric Guard or Scotchgard for cushions, and a UV-blocking sealer for teak or wicker. Two coats is the standard for most products, with 2–24 hours between coats depending on the product. That's the short version. Below is everything you need to do it right the first time.
How to Waterproof Patio Furniture: DIY Step-by-Step Guide
Maren Grady
29 Apr 2026
What 'Waterproof' Actually Means for Patio Furniture
Before you buy anything, it helps to know what you're actually after. 'Waterproof' and 'water-resistant' get used interchangeably on product labels, but they mean different things in practice. A truly waterproof surface means water does not soak in at all. Water-resistant (or water-repellent) means water beads and rolls off the surface instead of being immediately absorbed, but prolonged soaking will eventually get through. For most patio furniture, water-repellent is sufficient and realistic. Fully waterproof is usually only achievable with solid coatings that film over the surface, like exterior polyurethane or epoxy, which have their own trade-offs (peeling, cracking, harder to reapply).
The goal for most homeowners is this: water beads on contact, doesn't pool in joints or soak into cushions, and the finish holds up through a full season of sun, rain, and humidity. You also want UV protection built in, because UV damage (fading, graying, cracking) is as destructive as moisture, especially for wood and fabric. Keep both in mind when you're choosing products.
Decide What Each Piece Actually Needs
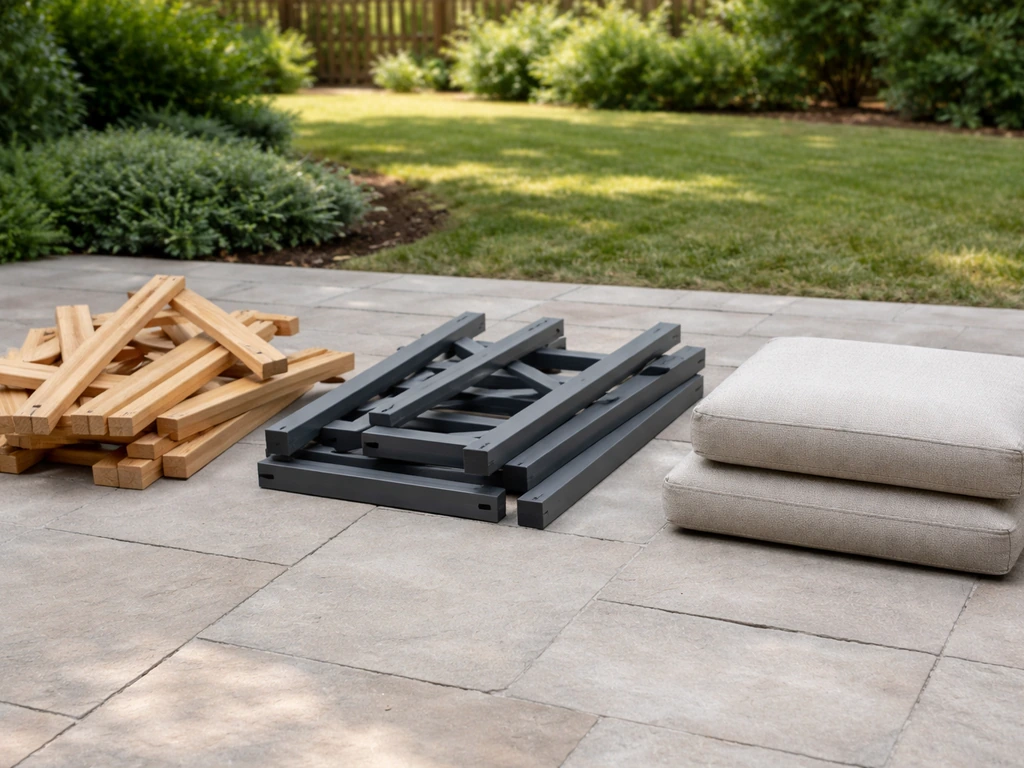
Walk around your patio set and sort everything into categories before you buy a single product. Treating a painted aluminum frame the same way as bare teak is a waste of time and money, and the wrong product can actually cause damage. Here's a quick way to categorize your furniture:
- Bare or unfinished wood (teak, cedar, pine, eucalyptus): needs a penetrating sealer with UV protection
- Painted or stained wood: needs a topcoat refresh or a repellent spray, not a penetrating sealer
- Metal (aluminum, steel, wrought iron): needs rust treatment if there's any corrosion, then a protective topcoat
- Wicker or rattan: needs a water repellent spray, not a heavy film-forming sealer
- Plastic or resin: least vulnerable, but UV protectant spray extends color life
- Fabric cushions, slings, and umbrellas: need a dedicated outdoor fabric guard spray
Each material has its own section below. If your set mixes materials (like a metal frame with wood slats and fabric cushions), you'll need to work through more than one process. That's normal. Budget an extra hour per material type and you won't feel rushed.
Pick the Right Product for Each Material
Here's where most people go wrong: they grab a generic 'outdoor wood sealer' and use it on everything. That works okay for wood, but it's wrong for metal, fabric, and plastic. Use this as your product-selection guide.
| Material | Best Product Type | Examples | Key Feature to Look For |
|---|---|---|---|
| Bare/unfinished wood | Penetrating water sealer | Rainguard Water Sealer, Seal-Once | Dries clear, penetrates grain, UV block |
| Teak specifically | Teak-specific sealer or oil | Teak Life UV, Defender Teak Sealer | UV protection, 1–2 coat coverage |
| Painted/stained wood | Exterior polyurethane topcoat | Rust-Oleum High Performance Polyurethane | Recoat window 24 hrs, UV stable |
| Steel / wrought iron | Rust converter + topcoat | Rust Bullet ProPLUS, KBS RustSeal | Oil-based or epoxy topcoat, full cure 48–72 hrs |
| Aluminum | Metal primer + exterior enamel spray | Rust-Oleum 2X Paint+Primer | Adhesion to bare aluminum, UV stable |
| Wicker / rattan | Light penetrating water repellent spray | Thompson's WaterSeal Spray, Scotchgard | Won't stiffen or discolor natural fibers |
| Plastic / resin | UV protectant spray | 303 Aerospace Protectant | UV block, no build-up |
| Fabric cushions / umbrellas | Outdoor fabric guard spray | 303 Fabric Guard, Scotchgard Heavy Duty | Restores DWR (durable water repellency) |
For wood, match the product to your climate: if you're in a rainy or damp region, prioritize a sealer rated for water exclusion. If you're in a hot, sunny area, UV protection from fading and graying matters just as much as water repellency. If you're in both (welcome to most of the US), look for a sealer that lists both benefits on the label. For teak specifically, 1–2 coats of a teak-specific UV sealer is usually all you need, and the coverage rate is roughly 100 sq ft per liter, so one bottle handles most furniture sets easily.
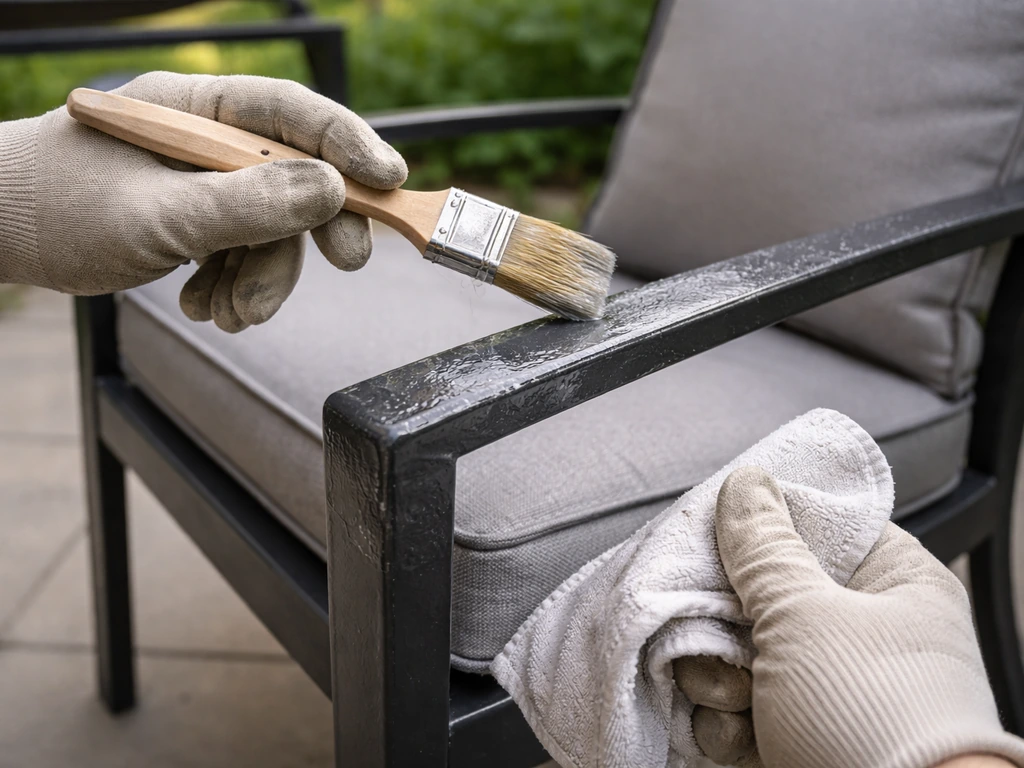
For metal frames, the product stack matters. If there's rust present, a rust converter goes on first (never thin it, apply straight from the bottle). After that cures, you apply a topcoat. If you're using an oil-based or epoxy topcoat, wait at least 48 hours after the rust converter before applying it. If you use RustCheck, you can topcoat after 24 hours with most paint types including water-based, solvent-based, epoxy, and urethane. The full cure on products like Rust Bullet ProPLUS is 72 hours, which matters if you want the best performance from your salt/fog and UV protection.
For cushions, 303 Fabric Guard and Scotchgard Heavy Duty Water Shield are the two most widely available options. Both restore DWR (durable water repellency) rather than creating a fully waterproof film, which is actually what you want: the fabric can still breathe, which prevents mildew. 303 Fabric Guard cures in 12–24 hours depending on temperature and humidity. Scotchgard recommends reapplying seasonally or whenever you notice repellency dropping. Neither is expensive ($10–$20 per can) and one can typically covers a full 4-piece cushion set.
Prep Work: The Step That Actually Determines Results

I'll be honest: prep is where most DIY waterproofing fails. People apply product to dirty, damp, or damaged surfaces and wonder why water still soaks in two weeks later. Every product in existence performs worse on a surface that isn't properly prepped. Give this step the time it deserves.
Cleaning
Start with a proper deep clean, not just a hose-down. For wood and wicker, use a mild dish soap mixed with warm water and a stiff-bristle brush. Scrub all surfaces including undersides, legs, and joints where dirt and mold accumulate. For metal, dish soap works, but a degreaser (like Simple Green) cuts through any oil residue that would prevent your sealer from bonding. For fabric cushions, check the manufacturer tag and use an outdoor fabric cleaner or a diluted white vinegar solution for mildew spots. Rinse everything thoroughly.
Drying Time (Don't Rush This)
This is where I've personally messed up before. You can't see moisture inside wood or wicker fibers just by looking at the surface. For bare wood, wait a full 2 dry days (48 hours) after cleaning before applying any sealer. That's not optional; Seal-Once specifically calls this out in their instructions. If you apply sealer over damp wood, it traps moisture inside and the sealer fails prematurely. Pick a window of warm, dry weather with no rain in the forecast for at least 48 hours after your final coat.
Sanding and Stripping
For bare or previously finished wood, a light sanding with 120–150 grit sandpaper opens the grain so the sealer can penetrate. You don't need to strip the wood down to raw lumber unless the old finish is peeling, flaking, or compromised. If the old finish is intact and just faded, clean it well and apply a compatible topcoat. If it's peeling, strip it fully with a paint stripper or mechanical sander, then start fresh.
Rust Removal on Metal
For wrought iron or steel, check every joint and weld point for rust. Light surface rust (orange staining, no pitting) can be handled with a rust converter applied directly. Heavier rust with pitting should be sanded or wire-brushed down to bare metal first, then treated with rust converter. Aluminum doesn't rust, but it oxidizes (chalky white residue), which needs to be cleaned off with a mild acid wash or white vinegar before priming. Never apply paint or sealer over rust or oxidation and expect it to hold.
How to Apply: Frames vs Cushions, Step by Step
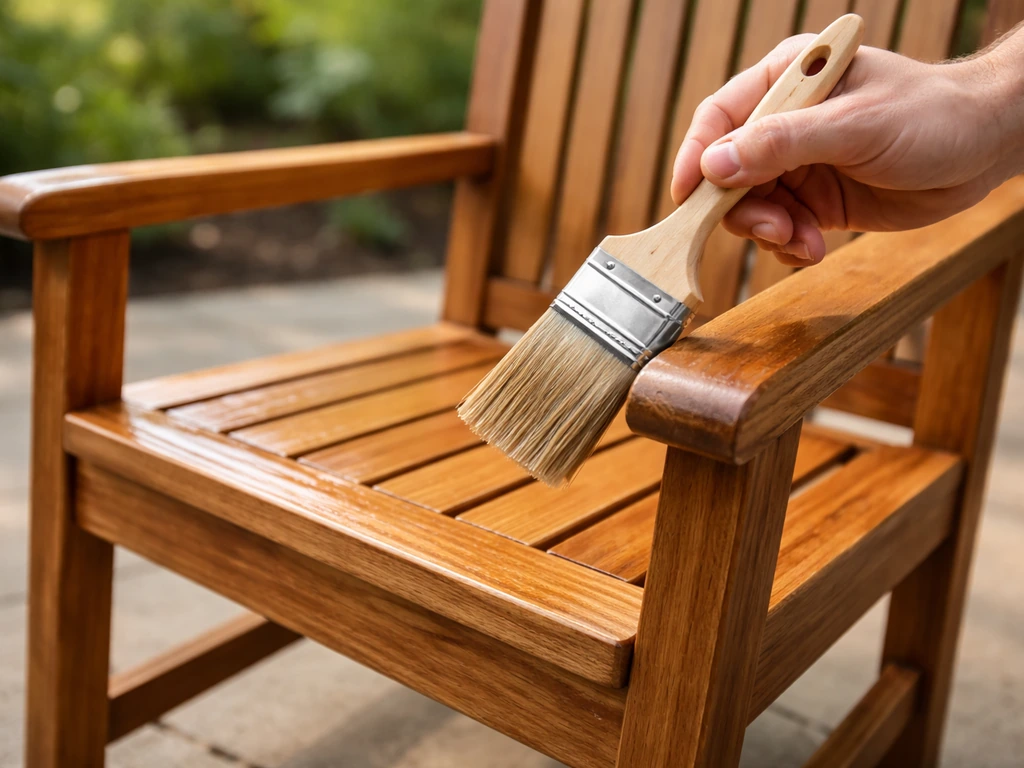
Wood Frames
- Clean and let the wood dry for at least 48 hours after washing.
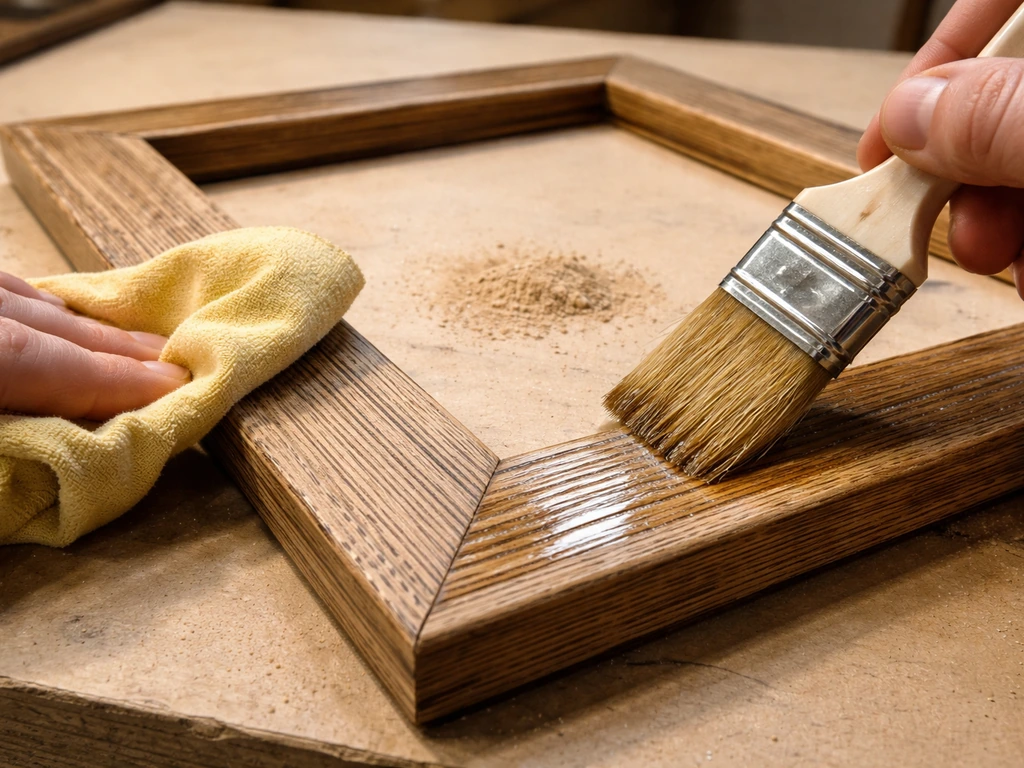
- Lightly sand with 120–150 grit and wipe away all dust with a tack cloth or damp rag.
- Stir (don't shake) your sealer. Shaking creates bubbles that show up as fisheye marks in the finish.
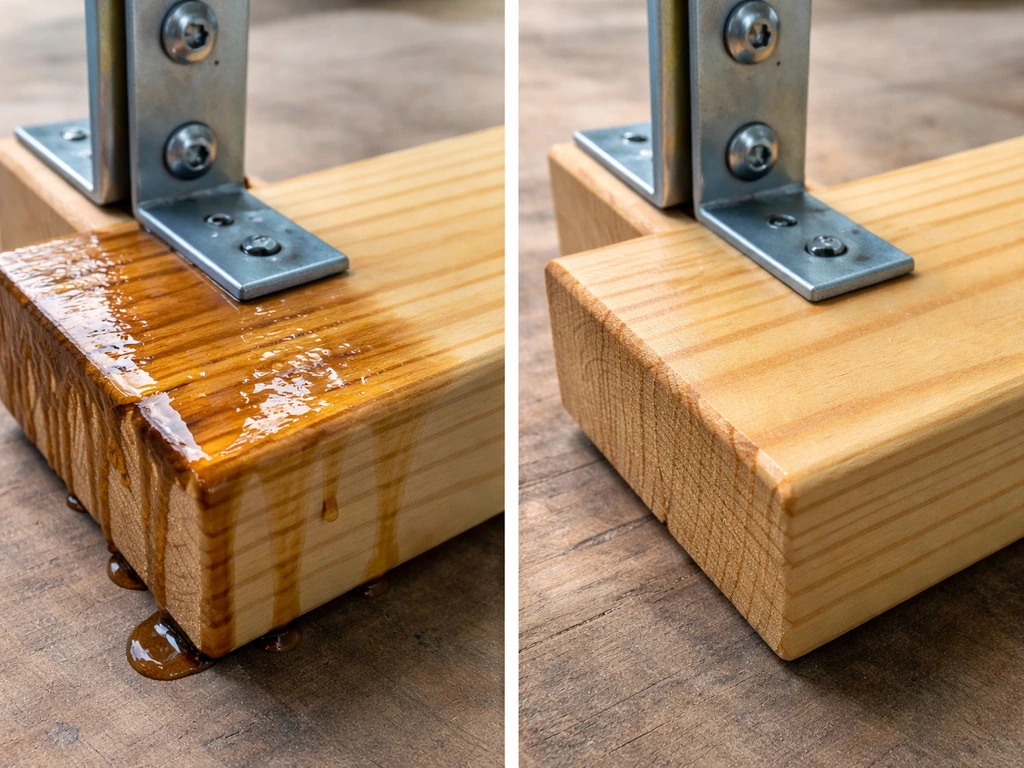
- Apply the first coat with a brush, foam roller, or pump sprayer. Work in the direction of the wood grain. For penetrating sealers like Rainguard, apply liberally and let the wood drink it in.
- Check product instructions for recoat window. Many oil-based sealers require the first coat to cure before rain and before adding subsequent coats. USDA Forest Products Lab guidance places the primer dry time around 48 hours for oil-based exterior finishes.
- For teak sealers, Defender's brochure specifies waiting at least 2 hours before recoating and confirms the first coat must be dry to touch.
- Apply the second coat using the same technique. Two coats is standard for most sealers.
- Let the final coat cure fully before exposing the piece to rain. For Rust-Oleum polyurethane topcoats, the recoat window is 24 hours. Plan for a full dry day after the last coat.
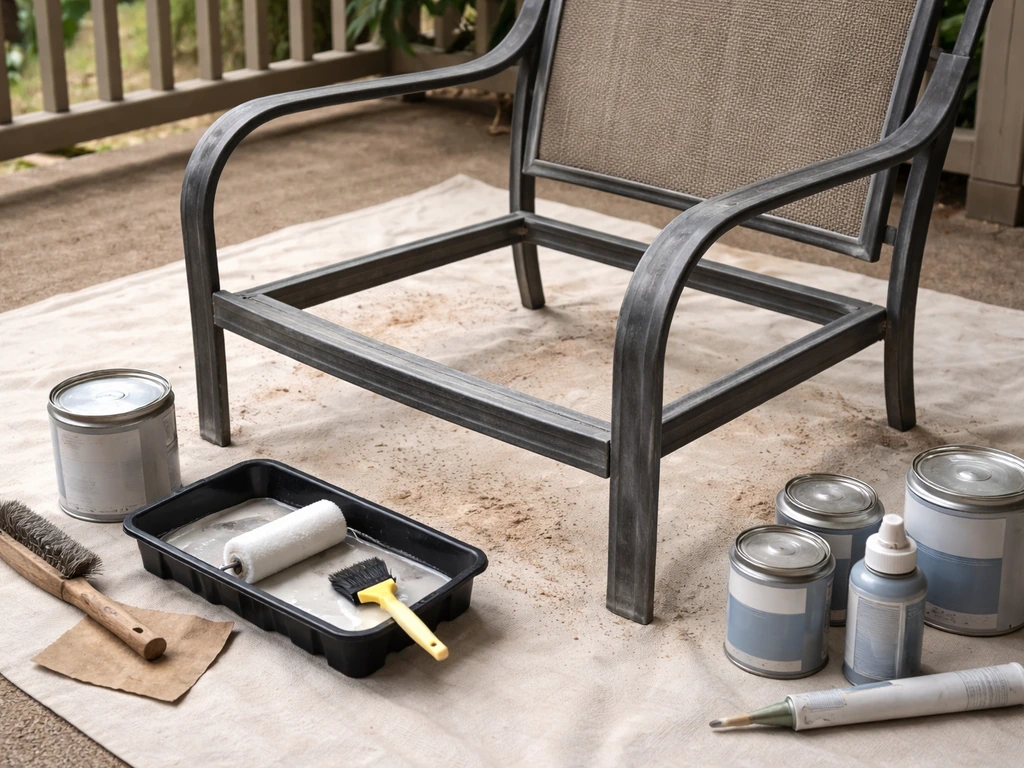
Metal Frames
- Clean with degreaser and rinse well. Let dry completely.
- Sand off loose rust or wire-brush heavily corroded areas down to bare metal.
- Apply rust converter straight from the bottle (do not thin). Work it into all joints and weld points.
- Wait for the rust converter to cure. If using an oil-based or epoxy topcoat, wait at least 48 hours. If using RustCheck, 24 hours is sufficient before topcoating.
- Apply your topcoat paint or sealer in thin coats. For KBS RustSeal, the second/final coat should cure at least 24 hours. For Rust Bullet ProPLUS, full cure is 72 hours.
- After full cure, apply a UV-stable wax or spray protectant annually to maintain the finish.
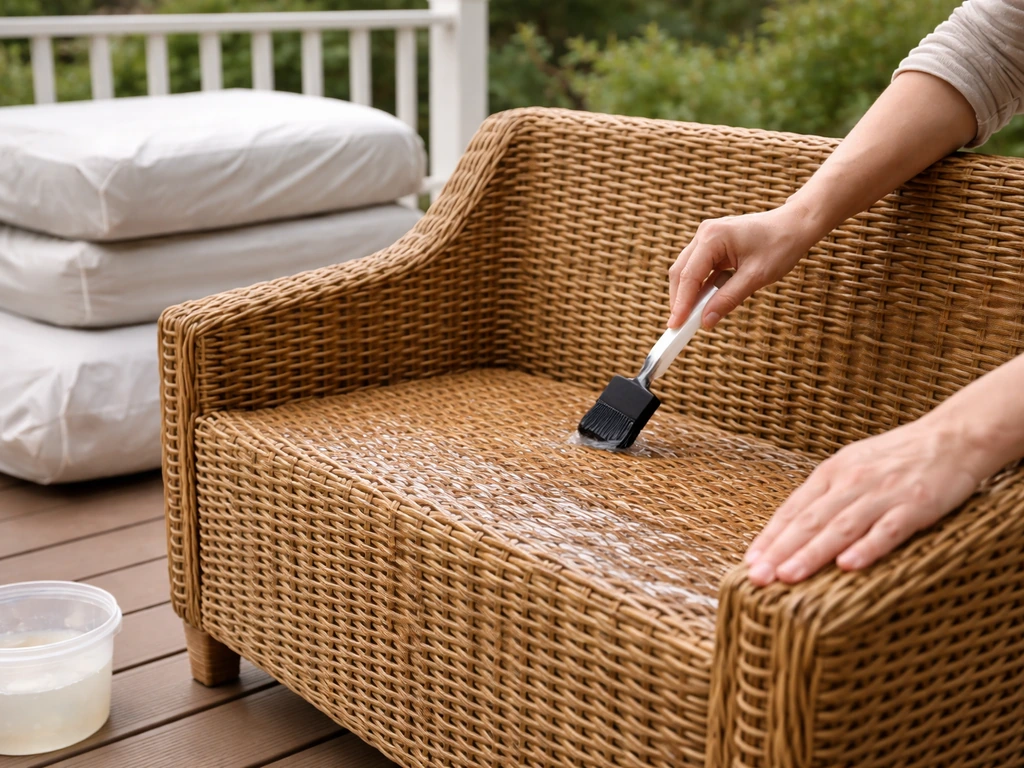
Wicker and Rattan Frames
- Clean gently with soapy water and a soft brush. Avoid saturating the weave.
- Let dry for at least 24–48 hours in a warm, ventilated spot.
- Apply a light water repellent spray (not a heavy film-forming sealer) in short, sweeping passes from about 6–8 inches away.
- Let the first coat dry, then apply a second light coat. You're not building up a thick film; you're just getting even coverage into the weave.
- Allow to cure fully (follow product instructions, typically 2–4 hours) before using.
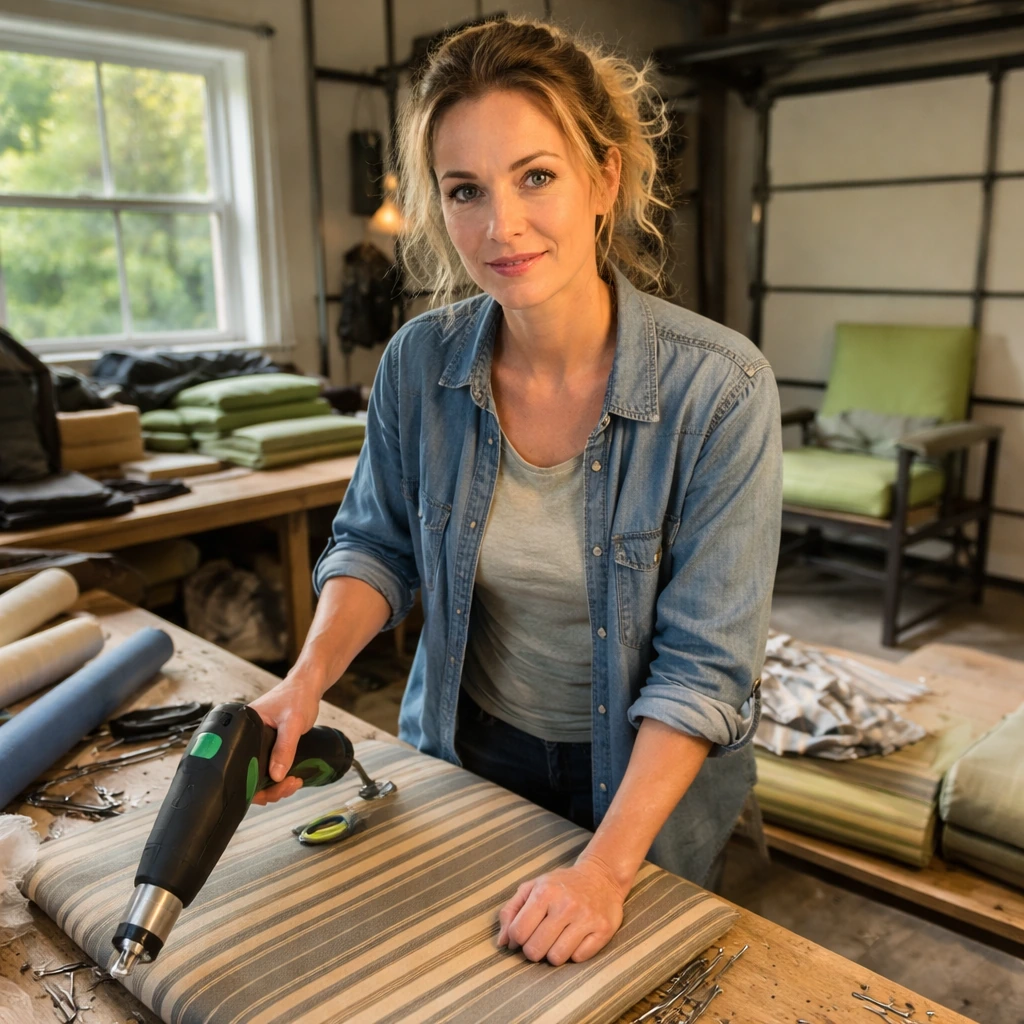
Fabric Cushions, Slings, and Umbrellas
- Clean cushions with outdoor fabric cleaner or a diluted dish soap solution. Rinse thoroughly and let dry completely in the sun.
- Lay cushions flat or hang them so all surfaces are accessible.
- Shake the fabric guard spray well. Hold the can 6 inches from the fabric and apply in overlapping passes until the fabric looks evenly wet but not dripping.
- Let the first coat dry (about 30–60 minutes in warm weather).
- Apply a second coat the same way for full coverage.
- Allow 12–24 hours to cure before using the cushions or exposing them to rain. Temperature and humidity affect cure time; in cool or humid conditions, err toward the 24-hour end.
- Test repellency by flicking a few drops of water onto the fabric. Water should bead and roll off. If it soaks in, apply another coat.
Sealing the Tricky Spots: Joints, Seams, and Hardware
Flat surfaces are easy. Where waterproofing fails is almost always in the joints, seams, hardware holes, and any place where two pieces of material meet. Water finds those gaps, pools there, and wicks inward. Don't skip these.
Frame Joints and Corner Connections
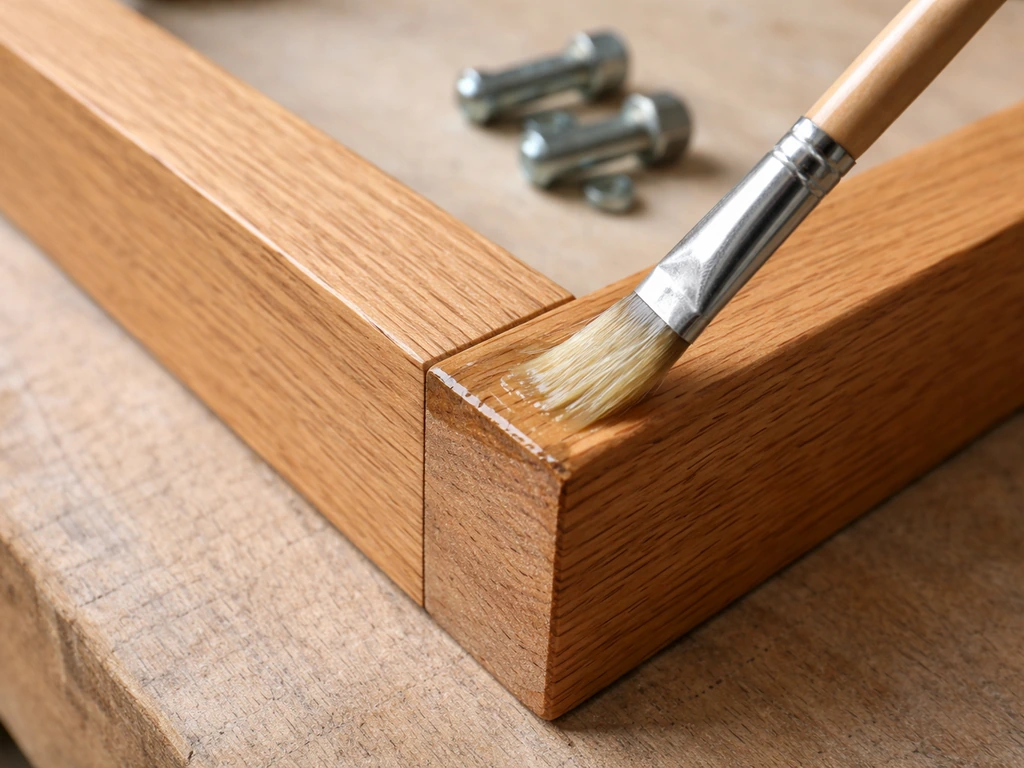
When applying sealer to wood or metal frames, work extra product into every joint with a small brush. If you're spraying, follow up with a brush just in the joints to make sure the product penetrates rather than bridging over the gap. On wood furniture, joints are often where the grain is exposed at end cuts, which absorbs moisture fastest. Give end grain an extra coat.
Hardware, Bolts, and Screws
Any metal hardware on wood furniture is a moisture entry point. Water seeps around bolt holes, corrodes the hardware, and then stains or swells the wood around it. After your main sealer coats are done, run a small brush around each bolt, screw, and fitting to seal the gap between metal and wood. For metal furniture, make sure rust converter and topcoat fully cover the threads and base of every bolt.
Cushion Seams
Stitching holes in cushion seams are where water infiltrates fastest on outdoor fabric. When applying fabric guard spray, hold the can closer (4–6 inches) at the seams and apply a slightly heavier pass so the product penetrates the stitch holes. One useful technique from tent-seam sealing: use a small brush to dab seam sealant directly along stitching lines for extra protection. Avoid getting any seam sealant on zippers or mesh panels, as it can gum them up.
Drain Holes and Weep Areas
Many patio chairs and tables have small drain holes at the bottom of hollow legs or in seat pans to let water out. Make sure these aren't blocked with old sealer, dirt, or debris before you apply new product. If you seal over a drain hole, water that gets inside has nowhere to go and will cause rot or rust from the inside out. Check these holes first, clear them with a small drill bit or toothpick if clogged, and avoid applying heavy sealer passes directly over them.
Test Your Work and Fix Problems
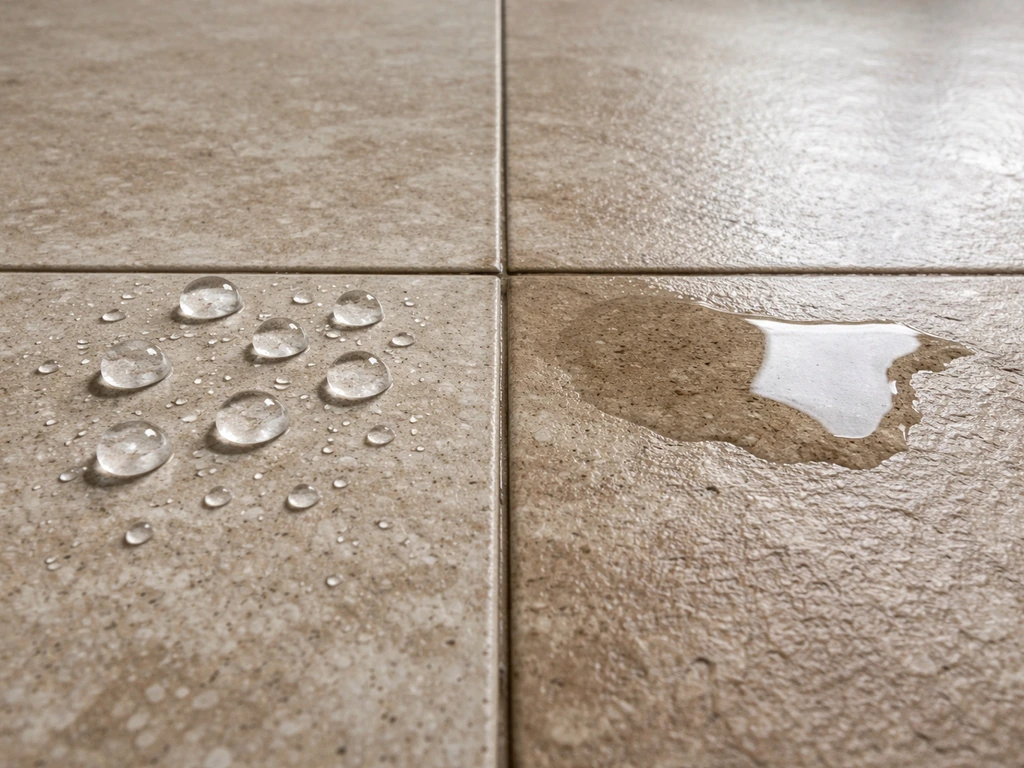
Once the cure time has passed, do a simple water bead test: sprinkle or pour a small amount of water onto treated surfaces and watch what happens. Water should bead up and roll off within a few seconds. If it just sits there slowly spreading into the surface, your waterproofing isn't working yet. Here's how to diagnose the most common problems.
Water Still Soaking In
The most common cause is that the surface wasn't dry enough before application. If you applied sealer to wood that was still holding moisture from washing or from rain, the sealer sits on top of the moisture barrier instead of penetrating. The fix: strip or sand the failed sealer, dry the wood properly (minimum 48 hours in dry conditions), and reapply. The second most common cause is applying sealer over a dirty surface. Dirt, oils, and old product residue prevent penetration. Same fix: clean, dry, reapply.
Uneven Coverage or Streaky Finish
Streaks usually come from applying too much product in one pass (it pools and dries unevenly) or not maintaining a wet edge while brushing. If you're brushing, work section by section and always brush back into the wet area you just laid down. If you're spraying, keep the can or gun moving constantly; stopping in one spot causes drips and thick patches. Light coats applied consistently beat one heavy coat every time. This is something almost everyone learns the hard way the first time.
Peeling or Bubbling Topcoat on Metal
This is almost always caused by applying the topcoat before the rust converter or base coat has fully cured, or by using an incompatible paint type over the converter. Oil-based topcoats require at least 48 hours after rust converter. Never apply a latex/water-based paint over rust converter if you're in an oil-based topcoat system; the incompatibility causes adhesion failure and eventual peeling. If this has happened, sand the peeling area back to the converter layer and start again with a compatible topcoat.
Fabric Repellency That Fades Fast
If fabric repellency seems to disappear after the first rain, the fabric wasn't fully dry before you applied the spray, or you didn't apply enough coats. Try applying a third coat on problem areas and allow the full 12–24 hour cure before testing again. Fabric guard products restore DWR but don't create a permanent waterproof layer, so some fade over a season is expected. That's why reapplication is part of the maintenance plan.
How Often to Re-Proof and How to Store Your Furniture
Waterproofing isn't a one-and-done task. Every sealer and repellent wears down over time from UV exposure, rain, and physical use. Knowing when and how to reapply keeps your furniture protected year after year without having to do a full deep-strip-and-reseal every season.
Re-Proofing Schedule by Material
| Material | How Often to Reapply | Signs It's Time |
|---|---|---|
| Bare wood (teak, cedar, pine) | Every 1–2 seasons | Water stops beading, wood looks gray or dry |
| Painted/sealed wood | Every 2–3 seasons | Paint peeling, chalking, or bare wood visible |
| Metal (rust converter + topcoat) | Inspect annually, recoat every 2–3 years | Rust spots returning, chips or scratches through topcoat |
| Wicker / rattan | Every season | Water soaks in immediately, fibers look weathered |
| Plastic / resin | Every 1–2 seasons | Fading, chalking, UV discoloration |
| Fabric cushions | Every season or after heavy use | Water beads disappear, fabric feels damp after rain |
For most wood furniture, the annual seasonal check takes about 30 minutes: clean the surface, let it dry, do the water bead test, and apply a single maintenance coat if repellency has dropped. Seal-Once and similar products are designed so thin coats applied as part of seasonal maintenance work better than waiting until the protection has fully failed and you need to strip and start over.
Storage: The Best Thing You Can Do for Longevity
Even the best waterproofing treatment takes a beating from year-round exposure. If you can store furniture indoors or in a covered space (garage, shed, basement) during the off-season, do it. Before storage, clean everything, let it dry completely, and apply a fresh maintenance coat of sealer or repellent. Store cushions inside in breathable bags or bins, not sealed plastic bags that trap humidity. If indoor storage isn't an option, high-quality fitted furniture covers are the next best thing. Look for covers with vents so condensation can escape, and lift the furniture slightly off the ground (furniture feet glides work great) so air can circulate underneath.
Covers as a Complement, Not a Replacement
Furniture covers extend the life of your waterproofing treatment, but they don't replace it. Covers trap condensation if they're sealed too tight, and any gap in the cover still exposes furniture to moisture. The system that works best is this: properly waterproofed frames and cushions, covered when not in use for extended periods, stored inside during the off-season. That combination will make most patio sets last 10+ years without major restoration work. Skip the waterproofing and rely only on covers, and you'll still get deterioration from the humidity and condensation that builds underneath.
If your set includes specific materials that need more detailed attention, there are deeper guides worth checking: sealing teak has its own process with oil vs sealer decisions, weatherproofing wicker involves some extra steps around rehydrating dry fibers, and protecting metal furniture (whether aluminum or wrought iron) each have specific product choices and rust-prevention strategies worth knowing. If you need a step-by-step metal plan, focus on rust converter first, then an appropriate topcoat, and finish with a water-bead test to confirm the protection weatherproof metal patio furniture. For a deeper walkthrough, see our guide on sealing teak patio furniture with the right oil or sealer options. The general process here gets you most of the way, but those material-specific guides go deeper on the edge cases.
FAQ
Can I make patio furniture truly waterproof with one thick coat of sealer?
Usually, no. Thicker coats often cure unevenly and are more prone to cracking or peeling, especially on joints and end grain. The better approach is thin, even coats with proper dry time between them, then confirm with a water-bead test after curing.
What should I do if water beads are working on flat surfaces but soaking happens at the joints?
Rework only the trouble areas by cleaning and drying, then add product directly into the seam, welds, bolt holes, and end cuts. Use a small brush application on joints so the coating penetrates rather than bridging across gaps.
Is it okay to waterproof over old sealer if it looks intact?
It depends on compatibility and adhesion. If the old layer is sound but just faded, cleaning and using a compatible topcoat can work. If the surface is tacky, peeling, or flaking, strip or sand back to stable material first, because sealing over failing layers causes early breakdown.
How long should I wait before using the furniture after waterproofing?
Follow the product’s cure window, not just the “dry to touch” time. For many finishes, full performance takes longer, and you should avoid heavy rain exposure until the recommended cure period has passed, then repeat the bead test if you suspect premature exposure.
Do I need to remove oxidation from aluminum before waterproofing?
Yes. Aluminum won’t rust, but chalky oxidation can prevent bonding. Clean it thoroughly and use the recommended prep (often mild acid wash or vinegar approach) before priming or applying any protective coating.
What if my wood feels dry on top, but the sealer fails quickly?
Surface dryness can be misleading, especially with wood and wicker. The fix is to extend drying time and re-prep the surface. If failure happens, strip or sand the failed layer, then dry for at least 48 hours in warm, dry conditions before resealing.
How do I avoid trapping water when my furniture has drain holes?
Before sealing, clear drain holes so water can exit from hollow legs or seat pans. Avoid applying heavy product directly over drains, and make sure joint work does not seal over those openings inadvertently.
Can I waterproof cushions and still prevent mildew?
Yes, but the goal is durable water repellency, not a fully sealed plastic-like barrier. Treatments like fabric guard sprays work best when the fabric can breathe, and they still require proper cleaning and complete drying before application to reduce mildew risk.
How often should I reapply fabric water repellency?
Expect seasonal touch-ups. Reapply when you notice water no longer beads well, after heavy wet-season exposure, or when the fabric’s repellency drops, since most fabric products restore performance rather than creating a permanent waterproof layer.
What happens if I apply a latex or water-based paint over a rust converter system?
That can cause adhesion failure and peeling if the layers are incompatible. If you’ve already applied incompatible topcoat, sand back to the rust-converter layer and reapply a compatible topcoat system, then verify by covering and re-testing with the water-bead check.
Should I waterproof plastic patio furniture the same way as wood or metal?
No. Plastic generally needs a product designed for that surface type, because using a wood sealer or metal coating can lead to poor bonding or quick failure. Clean thoroughly first, then choose a coating or repellent labeled for plastics or your specific finish type.
Do furniture covers replace waterproofing?
They help, but they do not replace it. Covers can trap condensation if they are too tight or non-vented, so the best results come from waterproofed surfaces plus covers for extended periods, ideally with vents and airflow space to reduce trapped humidity.