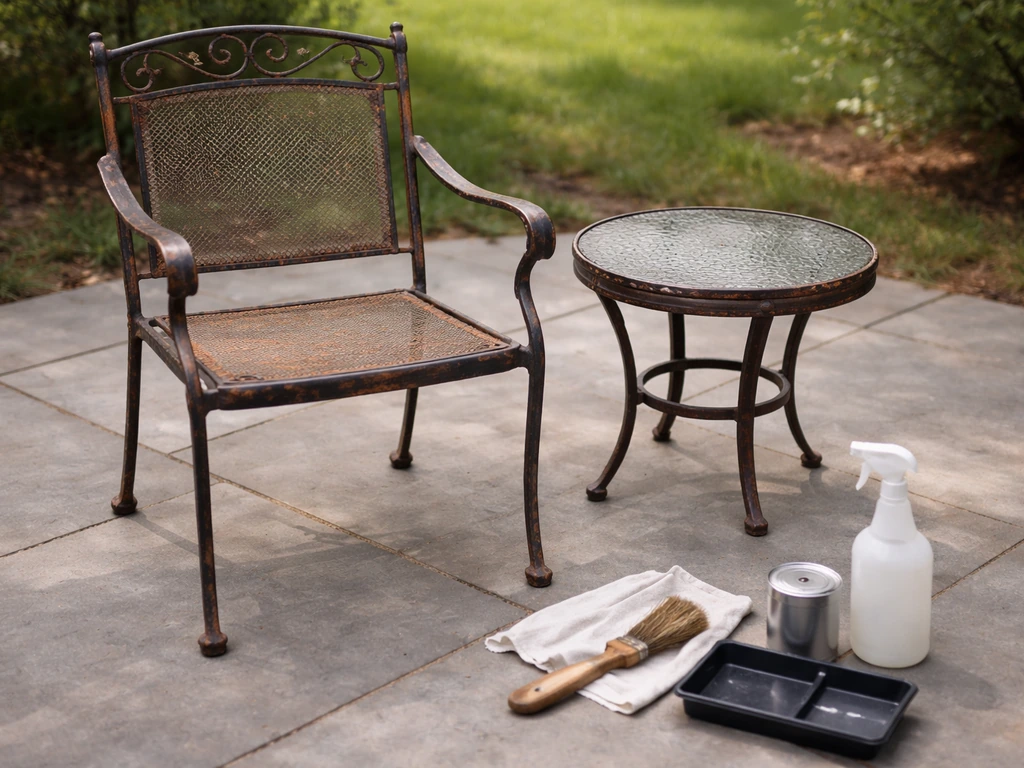
The best way to protect wrought iron patio furniture is to clean off any existing rust, prep the bare metal with a rust-inhibitive primer, apply a durable exterior paint, and then stay on top of annual touch-ups and smart seasonal storage. That combination stops the two things that destroy wrought iron faster than anything else: moisture getting to bare metal and paint that chips and traps corrosion underneath. Do all three consistently and a good set of wrought iron furniture can last decades.
How to Protect Wrought Iron Patio Furniture From Rust
Maren Grady
29 Apr 2026
Why wrought iron rusts outdoors (and what to watch for)
Rust is just iron reacting with oxygen and water. The moment bare metal is exposed to both, the process starts. But the rate at which it happens depends a lot on what else is in that water. Rain mixed with road salt, fertilizer residue, or coastal sea spray contains chloride ions that dramatically accelerate corrosion, eating into metal much faster than plain rainwater ever would. If you live near the ocean or in a region where roads get heavily salted in winter, your furniture is under a lot more chemical stress than the average backyard piece.
Freeze-thaw cycling is the other major threat that most people don't think about. When moisture sneaks under a painted surface and then freezes, it expands and physically pops the coating off from the inside. That's why you often see paint bubbling and flaking on wrought iron in spring, even on pieces that looked fine going into fall. Each freeze-thaw cycle compounds the damage, which is why stopping moisture intrusion before winter is so important.
Other things that speed up rust: sprinklers hitting the furniture regularly, wet cushions or covers sitting against the metal and trapping moisture, dirt and organic debris collecting in seams and welds (which holds moisture like a sponge), and any chip or scratch that breaks through the paint and exposes bare iron. Any one of these alone isn't catastrophic, but combine two or three and you've got a furniture piece that's deteriorating fast.
Quick inspection: spot rust, paint failure, and problem areas
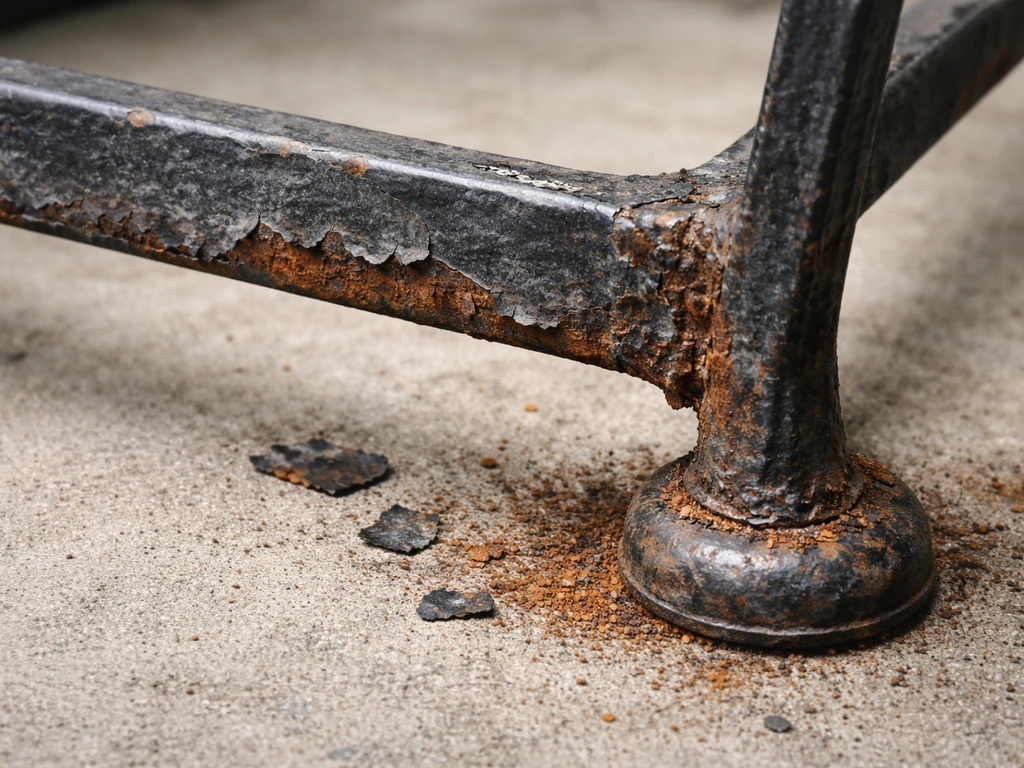
Before you do anything else, spend ten minutes doing a real inspection. Flip the piece over and look at the underside and legs, because those are almost always the worst spots. Check weld joints, seams, and any area where two pieces of metal meet, since moisture and debris collect there first. Run your fingers along flat surfaces to feel for bubbling paint, which almost always means rust is forming underneath even if you can't see it yet.
The most important call you'll make is distinguishing surface rust from deep pitting (sometimes called rot). Surface rust is a thin, flaky orange-brown layer sitting on top of the metal. You can scratch it off with a fingernail or wire brush and there's solid metal underneath. Pitting is different: the rust has eaten into the surface and left small craters, holes, or a heavily scaled texture that doesn't clean up to solid metal. Surface rust is absolutely fixable with DIY methods. Deep pitting with actual holes in the metal means structural integrity may be compromised, and replacement or professional repair is worth considering for load-bearing parts like legs and arm supports.
- Surface rust: thin orange-brown flaking, solid metal underneath after scratching, fully repairable at home
- Pitting/advanced rust: craters, scaling, rough texture that doesn't clean to solid metal, weakens load-bearing parts
- Paint failure: bubbling, cracking, or flaking paint (especially at welds and edges) signals moisture is getting under the coating
- Weld and seam corrosion: rust concentrated at joints means coating has failed there first, common on older pieces
- Loose hardware: bolts and screws corrode too, check that nothing is seized or structurally loose
Mark problem areas with a piece of painter's tape as you go. It sounds simple but it saves a lot of time later when you're in the middle of sanding and trying to remember which weld joint you were worried about.
Cleaning and prep steps before you protect it
This is the step most people rush, and it's the reason most DIY paint jobs on metal fail within a season. Paint and primer will not bond properly to a dirty, greasy, or damp surface, full stop. Spend the time here and everything else gets easier.
- Rinse the furniture with a garden hose to knock off loose dirt, bird droppings, and debris. For coastal furniture or anything near a road, this rinse also removes chloride residue that would otherwise keep corroding under your new coating.
- Mix a TSP substitute (like Rust-Oleum's Krud Kutter Pre-Paint Cleaner) with water, or use a dedicated metal degreaser. Scrub the entire piece with a stiff brush, paying extra attention to welds, seams, and crevices where grease and organic buildup collect.
- Rinse thoroughly. Any TSP or degreaser residue left on the surface will interfere with primer adhesion just as much as grease would.
- Let it dry completely. In warm weather this takes a few hours; on a humid day, give it overnight. If you're in a rush, wipe it down with clean rags and use a fan to speed drying. Never apply primer to damp metal.
One thing I've learned the hard way: don't use a pressure washer on older pieces with questionable paint. High pressure can drive water into every seam and weld, then you're waiting even longer for it to dry out. A stiff scrub brush and garden hose is enough.
Rust removal and surface preparation options
Once the piece is clean and dry, you need to deal with any rust before any coating goes on. The approach depends on how bad the rust is. For light surface rust on scratched areas, a wire brush or coarse sandpaper is usually enough to get back to clean metal. For more widespread rust, you have a few options, each with real trade-offs.
Mechanical removal: wire brush and sanding
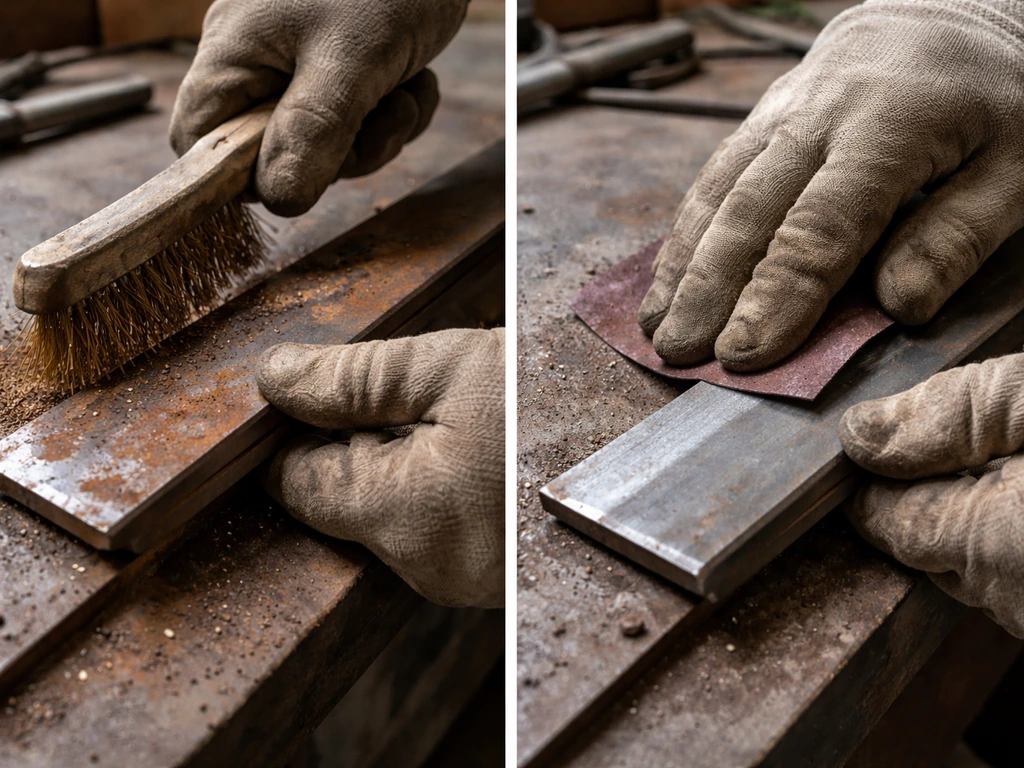
For most DIYers, a combination of a wire brush and 80-120 grit sandpaper is the go-to method. Use the wire brush to knock off loose and flaking rust first, then sand to smooth and create a surface profile (tiny scratches in the metal) that primer can grip. Don't skip the sanding after wire brushing, because a surface that's too smooth actually reduces primer adhesion. Wipe away all dust with a clean, dry cloth before moving on. For tight seams and weld joints, a wire brush attachment on a drill speeds things up considerably.
Rust converters: when to use them and how
Rust converters are water-based products that typically contain tannic acid or phosphoric acid. They chemically react with iron oxide and convert it into a stable, inert layer (iron tannate or ferric phosphate) that can be painted over. They're genuinely useful for rust in hard-to-sand areas like deep welds and scrollwork. But there's a critical rule: you must remove all loose and flaking rust before applying a converter. The chemistry only works on rust that's bonded to solid metal. If you paint a converter over a pile of loose scale, you just get a mess that fails quickly. Scrape and wire-brush first, then apply the converter with a brush or roller, let it fully cure (check your product's label, usually 24 hours), and then prime over it. Most converter manufacturers recommend oil-based or epoxy topcoats, not latex, for best results.
What you don't want to do
- Don't dip your wire brush back into a rust converter after it's touched rusty metal. You'll contaminate the product and redeposit rust onto treated areas.
- Don't paint over rust you haven't removed. Paint sitting on loose rust will peel off in one season, rust and all.
- Don't sand so aggressively that you leave deep gouges in the metal surface. Peaks that are too high from over-aggressive abrasion actually create new corrosion initiation points.
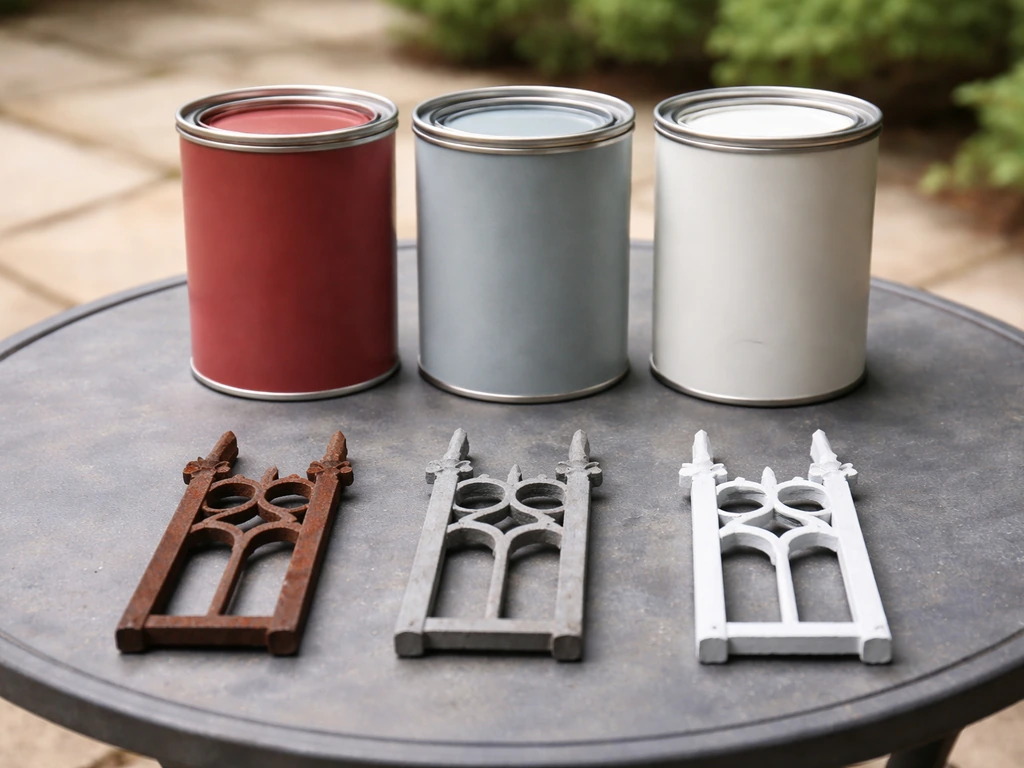
Choose the right protection system (primer + paint + finish)
The protection system is really three layers working together: a primer that bonds to bare metal and resists rust, a paint coat that adds color and weather resistance, and optionally a clear topcoat for extra durability. Skipping primer and going straight to paint is the single most common mistake I see, and it guarantees a short-lived result. Here's how to think about each layer.
Primer options compared
| Primer Type | Best For | Key Advantage | Watch Out For |
|---|---|---|---|
| Alkyd/Oil-Based Rust-Inhibitive Primer | Most DIY wrought iron projects, especially older pieces with surface rust | Bonds well to bare metal, compatible with oil-based topcoats, widely available | Longer dry time, requires mineral spirits for cleanup |
| Zinc-Rich Primer | High-corrosion environments (coastal, high-humidity, salty air) | Zinc sacrificially corrodes before the iron, giving extra protection | Pricier, best results with a clean bare-metal surface |
| Epoxy Primer (2-component) | Severe exposure, commercial or long-term restoration projects | Excellent adhesion, abrasion resistance, longest lifespan | More expensive, short pot life once mixed, less beginner-friendly |
| Acrylic Metal Primer (1-component) | Lighter-duty or rental/seasonal furniture | Easy application, fast dry, water cleanup, flexible topcoat options | Less corrosion resistance than alkyd or epoxy for bare iron |
For most homeowners with standard wrought iron patio sets, a good alkyd rust-inhibitive primer is the sweet spot between performance and ease of use. If you're near the coast or in a zone with harsh winters and road salt exposure, it's worth stepping up to a zinc-rich primer. The NPS recommends zinc-rich primer as the first coat in a full restoration system, followed by epoxy and urethane finish coats, which is overkill for most backyard furniture but points to how seriously professionals take that first coat.
Paint and topcoat
For the finish coat, an exterior-grade oil-based or alkyd enamel gives you a hard, durable surface that resists chipping better than latex on metal. Many manufacturers make spray paints specifically formulated for metal and outdoor use (Rust-Oleum's metal-specific lines are the most widely available). If you had your furniture powder-coated originally and it's failed in spots, you can touch up with brushable paint but powder coating has to be redone professionally as a full refinish, not a spot fix. For clear topcoats, an exterior spar urethane or a clear enamel adds an extra moisture barrier and UV resistance, which is especially useful if sun fading is an issue. To protect patio furniture from sun-related fading, a clear UV-resistant topcoat can help extend the life of your finish clear topcoat for extra durability.
This is a good place to note that if you're also thinking about protecting other metal patio furniture, the system is similar but the specific primer and prep differ by metal type. For aluminum patio furniture, the process is similar, but you need the right aluminum-specific primer and corrosion-safe topcoat. Aluminum, for example, doesn't rust the way iron does and needs a different primer. Wrought iron is the most demanding metal in your outdoor lineup precisely because it rusts so aggressively when the coating fails.
Application tips for a long-lasting coating
How you apply the coating matters almost as much as what you apply. A beautifully mixed primer slapped on in poor conditions or wrong technique will still fail early.
- Check conditions before you start. Ideal temperature for most primers and paints is 50-90°F (10-32°C) with humidity below 70%. Applying in direct sun on a hot day causes the coating to dry too fast and can leave bubbles. Applying in damp or cold conditions slows curing and reduces adhesion.
- Apply primer first, even to small touch-up areas. For a full piece, one coat of primer is a minimum; two thin coats are better than one thick coat.
- Spray vs brush: For intricate scrollwork and detailed wrought iron, spray paint gets into crevices far better than a brush. Use short, overlapping passes 8-12 inches from the surface. For flat or larger areas, a natural-bristle brush gives you more control and thicker coverage. A combination approach works well: spray into the ornamental details, then brush the flat sections.
- Don't forget the undersides, the inside of legs, and the underside of armrests and seat frames. These hidden areas are where rust almost always starts and where most DIYers skip. Flip the piece and coat the bottom first.
- Apply thin coats and let each coat dry fully before the next. Check the product's label for minimum recoat time. Rushing this step traps solvents under the surface and causes long-term adhesion failure.
- Give the final coat adequate cure time before rain or physical contact. Most products specify a minimum curing window before rain exposure (often 24-48 hours for a full alkyd system). Don't put cushions on or cover the piece until it's fully cured.
Here's something I didn't do correctly the first time: I painted a chair late in the afternoon in September, it got dew on it overnight, and the primer bonded poorly to the moisture-contaminated surface. I had to sand it back and redo it. If rain or dew is a possibility within your cure window, wait for a better day or move the furniture under cover.
Seasonal maintenance, covers, and storage to prevent future rust
Applying a great coating system is step one. Keeping rust from coming back is an ongoing routine, and it doesn't have to be complicated. The main goal is making sure moisture doesn't get a chance to sit on bare or compromised metal. Moisture management is especially important when protecting patio furniture cushions, since damp fabric and trapped humidity can lead to mildew and damage moisture doesn't get a chance to sit on bare or compromised metal. To learn more about how to protect patio furniture day to day, focus on preventing moisture buildup and keeping coatings intact moisture doesn't get a chance to sit on bare or compromised metal.
After rain and throughout the season
- After heavy rain, wipe down the furniture and let it dry before replacing cushions or covers. Water trapped under cushions against metal is a fast path to rust.
- Rinse the furniture a few times per season if you're near a coast or road. Salt and chloride deposits from spray or runoff accelerate corrosion even on painted surfaces.
- Inspect for chips and scratches every spring. Touch up any bare metal spots immediately with primer and matching paint. A 5-minute spot fix prevents a 5-hour restoration project the following year.
- Lubricate any hinges, pivot points, or folding mechanisms with a light machine oil or a penetrating oil spray (like WD-40). Metal-on-metal contact without lubrication wears paint and creates rust-prone spots.
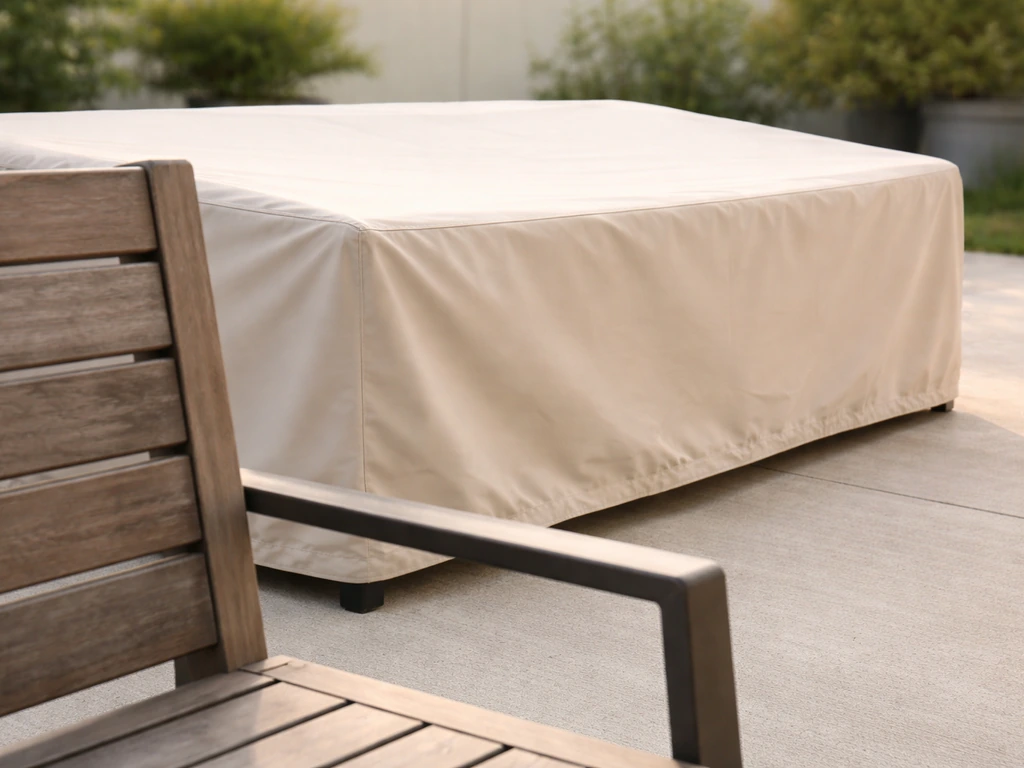
Covers: breathable beats waterproof
Here's something counterintuitive: a thick, non-breathable waterproof cover can actually make rust worse. When temperatures drop overnight, moisture condenses on cool metal surfaces, and if the cover seals that moisture in without any airflow, you've created a humid microclimate that stays wet for extended periods. Breathable covers made from woven polypropylene or ventilated polyester fabrics allow airflow that lets condensation escape. Look for covers with vents or open hems at the bottom so air can circulate. The cover should fit the furniture snugly but not be sealed to the ground.
Winter storage and off-season prep
If you can store wrought iron furniture indoors (garage, shed, basement) for winter, do it. A breathable cover and good airflow can also help you protect patio furniture from rain while reducing the chance moisture gets trapped against the metal If you can store wrought iron furniture indoors (garage, shed, basement) for winter, do it.. The combination of freeze-thaw cycling, road salt residue, and prolonged moisture exposure during winter does more cumulative damage than the rest of the year combined. Before storing, give the piece a full rinse to remove any salt or fertilizer residue, let it dry completely, do a touch-up of any chipped paint, and then store it off the ground on a wooden pallet or shelf so airflow gets under the legs. Storing directly on a damp concrete floor speeds up leg corrosion significantly.
If outdoor storage is your only option, use a breathable cover, elevate the furniture slightly on rubber feet or blocks, and try to position it where snow and ice won't accumulate on it or pack under the legs. Do a full inspection in early spring before the season starts, which is also the ideal time for your annual touch-up coat if needed.
Annual maintenance checklist
- Spring: Inspect all surfaces, welds, and hardware for rust or paint failure. Sand and prime any bare spots.
- Spring: Clean thoroughly with TSP substitute or degreaser before applying any new coating.
- Spring/Summer: Apply a fresh topcoat to the full piece every 2-3 years, or spot touch-up as needed each year.
- Throughout season: Wipe down after rain, rinse if near salt air or road spray, and keep cushions dry.
- Fall: Lubricate any moving parts, rinse off salt/fertilizer, do a final touch-up of chips, and allow to dry completely before covering or storing.
- Winter: Store indoors if possible, elevated off the floor; use a breathable cover if storing outdoors.
Common mistakes that undo all your hard work
Even people who know better make these mistakes when they're in a hurry or working with a new product for the first time. Keep this short list somewhere visible while you're working.
- Painting over loose rust: The paint will peel off with the rust underneath it. Always remove all loose and flaking rust before any primer goes on.
- Skipping primer: Exterior paint without primer on bare metal will not last. Primer is what gives paint something to bond to and what actually blocks moisture at the metal surface.
- Using latex paint directly on iron: Latex doesn't bond to bare iron well and doesn't give the same moisture barrier that alkyd or oil-based systems do. Use an appropriate metal primer and an oil-based or metal-specific topcoat.
- Sealing moisture in with a non-breathable cover: Especially in spring and fall when temperature swings are large, a sealed cover traps condensation against the metal. Choose breathable covers and leave the bottom edge open for airflow.
- Applying coatings in bad conditions: High humidity, cold temperatures, or direct hot sun all cause adhesion problems or bubbling. Wait for dry, mild conditions before painting.
- Forgetting the undersides: Rust almost always starts on the underside of frames, inside of legs, and hidden weld joints because those are the spots that never get checked or touched up.
Your next steps based on where your furniture is right now
Not everyone is starting from the same place, so here's a quick map to what you should do first based on your furniture's current condition.
| Current Condition | Immediate Priority | Protection Approach |
|---|---|---|
| No rust, paint looks intact | Inspect undersides and welds; clean with degreaser | Apply a fresh topcoat or clear sealer as a preventive step |
| Minor surface rust, paint chipping in spots | Wire-brush loose rust, sand chips, clean thoroughly | Spot prime with alkyd rust-inhibitive primer, then touch up paint |
| Widespread surface rust, significant paint failure | Full mechanical rust removal (wire brush + sanding), full clean and degrease | Full repaint: zinc-rich or alkyd primer, two coats exterior enamel, clear topcoat optional |
| Deep pitting at welds or load-bearing joints | Assess whether structural integrity is compromised | Repair or replace affected parts before any protective coating; consult a metal fabricator if needed |
| Furniture going into storage for winter | Rinse to remove salt/debris, touch up any bare metal, dry completely | Store elevated and indoors if possible; use a breathable cover if stored outdoors |
Wrought iron is genuinely one of the most durable materials you can have in outdoor furniture, but it needs this kind of attention to reach its potential lifespan. The full process from cleaning to priming to painting isn't fast, but it's completely manageable over a weekend. Do it right once and then maintain it consistently, and you won't have to do a major restoration again for years. For context, the same attention to prep and coating applies if you're protecting other metal patio pieces too, though the specific products and primer types change depending on the metal.
FAQ
Can I protect wrought iron patio furniture by just spraying a rust-preventive paint over the existing coating?
Not reliably. If there is any loose paint, flaking rust, or chalky contamination on the surface, coatings usually fail early because they cannot bond to sound metal. Plan on removing loose material, drying the piece thoroughly, then applying primer first, paint second.
How do I know if the rust I’m seeing is still “fixable” or if I should replace or repair the furniture?
If rust turns into visible holes, craters, or a sharply rough, scaled surface that doesn’t clean back to solid metal, assume corrosion has penetrated. Legs and arm supports are the highest risk, so if you can’t restore those areas to solid metal, consider professional repair or replacement rather than repainting.
What’s the best way to dry wrought iron after washing, especially if weather is unpredictable?
After scrubbing, rinse, and wiping, allow the furniture to air dry fully in a protected area with airflow. If you paint before it is completely dry, primer and paint can bond poorly and blister later. A practical check is to confirm there is no dampness in seams and welds, then wait an extra day if dew or rain is expected during the primer cure window.
Is a magnet test useful for determining whether rust has eaten too far into the metal?
Sometimes. While rust itself is often non-magnetic, heavily corroded areas may not behave consistently. A better decision aid is mechanical cleaning: if you can wire-brush and sand and still reach solid, smooth metal without uncovering pits or thin spots, it’s typically a surface rust situation.
Should I use a rust converter on all rust, or only certain spots?
Use it selectively. Rust converters are most helpful where sanding is difficult, like tight welds or scrollwork, but only after removing loose scale and flaking rust. If rust is widespread, sanding and priming may still be the stronger overall approach, and some converter systems require specific primer compatibility.
Can I use latex paint or regular interior paint on wrought iron outdoors?
Usually not. Outdoor metal coatings are formulated for weather and adhesion to prepared metal, and latex typically offers poorer chipping and corrosion resistance on iron surfaces than exterior oil-based or alkyd enamel. If you use latex anyway, expect more frequent touch-ups, especially in salted or coastal conditions.
What grit sanding should I use for wrought iron before priming?
For most DIY restorations, using coarse-to-medium abrasion like 80 to 120 grit after wire brushing is a good target because it creates a surface profile primer can grip. The key is not to go too smooth, and to remove all dust afterward with a clean, dry wipe.
Do I need to prime every time, even for small touch-ups on chips?
Yes, for best results. A chip that exposes bare iron needs rust-stopping primer so moisture cannot start corrosion underneath the topcoat. Spot-priming only the bare metal edges and feathering around the chip usually works better than painting directly on the bare rusted spot.
How long should I wait between primer and paint, and between coats?
Follow the product label for your specific primer and paint system, because cure time varies by temperature and humidity. As a rule of thumb, if there is any chance of dew or rain in the cure window, wait for a better day or ensure the piece stays covered and dry long enough for full primer set.
Should I remove and repaint loose weld areas or seams, or can I paint over them?
Don’t paint over active corrosion. If seams have trapped moisture, there may be hidden rust under edges and into the crevice. Wire-brush and clean those joints, then prime thoroughly so the primer reaches the cleaned metal and seals it before painting.
Will putting furniture on a cover always help, or can it backfire?
It can backfire if the cover traps moisture. A thick, non-breathable cover can create a humid microclimate, especially when temperatures drop and condensation forms on cool metal. Choose breathable covers with ventilation, and avoid sealing the furniture to the ground.
Is it better to store wrought iron indoors for winter, or leave it outside under a cover?
Indoors is usually better, especially in regions with freeze-thaw cycles and road salt. If outdoor storage is your only option, use a breathable cover, elevate the furniture so airflow gets under it, and aim to position it to prevent snow or ice from packing around the legs.
What preventive steps make the biggest difference between annual touch-ups?
Moisture management. Keep sprinklers from hitting the furniture, ensure wet cushions do not sit against the metal, clean off organic debris from seams, and fix chips promptly. A small scratch left unaddressed near salt, fertilizer, or coastal air can become a faster rust spot.