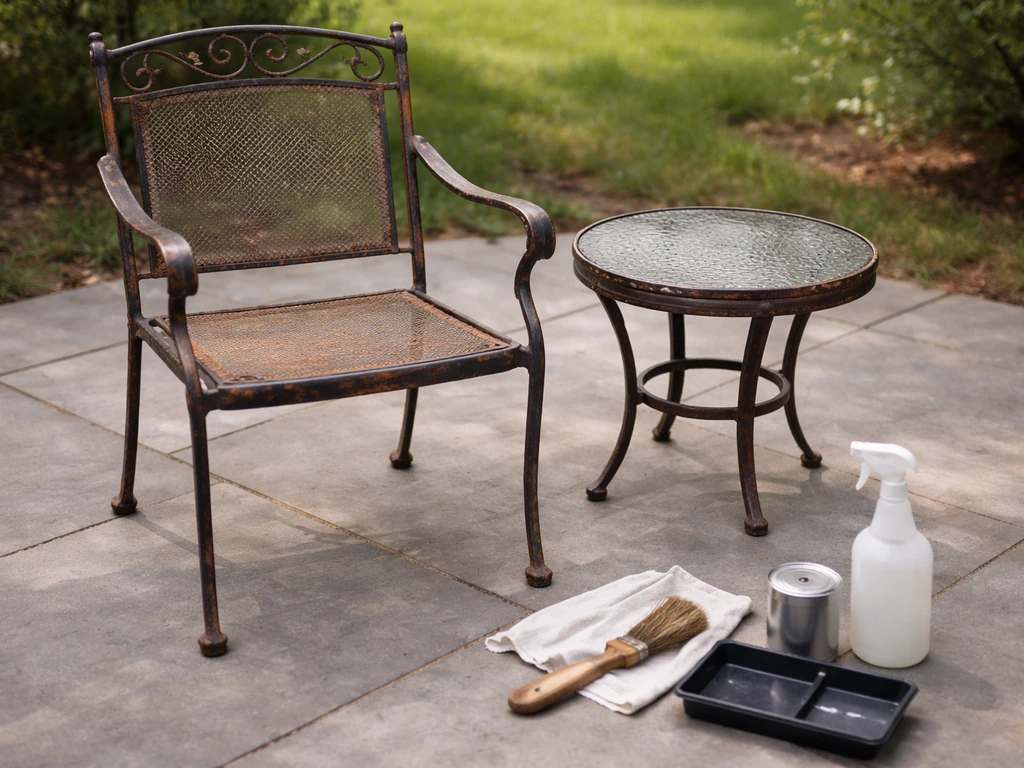
To protect metal patio furniture, you need to match your approach to the metal type and how much damage is already there. If the frame is new or just fading, a thorough clean, a coat of rust-inhibiting primer, and a UV-resistant topcoat will lock it in for years. If rust has already started, you need to mechanically remove the loose stuff first, treat the remaining rust with a converter like Rust-Oleum Rust Reformer or OSPHO, then prime and paint. The sequence matters: skipping any step is the number-one reason coatings fail within a season.
How to Protect Metal Patio Furniture From Rust and Wear

Maren Grady
29 Apr 2026
Step 1: Figure out what metal you have and how bad the damage actually is
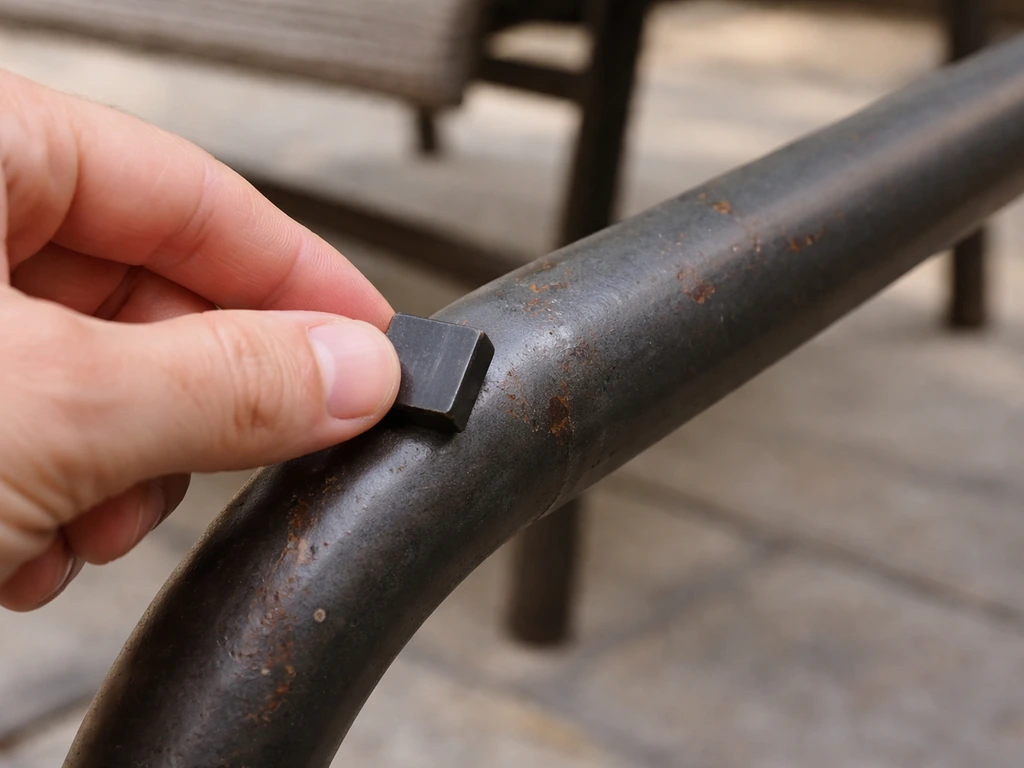
Before you buy a single can of paint, spend two minutes figuring out what you're working with. Grab a magnet from your fridge. If it sticks firmly to the frame, you've got steel or cast iron, both of which are prone to rust and need the full rust-prevention treatment. If the magnet doesn't stick, it's almost certainly aluminum, which doesn't rust the same way but does oxidize and pit over time.
Once you have confirmed it's aluminum, the rest of the process focuses on how to protect aluminum patio furniture from oxidation, pitting, and UV damage. You can also scratch a hidden spot with a key: aluminum will scratch to a bright silver-white, while steel scratches to a darker, shinier silver.
Once you know the metal, do a quick damage assessment. Work through these three tiers so you know which pathway to follow:
- New or barely used: Paint or powder coat is intact, no rust visible, maybe some surface grime. You're in the easiest spot. Clean, dry, and apply a protective topcoat or wax. Done.
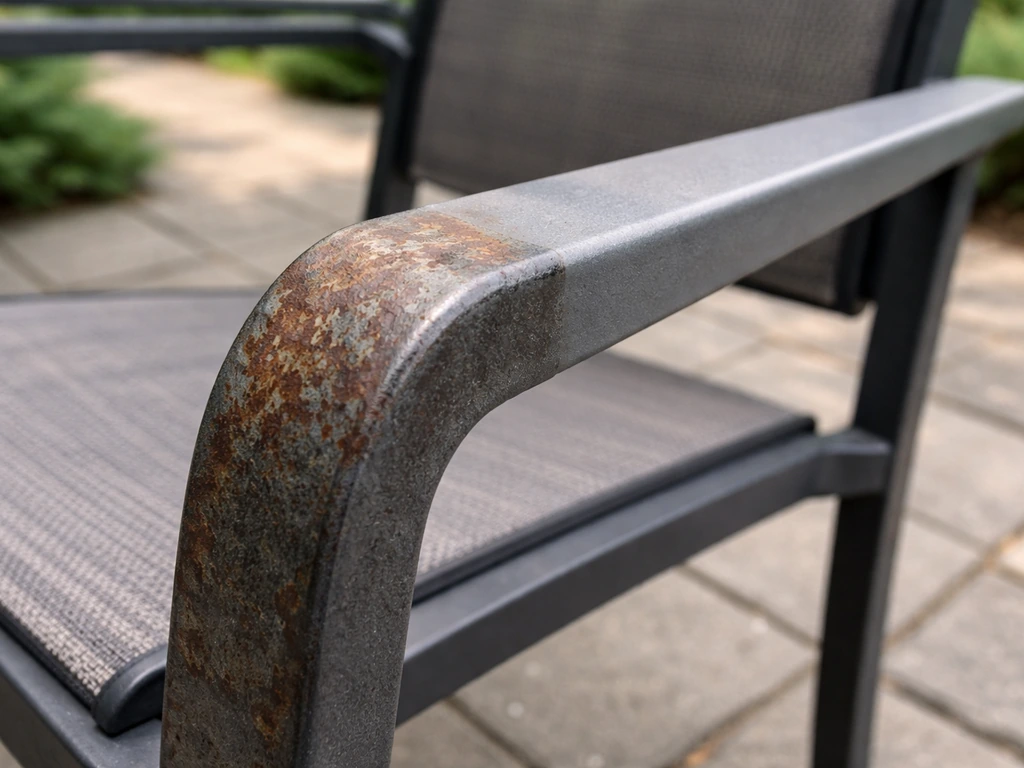
- Lightly damaged: Paint is chipping or peeling in spots, you see orange-red or dark brown rust patches on steel, or chalky oxidation on aluminum. You'll need to sand and treat before recoating.
- Heavily rusted or flaking: Large rust patches, deep pitting, paint peeling in sheets. This is a full strip-and-restore job. It takes half a day minimum, but it's absolutely worth it versus buying new furniture.
One helpful visual tip: rust on steel furniture that's dark brown or black is often magnetite (Fe3O4), an older, more stable form of corrosion. Bright orange-red rust is more active and needs more aggressive treatment. If you see black rust, it's been there a while, but it hasn't necessarily eaten through the metal yet, so don't panic.
Step 2: Clean and dry the frame before you do anything else
This step sounds obvious but it's where I've personally cut corners before and regretted it every time. Applying any kind of coating over dirty or damp metal is a guaranteed way to get bubbling, peeling, and early rust. Give yourself the full workflow here.
Mix a mild dish soap or non-bleach liquid laundry detergent with warm water. Use a soft-bristled brush to scrub down every surface, including the undersides of chair legs and the inside faces of hollow tube frames where moisture loves to hide. Rinse everything thoroughly. Skip the pressure washer here: it can force water into joints and small gaps in the frame that take forever to dry out, and it can also damage any remaining good paint or finish.
After rinsing, let the furniture sit in direct sunlight for at least two hours before moving on. If it's overcast or humid, give it longer or bring it into a dry garage or shed. Running your hand across the frame and feeling even faint coolness means there's still moisture there. Paint applied over moisture is paint that will bubble and peel within weeks.
Step 3: Remove rust and prep surfaces the right way
Here's the part most DIYers either skip entirely or rush through. Don't. Proper surface prep is 80 percent of whether your finish lasts one season or five.
For steel, cast iron, and wrought iron
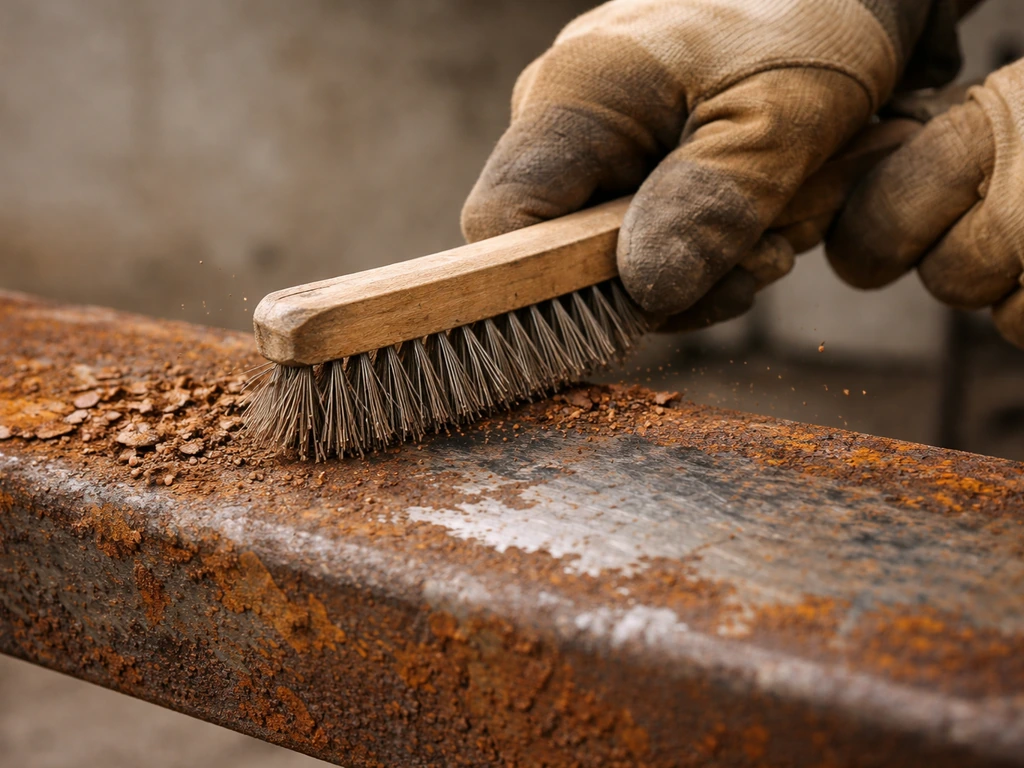
Start with a wire brush or wire wheel attachment on a drill to knock off all loose, flaky rust and peeling paint. For wrought iron patio furniture, thorough rust removal and proper prep are especially important because coatings fail fast when loose rust is left behind how to protect wrought iron patio furniture. You're not trying to get to bare shiny metal everywhere, you just need to remove anything that isn't firmly bonded to the frame.
For lighter surface rust, 320-grit sandpaper works well and gives the surface a profile (tiny scratches) that helps primer bond properly. For heavier rust, go coarser first (80-120 grit) and finish with 320. Wipe down the surface with a clean dry cloth to remove all dust and debris before the next step.
If there's still surface rust that's tight and solid after wire brushing (meaning it won't scrape off but it's clearly still there), you have two good options. OSPHO is a phosphoric acid-based rust treatment: you brush it on thin over the cleaned surface and let it dry. It chemically converts the rust into a stable compound that primer can bond to. Rust-Oleum Rust Reformer does the same thing in a spray or brush-on format.
KBS Rust Converter is another solid product: brush it on after removing the loose material, let it cure 24 hours, then topcoat. All of these work, and all cost around $15 to $25 for enough to cover several chairs. The key rule for any rust converter: do not apply it over loose, flaking rust. Remove that stuff first mechanically, then treat what's left.
One more thing: temperature and humidity matter more than most people realize. For Rust-Oleum Rust Reformer spray, apply it when temperatures are between 50, 90°F and humidity is below 85% so it dries properly temperature and humidity matter more than most people realize. Rust-Oleum Rust Reformer, for example, requires air and surface temperatures above 50 degrees Fahrenheit and reasonable humidity levels. On a cold damp April morning, wait until the afternoon. Applying products outside their rated conditions is one of the most common causes of early coating failure.
For aluminum frames
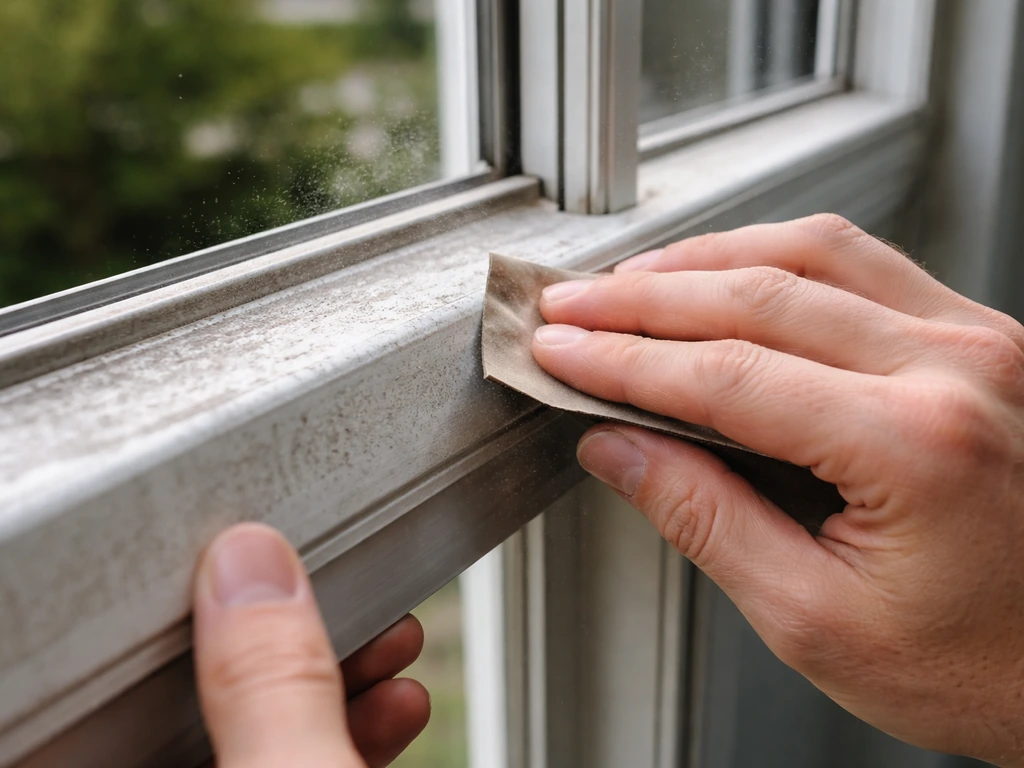
Aluminum doesn't rust, but it does oxidize to a dull chalky white-gray surface over time, especially with UV exposure. That chalky layer needs to go before you recoat. Sand with 320-grit paper and wipe clean. The bigger issue with aluminum is paint adhesion: standard primers don't bond well to bare aluminum.
Use an etch primer (sometimes called self-etching primer) specifically formulated for aluminum. For etch primer, r/Autobody notes it should be applied in a very light and controlled coat on bare metal, because sanding/grit choice and applying it too heavily can contribute to improper adhesion and flaking [etch primer (sometimes called self-etching primer) specifically formulated for aluminum. ](https://www. reddit.
com/r/Autobody/comments/1fpzhf8/semselfetchingprimerflaking/). This is a step that's easy to skip because the primer seems to go on fine, but without it, your topcoat will peel off in sheets by next summer. Products like Rust-Oleum's Professional Aluminum Primer are made for exactly this application.
Step 4: Pick the right coating system for your metal and situation
There's no single perfect product for every piece of metal furniture, but the decision tree isn't complicated once you know your metal type and damage level.
| Metal Type | Best Primer | Best Topcoat | Budget Range |
|---|---|---|---|
| Steel / Wrought Iron (light rust) | Rust converter (Rust Reformer, OSPHO) then direct-to-metal primer | Rust-inhibiting enamel or spray enamel (exterior rated) | $20–$45 total |
| Steel / Cast Iron (heavy rust) | Rust converter, then RustSeal or direct-to-metal alkyd primer | Exterior enamel or urethane topcoat | $35–$65 total |
| Aluminum (intact finish) | Etch/self-etching primer (e.g., Rust-Oleum Aluminum Primer) | UV-resistant exterior enamel or acrylic | $25–$50 total |
| Aluminum (oxidized/chalky) | Etch primer after 320-grit sanding | UV-resistant exterior topcoat | $25–$50 total |
A word on UV protection: if your furniture sits in direct sun most of the day, UV degradation is just as big a threat as rust. If you want your outdoor set to look good season after season, focus on how to protect patio furniture from sun by using UV-resistant finishes and keeping it out of harsh direct exposure when possible UV protection. The binders in coatings break down with UV exposure, causing chalking and fading.
Always confirm the topcoat you choose is rated for exterior use. Interior paints and some cheaper spray cans are not, and they'll chalk and fade fast. Powder coating (applied professionally) is the most durable long-term option for any metal type, but it's not a DIY process and runs $100 to $300 or more per piece. For most homeowners doing this themselves, a good rust-inhibiting primer plus an exterior enamel topcoat is the practical sweet spot.
Step 5: Apply the protection system yourself, from primer to topcoat
Take your time here. Rushing the application and not respecting dry times is the second-biggest cause of failed finishes, right behind bad surface prep. Rust-Oleum Rust Reformer technical data specifies dry-to-touch (tack-free) timing at 70, 80°F and 50% relative humidity as part of the 3575 System documentation dry-to-touch (tack-free) timing at 70–80°F and 50% relative humidity.
- Primer coat: Apply a thin, even coat of the appropriate primer (rust converter, etch primer, or direct-to-metal primer depending on your metal type). Thin is better than thick here. Heavy coats trap solvents, which causes bubbling later. Let it dry fully before touching.
- Recoat window: For Rust-Oleum Rust Reformer brush-on, you can spot-prime with an alkyd primer after 4 hours. For rust converters in general, waiting 24 hours before topcoating gives the best adhesion and rust protection. Check your specific product's data sheet.
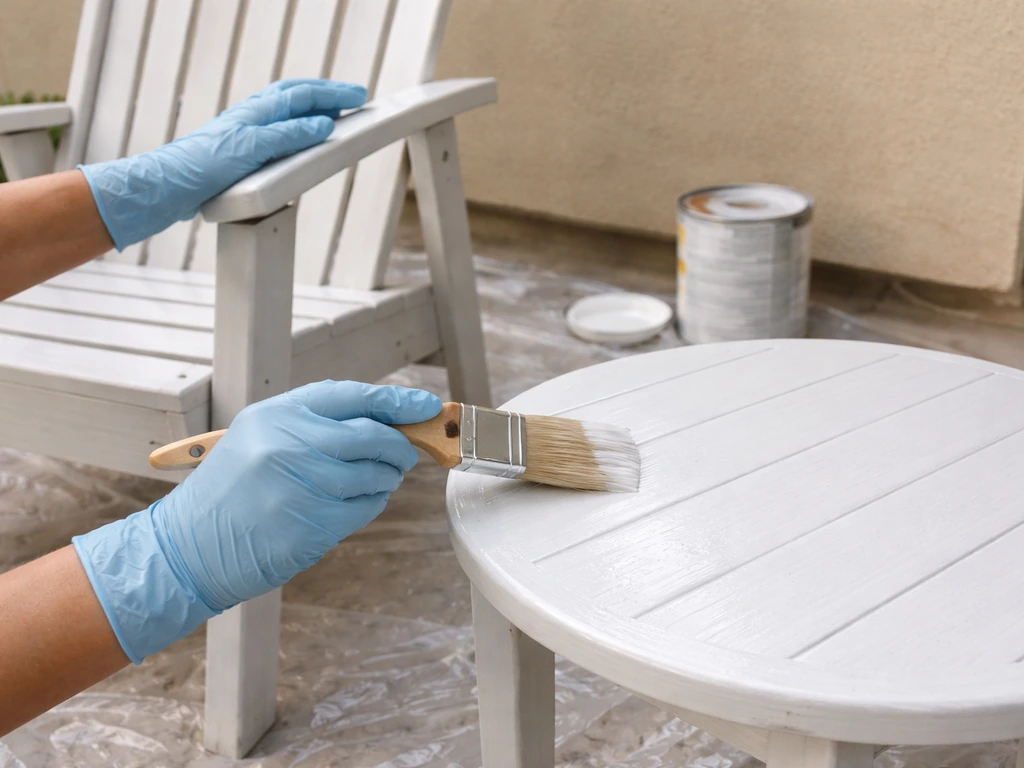
- First topcoat: Apply a thin, even coat of your chosen exterior enamel or rust-inhibiting paint. Again, thin coats. If you're brushing, use a good-quality natural bristle brush for oil-based products or a foam roller for a smoother finish on flat surfaces.
- Second topcoat: For steel or cast iron in harsh conditions, two topcoats are better than one. Let the first coat dry to touch (usually 1 to 2 hours for most spray enamels) before applying the second.
- Cure time: This is the step everyone skips. Just because paint is dry to the touch doesn't mean it's cured. Most enamel and rust-inhibiting paints reach full hardness after 24 to 72 hours. Keep the furniture out of rain and off direct ground contact during this window.
- For RustSeal specifically: the product achieves its recommended dry film thickness of 3 to 5 mils in 2 to 3 coats. It's compatible with urethane, epoxy, enamel, and water-based topcoats, giving you flexibility in what you use over it.
If you're spraying rather than brushing, hold the can 10 to 12 inches from the surface and use steady sweeping passes. Overlapping each pass by about 50 percent gives even coverage without drips. Drips mean you're holding too close or moving too slow.
Step 6: Set up a maintenance schedule that actually fits your life
A single good coating job can last 3 to 5 years with regular maintenance, or fail in one season if you ignore it. The maintenance isn't complicated, it just needs to happen.
| Frequency | What to Do |
|---|---|
| Monthly (during use season) | Quick wipe-down with mild soap and water. Check for chips, scratches, or areas where paint is lifting. Catch them early. |
| After any big storm | Dry the frame fully. Check joints, legs, and under armrests for standing water. These spots rust first. |
| Start of season (spring) | Full cleaning, close inspection for winter damage, touch up any chips or bare spots with matching primer and paint before rust can start. |
| End of season (fall) | Full cleaning and full dry before storage or covering. Any chips or bare spots found now should be touched up before covering for winter. |
| Every 2 to 3 years | Full inspection of coating integrity. If you see widespread chalking, peeling, or rust spreading, do a full sand-and-recoat before it gets worse. |
Touch-up work is simple: clean the area, sand lightly with 320-grit, dab on a matching primer, let it dry, then apply a small amount of matching topcoat with a brush. A $4 artist's brush and a small jar of matching enamel are worth keeping in a zip-lock bag in your shed specifically for this. Catching a chip early costs you ten minutes. Ignoring it can mean re-doing the whole piece.
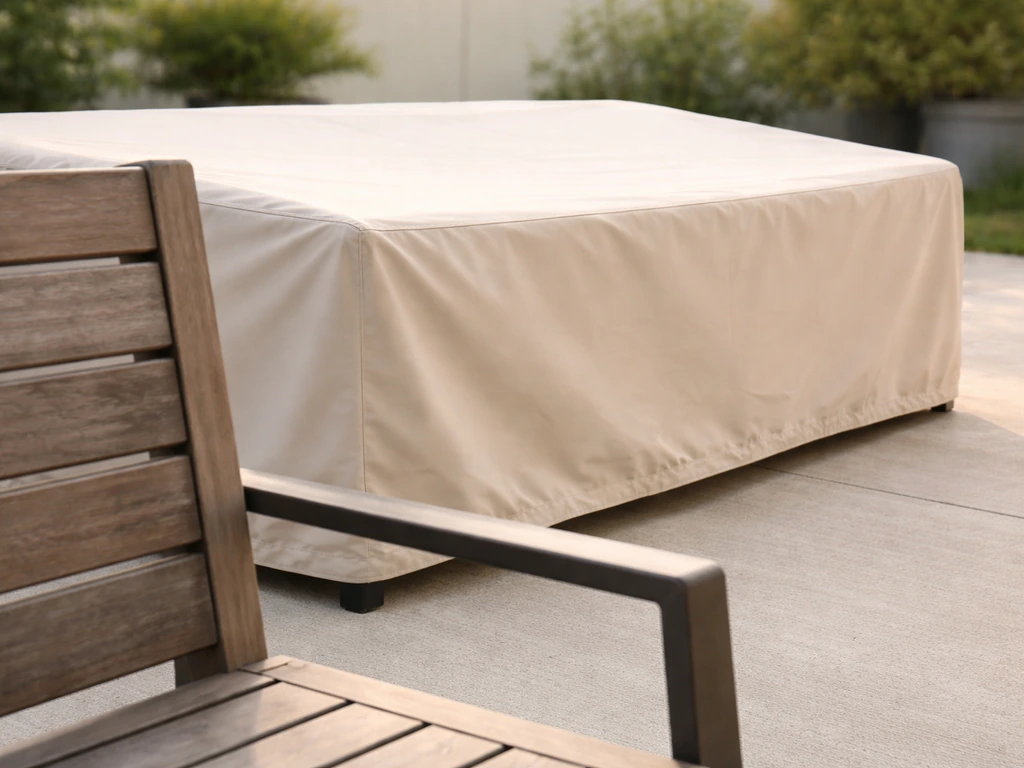
Step 7: Use covers and storage correctly (most people do this wrong)
A cover feels like it should protect everything, but a cover used incorrectly can actually make rust worse. If you need extra protection from rain, use covers that keep water out without trapping moisture underneath protect patio furniture from rain. Here's the real problem: if you throw a non-breathable cover over furniture that's even slightly damp, or if water pools on top of the cover and seeps through, you've just created a warm, dark, humid environment that accelerates corrosion. I've seen well-coated furniture come out of winter looking worse than furniture that was left uncovered but stored in a dry garage.
- Always dry completely before covering: After any cleaning or rain event, let the furniture air dry fully before putting on a cover. For off-season storage, give it two to three dry sunny days, not just hours.
- Choose a breathable vented cover: Look for covers that list ventilation or air flow as a feature. These allow moisture that builds up inside to escape rather than condense on the metal.
- Prevent pooling on top: Arrange covers with a slight angle or tension so water runs off rather than collecting in a low spot on top. A pool of standing water on a cover will work its way through seams and onto the furniture.
- Elevate legs off bare concrete or soil: Direct ground contact traps moisture under the furniture even when covered. Use rubber furniture pads, plastic feet, or set the pieces on a dry wood platform or deck during off-season storage.
- Remove the cover occasionally on dry days: Even with a vented cover, a quick uncovering on a dry sunny day once a month lets any built-up moisture escape. This matters especially in humid climates.
If you have cushions, those come off before covering the metal frame. Storing cushions separately (in a deck box or indoor space) also means you don't accidentally hold moisture against the frame with wet fabric. Protecting cushions is a whole separate topic, but even just removing them before covering the frame makes a real difference. To prevent mold, fading, and odors, you also want to clean and store patio furniture cushions the right way Protecting cushions is a whole separate topic.
Step 8: Troubleshoot the common failures before they get worse

Bubbling or blistering paint
This almost always means moisture was trapped beneath the paint film when you applied it, or you applied coats too thick and too fast, trapping solvents before they could escape. Sand the affected area down to bare metal or solid substrate, let it dry completely (full sun, several hours minimum), and reapply in thin coats with proper flash time between coats. Don't try to paint over bubbles. They will come back.
Recurring rust spots in the same place
If rust keeps coming back in the same spot after you've coated over it, you didn't remove all the active rust before painting. Paint applied over rust doesn't stop it, it just hides it temporarily. Sand or wire-brush back down to solid metal, treat with a rust converter, prime properly, then recoat. Joints and hollow tube ends are the usual culprits: water gets inside the tube and rusts from the inside out. If you see a rust ring forming around a hollow leg end, plug the bottom of the tube with a rubber furniture cap or silicone sealant to stop water from getting in.
Peeling or flaking coating
Peeling usually means the coating lost adhesion, either because the surface wasn't clean, because you skipped the correct primer for your metal type (this is especially common on aluminum where people skip the etch primer), or because an incompatible paint system was used. Strip the affected area back to solid, prep correctly for your metal type, and start fresh with the right primer. There's no shortcut that fixes peeling in place.
Sticky or tacky finish that won't fully harden
A sticky finish after more than 48 hours usually means the paint was applied too thick, the temperature was too cold during application or curing, or the humidity was too high. Rust-Oleum products, for example, need temperatures above 50 degrees Fahrenheit. If you painted on a cold or damp day, the coating may never fully cure properly. In mild cases, moving the furniture to a warm dry space and giving it more time can help. In bad cases, you may need to strip and start over. Lesson for next time: check conditions before you open a can.
Chalking or fading color
Chalking is what happens when UV exposure breaks down the coating's binders. It shows up as a dull, powdery residue on the surface. It's most common on furniture in direct sun and is a sign that either the original coating wasn't UV-rated for exterior use, or it has simply reached the end of its service life. Clean the chalky residue off with soap and water, sand lightly, and apply a fresh coat of UV-resistant exterior-rated topcoat. Skipping the recoat and just wiping the chalk off doesn't fix the underlying issue.
Metal patio furniture can genuinely last decades with the right care. The initial prep and coating job takes an afternoon, the seasonal maintenance is maybe an hour per year, and the touch-up work is something you can do in ten minutes while your coffee is brewing. The investment of time and around $30 to $60 in supplies is nothing compared to replacing a set of furniture every few years. Get the surface prep right, use the correct primer for your metal type, and keep up with the small maintenance moments. That's the whole system.
FAQ
Can I use a single all-in-one spray product instead of primer plus topcoat?
You can for very small, spot repairs, but for full protection, primer plus an exterior topcoat usually performs better. All-in-ones still need correct surface prep and dry conditions, and many of them are not as durable against UV as a dedicated UV-resistant topcoat.
What should I do if my metal furniture has old paint that is still firmly bonded, but the finish is dull or worn?
Clean thoroughly, then lightly sand to scuff and create a bonding profile, wipe off dust, and then apply an exterior-rated primer if the old coating is worn through to bare metal in spots. If the old layer is intact, you generally do not need to strip everything, but you must ensure there are no loose edges or flaking.
Is wire brushing always enough, or should I sand as well before priming?
Wire brushing is great for removing loose rust and peeling, but sanding or scuffing is often needed to level the surface and improve coating adhesion. Use sandpaper to smooth transition areas, then wipe clean so dust does not interfere with primer bonding.
How do I know when a rust converter is fully ready for primer and paint?
Follow the product’s specified cure time, not just “dry to the touch.” If the surface still feels tacky, shows a color shift that indicates incomplete conversion, or gets marred easily by light rubbing, give it more time. Cold or high humidity can significantly extend readiness.
Can I apply primer and paint in direct sun to speed up drying?
Direct sun can help drying, but overheating can cause brush marks, premature skinning, or uneven curing. Work in the morning or afternoon with shade during application when possible, especially for spray painting, and make sure the metal is not hot to the touch before you start.
What causes orange-brown bleed-through or staining after painting?
That usually means active rust or soluble corrosion products are still present under the coating, or the coating system is too thin. Spot treat by sanding back to solid substrate, apply a rust converter to what remains, prime correctly, then recoat in thin layers with proper flash time.
Should I coat the underside of chair legs and table frames, or only the visible tops?
Coating only the visible areas leaves corrosion “starting points” in joints and hidden undersides where water collects. Spend extra effort on undersides, inside faces of hollow tubes, and around welds, then use a thin, even application so it reaches edges without building drips.
Do I need to remove surface chalk on aluminum or steel before painting?
Yes. Chalking is usually oxidized binder residue, it reduces adhesion. Wash, then lightly sand to remove the powder layer, wipe clean, and only then apply primer and UV-rated topcoat.
Is a cover enough to stop rust, or can it make things worse?
A cover can help, but only if it keeps water out without trapping moisture. Avoid non-breathable covers, and prevent pooling water on top. If you live in a humid area, consider storing in a garage or using a breathable cover and checking it periodically.
How often should I inspect and touch up my patio furniture to avoid a full repaint?
Check at least once per season, after winter and after heavy rain periods. Touch up chips and bare spots as soon as you notice them, doing clean, sand lightly with 320-grit, prime, then recoat, so rust never gets time to expand under the coating.
What’s the safest way to handle joints, hollow tube ends, and seams during rust protection?
Treat them as high-risk zones. After cleaning and prepping, look for places water can enter and hold, then consider sealing tube ends with rubber caps or suitable sealant if rust keeps returning there. Ensure the interior is dry before you coat, otherwise the problem restarts from inside.