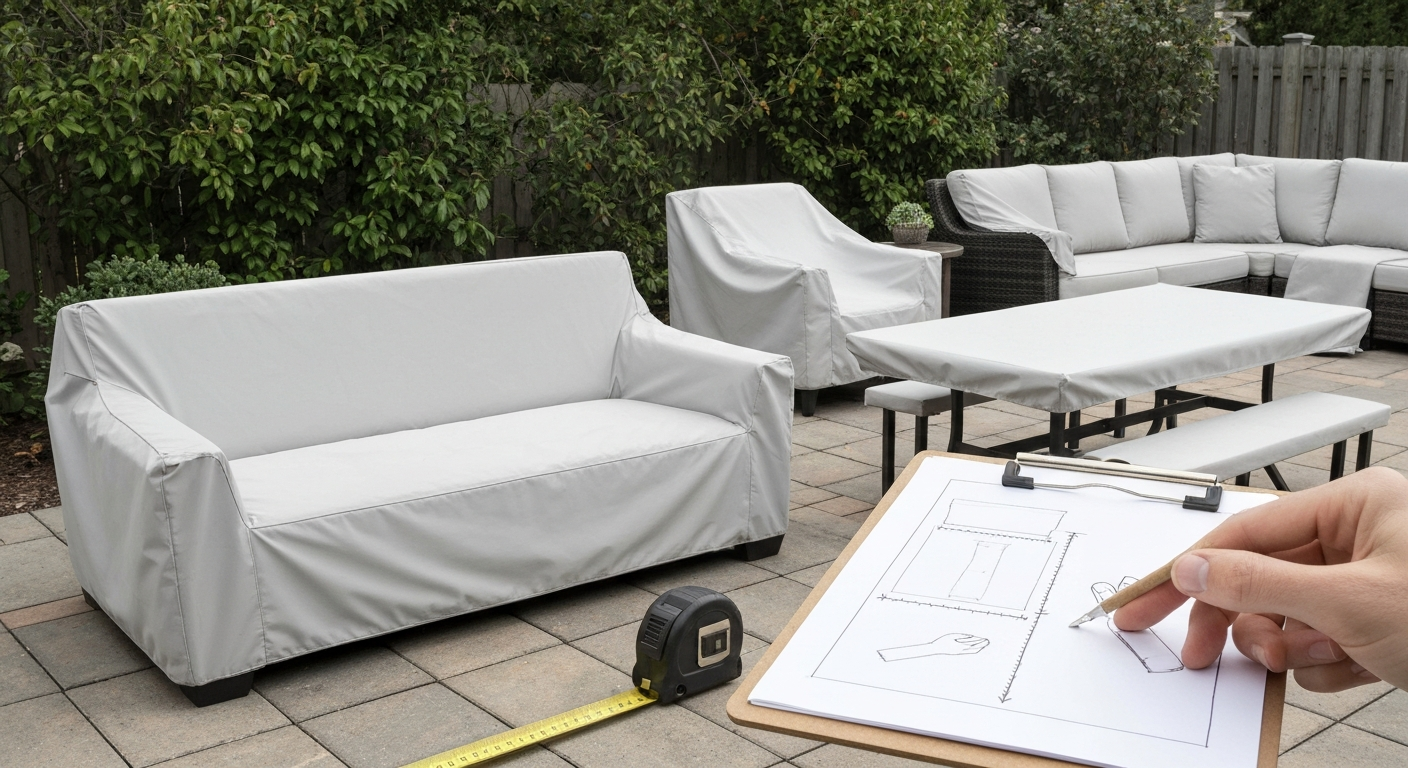
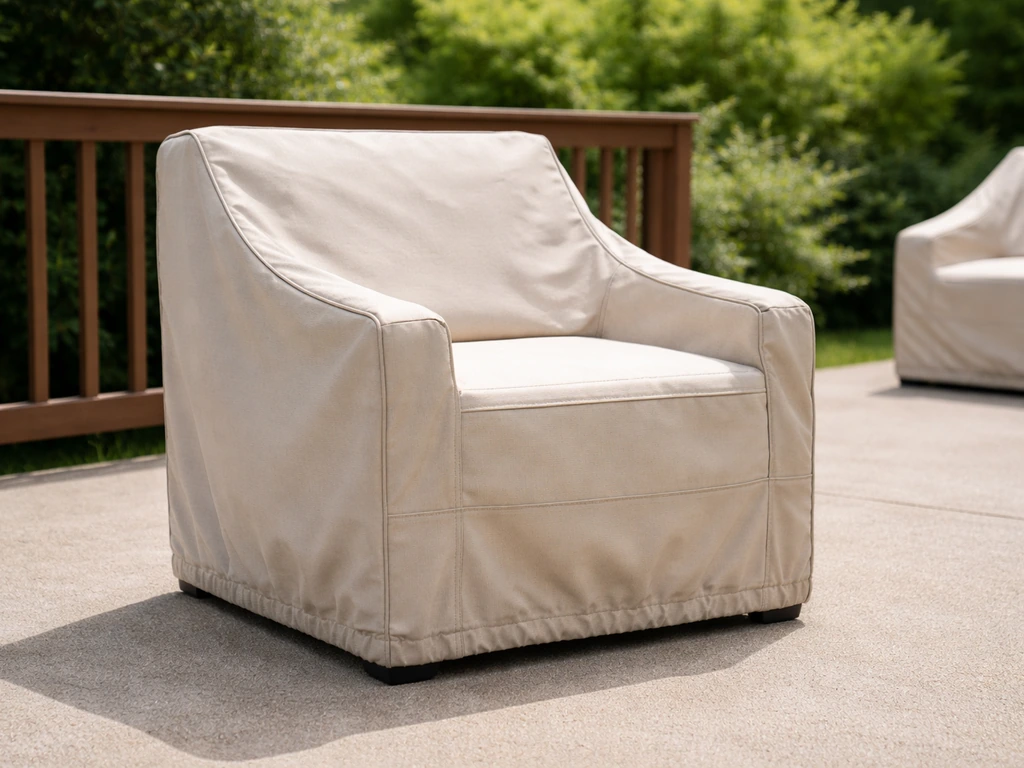
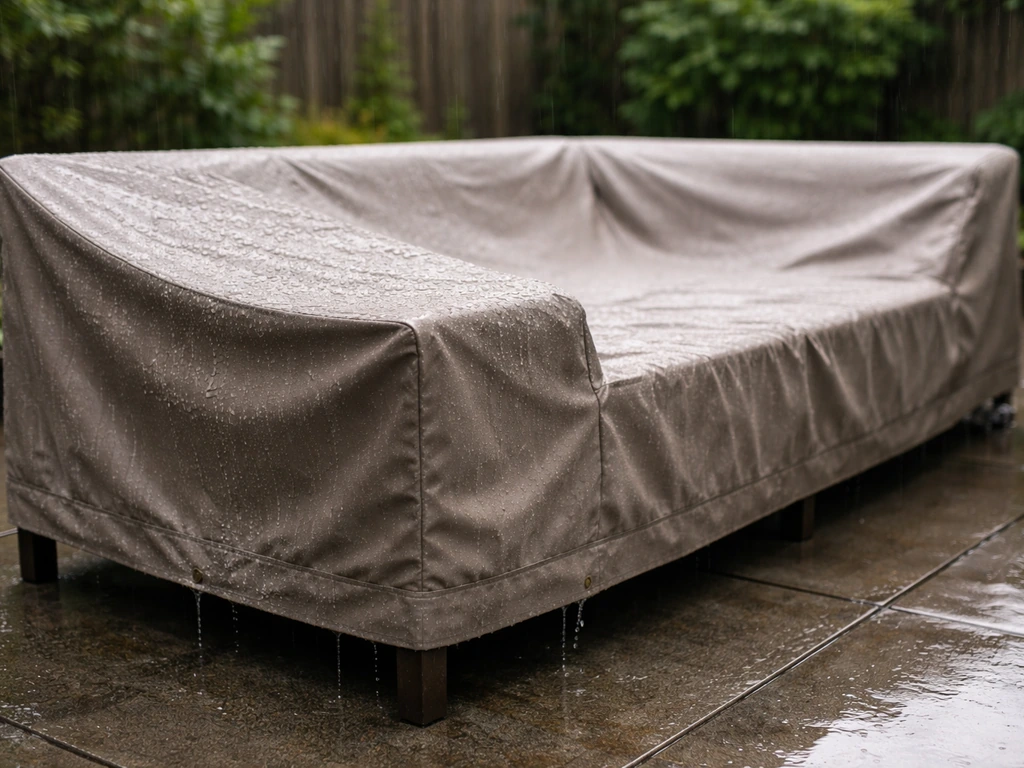
You can make your own patio furniture covers at home using outdoor-rated fabric, basic sewing tools (or no-sew alternatives), and a tape measure. A DIY cover for a single chair costs roughly $15 to $40 in materials and takes two to four hours. A full dining set cover runs $50 to $120 and a weekend of work. The payoff is a cover that actually fits your furniture, uses fabric you chose, and lasts as long as a store-bought option when you use the right materials.
How to Make Your Own Patio Furniture Covers: Patterns & Finish

Maren Grady
4 Aug 2026
Make or buy? Decide before you spend a cent
Before you cut a single piece of fabric, it is worth being honest about whether making your own covers actually makes sense for your situation. If you prefer a ready-made option, see our guide on how to buy patio furniture covers for tips on sizing, materials, and where to shop. For odd-shaped pieces, oversized sectionals, or furniture with unusual proportions, DIY almost always wins because off-the-shelf covers simply will not fit properly and will flap, collect water, or blow away in the wind. But if you have a standard rectangular dining table or a basic four-leg chair in a common size, a bought cover might be cheaper and faster when you factor in your time.
Buy vs. make: a quick checklist
| Factor | Buying a Cover | Making a Cover |
|---|---|---|
| Cost (single chair) | $20–$60 retail | $15–$40 in materials |
| Cost (dining set) | $60–$180 retail | $50–$120 in materials |
| Time investment | 15 minutes to order/pick up | 2–8 hours per project |
| Skill needed | None | Basic measuring + sewing or no-sew methods |
| Custom fit | Generic sizing only | Exact fit to your piece |
| Fabric choice | Limited (usually polyester) | Full range of outdoor fabrics |
| Durability | Varies widely by brand | High if correct fabric and thread used |
| Odd-shaped furniture | Usually a poor fit | Perfect fit possible |
| Immediate need | Fast if in stock | Requires lead time for materials |
My honest take: if your furniture is a standard shape and you need something this weekend, buying is fine. If your furniture is non-standard, you want a specific fabric or color, or you have a few hours to spare, making your own covers will serve you far better in the long run. Budget-wise, the savings are real but modest for a single piece. Where DIY really pays off is when you are covering an entire set, because buying custom-fit covers for four chairs and a table can cost $200 or more, while making them yourself usually lands under $100.
Materials and tools shopping list
Print this list before heading to the fabric store or ordering online. Everything here is available at major fabric retailers, hardware stores, or online suppliers. Quantities depend on your furniture size, so measure first (see the measurement section below) before buying fabric.
Fabric
- Outdoor upholstery fabric (solution-dyed acrylic, olefin, or PVC-coated polyester) — quantity based on measurements plus 20% overage
- Waxed or waterproof canvas (for budget no-sew projects)
- Ripstop nylon or polyester tarp material (no-sew option)
Thread and needles
- Bonded UV-resistant polyester thread (size Tex 70 or Tex 90 for most covers)
- GORE TENARA ePTFE thread (premium option for maximum UV and rot resistance)
- Heavy-duty sewing machine needles: size 18 to 22 for canvas and coated fabrics
- Leather or wedge-point needles for PVC-coated or vinyl-type fabrics
Hardware and fastenings
- Grommet kit with #2 or #4 brass or stainless grommets (avoid plain steel — it rusts)
- Shock cord (bungee cord) or 1/4-inch nylon drawcord
- 1-inch nylon or polypropylene webbing straps
- Plastic side-release buckles or metal cam buckles
- Sew-on or adhesive-backed hook-and-loop (Velcro) tape, 1-inch width
- Snap fasteners and snap pliers (or a snap press if you have one)
- 1/4-inch elastic (for elastic-hem channels)
Sewing tools
- Heavy-duty sewing machine with a walking foot (walking foot is important — it feeds thick layers evenly)
- Sharp fabric scissors or a rotary cutter and self-healing cutting mat
- Tailor's chalk or a fabric marking pen
- Metal ruler and long yardstick
- Tape measure (flexible)
- Binder clips or fabric clips (standard pins often cannot penetrate heavy outdoor fabric)
No-sew tools
- Iron-on outdoor hem tape (look for waterproof-rated hem tape, not standard fusible web)
- Fabric glue rated for outdoor/waterproof use
- Grommet setting tool (hand press or hammer-and-die set)
- Bungee cords or cam straps for securing tarp-style covers
Waterproofing and finishing
- Seam sealant (Gear Aid Seam Grip WP or equivalent)
- DWR spray reproofer (3M Scotchgard Outdoor Water Shield or similar — use outdoors with ventilation)
- Seam tape (iron-on or peel-and-stick, rated for outdoor fabrics)
Choosing the right fabric
Fabric choice is the single decision that most determines how long your covers last. I learned this the hard way after making my first set of covers from a cheap non-rated polyester and finding them sun-bleached and brittle within one season. Here is what you actually need to know about the main options.
Solution-dyed acrylic (Sunbrella and similar)
This is the gold standard for outdoor fabric. Solution-dyed acrylic means the color is baked into the fiber during manufacturing, not printed on top, so it does not fade the way surface-dyed fabrics do. Sunbrella Horizon, for example, is a technical-grade version of this fabric weighing about 19.8 oz per square yard, rated 4+ for colorfastness under the SAE J2527 accelerated weathering standard, and inherently resistant to mildew (the fiber itself does not support mold growth). The Sunbrella® Horizon Technical Data Sheet (Trivantage copy) lists a nominal weight of about 19.8 oz/yd² (ASTM D3776), reports many colors as 4+ for SAE J2527 colorfastness, and includes the manufacturer's care and cleaning guidance (mildew resistance and recommended cleaning solutions). It is breathable, so moisture does not get trapped between the cover and your furniture, which matters for preventing mildew on cushions stored underneath. The main downside is cost: expect $20 to $35 per yard at retail. It is worth it for covers on expensive furniture, but budget shoppers can look for Sunbrella remnants or house-brand solution-dyed acrylics.
PVC-coated polyester (vinyl)
PVC-coated polyester is fully waterproof and extremely durable. Heavy grades run from about 280 to over 1,000 grams per square meter depending on the coating weight, and the material is stiff, tear-resistant, and easy to wipe clean. The trade-off is that it does not breathe at all, which means moisture and condensation can get trapped under the cover and promote mildew on your furniture. For this reason I recommend it for covers in rainy climates when you will remove the cover to air out furniture regularly, or when you add ventilation grommets at the top corners. It also requires special needles and a Teflon presser foot when sewing, because the coating can stick to a standard metal foot.
Olefin (solution-dyed polypropylene)
Olefin is a lighter-weight option, typically around 260 grams per square meter (roughly 7 to 9 oz per square yard), that is bleach-cleanable, solution-dyed for UV stability, and often rated UPF 50+. It is more affordable than solution-dyed acrylic and works well for casual covers on furniture that is not exposed to extreme weather. It is not inherently waterproof but handles light rain well and dries quickly.
Waxed or waterproof canvas
Standard cotton duck canvas (10 to 12 oz per square yard is the common outdoor utility weight) is not waterproof on its own. Vendor product pages for RHINOTUFF™ Tent Canvas / Waterproof Canvas (Big Duck Canvas) note that untreated cotton duck is commonly sold in weights such as 12 oz and that waxed or factory‑treated 'waterproof duck' variants are offered for improved water resistance. Waxed or factory-treated waterproof canvas is, and it is a great budget-friendly, environmentally friendlier option. It sews easily, can be re-waxed after washing, and develops a nice patina over time. The downside is weight: it is heavier than synthetics and can mildew if stored damp.
Quick fabric comparison
| Fabric | Waterproof? | Breathable? | UV Resistant? | Approx. Cost/Yard | Best For |
|---|---|---|---|---|---|
| Solution-dyed acrylic (Sunbrella) | Water-resistant (not fully waterproof) | Yes | Excellent | $20–$35 | All-purpose, premium covers |
| PVC-coated polyester | Fully waterproof | No | Good | $10–$20 | Rainy climates, heavy use |
| Olefin | Water-resistant | Yes | Good | $8–$15 | Light-duty, budget builds |
| Waxed/waterproof canvas | Water-resistant to waterproof | Somewhat | Moderate | $8–$18 | Natural-look, re-waxable covers |
| Ripstop nylon/tarp | Waterproof (with seam sealing) | No | Moderate | $5–$12 | No-sew, quick covers |
Hardware and fastenings: keeping covers on in the wind
A cover that blows off in the first storm is useless. Here is what actually works, and what each fastening option is best suited for.
Grommets
Grommets are reinforced eyelets set into the fabric that give you a strong, tidy anchor point for cords, straps, or bungees. Use #2 (3/8-inch inner diameter) or #4 (1/2-inch) brass or stainless steel grommets. Avoid plain steel, it will rust and stain your fabric within one season. Set grommets at the bottom hem corners and every 12 to 18 inches along the hem on large covers. A hand grommet setter costs about $10 to $20 and is a worthwhile addition to your toolbox.
Drawcords and elastic hems
A drawcord channel is a folded hem with a cord threaded through it so you can cinch the cover tight under the furniture. Use 1/4-inch nylon cord and set the channel at least 1 inch wide so the cord moves freely. For chairs and smaller pieces, a 1/4-inch elastic hem is even easier: sew a channel and thread elastic through it so the cover stretches on and grips the furniture legs automatically. Both methods are much more secure than covers with no fastening at all.
Straps and buckles
For large covers (dining tables, sofas), sew 1-inch nylon webbing straps under the hem so they can wrap under the furniture and buckle together. Plastic side-release buckles work fine for most covers. If you live somewhere with serious wind, upgrade to metal cam buckles, which hold tighter under load.
Hook-and-loop (Velcro) and snaps
Velcro works well for flaps that close over armrests or along a central seam. Use outdoor-rated sew-on Velcro when possible; the adhesive-backed version tends to fail in heat and humidity. Plastic snaps are a clean, professional-looking option for chair covers and cushion covers, and they add almost no bulk. A snap pliers set costs $10 to $20 and makes installing snaps straightforward.
How to measure your furniture and draft a pattern
Measuring is where most DIYers rush and then regret it. The rule I follow is: measure twice, cut once, and then measure again before cutting. Always measure the widest, tallest, and deepest points of your furniture, not an average, covers need to accommodate the biggest dimension.
The six measurements you need for any piece
- Height (H): from the ground to the highest point (usually the top of the back)
- Width (W): across the widest point (often the armrests)
- Depth (D): front to back at the deepest point (often the armrests or seat depth)
- Drop length: how far down you want the cover to hang below the seat — usually 4 to 8 inches, enough to protect but not so long it drags
- Leg clearance: height from ground to underside of seat frame, relevant if you want the cover to tuck under
- Cushion thickness: if covering cushions in place, add this to your height
Seam allowances and ease
Add a 1-inch seam allowance to every sewn edge. For covers that need to slip on and off easily, add 1 to 2 inches of ease (extra space) to the width and depth measurements. For box-style covers with a top panel and side panels, add the depth measurement to each side of the top panel to create the drop. A hem allowance of 1.5 to 2 inches at the bottom gives you enough fabric to fold and stitch a clean finish or insert a drawcord channel.
Measurement templates for common furniture
Use these templates as starting points. Every piece of furniture is different, so always verify against your actual measurements before cutting.
| Furniture Type | Key Measurements to Take | Rule-of-Thumb Allowances | Typical Fabric Needed |
|---|---|---|---|
| Single patio chair | H, W, D, drop length | +2 in ease on W and D; +1 in seam allowance all edges; +2 in hem | 2–3 yards |
| Loveseat / 2-seat sofa | H, W, D, drop length | +3 in ease on W; +2 in ease on D; +1 in seams; +2 in hem | 4–6 yards |
| 3-seat sofa | H, W, D, drop length | +4 in ease on W; +2 in ease on D; +1 in seams; +2 in hem | 6–8 yards |
| Rectangular dining table | H (table height), W, L, drop length | +2 in ease on W and L; +1 in seams; +3 in hem per side | 4–7 yards |
| Round dining table | Diameter (D), height (H), drop length | +2 in ease on diameter; hem allowance = drop + 2 in | 3–5 yards |
| Coffee table | H, W, L, drop length | +1 in ease on W and L; +1 in seams; +2 in hem | 2–3 yards |
| Box cushion (seat or back) | L, W, thickness (T) | +1 in seam allowance all edges; boxing strip = T + 2 in seam allowance | 1–2 yards per cushion |
To draft a pattern from these measurements, use kraft paper, old newspaper, or inexpensive interfacing as your template material. Draw and cut your panels to the calculated dimensions (including all allowances), then hold the paper pieces up to the furniture to check fit before touching your good fabric. Adjust the paper template until everything looks right, then trace it onto your fabric.
Step-by-step sewn cover construction
The general process below applies to any sewn cover. After this I walk through the specifics for a single chair, a loveseat, a dining table, and a box cushion slipcover.
General construction steps
- Pre-wash fabric if it is canvas or untreated woven material — skip this for solution-dyed acrylics and PVC-coated fabrics
- Lay fabric flat on a large clean surface (the floor works fine) and transfer your pattern pieces using chalk or a marking pen
- Cut panels with sharp scissors or a rotary cutter — don't rush this step; ragged cuts lead to uneven seams
- Clip or pin panels together with right sides facing each other, matching edges exactly
- Set your machine: bonded polyester thread in Tex 70 or Tex 90, needle size 18 for medium-weight fabrics or size 20 to 22 for heavy canvas and vinyl
- Stitch at 1-inch seam allowance using a straight stitch at 8 to 10 stitches per inch; backstitch 1/2 inch at the start and end of every seam
- For PVC-coated or vinyl fabrics, use a Teflon presser foot and do not use pins (they leave permanent holes) — use binder clips instead
- Sew corners by stopping with the needle down, lifting the presser foot, pivoting the fabric 90 degrees, and continuing
- Clip the seam allowance at curved or corner areas to reduce bunching
- Press seams flat with a warm iron if using canvas or acrylic fabric — skip ironing on PVC-coated fabrics
- Finish raw edges with a zigzag stitch, serger, or fold-and-stitch method to prevent fraying
- Sew the bottom hem: fold twice (1/2 inch then 1 inch) and stitch, or fold once to 2 inches and stitch with a drawcord channel
- Install grommets, snaps, or Velcro at marked positions
- Apply seam sealant to all exterior seams and allow to cure per product instructions
Single patio chair cover: step-by-step build
Cut three panels: a top panel (width x depth of chair top, plus seam allowances), a front/back panel (width x combined height plus drop, cut as one long piece if fabric allows, or as two separate pieces), and a left/right side panel (depth x height plus drop, cut as two matching pieces). Sew the front/back panel to the left side panel, then the right side panel, forming a box shape open at the bottom. Sew the top panel to the top of the box, pivoting carefully at corners. Hem the bottom opening with a 1.5-inch fold and install a drawcord channel or elastic hem. Add two or four grommets at the bottom corners and thread with shock cord or tie cords. Estimated time: 2 to 3 hours.
Loveseat or two-seat sofa cover: step-by-step build
The construction is identical to the chair cover but scaled up. Because loveseats are wider, you will likely need to seam two pieces of fabric together to create a wide enough top panel. Place that seam down the center of the top panel and seal it well. Use 1-inch webbing straps sewn at each corner of the bottom hem, with buckles, to secure the cover under the sofa frame. On a loveseat, also add a strap underneath the front apron midway along the width to prevent billowing. Estimated time: 3 to 5 hours.
Rectangular dining table cover: step-by-step build
A rectangular table cover has one large top panel and four side drop panels. Cut the top panel to the table's length and width plus seam allowances. Cut four side panels: two at (table length + 2 seam allowances) x (drop height + hem allowance), and two at (table width + 2 seam allowances) x (drop height + hem allowance). Sew the long side panels to the long edges of the top panel first, then sew the short side panels, and finally sew the corner seams to close the box shape. Hem the bottom with a drawcord channel and install corner grommets. For a table that seats 6 or more, add a pair of strap-and-buckle closures at the midpoint of each long side to fight wind billowing. Estimated time: 4 to 6 hours.
Box cushion slipcover: step-by-step build
A box cushion cover has three parts: a top panel, a bottom panel (usually with a zipper or velcro closure), and a boxing strip that wraps around all four sides. Cut the top and bottom panels to cushion length x width plus 1-inch seam allowance on all sides. Cut the boxing strip to cushion thickness plus 2 inches (for seam allowances), and long enough to go around all four sides (perimeter of the cushion plus a couple of inches overlap). Sew the boxing strip to the top panel by pinning and stitching around the perimeter, pivoting at corners. Sew the bottom panel to the remaining edge of the boxing strip, leaving one side open for a zipper or velcro closure. Install zipper or sew on hook-and-loop tape. This is the most versatile project here because the same technique works for a single chair pad or a large sectional seat cushion. If you want to go deeper on cushion slipcovers, slipcover construction with fitted fabric is its own dedicated technique worth exploring.
No-sew alternatives that actually hold up
Not everyone has a sewing machine capable of handling heavy outdoor fabric, and that is completely fine. No-sew covers are a legitimate option, especially for seasonal use. Here is what works, and what to skip.
Tarp-style covers with hems and grommets
- Buy a heavy-duty poly tarp or PVC-coated fabric cut to your measured dimensions (add 6 to 8 inches on all sides for the drop)
- Fold and press the edges to form a 1.5-inch hem, then bond with outdoor-rated waterproof hem tape — iron-on types require a dry iron at medium heat; follow the tape manufacturer's temperature directions
- Set grommets every 12 to 18 inches along the hemmed edges using a grommet kit
- Thread shock cord through corner grommets and loop under the furniture legs to secure
- For a cleaner look, add cam buckle straps under the furniture instead of cord
Adhesive and tape hem systems
Waterproof hem tape (not standard fusible web, which is not waterproof) bonds fabric edges without sewing and holds surprisingly well on canvas and coated fabrics. The key is surface prep: fabric must be clean and completely dry before applying tape. For polyester and nylon fabrics, use peel-and-stick seam tape rated for outdoor use. For canvas, iron-on tape works well. These bonds are not as strong as sewn seams and will eventually fail at stress points, so reinforce corners with an extra layer of tape or a dab of outdoor fabric glue.
Velcro and bungee cord attachment systems
Adhesive-backed outdoor Velcro strips can be applied to the underside of a tarp cover and to the furniture frame itself to hold the cover in place. This works best on metal or plastic furniture with flat surfaces. Bungee cords through grommets are the simplest wind-security method and easy to remove when you need to use the furniture. For a tidier finish, sew-on Velcro (bonded with adhesive as a no-sew method) is more durable than purely adhesive-backed strips in heat and humidity.
Waterproofing and seam sealing
Even if you choose a waterproof fabric, sewn seams are the weak point. Every needle hole is a potential entry point for water, and stitching degrades with UV exposure over time. Sealing your seams is not optional if you want covers that actually keep moisture out. For detailed, step-by-step instructions on how to make waterproof patio furniture covers, see our guide on how to make waterproof patio furniture covers.
Seam sealant (the most important step)
Gear Aid Seam Grip WP is the product I recommend for most DIY covers. It is a moisture-cured polyurethane seam sealant that bonds to coated and uncoated fabrics, fills needle holes, and remains flexible after curing. Apply it to the inside of seams after sewing, spreading a thin bead along the entire stitch line with the applicator brush or your finger (wear gloves). It needs 8 to 12 hours to tack and 24 to 72 hours for full cure depending on humidity. Do not rush this. Apply it in a ventilated space.
Iron-on seam tape
For a faster option on medium-weight fabrics, iron-on seam tape applied over stitched seams bonds the seam allowances together and adds a waterproof layer. This works well on canvas and acrylic fabrics. It is less effective on PVC-coated fabrics (the coating repels the tape adhesive) and on very lightweight synthetics.
DWR reproofer sprays
DWR stands for durable water repellent, which is a topical treatment that causes water to bead on the fabric surface rather than soaking in. Products like 3M Scotchgard Outdoor Water Shield are repellents, not waterproofing treatments, they won't turn a non-waterproof fabric into a waterproof one, but they do dramatically improve water resistance on water-resistant fabrics. Always apply in a well-ventilated outdoor area, follow the SDS safety guidance (these are aerosol products with VOC content), and reapply after cleaning or whenever water stops beading on the fabric. If you are dyeing your covers, test the reproofer on a small dyed patch first, as some treatments can affect color or dye adhesion.
Making slipcovers and safe dyeing for outdoor fabric
A slipcover is a removable fabric cover designed to fit closely over furniture rather than drape over it like a protective tarp cover. For detailed, step-by-step instructions on how to make slipcovers for patio furniture, see the dedicated guide section. For cushions and chair seats, slipcovers give a clean, intentional look. The box cushion method described above is the most common approach. For chair backs and seat frames, a fitted slipcover uses darts or tucks at the corners to follow the furniture's shape. Cut panels generously, pin and fit them directly on the furniture, then sew. The fitting step is where you spend most of your time, and it is worth it.
If you want to change the color of existing outdoor fabric covers or a plain base fabric, dyeing is possible but comes with important caveats. Solution-dyed fabrics like Sunbrella cannot be re-dyed effectively because the color is in the fiber itself and new dye has nothing to bond to. Surface-dyed or undyed fabrics can be dyed using fiber-reactive dyes (for cotton/canvas) or acid dyes (for nylon). Polyester requires disperse dye and high heat, which is difficult to achieve reliably at home. Before dyeing any outdoor fabric, always pretest on a scrap: check that the dye bonds evenly, check colorfastness by rinsing thoroughly, and re-test your water-repellent coating because many dyeing processes (especially heat and alkaline baths) will degrade DWR treatments. You will need to re-apply a reproofer spray after dyeing. For a deeper look at color options and full process guidance, exploring dedicated guidance on how to dye patio furniture covers is worth your time.
Fastening and wind security
Wind is the enemy of patio covers. An unsecured cover does more damage than no cover at all, a flapping, heavy wet cover can scratch or dent furniture, and a cover that blows across the yard is useless. Here is a layered approach that works at different wind levels.
Grommet placement strategy
Install grommets at every corner of the bottom hem as a baseline. For covers on furniture taller than 24 inches, also install grommets at the midpoint of each long side. This gives you eight attachment points on a rectangular table cover, which is enough for most conditions. Thread shock cord through the corner grommets and loop under leg crossbars or tie together beneath the furniture.
Vents to prevent ballooning
One trick that makes a huge difference: install two or four air vents near the top of large covers. You can buy purpose-made fabric cover vents or simply install a pair of large grommets covered with a small flap of waterproof fabric. These allow air pressure to equalize so wind does not balloon the cover upward and tear it off. Without vents, a strong gust creates lift under a sealed cover and the whole thing acts like a sail.
Weighted hems and anti-flap techniques
Sewing a narrow channel at the hem and threading a length of chain through it adds weight that resists lifting. This is especially useful for tarp-style no-sew covers. Alternatively, sew pockets at the hem corners and fill them with small smooth stones or gravel (nothing sharp that could tear the fabric from inside). For dining chairs grouped together, link their covers with a short strap and buckle between adjacent chairs so they resist the wind as a group rather than individually.
Finishing methods that make your covers last
Good finishing is what separates covers that last one season from covers that last five. None of these steps are difficult, but each one matters.
- Seam tape over all exterior seams: apply after seam sealant is cured for a belt-and-suspenders waterproof finish
- Grommets at all corners and high-stress hem points: prevents tearing at drawcord and strap attachment points
- Drawcord channels: fold and stitch a 1.5-inch channel at the bottom hem, thread with nylon cord, and tie a stopper knot at each end so the cord doesn't pull through
- Elastic hems on smaller covers (chairs, cushions): easier to put on and take off than drawcords, and grippy enough for light wind
- Reinforced corners: cut small triangles of extra fabric and sew them inside each corner on the wrong side of the fabric before assembly — this prevents the corner seams from tearing out under stress
- Backtack all stitch lines at start and end points, and add an extra pass of stitching (double-stitch) on any seam that will take direct strain from straps or cords
Cost and time estimates
| Project | Materials Cost (budget) | Materials Cost (premium) | Time Estimate | Difficulty |
|---|---|---|---|---|
| Single patio chair cover (sewn) | $15–$25 | $35–$55 | 2–3 hours | Beginner |
| Single patio chair cover (no-sew) | $10–$20 | $25–$40 | 1–2 hours | Beginner |
| Loveseat/2-seat sofa cover | $30–$50 | $70–$110 | 3–5 hours | Beginner-intermediate |
| Rectangular dining table cover | $35–$60 | $80–$130 | 4–6 hours | Intermediate |
| Full dining set (4 chairs + table) | $80–$130 | $180–$280 | 10–16 hours | Intermediate |
| Box cushion slipcover (per cushion) | $10–$20 | $25–$45 | 1.5–2.5 hours | Beginner-intermediate |
| Coffee table cover | $15–$25 | $30–$55 | 2–3 hours | Beginner |
A few budget tips from personal experience: buy fabric remnants when you can, most fabric stores sell end-of-bolt pieces at 30 to 50 percent off and a chair cover only needs 2 to 3 yards anyway. For grommets, kits sold at hardware stores (rather than fabric stores) are often cheaper for the same quality. Thread is one place worth spending a little more: bonded UV-resistant polyester thread costs a few dollars more than standard thread but lasts years longer outdoors.
Maintenance, care, and troubleshooting
Cleaning your covers
Solution-dyed acrylic fabrics like Sunbrella can be cleaned with a mild soap and water solution, scrubbed gently with a soft brush, and rinsed thoroughly. For stubborn stains, the manufacturer recommends a diluted bleach solution (up to 1 cup bleach per gallon of water) left on the fabric for several minutes before rinsing. Always rinse completely because residual cleaning agents break down fabric over time. PVC-coated covers can simply be wiped down with a damp cloth and mild cleaner. Canvas covers should be brushed off dry before spot-cleaning to avoid working dirt into the weave.
Reproofing
DWR treatments wear off with UV exposure, washing, and physical abrasion. You will know it is time to reproof when water no longer beads on the surface and instead soaks into the top layer of fabric. Clean the cover first, let it dry completely, then apply a DWR reproofer spray evenly from about 6 inches away. Let it dry, then heat-activate with a warm iron (on canvas or acrylic) or a heat gun (carefully, on coated fabrics) to improve adhesion. Reapply every season for best results.
Patching and repairs
Small tears and pin holes can be repaired with a dab of Seam Grip WP or a patch of matching fabric bonded with waterproof fabric glue. For larger tears, cut a patch 2 inches wider than the damage on all sides, round the corners (round patches are less likely to peel at the edges than square ones), and adhere with fabric glue. Let cure fully before re-installing the cover. For sewn covers, re-stitching a seam that has failed is faster and stronger than gluing, set the machine back up, overlap the old stitch line slightly, and add a second parallel row of stitches 1/4 inch away for reinforcement.
Mildew prevention
Mildew is almost always caused by storing covers while they are wet or by covering furniture with cushions that are still damp. The fix is simple: air everything out before covering. If mildew spots do appear, clean with the diluted bleach solution mentioned above. Mildew does not degrade solution-dyed acrylic fiber, but it will stain and weaken canvas and it absolutely will degrade standard polyester thread, which is another reason to use bonded UV-resistant or PTFE thread on outdoor projects.
Common problems and fixes
| Problem | Likely Cause | Fix |
|---|---|---|
| Cover blows off in wind | No or insufficient fastening | Add grommets and shock cord; add strap-and-buckle under frame |
| Water pools on cover surface | DWR depleted or no waterproofing on fabric | Clean cover and apply DWR reproofer spray |
| Seams leaking water | Unsealed needle holes | Apply Seam Grip WP or seam tape to all exterior seams |
| Mildew spots appearing | Stored while wet; inadequate airflow | Clean with diluted bleach; add ventilation grommets; dry before storing |
| Thread fraying or breaking | Standard thread, not UV-stabilized | Re-stitch with bonded polyester or PTFE thread |
| Cover too loose / flapping | Excess ease or no hem fastening | Add elastic hem, drawcord, or adjust fit with a seam |
| Grommets pulling out | Grommets set in unsupported fabric | Add a fabric reinforcing patch behind the grommet location |
| Fabric cracking or stiffening | PVC-coated fabric degraded by UV | Apply vinyl conditioner; replace fabric if severely cracked |
Safety, materials handling, and sustainability
A few safety notes worth stating clearly. DWR sprays like Scotchgard contain VOCs and should always be used outdoors or in a very well-ventilated area. Never spray them indoors. Read the SDS (Safety Data Sheet) for any chemical product you are using, including seam sealants and fabric adhesives, especially if you are working in an enclosed space. Seam Grip WP is moisture-cured and releases isocyanate compounds during curing, which are respiratory irritants at high concentrations, use it outdoors or with a respirator rated for organic vapors.
On the sustainability side: choosing solution-dyed fabrics means less dye runoff into wastewater compared to surface-dyeing processes. When your covers eventually wear out, canvas covers can be composted or repurposed. Synthetic covers (PVC, polyester) should go to a textile recycling facility rather than landfill where possible. Buying quality materials the first time, and repairing rather than replacing covers when problems arise, is the most sustainable choice of all. If you are working with dyes, dispose of dye baths according to your local regulations, never dump concentrated dye down storm drains, and wear gloves and eye protection throughout.
Your action plan: what to do right now
Here is the sequence to follow so you can move from reading this guide to having finished covers as efficiently as possible.
- Measure all your furniture using the six-measurement method above and record H, W, D, drop length, leg clearance, and cushion thickness for each piece
- Use the measurement templates table to calculate panel dimensions and total fabric yardage needed, adding 20% for cutting errors and remnants
- Decide on fabric: solution-dyed acrylic for best all-around performance, PVC-coated for maximum waterproofing, olefin or waxed canvas for budget builds
- Order or buy fabric, thread (bonded polyester Tex 70 or Tex 90), grommets, and your chosen fastening hardware
- Draft paper templates from your measurements and test-fit them against your furniture before cutting fabric
- Cut panels, assemble using the step-by-step build guides above for your specific furniture type, and finish seams
- Apply seam sealant to all exterior seams, allow to cure fully (24 to 72 hours), then apply DWR reproofer
- Install grommets, drawcords or elastic hems, and straps; test fit and adjust
- Label your covers (a small sewn-in tag with furniture type and date made helps enormously at the start of next season)
- Set a calendar reminder to inspect, clean, and reproof covers at the start and end of each outdoor season
If you find that a fully sewn project is more than you want to tackle right now, start with the no-sew tarp method for one piece to get comfortable with measuring and fastening, then graduate to a sewn chair cover. And if making your own covers ends up not being the right fit for your situation, the comparison table at the top of this guide has the honest breakdown to help you decide. The goal is furniture that is protected, covers that fit, and a project you can actually finish.
FAQ
What primary research and authoritative sources should I review to create an accurate DIY guide for waterproof, UV‑resistant patio furniture covers?
Start with manufacturer technical data sheets and care guides for major outdoor fabrics (Sunbrella, Serge Ferrari, GORE® TENARA®, marine vinyl suppliers) to get weight, construction, UV/colorfastness and cleaning specs. Review coated fabric and PVC datasheets for heavy‑duty covers. Consult textile testing standards (ISO 811 / EN 20811, AATCC 127 for hydrostatic head; AATCC TM22 / ISO 4920 for spray/water repellency; AATCC TM35 for rain tests). Include product SDS and application notes for topical DWRs (3M Scotchgard) and seam sealants (Gear Aid Seam Grip WP, 3M marine adhesives). Use specialist sewing/needle/thread guides (Sailrite) for machine/needle/thread pairings and Tenara/ePTFE thread info. Finally, consult commercial lab test service descriptions (Nelson Labs, SGS) to understand reporting and feasible DIY test substitutes.
Which fabric types and technical specifications should the guide cover, and what spec values matter?
Cover solution‑dyed acrylic (Sunbrella) and olefin (solution/spun‑dyed polypropylene) for upholstery; PVC/PVC‑coated polyester and laminated composites (Soltis/Serge Ferrari) for heavy duty covers; waxed/laminated cotton duck for a budget option. Key specs: fabric weight (oz/yd² or g/m²), hydrostatic head (mm H2O), DWR/spray test rating, UV/colorfastness (SAE J2527 or vendor data), tensile/tear strength, thickness, and recommended cleaning/care. Note welded vs sewn compatibility (laminates often require welding or specialized seams).
What lab tests and DIY verification methods should be recommended to validate waterproof and UV performance?
Specify standard lab tests: ISO 811 / EN 20811 and AATCC 127 for hydrostatic head (waterproof rating), AATCC TM22 / ISO 4920 for spray/water repellency, and accelerated UV/colorfastness tests (e.g., AATCC TM16 or SAE J2527 equivalents). For DIY checks, describe simple rain/spray simulations (consistent nozzle, measured flow) to observe pooling, drip-through and seam leakage, and timed sun‑exposure color checks with photo documentation. Recommend professional lab testing for final claims or product development; include how to submit samples and interpret cm/mm H2O and pass/fail thresholds (e.g., >1000 mm hydrostatic head for highly waterproof membranes).
What materials, tools, and hardware lists are essential to include for sewn and no‑sew builds?
Provide separate lists: Fabrics (solution‑dyed acrylic, olefin, coated polyester, laminated PVC, waxed duck), threads (bonded polyester, GORE® TENARA® ePTFE), seam tapes, seam sealants (Seam Grip WP), topical DWR (3M Outdoor Water Shield), grommets/rivets, webbing, drawcord, elastic, Velcro, buckles, and edge binding. Tools: heavy‑duty sewing machine or walking‑foot industrial machine, appropriate needles (#18–#22), scissors/rotary cutter, seam roller, grommet press, heat gun (for some seam tapes), measuring tape, tailor’s chalk, pattern paper, sewing clamps, awl, seam ripper. No‑sew: heavy adhesive/seam tape, adhesive‑backed hook/loop, cargo straps, and seam sealant as needed.
What measurement templates and pattern rules should I provide for chairs, sofas, tables and cushions?
Give basic pattern rules: measure maximum width, depth, height and add specification allowances—hem/drop (4–8 in depending on desired tuck), ease for corners (add 1–2 in per corner), seam allowance (0.5–1 in), and wind/security allowance for straps. Provide template rules: for single chair use three panels (top, front, skirt) with curved corner templates; for sofas scale up by seat count and include center/back seam; for tables create top circle/rectangle plus skirt with gussets at legs; for cushions make two panel + zipper strip or envelope overlap. Provide printable scale rules: map measurements to printable grid (e.g., 1 in = 1 grid square) and explain how to create full‑size patterns by tiling printer pages.
What step‑by‑step sewn and no‑sew build methods must be included so readers can act immediately?
Include concise printable step lists per piece: 1) Measure and create pattern; 2) Cut fabric with seam allowances; 3) Finish raw edges (serge, zigzag, binding); 4) Join panels using appropriate stitch length and thread (bonded polyester or Tenara) and needle; 5) Reinforce corners and high‑stress points with bartacks or patch backing; 6) Apply seam tape/sealant to interior seams (or external seam tape for coated fabrics); 7) Install fastening hardware (grommets, drawcord channel, Velcro or straps) and test fit. No‑sew: 1) Cut panels slightly oversized; 2) Bond seams with contact adhesive or adhesive seam tape per manufacturer's prep; 3) Use seam sealant over joints; 4) Add external straps/grommets and weatherproof with topical DWR. Provide printable step checklists and typical stitch settings (stitch length, needle size) for common fabric weights.