You can successfully dye most patio furniture covers, but the single biggest factor in whether it works is matching the dye type to the fabric. Cotton and canvas covers take fiber-reactive dyes like Procion MX beautifully in cold water. Polyester covers need disperse dyes and serious heat, around 250°F (120°C), or the color simply won't bond. Acrylic fabrics like Sunbrella are nearly impossible to re-dye at home and will disappoint you.
How to Dye Patio Furniture Covers: Step-by-Step DIY Guide

Maren Grady
12 May 2026
A Sunbrella reseller explains that Sunbrella performance fabrics are made of 100% solution-dyed acrylic, which helps explain why DIY home re-dye attempts typically fail for these acrylic fabrics Acrylic fabrics like Sunbrella are nearly impossible to re-dye at home.
Know your fabric first, buy the right dye second, and the rest of the process is very manageable. If you are still figuring out what to buy, focus on cover material and fit so you can get the results you want before dyeing or maintenance how to buy patio furniture covers.
Identify your cover material and pick the right dye
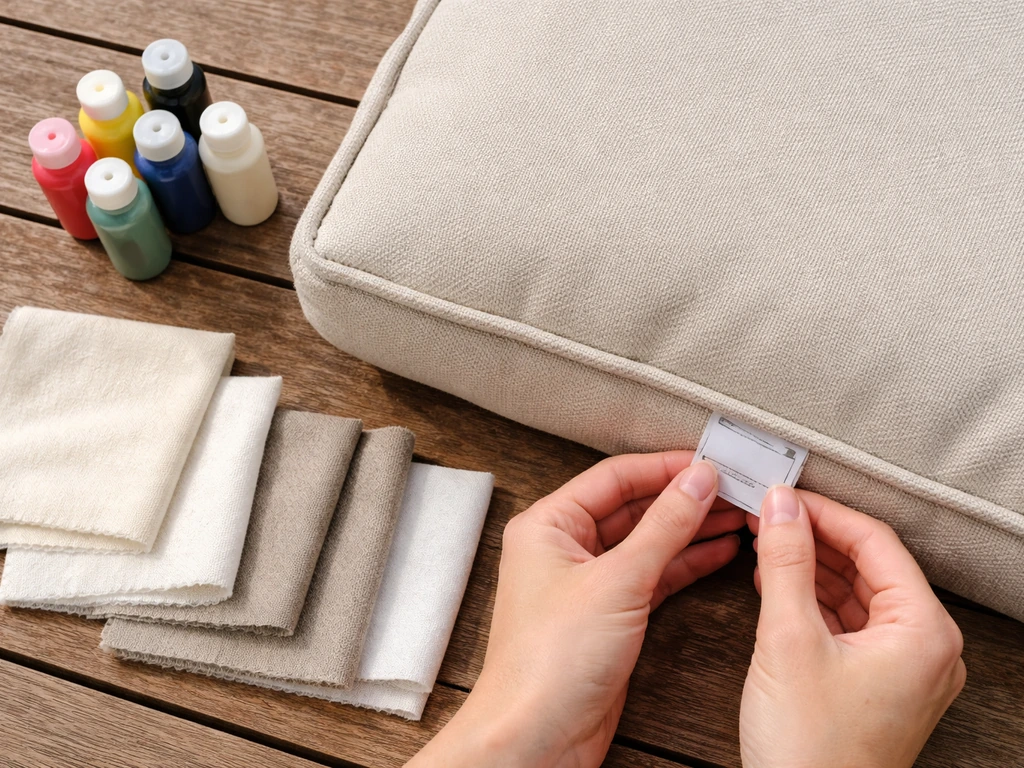
Before you spend a dime on dye, figure out what your cover is actually made of. Check the tag sewn into a seam or look up your furniture brand online. The most common patio cover materials are canvas or duck cloth (usually 100% cotton or a heavy cotton blend), polyester, acrylic (like Sunbrella or similar solution-dyed brands), olefin, and vinyl or coated fabrics. Each one needs a completely different approach.
| Cover Material | Dye Type to Use | Heat Required? | DIY Difficulty |
|---|---|---|---|
| Cotton / Duck Cloth / Canvas | Fiber-reactive (Procion MX) | No — cold water process | Easy |
| Cotton-Polyester Blend (under 50% poly) | Fiber-reactive (cotton portion dyes; poly stays lighter) | No — cold water | Moderate |
| 100% Polyester | Disperse dye only | Yes — ~250°F / 120°C | Hard |
| Acrylic (Sunbrella, solution-dyed) | Not recommended — dye won't bond | N/A | Not feasible |
| Olefin / Polypropylene | Not recommended | N/A | Not feasible |
| Vinyl / PVC-coated fabric | Fabric paint, not dye | No | Moderate (different process) |
The reason acrylics and olefins are off the table is that they are solution-dyed during manufacturing, meaning color is baked into the fiber itself before it is ever woven. There is no surface to chemically bond new dye to. Polyester is technically dyeable, but only with disperse dyes applied at temperatures that require a pressure cooker or a dedicated dye pot, most home stove setups can hold 212°F at best, and polyester really needs 250°F for even, vibrant results. Below that range you get uneven, washed-out color. For blended fabrics, fiber-reactive dye will grab the cotton portion and leave the polyester lighter, giving you a natural heathered look that can actually be beautiful if you expect it.
For most homeowners with canvas or cotton patio covers, Procion MX fiber-reactive dyes are the clear recommendation. They are widely available from Dharma Trading, Jacquard, and craft stores, cost around $5 to $10 per packet, and bond chemically to the fabric without any heat at all.
A Reddit commenter troubleshooting Procion MX dyeing on cotton says soda ash is the only fixative needed because it raises pH for bonding, and they do not use a separate fixative product for their process soda ash raises pH so Procion MX can bond to cotton. The color is genuinely permanent once fixed.
For polyester, iDye Poly or Jacquard Disperse Dyes are the ones to look for, but go in knowing the process requires careful temperature control.
Prep work: cleaning, mildew removal, repairs, and test swatches
Here is where most people skip steps and then wonder why their dye job looks blotchy. Any oil, sunscreen residue, mildew stain, water repellent finish, or fabric sizing sitting on the cover will block the dye from penetrating evenly. I learned this the hard way on my first canvas chair cover, had a clean-looking cover, dyed it, and ended up with random light patches right where I had been resting my arms all summer. Those invisible skin-oil deposits blocked the dye.
Step 1: Deal with mildew and stains first
If your cover has mildew, remove it before dyeing. A solution of 1 cup white vinegar per gallon of water works well for surface mildew on cotton. Let it soak for 15 to 20 minutes, then scrub gently with a soft brush. Rinse thoroughly. One important warning: avoid using bleach-based or chlorine spot treatments right before dyeing. Bleach residue will strip fiber-reactive dyes off the fabric almost immediately and can permanently damage the fibers. If you must use a stronger mildew treatment, do it, rinse extremely well, and give the cover a full wash cycle before dyeing. The Smithsonian's textile conservation guidance echoes this, random chemical spot treatments before dyeing can cause unpredictable damage to fabric and dyestuff.
Step 2: Prewash with Synthrapol or a degreasing detergent
Synthrapol is a specialty surfactant that textile dyers swear by, and for good reason. It strips out oils, waxes, starches, and factory sizings that cause uneven dye uptake, things that regular laundry detergent leaves behind. Prewashing with Synthrapol before dyeing is one of the highest-impact steps you can take for an even result. Use about 3 tablespoons of Synthrapol per 8 pounds of fabric in a hot wash. If you cannot get Synthrapol, a couple of good hot-water washes with a plain, dye-free, fragrance-free detergent is a reasonable substitute. Do not use fabric softener, ever, during any step of this process.
Step 3: Repair holes and damage before dyeing
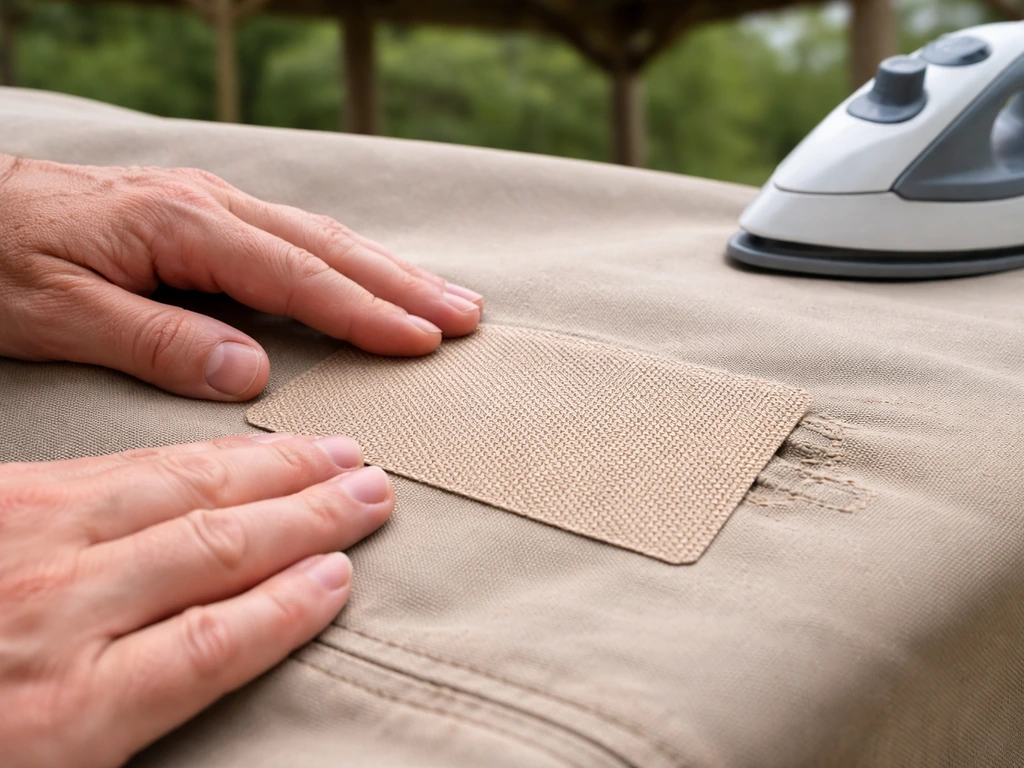
Dye will not hide holes or tears, it will actually make them more visible because the raw edges fray and wick color unevenly. Patch any holes with an iron-on canvas repair patch or hand-stitch tears closed before you dye. The patched area will show a slight color difference if the patch is a different fabric weight, but that is far less noticeable than a gaping hole with frayed, darker edges.
Step 4: Always do a test swatch

Cut a small piece of fabric from a hidden hem allowance or seam, or use a similar scrap of cotton fabric. Do your full dye process on that swatch first. This tells you the actual color result (which will often be darker than the dye packet photo), how well the fabric accepts the dye, and whether you need to adjust the dye concentration. Skipping the swatch and committing 3 hours to a full cover is a gamble I would not take twice.
Dyeing methods: bucket/soak, washing machine, and when heat matters
There are three main methods for dyeing patio covers at home. Which one you use depends on the size of your cover, the dye type, and what equipment you have available. All three work well when done correctly.
Method 1: Bucket or tub soaking (best for cotton, most control)
This is the method I recommend for most people dyeing canvas or cotton patio covers for the first time. You get the most control over the process and can monitor color development as you go. You need a large plastic bucket or storage tote (at least 5 gallons for a chair cover, more for a sofa or chaise cover), rubber gloves, a wooden dowel or old wooden spoon for stirring, and your dye supplies.
- Prewash your damp cover with Synthrapol as described above. Keep it damp — do not let it dry before dyeing.
- Prepare a soda ash presoak: dissolve 1 cup of soda ash (sodium carbonate, available at pool supply stores or dye suppliers) in 2.5 gallons of warm water. Submerge the damp cover and soak for 20 minutes. This alkaline soak primes the cotton fibers to bond with fiber-reactive dye.
- While the cover is soaking, dissolve your Procion MX dye in warm water — about 105°F works well. Start with 2 to 4 tablespoons of dye powder per pound of dry fabric for a medium-deep color. Dissolve the dye thoroughly before adding to your dye bath.
- In a separate large bucket, dissolve 1 cup of plain non-iodized salt per gallon of warm water. Add your dissolved dye to the salt water and stir well. The salt slows the dye uptake slightly, which promotes more even absorption.
- Remove the cover from the soda ash soak (do not rinse it) and place it into the dye bath. Keep it fully submerged and agitate it consistently for the first 10 to 15 minutes, then continue to turn and press it every few minutes.
- Let the cover dye for 50 to 60 minutes total, agitating regularly throughout.
- Remove the cover and rinse immediately in cold water — cold, not warm. Cold water rinses out soda ash without reactivating the dye reaction. Continue rinsing until the water runs fairly clear.
Method 2: Washing machine dyeing (easiest for large covers)
The washing machine method is faster and easier for large covers like sectional pieces or full chaise lounge covers. The trade-off is that you have less visual control and more dye waste. Important: use an older washing machine you do not mind staining, or run a hot empty cycle with bleach immediately after dyeing to clean the drum. Front-loaders can be tricky because you cannot add chemicals mid-cycle on most models, a top-loader with an agitator and a pause function is ideal.
- Prewash the cover in the machine with Synthrapol on a hot cycle. Leave it damp inside the drum.
- Dissolve double the normal dye quantity (washing machine dyeing requires more dye than bucket dyeing because of dilution in the larger water volume). Dissolve dye in 2 cups of hot water first, then add to the machine.
- Add 1 cup of non-iodized salt per pound of fabric dissolved in hot water. Add this to the drum.
- Set the machine to the longest hot-water cycle. Let it fill and agitate for about 10 minutes before adding the soda ash fixative.
- Dissolve 1/2 cup of soda ash per pound of fabric in 2 cups of hot water. Add this to the machine and let the cycle continue for at least 30 to 40 more minutes of agitation.
- Allow the cycle to complete normally, including the spin. Follow with a cold rinse cycle.
Method 3: Heat-based dyeing for polyester (disperse dye)
If you have confirmed your cover is 100% polyester, you need disperse dyes and heat. Polyester is a hydrophobic fiber, meaning it repels water, dye cannot penetrate it at room temperature. Disperse dyes work by turning into a vapor at high temperatures that then condenses into the fiber. The target temperature is 120°C to 130°C (250°F to 265°F), which is above boiling point. At home, this means using a large stainless steel stockpot on your stove, a candy thermometer to monitor temperature, and iDye Poly packets. Do this outside or in a very well-ventilated space because the dye fumes at these temperatures should not be inhaled.
- Fill the pot with enough water to fully submerge the cover. Add the iDye Poly packet and the included color intensifier. Stir to dissolve.
- Wet the cover and submerge it in the cold dye bath before heating — this promotes more even color uptake.
- Heat the bath slowly and steadily. A heating rate of about 2°C per minute is ideal. Rushing the temperature rise causes streaks and barré marks in the fabric.
- Maintain the bath at 120°C to 130°C for 30 to 45 minutes, stirring continuously. Uneven agitation causes blotches.
- Remove from heat, allow to cool partially, then remove the cover and rinse in progressively cooler water until the rinse runs clear.
- Wash in a machine with a mild detergent to remove any surface dye residue.
How to prevent uneven color, blotching, and color bleeding
Uneven color is the most common complaint from first-time dyers, and almost all of it comes down to one of four problems: the cover was not clean enough before dyeing, it was not kept fully submerged, it was not agitated consistently, or the dye concentration was uneven because the dye was not dissolved properly before being added to the bath.
- Always dissolve dye powder completely in warm water before adding it to the dye bath. Undissolved clumps create dark spots that are nearly impossible to correct.
- Keep the cover fully submerged throughout dyeing. Any part that floats out of the dye bath will be lighter. Use a plate or heavy zip-lock bags filled with water as weights if needed.
- Agitate consistently. You do not need to stir every second, but turn and press the fabric every 3 to 5 minutes throughout the full dye time. Uneven agitation is the number one cause of light streaks.
- Never dye a dry cover. A dry cover soaks up dye unevenly — wet fiber absorbs dye far more consistently.
- For the bucket method, avoid folding the cover the same way throughout. Refold and rotate it every time you agitate so the same crease is not always blocking dye penetration.
- Color bleeding onto hands or cushions after dyeing almost always means the rinse and wash steps were not thorough enough. It is unfixed excess dye sitting on the surface of the fabric, not a sign the dye bonded badly.
A note on going darker versus lighter: fiber-reactive dyes can take a light cover to a darker color without issue. But you cannot reliably dye a dark cover a lighter color with household dyes, you would need to strip the existing color with a color remover first, and even then, the results on previously dyed outdoor fabric are unpredictable. Stick to going darker or changing to a similar-depth color for the most reliable results.
Rinse, wash, and colorfast steps for long-lasting results
The rinsing and washing steps after dyeing are not optional cleanup, they are what actually determine how long the color lasts. Fiber-reactive dye bonds chemically to cotton fibers, but any unfixed dye sitting on the surface will bleed out every time the cover gets wet if you do not remove it properly now.
- Start the rinse with cold water, not warm. Cold water rinses out soda ash without reactivating the dye chemistry. Run cold water through the cover until it runs fairly clear.
- Gradually shift to warm water over several rinse cycles. The water will continue to show some color for a while — this is surface dye coming off, not the bonded dye releasing.
- After rinsing, wash the cover with 3 tablespoons of Synthrapol per 8 pounds of fabric for at least 10 minutes at a warm temperature. This final Synthrapol wash is specifically designed to remove unfixed dye particles from fiber surfaces without affecting the chemically bonded color. It is the single best thing you can do to prevent future bleeding.
- If you do not have Synthrapol, a hot machine wash with a plain dye-free detergent for a full cycle is an acceptable substitute, but Synthrapol genuinely works better for this step.
- After washing, check for any color still bleeding into the rinse water. If it is still heavy, repeat the Synthrapol wash. Most covers are done after one or two wash cycles.
One thing worth knowing: even properly fixed and washed fiber-reactive dye on cotton will run slightly in the first few washes after dyeing. This is normal and not a failure. The bonded color is stable, it is just the last traces of surface dye releasing. After two or three washes, bleeding stops entirely on a properly processed cover.
Drying, reinstalling, and making your dyed cover weather-ready
How you dry a freshly dyed patio cover matters more than most people realize. Tumble drying in a hot dryer can cause dye to transfer to the drum and can cause some colors to shift slightly. Air drying is safer and also gives you a chance to stretch the cover back into its correct shape while it is still damp.
Drying and shaping
Hang the cover on a clothesline or lay it flat on a clean surface out of direct sunlight while it is damp. Direct sun during initial drying can cause uneven fading before the color has fully cured. Once it is mostly dry (damp but not dripping), you can move it into sun to finish. This usually takes a few hours on a warm day. Do not re-install the cover on the furniture while it is still wet, moisture trapped between the cover and the furniture frame promotes mildew, and a wet cover can also transfer dye to the frame or cushions.
UV protection and weatherproofing

One honest reality about dyeing patio covers: home-dyed cotton and canvas covers will fade faster in outdoor UV than factory-dyed performance fabrics, simply because manufacturer dyes are applied under industrial conditions with UV-resistant fixatives. You can slow this down meaningfully by applying a UV-blocking fabric protector spray (products like Scotchgard Heavy Duty Water Shield or similar outdoor fabric protectors) after the cover is fully dry and cured. Reapply every season. This also restores some of the water repellency that washing and dyeing will have stripped from any factory finish.
Ongoing care to protect your dye job
- Wash dyed covers in cold water on a gentle cycle to minimize color fading over time.
- Use a dye-free, fragrance-free detergent. Optical brighteners in regular laundry detergent can alter the perceived color of dyed fabric and accelerate fading.
- Never use bleach or bleach-containing cleaners on a dyed cover — it will strip the color.
- Avoid storing damp covers in dark, enclosed spaces after washing, which promotes mildew. Store covers clean and bone dry.
- Plan to re-dye every 2 to 3 seasons for covers in full sun, or every 3 to 5 seasons for covers kept in shade or brought in seasonally. The process gets faster and easier each time you do it.
If you are thinking about making new covers from scratch rather than re-dyeing existing ones, starting with undyed natural canvas gives you complete color control from the beginning, and you can apply everything in this guide to get the exact color you want before the cover ever hits the furniture. If you want to make your own patio furniture covers instead of dyeing existing ones, plan your fabric choice and measurements first to get a clean, professional fit making new covers from scratch. Similarly, if your current covers are too far gone to save with dye, making your own replacements or sewing custom slipcovers gives you the opportunity to pick a fabric that is genuinely easy to dye or re-dye in the future.
The bottom line is that dyeing patio covers is a completely achievable DIY project for cotton and canvas covers, and the results can genuinely look great for multiple seasons when the prep and post-dye steps are done correctly. If you need waterproof patio furniture covers, the best approach is choosing and applying a fabric protector after dyeing and curing. The process takes about 3 to 4 hours from start to dry, costs under $30 in supplies for most chair covers, and saves you from replacing covers that have years of structural life left in them.
FAQ
Can I use bleach or whitening spot treatments before dyeing patio cover fabric?
Yes, but treat it as “reducing residue,” not “whitening the fabric.” Use vinegar or a dedicated mildew remover only as needed, then do a full hot wash afterward to get rid of any chemical you used. Avoid chlorine or bleach spot treatments right before dyeing, even if the surface looks clean.
What if the color looks too light after the first dye bath, can I redo it?
For cotton and canvas (fiber-reactive dye), you usually cannot dye from light to a much darker shade in one pass if the fabric is heavily soiled or has uneven buildup. If your swatch tests indicate weak uptake, repeat the same dye bath once after proper re-prep (clean rinse, no softener) rather than doubling dye concentration without testing.
Why do I get tide lines or blotches, and can I prevent them?
For fiber-reactive dye, pre-wet matters, but the key is fabric must be clean and evenly saturated before dye enters the bath. If your cover starts drying or only parts of it stay dry, you get hard tide lines that rinsing cannot fully fix. Keep agitation consistent, or in the bucket method stir periodically so the dye distribution stays even.
Can I fix uneven dye with a sealer or fabric coating instead of re-dyeing?
Don’t try to “seal” uneven dye with a topcoat. Instead, you have two practical options: either re-dye after fixing the cause (cleanliness, submersion, mixing, or swatch sizing), or accept the mottled look and apply a UV-blocking fabric protector after the fabric is fully cured.
Is it safer or better to dye in a washing machine than in a bucket?
If you must dye in the washing machine, choose a top-loader when possible because many front-loaders do not allow adding dye chemicals mid-cycle. Also, avoid using detergent with fabric softeners or unknown additives, run an empty hot cycle with a proper rinse afterward, and wash stained items separately to prevent cross-color transfer.
Can I dye a dark patio cover lighter using the same process?
Color removal can work, but it is unpredictable on outdoor-dyed fabric, especially if the cover previously held mildew treatments or has been exposed to sun and weather. If your goal is to go lighter, the most reliable route is stripping with a proper fabric-safe color remover and then swatch-testing, because residual dye can cause muddy results.
When should I apply a UV-blocking fabric protector after dyeing?
Choose a UV-blocking fabric protector only after the dye has finished rinsing, washing, and drying, and after any recommended curing time. If you apply protector while the fabric is still damp or not fully cured, you can trap excess surface dye and create uneven aging or spotting.
Can I dye acrylic or Sunbrella-type patio covers at home?
Typically, yes if the cover is truly acrylic or polyester-similar and you confirm fabric type on the tag or with brand info. However, home results can be disappointing for acrylics because the color is solution-dyed in manufacturing. For polyester, expect high temperature requirements and careful ventilation, and swatch first to confirm the color you want is achievable.
How should I adjust expectations for cotton-polyester blends?
Swapping dye type for blended fabrics is where surprises happen. Fiber-reactive dye usually concentrates on the natural fiber portion, leaving the synthetic portion lighter (heathering). If you want a uniform look, swatch is the decision tool, and plan for a slightly different final shade than the dye packet sample.
What’s the real reason for prewashing with Synthrapol, is it mandatory?
Prewashing with a surfactant like Synthrapol helps because it removes oils, waxes, starch, and factory sizing that block even dye uptake. If you skip it, you often get faint “hot spots” where residue is thicker. If you cannot get Synthrapol, do multiple hot-water washes with a fragrance-free dye-free detergent and absolutely no softener.
How big should my dye swatch test be, and does it reliably predict the final result?
Yes, but treat it as a color measurement only, not a final guarantee. Do the swatch with the same prep, same dye amount per volume, and the same rinse and drying approach you plan to use. Fabric scraps can accept dye differently than the cover, especially if seams or worn areas have different finishes.
Can I put the cover back on the furniture right after dyeing?
It’s best to wait until the cover is mostly dry to damp before moving it, then finish drying flat or hanging in indirect light. Reinstalling while wet can promote mildew, and it can also transfer remaining surface dye to the furniture frame or cushions.
How do I prevent dye speckles caused by undissolved dye?
If the dye doesn’t dissolve properly, you get speckling or uneven concentration. Dissolve dye thoroughly in warm water before adding to the bath, then stir until the bath looks uniform. If your method doesn’t include a proper dissolution step, compensate with longer mixing time rather than just adding more dye powder.
Should I repair holes and tears before dyeing, or can I dye first?
Yes, but do patching first and dye afterward. Iron-on or hand-stitch repairs need to be clean and firmly adhered, because frayed edges wick color unevenly. Expect the patched area to be slightly different in shade, but it will look much better than visible holes with dark frayed borders.