You can build a solid, good-looking patio bench from pallets in a single weekend for under $30, even if you've never built furniture before. The key steps are finding the right pallets, breaking them down safely, cutting and stacking the frames for seat height, securing everything with exterior screws, and finishing the wood with a weatherproof sealer or stain that will actually hold up outdoors. Done right, this bench will last for years, not just one season.
How to Make a Patio Bench Out of Pallets: Step-by-Step

Maren Grady
11 Jun 2026
Choosing and Preparing Your Pallets
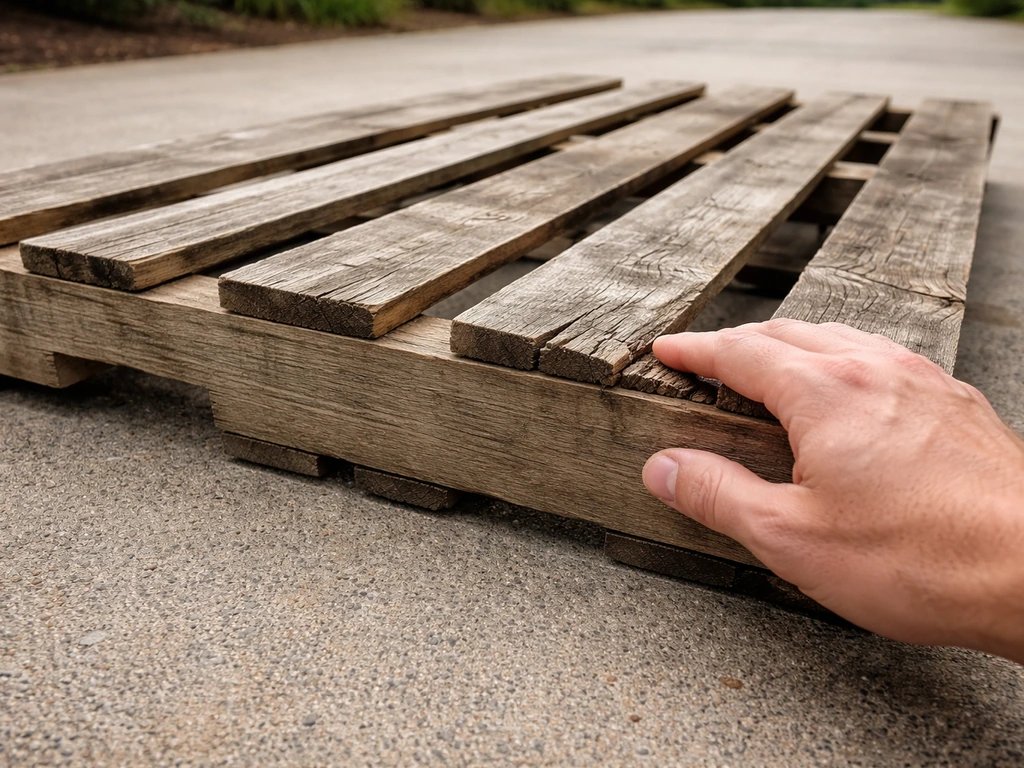
Not every pallet is safe to use for outdoor furniture, so this step matters more than most guides admit. Before you touch a pallet, flip it over and look for a small stamp or burned mark on the stringer (the thick side board). You're looking for the ISPM 15 international treatment code. ["HT" means the pallet was heat-treated](https://www.
ippc. int/static/media/files/publication/en/2016/11/ISPM15Revised2009E. pdf), which is what you want. "MB" means it was fumigated with methyl bromide, a chemical that can off-gas and cause serious respiratory and skin irritation.
The CDC and NIOSH list methyl bromide as a hazard to eyes, skin, and lungs. Avoid any pallet stamped MB entirely. If there's no legible stamp, or the wood looks unusually dark or stained in a chemical-looking pattern, skip it and find another one.
Once you've confirmed your pallets are HT-stamped, inspect them physically. Look for boards that are cracked through more than halfway, badly warped, or showing soft, spongy spots that signal rot. Press your thumbnail into the wood in a few places. If it sinks in easily, the wood is compromised and won't hold weight safely.
Check for protruding nails and visible splinters before you even pick the pallet up. If the pallet has any black or green fuzzy patches, that's mold. You can pressure wash moldy pallets to remove surface contamination, then let them dry completely in the sun for a day or two. For stubborn mold, a 10% bleach solution (one part bleach, nine parts water) with good ventilation works well as a disinfecting wash.
Let the wood dry fully before you do anything else with it.
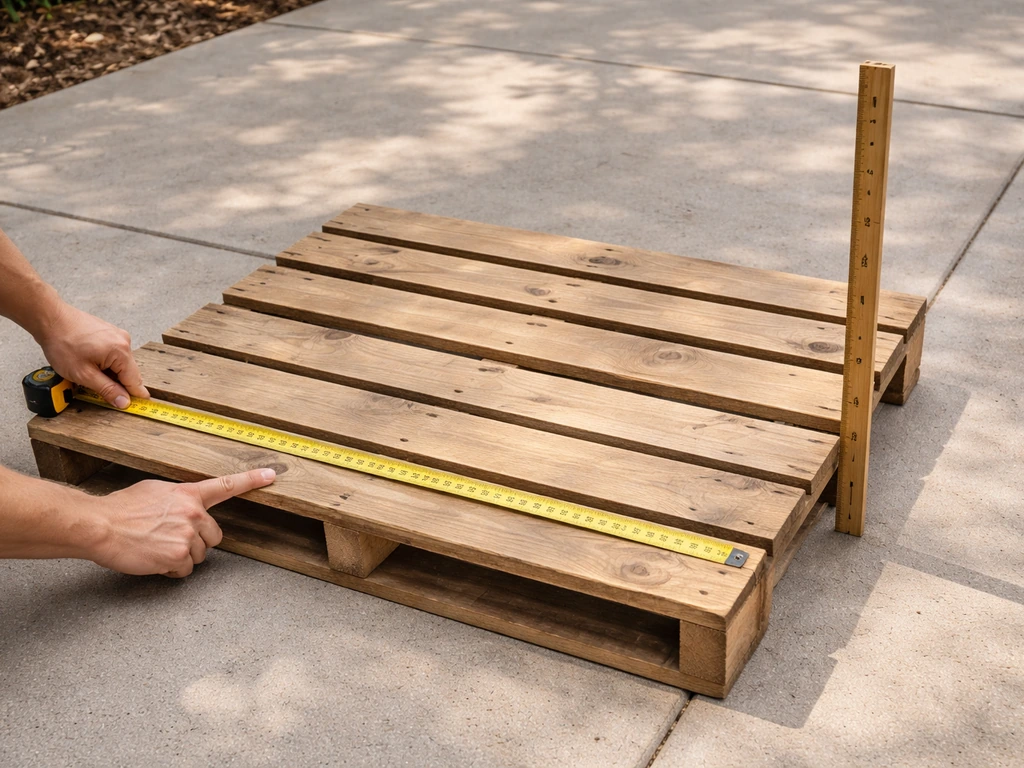
For a standard pallet bench, you'll typically need two to three pallets depending on your design. The most common North American pallet size is 48 by 40 inches (the GMA format), with around 7 top deck boards per pallet. Deck board thickness usually runs between half an inch and three-quarters of an inch, which is thinner than dimensional lumber, so you'll be stacking and doubling up boards for structural strength rather than relying on a single layer.
Disassembly is where most beginners either give up or hurt themselves. Wear safety goggles with side shields (flying nail heads are no joke), heavy work gloves, and a dust mask since pallet wood sanding creates fine wood dust that OSHA flags as a respiratory hazard at sustained exposure. Use a pry bar and a hammer to work the boards loose.
One smart trick: drive the nail through the board from the head side so the point pops out the back, then use the pry bar to lever the board up with the nail head exposed for easy removal. After disassembly, go over every board with a belt sander or orbital sander to knock off splinters, then do a final pass to pull any remaining nail fragments with pliers.
Tools, Supplies, and Safety
Here's everything you'll realistically need. I've split this into what's essential versus what makes the job easier but isn't strictly required.
| Item | What It's For | Budget Notes |
|---|---|---|
| Circular saw or miter saw | Cutting boards and pallet frames to length | Rent from a home center if you don't own one |
| Power drill + driver bits | Driving exterior screws | A basic 18V cordless drill is plenty |
| Belt or orbital sander | Smoothing rough pallet wood | A detail sander works for tight spots |
| Pry bar and hammer | Pallet disassembly | A flat bar works better than a curved pry bar here |
| Tape measure and speed square | Measuring, marking, and checking square | Essential for a bench that doesn't wobble |
| Clamps (2–4) | Holding boards while you drive screws | Bar clamps or spring clamps both work |
| Safety goggles, gloves, dust mask | PPE during disassembly and sanding | Non-negotiable |
| 3-inch exterior-rated screws | Main structural fasteners | Coated or stainless steel to resist rust |
| 2-inch exterior-rated screws | Attaching slats and lighter boards | Same rust-resistant coating |
| Wood filler (exterior grade) | Filling knots, cracks, and old nail holes | Smooth the surface before finishing |
| 80, 120, and 220 grit sandpaper | Progressive sanding from rough to smooth | Buy a variety pack |
| Weatherproof finish (sealer/stain/paint) | Outdoor protection | See the finishing section below |
| Paint brushes or foam rollers | Applying finish | Foam rollers give even coverage on flat boards |
One thing I'd emphasize on hardware: don't use regular zinc-coated drywall screws. They corrode fast outdoors and will rust-stain your wood within a season. Spend a few extra dollars on screws specifically rated for exterior or deck use. Stainless steel is the best option for longevity, especially if you live somewhere humid or near the coast.
Design and Measurements for a Pallet Bench
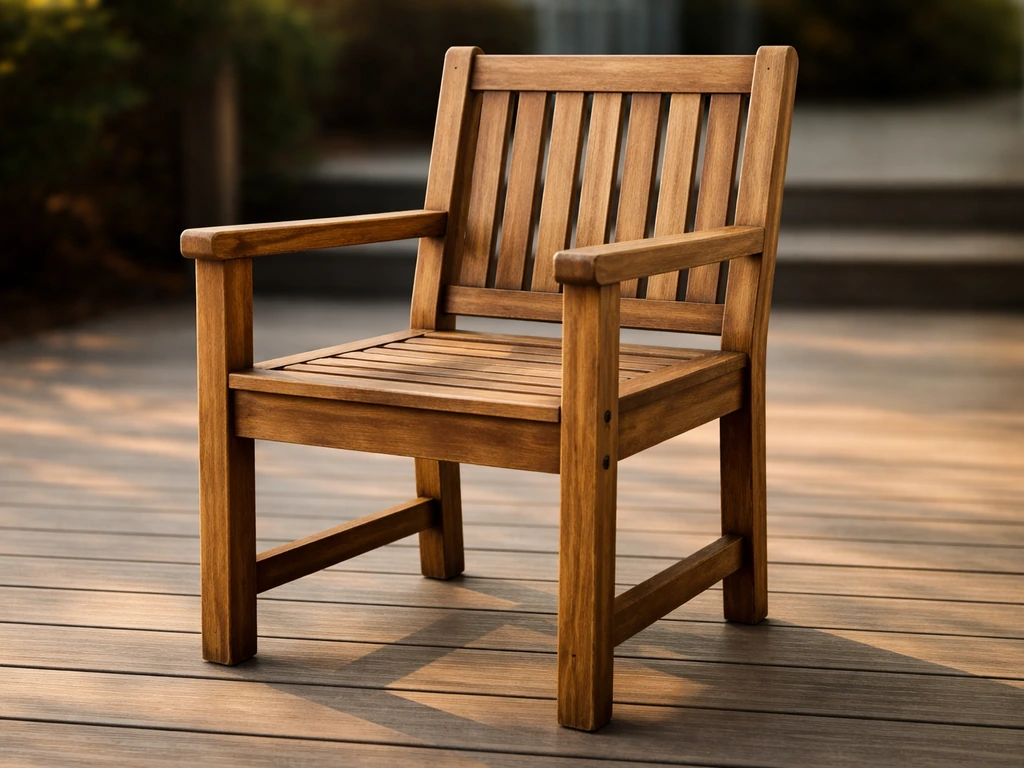
A comfortable outdoor bench seat sits between 15 and 18 inches off the ground. That range matches standard chair height and lets most adults sit and stand up easily. If you want something like a patio chair instead of a bench, you can use the same pallet-safe prep, exterior hardware, and weatherproof finish, then adjust the frame and slat layout for seat height and back support.
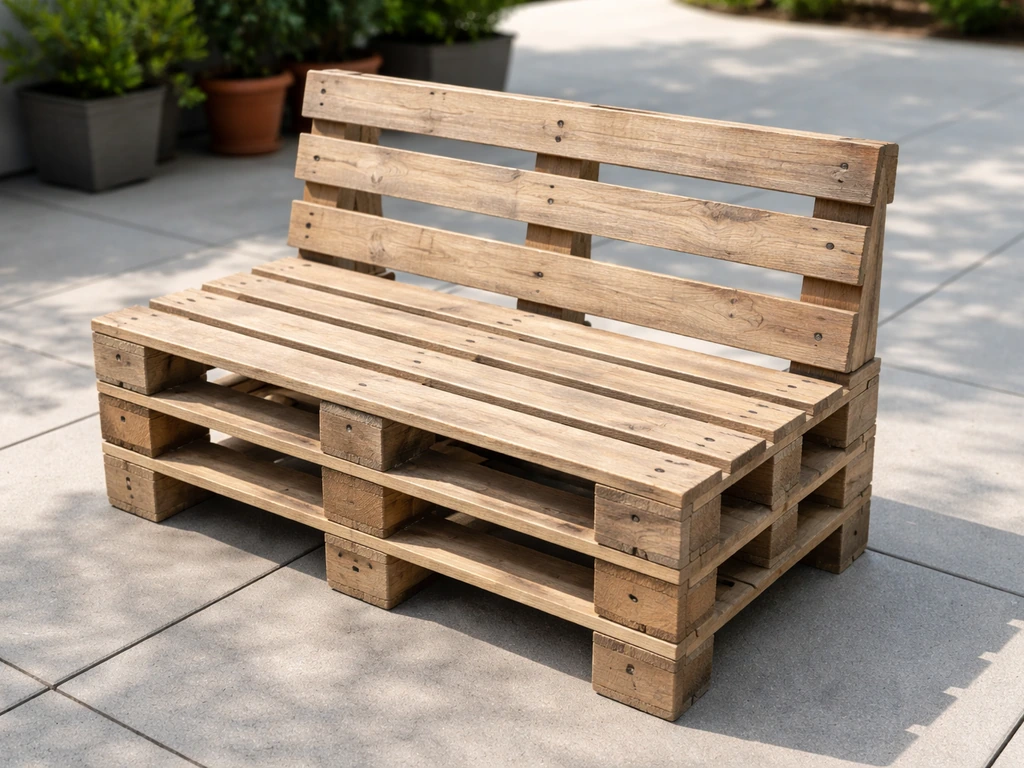
For a pallet bench, the simplest way to hit that height is to stack two pallets flat on top of each other. A standard GMA pallet is about 5 to 6 inches tall including deck boards, so two stacked pallets will put you around 10 to 12 inches, which means you'll need to add a short leg frame or build up the base with lumber to reach the 15-to-18-inch target.
For width, a single 40-inch or 48-inch pallet makes a one-person to two-person bench. For a three-person bench, plan for 60 to 72 inches total seat length. You can achieve this by cutting boards to length and building a custom seat frame, or by arranging two pallets side by side and trimming to fit. Bench depth (front to back) of 16 to 20 inches is comfortable for sitting without a back rest. If you're adding a back rest, keep the seat depth at 16 inches so the backrest angle doesn't push you too far forward.
Backless vs. Backed Bench
A backless bench is faster to build, more versatile (it works from both sides), and takes up less visual space on a small patio. A backed bench is more comfortable for long sits and looks more like finished furniture. If this is your first pallet build, start with the backless version. You can always add a back later, which is just a few more boards attached to a pair of angled supports. The steps below cover the backless bench, with a note on where to add the back support posts.
Reinforcing for Weight
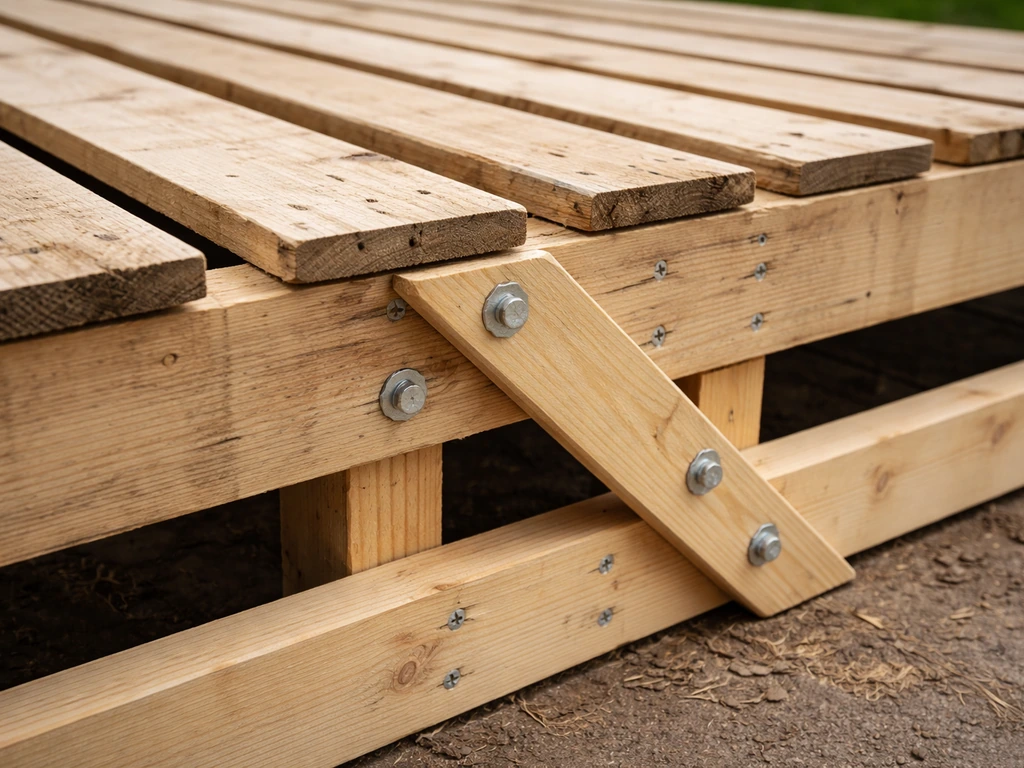
Pallet deck boards are thin, often less than three-quarters of an inch, so you need to think about how weight distributes across the seat. The original center stringers of a pallet actually do a lot of work here. One effective approach used by experienced pallet builders is to keep the center 2x4 stringer boards in place when you disassemble the pallet rather than stripping the pallet down to individual boards. That center support prevents the seat slats from bowing under a person's weight. For the leg frame or base, add a cross brace between the legs to resist racking and side-to-side sway. Diagonal bracing works even better if the bench will be freestanding rather than anchored to a wall.
Step-by-Step Build Process
- Sort and select your best boards. After disassembly and sanding, lay all your boards out and pick the flattest, most consistent ones for the seat surface. Set aside any badly warped boards for use in the hidden frame parts where appearance doesn't matter.
- Build the base frame. Cut four legs from your thickest pallet lumber or from a 2x4 (you can buy a single 8-foot 2x4 for around $4 if your pallet stock is too thin). For a bench sitting at 16 inches, cut legs at 14 inches since the seat frame and boards will add the remaining 2 inches. Cut two long side rails to match your bench's total length, and two short end rails to match the depth (16 to 20 inches). Screw the legs to the inside corners of the rails using 3-inch exterior screws, two screws per joint. Check each corner with a speed square before the screws are fully tight.
- Add a center support. For any bench longer than 40 inches, cut an additional support rail and attach it across the middle of the frame, running front to back. This prevents the seat slats from sagging under weight. This is where keeping that center pallet stringer intact really pays off.
- Add cross bracing. Cut two short diagonal braces from scrap lumber and attach them between the legs on each end of the bench, running from the bottom of one leg to about halfway up the adjacent leg. Screw them in place with two screws on each end. This single step will eliminate almost all wobble.
- Attach the seat slats. Lay your selected boards across the top of the frame, spacing them evenly with a consistent gap of about a quarter inch between each board for drainage and wood movement. A nail or a folded-over piece of cardboard works as a spacer. Start at the front edge and work back. Drive two 2-inch screws per board end into the frame rail below, keeping screws at least half an inch from any board edge to avoid splitting.
- Check for level. Set the bench on a flat surface and press down on each corner. If it rocks, identify the high corner and trim the leg slightly with a saw or plane, or use exterior-grade adhesive furniture pads to level it out. This is much easier to fix now than after finishing.
- Optional: Add back supports. If you want a backrest, now is the time to attach two angled 2x4 posts at the rear corners of the bench, angled back at about 5 to 10 degrees from vertical. These posts should extend 18 to 22 inches above the seat surface. Attach horizontal back slats across these posts the same way you attached the seat slats, with even spacing and two screws per end.
- Do a final sanding pass. Go over the entire assembled bench with 120-grit sandpaper, then finish with 220-grit on all exposed surfaces. Pay special attention to the edges of the seat slats, rounding them slightly so they don't dig into the backs of legs when seated. Fill any remaining gaps, cracks, or old nail holes with exterior wood filler, let it dry fully, and sand flush.
Finishing, Weatherproofing, and Comfort Upgrades
Finishing is where a lot of first-timers shortcut and then wonder why their bench looks rough after the first winter. Raw pallet wood outdoors will gray out, crack, and start to degrade in one season without protection. You have three main choices: a penetrating wood stain, a surface sealer, or exterior paint. Each has a real tradeoff.
| Finish Type | Best For | Durability | Recoat / Maintenance | Budget |
|---|---|---|---|---|
| Penetrating wood stain (e.g., DEFY Extreme) | Showing natural wood grain | Good; resists water and UV | Touch-up every 1–2 years; recoat within 10–15 min wet-on-wet; dry to touch in 2–6 hours | Moderate |
| Spar urethane (e.g., Minwax Helmsman) | Highest moisture resistance | Excellent; flexible film that handles sun/rain | Recoat at 6 hours; light use after 24 hours; sand lightly at 220 grit between coats | Moderate |
| Exterior paint | Hiding imperfections in rough wood | Good if properly primed | Touch up chips annually; full recoat every 2–3 years | Low to moderate |
| Raw/unsealed (no finish) | Nothing—skip this option outdoors | Poor; wood grays and cracks within months | Constant | Free, but costly long-term |
My personal recommendation for pallet wood specifically is spar urethane, because it's flexible. Pallet boards often have more grain variation and small checks than milled lumber, and a rigid finish can crack as the wood moves through temperature changes. Apply a thin first coat, let it dry the full 4 to 6 hours, sand lightly with 220-grit to knock down any raised grain, wipe off the dust, and then apply a second coat. A third coat on the seat surface (which takes the most abuse) is worth the extra hour. Don't forget to coat the cut ends of every board. End grain soaks up water like a straw, and sealing it dramatically extends the life of the wood.
For hardware, swap any screws or bolts you used in construction for stainless steel equivalents if budget allows, or at minimum use exterior-rated coated screws. Regular steel fasteners will rust and stain the wood orange within a season, and they'll weaken at the joint over time. This is especially important if you're anywhere with coastal humidity or heavy rain seasons.
Making It Actually Comfortable
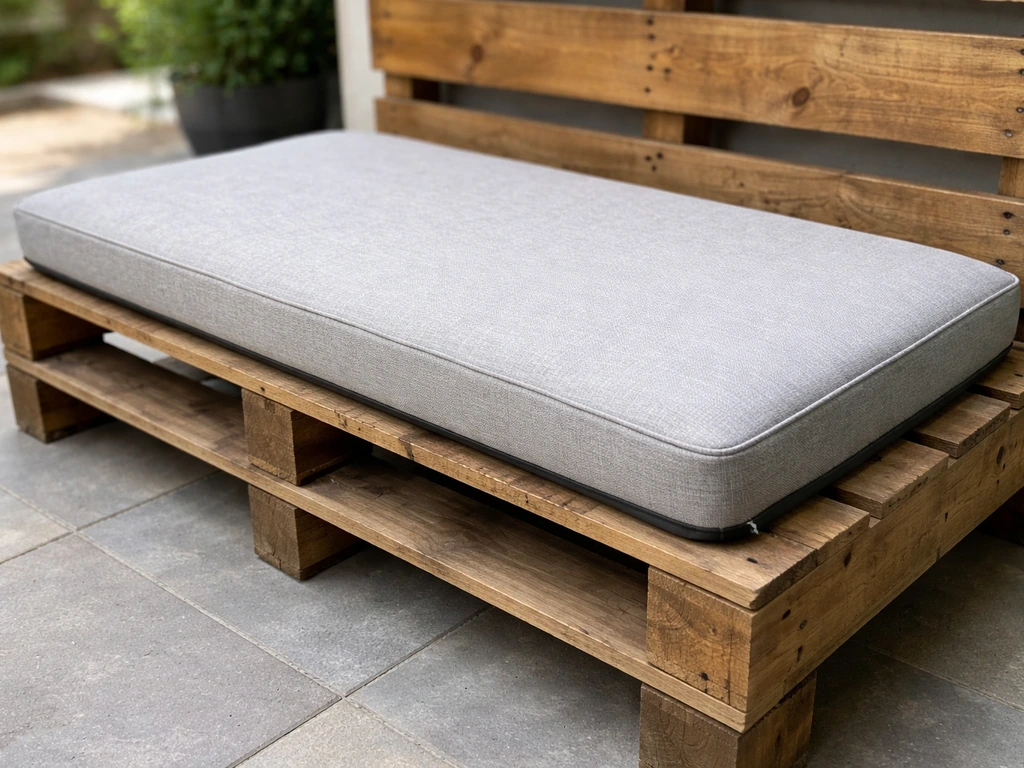
Bare pallet wood is not comfortable to sit on for long. Adding a bench cushion transforms the experience. Look for outdoor-rated cushions with a non-slip backing, which keep the cushion from sliding every time someone gets up. To stop cushions from blowing away on windy days, attach a few stainless steel pad eyes or screw eyes to the underside of the bench frame and tie the cushion with weather-resistant straps or bungee cord loops.
A related discussion also recommends attaching cushions to the bench with straps or ties so they do not blow away in windy conditions attach a few stainless steel pad eyes or screw eyes to the underside of the bench frame and tie the cushion. Velcro strips rated for outdoor use also work well and are easy to replace.
If you'd rather keep things low-profile, cut a thin outdoor foam pad to fit the seat and staple outdoor fabric directly to the bench seat slats for a built-in upholstered look. That approach also connects nicely to the site's upholstery projects if you want to go deeper on fabric choices and techniques.
Installation, Upkeep, and Storage for Longevity
Where and how you place the bench matters as much as how you built it. On a concrete or paver patio, the bench is stable and protected from ground moisture. If you're putting it directly on soil or grass, the legs will eventually sink, especially after rain softens the ground. Slide a patio paver under each leg to distribute the weight and keep the legs from sinking. This also dramatically slows wood rot at the base of the legs since they're not sitting in direct contact with wet soil.
If the bench is on a patio and you want it to stay put (which also prevents it from tipping on windy days or shifting under active use), anchor it. On concrete, mark the leg positions, drill pilot holes into the concrete with a masonry bit, and use concrete anchors or lag screws to fasten the legs to the surface. Clean the concrete surface before you mark and drill so your measurements are accurate. On a deck, screw through the bench legs directly into the decking. Anchoring adds stability and it protects the bench from casual theft, which is worth mentioning if this is going in a shared outdoor area.
Seasonal Maintenance
Once a year, ideally in early spring before heavy use season, give the bench a close inspection. Look for any finish that's peeling, chipping, or showing bare wood. Lightly sand those spots with 120-grit and spot-apply your sealer or stain. Check every screw for rust or looseness and tighten or replace as needed. If you see any soft spots developing in the wood, probe them with a screwdriver. Early-stage softness can sometimes be stabilized with a penetrating epoxy wood hardener before it becomes structural rot.
For winter storage in cold climates, the best option is to bring the bench inside or into a dry garage or shed. If outdoor storage is your only option, cover it with a breathable furniture cover (not plastic tarps, which trap moisture) and tip it slightly so water doesn't pool on the seat.
Bringing in cushions and fabric components at the end of the season makes a huge difference in how long they last, and this is worth building into your routine from the start. If you're also thinking about where to store cushions, a dedicated patio storage bench is a natural next step once you've got this build under your belt.
If you are looking for a handy spot to stash cushions, tools, or seasonal items, the same bench can double as a patio storage bench. If you want a purpose-built spot for them, look for guidance on how to build a storage box for patio cushions and add weatherproofing so the fabric stays fresh.
If you want to build your own patio bench out of wood, the same seasonal care and finishing tips will help it last for years patio storage bench.
One thing I've found after building and maintaining a few of these: the benches that last the longest aren't the ones built with the most expensive materials. They're the ones where the owner does a quick inspection every spring and doesn't skip the finish maintenance. Fifteen minutes once a year keeps pallet wood looking intentional instead of abandoned. That's a worthwhile return on a weekend project.
FAQ
Can I use any pallet I find for a patio bench, or do I have to be picky?
Be picky. Look specifically for an HT stamp (heat-treated), avoid any MB (methyl bromide), and skip pallets with unclear stamps or odd chemical-looking discoloration. If you cannot confirm the treatment, assume it is not suitable for outdoor furniture.
What should I do if the pallet stamp is missing or unreadable?
If you cannot confirm HT from a stamp or burned mark on the stringer, it is safer to find another pallet. The time you save by using an unknown pallet often costs more later because you may be dealing with compromised wood, treatment residues, or inconsistent board sizing.
Is it okay to pressure wash a moldy pallet before building, or does it cause other problems?
You can pressure wash mold from the surface, but you must fully dry it afterward (often a day or two in good sun, plus airflow). If the wood feels soft even after drying, do not build with it, because surface cleaning will not fix internal rot.
How do I tell if pallet wood is too damaged even if it looks solid?
Check for soft or spongy spots by pressing with a thumbnail, and discard boards with cracks that go more than halfway through or with warped sections that do not spring back. Also pull a few boards and inspect for dark rot patterns near nail holes, those areas often fail first.
What’s the safest way to remove boards without damaging the wood too much?
Drive nails from the head side so the tip pops out the back, then pry up while the head is exposed. This reduces splintering and keeps board edges cleaner, which matters for tight seat slat spacing and better finish adhesion.
Should I sand after disassembly or after cutting the final seat pieces?
Do both, but in the right order. Knock down splinters right after disassembly, then do a lighter sanding after you cut to final dimensions so you do not leave fresh rough edges that will show through once coated.
How can I prevent pallet boards from wobbling or bowing on the seat?
Support the seat where the load will travel. A practical approach is to keep the center 2x4 stringer style supports in place rather than stripping everything into individual boards, then add bracing under the base so the bench resists side-to-side movement (racking).
What screw type should I use if I already bought some galvanized screws?
You can use exterior-rated coated or deck screws, but avoid regular zinc-coated drywall screws. Galvanized or drywall hardware can rust and stain wood, and it can loosen faster outdoors, especially after repeated wetting and drying.
Will two stacked pallets always give me a seat height in the 15 to 18 inch range?
Usually, but not always. Pallet height can vary because deck boards can be different thicknesses or because pallets have damaged/removed boards. Measure your target carefully, then build up with a short leg frame or add base lumber to hit the height instead of assuming the standard.
How much depth should the bench be if I want it comfortable without a backrest?
Aim for 16 to 20 inches front to back. If you later add a backrest, keep the seat depth closer to 16 inches so the backrest does not push you forward at an awkward angle.
What’s the best way to handle cut ends so they do not rot first?
Coat every cut end and the end grain thoroughly. End grain absorbs water quickly, so do not rely on finish applied only to the top and sides. When you do touch-ups later, include the end grain again, since it is the first area to show failure.
Why does a rigid finish sometimes fail on pallet furniture?
Pallet wood often has checks, grain variation, and natural movement. A rigid coating can crack as the boards expand and contract, letting water in. Flexible finishes like spar urethane tend to tolerate movement better if applied in multiple thin coats.
How many coats of spar urethane should I plan on, and when can I use the bench?
Plan for two coats, with a third coat on the seat surface where wear is highest. Let each coat dry fully (the first coat often needs several hours), and sand lightly between coats with a fine grit (like 220) if you notice raised grain.
How should I secure a cushion so it does not slide or blow away?
Use a non-slip backing and add retention hardware on the underside of the frame, such as small screw eyes or pad eyes, then strap the cushion in with weather-resistant straps. In windy areas, Velcro outdoors can help, but straps usually hold more reliably during repeated use.
Can I put the bench directly on grass or soil?
It is not ideal long-term. Legs will sink after rain and stay in contact with moisture, accelerating rot. If you must place it on soft ground, put a patio paver under each leg to distribute weight and reduce direct wet contact.
What’s the difference between anchoring on concrete versus on a deck?
On concrete, use pilot holes with masonry bits and concrete anchors or lag screws into the slab. On a deck, fasten through the bench legs into the decking structure, not just the surface boards, so the bench stays stable without loosening.
Do I need to remove the bench cushions and cover the whole bench in winter?
If you can, yes. Bring cushions and fabric parts indoors or into a dry area, then cover only what remains with a breathable cover. Avoid plastic tarps because they trap moisture and can create mildew or finish damage under the cover.
How often should I inspect and refinish the bench?
Do a quick inspection once a year, ideally before heavy use. Look for peeling or bare spots, spot-sand and recoat those areas, then probe any developing soft spots. Catching early softness before it becomes structural rot can save you from replacing major seat boards.