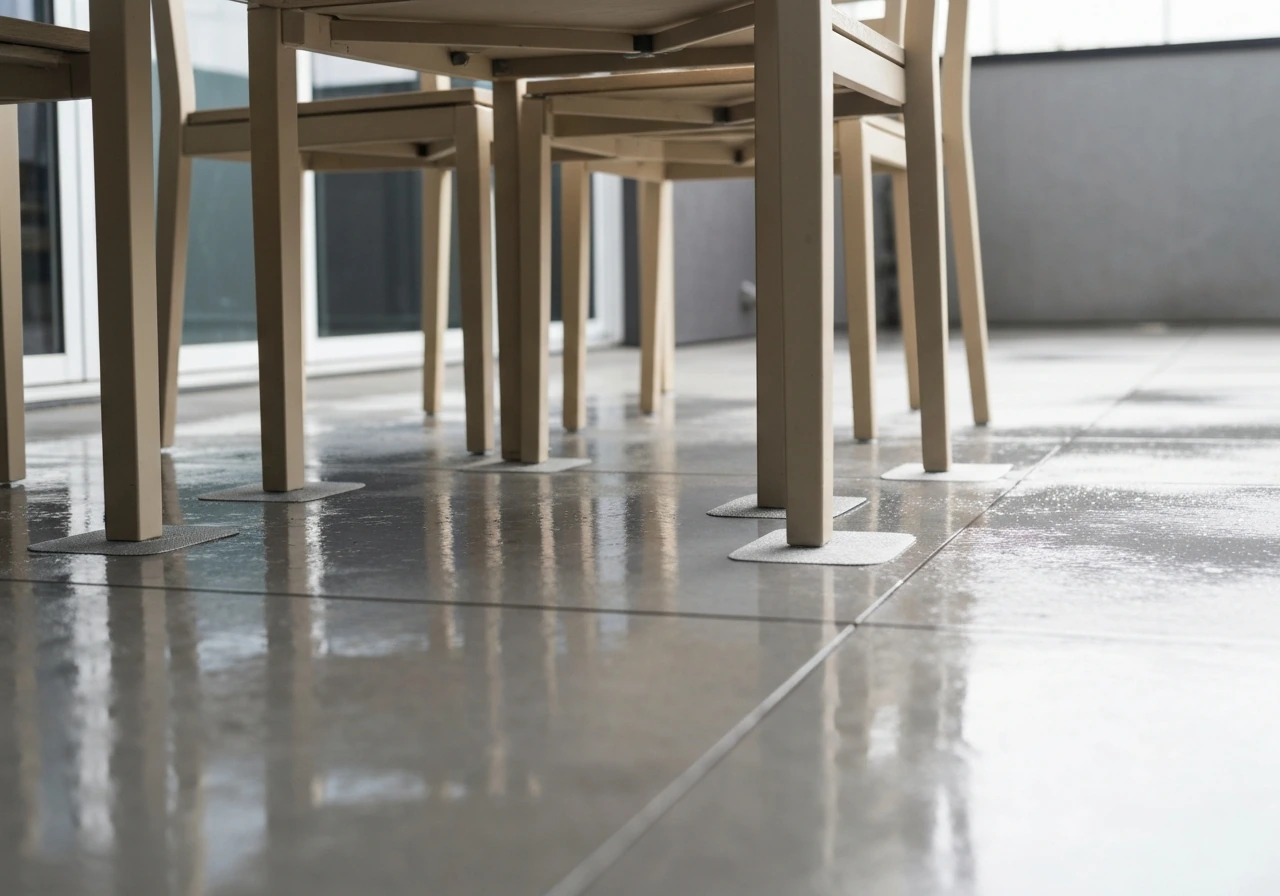
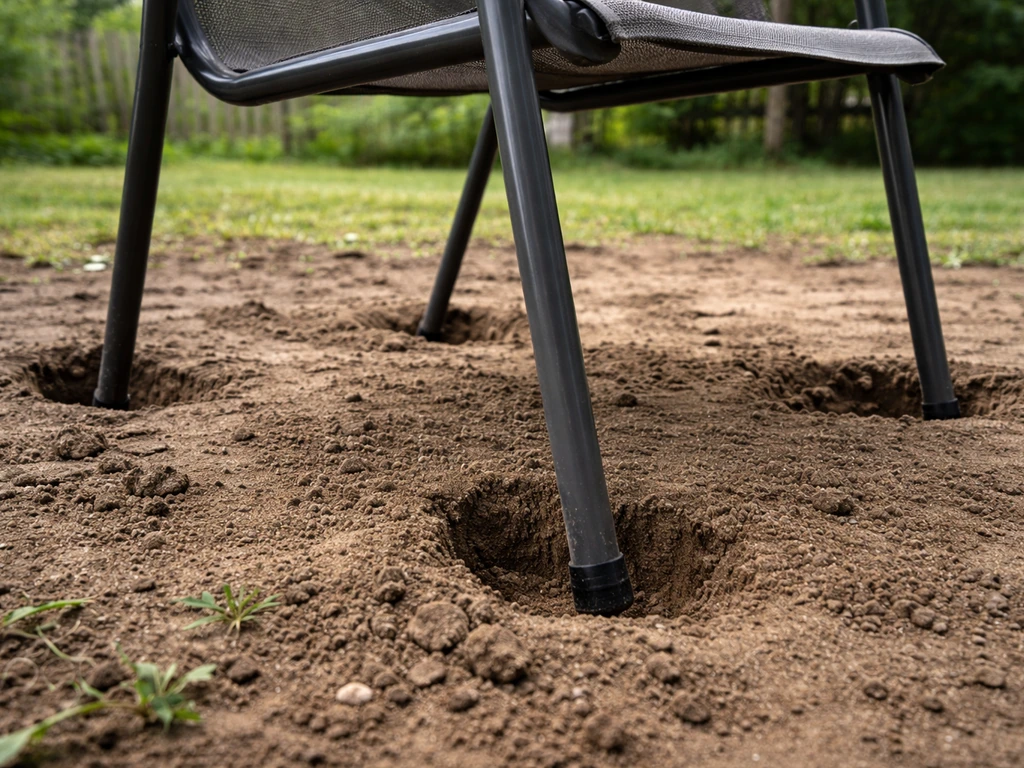
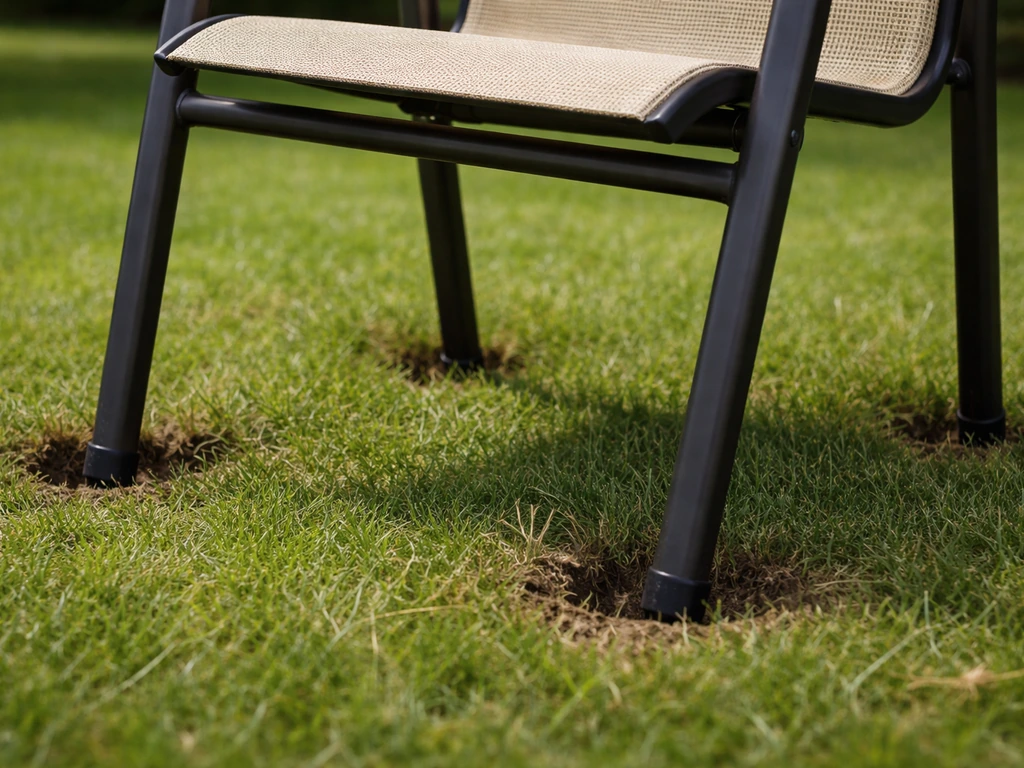
The fastest fix for most patio furniture that keeps sliding or shifting is a set of rubber furniture feet or a gripper pad under each leg. For step-by-step tips on how to keep patio furniture from sliding, see our in-depth guide. Rubber on dry concrete produces a static friction coefficient between 0.5 and 0.9, which means even a lightweight chair develops meaningful resistance before it starts to move. But sliding is only one part of the problem. Depending on your surface, you might also be dealing with legs that sink into soft ground, furniture that rocks on uneven pavers, or a whole set that blows across the yard in a summer storm. Each of those problems has a different cause and a different fix, and picking the wrong solution wastes money. This guide walks through every common outdoor surface and gives you specific, tested methods for each one.
How to Keep Patio Furniture from Moving: DIY Fixes for Decks, Grass & Concrete

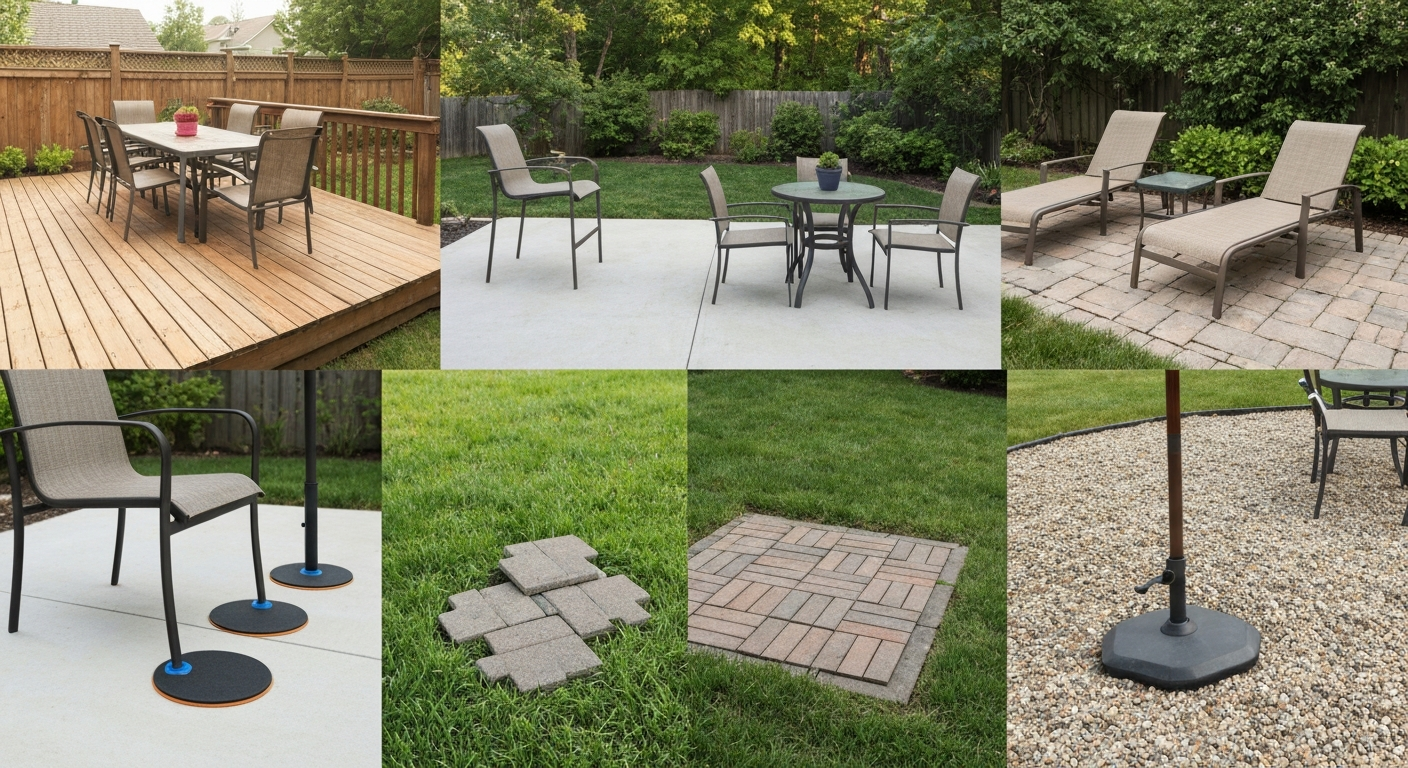
Figure out your actual problem before you buy anything
I made the mistake early on of buying a pack of rubber chair feet and calling it done, only to find my chairs still inching around on the deck every time someone leaned back. The rubber was doing its job, but the real issue was a slightly sloped deck surface combined with lightweight aluminum chairs. The fix wasn't more grip, it was weight and a better leveling strategy. So before spending anything, diagnose which problem you actually have.
- Sliding or creeping on a hard surface (deck, concrete, pavers): needs friction, grip pads, or anti-slip feet
- Rocking or wobbling on an uneven surface: needs leveling or adjustable feet
- Legs sinking into soft ground (grass, soil, gravel): needs wider foot support or a solid sub-platform
- Whole pieces moving in wind: needs anchoring, tie-downs, or added ballast weight
- Covers pooling water: needs a support frame or vented cover (a closely related problem covered in a companion guide on how to keep water from pooling on patio furniture covers)
Once you know which problem you have, pick the method for your surface type from the sections below. If you have more than one problem, say, sinking AND sliding, tackle the sinking first, because no grip pad can compensate for an unstable base.
Rules of thumb and measurements worth knowing before you start
You don't need engineering software to make smart decisions here, but a couple of quick calculations will save you from wasting money on solutions that are undersized for your situation.
Weight and bearing pressure basics
The core formula for preventing sinking is simple: divide the total weight bearing on a leg by the contact area of whatever support you put under it. The result needs to be lower than what your soil can handle. Building codes (specifically IBC Table 1806. Soil Bearing Capacity IBC: Presumptive Values, Table 1806.2 (practical calculation guidance), DataDrivenAEC summarizes presumptive bearing pressures and shows how to apply them in simple load‑area calculations for homeowners Soil Bearing Capacity IBC: Presumptive Values, Table 1806.2 (practical calculation guidance) — DataDrivenAEC. 2) give presumptive soil bearing values most homeowners can use as a starting point without hiring a geotechnical engineer.
| Soil Type | Presumptive Bearing Capacity (IBC) | Practical Takeaway |
|---|---|---|
| Clay or silt | 1,500 psf | Needs the largest foot pads; most problem sites are this type |
| Sand / compact sand | 2,000 psf | Medium risk; wider feet still help after rain |
| Sandy gravel / gravel | 3,000 psf | Usually stable with standard pads |
| Bedrock / crystalline rock | 12,000 psf | Sinking is not your problem here |
Here's how to use those numbers in real life. Say you have a 200 lb dining chair (person plus chair weight) sitting on clay soil. Divide 200 by 1,500 and you get 0.133 square feet, or about 19 square inches of contact area required just to stay at capacity. That's roughly a 4.5-inch square pad per leg. But clay gets softer when wet, and codes recommend a safety factor of 2 to 3 for soft or organic soils, so target at least 40–57 square inches of contact area, a 6- to 8-inch diameter round pad or a 6x6-inch square paver. This is why those skinny little plastic leg caps you find at the dollar store often fail on grass.
Footing size and spacing guidelines
- Minimum pad diameter for soft soil (clay/silt): 6 inches per leg, 8 inches preferred
- Minimum pad thickness for pavers used as foot supports: 1.5 inches (standard patio paver)
- Rubber foot pads for hard surfaces: 1/4 to 3/8 inch thick, sized to match leg diameter within 1/4 inch
- Spacing between anchor points for tie-down straps: no more than 24 inches apart for reliable hold in 40+ mph gusts
- Grip pad coverage rule: the pad should cover at least 80% of the leg's bottom contact surface to be effective
Material compatibility at a glance
| Furniture Material | Safe with Rubber Pads? | Safe with Adhesive Products? | Notes |
|---|---|---|---|
| Powder-coated metal | Yes | Yes, with care | Test adhesive on underside; heat can soften powder coat |
| Raw or painted wood | Yes | Yes | Sand lightly first; adhesive bonds well to clean wood |
| Plastic / resin | Yes | Check label | Some adhesives attack polypropylene; use peel-and-stick pads |
| Wicker / rattan | Yes (base frame only) | Avoid on wicker weave | Attach to the metal or wood base frame, not the weave |
| Glass tops | Yes (edge bumpers) | Yes, silicone-based only | Non-marring silicone bumpers prevent slipping and scratching |
Decks (wood and composite): grip, protect, and fasten
Decks are one of the trickier surfaces because you're working with a material you don't want to damage. Screw holes, deep gouges, and chemical staining from the wrong product can cost you real money in repairs. The good news is there are several effective options that don't require any fasteners at all.
Anti-slip rubber feet and grip pads
Self-adhesive rubber bumpon-style feet (products like 3M Bumpon or generic equivalents) are the easiest starting point. They stick to the bottom of furniture legs, add about 1/4 inch of rubber between the leg and the deck, and dramatically increase friction without scratching. The 3M Bumpon series is rated for temperatures down to -34°C and up to 49–93°C depending on grade, so they handle summer heat and winter storage well. Key installation note: the deck surface and the leg bottom must both be clean and completely dry. Wipe with isopropyl alcohol and let it dry for 10 minutes before sticking anything down. I skipped this step once on a humid morning and had pads peeling off within a week.
- Clean the bottom of each furniture leg with isopropyl alcohol on a cloth
- Let dry completely (at least 10 minutes; longer in humid conditions)
- Peel the backing from the adhesive rubber pad
- Press firmly onto the leg bottom for 30 seconds with steady pressure
- Wait 24 hours before putting full weight on the chair or table
- For composite decking, verify the pad is non-marking (look for that label specifically)
Protective furniture coasters for decks
Rubber or felt-bottom furniture coasters sit on the deck and the leg sits in them. They're especially useful for heavy pieces like cast iron or stone-top tables because they distribute weight over a wider area, which prevents the legs from denting softwood decking. Look for coasters with a felt or rubber bottom (so they don't scratch the deck themselves) and a recessed cup on top that captures the leg and prevents lateral movement. Diameter should be at least 1 inch wider than the leg diameter on all sides.
Semi-permanent fastening for decks
For furniture that never moves, like a built-in dining set or a heavy pergola table, you can use L-bracket hardware screwed into the deck framing. Use stainless steel hardware on any outdoor wood application, standard zinc screws rust and stain the wood. If you're on a composite deck, check the manufacturer's fastener guidelines first, because some composites require specific screw types to avoid voiding the warranty. For a furniture piece you want semi-permanent but still removable, consider rubber-gripped furniture feet paired with a non-slip outdoor rug under the whole seating area. A quality outdoor rug adds grip, protects the decking, and defines the space aesthetically.
Concrete patios: pads, grippers, and no-permanent-damage options
Concrete is the most forgiving surface to work on because it's hard, stable, and won't be damaged by most DIY solutions. The main issue is that concrete can be polished, sealed, or textured in ways that change how well grip products work. Wet or damp concrete, sealed concrete, and stamped concrete all have different friction characteristics, sealed concrete in particular can be quite slippery.
Rubber feet and gripper pads
The same rubber bumpon feet that work on decks work well on concrete, and here they can develop even more friction since rough concrete gives rubber more to grab. On unsealed concrete, a rubber foot can achieve a static friction coefficient close to 0.8–1.0, which is substantial. On sealed or polished concrete, that drops significantly, and you may want to use a larger-format non-slip mat under the entire furniture grouping instead of just individual leg caps.
Non-permanent floor grippers and furniture anchors
Outdoor-rated non-slip furniture pads, the kind sold as non-marking floor protectors, come in stick-on and slip-on versions. The slip-on type (a rubber cup or sleeve that fits over the leg end) are handy for tubular metal furniture because you can swap them out seasonally without leaving adhesive residue. For heavier furniture on concrete, consider a rubber furniture coaster with a concave base. These grip the concrete while also capturing the leg and stopping lateral movement in two directions at once.
Adhesive anchors for permanent installations
If you want truly fixed furniture on concrete (a common goal for tables in windy areas), concrete adhesive anchors or mechanical wedge anchors are the professional-grade solution. Products from manufacturers like Hilti and Simpson Strong-Tie publish load tables showing exact allowable tensile and shear forces for each anchor size and embedment depth. For a DIY furniture anchor into a residential patio, a 3/8-inch diameter sleeve anchor with 1.5-inch embedment is typically more than sufficient for the loads involved. Critical rule: maintain the manufacturer's minimum edge distance (usually 1.5 to 2 inches from the concrete edge) or the published load values drop significantly. Always wear eye protection when drilling into concrete.
Pavers and brick: level first, then stabilize
Pavers present a two-part challenge. First, individual pavers can settle unevenly, creating a rocking surface that no grip pad will fix. Second, furniture legs can sink into the sand bedding layer if the compaction beneath isn't solid. I've reset probably a dozen pavers over the years, and most of the time the cause was the same: an inadequate base below.
What a proper paver base actually looks like
The Interlocking Concrete Pavement Institute (ICPI) standard for residential patio installations calls for a 4-inch compacted aggregate base plus a 1-inch bedding sand layer. That base needs to be compacted in lifts (roughly 2-inch layers at a time) and should extend beyond the paver field edge by at least the same distance as the base thickness. Skipping the compaction step is the single biggest cause of paver settlement. If your furniture legs are sinking or the pavers rock when you sit down, the first thing to check is whether the base was properly compacted.
Fixing a settled paver under a furniture leg
- Remove the paver by lifting it straight up (use two flathead screwdrivers as levers if it's tight)
- Inspect the sand bed — if it's loose or has washed away, add coarse bedding sand to restore the 1-inch depth
- Compact the sand with a hand tamper or the heel of your boot across the full area
- If the base aggregate below the sand feels soft, add a handful of compactable gravel, wet it, and tamp again
- Reset the paver and check it with a level — it should match the height of its neighbors within 1/8 inch
- Fill joints with polymeric sand, compact with a rubber mallet, and lightly mist to activate the binder
Paver pads and protective furniture feet on pavers
Even on a well-installed paver patio, rubber furniture feet are a good idea. They prevent the legs from catching on paver joints (a common cause of scraping and tipping), reduce noise on hard surface patios, and add that friction layer that keeps things from sliding. Paver/protective pads and pedestal systems: for rooftop or deck pavers and membrane roofs, use manufacturer-recommended pedestal pads or protective boards between pavers and the membrane to distribute load and prevent membrane damage; consult the membrane or deck manufacturer for chemical compatibility and load limits. For furniture with thin or sharp legs (like metal bistro chairs), use a rubber or plastic cap that spreads load across the full leg diameter rather than concentrating it at a point. Point loads on pavers can crack them over time, especially thinner 1.25-inch pavers.
Grass and soft soil: wide feet, platforms, and stabilizers
Grass and soft soil are the hardest surfaces to deal with because the ground itself changes, it's firm after a dry week and soft after rain, and organic topsoil can compress unevenly under repeated loads. A chair that's stable on Monday might sink two inches by Saturday after a rainstorm. The companion guide on how to keep patio chairs from sinking into grass and how to keep patio furniture from sinking into the ground goes deeper on this topic, but here are the core strategies.
Wide-foot coasters and paver pad supports
The goal is to get enough contact area under each leg that the load per square inch drops below the soil's bearing capacity. For step-by-step methods on how to keep patio furniture from sinking into the ground, see our detailed guide covering pads, platforms, and anchoring options. For clay or silt soil, target 6- to 8-inch diameter pads per leg. Concrete paver squares (typically 6x6 or 12x12 inches, 1.5 inches thick) make excellent and very cheap leg supports, a pack of small pavers from a home improvement store runs about $0.50 to $2.00 each. Place one paver flat under each leg. If the paver itself tips because the ground is uneven, dig out a small recess, compact the soil, and bed the paver in a thin layer of sand.
Temporary platforms for soft ground
For a full dining set on grass, individual paver pads under each leg get unwieldy fast. A better approach is to build or buy a temporary platform deck. Interlocking plastic deck tiles (sold at most home improvement stores for about $2–4 per 12x12-inch tile) click together on the grass surface and create a stable base. They're designed to drain through the tile body, so they don't flood, and they can be picked up and stored for winter in about 10 minutes. For a 10x10-foot space you're looking at roughly 100 tiles and a cost of $200–400 depending on brand. That's not trivial, but it's far less than pouring a concrete pad.
Ground anchors and screw-in stakes for wind
On soft ground, sliding isn't usually the problem, tipping and blowing over in wind is. Helical (auger-style) screw-in ground anchors are the DIY-friendly solution here. They look like oversized corkscrews, are driven into the ground by hand or with a drill adapter, and develop pullout resistance through the helical bearing plates that engage the soil. Attach furniture legs to the anchors with short bungee cords, locking carabiners, or purpose-made furniture tie-down straps. For heavier pieces, use two anchors per furniture unit on the windward side. This is particularly useful during storm season, install them in 15 minutes before a forecast wind event and pull them out after.
Gravel and loose aggregate: stability without sacrificing drainage
Gravel patios are popular because they're cheap to install and drain beautifully, but they're genuinely one of the worst surfaces for furniture stability. Individual stones shift under point loads, legs dig in over time, and the whole surface can develop ruts in high-traffic areas. The good news is there are DIY-friendly ways to stabilize gravel without losing the drainage benefits that make it attractive in the first place.
Geotextile underlayment: the foundation that most people skip
If you're installing or renovating a gravel patio, laying a nonwoven geotextile fabric before placing the gravel is one of the highest-value steps you can take for long-term stability. A 3- to 5-ounce-per-square-yard nonwoven fabric separates the subgrade soil from the gravel layer, preventing the fine soil particles from migrating up into the gravel and causing the surface to become soft and uneven over time. It also improves drainage and prevents the gravel base from sinking into soft subsoil. The fabric doesn't replace the recommended aggregate base thickness, it works with it. Overlap fabric seams by at least 12 inches, pin or staple edges down, and make sure the fabric extends under the full patio area before placing any gravel.
Stabilizing mats and furniture trays on gravel
For furniture already sitting on an existing gravel surface, the practical solution is a stabilizing mat or base tray placed under the furniture grouping. Heavy-duty rubber or PVC grid mats (the type sold for under-sink shelf liners, equipment mats, or specifically as patio furniture pads) sit on the gravel surface, spread the furniture load across a larger area, and prevent legs from pushing down into the stones. Look for mats with an open grid pattern, solid rubber mats will pond water. Outdoor rug pads with drainage holes also work and look much better aesthetically, though they need to be lifted and rinsed periodically.
Gravel stabilization grids
Plastic honeycomb gravel stabilization grids (sometimes called gravel grids or gravel pavers) are the most effective permanent solution for gravel surfaces that get heavy furniture use. You lay them on the prepared base before adding gravel, the gravel fills the cells and is locked in place, creating a surface that feels almost like solid ground to furniture legs. They're not cheap ($1.50 to $3.00 per square foot installed) but they eliminate the sinking and shifting problem entirely while maintaining full drainage. If you're building a new gravel patio and you know furniture will live on it, this is worth the upfront investment.
Anchoring and wind-proofing: when grip alone isn't enough
Wind is the variable that most grip solutions don't account for. A rubber foot that's perfect for preventing casual sliding under normal use does almost nothing when a 50 mph gust hits a chair with a high back. If you live in a region with regular afternoon wind events, coastal exposure, or storm seasons, you need a dedicated anchoring strategy on top of whatever surface-specific solution you use.
Tie-down straps and bungee anchoring systems
Purpose-made outdoor furniture tie-down kits use cam-buckle straps that loop under furniture frames and attach to anchor points, either screw-in ground stakes, concrete anchors, or heavy pots and planters used as ballast. Strap attachment points should be spaced no more than 24 inches apart for reliable performance in high wind. For a standard 4-piece dining set, six to eight anchor points distributed around the group is a practical minimum. Store-bought furniture anchor kits run $15–35 and handle most residential wind conditions. If you're in a hurricane-prone area, look specifically for kits rated to sustained wind speeds rather than generic bungee products.
Ballast weight as a low-cost solution
Sometimes the simplest answer is just adding weight. Heavy ceramic or concrete planters placed at the corners of a seating area serve double duty, they look good and they anchor the space. Umbrella stands work the same way. For lightweight plastic furniture that you don't want to permanently modify, filling the hollow legs with sand (where the leg design allows) adds surprising resistance. A 1-inch-diameter, 12-inch-tall hollow leg filled with sand adds roughly half a pound, which is modest, but multiplied across four legs and four chairs, it adds up.
Cost and time comparison across all methods
| Method | Best Surface | Approx. Cost (per chair or per 100 sq ft) | DIY Time | Permanence |
|---|---|---|---|---|
| Self-adhesive rubber feet (bumpon type) | Deck, concrete, pavers | $5–15 for a full set of 8 | 15 min | Semi-permanent; replaceable |
| Slip-on rubber leg caps | Deck, concrete, pavers | $8–20 for a set of 4 | 5 min | Removable; seasonal use |
| Furniture coasters (rubber/felt base) | Deck, concrete | $10–30 for a set of 4 | 5 min | Removable |
| Small paver pads (6x6 or 12x12 in.) | Grass, gravel, soft soil | $0.50–2.00 per paver | 30 min for a set | Permanent if bedded in sand |
| Interlocking plastic deck tiles | Grass, soft soil | $200–400 per 100 sq ft | 2–3 hours | Removable seasonal platform |
| Gravel stabilization grid | Gravel | $150–300 per 100 sq ft | Half day | Permanent |
| Screw-in ground anchors + straps | Grass, soft soil | $15–40 per furniture unit | 20 min | Removable |
| Concrete mechanical anchors | Concrete | $10–20 per anchor + drill bit | 1–2 hours | Permanent |
| Non-slip outdoor rug with gripper pad | Deck, concrete, pavers | $30–80 for rug + $15–25 for pad | 30 min | Semi-permanent; seasonal storage |
| Geotextile underlayment (new install) | Gravel, soft soil base | $0.10–0.30 per sq ft | 1–2 hours per 100 sq ft | Permanent (buried) |
Troubleshooting: when your fix stops working
Even good solutions need maintenance. For care of protective covers, including tips to prevent water pooling on them, see how to keep water from pooling on patio furniture cover. Here's what to check when a fix that was working starts failing.
- Rubber feet peeling off: The adhesive bond has failed, usually from moisture or UV exposure. Remove the old pad completely, clean with isopropyl alcohol, let dry for 30+ minutes (not 10), and install a fresh pad. If you're in a hot climate, choose a pad grade rated to 93°C rather than the basic 49°C grade.
- Paver rocking after reset: The bedding sand likely compressed or washed out again. Lift, add coarser sand (concrete sand, not play sand), tamp, reset. If it keeps happening, the base below the sand is inadequate — add compactable gravel base material and compact before re-sanding.
- Furniture sinking into grass after rain: Your pad size is too small for the post-rain soil bearing capacity. Move up to the next size (from 4-inch to 6-inch or 6-inch to 8-inch diameter), or switch to concrete paver squares.
- Grip mat sliding on deck: The mat's underside isn't compatible with the deck finish. Try a rug pad specifically rated for composite or smooth hardwood surfaces — not all rug pads are the same.
- Anchor stakes pulling out in wind: Soft, saturated soil can't hold shallow stakes. Add a second stake parallel to the first, 6 inches away, and cross-connect with a strap. Or switch to a helical auger anchor that develops bearing below the surface.
- Rust stains on concrete from metal furniture legs: Replace bare metal leg caps with rubber or plastic ones immediately. Stain removal is possible but time-consuming — prevention is much easier.
When to repair a leg versus replace the whole piece
If a furniture leg is bent, cracked, or has lost so much material from rust that the wall is thin, no grip pad or anchor is going to give you reliable long-term stability. A bent leg on a metal chair can often be straightened with a rubber mallet and a piece of scrap wood as a backing block, but a leg that's rusted through structurally is a safety issue, especially on a chair holding a person's full weight. The rule I use: if the metal wall thickness has dropped below about half its original thickness from corrosion, or if the weld at a joint is cracked, it's time to replace rather than patch. For wooden furniture legs, any soft, punky, or crumbling wood means rot has set in and the structural integrity is compromised, a furniture foot isn't going to save it. On the other hand, cosmetic rust, surface crazing on plastic, or a loose rubber foot are all easy DIY repairs worth doing.
FAQ
What’s a clear SEO-friendly title and concise meta description for an article about stopping patio furniture from moving?
Title: "How to Keep Patio Furniture from Moving, Sliding, or Sinking: DIY Fixes for Every Surface". Meta description (concise): "Step-by-step, budget-friendly DIY solutions to stop patio furniture from sliding, sinking or tipping—surface-specific fixes, anti-slip pads, anchors, cover water-management, tools, costs and safety tips."
What quick rule-of-thumb lets me estimate if a furniture leg will sink on soil or grass?
Estimate required contact area = furniture weight (lb) ÷ allowable bearing pressure (psf). Example: a 200 lb chair on soft clay (~1,500 psf) needs ≈0.13 ft² (≈19 in²) contact. Increase by a safety/settlement factor of 2–3 for wet/organic soils; choose pads or pavers sized accordingly (e.g., 6–8 in. diameter coasters for small chairs).
What surface-specific solutions work best on a wood deck?
Options: 1) Anti-slip: rubber gripper pads or adhesive non-marking bumpers under legs. 2) Sinking: install wide plastic/ rubber furniture coasters or 6–8 in. composite paver pads. 3) Permanent: mount deck post-style anchors or through-bolted keyed bases if furniture is fixed. Prep: clean, dry surface and protect finish with felt or rubber. For rooftop/deck membranes, use manufacturer-approved protective boards or pedestals.
What should I use on concrete or poured slab patios?
Anti-slip: dense rubber pads (hardness Shore A 60–80) or coarse Bumpon-style products on clean, dry concrete. Anchoring: mechanical concrete anchors (wedge or sleeve) or adhesive epoxy anchors sized per manufacturer tables. Sinking rarely an issue on sound slabs—check for cracks or spalling and repair before anchoring. Follow minimum embedment and edge-distance guidance for anchors.
How do I stop furniture from shifting on pavers and prevent single-leg sinking?
Improve base: ensure compacted aggregate base (typical residential: 4 in. compacted) and edge restraints per guidance. Quick DIY fixes: place full pavers, 1–2 in. concrete paver pads, or wide plastic/rubber coasters under each leg to spread load. For permanent anchoring, install a larger concrete pad set under paver or use surface-mounted anchors fixed into concrete curb or poured footings beyond paver field.
What are the best solutions for grass, loose soil and gravel surfaces?
Grass/soft soil: large-diameter coasters (4–12 in.), concrete paver pads, or portable wooden/ composite platforms to distribute load. Add geotextile under gravel or pea stone to stabilize subgrade. For gravel: compact aggregate base, add larger pavers or concrete stepping pads under legs. Consider screw-in helical anchors or weighted bases for wind resistance where permitted.