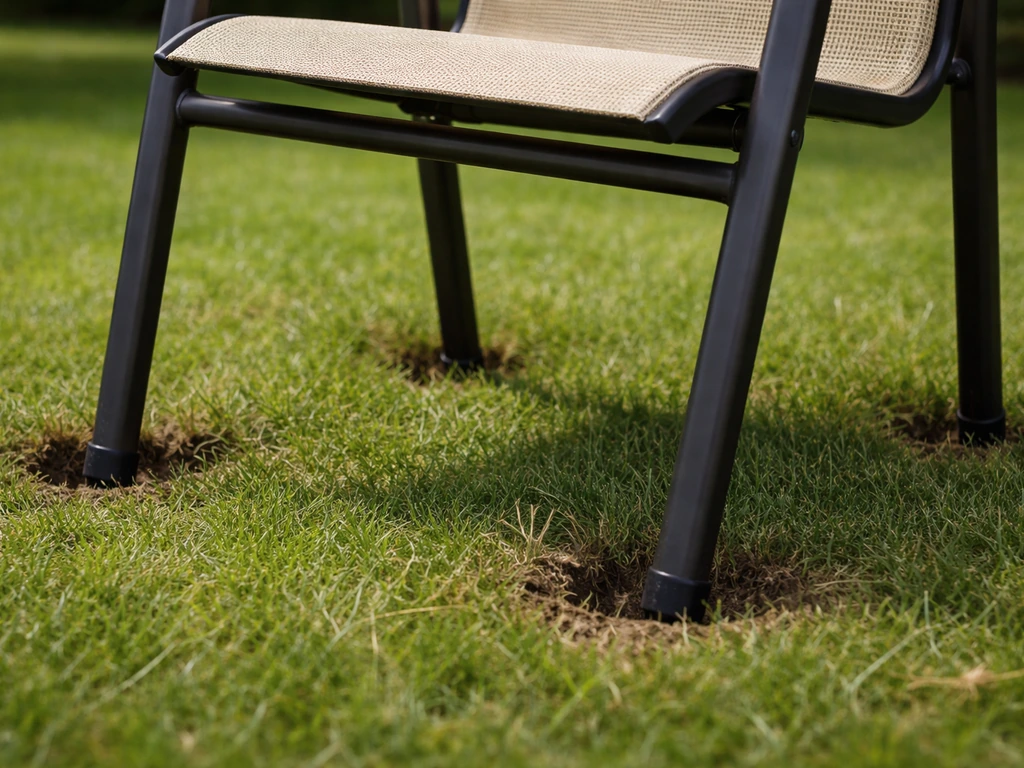
The fastest fix is to slide a rubber or composite furniture pad under each leg right now, then figure out why the ground gave way in the first place. For most people, the sinking comes down to one of three things: legs with a tiny footprint that concentrate all the weight onto a small patch of soft soil, a base that was never properly compacted, or water pooling under the surface and turning solid ground into mush. Once you know which one you're dealing with, the permanent solution is straightforward and almost always a DIY job you can finish in an afternoon.
How to Keep Patio Furniture From Sinking Into the Ground

Maren Grady
7 Jul 2026
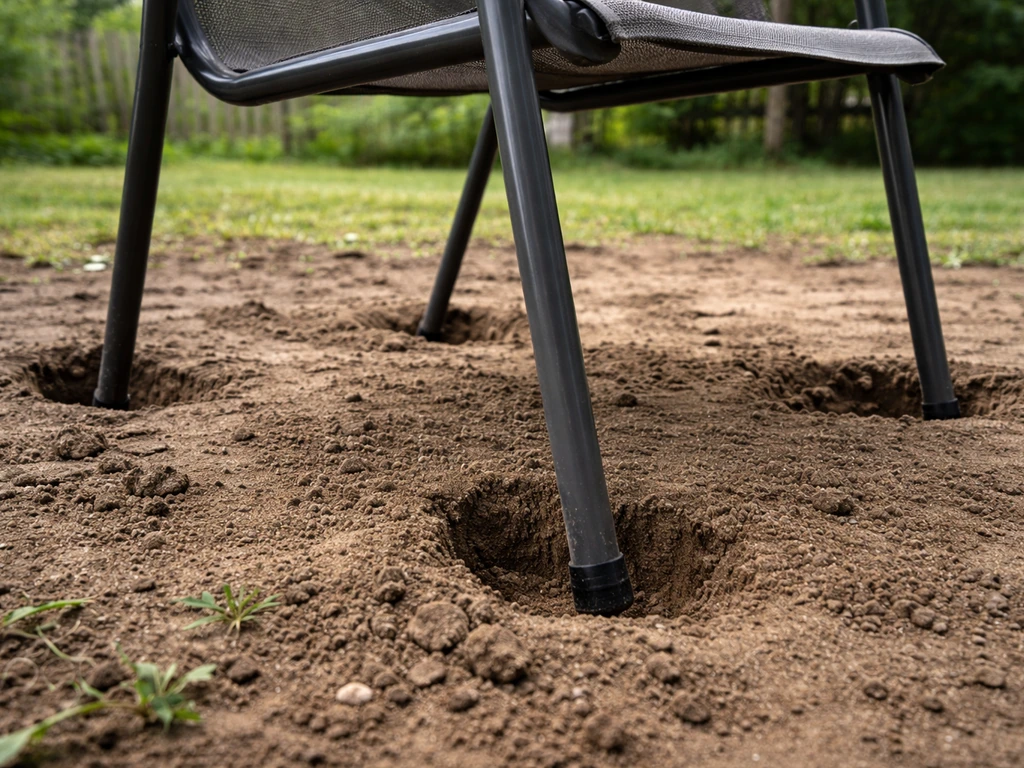
Quick diagnosis: why your patio furniture is sinking
Before you buy anything or move a single chair, spend two minutes figuring out which category your problem falls into. The fix for 'small pointy legs on soft lawn' is completely different from 'my concrete paver dipped after last winter,' so a quick diagnosis saves you money and wasted effort.
Run through this checklist and mark every box that applies to your situation:
- Legs have a small diameter (under 1 inch) or a pointed/tapered tip that digs in rather than resting flat
- Ground feels soft, spongy, or wet when you press on it near the leg impressions
- The sinking gets noticeably worse after rain or irrigation
- Only one corner or one leg is sinking while the others are fine
- The furniture rocks or wobbles even when placed on an apparently flat surface
- Existing rubber caps or glides have fallen off, worn flat, or cracked
- Furniture sits on mulch, loose gravel, or freshly turned soil
- Pavers or stepping stones underneath have dipped or tilted
- The problem reappeared after you already tried to fix it once
If you checked mostly the first two bullets, the issue is contact area: the leg is too narrow for the surface. If you checked the water-related ones, drainage is your enemy. If pavers are involved, the base underneath them has settled or been undermined by water washing away the fine material that holds everything level. And if the problem keeps coming back after fixes, that last bullet is a red flag that there's a chronic drainage or compaction failure underneath, not just a surface-level issue.
The decision tree: fix the legs, fix the ground, or both?
Here's how I think about it: if the rest of your patio surface is solid and only the furniture is sinking, fix the legs and add pads. If the ground or surface is visibly soft, uneven, or wet even without furniture on it, fix the ground first or the pads will just sink too. If both are true, you need to do both, and I'll walk you through exactly how.
Today's fix: stop the sinking in minutes to hours
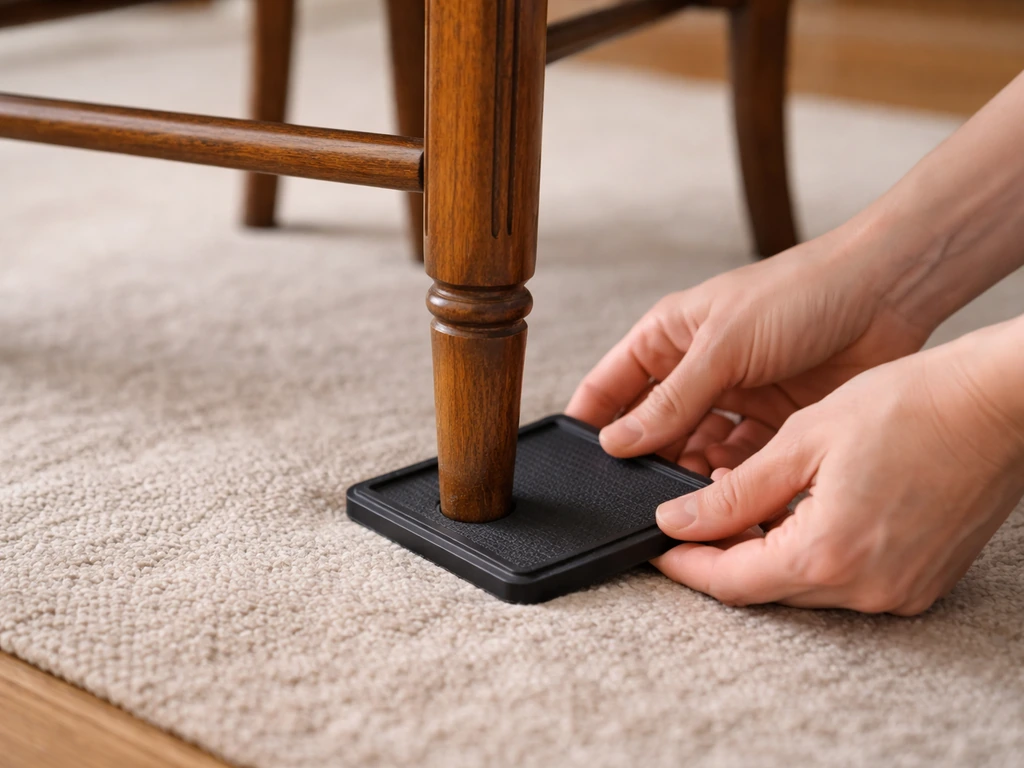
These are the things you can do right now, today, without ordering anything or waiting for the ground to dry out. They're not all permanent solutions, but they'll stop the damage and let you use your furniture while you work on the longer fix.
- Slide rubber furniture pads or furniture coasters under each leg. Wide, flat rubber pads (3 to 4 inches in diameter) are available at any hardware store for a few dollars each. They spread the load over a bigger footprint and immediately stop pointy or narrow legs from digging in.
- Relocate the furniture to the firmest spot available. Concrete, compacted stone, or an existing paver field is always better than bare lawn or mulch for the short term. Even moving a few feet can matter.
- Slip a flat scrap of wood or a paving brick under any sinking leg as a temporary shim. This levels things out immediately and protects both the leg and the ground while you plan the real fix.
- If one spot is visibly waterlogged, redirect any nearby irrigation heads or downspout extensions away from that area before doing anything else. Putting pads into saturated ground is only a temporary fix at best.
- For a rocking table or chair on an uneven surface, fold a thin piece of rubber mat or a furniture shim wedge under the short leg. Screw-in leveling feet (more on those below) are the permanent version of this.
One thing I've learned the hard way: don't just jam a bigger pad under a leg and call it done if the ground underneath is still wet and soft. The wider pad will buy you time, but it'll eventually sink too if the soil never dries out or compacts. Think of today's fixes as buying yourself a week to do the proper job.
Best solutions for each ground type
The right solution depends heavily on what your furniture is sitting on. What works perfectly on a concrete slab is the wrong call for a mulch bed, so let's go surface by surface.
Grass, dirt, and mulch
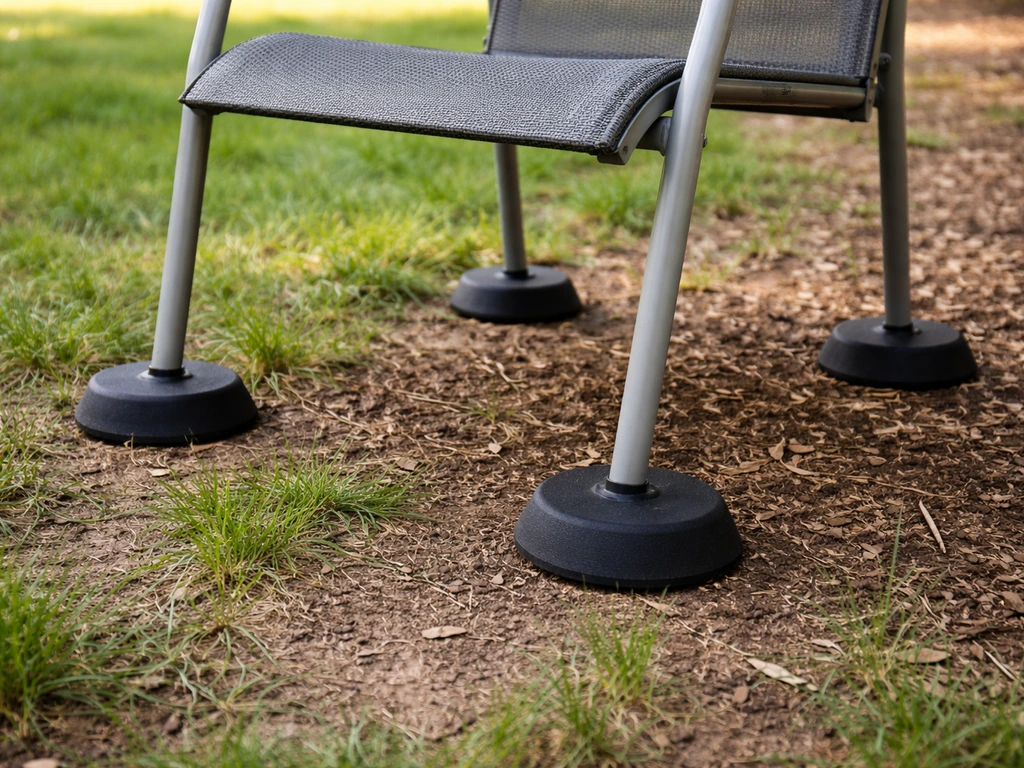
This is the most common situation and honestly the trickiest, because the ground itself is the problem. Grass and topsoil are soft by design, and mulch is even worse since it compresses and decomposes over time. The best long-term solution here is to get the furniture legs off the soft material entirely. Options in order of how permanent they are:
- Large rubber or composite furniture pads placed directly under each leg. Go as wide as possible, at least 3 to 4 inches. This works for lighter furniture or temporary setups.
- Paver stepping stones or concrete deck blocks placed under each leg. Set them into the ground so the top surface is flush or slightly proud of the lawn. They give each leg a firm, flat landing point.
- A full gravel or compacted base pad under the furniture grouping. Excavate 4 to 6 inches, fill with compacted crushed stone (3/4-inch minus works well), and set your furniture on top. This is the gold standard for grass and dirt because it also drains water away from the surface instead of pooling it.
For mulch specifically: the only real solution is to remove the mulch from the furniture footprint and replace it with a firm material. You can keep a ring of mulch around the edges for aesthetics, but putting furniture directly into a mulch bed will always be a losing battle.
Loose gravel
Loose pea gravel or river rock looks great but is basically a sandbox for furniture legs. The fix is either to compact the gravel properly (which requires a plate compactor or a lot of patient tamping), place individual flat stepping stones or pavers under each leg, or switch the top layer to crushed angular gravel (like crusher run or 3/4-inch minus), which interlocks and compacts much more firmly than round stones. Round gravel simply cannot compact the same way angular crushed stone can.
Pavers and stepping stones
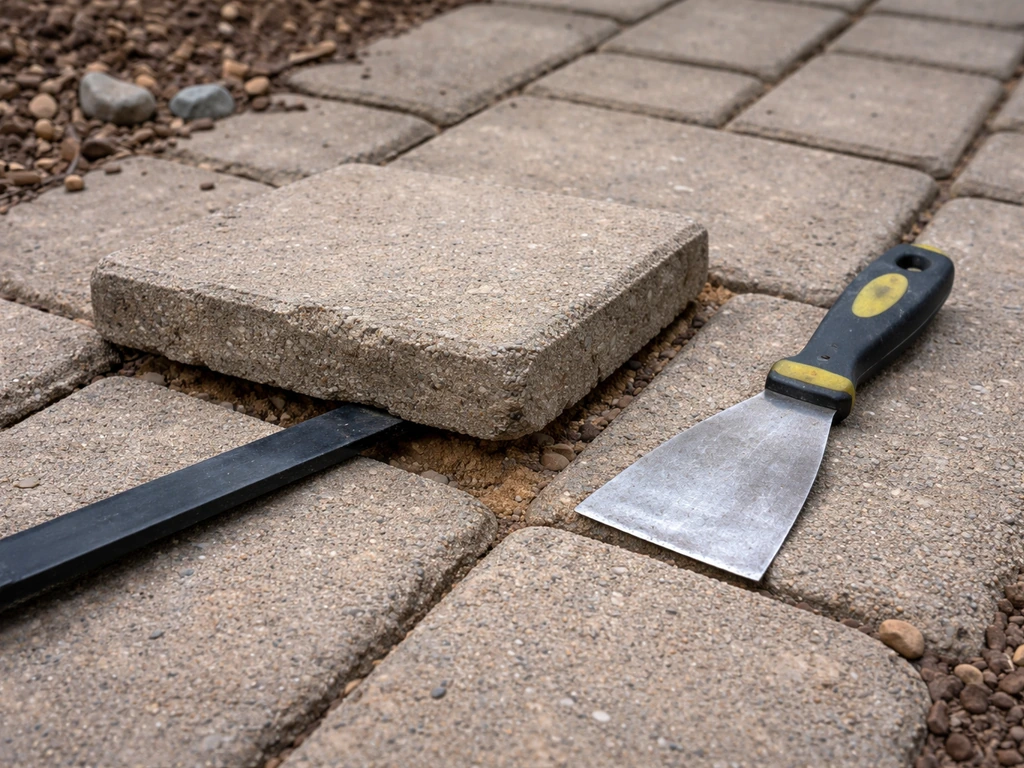
If a paver has sunk, the problem almost always started underneath it, not in the paver itself. Water washes away the fine sand in the bedding layer, or the base was never properly compacted in the first place, and the paver drops. The surface-level fix of adding sand on top and hoping for the best doesn't last. The right fix is to lift the sunken paver, inspect the base, correct the drainage or compaction issue, and reset it properly. Here's the short version of that process:
- Carefully pry up the sunken paver using a flat bar or wide putty knife. Set it aside somewhere safe.
- Dig out any soft, wet, or eroded base material until you reach something firm. Don't just add material on top of the soft stuff.
- Add compacted crushed stone in layers (2-inch lifts, tamped firmly between each) until the base is back to the correct height.
- Add a layer of coarse bedding sand (about 1 inch) on top of the compacted stone.
- Reset the paver, check it for level with a small torpedo level, and bed it in firmly with a rubber mallet.
- Check that the reset paver drains water away from the center of the surface rather than trapping it underneath.
If you skip the base repair and just reset the paver on the same undermined base, you'll be back to square one after the next heavy rain. I've seen people reset the same paver three times because they kept skipping this step.
Concrete slabs
Concrete is generally the best surface for patio furniture because it doesn't compress. But furniture can still rock or feel unstable if the slab has cracked and shifted, or if a leg lands right on a crack or joint. The fix for furniture on concrete is almost always at the leg level: add rubber or felt glides, or install screw-in leveling feet so you can dial in the height of each leg independently. If the slab itself has sunk or heaved (especially after a winter freeze-thaw cycle), that's a separate project, but the furniture fix is still just leveling feet and pads.
Choosing and installing support pads and footings that distribute weight
The physics here are simple: pressure equals force divided by area. A 50-pound chair concentrated on a 1/2-inch diameter leg tip creates enormous pressure per square inch. Spreading that same load over a 4-inch rubber pad or a 12-inch concrete deck block reduces the pressure dramatically, and the ground stops giving way. Here's a comparison of your main options:
| Material | Best surface | Load capacity | Cost (per leg) | Longevity |
|---|---|---|---|---|
| Rubber furniture pads (3-4 inch) | Grass, dirt, pavers, concrete | Light to medium (chairs, side tables) | $1–$4 | 2–5 years |
| Composite/HDPE furniture feet | All surfaces | Medium to heavy (dining sets, loungers) | $3–$8 | 10+ years |
| Natural stone/paver tile (12 inch) | Grass, dirt, gravel | Heavy (any furniture) | $2–$6 each | Decades |
| Concrete deck block (nominal 12x12 inch) | Grass, dirt, soft ground | Very heavy (tables, sectionals) | $5–$10 each | Decades |
| Compacted crushed stone pad | Grass, dirt, mulch areas | Any weight (whole furniture grouping) | $20–$60 total | Permanent with maintenance |
For rubber pads, installation is as simple as pressing them under each leg. For composite or screw-in feet, you'll typically drill a small pilot hole into the bottom of a hollow leg or thread them into an existing threaded insert. For deck blocks and paver tiles, here's how to install them properly so they don't just become another sinking surface:
- Mark the footprint where each leg will sit.
- Dig out a shallow hole 2 to 3 inches deep and wide enough for the block or paver to sit with an inch of clearance on each side.
- Fill the bottom of the hole with 1 to 2 inches of compacted crushed stone or coarse gravel. This is the drainage layer that keeps water from pooling under the pad.
- Set the block or paver on top, check for level in both directions with a torpedo level, and adjust the gravel bed until it reads level.
- Backfill around the sides with the same crushed stone and tamp it down firmly.
- Set the furniture leg onto the pad and check that the load is centered, not sitting on an edge.
For a whole-grouping crushed stone pad, the process is the same idea but scaled up: excavate 4 to 6 inches across the entire furniture area, lay a layer of compactable base material (often called 3/4-inch minus or crushed aggregate), compact it in 2-inch lifts, and finish with a finer compacted top layer. A plate compactor from a tool rental shop makes this go much faster and produces a far more stable result than hand tamping. Proper compaction (targeting around 95% maximum dry density) is what separates a base that lasts years from one that sinks again after the first rainstorm.
Leveling wobbly furniture: shims, leveling feet, and leg adjustments
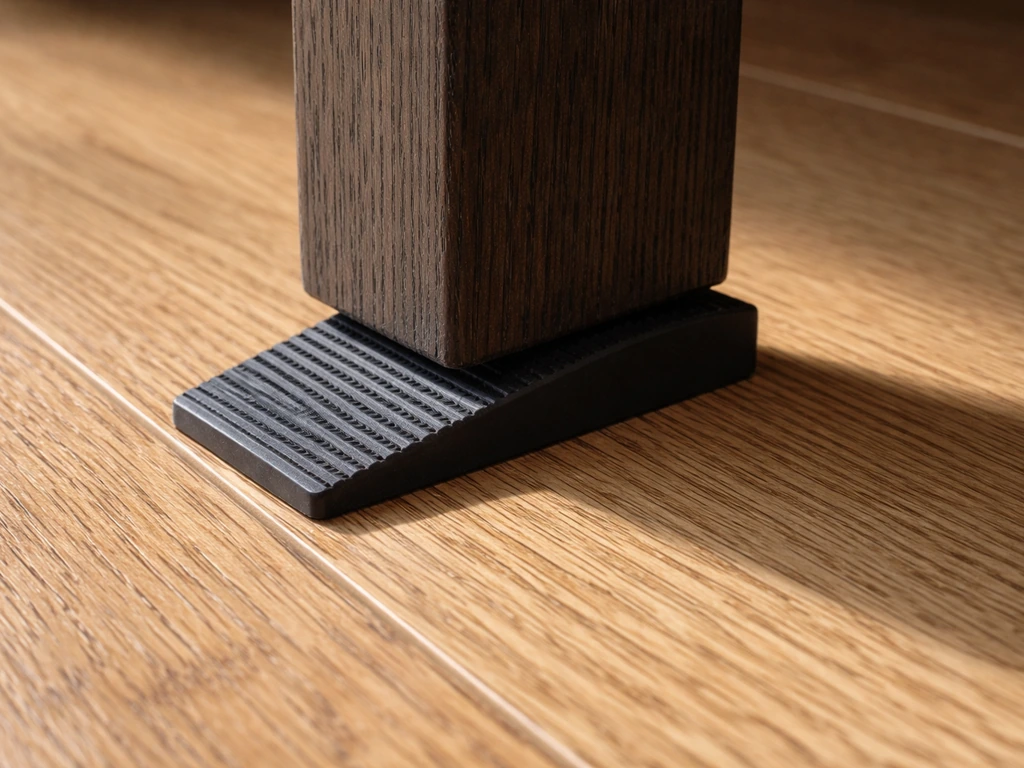
Sinking and wobbling are related but not the same problem. Sinking is about the surface giving way. Wobbling is about the furniture legs not all touching the ground at the same height. Both are annoying, and they often happen together when ground is uneven.
Temporary shims
For a quick level, rubber furniture shim wedges (sometimes called furniture leveling wedges) slide under the short leg and can be stacked for more height. They're almost invisible under the furniture and cost about $5 to $10 for a pack. For outdoor use, make sure you're buying rubber or composite shims, not the wood wedges meant for interior flooring. Cedar or blank" rel="noopener noreferrer">pressure-treated wood shims (UC4A ground-contact rated) will hold up outdoors if you want a wood option, but rubber is easier and longer-lasting.
Screw-in leveling feet
This is my favorite permanent fix for any furniture with hollow metal or wood legs. Screw-in leveling feet thread into the bottom of each leg and have a wide rubber or nylon foot with a threaded stem. You turn the stem up or down to adjust the height of that leg independently, so you can perfectly level a table or chair on any slightly uneven surface in about two minutes. They typically adjust 1/2 inch to 1 inch in either direction, which handles most real-world unevenness. Buy them in stainless steel or zinc-plated versions for outdoor use. A set of four runs about $8 to $20 depending on the diameter.
One corner sinking
If only one leg is sinking, that corner is sitting on a softer or wetter spot than the others. Check for a nearby downspout, a low point where water drains toward, or a spot that gets more shade and stays wetter longer. Fix the drainage issue, then use a deck block or paver under just that leg to bring it to the same bearing capacity as the others. A leveling foot on that corner gives you the fine-tuning on top.
Prevent it from coming back: drainage, compaction, and seasonal maintenance
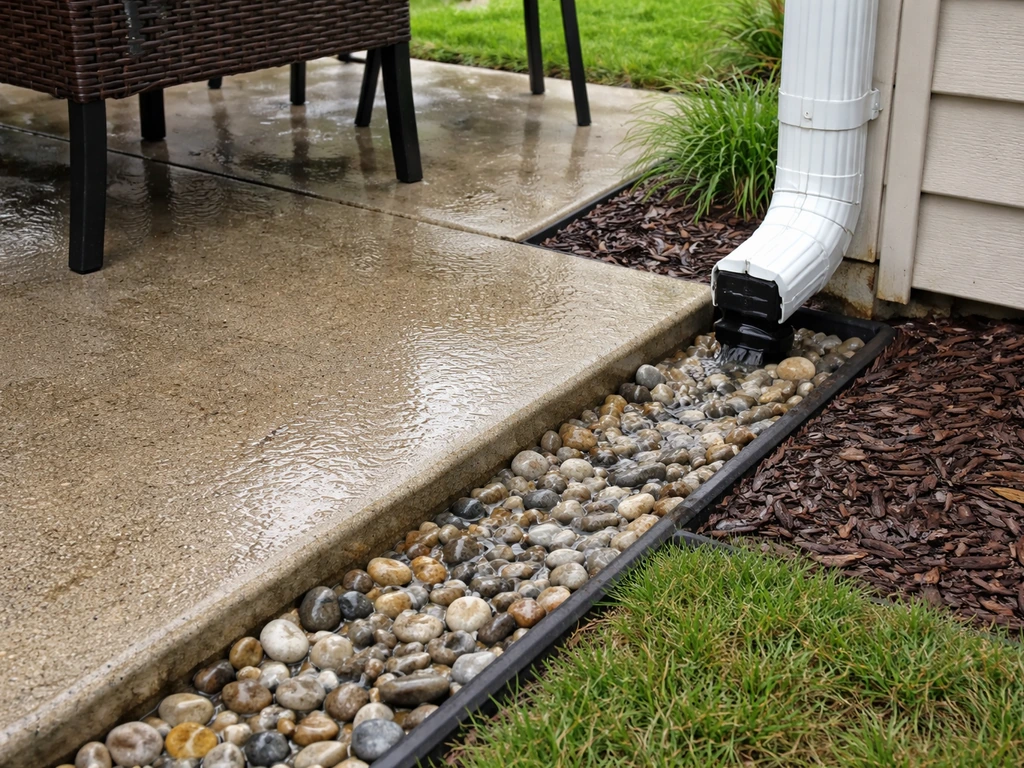
The number one reason furniture sinking keeps coming back is water. Water softens soil, washes away base material, and in cold climates drives frost heave, where freezing moisture expands under your patio surface and pushes things upward in winter only for them to drop back unevenly in spring. Here's how to break the cycle.
Drainage fixes that actually work
- Make sure the grade (slope) of your patio area directs water away from furniture zones, not toward them. Even a 1/8-inch drop per foot is enough.
- Extend downspouts at least 6 feet away from patio areas using flexible downspout extensions.
- If water persistently pools near your furniture, consider a simple French drain (a gravel-filled trench with a perforated pipe) running from the wet spot to a lower area of the yard.
- Avoid letting sprinklers hit directly under furniture. Reposition heads so water doesn't saturate those footprint spots repeatedly.
Seasonal maintenance checklist
Once or twice a year, give your patio setup a five-minute check. It takes almost no time and catches problems before they get expensive.
- After the first heavy rain of spring, walk around and check every furniture leg for new impressions or shifts in the pads beneath them.
- After winter, check all paver or stone footings for frost heave. If a paver has lifted or tilted, reset it properly (see the paver section above) before placing furniture back on it.
- Inspect rubber pads and glides for cracking, flattening, or missing pieces. Replace worn pads before they compress completely.
- Check screw-in leveling feet to make sure they haven't loosened over the season. Hand-tighten if needed.
- Look for new soft spots or wet areas near the furniture footprint. Address drainage before they worsen.
- If you use a compacted crushed stone pad, rake it level and add a thin top-up layer of fresh aggregate every two to three years as it settles slightly.
Furniture that slides around on your patio surface is a related but different problem from sinking, and the fixes overlap in some areas (wider feet help both issues). If your main problem is that patio furniture slides around, you can prevent it by adding non-slip pads or glides designed to grip the surface. Similarly, if you're dealing with furniture that shifts after wind events, that's more of an anchoring challenge than a ground support one.
Troubleshooting when nothing holds: ground still soft, uneven load, or surface shifting
If you've tried pads, blocks, or base work and the furniture is still sinking or shifting, here's how to dig into what's actually going wrong.
The base isn't deep or compacted enough
This is the most common reason repairs don't hold. A thin layer of gravel or a single paver sitting on uncompacted soil will eventually sink no matter how wide it is. The base needs to be at least 4 inches of compacted crushed aggregate for light furniture loads, and 6 inches or more for heavy dining sets or sectionals. If you set a deck block or paver and it's sinking again within a few weeks, the base layer under it isn't thick enough or wasn't compacted. Dig it back out, go deeper, and compact in layers. This is the step most people skip because it feels like overkill for 'just a couple of chairs,' and it's the step that decides whether the fix lasts one season or ten years.
The ground is chronically wet
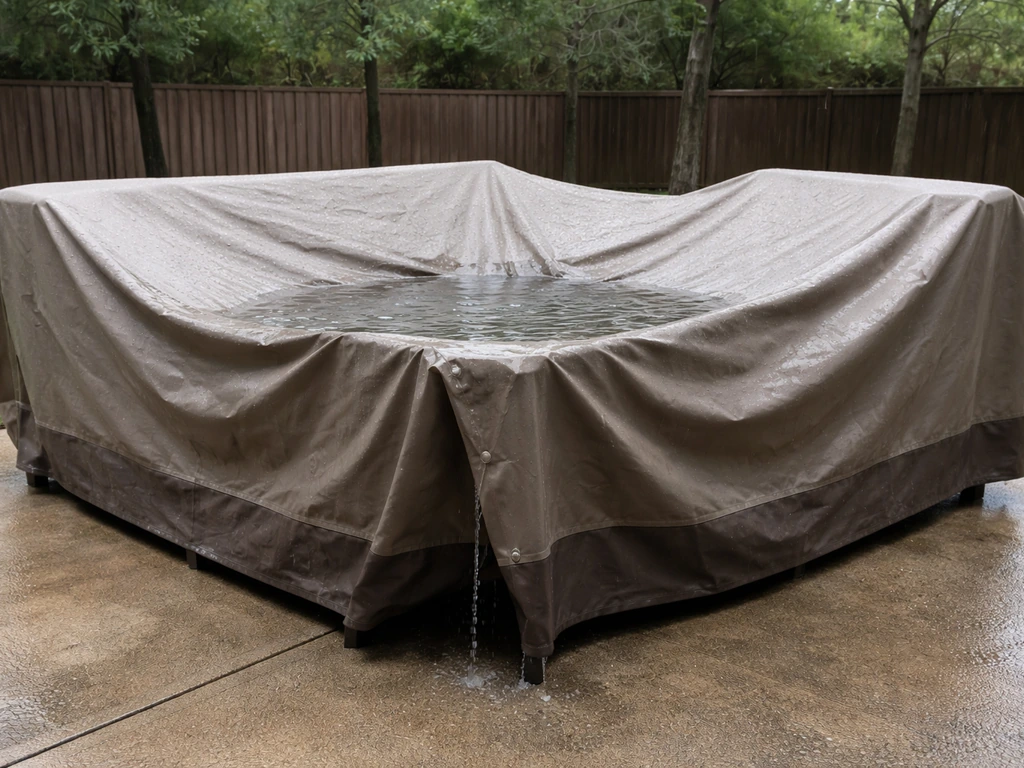
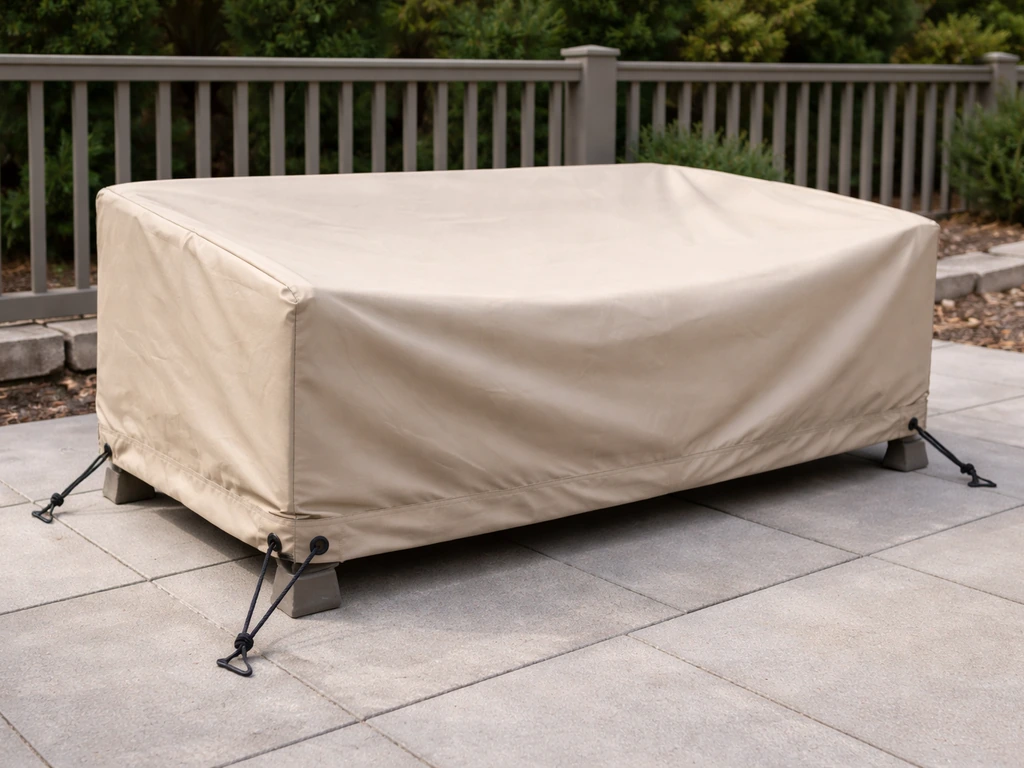
If the soil in your patio area never fully dries out, no amount of surface preparation will permanently hold because the soil below your base layer is always saturated and weak. This is a drainage problem, not a compaction problem, and you need to address it at the source. To prevent water from pooling on the patio furniture cover, focus on proper drainage around the area and keep the cover pitched so runoff can shed away from the legs how to keep water from pooling on patio furniture cover. Look uphill from the wet area for where the water is coming from, check for broken or undersized gutters/downspouts, and consider whether the ground around your home's foundation is properly graded. Sometimes a simple French drain solves years of ongoing sinking. Repeated sinking after multiple repair attempts is almost always pointing to this kind of chronic issue underneath.
Uneven load distribution
A four-legged table or chair on uneven ground will sometimes rock so that only two or three legs bear weight at once, which concentrates the load on fewer points and causes those specific legs to sink faster. Leveling feet solve this by letting you adjust each leg until all four make firm contact simultaneously, spreading the weight evenly. If you've already tried leveling feet and still have an uneven load problem, check whether the furniture frame itself has bent or warped, which can prevent it from sitting flat regardless of what's under the legs.
Surface shifting (pavers, gravel, or stone moving laterally)
If pads, stones, or pavers are sliding sideways rather than just sinking straight down, the issue is lateral movement, not just vertical settlement. For individual stones or pavers, this usually means the edging or border restraint around the patio has failed or was never installed. Re-setting the border and adding polymeric sand between pavers locks them in place laterally. For loose gravel, switching to angular crushed stone and installing a solid edging material (steel, aluminum, or concrete edging) around the perimeter stops the lateral spread. If the whole gravel or paver field is shifting on a slope, you may need to add a retaining element at the downhill edge.
One last thing worth saying: if you've gone through proper base preparation, good drainage, and correctly installed pads or footings and things still keep moving, take a hard look at whether the furniture itself is the right fit for that location. Heavy sectionals on a steep slope, delicate bistro chairs on a soft lawn, and oversized dining sets on individual stepping stones are all setups that fight against you from the start. Sometimes the most practical fix is choosing furniture with a wider base footprint, or simply relocating the furniture grouping to a spot that can handle the load without so much ongoing maintenance.
FAQ
Can I just put thicker pads under the legs to stop sinking immediately?
Yes, but only as a short-term protective layer. A larger pad spreads load, but if the soil beneath stays wet or uncompacted, the pad will eventually sink too. If you need a week of use, use pads temporarily, then plan base repair or drainage correction before the wet season returns.
Is pea gravel enough to prevent patio furniture from sinking?
Avoid placing furniture legs directly on loose round gravel like pea gravel or decorative stones, because it cannot compact into a stable bearing surface. Instead, use angular crushed stone that interlocks, or set each leg on a compacted base under it (paver or deck block under every leg).
How can I tell whether the problem is the patio surface or something below it?
If the furniture keeps sinking in the same spots, assume the weak area is below the surface. Test by walking on the patio area without furniture, look for soft or wet patches, and check whether paver dips match the same leg locations. That pattern usually points to an undermined bedding layer, inadequate compaction, or chronic drainage.
What should I do if only one paver under the furniture dipped?
For pavers, adding more sand on top is usually a band-aid. The lasting fix is lifting the sunken paver, inspecting and rebuilding the bedding and base, then resetting and addressing the drainage path that caused washing or settlement.
What if the patio looks fine, but sinking happens after rain or snow?
Water pooling under furniture cover or legs can undermine base material and cause freeze-thaw heave in colder areas. Make sure runoff sheds away from the furniture area, keep the cover pitched so water does not sit, and check gutters, downspouts, and grading uphill of the patio.
Are wooden shims okay to level patio furniture outdoors?
Do not rely on wood shims that are not rated for ground-contact use outdoors, they can rot and compress over time. If you use wood, choose ground-contact treated shims rated for outdoor exposure, otherwise prefer rubber or composite leveling wedges.
Will screw-in leveling feet fix sinking, or only wobbling?
Leveling feet fix uneven contact heights, but they do not stop sinking if the bearing capacity under a leg is failing. Use a quick visual check: if a leg visibly sinks over days or weeks, you need base compaction or drainage work, not just height adjustment.
How thick should the base be if I’m building a crushed stone support pad under the whole set?
Yes, but do it in a way that targets the base, not just the surface. For a whole-group crushed stone pad, excavate the area, build a compactable base in lifts, and compact each lift to a high density. A plate compactor rented from a tool shop is the easiest way to hit that compaction consistently.
Why does my table rock, and why do only certain legs sink faster than the others?
Yes, but it depends on whether the weight distribution is the issue. If the furniture rocks because some legs are not contacting, leveling feet help. If only two legs sink faster, a softened spot nearby is likely, address that spot’s drainage and add a deck block or base repair under that leg.
What’s different about fixing sliding sideways versus sinking straight down?
If the furniture is sliding sideways, pads for grip may not solve it because the underlying support may also be shifting. Check patio edging or restraint, and for paver fields consider polymeric sand and intact border restraint to prevent lateral movement.
I repaired it before, and it sank again. What’s the most common reason it keeps coming back?
If you keep redoing the same repair and it returns after storms, prioritize diagnosing chronic water movement first, then compaction. Look uphill for downspout flow, check whether the patio base is being undermined, and consider adding drainage like a French drain if the area stays saturated.