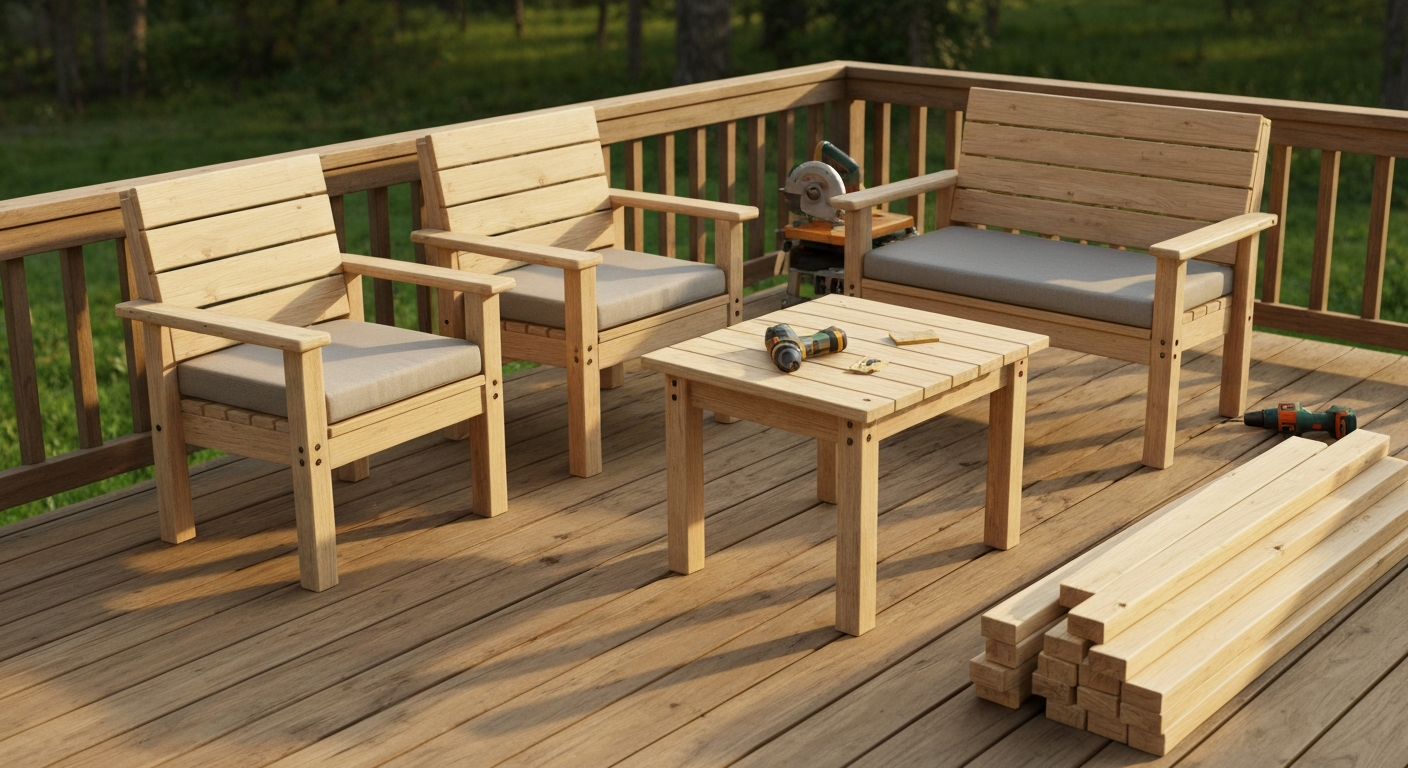
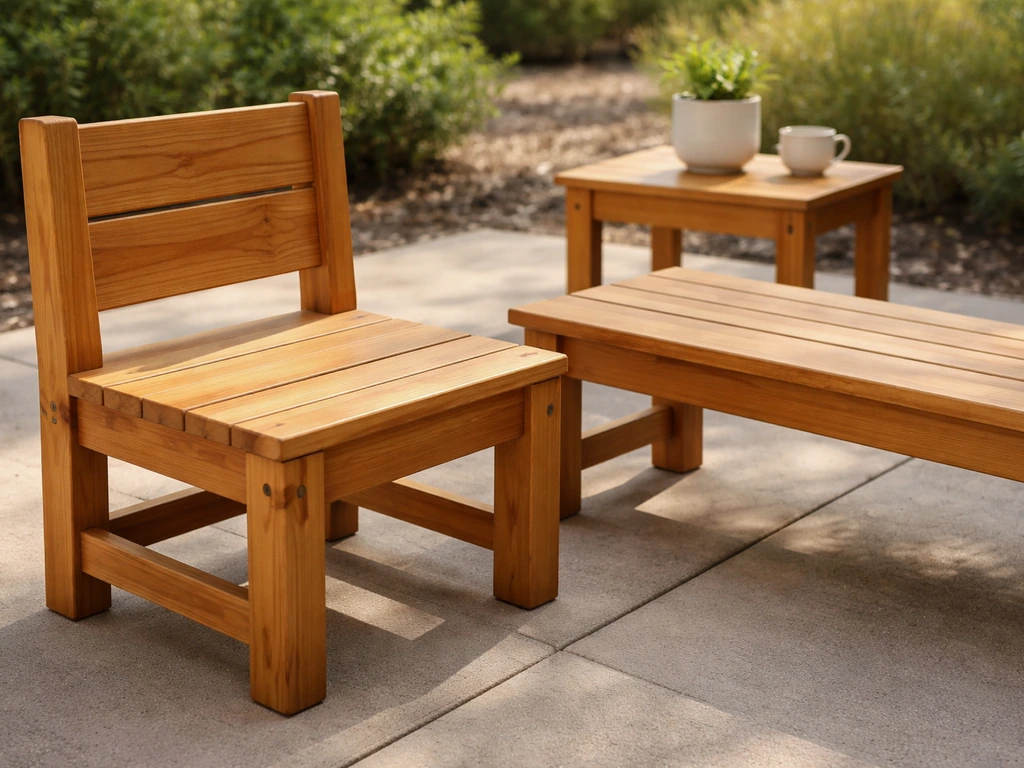
You can build solid, attractive patio furniture yourself for a fraction of retail cost using basic tools, dimensional lumber, or PVC pipe. A simple 2x4 bench costs roughly $20–40 in materials. A full Adirondack chair in cedar runs $60–120. A PVC pipe lounge set can come in under $80. None of these projects require a workshop full of tools or years of experience. What they do require is accurate planning, the right fasteners for outdoor exposure, and a clear understanding of how wood or pipe behaves over seasons of sun, rain, and weight.
How to DIY Patio Furniture: Complete Step-by-Step Guide

Maren Grady
8 Aug 2026
Who this guide is for and what we're building
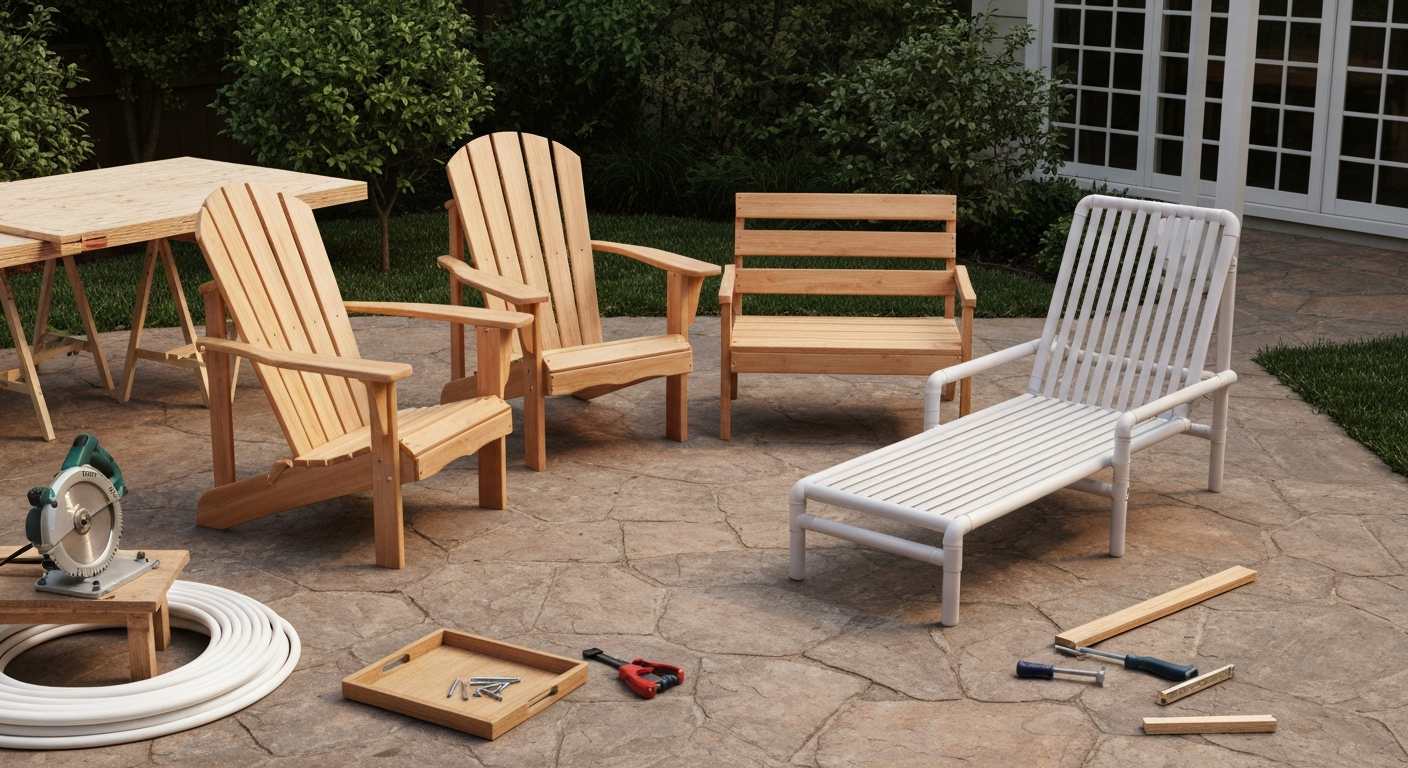
This guide is written for homeowners and renters who want functional, good-looking outdoor furniture without paying $400 for a single chair at a big-box store. It covers three complete build approaches: traditional exterior wood builds using species like cedar or redwood, budget-friendly 2x4 builds that work with basic construction lumber, and lightweight PVC pipe furniture that's easy to assemble and store. Each method has its own materials list, cut list, joinery options, and finishing steps.
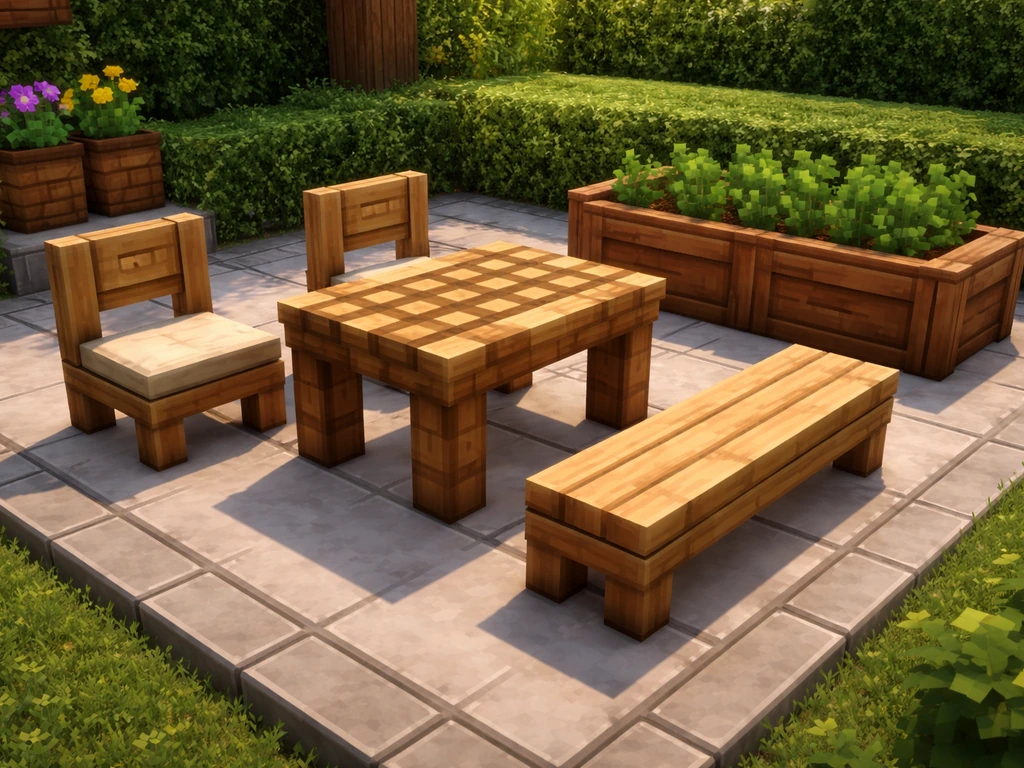
One quick note before we get into it: if you've been browsing Minecraft build tutorials for patio design ideas, that's genuinely useful for visualizing layouts, proportions, and furniture arrangements. For block-by-block layouts and visual inspiration, see our guide on how to make patio furniture in Minecraft. Plenty of in-game builds have inspired real-world projects. But Minecraft designs aren't structural plans, and none of the in-game techniques translate directly to real materials, load limits, or weather resistance. Treat those as mood boards, not blueprints. We'll give you the actual dimensions, fastener specs, and material choices here.
Safety first: setting up your workspace and protecting yourself
I'll be honest: the times I've gotten hurt on projects were almost always when I was rushing and skipped a basic safety step. Setting up properly before you cut a single board takes about ten minutes and prevents most of the common injuries. Here's what that looks like in practice.
Your workspace needs a flat, stable surface for cutting and assembly. A pair of sawhorses with a 2x10 or sheet of plywood across them works perfectly. Make sure the ground under your sawhorses is level so your workpiece doesn't shift mid-cut. Keep your work area clear of sawdust, offcuts, and extension cords running across foot traffic zones. Good lighting matters more than people expect: shadows hide pencil lines and misaligned drill bits.
Personal protective equipment you actually need
- Safety glasses or goggles: mandatory for any cutting, drilling, or sanding. Flying wood chips and PVC shavings are the most common eye hazard on these projects.
- Hearing protection: foam earplugs or earmuff-style protectors for any extended power tool use. A circular saw at 90+ dB causes cumulative hearing damage faster than most people realize.
- Dust mask or N95 respirator: wood sanding generates fine particles, and pressure-treated lumber sanding creates chromated copper arsenate (CCA) or ACQ preservative dust that you do not want to inhale. N95 minimum for treated wood.
- Work gloves: cut-resistant gloves for handling rough lumber, freshly cut PVC, or sheet metal hardware. Remove gloves before operating a drill or saw—gloves can catch in rotating bits.
- Steel-toed boots or closed-toe shoes: lumber and pipe sections are heavy and drop unpredictably.
- Knee pads: optional but genuinely useful for any assembly work done on the ground.
For chemical steps like applying stain, sealant, or PVC cement, add chemical-resistant nitrile gloves and work in a ventilated area or outdoors. PVC primer and cement fumes are strong and fast-acting in enclosed spaces.
Planning your project before you buy a single board
The biggest mistake I see beginners make is going to the lumber yard before they have a real plan. You end up buying too much of the wrong stuff, or not enough of the right stuff, and the project stalls. Spend 30–60 minutes on planning and you'll save both money and frustration.
Style and site considerations
Think about where the furniture will live. A covered porch with minimal rain exposure is far more forgiving than a fully exposed deck in a humid climate. Full sun and wet environments demand naturally durable or treated wood and stainless hardware. A shaded, covered area gives you more material flexibility. Measure your patio or deck space and sketch a rough layout to scale, even on graph paper. Nothing is worse than finishing a table that won't fit through your gate.
Load capacity and structural basics
Adult furniture needs to support real loads. A dining bench should handle at least 250–300 lbs safely without flexing or cracking. A lounge chair sees dynamic loads when someone leans back or shifts weight. For simple benches and chairs built from 2x4 or larger lumber, you're generally within safe limits if you follow established plans and use proper joinery. Where it gets tricky is with longer unsupported spans, like a bench seat board spanning more than 48 inches without a center leg or stretcher. When in doubt, add support rather than remove it.
Project decision checklist
- What furniture do I actually need? (chairs, bench, table, lounger, side table)
- How many pieces and what configuration? (dining set for 4, conversation set, single chair)
- What is my total budget including tools, materials, and finish?
- What is my realistic skill level? (first build vs. experience with power tools)
- How much time can I dedicate? (weekend project vs. multi-weekend build)
- Where will the furniture live? (covered, exposed, coastal, inland)
- Do I want it to be permanent or storable/portable?
- Do I already own the required tools, or do I need to buy or borrow them?
Getting the dimensions right: ergonomics and standard measurements
This is the section most beginner guides skip, and it's why so many homemade chairs end up uncomfortable. Ergonomic seating dimensions are well-studied. For comfortable adult seating, the finished seat height should fall between 16 and 19 inches (405–485 mm). See Chair Size Design Based on User Height (PMC / peer‑review article) for peer‑reviewed ergonomic ranges that align with these seat height, depth, and back angle recommendations. Seat depth runs 16–22 inches (405–560 mm) depending on whether you're building an upright dining chair or a deeper lounge chair. The seat-to-back angle, meaning how far the backrest tilts away from vertical, should be 95–110 degrees for relaxed outdoor seating. A perfectly vertical backrest (90 degrees) feels like a punishment chair. More than 115 degrees and you start needing a footrest to stay comfortable.
If you're building for a specific group, say, shorter users or kids, prototype the seat height with scrap wood before committing to final cuts. A stack of scrap boards and a piece of plywood will tell you whether 17 inches feels right before you've cut anything. I've done this on every chair build and caught two dimension problems that would have been annoying to fix after assembly.
| Furniture Type | Seat Height | Seat Depth | Seat Width | Back Angle | Table Height |
|---|---|---|---|---|---|
| Dining chair | 17–19 in (430–485 mm) | 16–18 in (405–455 mm) | 17–20 in (430–510 mm) | 95°–100° | — |
| Lounge/Adirondack chair | 16–18 in (405–455 mm) | 20–22 in (510–560 mm) | 20–24 in (510–610 mm) | 105°–110° | — |
| Bench (backless) | 17–18 in (430–455 mm) | 12–15 in (305–380 mm) | 48–72 in (1220–1830 mm) | — | — |
| Dining table | — | — | — | — | 28–30 in (710–760 mm) |
| Coffee/side table | — | — | — | — | 16–18 in (405–455 mm) |
For arm height on chairs, aim for 7–9 inches above the seat surface so forearms rest naturally without shoulder shrugging. If you're building a table and chairs together, confirm the clearance between seat and tabletop underside is at least 10–12 inches so thighs fit comfortably.
Choosing your materials: wood species, lumber grades, PVC types, and hardware
Wood species and decay resistance
Not all wood belongs outside. The USDA Forest Products Laboratory Wood Handbook (FPL-GTR-190) is the gold standard reference for wood properties, and it rates heartwood decay resistance by species. For outdoor furniture, you want species in the durable to very durable range. Here's how the common options stack up.
| Species | Decay Resistance | Workability | Relative Cost | Best For |
|---|---|---|---|---|
| Teak | Very durable (excellent) | Moderate (oily, blunts tools) | Very high ($$$) | Premium furniture, coastal exposure |
| Ipe (Handroanthus spp.) | Very durable (excellent) | Difficult (very hard, 3,510 Janka) | High ($$–$$$) | Decking, heavy-duty frames |
| Cumaru | Very durable | Difficult (similar to ipe) | High ($$–$$$) | Heavy-use outdoor frames |
| Western red cedar | Durable | Easy (lightweight, soft) | Moderate ($$) | Chairs, tables, trim, all-around builds |
| Redwood | Durable | Easy (lightweight) | Moderate–high ($$–$$$, regional) | Chairs, benches, planters |
| Cypress | Durable | Easy to moderate | Moderate ($$) | Southern climates, benches |
| Pressure-treated pine | Durable (by treatment) | Easy (common framing lumber) | Low–moderate ($) | Ground contact, frames, structural parts |
| Douglas fir / SPF (untreated) | Low | Easy | Low ($) | Interior or covered-porch builds only |
My personal go-to for beginner builds is western red cedar. It's light, forgiving to cut and sand, smells fantastic, and holds up well outdoors with a basic annual oiling. Teak and ipe are beautiful but brutal on saw blades and your budget. If you're building your first piece, don't start with ipe. Save that for when you've got the confidence and the carbide blades.
Lumber grades and what to look for at the yard
For structural parts (legs, aprons, stretchers), choose Select or #1 grade lumber with tight, straight grain and no large knots at stress points. For tabletop boards and seat planks where appearance matters, Select or Clear grades minimize knots and warping. For painted or stained builds where minor defects will be hidden, #2 grade is fine and noticeably cheaper. Regardless of grade, sight down every board before buying. Reject any board with a significant bow, crook, twist, or cup, especially for long pieces like seat planks and table legs. Wet or recently kiln-dried lumber will continue to move as it acclimates, so let boards sit in your workspace for a few days before cutting if possible.
2x4 specifics: nominal vs. actual dimensions
Here's something that trips up almost every first-time builder: a 2x4 is not 2 inches by 4 inches. After milling and drying, a nominal 2x4 actually measures 1.5 inches by 3.5 inches (38 x 89 mm). A 1x6 is actually 0.75 x 5.5 inches. The American Wood Council publishes full nominal-to-actual conversion tables, and you must use actual dimensions when writing cut lists and planning joinery. Getting this wrong throws off every measurement in your project. I built a table once using nominal dimensions in my cut list and ended up with legs that were 2 inches too short. Always work in actual dimensions.
PVC pipe types and fittings
Schedule 40 PVC is the standard for furniture builds. It has a tensile strength of roughly 7,000–7,500 psi and compressive strength around 9,500–10,000 psi, which is adequate for light furniture loads when designed conservatively. The critical limitations are long-term creep under sustained load and UV degradation over time. Unprotected PVC becomes brittle and chalky in direct sunlight within a few seasons. Use UV-stabilized pipe and fittings where available, or plan to paint with a UV-blocking exterior paint. For load-bearing spans, stick to 1.25-inch or 1.5-inch diameter pipe and keep unsupported lengths under 24 inches for seats. Reinforce structural sections by inserting a wooden dowel or steel rod inside the pipe. Common fitting types you'll use: 90-degree elbows, 45-degree elbows, tee fittings, cross fittings, and end caps. Solvent cement (PVC cement with purple primer) creates a permanent, strong bond. Dry-fit everything before cementing because you cannot disassemble a cemented joint.
Hardware choices: fastener alloys by exposure zone
This is where a lot of DIY patio furniture falls apart, literally. Using the wrong fasteners causes rust streaks, staining, and structural failure within a season or two. For inland environments without salt air, stainless steel 304 (also called A2) is the standard recommendation. For coastal or marine environments, or anywhere deicing salt is used, upgrade to stainless steel 316 (A4), which has significantly better pitting and crevice corrosion resistance. Hot-dip galvanized hardware is an acceptable lower-cost alternative for inland builds but degrades faster near salt water. Avoid plain zinc-plated or black-oxide fasteners entirely for outdoor use. For pressure-treated lumber specifically, you must use stainless steel or hot-dip galvanized fasteners rated for ACQ or CA treatment chemistry. The copper compounds in modern pressure treatment react with plain zinc and corrode it rapidly.
Tools you'll need and how to use them safely
Hand tools
- Tape measure: 25-ft minimum. Lock it and mark with a sharp pencil, not a fat marker.
- Combination square: for marking 90-degree lines and checking square during assembly. A cheap square that's out of true will ruin every cut.
- Miter box and hand saw: sufficient for straight and 45-degree cuts on lighter lumber if you don't own power tools.
- Chisels (1/4, 1/2, 3/4 in): for cleaning mortises and fitting joints. Keep them sharp.
- Clamps (at least 4, preferably 6–8): bar clamps or F-clamps for glue-ups. You always need more clamps than you think.
- Mallet: for driving chisels and seating joints without damaging wood surfaces.
- Marking gauge: for consistent layout of mortise-and-tenon and dado joints.
Power tools
- Circular saw: the workhorse of most patio furniture builds. Use a 40-tooth carbide blade for clean crosscuts in dimensional lumber. Always use the guard. Clamp a straight-edge guide for rip cuts.
- Miter saw (compound or sliding): not strictly required but makes repetitive angled cuts on chair and table legs much faster and more accurate than a circular saw.
- Drill/driver (18V cordless minimum): for driving screws and drilling pilot holes. A 12V is fine for lighter work but fatigues quickly on framing lumber.
- Drill press or drill guide: for accurate perpendicular holes in mortise-and-tenon or dowel work.
- Jigsaw: for curved cuts on Adirondack chair arms and backs.
- Random orbital sander: 80, 120, and 180-grit discs for prep and finish sanding.
- Router (optional): for rounding over sharp edges on seat boards and armrests. A 1/8 or 1/4-in roundover bit removes the splinter risk on edges people actually touch.
- Pocket hole jig (Kreg or equivalent): for pocket screw joinery. A beginner-level jig runs $25–40 and dramatically speeds up cabinet-style assembly.
Jigs worth making
A simple crosscut sled for your circular saw, made from plywood and a straight fence, gives you repeatable 90-degree cuts on boards without clamping a new straightedge every time. For chair leg angles, cut a wedge-shaped jig block at your desired angle and clamp it to your miter saw fence. These simple jigs turn an hour of careful measuring into a 20-minute cut session.
Joinery and fastener options
Choosing the right joinery for each part of your furniture is one of the most important structural decisions you'll make. Research on furniture joint performance consistently shows that mortise-and-tenon and loose-tenon joints provide the highest long-term bending and stiffness capacity, making them the right choice for primary load paths like leg-to-rail connections. Dowel joints also perform well and are more accessible for beginners. Pocket screws are fast, reasonably strong in shear, and perfectly adequate for secondary joints like attaching seat planks to frames, but they handle racking loads less well than glued mortise joints. Here's a practical breakdown.
| Joinery Type | Strength Profile | Skill Level | Tools Required | Best Application |
|---|---|---|---|---|
| Mortise and tenon (traditional) | Highest bending + stiffness | Intermediate–advanced | Chisels, mallet, marking gauge, drill | Leg-to-rail, chair back posts |
| Loose tenon (Domino/router jig) | Very high, comparable to traditional M&T | Intermediate | Biscuit/domino joiner or router jig | Frame joints, face frames |
| Dowels (glued) | High in shear and tension | Beginner–intermediate | Drill, dowel centers, drill guide | Rail-to-leg, apron joints |
| Pocket screws (Kreg-style) | Good in shear, lower racking resistance | Beginner | Pocket hole jig, drill/driver | Seat planks, secondary frames |
| Screws + exterior glue | Good for smaller sections | Beginner | Drill/driver, clamps | PVC furniture, smaller sub-assemblies |
| Carriage bolts + washers | High in tension and shear | Beginner | Drill, wrench | Heavy structural connections, bench legs |
| Metal brackets (Simpson or similar) | Consistent and load-rated | Beginner | Drill/driver | Post-to-beam, heavy-duty connections |
For exterior adhesives, Titebond III Ultimate (ANSI/HPVA Type I rated) is a water-cleanup PVA glue rated for exterior exposure and is my go-to for most wood furniture joints. It's not rated for continuous submersion, but for outdoor furniture that drains and dries, it holds extremely well. For gap-filling or structural repair of damaged joints, marine-grade epoxy (West System or equivalent) is the stronger option and fills voids that PVA can't bridge. The catch with epoxy: it yellows and chalks under UV exposure, so any epoxy-repaired joint on an exposed surface needs to be topcoated with UV-stable varnish or paint. Use pilot holes for all screws in hardwood and near board ends in softwood to prevent splitting. For structural bolts, add a washer under both head and nut to distribute load and prevent pull-through.
Sample cut lists and fastener schedules
These cut lists use actual lumber dimensions throughout. Buy an extra 10–15% of material to account for defects and cutting errors. All screws listed are exterior-rated stainless or coated; substitute 316 stainless in coastal environments.
Build 1: cedar Adirondack chair (traditional wood build)
| Part | Qty | Actual Size (in) | Length (in) | Notes |
|---|---|---|---|---|
| Back legs | 2 | 1.5 x 3.5 (2x4) | 35 | Cut angled top: 22° from vertical |
| Front legs | 2 | 1.5 x 3.5 (2x4) | 21 | Square cut top and bottom |
| Seat supports (side rails) | 2 | 1.5 x 3.5 (2x4) | 30 | Front edge angled to match seat slope |
| Seat planks | 5 | 0.75 x 5.5 (1x6) | 22 | Front plank wider if desired |
| Back slats | 7 | 0.75 x 3.5 (1x4) | 36–42 | Fan cut: longest center, shortest outer |
| Back support cross rail (upper) | 1 | 0.75 x 5.5 (1x6) | 30 | Curved top cut optional |
| Back support cross rail (lower) | 1 | 0.75 x 3.5 (1x4) | 21 | |
| Armrests | 2 | 1.5 x 5.5 (2x6) | 28 | Front rounded, jigsaw curve |
| Front arm supports | 2 | 1.5 x 3.5 (2x4) | 10 | |
| Front stretcher | 1 | 1.5 x 3.5 (2x4) | 21 | Between front legs at base |
| Connection | Fastener | Qty | Notes |
|---|---|---|---|
| Seat planks to side rails | 2.5 in exterior screws | 20 | 2 per plank per rail; pre-drill |
| Back slats to cross rails | 1.5 in exterior screws | 28 | 2 per slat top and bottom |
| Back legs to side rails | 3 in exterior screws + Titebond III | 8 | 2 per joint; clamp while curing |
| Front legs to side rails | 3 in exterior screws + glue | 8 | Pre-drill; countersink optional |
| Armrests to front arm supports | 2.5 in exterior screws | 6 | 3 per arm from below |
| Armrests to back legs | 2.5 in exterior screws + glue | 4 | Pre-drill; angle slightly |
| Front stretcher to front legs | 3 in exterior screws | 4 | 2 per side; countersink and plug |
Estimated material cost for cedar Adirondack chair: $65–110 depending on regional cedar prices. Build time: 6–10 hours for a first build, 4–6 hours once you've done one before. Difficulty: beginner to intermediate (the jigsaw curves on the armrests and back slats fan are the only non-straight cuts).
Build 2: budget 2x4 outdoor bench
| Part | Qty | Actual Size (in) | Length (in) | Notes |
|---|---|---|---|---|
| Legs | 4 | 1.5 x 3.5 (2x4) | 17.5 | Square cut; sand all edges |
| Seat supports (long rails) | 2 | 1.5 x 3.5 (2x4) | 48 | Horizontal, connect front-to-back leg pairs |
| End aprons | 2 | 1.5 x 3.5 (2x4) | 12 | Connect leg pairs at each end |
| Seat planks | 3 | 1.5 x 3.5 (2x4) | 60 | Lay flat across long rails; 1/4 in gap between |
| Lower stretcher (optional) | 1 | 1.5 x 3.5 (2x4) | 48 | Center bracing between long rails at base |
| Connection | Fastener | Qty | Notes |
|---|---|---|---|
| Seat planks to long rails | 2.5 in exterior screws | 12 | 2 per plank per rail; pre-drill to prevent split |
| Long rails to legs | 3 in exterior screws + glue | 8 | 2 per joint; clamp flush before driving |
| End aprons to legs | 3 in exterior screws | 8 | 2 per joint; check square before fastening |
| Lower stretcher to long rails | 3 in exterior screws | 4 | Optional; adds racking resistance on soft ground |
Estimated material cost (SPF 2x4, pressure-treated or cedar for longevity): $18–40. Build time: 2–3 hours. Difficulty: true beginner. This is genuinely the best first project for anyone who's never built furniture. If you want to explore more creative 2x4 configurations for chairs and tables, this same lumber and basic technique scales up well. For step-by-step plans, cut lists, and tips on how to make patio furniture out of 2x4, consult our dedicated guide.
Build 3: PVC pipe lounge chair
| Part | Qty | Pipe Size (nominal) | Length (in) | Notes |
|---|---|---|---|---|
| Front legs | 2 | 1.5 in Sch 40 PVC | 14 | |
| Rear legs | 2 | 1.5 in Sch 40 PVC | 22 | Creates reclined seat angle |
| Seat side rails | 2 | 1.5 in Sch 40 PVC | 40 | |
| Seat cross rails | 4 | 1.5 in Sch 40 PVC | 22 | Spaced evenly across seat depth |
| Backrest uprights | 2 | 1.5 in Sch 40 PVC | 20 | |
| Backrest cross rails | 3 | 1.5 in Sch 40 PVC | 22 | |
| Armrest rails | 2 | 1.5 in Sch 40 PVC | 28 |
| Connection Type | Fitting | Qty | Notes |
|---|---|---|---|
| Leg to seat rail (front) | 90° elbow, 1.5 in | 2 | Solvent cement; hold 30 sec after joining |
| Leg to seat rail (rear) | 45° elbow, 1.5 in | 2 | Angle creates seat tilt |
| Seat cross rail to side rail | Tee fitting, 1.5 in | 8 | 4 tees per side rail for cross rail spacing |
| Backrest upright to seat rail | 90° elbow, 1.5 in | 2 | |
| Backrest cross rails to uprights | Tee fitting, 1.5 in | 6 | 3 per upright |
| Armrests to uprights | Tee or elbow, 1.5 in | 2 | |
| All open ends | End caps, 1.5 in | All open ends | Finish and prevents moisture ingress |
Estimated material cost (1.5 in Schedule 40 PVC, fittings, cement): $50–80. Build time: 3–5 hours including dry-fit and cementing time. Difficulty: beginner. The most critical step is dry-fitting the entire assembly before you open the cement, because you have roughly 30 seconds to position a cemented joint before it locks. Work in sections and cement one sub-assembly at a time. For seating, stretch UV-resistant outdoor fabric, nylon webbing, or a pre-made replacement sling across the seat cross rails and staple or lace it under tension.
Cushions and basic reupholstery
For DIY cushions, the most durable outdoor foam is closed-cell polyurethane foam rated for outdoor use (usually labeled 'dry fast' or 'open cell drainage' foam for wet climates). Standard density is 1.8–2.0 lb/cu ft for seat cushions; go higher (2.5 lb) for seats that will see heavy daily use. Cut foam with an electric carving knife or serrated bread knife for clean edges. Cover with outdoor-rated fabric: solution-dyed acrylic (like Sunbrella) is the gold standard for UV and mildew resistance, but it costs $15–30 per yard. Budget alternatives include polyester canvas or marine vinyl, both of which perform well if not continuously wet.
For reupholstering existing cushion covers, a basic sewing machine with a heavy-duty needle (size 18–20) handles most outdoor fabrics. A no-sew approach using outdoor fabric adhesive or iron-on tape works for simple covers with straight seams, though hand-stitched seams outlast adhesive in wet conditions. For replacement slings on PVC or aluminum chairs, pre-made replacement slings sized to your chair's width are widely available and are usually faster and cheaper than custom-sewing your own.
Finishing and weatherproofing your build
Raw untreated wood left outside without a finish will gray, crack, and check within one to two seasons depending on your climate. The good news is that finishing is straightforward. For cedar and redwood, a penetrating exterior oil (teak oil, Danish oil, or a dedicated cedar finish) applied annually keeps the wood hydrated and protected without a film that peels. For painted surfaces, prime with an exterior oil-based primer, then apply two coats of exterior latex or alkyd paint. A painted 2x4 bench properly primed and painted will last many seasons in inland climates.
For teak and ipe, many builders choose to let them weather naturally to silver-gray, which is a UV-degraded surface layer that doesn't affect structural integrity. If you want to maintain the original color, a teak oil or ipe oil applied every 1–3 months during the use season is required. For PVC furniture, exterior spray paint formulated for plastic (look for 'bonds to plastic' on the label) sticks well and provides UV protection. Lightly sand the PVC with 220-grit before painting for better adhesion. For any joint or seam that sees water pooling, seal with exterior caulk rated for wood or plastic movement to prevent moisture ingress.
Seasonal maintenance and storage
The single best thing you can do to extend the life of DIY patio furniture is to get it off the ground and under cover during the off-season. Moisture wicking up from wet ground is a faster path to rot than rain from above. Even a simple cover and elevated storage position makes a significant difference.
Annual maintenance checklist
- Inspect all joints for movement, cracking, or loosening. Tighten screws and bolts as needed; re-glue any joints showing separation.
- Check for checks (surface cracks) in wood. Small surface checks are cosmetic; deep or widening checks at joints are a structural concern. Fill with exterior wood filler and refinish.
- Sand any areas where finish has peeled or worn through down to bare wood. Re-apply finish within a few days to prevent moisture absorption.
- Inspect metal hardware for rust. Replace any corroded fasteners; wire brush and treat surface rust on brackets or hinges with rust-inhibiting primer.
- Clean fabric cushions with mild soap and water or a diluted bleach solution (1/4 cup bleach per gallon water) for mildew spots. Rinse thoroughly and air dry completely before storing.
- Lubricate any folding joints or hinges with a dry silicone spray or paste wax.
- For PVC furniture: check all solvent-cemented joints for cracking. A cracked joint can be repaired with fresh PVC cement if the pipe is clean and dry, but severe cracks may require cutting out the fitting and splicing in a new section.
- Before storage, clean all surfaces, ensure everything is dry, and apply a fresh coat of oil or sealant to wood pieces.
For storage, PVC furniture is the easiest: it disassembles into bundles if you used slip-fit rather than cemented joints, or stores flat against a garage wall. Wood furniture benefits from furniture covers or storage in a shed, ideally elevated on blocks or a pallet. Avoid wrapping tightly in plastic tarps that trap moisture. Breathable furniture covers are worth the $15–25 investment over garbage bags that create condensation.
Common repairs and how to troubleshoot problems
Here are the failures I see most often and how to address them before they become full replacements.
- Wobbly legs: almost always caused by a joint that wasn't square during assembly or glue that failed. Pull the joint apart if possible, clean off old glue, re-apply Titebond III or epoxy, clamp square, and let cure fully (24 hours for PVA, 8–12 hours for most epoxy). Add a corner bracket on the interior of the joint as insurance.
- Splitting seat planks: usually from screws placed too close to the board end or without pilot holes, or from wood movement in a joint that's glued across the grain. Glue the split with thin CA (cyanoacrylate) glue or exterior wood glue, clamp, then widen pilot holes for any future screws in that area.
- Surface checks and cracks: sand the area, fill with exterior wood filler, re-sand when dry, and apply finish. Deep structural cracks in legs or critical members should be replaced, not patched.
- Rust stains from hardware: these come from using the wrong fastener grade. Remove the fastener, clean the stain with oxalic acid-based deck brightener, and replace with stainless or hot-dip galvanized hardware.
- PVC sagging under load: caused by undersized pipe or excessive unsupported span. Reinforce by inserting a wood dowel or steel rod core inside the pipe section. For a seat cross rail that's deflecting, add an additional cross rail in the center.
- Mildew on wood: scrub with a 1:4 bleach-to-water solution, rinse thoroughly, dry, then apply a mildew-resistant finish or sealer.
Realistic time and cost estimates
One thing I'll never do is undersell how long a project takes. Every estimate I've seen in beginner guides is optimistic by 30–50%. Here's an honest breakdown.
| Project | Materials Cost (USD) | Tool Investment (if buying) | Build Time (first build) | Difficulty |
|---|---|---|---|---|
| 2x4 outdoor bench | $18–40 | $50–150 (basic) | 2–3 hours | Beginner |
| Cedar Adirondack chair | $65–110 | $150–300 (adds jigsaw, sander) | 6–10 hours | Beginner–intermediate |
| PVC lounge chair | $50–80 | $0–50 (basic hand tools only) | 3–5 hours | Beginner |
| Cedar dining table (4-seater) | $120–200 | $200–400 (adds miter saw) | 8–14 hours | Intermediate |
| 2x4 dining chair set (4 chairs) | $80–160 total | Tools from prior builds | 12–20 hours total | Intermediate |
| PVC conversation set (2 chairs + table) | $100–160 total | Tools from prior builds | 6–10 hours | Beginner–intermediate |
Tool investment is a one-time cost spread across many projects. If you're starting from zero tools, borrowing from a neighbor or renting from a home center for a weekend ($20–40 for a miter saw rental, for example) is a legitimate way to complete your first build without committing to a full tool purchase. After two or three builds, buying your own tools starts to make financial sense.
Where to find plans and go deeper
Free downloadable plans from reputable sources like Ana White, Rogue Engineer, and the USDA Forest Products Laboratory's design guides give you dimensioned drawings, cut lists, and assembly sequences for dozens of furniture styles. For step-by-step instructions on how to build patio furniture out of wood, consult our detailed how-to guide with cut lists, material recommendations, and finishing tips. Many of the measurements and species recommendations in those plans align directly with the ergonomic standards and material properties we've covered here. When evaluating a plan from any source, confirm it uses actual lumber dimensions in its cut list, specifies exterior-rated fasteners, and includes a finish recommendation. If any of those elements are missing, apply the specs from this guide to fill the gaps.
Building your own patio furniture is genuinely one of the most satisfying DIY projects you can take on. The first time you sit in a chair you built from a pile of boards, you'll understand why people do this. Start with the bench or the PVC chair, get a feel for the tools and the process, and work up to more complex builds from there. The skills transfer directly: a builder who's confident with their 2x4 bench has already mastered 80% of what's needed for an Adirondack chair or a full dining table.
FAQ
What core ergonomic dimensions should the guide specify for comfortable adult patio seating?
Provide finished seat height (16–19 in / 405–485 mm), seat depth (16–22 in / 405–560 mm) and typical seat‑to‑back angle (95°–110° recline) as planning targets. State these as ranges to be confirmed with a full‑scale prototype for the intended users, and cite BIFMA/seating guidance and peer‑review ergonomics research for justification.
Which authoritative material‑property references must be cited for wood selection and structural guidance?
Cite the USDA Forest Products Laboratory 'Wood Handbook' (FPL‑GTR‑190) for strength, moisture, fastener behavior and design values. Also reference species decay/stability data (e.g., The Wood Database entries for teak, ipe, cedar, cumaru) when recommending species for exposure and maintenance.
How should the guide treat lumber sizing to avoid cutting/joint errors?
Clearly explain nominal vs actual dimensions (e.g., a '2×4' is 1.5×3.5 in / 38×89 mm). Use actual dimensions in all cut lists, joinery tolerances and diagrams and cite American Wood Council dimensional guidance and relevant code language (IBC Chapter 23) as rationale.
What fastener and corrosion specifications are required for safe long‑lasting outdoor furniture?
Specify fastener alloy by exposure zone: stainless steel 316 (A4) for coastal/marine or deicing salt exposure, stainless 304 (A2) for inland, and hot‑dip galvanized as a budget option with caveats. Call out screw/bolt diameters, minimum embedment (e.g., bolt embedment ≥1.5× thinner member thickness), washers, lock‑nuts, and reference Simpson Strong‑Tie and AISC corrosion guidance for selecting hardware and spacing.
What joinery options and engineering notes must be included and when should each be used?
List mortise‑and‑tenon (including haunched/keyed), loose tenon/dowel, dowel, pocket‑screw, and bolted butt joints. State that mortise/tenon and loose tenon provide highest structural capacity for primary load paths (legs/rails) per joint research; pocket screws or screws+glue are acceptable for secondary or quick builds. Provide load‑case guidance and refer to peer‑review joint studies and manufacturer connector tables.
Which adhesives and finish‑system rules must the plans state explicitly?
Specify exterior‑rated adhesives (e.g., Titebond III Ultimate or equivalent ANSI/HPVA Type I PVA) with manufacturer cure/open time and temperature notes; for gap‑filling and waterproof needs list marine epoxies (West System style) and state the need to overcoat epoxies with UV‑stable varnish/paint due to yellowing. Cite product technical data and epoxy UV guidance.