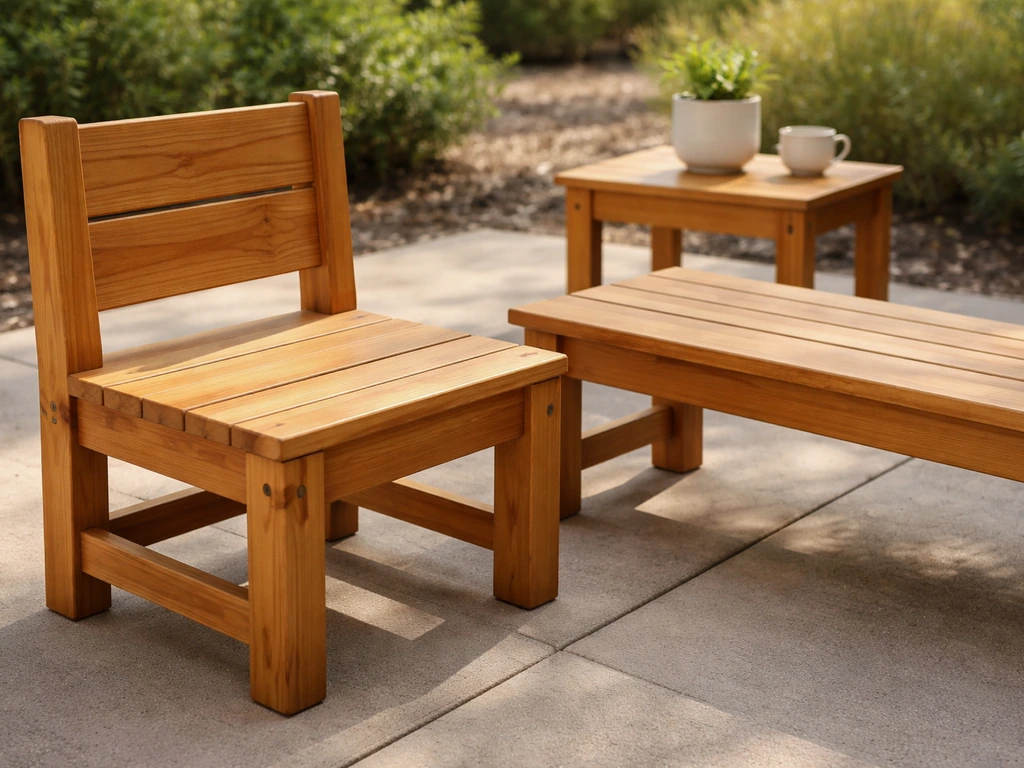
You can build a solid, good-looking patio chair, bench, or dining table from standard 2x4 lumber for somewhere between $30 and $80 in materials, depending on the project. The boards are cheap, widely available at any home center, and strong enough to hold up a full-grown adult without complaint. If you have a circular saw, a drill, and a Saturday afternoon, you have everything you need to get started.
How to Make Patio Furniture Out of 2x4: 3 DIY Plans + Cut Lists

Maren Grady
21 Jul 2026
What you can build with 2x4s (and what this guide covers)
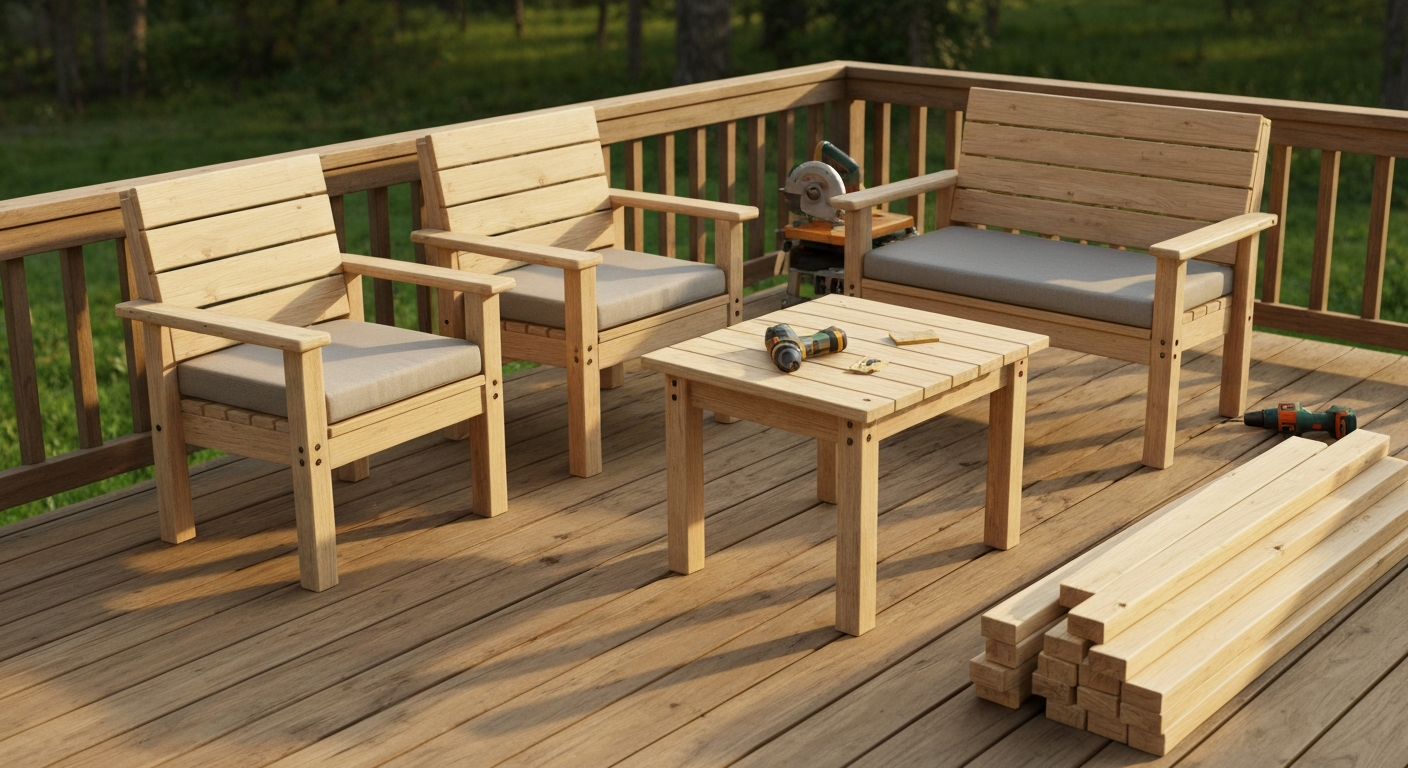
Standard dimensional 2x4 lumber is one of the most versatile building materials available at any hardware or home improvement store. With it you can build a simple Adirondack-style chair, a sturdy two-person garden bench, a small outdoor dining table, a planter box with bench seating, a potting station, and a lot more. This guide focuses on three specific projects you can complete in a weekend: a simple patio chair, a two-person bench, and a small dining table. Each comes with an exact cut list, step-by-step assembly instructions, an estimated build time, and a rough cost breakdown. For more plans and step-by-step tutorials on how to DIY patio furniture, see our how to DIY patio furniture collection.
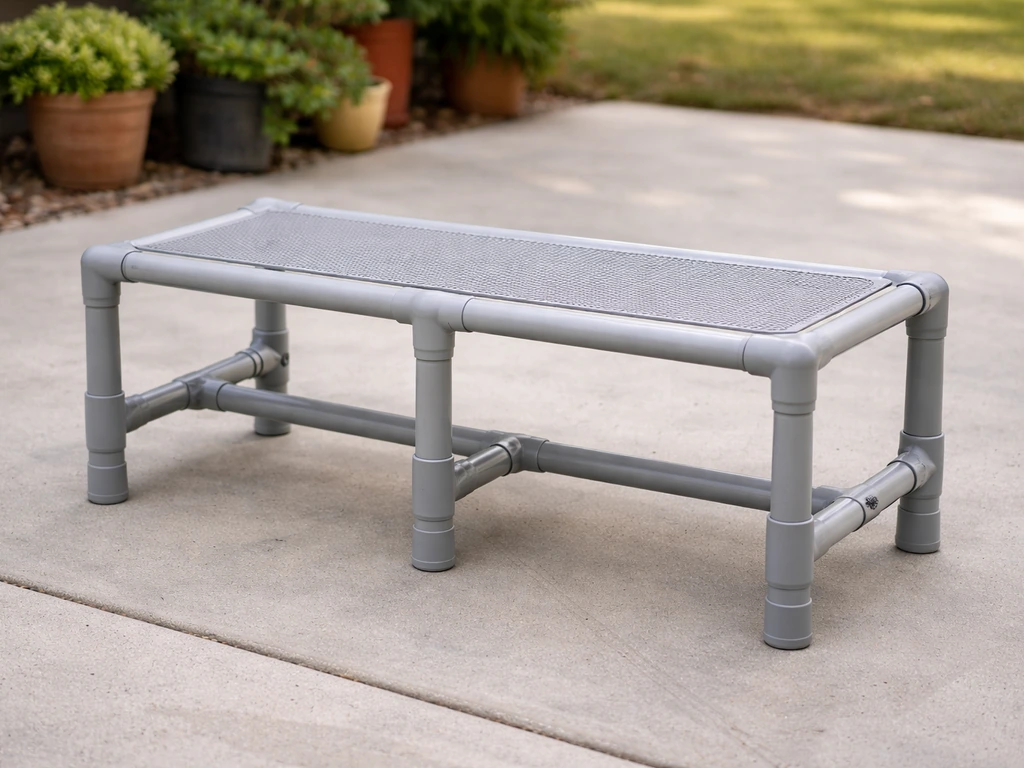
This guide is written for homeowners and DIYers who want practical results without a professional woodworking background. You do not need a table saw, a jointer, or a workshop full of specialty tools. If you have never built anything before, this is a very reasonable place to start. That said, a note on scope: this article covers real-world physical builds. If you are looking for how to build patio furniture in a video game like Minecraft, that is a separate and totally different topic covered elsewhere on this site. Likewise, if you want to explore builds using PVC pipe or full milled lumber, those projects have their own guides. See our guide on how to make patio furniture out of PVC pipe for detailed instructions on those builds. The focus here is 2x4 dimensional lumber, outdoors, in the real world.
Planning your project before you cut a single board
Skipping the planning phase is how you end up with a chair that is too low, a bench that wobbles, or a table that seats two people awkwardly. Spend twenty minutes sketching your project and asking a few key questions before you ever set foot in the lumber aisle.
Sizing and ergonomics
For comfortable outdoor seating, aim for a seat height of 17 to 18 inches from the ground. Seat depth works best between 16 and 18 inches. Backrest height depends on preference, but 14 to 18 inches above the seat gives a good range. For a dining table, standard height is 29 to 30 inches. A two-person bench typically runs 48 to 60 inches long and 14 to 16 inches deep. These are not arbitrary numbers: they match human body proportions well enough that most adults and older children will find them comfortable. If you are building specifically for shorter users or children, drop the seat height to 15 or 16 inches.
Load capacity
A well-built 2x4 frame can support 300 to 500 pounds or more when the joints are properly fastened and the legs are braced. The weak points are almost never the wood itself: they are the joints. Butt joints held with only two or three screws can pull apart under dynamic load (someone dropping heavily into a seat). Through-bolted joints and pocket-screw assemblies with glue are far stronger. For any bench or chair expected to hold two adults, plan cross-bracing into your design at the outset, not as an afterthought.
Choosing a style
For beginners, a straight-line modern or farmhouse style is the easiest starting point. Angled cuts for Adirondack-style reclined backs add character but also add complexity. For your first build, square cuts and 90-degree joints are your friends. You can always add decorative chamfers or angled backs on version two.
Picking your lumber and hardware
Understanding 2x4 actual dimensions
This trips up a lot of first-time builders. A '2x4' is a nominal label, not the real measurement. According to the blank" rel="noopener noreferrer">American Wood Council / North American Softwood Lumber – Environmental Product Declaration (AWC), standard dimensional 2x4 lumber has actual finished dimensions of 1.5 × 3.5 in (38 × 89 mm). The actual finished dimensions of a standard surfaced 2x4 are 1.5 inches by 3.5 inches (38.1 mm by 88.9 mm). When you write your cut list and plan your joinery, always use 1.5 x 3.5 as your working number, not 2 x 4. If you design based on the nominal size, your assembled piece will be noticeably smaller than planned, and joints will not line up correctly.
Lumber grades and species
For patio furniture, you do not need the highest-grade Select or Clear lumber. Construction-grade No. 2 or better (sometimes labeled #2 & BTR) is perfectly fine. The most common species sold as dimensional 2x4s in North American home centers are Spruce-Pine-Fir (SPF) and Southern Yellow Pine (SYP). SPF is lighter and easier to work with hand tools. SYP is denser, heavier, and slightly stronger. Cedar and redwood are also available in some regions: they are naturally rot-resistant and beautiful but cost significantly more. For a first outdoor project, No. 2 SPF is a solid, budget-friendly choice.
Whatever species you pick, look for boards labeled S4S (Surfaced Four Sides) at the store. S4S means all four faces and edges have been planed smooth at the mill, so you get a straight, square board with consistent dimensions right off the shelf. Pull boards from the rack individually and sight down the length of each one. Reject anything with a severe crown (bow from end to end), a cup (curvature across the width), or a bad twist. A slight bow can often be pulled straight during assembly, but a twisted board is a headache you do not want.
Treated vs. untreated lumber
Pressure-treated (PT) lumber has preservatives forced into the wood fibers under pressure to resist rot, decay, and insect damage. For outdoor furniture that will stay outside year-round and may experience regular rain or ground contact, PT lumber is a smart choice. The American Wood Protection Association classifies treated lumber by Use Category: UC3 is rated for above-ground exterior exposure (ideal for chair legs, tabletop frames, bench rails), while UC4 is rated for ground contact. Check the end tag stapled to the board to confirm the rating before you buy.
Modern PT lumber uses preservatives like Alkaline Copper Quaternary (ACQ), Copper Azole (CA), or Micronized Copper Azole (MCA). Chromated copper arsenate (CCA) was phased out for most residential retail applications after 2003, so you are unlikely to encounter it at a standard home center today. One important catch: ACQ and CA-based preservatives can accelerate corrosion in plain steel fasteners. Always use hot-dip galvanized or stainless steel fasteners with pressure-treated lumber. More on fastener selection below.
Untreated pine or SPF is lighter, easier to paint or stain immediately, and cheaper. For furniture that will be stored indoors or covered seasonally, it is perfectly adequate. For furniture left in direct rain exposure year-round, you will need to be more diligent about finishing and recoating to prevent rot.
Fasteners and adhesives
For exterior 2x4 furniture, your primary fastener options are structural wood screws, pocket-hole screws, lag screws, and carriage bolts. For most furniture joints, 2.5-inch or 3-inch construction screws (like GRK RSS or similar structural screws) work extremely well. For pocket-hole joinery with 1.5-inch material, use 2.5-inch Kreg-brand or compatible pocket screws. For leg-to-apron connections on tables or heavy structural joints, 5/16-inch or 3/8-inch lag screws or carriage bolts with washers and nuts provide better shear resistance.
If you are using pressure-treated lumber, always match your fastener type to the preservative. Simpson Strong-Tie, Kreg, and most fastener manufacturers publish corrosion-classification charts for their products. Type 316 stainless steel offers the best corrosion resistance, especially in coastal or salt-spray environments. Type 304 stainless is acceptable for most inland exterior use. Hot-dip galvanized (HDG) fasteners are also rated for use with current PT preservatives. Avoid electroplated zinc fasteners with treated lumber: they will corrode much faster.
For wood glue, Titebond III Ultimate Wood Glue is a one-part waterproof exterior glue that works well on 2x4 furniture joints. One honest caveat I have learned from experience: glue adhesion on pressure-treated lumber can be inconsistent. The preservatives and residual moisture in the wood can interfere with bonding. If you are gluing PT lumber, check that the boards are dry (moisture content at or below about 15% if you have a meter), and sand the glue surfaces lightly to remove mill glaze. Glue-and-screw together is always stronger than screws alone, but do not count on glue as your primary structural element in heavily loaded joints.
Tools you need (and tools that just make life easier)
Must-have tools
- Circular saw with a 24-tooth framing blade (for crosscuts) and ideally a 40-tooth blade (for cleaner rip cuts)
- Cordless drill/driver (12V minimum; 18V or 20V is more comfortable for driving 3-inch screws)
- Speed square or combination square for marking and checking 90-degree angles
- Tape measure (25-foot)
- Clamps: at least four 6-inch bar or F-clamps; more is always better
- Pencil and marking knife for layout
- Sawhorses or a stable work surface (two is the minimum; four is better)
- Safety glasses, hearing protection, and work gloves
Highly recommended but optional
- Pocket-hole jig (Kreg K4, K5, or similar): speeds up assembly enormously and produces cleaner joints
- Random orbital sander (saves hours compared to hand-sanding)
- Miter saw / compound miter saw: makes repeatable crosscuts much faster and more accurate than a circular saw
- Moisture meter: essential if you plan to stain or paint pressure-treated lumber
- Countersink bit set: allows you to recess screw heads cleanly for a finished look
- Level: helps set leg heights and check table surfaces during assembly
- Impact driver: faster and more comfortable than a drill/driver for driving lots of screws
Workshop setup
You do not need a dedicated workshop. A driveway, a backyard, or even a garage with the car moved out all work fine. Set up your sawhorses at a comfortable working height (typically 28 to 32 inches for most adults). Make sure you have enough clear space to support the full length of your boards when cutting. A 10-foot 2x4 being crosscut needs at least 5 feet of supported material on each side of the blade. Cutting unsupported material causes the board to pinch the blade, which can bind or kickback: one of the most common circular saw injuries.
Safe cutting and work practices
I will be blunt: most shop injuries happen during distraction or when skipping a safety step because the task seems quick. Put your safety glasses on before the first cut and leave them on. Hearing protection goes on before you start the saw. Gloves are useful for handling rough lumber but take them off when operating a circular saw: a snag can pull your hand into the blade path.
Cutting safely with a circular saw
Set your blade depth to about 1/4 inch below the thickness of the board. A deeper blade exposure than necessary increases risk without improving the cut. Always clamp your workpiece: never hold a board with one hand while cutting with the other. Use a speed square as a crosscut guide by hooking it over the edge of the board and running the saw base plate against the square's fence. Mark your cut line with a pencil, add a clear X on the waste side, and cut just outside the line so the kerf (the material removed by the blade) comes out of the waste, not your finished piece.
Drilling and driving screws
Pre-drilling is not always required with modern structural screws designed to self-tap into dimensional lumber, but it is strongly recommended near board ends and edges where splitting is most likely. Use a drill bit that matches the shank diameter of your screw (not the thread diameter). Countersinking the hole slightly lets the screw head sit flush or just below the surface, which both looks cleaner and prevents the head from becoming a snag or water trap.
Clamping and assembly checks
Clamp parts together before driving any screws. Screwing without clamping often pulls joints slightly out of alignment. After driving the first screw in any joint, check the angle with your speed square before driving the second. It is much easier to back out one screw and adjust than to disassemble a fully fastened joint. Check your assembly for square by measuring diagonally corner to corner in both directions: if the two measurements match, you are square. If they differ, apply gentle pressure on the longer diagonal until they equalize.
Core joinery and assembly techniques
2x4 furniture relies on a handful of joint types. You do not need to master all of them for your first build, but understanding what each one does well helps you make smarter choices.
Butt joints
A butt joint is simply two pieces of wood meeting end-to-face or face-to-face. It is the easiest joint to make and the weakest on its own. Reinforced with three or more screws and exterior wood glue, it is adequate for many furniture connections. The key is fastener placement: drive screws in a triangular or offset pattern rather than in a straight line along the grain, which reduces splitting risk and creates better mechanical resistance to rotation.
Pocket-hole screws
Pocket-hole joinery uses a jig (like a Kreg K4 or K5) to drill an angled pilot hole through the face of one board so a screw can pull two boards tightly together face-to-face or end-to-face. It is fast, clean, and strong enough for most furniture applications. For 1.5-inch material (the actual thickness of a 2x4), use 2.5-inch pocket screws and set your jig's depth collar per the manufacturer instructions. Space pocket holes every 6 to 8 inches along seat slats and panel edges, and keep them at least 1 inch from the ends of boards to avoid splitting. The holes end up on the underside or back face of the joint, so they are invisible from the front.
Through-bolts and lag screws
For structural connections like leg-to-apron joints on a table or heavy bench frames, through-bolts (carriage bolts with a nut and washer) or lag screws provide much better shear and withdrawal resistance than screws alone. Common sizes for 2x4-to-2x4 connections are 5/16-inch or 3/8-inch diameter. Carriage bolts require drilling a through-hole in both pieces; the square shoulder under the round head bites into the wood to prevent spinning. Lag screws thread into the receiving piece and require less access since you only need one side. Both benefit from a flat washer under the nut or head to distribute load and prevent the fastener from pulling through the wood.
Bracing
Diagonal bracing is your best tool against racking, which is the tendency of a four-legged frame to lean and collapse sideways under side load. On a bench or chair, a single diagonal brace between front and rear legs (or an X-brace) makes an enormous difference. Even a simple horizontal stretcher (a board connecting two leg pairs near the bottom) significantly stiffens a frame. Do not skip this step on anything you plan to sit in.
Glue-and-screw sequencing
The correct sequence is: dry-fit first (assemble without glue to verify everything fits), then apply glue to both mating surfaces, then clamp, then drive screws. Do not apply glue, attempt to align, then try to add clamps: you will be fighting the slippery glue while the clock ticks. Apply glue, align immediately, add one clamp to hold position, check square, add remaining clamps, then drive screws. Wipe squeeze-out with a damp rag before it cures: dried glue shows through stain.
Preparing your lumber and building a smart cut list
Before you buy anything, write out every piece you need with its finished length and quantity. This is your cut list. Group pieces by length and see how many pieces you can get from a single 8-foot 2x4 (which gives you 96 usable inches minus kerf losses). A standard circular saw kerf is about 1/8 inch per cut, so account for that when planning how many pieces fit on a board. Optimizing your cut list before shopping can easily save you one or two boards per project, which is real money.
At the store, always add 10 to 15 percent to your total board count to account for defects you will reject and any miscalculations. For a project needing 10 boards, buy 11 or 12. The extra couple of dollars on lumber is far cheaper than a second trip mid-project.
Measuring and marking
Hook your tape on the end of the board and mark the measurement with a V-shaped tick (not a line), then use a speed square to extend the cut line across the face of the board. The point of the V lands exactly on the dimension; a line drawn with a pencil has width, which introduces error. Mark the waste side with an X immediately so you always know which side of the line to cut on. Measure twice, cut once is a cliche because it is true.
Crosscuts vs. rip cuts
A crosscut goes across the grain (shortening a board). A rip cut goes along the grain (narrowing a board). Most 2x4 patio furniture projects require only crosscuts. If you need to rip a 2x4 down to a narrower strip (for example, to make thinner seat slats), clamp a straight board parallel to your cut line as a fence guide for your circular saw. This keeps the saw running straight and produces a much cleaner edge than freehanding.
Materials and shopping checklist
Below is a per-project material breakdown for the three builds in this guide. Prices are estimates based on mid-2026 average retail pricing at major home centers in the continental U.S. and will vary by region and species. Always check your local store's current pricing before budgeting.
| Project | 2x4 Boards (8 ft) | Fasteners | Glue | Finish | Est. Total Cost |
|---|---|---|---|---|---|
| Simple Patio Chair | 8 boards | 1 lb box 3" construction screws + 2.5" pocket screws | 1 bottle Titebond III | 1 qt spar urethane or exterior stain | $35–$55 |
| Two-Person Bench | 10 boards | 1 lb box 3" construction screws + carriage bolts (4x 3/8"x3.5") | 1 bottle Titebond III | 1 qt spar urethane or exterior stain | $45–$65 |
| Small Dining Table (30"x48") | 14 boards | 1 lb box 3" construction screws + 4x 3/8" lag screws (3" length) | 1 bottle Titebond III | 1 qt spar urethane or exterior stain | $55–$80 |
Fastener selection quick guide
| Fastener Type | Best Use | Recommended for PT Lumber? | Notes |
|---|---|---|---|
| 3" structural screw (GRK, Simpson, etc.) | Primary framing joints, leg-to-rail connections | Yes, with HDG or coated version | Self-tapping; pre-drill near ends |
| 2.5" pocket screw | Pocket-hole joinery on seat slats, panels, rails | Yes, with coated version | Use with pocket-hole jig only |
| 3/8" carriage bolt + nut + washer | Heavy structural leg joints, bench frames | Yes, with HDG or stainless | Requires through-drilling; very strong shear resistance |
| 3/8" lag screw | Table apron-to-leg, one-sided access joints | Yes, with HDG or stainless | Pre-drill shank hole; provides excellent withdrawal resistance |
| Type 304 stainless screws | All exterior joints inland | Yes | Good corrosion resistance away from salt environments |
| Type 316 stainless screws | Coastal or salt-spray environments | Yes | Best corrosion resistance; higher cost |
Shopping tips before you go
- Buy your lumber in person, not online, so you can hand-pick straight boards
- Check the end tag on pressure-treated boards for the Use Category (UC3 for above-ground furniture parts)
- If you plan to stain or paint PT lumber soon after buying, ask for KDAT (kiln-dried after treatment) stock: it is ready to finish much faster than wet-treated lumber
- Buy one extra board per 10 needed to cover defects and measurement errors
- A single bottle of Titebond III covers all three projects with some left over
- Pick up sandpaper in 80-grit and 120-grit while you are at the store: you will need both
Project 1: Simple Patio Chair
This is a straightforward upright patio chair with a flat seat, vertical back slats, and four straight legs. Build time is 3 to 5 hours for a first-timer. It seats one adult comfortably and holds well over 300 pounds when built as described.
Cut list (all dimensions are actual finished sizes using 1.5" x 3.5" stock)
| Part | Qty | Length | Notes |
|---|---|---|---|
| Front legs | 2 | 17.5" | Seat height 17.5" from floor |
| Rear legs | 2 | 34" | Continue up to form backrest support |
| Front seat rail | 1 | 20" | Connects front legs across the front |
| Rear seat rail | 1 | 20" | Connects rear legs across the back |
| Side seat rails | 2 | 16" | Connect front leg to rear leg on each side |
| Seat slats | 5 | 21.5" | Laid across the seat rails; spaced 0.25" apart |
| Back slats | 3 | 14" | Span between rear legs; evenly spaced |
| Top back rail | 1 | 20" | Caps the top of the backrest |
| Front-to-rear stretcher | 2 | 16" | Low cross-brace between legs for racking resistance |
Assembly steps
- Cut all pieces to length and sand all faces with 80-grit to remove mill roughness and splinter risk.
- Build the two side frames first: attach one front leg and one rear leg with a side seat rail (at 17.5" from the bottom of the front leg and flush with the top of the rear leg at the seat position). Clamp, check for square, and fasten with two 3" screws through the rail into each leg. Glue first if you have Titebond III.
- Add the low stretcher to each side frame, positioning it 4" from the bottom of the legs. Fasten the same way.
- Stand the two side frames upright, parallel to each other, 20" apart (outside face to outside face). Connect them with the front seat rail and rear seat rail, clamping firmly and checking square diagonally before driving screws.
- Lay seat slats across the top of the seat frame with even 0.25" spacing. Use a 0.25" scrap of plywood or a folded business card as a spacer. Fasten each slat with two 3" screws or pocket screws at each end.
- Attach the top back rail across the tops of the two rear legs, flush at the top. Fasten with glue and two screws per end.
- Attach the three back slats evenly spaced between the rear seat rail and the top back rail. Fasten with 3" screws top and bottom.
- Sand the entire chair with 120-grit. Round over any sharp corners slightly with sandpaper. Apply your chosen exterior finish.
Project 2: Two-Person Bench
A bench is the friendliest first 2x4 project because it has no complex angles, uses only straight cuts, and results in something genuinely useful. This one seats two adults at 18 inches high, runs 48 inches long, and includes a backrest. Estimated build time is 3 to 4 hours.
Cut list
| Part | Qty | Length | Notes |
|---|---|---|---|
| Legs | 4 | 17.5" | All four identical for a level seat |
| Seat rails (long) | 2 | 48" | Run front-to-back along the long axis |
| Seat rails (short/end) | 2 | 14" | Connect front and rear long rails at each end |
| Seat slats | 5 | 48" | Laid across the short seat rails; 0.25" spacing |
| Backrest posts | 2 | 16" | Vertical members rising from the rear long rail |
| Backrest slats | 3 | 48" | Span horizontally across the backrest posts |
| Diagonal braces | 2 | approx. 22" (cut to fit) | From front leg to rear long rail underside; measure in place |
Assembly steps
- Cut all pieces. Sand faces and edges with 80-grit.
- Build the two end frames: attach two legs to a short seat rail. The rail sits on top of the legs with legs flush to the outside face. Use two 3/8" carriage bolts per joint for maximum strength: drill through both pieces, insert the bolt, add washer and nut, and tighten firmly. This is where I always say: use bolts here, not just screws. Screws alone can pull through under dynamic load from two adults shifting their weight.
- Stand both end frames upright 48" apart (outside face to outside face). Connect them with the two long seat rails, one at the front and one at the back. Fasten with two 3" structural screws at each joint, glued and clamped.
- Cut and install diagonal braces from each front leg corner up to the rear long rail. These can be cut at 45 degrees at both ends if you have a miter saw, or you can cut them square and let them land face-to-face. Either works. Fasten with two screws at each end.
- Lay seat slats across the top with 0.25" spacing. Fasten with pocket screws from below, or with two 3" screws per end driven through the slat into the rail.
- Install backrest posts vertically on the rear long rail, one near each end, spacing them 42" apart center-to-center. Fasten with two 3" screws or a carriage bolt at each base.
- Attach three backrest slats horizontally across the posts: one at the top, one at mid-height, one about 2" above the seat. Fasten with glue and two 3" screws at each end.
- Sand with 120-grit, ease all edges, and apply finish.
Project 3: Small Outdoor Dining Table (30" x 48")
This table seats four people comfortably at 29.5 inches tall, the standard dining height. It is the most material-intensive of the three projects but still well within reach of a careful beginner. Estimated build time is 5 to 7 hours, including finishing prep. Total cost with standard SPF and a basic finish runs about $55 to $80.
Cut list
| Part | Qty | Length | Notes |
|---|---|---|---|
| Legs | 4 | 28" | 28" leg + 1.5" tabletop frame = 29.5" finished table height |
| Long apron boards | 2 | 45" | Run along the 48" length; 45" allows 1.5" leg on each end |
| Short apron boards | 2 | 27" | Run along the 30" width; 27" for same reason |
| Tabletop slats | 8 | 48" | Full-length slats with 0.25" spacing give approx. 30" total width |
| Center stretcher | 1 | 45" | Runs along the underside of tabletop center for rigidity |
| Lower cross-braces | 2 | 27" | Connect legs below apron for racking resistance |
Assembly steps
- Cut all pieces and sand with 80-grit. Label parts with painter's tape to avoid confusion during assembly.
- Build the two long apron-and-leg sub-assemblies first: clamp two legs to a long apron board so the apron sits flush with the top of the legs and is inset 1.5" from the outside face of each leg. This inset is important: it lets the short aprons meet the legs cleanly. Fasten with a 3" lag screw per leg per side, after pre-drilling the shank hole. Add glue to the mating surfaces.
- Connect the two long sub-assemblies with the two short apron boards. Clamp firmly, check square, and fasten with two 3" screws at each joint (screwing through the short apron into the end grain of the long apron) plus a 3/8" lag screw per leg.
- Add the lower cross-braces between the legs on each short side, positioned 6" from the bottom of the legs. Fasten with two 3" screws per end.
- Flip the base upside down on a flat surface. Check that all four leg ends are in the same plane (no rocking). If one leg is proud, mark and trim with a saw or use self-leveling furniture feet.
- Lay the eight tabletop slats across the apron frame (base still inverted). Space them evenly with 0.25" gaps. The outer slats should overhang the aprons by about 1.5" on each long side. Fasten each slat to the apron with two pocket screws from below using the pocket-hole jig, or two 3" screws driven up through the apron into the slat from below. Do not drive screws down through the top surface if you want a clean top.
- Install the center stretcher along the underside center of the tabletop, between the two long aprons, for added rigidity. Fasten with two 3" screws at each end.
- Flip the table right-side up, check for level and square, sand the top surface with 120-grit, and apply finish.
Finishing and weatherproofing your 2x4 furniture
Raw 2x4 lumber left outdoors unfinished will gray, check (develop small surface cracks), and begin to degrade within one to two seasons. A proper exterior finish is not optional if you want your furniture to last. The good news is that it is simple and does not require special skills.
For untreated SPF or pine, spar urethane is an excellent choice. Products like Minwax Helmsman Spar Urethane are formulated specifically for outdoor horizontal surfaces like tabletops, which take much more UV and moisture abuse than vertical surfaces. Apply at least two coats, sanding lightly with 220-grit between coats. A third coat on the tabletop is worth the extra hour. Penetrating exterior stains and oils are also a good option: they soak into the wood rather than forming a film, which means they do not peel, but they do need more frequent reapplication (typically every one to two years versus two to three for a film finish).
For pressure-treated lumber, the timing of finishing matters. The wood often comes from the store with elevated moisture content from the treatment process. If you apply stain or a penetrating finish to wet PT lumber, it will not absorb properly and will peel or blotch. The most reliable test: sprinkle a few drops of water on the board. If the water beads up, the wood is not ready. If it soaks in within 30 seconds, you are good to apply finish. If you buy KDAT (kiln-dried after treatment) stock, which many home centers now carry, the boards are much drier and often ready to finish within a day or two of purchase. A moisture meter reading of 15% or below is the objective threshold to aim for.
Adding cushions and improving comfort
A flat 2x4 seat is comfortable enough for short periods, but a 2-inch outdoor foam cushion in a water-resistant cover makes a dramatic difference for longer sitting. Standard outdoor chair cushions (typically 20 x 16 x 2 inches) fit the chair build above with minor slat spacing adjustments. For the bench, a simple 48 x 16-inch bench cushion works perfectly. Tie-downs through small drilled holes in the outermost seat slats keep cushions from sliding off in the wind, a detail that sounds minor until your cushions have blown into the neighbor's yard three times.
Seasonal maintenance and storage
At the end of each season (or before your first hard freeze), inspect every joint for looseness. Tighten any screws that have backed out slightly, and re-drive or replace any that have corroded or stripped. Check the finish: any area where the wood is graying or where water no longer beads means it is time to lightly sand and recoat. A once-yearly light sanding with 150-grit and a fresh coat of exterior finish is the single most effective maintenance step you can take.
For winter storage, the best option is indoors: a garage, shed, or basement. If outdoor storage is your only option, cover the furniture with breathable furniture covers (not plastic tarps, which trap moisture and accelerate mold and rot). Elevate pieces off the ground on blocks or feet to prevent the bottom of legs from sitting in standing water. A few inches of clearance makes a substantial difference in leg longevity.
Troubleshooting common problems
| Problem | Likely Cause | Fix |
|---|---|---|
| Frame rocks or wobbles | Legs not level or racking without bracing | Trim the long leg(s) or add diagonal bracing; check with a level |
| Screws strip out of wood | Driving too fast or into end grain only | Fill hole with wood toothpick and glue, let dry, re-drive; switch to larger-diameter screw |
| Joints pull apart under load | Screws only, no glue; or end-grain-only connection | Disassemble, add Titebond III, re-clamp and re-drive; add through-bolt if needed |
| Finish peeling on PT lumber | Applied before wood was dry enough | Strip finish, wait for MC below 15%, reapply |
| Seat slats cupping or warping | Boards installed with heart side up; moisture differential | Reinstall slats with heart side down; seal all six faces before assembly |
| Boards splitting at screw holes | Screws too close to end; no pre-drill | Pre-drill pilot holes; move fasteners at least 1" from board ends |
| Table surface uneven | Slats at different heights or one leg proud | Trim proud leg; re-fasten any raised slats; use a long straightedge to identify high spots |
When 2x4s are not the right choice
2x4 lumber is a great starting point, but it is not always the best material for every outdoor furniture project. If you want a lightweight piece that is easy to move around a small patio, 2x4 builds can feel quite heavy. PVC pipe furniture is significantly lighter, requires no finish, and never rots: a worthwhile alternative if weight or zero-maintenance are priorities. If you prefer a digital, creative approach, see a step-by-step guide on how to make patio furniture in Minecraft for inspiration and quick mockups. If you want a smoother, more refined surface with thinner profiles (like a formal dining chair with tapered legs), standard 2x4 dimensional stock is bulkier than ideal and you would be better served by milled or S4S hardwood lumber sized to your project. And if your vision involves complex joinery like mortise-and-tenon or dovetails, that is a longer-term skill development project that goes beyond the scope of what this guide covers.
One last thought before you start cutting
The single biggest mistake I see beginners make is rushing to the saw before having a complete cut list and a dry-fit plan. Take the extra 30 minutes to sketch your project, write every piece with its actual finished dimension (remember: 1.5 x 3.5, not 2 x 4), and do a dry-fit with clamps before any glue or permanent fasteners go in. The builds in this guide are genuinely achievable for a first-timer, and the finished result, a set of outdoor furniture you built yourself for a fraction of retail price, is worth every hour. Start simple, build the bench first if you are unsure, and let the experience from that project carry you into the chair and the table. You will be surprised how quickly the techniques become second nature.
FAQ
What core factual measurements and dimensional conventions must the article use when planning with 2x4 lumber?
Use actual finished dimensions (1.5 in × 3.5 in / 38.1 mm × 88.9 mm) for all cut lists, clearances, and board‑foot calculations (not the nominal “2×4” label). State whether measurements are imperial and include metric conversions. Note S4S (surfaced four sides) stock if the plan assumes straight, square components.
What exact cut lists and material specs are required for the three publication‑ready projects (simple chair, two‑person bench, small dining table)?
Provide: a complete cut list (quantity of 2×4 pieces and lengths, expressed in actual length), list of additional lumber (e.g., plywood or 2×6 seat slats if used), all fasteners by type/size/finish (e.g., 2½" pocket screws for 1.5" stock, 3/8" carriage bolts for through‑bolted joints), glue spec (exterior‑rated such as Titebond III), recommended wood species or treatment (e.g., SYP, SPF, kiln‑dried, pressure‑treated UC3/UC4 where required), and an itemized hardware list (hinges, brackets, sandpaper grits, finish). Include waste allowance (typically 10–15%).
What joinery and fastener detail must be specified for strength and weather exposure?
Specify primary joint methods (pocket‑hole joinery with pocket spacing every 6–8 in on slats/rails; lap or butt joints reinforced with screws or through‑bolts where loads concentrate). For 2×4‑to‑2×4 structural connections show recommended fastener sizes: common practice 5/16" or 3/8" lag/bolt for high‑load through connections with embedment per AWC/NDS tables. Cite Simpson Strong‑Tie / AWC tables for withdrawal/shear design values and state corrosion class (hot‑dip galvanized, stainless 304/316). For treated lumber, require compatible fasteners per AWPA/Simpson guidance.
What safety and tool requirements should be included?
List essential tools (circular saw or miter saw, drill/driver, pocket‑hole jig, clamps, tape measure, speed square, orbital sander, countersink, wrench, work supports), PPE (eye protection, hearing protection, dust mask/respirator when cutting or sanding treated wood, gloves), and safe practices (secure workpieces, proper blade/bit selection, avoid cutting treated sawdust exposure, ventilation when finishing). Include torque and pilot‑hole guidance for lag/through bolts and warnings about over‑driving pocket screws.
How should pressure‑treated lumber and preservative choices be addressed?
Explain AWPA Use Categories (UC3 = above‑ground exterior; UC4 = ground contact) and recommend UC4 for parts that contact soil or continuous wetting. Identify common retail preservatives (ACQ, CA, MCA) and note that older CCA‑treated stock is uncommon for residential retail. Warn that preservatives accelerate corrosion of plain steel—specify fastener compatibility (hot‑dip galvanized or stainless) and reference Simpson/ AWPA corrosion guidance.
What fastener corrosion and stainless grade guidance is required?
Recommend stainless grades by exposure: 316 (marine) for coastal/salt environments, 304 acceptable inland for many uses but less resistant to chlorides. For treated lumber specify hot‑dip galvanized or stainless per connector manufacturer; cite Simpson Strong‑Tie corrosion tables and advise following AWPA/connector recommendations. Include recommended pocket screw lengths for 1.5" stock (e.g., 2½" pocket screws per Kreg guidance).