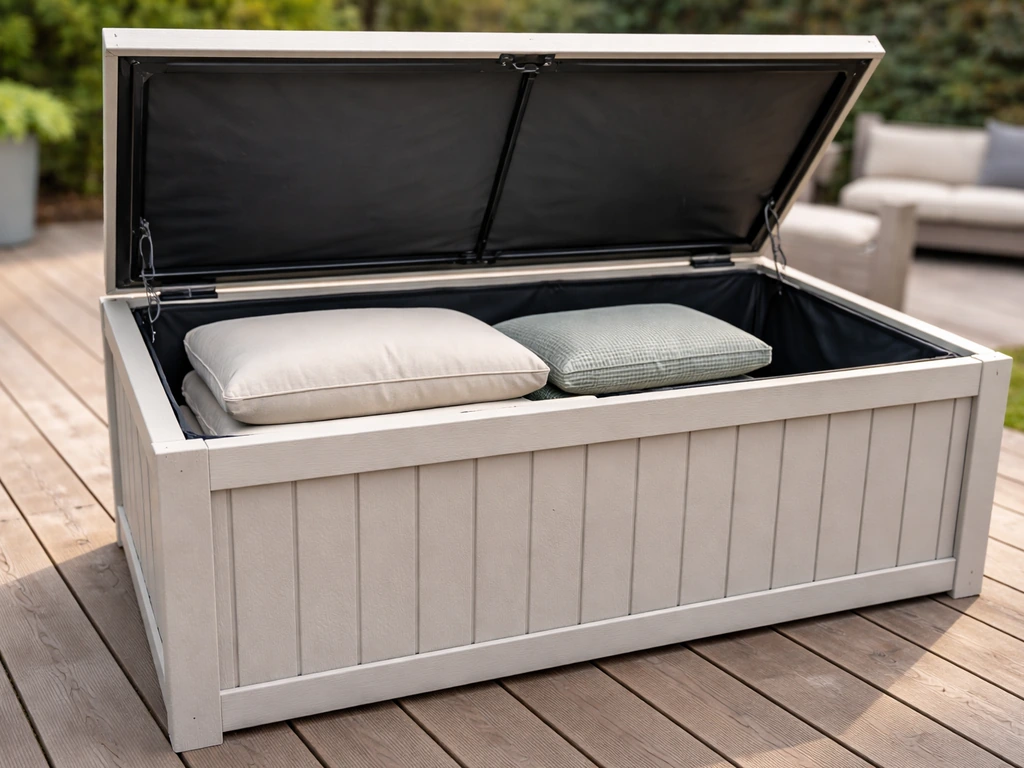
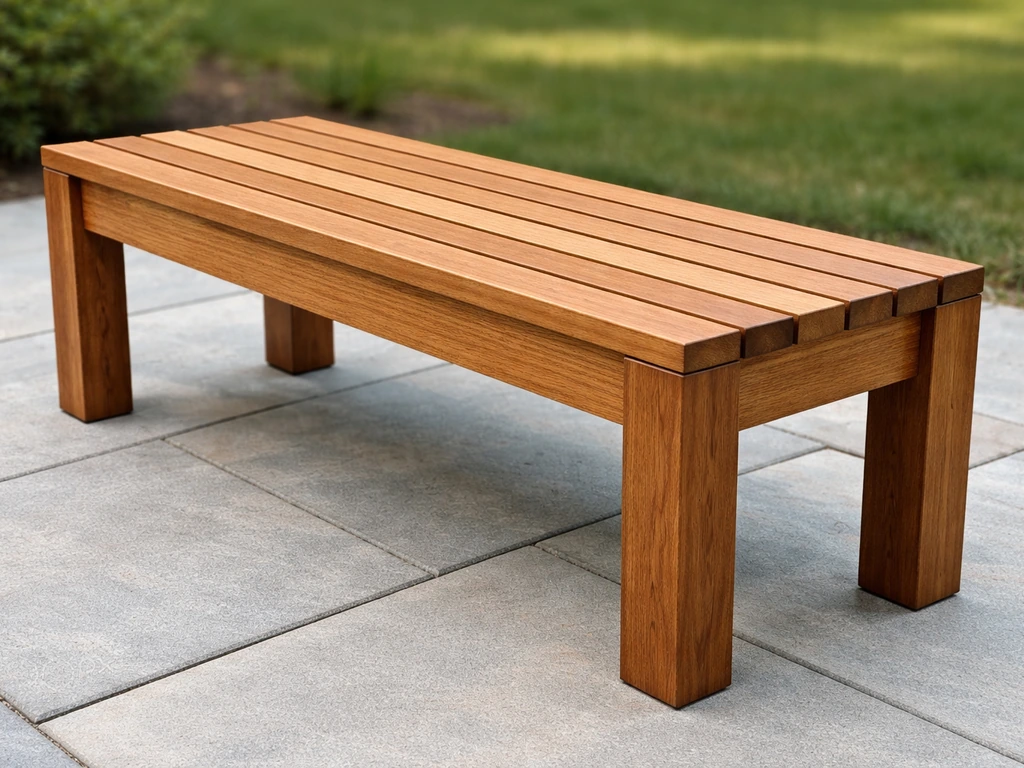
You can build a solid, weatherproof patio storage bench in a single weekend using standard dimensional lumber, a handful of exterior screws, and basic tools you probably already own. For step-by-step plans and a downloadable cut list, see our guide on how to make a patio bench out of wood. The finished bench will seat three adults comfortably, stand 18 inches tall, and hide a deep storage compartment that fits four to six full-size seat cushions. Total material cost runs roughly $80–$150 depending on wood species and hardware, which is a fraction of what comparable retail pieces cost, and yours will actually fit your space and hold up to real outdoor conditions.
How to Build a Patio Storage Bench: Complete DIY Plan

Maren Grady
6 Aug 2026
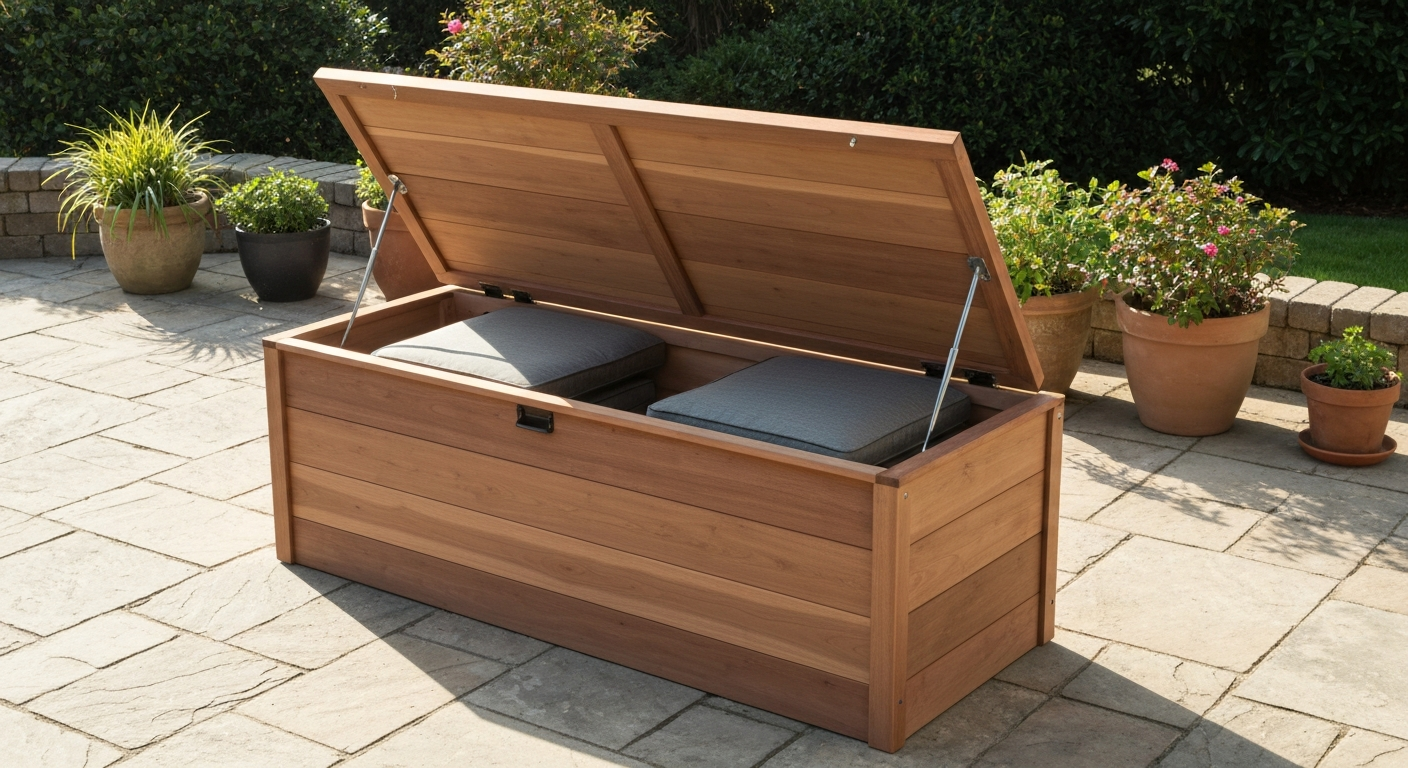
Who this guide is for and what you'll end up with
This guide is written for beginners who have never built furniture before, but experienced makers will find the cut list, framing details, and hardware options useful too. I'll walk through every step from picking lumber at the hardware store to screwing on the lid hardware, and I'll flag the spots where I personally went wrong the first time I built this so you can skip the frustration. The finished bench is 60 inches long, 18 inches deep, and 18 inches tall, a three-seat module that works as standalone patio seating, an entryway bench, or an anchor piece for a larger outdoor sectional. The internal storage box is about 14 inches deep, which is exactly enough room for cushions, throw blankets, or garden tools. If you want a dedicated cushion chest without seating, or a shorter two-seat version, I'll show you how to adapt the plan at the end.
Project overview and finished bench specs
Before you buy a single board, it helps to picture exactly what you're building. This is a box-frame bench: a rectangular framed box forms the base and storage compartment, a hinged lid doubles as the seat, and optional face boards dress the exterior. The design is intentionally simple, no mortise-and-tenon joinery, no router work, no specialized jigs. Everything connects with exterior screws, and the whole structure is stiff enough to handle normal adult loads (the framing targets support for at least 250 lb across the seat span, which covers most real-world use).
| Dimension | Measurement | Notes |
|---|---|---|
| Overall length | 60 inches | Seats 3 adults at ~18" per person |
| Overall depth (front to back) | 18 inches | Comfortable for seated use with cushion |
| Finished seat height | 18 inches | ADA-aligned ergonomic target for adults |
| Internal storage depth | ~14 inches | Fits standard seat cushions |
| Internal storage length | ~56 inches | Full interior width minus framing |
| Internal storage width | ~14 inches | Interior depth minus framing |
| Lid thickness | ~1.5 inches | Two layers of 3/4" plywood or solid slats |
| Estimated weight capacity | 250+ lb | Across seat span with standard framing |
The 18-inch seat height is the sweet spot for most adults, it lets you sit and stand without straining, and it matches the guidance used in accessible-design standards. The 18-inch front-to-back seat depth keeps your thighs supported without cutting off circulation behind the knees, especially once you add a 2-inch cushion on top. If you're building a companion piece to a dining set or a dedicated cushion storage box, the related builds on this site cover those adaptations in more detail.
Tools and materials
Lumber and sheet goods
For outdoor longevity you have three real options: western red cedar, redwood heartwood, or pressure-treated (PT) pine. Cedar and redwood are naturally rot-resistant, easy to work, and look great with a clear sealer, but they cost more. PT pine is the budget pick and will outlast untreated pine by decades outdoors, but you must use corrosion-resistant fasteners with it (more on that below). Avoid using standard whitewood or SPF studs for anything that will stay outside year-round, they'll start cupping and checking within one season. For the lid panel, use exterior-rated plywood stamped EXTERIOR or MARINE (not CDX, which is only rated for temporary weather exposure). CDX is fine for internal framing that's protected from direct rain, but the lid surface and any face panels that see weather need the better bond.
- 2×4 lumber (actual: 1.5" × 3.5"): 8 boards at 8 ft — framing, legs, apron rails
- 2×2 lumber (actual: 1.5" × 1.5"): 2 boards at 8 ft — interior cleats and lid support ledger
- 1×4 cedar or PT boards (actual: 0.75" × 3.5"): 6 boards at 6 ft — exterior cladding and seat slats (optional)
- 3/4" exterior-rated plywood: one 4×8 sheet — lid panel and internal floor
- 1/4" or 1/2" exterior plywood: optional for interior lining
Hardware and fasteners
Here's where a lot of beginners make an expensive mistake: using standard zinc drywall screws on an outdoor project. They rust within one season and stain the wood orange. For this bench, use #10 exterior deck screws (2.5 inch and 3 inch lengths) for framing, and #8 stainless-steel exterior screws (1.5 inch and 2 inch) for face boards and trim. If you're working with pressure-treated lumber, stainless steel fasteners (304 grade for inland, 316 for coastal) are the safest choice because some PT preservative chemistries accelerate corrosion in hot-dip galvanized fasteners. Simpson Strong‑Tie, Pressure‑Treated Wood / Corrosion FAQ recommends hot‑dip galvanized (or proprietary HDG/ZMAX) or stainless‑steel fasteners depending on preservative chemistry and exposure, and advises 300‑series stainless (304/316) where preservative retention or coastal/marine exposure is high, noting not to mix galvanized and stainless in contact Simpson Strong‑Tie — Pressure‑Treated Wood / Corrosion FAQ. Don't mix stainless and galvanized hardware on the same joint, the contact can cause galvanic corrosion.
- #10 exterior deck screws, 3" length: 1 lb box — framing connections
- #10 exterior deck screws, 2.5" length: 1 lb box — rail-to-leg connections
- #8 stainless exterior screws, 1.5" and 2" lengths: 1 box each — cladding and trim
- Continuous (piano) hinge, 48–60" length, stainless or zinc-plated: 1 piece
- Lid support straps or gas struts rated for lid weight: 1 pair
- Exterior wood glue (Titebond III or equivalent Type I/D4 rated): 1 bottle
- Joist hanger screws or structural screws for cleat attachment: small box
- Exterior primer and paint, or penetrating oil/sealer: per coverage
Tools
- Circular saw or miter saw — for crosscuts and ripping plywood
- Drill/driver with #2 Phillips and square-drive bits
- Drill bits: 1/8" pilot bit, 3/8" countersink bit
- Tape measure and speed square
- Clamps: at least 4 bar clamps or F-clamps
- Sander (random-orbit or belt sander) plus 80- and 120-grit paper
- Level (2-foot or 4-foot)
- Safety gear: safety glasses, hearing protection, work gloves
- Pencil and marking knife for layout
- Optional: pocket-hole jig (Kreg or similar) for cleaner joints
The build plan: measurements and cut list
This is the part most beginner guides skip over or fudge, and it's where projects fall apart. Every measurement below uses actual (finished/dressed) lumber dimensions, not nominal. See Kreg Learn, lumber sizing and shop planning guidance (nominal vs actual and cut‑list discipline) for a practical cut‑list method: always calculate using actual finished board dimensions, list finished width/height/thickness per part, note joinery allowances, and add 5–10% waste Kreg Learn — lumber sizing and shop planning guidance (nominal vs actual and cut‑list discipline). A 2×4 is actually 1.5 inches by 3.5 inches. A 1×4 is actually 0.75 inches by 3.5 inches. This matters because if you design around nominal sizes, your joints won't line up and your lid won't sit flat. I learned this the hard way on my first build, add 10% to your material order to cover crosscuts, any miscuts, and the occasional board that's bowed too badly to use.
| Part | Actual dimensions (T × W × L) | Qty | Material | Notes |
|---|---|---|---|---|
| Front/back bottom rails | 1.5" × 3.5" × 60" | 2 | 2×4 cedar or PT | Long horizontal base frame |
| Side bottom rails | 1.5" × 3.5" × 15" | 2 | 2×4 cedar or PT | Short sides of base frame |
| Corner legs / uprights | 1.5" × 3.5" × 14.25" | 4 | 2×4 cedar or PT | Height = 18" seat − 3.75" top − 0" base clearance |
| Front/back top rails (apron) | 1.5" × 3.5" × 57" | 2 | 2×4 cedar or PT | Sits between corner legs |
| Side top rails (apron) | 1.5" × 3.5" × 15" | 2 | 2×4 cedar or PT | Short apron sides |
| Internal cross supports | 1.5" × 3.5" × 15" | 2 | 2×4 cedar or PT | Span at 20" intervals under lid |
| Lid support cleat (ledger) | 1.5" × 1.5" × 57" | 2 | 2×2 cedar or PT | Runs inside front and back top rails |
| Interior storage floor | 0.75" × 15" × 57" | 1 | 3/4" exterior ply | Rests on bottom rails; add drain holes |
| Lid panel | 0.75" × 18" × 60" | 1 | 3/4" exterior ply | Full seat lid, or built from slats |
| Exterior face boards (optional) | 0.75" × 3.5" × 57" | 4–6 | 1×4 cedar | Two rows front and back cladding |
A few notes on this cut list: the leg height of 14.25 inches is calculated by subtracting the bottom rail (3.5 inches) and the lid panel (0.75 inches) from the target seat height of 18.5 inches, then rounding down slightly so the finished height lands right at 18 inches once the lid and any cushion are in place. The lid support cleats (2×2 strips glued and screwed to the inside face of the top apron rails) give the lid a positive stop so it doesn't drop into the box. Always do a dry-fit of all parts before applying any glue.
Site prep: where to put it and what to set it on
Even a well-built bench will rot prematurely if it sits in a puddle or directly on wet concrete. Before you start assembly, decide where the bench will live and prep that spot. For a concrete or paver patio, the main concern is standing water pooling under the base frame. On a wood deck, the concern is trapping moisture between the bench bottom and the decking. A few simple precautions will double the service life of your bench.
- On concrete or pavers: attach rubber furniture feet or neoprene pads (about 1/4" thick) to the bottom of the base rails so air can circulate and water drains away — this alone prevents most base rot
- On a wood deck: use the same pad approach, or attach small HDPE or composite spacer blocks to lift the bench 1/2" off the deck surface
- Check level before finalizing position: use a 4-foot level across the planned footprint; shim under the base if needed using composite shims or cedar shims (never wood shims directly on concrete — they absorb water)
- Avoid placing the bench directly against a wall or fence where air won't circulate behind it; leave at least 2–3 inches of clearance
- If the bench will sit on soil or gravel (not ideal for a storage bench), set it on paver stones or composite decking tiles to keep the base frame off the ground entirely
Step-by-step: building the frame and base
Take your time on the base, it's the part that determines whether the finished bench sits level and square. A twisted base means a lid that won't close evenly, and that's annoying to fix after the fact. I always build the base frame first as a flat rectangle on a garage floor, check it for square by measuring corner-to-corner diagonals (they should match within 1/8 inch), then add the legs.
- Cut all your parts per the cut list and do a dry layout on a flat surface before touching the glue — this reveals any measurement errors when there's still time to fix them.
- Build the bottom base frame first: lay the two 60-inch bottom rails parallel on the floor, then set the 15-inch side rails between the ends. The assembly is 60 inches long overall because the side rails fill the gap between the front and back rails (1.5" + 15" + 1.5" = 18" depth). Pre-drill with a 1/8" pilot bit, then drive two 3-inch deck screws through the long rail into each end of the short rail.
- Check the frame for square: measure diagonally from corner to corner both ways. If the measurements differ by more than 1/8 inch, apply light pressure to the longer diagonal corner and recheck. Clamp in position before the glue sets.
- Cut the four corner legs at 14.25 inches. Apply a small bead of Titebond III to the top face of the base frame corners where the legs will sit, then clamp and screw each leg in place using two 3-inch screws per leg — one from each face direction. Pilot-drill all holes first to prevent splitting.
- Build the top apron frame: same process as the base frame. The two 57-inch front and back rails sit between the corner legs (so the apron is 1.5" shorter on each end than the overall bench length, fitting between the legs). The two 15-inch side apron rails fill the short sides.
- Set the assembled top apron frame onto the tops of the legs and clamp it in position. Confirm the whole structure is square and level, then drive two 3-inch screws through each top rail into the top of each leg.
- Install the two internal cross supports: cut two pieces of 2×4 at 15 inches (same as the side rails). These span the interior front-to-back at roughly 20-inch intervals from each end. Toe-screw or use metal angle brackets to attach each cross support to the top apron rails — this is what prevents lid sag over the long span.
- Install the lid-support cleats: cut two 2×2 strips at 57 inches. Glue and screw each cleat to the inside face of the front and back top apron rails, flush with the top edge. These act as the lid stop and give the piano hinge something solid to mount to.
- Drop in the interior storage floor panel (3/4" plywood, 15" × 57"): it rests on top of the bottom base frame. Before installing it permanently, drill four 1/2-inch drain/vent holes in the corners of the plywood floor, then set it in place and screw it down from below or with small L-brackets — do not glue it so you can remove it for cleaning.
Step-by-step: seat lid, storage box finish, and ventilation
The lid is the part people will touch and sit on every day, so it's worth spending extra time getting it right. A lid that fits perfectly, closes without slamming, and doesn't warp after one rainy season is the difference between a project you're proud of and one you stop using.
- Cut the lid panel from 3/4-inch exterior-rated plywood at 18 inches wide by 60 inches long. Sand all edges smooth with 80-grit, then finish with 120-grit. Round the front two corners slightly with sandpaper or a block plane — this prevents the sharp plywood edges from delaminating as quickly.
- If you prefer a slatted lid (better airflow, no plywood delamination risk over time), cut 1×4 cedar boards at 60 inches and space them 1/4 inch apart across the 18-inch seat depth. You'll need about five 1×4 boards per slat-style lid. Attach them to two 2×2 crossbars running front-to-back on the underside — this holds the slats aligned and gives you a rigid panel to hinge.
- Before installing the lid, do all your sanding and apply the first coat of sealer or paint to all interior surfaces of the storage box and the underside of the lid. It's nearly impossible to coat these surfaces properly after assembly.
- Ventilation is critical for stored cushions: in addition to the drain holes in the floor panel, cut a 1-inch-wide by 3-inch-long slot in the bottom of the front face board on each short end of the bench. This creates a cross-draft from end to end when the lid is closed. If you're storing cushions in a humid climate, toss a few desiccant packs into the box — they're cheap and they work.
- Optional interior liner: cut a piece of exterior plywood or pressure-treated 1/4-inch plywood to line the interior walls. This keeps rough framing away from fabric cushions and makes the inside look finished. Attach with small screws — no glue — so you can replace panels if they ever need it.
- Attach the lid to the bench using a continuous (piano) hinge (see the next section for full hinge guidance). Once hinged, test that the lid opens and closes freely without binding or racking to one side. If the lid binds, the apron frame is probably slightly out of square — you can usually correct this by shimming one end of the hinge slightly.
- Install lid support straps or gas struts before final use — never rely on a prop stick for a storage bench that kids or pets might interact with. The lid support hardware keeps the lid safely propped open while you load and unload cushions.
Hinge and lid hardware: which type to use and how to install it
The hinge choice matters more than most people realize for a bench lid this wide. A 60-inch lid is heavy and spans a long distance, point-load hinges (two small butt hinges) can cause the lid to rack, warp over time, or even split the lid panel at the hinge mounting points. Here's a breakdown of the main options.
| Hinge type | Best for | Pros | Cons | Cost range |
|---|---|---|---|---|
| Continuous (piano) hinge | Long lids (36"+ spans) | Distributes load evenly, no lid sag, very stable | Requires straight lid and apron edges; harder to adjust | $8–$25 for a 48–60" stainless piece |
| Multiple butt hinges (3+ pairs) | Medium lids up to 48" | Easy to source, adjustable individually | Lid sag risk if spaced too far apart; more mounting points to seal | $3–$8 per pair |
| Removable lid (no hinges) | Simple builds, utility benches | No hardware to rust, easy to remove for cleaning | Lid can blow off in wind; no soft-close option | $0 |
| Gas struts (lift supports) | Heavy lids over 20 lb | Lid stays open hands-free, no slamming | Requires correct force/stroke sizing; adds cost | $15–$40 per pair |
| Soft-close lid supports | Safety-focused builds | Prevents lid slam on fingers, great for kids | Adds cost, requires proper mounting angle | $20–$50 per pair |
For this 60-inch bench, I recommend a continuous (piano) hinge running the full length of the back of the lid. Buy stainless steel if your budget allows, zinc-plated piano hinges will rust within two to three seasons in most climates. To install: set the hinge on a flat surface and align the lid panel with the back apron rail. Clamp both in position, then pre-drill pilot holes every 6 inches along the hinge leaf using a 1/8-inch bit. Drive stainless screws snugly but don't overtighten, piano hinge screw holes strip easily in plywood edge grain. If you're mounting into plywood edge grain, apply a drop of thin CA glue into each pilot hole and let it cure for 30 seconds before driving the screw, this hardens the grain and dramatically reduces strip-out.
For gas struts, don't guess at the force rating. The strut manufacturers (Stabilus and similar) publish online force calculators where you enter lid weight, lid length, hinge position, and desired opening angle. A typical 3/4-inch plywood lid at 60 inches weighs about 18–22 pounds, that usually calls for a pair of struts in the 60–80 Newton range, but confirm this with the calculator for your exact lid weight and geometry. Mount struts to the inside of the side apron walls and the underside of the lid using the brackets supplied. Test the opening angle before final mounting, you want the lid to stay open at 90–100 degrees, not push past vertical.
Finishing and weatherproofing
No matter how good your lumber is, bare wood left outdoors will check, gray, and eventually crack. The goal of finishing isn't just aesthetics, it's sealing end grain and exposed surfaces so moisture can't get in and cause the expansion-contraction cycles that split boards over time. End grain is the biggest vulnerability: cut ends absorb water like a sponge, so give them an extra coat of sealer or paint compared to face surfaces.
- Sand the entire exterior with 120-grit, then 150-grit, paying special attention to any squeeze-out from glue joints — dried exterior glue will prevent finish from penetrating.
- Apply end-grain sealer or an extra brush coat of your chosen finish to all cut ends before doing anything else — let it soak in, then apply a second coat.
- For a natural wood look (cedar or redwood): use a penetrating exterior oil or deck stain (TWP, Armstrong Clark, or similar). Apply two coats, letting each dry fully. These finishes need re-application every 1–2 years but are easy to touch up without stripping.
- For a painted finish: apply one coat of exterior oil-based primer, sand lightly with 150-grit when dry, then apply two coats of exterior latex or alkyd topcoat. Painted surfaces typically last 3–5 years before needing a refresh.
- Seal around all hardware mount points (hinge screws, lid support brackets) with a small dab of clear exterior caulk or silicone after installation — these screw holes are direct paths for water infiltration.
- Let all finishes cure fully before putting the bench in service — most exterior paints and oils need 48–72 hours of cure time at room temperature.
Time and cost estimate
This is an honest estimate, not an optimistic one. If you've built furniture before, you might finish in a day. If this is your first project, plan for two full weekend days, including time for glue to set and finish coats to dry.
| Phase | Estimated time | Notes |
|---|---|---|
| Lumber selection and shopping | 1–2 hours | Sort boards at the store for straightness |
| Measuring, marking, and cutting | 2–3 hours | The longest phase for beginners |
| Base and frame assembly | 2–3 hours | Including clamp time for glue joints |
| Lid construction | 1–2 hours | Longer if building a slatted lid |
| Hinge and hardware install | 1 hour | |
| Sanding and finishing (2 coats) | 2–3 hours + drying time | Drying adds 12–48 hours between coats |
| Total active build time | 9–14 hours | Spread across 2 weekends for beginners |
| Material category | Budget option | Mid-range | Premium |
|---|---|---|---|
| Lumber (PT pine) | $35–$50 | Cedar: $60–$90 | Redwood: $90–$140 |
| Plywood (1 sheet) | $30–$40 | $40–$55 exterior grade | $55–$80 marine grade |
| Fasteners and hardware | $15–$25 | $25–$40 (stainless) | $40–$60 (SS + gas struts) |
| Finish (sealer or paint) | $15–$25 | $25–$40 | $40–$60 |
| Total estimate | $95–$140 | $150–$225 | $225–$340 |
Safety tips for the build
- Always wear safety glasses when cutting — circular saw kickback and flying splinters are the most common workshop injuries on projects like this
- Clamp your workpiece before cutting; never hold lumber with your hand near an active blade
- Pre-drill all screw holes near board ends (within 2 inches of the end) to prevent splitting — this is especially important with cedar, which splits easily
- When working with pressure-treated lumber, wear gloves and a dust mask — PT sawdust contains preservative chemicals that irritate skin, eyes, and lungs; wash hands before eating or touching your face
- Keep a first aid kit in your workspace and know where it is before you start
- Don't use a prop stick to hold the lid open while loading cushions — install lid support hardware before putting the bench in service, particularly if children are nearby
Common mistakes and how to fix them
Every builder makes mistakes, and this project has a few specific spots where things reliably go sideways. Here are the ones I've seen (and made) most often.
- Lid doesn't sit flat: usually caused by an out-of-square apron frame. Fix it before installing the hinge by checking diagonals and shimming the low corner. If you catch it after hinging, you can sometimes plane or sand the lid edge to compensate.
- Screws strip out in plywood edge grain: use the CA glue trick described in the hinge section, or switch to longer screws with a washer head. Never try to retighten a stripped screw — pull it, fill the hole with epoxy wood filler, let it cure fully, then re-drill and drive a new screw.
- Base frame wobbles after assembly: you either have a twisted board in the base or the floor surface isn't flat. Shim the short leg with a rubber pad, or replace the twisted board if it's significant.
- Moisture inside the storage box after rain: check that your drain holes are actually at the lowest point of the interior floor, not higher. Also confirm the lid panel overhangs the front apron by at least 1/2 inch to shed water away from the box opening.
- Exterior finish peeling after one season: this is almost always from applying finish over damp wood. Wait 48–72 hours of dry weather before finishing, and never apply oil finish when the temperature is below 50°F or above 90°F.
- Piano hinge screws pull out under lid weight: you've probably hit a knot or weak edge grain. Remove the hinge, fill holes with epoxy, and remount. Consider adding a 1×2 hardwood backing strip glued to the inside of the back apron rail to give the hinge screws more material to bite into.
Maintaining your bench through the seasons
A storage bench that gets a little attention once or twice a year will easily last 10–15 years. One that gets ignored will start showing problems in 3–5. The maintenance routine is simple and takes less than an hour per session.
- Spring (before cushion season): inspect all hinge and hardware screws and tighten any that have worked loose over the winter. Sand any checking or raised grain with 120-grit and apply a fresh coat of exterior oil or deck stain if the finish looks dry or gray.
- Summer: once a month, open the storage box and let it air out for a few hours — this is especially important in humid climates. Check that drain holes are clear of debris.
- Fall (before storing for winter): remove all cushions, dry them fully, and store them in the bench. Wipe down the interior with a diluted white vinegar solution to inhibit mold, let it dry completely, and add fresh desiccant packs. In freeze-thaw climates, apply a coat of exterior wax or penetrating oil to all exterior surfaces before the cold season.
- Every 1–2 years: inspect all wood-to-wood joints for any play or movement. Tighten screws and add additional ones if needed. Check for any soft spots in the wood that indicate rot beginning — catch them early and treat with a penetrating epoxy consolidant (Smith's or Abatron) before they spread.
Variations and adaptations
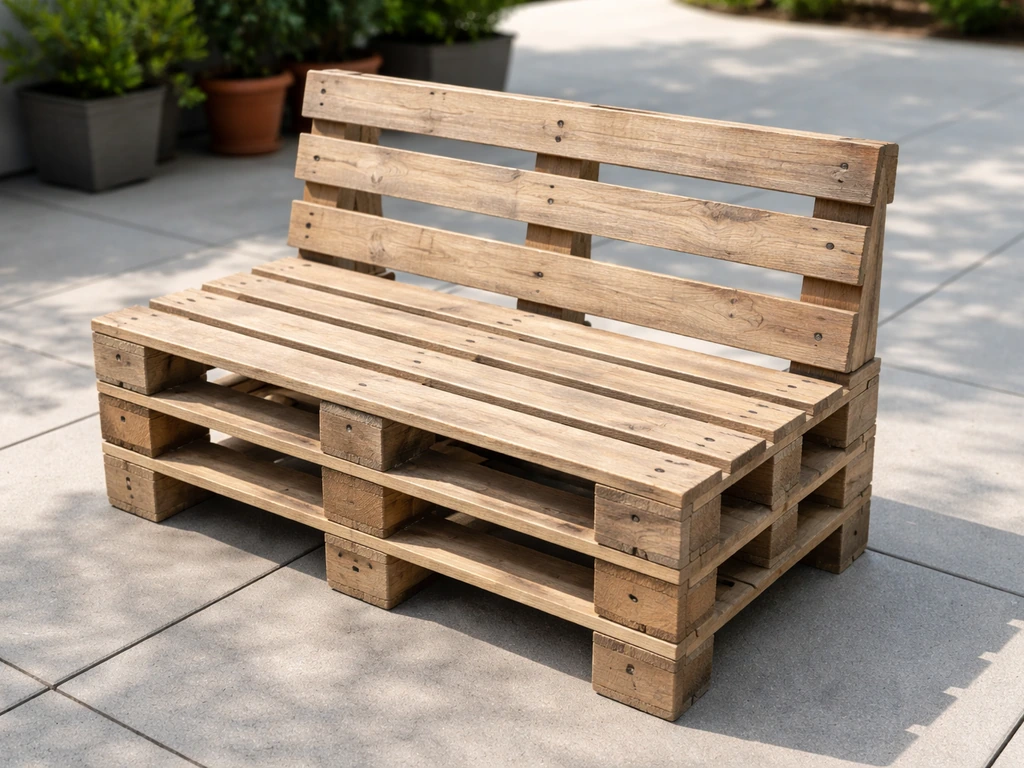
Once you've built this bench, the same box-frame logic adapts easily into several related projects. If you want to build the same design from pallets instead of dimensional lumber, the framing approach is nearly identical, you're essentially deconstructing pallets into 2×4-equivalent members and 1×4 slats, then assembling them the same way. The main challenge with pallets is finding ones that are heat-treated (marked HT) rather than chemically treated, and sorting out the warped and cracked boards before you start. A pallet version of this bench will cost almost nothing in materials but takes more prep time.
If you want just the storage box without the bench seat, the design simplifies significantly: drop the seat height to 12–14 inches, remove the apron rails and cleats, and just build the rectangular box with a hinged lid. This makes a dedicated cushion storage chest that sits lower than a bench and can slide under a side table or against a wall. For a single-seat version of this bench with armrests adapted into a storage chair, the same frame construction works, you'd shorten the bench to about 24 inches wide and add angled or vertical arm supports at each end. For step-by-step plans to convert this into a single-seat storage chair, see how to build a patio chair. These related builds are worth exploring once you've got the basic box-frame technique under your belt.
FAQ
What are the essential dimensional specifications I must decide up front for a single, buildable patio storage bench plan?
Decide finished overall length, seat height, seat depth, internal storage depth/height, and wall/thickness details. Use recommended targets: seat height 18" (17–19" acceptable), seat depth 16–18" (16–20" range), per‑person width ~18" (so a 3‑seat bench ≈54–60" finished). Specify lid overhangs, apron/frame thickness, and clearance for hinges/struts. State whether measurements in the plan are finished (actual) sizes and convert any nominal lumber to actual sizes in the cut list.
What structural load and framing requirements must the plan include?
Specify design loads (e.g., 250–300 lb per seating position for residential use), framing spacing (support cross members ≤12–16" o.c. under top), materials for perimeter apron/cleats (e.g., 2×4 actual 1½"×3½" or 2×2), plywood thickness for seat/lid (¾" or exterior 15mm), and placement of blocking/doublers to prevent lid sag. Reference BIFMA/ANSI or stated safety factor for residential furniture.
What exact materials and finishes must be listed (including species/grades and outdoor suitability)?
List lumber species (western red cedar, redwood, or pressure‑treated pine), specify pressure‑treated grade/exposure category if used (above‑ground vs ground‑contact), exterior plywood grade (APA EXTERIOR or MARINE for long exposure; avoid temporary CDX for exposed tops), recommended exterior adhesives (Titebond III / D4 where applicable), fastener types (hot‑dip galvanized, ZMAX, or stainless—304 inland, 316 coastal), hinge/hardware options (piano hinge, butt hinges, gas struts, soft‑close kits), sealants and paints/stains (exterior oil‑ or acrylic‑latex primers/topcoats, exterior spar varnish), and recommended corrosion‑resistant hardware brands or spec sheets.
What level of detail is required in the cut list and material quantities?
Provide a full cut list using finished (actual) board dimensions: part name, finished length, width, thickness, quantity, and material (e.g., 1 — seat lid: 60"×18"×3/4" exterior plywood). Include dimensional lumber parts for apron, legs, internal cross supports, cleats, and trim. Show panel layouts for plywood sheets, indicate waste allowance (5–10%), and note which parts can be ripped from full stock lengths. Include fastener counts (screws, bolts, washers), hinge quantity/length, gas‑strut ratings (or selection calculator link), and recommended hardware sizes.
What specific tools and shop/practical requirements belong in the materials/tools list?
List power tools (circular saw/table saw, miter saw, drill/driver, impact driver, router (optional), jigsaw), measuring tools (tape, combination square, speed square, straightedge), fastening tools (clamps, countersink, pocket‑hole jig optional), finishing tools (sandpaper, brushes, sprayer optional), safety gear (eye/ear protection, respirator/gloves), and consumables (exterior wood glue, stainless/galvanized screws, sandpaper, epoxy for exposed end‑grain if used). Note any shop space or transport constraints for long stock and mention that plans assume basic woodworking skills; include reference to tutorials for pocket holes or basic joinery if beginner.
How detailed should step‑by‑step assembly instructions be?
Provide sequential numbered steps from cutting to finishing that a competent DIYer can follow without gaps: stock preparation, dry‑fit framing, assemble box (with fastener types and spacing), install internal supports, attach lid with chosen hinge option including reinforcement details, fit gas struts (with mounting positions and force selection method), add ventilation/drainage features, sand and finish, and final installation. Include typical screw spacing, glue application notes, pre‑drilling countersink sizes for screws, and photos/diagrams or dimensioned drawings called out for complicated steps.