The fastest fix for patio curtains that won't stop flapping is to add weight to the bottom hem. You can do this five ways: sew a hem pocket and drop in removable weights, stitch a bead chain directly into the hem, clip or magnet on external weights, slide in an aluminum or PVC bottom bar, or anchor the hem to the floor with a tension cord. Which one you choose depends on your fabric type, whether you rent or own, and how much wind you're dealing with. This guide walks through all five methods with step-by-step instructions, plus quick fixes, a weight reference table, and advice for clear vinyl panels.
How to Weigh Down Patio Curtains: 7 DIY Methods & Tips

Maren Grady
25 Jul 2026
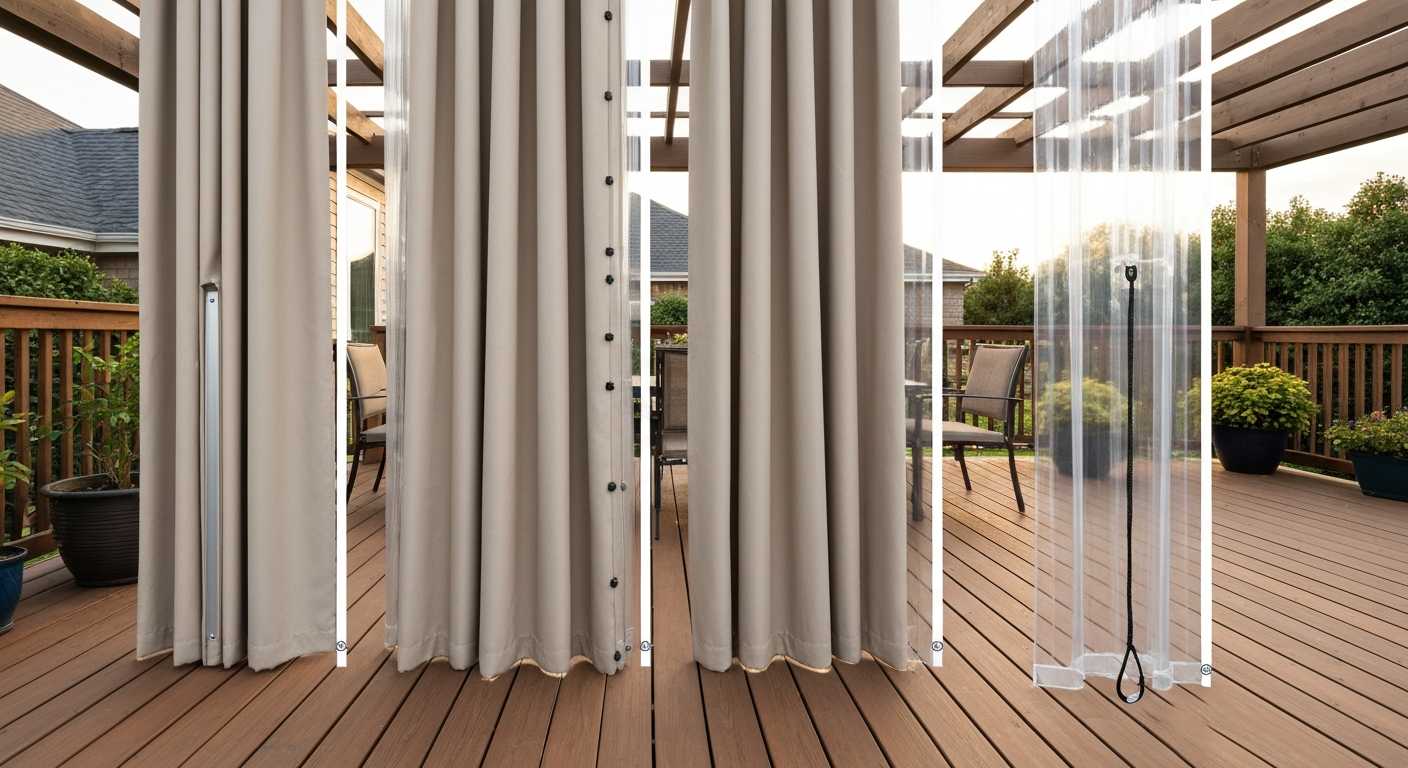
Why your patio curtains won't hang straight (and why weight fixes it)
Wind is the obvious villain, but fabric choice and mounting hardware play just as big a role. A lightweight polyester panel hung on a loose grommet track will billow and twist even in a mild breeze. A heavier outdoor fabric like Sunbrella acrylic hangs better on its own, but it still needs bottom weight to track straight and stop it from wrapping around the rod in gusty conditions. The moment you add a consistent, distributed weight to the hem, the curtain behaves like a properly tensioned shade instead of a sail.
Beyond aesthetics, there are real practical reasons to get this right. A curtain that flaps constantly fatigues seams at the top grommet holes and rod pockets. Clear vinyl panels that whip in the wind can crack along the edges, especially in cold weather. And a curtain that wraps itself around a support post creates a tripping hazard and can knock over furniture. Weighing down the hem solves all of these problems at once. This guide covers exactly how to do it, whether your curtains are sewn cloth panels or thick marine-grade clear vinyl.
When you actually need to add weight
Not every patio curtain needs extra ballast. Before you start cutting or sewing, run through these quick checks to figure out whether you actually have a weighting problem or something else entirely.
- Wind speed and exposure: If your patio is fully exposed to prevailing winds or sits on a second-floor deck, you almost certainly need weighting. Ground-floor patios with fencing or shrub breaks may only need weight during storms.
- Fabric weight: Sheer or lightweight outdoor polyester (under 5 oz/yd²) will flutter in even light breezes. Heavier canvas or acrylic fabrics (8–12 oz/yd²) hang better but still benefit from hem weight in exposed spots.
- Panel length: Panels over 7 feet tall have more fabric area for wind to catch. Longer panels need proportionally more weight to maintain a straight hang.
- Hardware play: If grommets are oversize for your rod, or if clip rings have a lot of swing, the curtain can rock and flap even without strong wind. Adding weight reduces that pendulum motion.
- Location: Coastal or high-elevation sites get consistent wind that makes weighting a necessity, not an upgrade. Inland suburban patios may only need it for storm season.
- Clear vinyl panels: These are stiffer but also act like a sail on a flat face. They need weight and often a bottom anchor to stop the panel from bowing outward.
Visible vs. hidden: picking the right approach before you buy anything
There are two broad camps for weighting patio curtains: methods that hide the weight inside the hem (chains, rod pockets, sewn-in pellets) and methods where the weight or hardware is visible on the outside (bars, clips, magnets, bungee cords). Neither is universally better. Here is an honest comparison so you can pick what fits your situation.
| Approach | Examples | Pros | Cons | Best For |
|---|---|---|---|---|
| Hidden / sewn-in | Chain hem, weighted pellets in pocket, rod pocket insert | Clean look, no external hardware, distributes weight evenly | Requires sewing or seam alteration, not renter-friendly unless removable pocket used | Permanent installs, decorative cloth curtains, high-wind zones |
| Visible / external | Bottom bar, clip-on weights, magnetic weights, bungee cord anchors | No sewing needed, fully reversible, adjustable weight | Hardware shows, can clang in wind, bar ends may snag fabric | Renters, clear vinyl panels, temporary setups, quick fixes |
| Adhesive / peel-on | Adhesive hem weights, double-sided tape weights on vinyl | Very fast, no tools | Bond degrades outdoors, not for heavy wind, may leave residue on vinyl | Light curtains in sheltered spots, temporary use only |
My honest recommendation: if you own your home and the curtains are cloth, go straight to Method 2 (sewn-in chain). It's the most durable and disappears completely inside the hem. If you rent, or if the panels are expensive clear vinyl you don't want to alter, start with Method 3 (magnetic clips) or Method 4 (bottom bar with no permanent attachment). The rest of this guide gives you step-by-step instructions for all five methods so you can mix and match.
Materials and tools you'll need
You don't need all of this for every method. Read through the methods first and then buy only what applies to your project. I'll call out what each method needs specifically.
- Stainless steel bead chain (304 grade for outdoor rust resistance) — sold by the foot at hardware stores and McMaster-Carr; plan on 1 foot per foot of curtain width
- Curtain weights (small lead-free disc weights designed for drapery hems) — sold in packs of 20–50 at fabric stores or online
- Metal washers (1.5"–2" zinc or stainless) — 10 to 20 per curtain panel depending on spacing; very cheap and available at any hardware store
- Aluminum flat bar (1" x 1/8" or 3/4" x 1/8") — for bottom bar method; sold in 6-foot and 8-foot lengths, cut to width
- PVC flat bar or schedule-40 PVC pipe (1/2" diameter) — lighter alternative to aluminum bar; easier to cut with a hacksaw
- Magnetic curtain weights — clip-on pairs that pinch the hem between two magnets; sold as a set of 4–6
- Bungee cord (6"–12" length) or paracord — for tension anchor method
- Tent stakes or deck screw hooks — used as floor/floor-rail anchors for bungee method
- Hem tape (iron-on fusible tape for cloth curtains) — if you want to create a no-sew hem pocket
- UV-resistant bonded polyester thread (Tex 70 or Tex 90 weight) — for any sewing on outdoor or vinyl curtains; PTFE/Tenara thread is the upgrade option for maximum UV resistance
- Sewing machine capable of straight stitch — a basic machine works; a walking foot helps with thick fabrics or vinyl
- Needles: size 16–18 for outdoor cloth fabrics, size 20–21 for clear vinyl panels
- Seam ripper — to open existing hems without cutting fabric
- Measuring tape and tailor's chalk or washable marker
- Scissors or rotary cutter
- Snap pliers or heavy-duty stapler (for attaching bar clips or zip-tie anchors)
- Hacksaw or pipe cutter (for cutting aluminum or PVC bar)
- File or sandpaper (to smooth cut bar ends and prevent snags)
- Rubbing alcohol or mild soap and water (surface prep for any adhesive application)
- 3M Tape Primer 94 (optional, but dramatically improves adhesive bond to clear vinyl or PVC surfaces)
Compatibility notes: clear vinyl, rods, tracks, grommets, and clips
Before you choose a method, it's worth understanding how your existing hardware affects your options. Most problems I see come from people adding weight to a curtain that's still attached to the wrong hardware for the job.
Clear vinyl panels are a special case. Marine-grade clear PVC like Regalite or O'Sea 40-gauge (0.040" thick) is stiff enough that it resists gentle breezes on its own, but larger panels act like a flat sail in strong wind. The stiffness also means you can't just gather and hem them the way you would with cloth. Sailrite recommends sewing clear vinyl with size 20–21 needles and Tex-90 or heavier thread, and binding all raw edges after sewing because the material can tear from stitch holes under load. For anything thicker than 40-gauge, welding the hem shut with a hot-air welder gives a stronger bond than sewing. If you're considering making your own clear vinyl patio curtains from scratch, I have a detailed guide on the site covering exactly that process.
For rod and track systems, here's what plays nicely with each method: standard round rods (3/4"–1") work with all five methods since weight at the hem doesn't change the top attachment. Grommet panels on a rod need the bottom to hang free or be anchored to the floor, which makes the bungee cord method (Method 5) a natural fit. Clip-ring systems have a lot of swing at the top, so they benefit the most from added hem weight. Track systems (ceiling-mounted or on a pergola beam) are usually the most stable and often only need a light chain or disc weights. Bottom bars are fully compatible with all top-attachment styles.
Adhesive methods (peel-on weights, magnetic clips) need clean, flat hem surfaces. Retail Command product detail pages (for example, Target, Command Outdoor Large Hook product listing (example retail product spec)) show typical per‑hook load capacities for medium/large outdoor hooks in the ~1.8–6.8 kg (~4–15 lb) range and state that multiple strips or attachment points are needed to share heavier loads, follow manufacturer guidance to avoid adhesive failure blank" rel="noopener noreferrer">Target — Command Outdoor Large Hook product listing (example retail product spec). On gathered or pinch-pleated cloth curtains, the uneven surface makes adhesives unreliable. On flat-hem cloth or clear vinyl, adhesives work better but degrade faster outdoors. If you use any tape or adhesive on clear vinyl, clean the surface first with rubbing alcohol and consider applying 3M Tape Primer 94 to improve bond strength to the PVC surface, which is a low-energy plastic that resists adhesion without prep.
How much weight do you actually need?
This is the question I get most often, and the answer depends on both panel size and fabric weight. Too little weight and the curtain still flaps. Too much weight and you stress the top grommets or gathers, eventually tearing the fabric. Here's a practical reference table based on common outdoor panel sizes and fabric categories.
| Panel Width | Fabric Type | Fabric Weight (approx.) | Suggested Hem Weight | Notes |
|---|---|---|---|---|
| Up to 54" | Sheer/lightweight outdoor polyester | 3–5 oz/yd² | 4–8 oz (115–225g) | Use 4–6 disc weights or 4 ft of light bead chain |
| Up to 54" | Mid-weight outdoor canvas or acrylic (e.g. Sunbrella) | 8–10 oz/yd² | 8–14 oz (225–400g) | Use 6–8 disc weights or full-width bead chain |
| Up to 54" | Clear vinyl 30–40 gauge | Approx. 10–14 oz/yd² | 10–16 oz (285–450g) | Bottom bar or full-width chain preferred for even distribution |
| 54"–84" | Sheer/lightweight outdoor polyester | 3–5 oz/yd² | 8–14 oz (225–400g) | Space disc weights every 8–10 inches across hem |
| 54"–84" | Mid-weight outdoor canvas or acrylic | 8–10 oz/yd² | 14–24 oz (400–680g) | Full-width bead chain or bottom bar recommended |
| 54"–84" | Clear vinyl 40 gauge | Approx. 10–14 oz/yd² | 16–28 oz (450–795g) | Aluminum bottom bar is the most practical option |
| Over 84" | Any cloth fabric | Varies | 24–40 oz (680g–1.1kg) | High wind: bottom bar plus floor anchor; standard: full-width chain |
| Over 84" | Clear vinyl 40 gauge | Approx. 10–14 oz/yd² | 28–48 oz (795g–1.36kg) | Use aluminum bar plus bungee floor anchor; consider secondary mid-panel tie |
These are starting ranges, not exact engineering values. For very exposed sites (coastal, high elevation, rooftop decks), go toward the upper end of the range. For sheltered patios or panels that only need occasional wind resistance, the lower end works fine. The key principle from structural guidance like ASCE 7 wind load standards is that even lightweight panels can experience significant distributed wind pressure in gusts, so it's always safer to add slightly more weight than you think you need rather than less. You can always remove disc weights or trim a chain later if the curtain hangs too heavily.
Method 1: Hem pocket with removable weights
This is the most beginner-friendly sewing method, and it's also the most flexible because you can add, remove, or swap out the weights without touching the curtain again. The idea is simple: you create or open up the existing hem to form a channel, then drop in disc weights or small sandbag pouches that you can slide out before washing or storing the curtain.
Photo set for this method should include: (1) the closed hem before opening, (2) seam ripper opening one end of the hem seam, (3) the inside of the open hem pocket, (4) disc weights being inserted, (5) hand-stitching or machine-stitching the end closed, (6) the finished hem from outside, (7) the curtain hanging straight with weights installed.
- Lay the curtain face-down on a clean flat surface and locate the bottom hem. Most outdoor curtains have a 2"–4" double-fold hem. If yours is narrower than 1.5", you'll need to let it down and re-hem wider before inserting weights.
- Using a seam ripper, carefully open 2"–3" of the hem stitching at one side seam. Go slowly — you're pulling out stitches, not cutting fabric. If the thread is stubborn, slide the seam ripper under every 3rd stitch and the whole row will release.
- Reach inside the pocket and check that it runs the full width of the curtain. Some cheaper curtains have the hem tacked shut at intervals; open those tacks the same way.
- Slide disc weights into the pocket, spacing them roughly every 8–10 inches across the width. For a 54" panel in mid-weight fabric, 6 weights is a good starting point. Work from the open end toward the opposite side seam.
- Once all weights are in, close the opening with a hand needle and UV-resistant polyester thread (Tex 70 works fine here), or run a short machine-stitch seam across the opening. A simple running stitch or backstitch is plenty; this seam only needs to keep the opening closed, not bear any load.
- Hang the curtain and check the drape. If it still flaps lightly, add 1–2 more weights. If the top grommets look strained or the rod bends slightly, remove 1–2 weights.
- To remove weights before washing: use the seam ripper again to open the same short section, slide out the weights, wash the curtain, then re-insert and re-stitch.
If you'd rather skip sewing entirely, iron-on hem tape can close the pocket opening instead of stitching. It works reasonably well on polyester outdoor fabrics but don't rely on it in very wet climates where repeated soaking and drying will weaken the adhesive bond over a season or two.
Method 2: Sewn-in chain or bead chain hem
This is my personal go-to for any cloth curtain I'm installing permanently. A length of stainless steel bead chain stitched inside the hem is completely invisible, distributes weight perfectly evenly across the full width, and never shifts or clusters. The only downside is that you can't remove the weight without opening the hem again, so don't do this to curtains you'll need to machine-wash frequently.
Photo set for this method: (1) measuring and cutting bead chain to curtain width, (2) open hem showing chain placement along the fold, (3) pinning the hem closed over the chain, (4) machine stitching the hem shut, (5) close-up of stitches alongside chain beads, (6) finished hem exterior, (7) panel hanging straight.
- Cut a length of 304 stainless steel bead chain to match the curtain's finished width exactly. Use bolt cutters or strong wire cutters to cut between beads. If you cut through a bead, file the end smooth so it doesn't snag fabric.
- Open the hem using a seam ripper as described in Method 1. You need the full hem width open for this one, not just an end section.
- Lay the chain flat inside the hem pocket, running the full width from side seam to side seam. Center it vertically within the hem so it sits against the lower fold.
- Pin the hem shut over the chain every 6 inches, keeping the chain centered inside. The chain will try to roll toward the fold; light pinning keeps it from bunching.
- Machine-stitch the hem closed using UV-resistant bonded polyester thread at Tex 70 or Tex 90 weight. A straight stitch at 3.5mm length is appropriate for most outdoor canvas and acrylic fabrics. Stitch right below where the chain sits so the chain is trapped between the stitching line and the hem fold — don't stitch directly through the beads.
- Trim any loose thread ends and snip off pins. Run your fingers along the hem from outside to confirm the chain is evenly distributed and not bunched at one end.
- For clear vinyl panels: the same process works, but use a size 20–21 needle, Tex-90 or heavier thread, and sew slowly (lower machine speed). After stitching, seal any raw vinyl edges with a vinyl binding strip or a bead of vinyl cement to prevent cracking from stitch-hole tear.
Where I messed up the first time: I used a standard cotton/poly thread for an outdoor curtain because it was on the machine already. Within one season it had UV-degraded at the needle holes and the hem started opening. Always use UV-resistant polyester (bonded Coats Dabond or Sailrite's equivalent) for anything that lives outside.
Method 3: Magnetic and clip-on weighted solutions
If you don't want to sew at all, magnetic curtain weights are the fastest no-tools option. They come as matched pairs of magnets that you sandwich around the hem fabric, pinching the weight onto the panel. Clip-on drapery weights work similarly but use a small spring clip instead of magnets. Neither is as sturdy as a sewn-in solution, but for sheltered patios or temporary setups they're genuinely useful.
Photo set for this method: (1) magnetic weight pair shown open, (2) hem fabric being placed between magnet halves, (3) magnets snapped closed on hem, (4) multiple weights evenly spaced along hem, (5) clip-on weight alternative being attached, (6) full curtain view with weights installed.
- Hang your curtain first so it drapes naturally. This helps you see where the hem actually falls and where you need weight.
- Space magnetic weight pairs evenly across the hem. For a 54" panel, 4–6 pairs gives good coverage. Mark the positions lightly with tailor's chalk if you want consistent spacing.
- At each marked position, slide the hem fabric between the two magnet halves and press them together. They should snap shut firmly. If the magnet pair feels loose on a thick hem, fold a small piece of the hem fabric to double the thickness before sandwiching.
- For clip-on weights, open the spring clip, slide it over the hem edge, and release. These work best on hems up to about 3/8" thick.
- After installing all weights, step back and check that the hem is straight. If the curtain still billows in the middle, add one more weight pair at the center.
- Check the magnets after the first rainstorm. Cheap magnetic weights often have plated steel cores that rust on the back side and stain the fabric. Look for weights with stainless or polymer-coated magnets for outdoor use.
Honest limitation: magnetic weights will fly off in strong gusts (above about 20–25 mph sustained wind) unless the curtain is also anchored at the sides. Think of them as the right tool for calm evenings and light breezes, not for a fully exposed deck during summer storms. For heavier wind situations, use Method 4 or Method 5 instead.
Method 4: Weighted bottom bar (aluminum, PVC, or steel)
A bottom bar is the most effective non-sewing solution for keeping patio curtains straight in real wind. It's exactly what it sounds like: a rigid bar inserted into or attached to the hem that weights the entire bottom edge evenly and prevents any billowing. This is also the best method for large clear vinyl panels.
Photo set for this method: (1) measuring curtain width for bar length, (2) cutting aluminum flat bar with hacksaw, (3) filing bar ends smooth, (4) inserting bar into hem pocket or attaching with clips, (5) vinyl panel with bar sitting inside sewn hem channel, (6) finished installation from outside, (7) curtain view showing perfectly straight hang.
- Measure the finished width of your curtain panel and subtract 1/2" for clearance. Cut your bar to this length. For most patio panels up to 84" wide, 1" x 1/8" aluminum flat bar is strong enough without being heavy. PVC flat bar is lighter and won't rust but flexes more on wider panels — fine for up to 54" widths.
- If cutting aluminum, use a hacksaw with a metal-cutting blade or a miter saw with an aluminum-rated carbide blade. Make the cut square. After cutting, file or sand both ends until they're smooth and rounded. Sharp bar ends will slowly slice through your hem fabric from the inside — this is the most common installation mistake I see.
- For a hem-pocket installation on cloth curtains: open the hem (as in Method 1) and slide the bar in along the hem fold. The bar should sit snug inside the channel without forcing it. Close the hem opening with a few stitches or heavy-duty hem tape.
- For clear vinyl panels: if the panel has an existing sewn or welded hem channel, slide the bar in the same way. If not, attach the bar to the bottom edge using heavy-duty stainless screws and #8 grommets spaced every 10"–12". Place a grommet washer on each side of the vinyl before driving the screw to distribute load and prevent tearing.
- For a clip-on bar installation (no sewing): use heavy-duty curtain hem clips spaced every 8"–10" to attach the bar to the outside of the hem. This is fully reversible and works on both cloth and vinyl. The bar will be visible, which is a trade-off.
- Hang the curtain and check that the bar doesn't sag in the center. If it does on wider panels, add a center support by threading a zip tie through a hem grommet and looping it around the bar to pull it up against the hem edge.
- For steel bars (heavier but very stiff for wide spans): use galvanized or powder-coated steel to prevent rust. Bare mild steel will rust in one season outdoors and stain your curtains with orange streaks.
Weight comparison for bars: a 72" length of 1" x 1/8" aluminum flat bar weighs about 14 oz. The same length in PVC weighs about 6 oz. Steel at the same dimensions weighs about 38 oz. For most residential patio curtains, aluminum is the sweet spot, enough weight without stressing the top hardware.
Method 5: Tension cord or bungee anchoring
This method doesn't add weight at all, it adds tension, pulling the bottom hem down and outward to anchor it. It's the best choice for very high wind situations because it resists uplift directly rather than relying on mass. It's also the most renter-friendly permanent fix since the anchors can be removed without damage if placed thoughtfully.
Photo set for this method: (1) tent stake or hook anchor installed in deck board joint or floor anchor, (2) bungee cord hooked through hem grommet, (3) bungee stretched to floor anchor, (4) paracord tie-down alternative close-up, (5) full panel view showing taut, anchored hang, (6) two-panel view with both panels anchored.
- Install an anchor point at floor level directly below (or slightly outward from) the bottom hem. On wood decks, a stainless screw hook driven into a deck board works well. On concrete, a concrete anchor hook or heavy adhesive hook rated for outdoor use can work for light curtains. On a grassy or gravel patio, a tent stake driven at an angle gives surprising hold.
- Add a grommet to the bottom corner of each curtain panel if there isn't one already. A grommet kit (under $10 at any fabric or hardware store) lets you install a reinforced eyelet without sewing. Size #2 (3/8" inner diameter) is standard for curtain work.
- Hook a 6"–9" bungee cord through the bottom corner grommet and stretch it down to the floor anchor. The bungee should be under light tension — you want it to pull the hem down, not yank it sideways.
- For a two-panel setup where panels need to hang together, add a floor anchor under each panel corner (4 anchors total for two panels side by side).
- As an alternative to bungee, paracord or UV-resistant nylon cord works well and is less visible. Tie it with a bowline knot at the grommet and a cleat hitch or figure-eight at the anchor. This is less forgiving than bungee if the curtain is blown sideways, but more durable over time.
- In very high-wind zones, combine this method with Method 4 (bottom bar) for the best result: the bar distributes weight across the hem while the bungee anchors prevent uplift.
Quick fixes: washers, adhesive weights, and hem clips
Not every situation calls for a full method. Sometimes you just need a stopgap while you wait for supplies, or you're renting and can't make any permanent changes at all. These lighter options are worth knowing.
Photo examples for this section: (1) metal washers sewn into a small fabric pouch, (2) pouch being pinned inside a hem, (3) adhesive peel-on weight being applied to vinyl panel hem, (4) hem clip on curtain bottom edge with washer threaded through clip loop.
- Metal washer pouches: sew 4–6 large zinc or stainless washers (1.5"–2" diameter) into a small rectangle of outdoor fabric to make a simple weight bag. Pin or hand-sew these into the hem at intervals. One pouch of 5 washers weighs about 3–4 oz — good for a light fabric panel as a low-cost alternative to drapery disc weights. Cost: about $3–5 per panel in materials.
- Adhesive peel-on weights: these are small weighted strips with a peel-and-stick back, marketed for blinds and drapery. They work in sheltered spots but I've seen them fail within a single rainy season on outdoor panels. If you use them on clear vinyl, prep the surface with rubbing alcohol and 3M Tape Primer 94 first to improve adhesion to the PVC surface. Even then, consider them temporary.
- Hem clips with built-in weight: heavy-duty curtain rings with weighted clips (sometimes sold as 'drapery weights') can be clipped to the bottom hem edge of any panel without tools. They add 1–2 oz per clip and are completely reversible. Less effective in strong wind but perfectly adequate for sheltered spaces.
Installation tips that protect your fabric and hardware
Adding weight to a curtain hem shifts mechanical stress upward to the top attachment points. Before you finish any installation, take five minutes to check these things, they'll save you from a curtain that falls down or tears at the worst moment.
- Check grommet integrity before adding weight: press each grommet washer firmly. If the grommet spins freely or the washer feels loose against the fabric, reinforce it with a grommet repair kit before adding hem weight. A loose grommet under load will tear through the fabric within weeks.
- Distribute weight evenly: weight clustered at one side makes the curtain hang at an angle and stress side seams unevenly. Whether you're using disc weights, bead chain, or a bar, verify even distribution before closing the hem.
- Prevent water pooling at the hem: if your hem design creates a U-shape that catches rainwater, the added water weight will further stress grommets and top hardware during storms. For outdoor cloth curtains, leave a small gap at each end of the hem stitching (about 1/2") to let water escape. For bottom bars, drill two or three 3/16" drain holes in the bar before installation.
- Use the right fasteners for outdoor conditions: any metal hardware added to an outdoor curtain should be stainless steel (304 minimum), hot-dip galvanized, or powder-coated. Zinc-plated hardware is acceptable for sheltered spots but will rust in direct rain within a season or two.
- Don't stress the seams when inserting bars: if you're forcing a bar into a hem channel that's slightly too narrow, you're stretching the seam stitches with every push. Stop, open the hem a little more, then reinsert smoothly. Forcing it will cause seam failures over time.
- For vinyl panels: never fold or crease the panel to install a weight. Fold lines in PVC become permanent crack lines, especially once the material has been exposed to cold temperatures. Sailrite notes that marine-grade 40-gauge vinyl has a cold-crack rating down to about -30°F, but repeated bending along a fold line dramatically shortens its life.
Troubleshooting common problems
Curtain still flapping after adding weight
If the curtain still moves significantly after adding hem weight, the issue is usually one of three things: the weight isn't heavy enough for the exposure level (go up 20–30% in weight), the weight is concentrated at corners instead of distributed across the full hem, or the top hardware has too much play (oversize grommets on an undersized rod). Fix the hardware first, no amount of hem weight will stabilize a curtain that's swinging freely at the top.
Hem sagging or drooping in the middle
This usually means a bottom bar that's too long and too flexible, or a chain that's too heavy for the hem stitching. For a sagging bar, add a center support zip-tie to the hem as described in Method 4. For a sagging chain, replace some of the chain weight with lighter disc weights near the center, or upgrade your hem stitching to a double-stitch seam.
Bottom hem dragging on the floor or deck
Added weight doesn't cause this, but it reveals it. If your curtain hem drags after you add a bar or chain, the panel was already too long, the added weight just removed the slack that was hiding it. Hem the curtain up 1"–2" before adding the weight. A hem that drags on a wet deck will wick moisture, breed mildew, and rot at the hem fold within a season.
Hardware rust and fabric staining
Orange rust stains on curtain fabric below metal weight positions are caused by non-stainless hardware corroding inside the hem. The only fix is to remove the rusted hardware, wash the curtain (Sunbrella fabrics respond well to a dilute bleach-and-mild-soap solution per Sunbrella's care guidance), and replace the hardware with 304 stainless or coated alternatives. Never use bare steel, zinc-plated iron, or chrome-plated hardware inside an outdoor hem.
High wind load: when standard methods aren't enough
For coastal or high-elevation patios that regularly see sustained winds above 30 mph, the right answer is usually not more weight, it's a combination of Methods 4 and 5 (bottom bar plus floor anchors) and side-channel guides that keep the panel from billowing outward. Think about how roll-down patio shades work: they run in side channels that prevent the fabric from acting as a sail. You can replicate this with simple aluminum angle tracks screwed to posts on either side of the curtain opening. This converts a free-hanging curtain into a guided panel that is dramatically more stable in wind.
Maintenance, seasonal storage, and inspection
Weighted outdoor curtains need a twice-yearly check minimum: once at the start of outdoor season (spring) and once before winter storage. Here's what to look for and do.
- Inspect all hem hardware for rust, corrosion, or migration (weights that have shifted to one end of the hem). Open the hem if needed, replace any suspect hardware, and restitch.
- For cloth outdoor curtains: clean with mild soap and water per the fabric manufacturer's care guide. Sunbrella recommends a mild soap-and-water wash for routine cleaning, with a dilute bleach solution only for tough stains. Rinse thoroughly and allow to dry completely before re-hanging or storing.
- For clear vinyl panels: wipe down with mild soap and water or a dedicated vinyl cleaner. Avoid Rain-X, Pledge, Plexus, or any commercial polish — these can cause hazing, clouding, or plasticizer migration in clear PVC. After cleaning, a manufacturer-approved vinyl protective polish can be applied to restore clarity.
- Before winter storage, remove all detachable weights (disc weights from removable hem pockets, magnetic clips, clip-on weights). Store them separately in a labeled bag so you have them ready in spring.
- For curtains with sewn-in chain or bars: fold or roll the panel loosely (never crease it sharply) and store in a breathable storage bag or on a roll tube. Avoid compressing clear vinyl panels under heavy objects — the creases will be permanent.
- Check all top grommet and rod hardware for corrosion annually. A corroded rod or track will stain curtain fabric at every contact point. Clean metal hardware with a mild metal cleaner and apply a light coat of corrosion-resistant lubricant (WD-40 Specialist or similar) before re-hanging curtains for the season.
- Inspect bungee cords annually. Outdoor bungee cord UV-degrades over 1–2 seasons and can snap without warning. Replace any cord that shows surface cracking or has lost its stretch elasticity.
Renter-friendly options: no-drill and fully reversible
If you rent, the rules are simple: don't drill, don't damage surfaces, and be able to restore everything when you move out. Here's what actually works within those constraints.
- Magnetic weights (Method 3): fully reversible with zero installation. Best for sheltered balconies and light fabrics.
- Clip-on hem weights: same story — clip on, clip off, no marks left on fabric.
- Command outdoor hooks as floor anchors: 3M Command outdoor hooks with Velcro-style strips are rated for specific load capacities (larger outdoor models handle roughly 4–15 lbs depending on the model per the manufacturer's load rating) and can be used as floor anchor points for bungee cords when the surface is smooth and clean. Follow the installation steps exactly — they require a 1-hour dry time before loading. Never exceed the rated capacity and always use multiple anchor points to share the load.
- Freestanding curtain rods with weighted bases: if your curtain isn't even permanently hung yet, a weighted freestanding rod eliminates all wall-mounting needs. The weight of the base keeps the whole assembly stable.
- Tension-rod systems with hem weights: for smaller patio openings, a spring-tension curtain rod between two surfaces (posts, columns, a door frame) combined with magnetic or clip hem weights gives a fully removable setup.
- Avoid adhesive solutions on rental surfaces: double-sided tape and adhesive anchors can pull paint or finish off walls and floors when removed. Even 'damage-free' tape can fail this test on some paint types.
Comparing the five methods: cost, durability, and looks
| Method | Approximate Cost (per panel) | Durability | Visibility | Reversible? | Best Use Case |
|---|---|---|---|---|---|
| Hem pocket with removable weights | $5–$15 | 5–7 years with stainless weights | Hidden | Yes (weights removable) | Cloth curtains, budget-conscious, moderate wind |
| Sewn-in bead chain | $8–$20 | 10+ years with stainless chain | Hidden | No (requires re-opening hem) | Permanent cloth installs, high-wind zones |
| Magnetic / clip-on weights | $12–$30 for a set | 2–4 years (magnet coating degrades) | Visible | Yes | Renters, light fabrics, sheltered patios |
| Weighted bottom bar (aluminum) | $10–$25 | 10+ years (aluminum) | Slightly visible (hem edge) | Yes (bar slides out) | Clear vinyl, wide panels, strong wind |
| Tension cord / bungee anchor | $5–$15 | 1–2 years (replace bungee annually) | Slightly visible (cord) | Yes | High wind, combined with other methods, renters with anchor points |
For most homeowners with standard cloth outdoor curtains and a moderately exposed patio, Method 2 (sewn-in bead chain) gives the best value over time. The upfront sewing effort pays off over years of zero maintenance. For renters or anyone dealing with clear vinyl panels, Method 4 (aluminum bottom bar) is the most practical and long-lasting reversible option. The bungee anchor method (Method 5) is best used as a complement to other methods rather than a standalone fix.
Photo checklist for each method
If you're documenting your own project or creating a reference for a reinstallation later, these are the shots worth taking for each method.
| Method | Required Photos |
|---|---|
| Method 1: Hem pocket | Before (closed hem exterior), seam ripper opening hem, open pocket interior, weights being inserted, stitching end closed, finished hem, final hang |
| Method 2: Sewn-in chain | Chain cut to length, open hem with chain laid in, pinned hem, machine stitching in progress, close-up of stitches at chain, finished hem exterior, final hang |
| Method 3: Magnetic clips | Magnet pair open showing both halves, hem being sandwiched, magnet closed on hem, multiple weights evenly spaced, close-up of clip-on alternative, full curtain front view |
| Method 4: Bottom bar | Bar being measured and cut, filing bar ends, bar being inserted into hem, close-up of end clearance inside hem, bar clips alternative, full curtain side profile, final straight hang |
| Method 5: Bungee anchor | Floor anchor installation, grommet at hem corner, bungee attached to grommet, bungee stretched to floor anchor, paracord alternative close-up, full curtain view taut and anchored |
What to tackle next on your patio
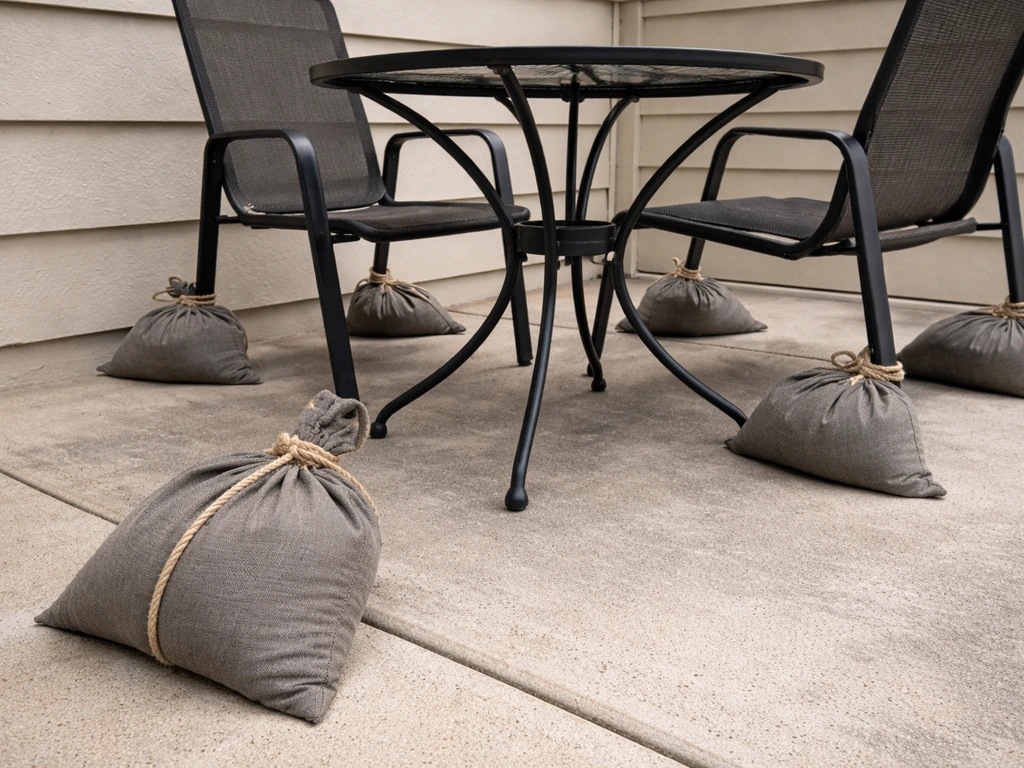
Weighing down your curtains is part of a broader strategy for keeping your whole patio setup stable and maintained. If you've sorted the curtains, you might find your patio furniture itself needs anchoring next, especially if you're in a wind-prone area. Furniture that slides or tips in gusts causes damage and is a real safety hazard, and there are DIY solutions for that too. If you need that, see our short guide on how to weigh down patio furniture for practical anchoring and weighting options. In the same way you've just added ballast to the curtain hem, there are practical methods for adding weight or anchoring feet to chairs, tables, and loungers.
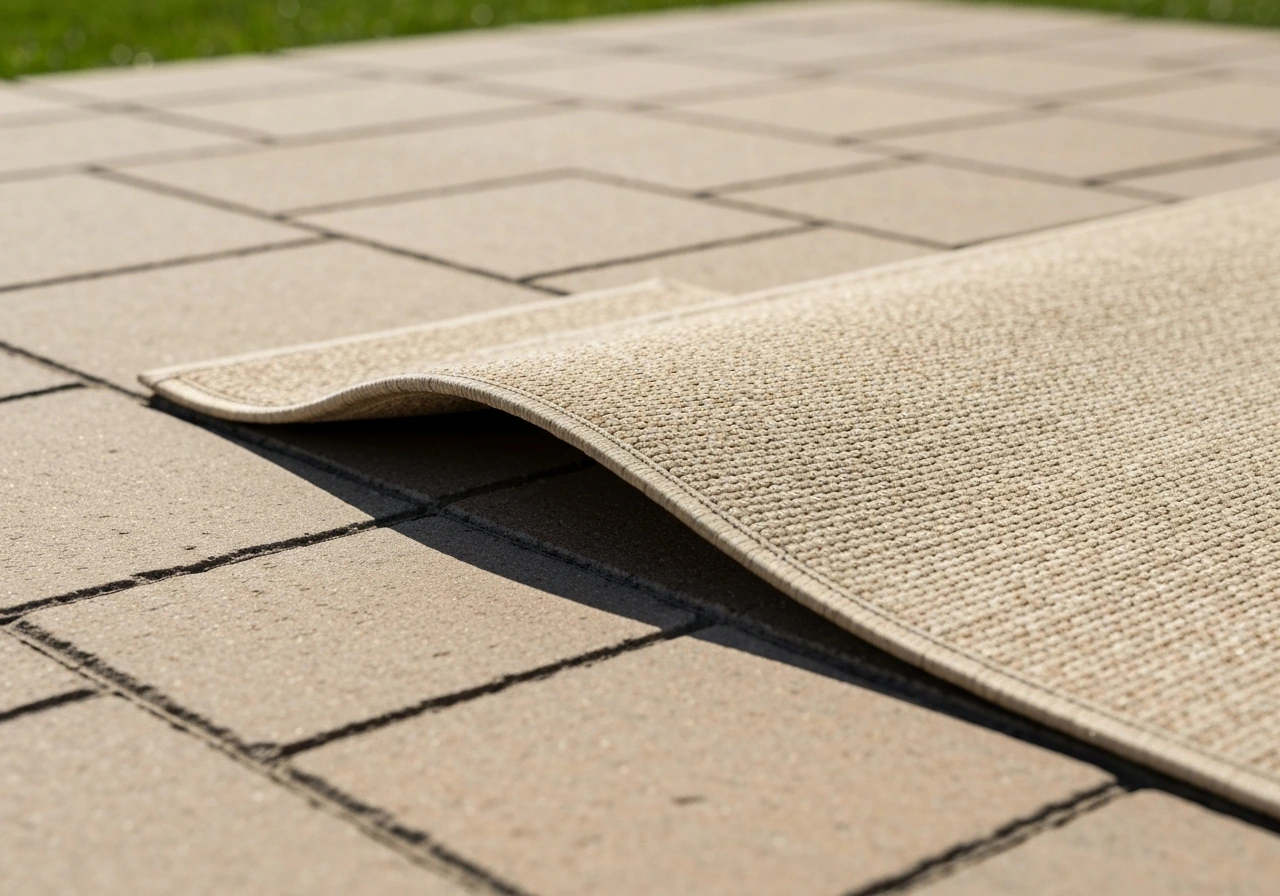
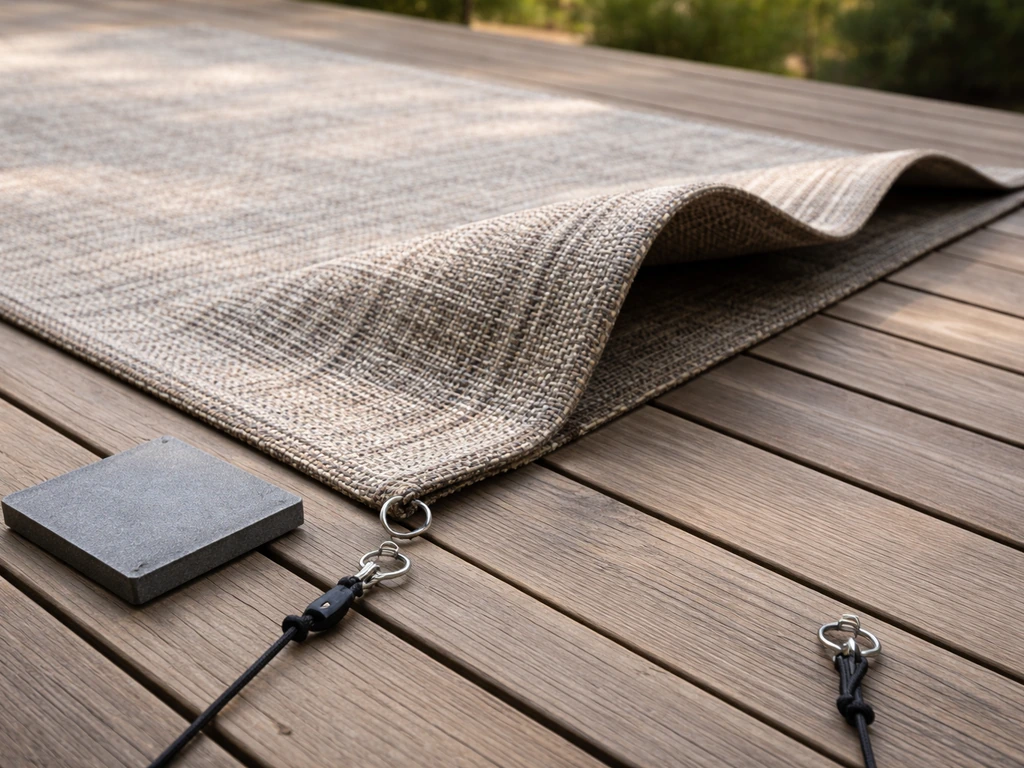
If you have a patio rug under your furniture and the curtains, that piece of the puzzle often shifts or bunches independently of everything else. There are specific techniques for keeping outdoor rugs locked in place on both hard and soft surfaces that complement everything you've done with the curtains above. For specific techniques, see our guide on how to keep patio rug in place for methods that lock outdoor rugs on both hard and soft surfaces (internal reference 6525db99-6176-491a-9502-ca627b096bbe). For step‑by‑step options for hard and soft surfaces, see our guide on how to weigh down a patio rug.
And if you're considering making your own clear vinyl patio curtains rather than buying pre-made panels, there's a full guide on this site that walks through material selection (including the gauge, thread, and needle specs mentioned here), cutting, sewing, and grommeting a panel from scratch, which is a surprisingly approachable weekend project that saves significant money over buying pre-fabricated outdoor enclosures.
FAQ
When should I add weights to patio curtains?
Add weights when curtains: 1) flap or billow in moderate wind; 2) don’t hang straight (especially clear vinyl shows ripples); 3) gather water at the bottom after rain; 4) rub against hardware or frames causing wear; or 5) are used on windy, exposed patios. If curtains are purely decorative and sheltered (deep covered porch), weights may be unnecessary. For rental units, choose non‑destructive options (clips, magnets, Command hooks) first.
What decision criteria help choose visible vs hidden weighting solutions?
Use visible solutions (bottom bars, decorative hem chains) when you want a durable, low‑maintenance fix and don’t mind the look. Use hidden solutions (chain-in-hem, sewn pockets with pellets) when appearance matters or you need a smooth edge for vinyl transparency. Choose magnetic/clip or adhesive options when you can’t or won’t sew or permanently alter fabric or hardware (renters). Match solution to fabric: heavy cloth tolerates bars and chains; thin clear vinyl benefits from wide hem pockets and distributed weights to avoid point stress.
What materials and tools will I likely need?
Materials: stainless steel ball/ball chain, hem weights (chain, lead‑free pellets), metal washers (stainless), small aluminum/steel bottom bar (painted or anodized), magnetic weights or magnetic strips rated for outdoor use, outdoor-rated adhesive tape (VHB) and primer (for plastics), Command outdoor clips/hooks, bungee cord/elastic, nylon webbing or cord, sewing thread (UV‑resistant bonded polyester Tex 70–90), clear‑vinyl‑compatible needles (#20–#21), seam binding, marine-grade reinforcements for vinyl. Tools: sewing machine (capable of heavy fabric/vinyl) or hand sewing tools, hot‑air welder or hot‑wedge (for industrial PVC joins if used), scissors/utility knife, seam gauge, rivet tool/snaps, drill/screwdriver for bars, measuring tape, fabric clips/clothespins, solvent/cleaner (isopropyl), 3M primer (only if using VHB on low‑energy plastics). Safety: eye protection when welding/drilling, gloves when handling metal.
What are five proven DIY methods with step‑by‑step instructions?
Method 1 — Sewn hem pocket with chain or pellets: 1) Measure curtain width and add 1–1.5" for hem allowance. 2) Fold up bottom edge twice to make a 1"–2" pocket (wider for vinyl or thicker chain); pin/clip. 3) Sew using UV‑resistant bonded polyester thread and recommended needle; for vinyl use #20–#21 needle and avoid backstitching over same needle hole repeatedly. 4) Insert stainless ball chain or weighted pellets and close a short access seam or leave small opening with stopper. Photo set: pocket construction, sewing machine with vinyl, inserting chain, finished hem. Method 2 — Sewn‑in chain (continuous): 1) Create a reinforced channel (1.5"–2") and sew two parallel seams creating a tube. 2) Feed stainless ball chain through with beading tool or wire; crimp or stitch ends to prevent migration. 3) Reinforce ends with bartack or small patch. Photo set: channel sewing, feeding chain, end reinforcement. Method 3 — Magnetic/clip solutions (renter‑friendly): 1) Clean curtain bottom and the mounting surface with isopropyl; let dry. 2) Use outdoor-rated magnets with a fabric sleeve or magnetic hem pockets (sew small pocket to accept magnet) or attach magnetic strips to a small hem-weighted bar. 3) For non‑magnetic frames, use stainless clips or Command outdoor strips/clips spaced every 12–24". Respect load ratings and multiply clips where needed. Photo set: magnets in hem sleeve, Command clips in use, clip spacing. Method 4 — Weighted bottom bar: 1) Measure curtain width and cut lightweight aluminum or hollow stainless tube to fit. 2) Sew small pockets or tabs at hem to hold the bar or slide bar into a full hem channel (hem must be wide enough). 3) Secure bar ends with end caps or stitching; weigh/coat bar to avoid rust. Photo set: cutting tube, inserting bar, hem channel. Method 5 — Tension/cable with bungee: 1) Attach small low‑profile grommets or sewn webbing tabs along the hem and run an elastic cord or bungee through them, tensioning slightly to pull the curtain straight. 2) Anchor the bungee ends to nearby frame hardware or discreet hooks. 3) Use shock‑absorbing cord to reduce peak wind forces. Photo set: grommet placement, threading bungee, anchored installation.
How do I adapt these methods for clear vinyl curtains?
Use wider hem pockets (1.5"–2.5") and distribute weight to avoid concentrated stress points. Sew with recommended needle sizes (#20–#21) and UV‑resistant bonded polyester thread; if available, use hot‑air welding for watertight, high‑strength seams. Avoid solvent‑based adhesives or polishes that cause hazing (per Sailrite). When using magnets or tapes, test on a small scrap; consider mechanical attachments (tabs, rivets, snaps) with reinforced patches rather than permanent adhesives to preserve clarity and prevent plasticizer migration.
What weight should I add per curtain size and fabric type? (small table)
Suggested bottom weight ranges (distributed evenly along hem): - Lightweight voile or sheer (44"–60" wide): 4–8 oz (0.25–0.5 lb) total - Medium outdoor fabric (Sunbrella‑type) 44"–60": 8–16 oz (0.5–1.0 lb) total - Heavy outdoor canvas/awning fabric 44"–60": 1–2 lb total - Clear vinyl panel (44"–60" wide, 0.04" thickness): 8–16 oz (0.5–1.0 lb) total - Wide panels (over 72"): increase totals by 50–100% and distribute across more pockets/weights Note: these ranges are practical starting points. Factor in exposure—higher wind exposure requires more ballast or mechanical tie‑offs. For precise wind load design consult ASCE C&C guidance; distribute weight to avoid stress concentrations.