To seal metal patio furniture, you clean the frame thoroughly, remove any rust, sand the surface smooth, apply a rust-inhibiting metal primer, and finish with a weather-resistant topcoat rated for outdoor metal. Done right on a dry weekend, this process can add five to ten years of life to a steel, wrought iron, or aluminum piece that would otherwise continue rusting and flaking.
How to Seal Metal Patio Furniture: Weekend DIY Steps

Maren Grady
6 Aug 2026
Sealing vs. waterproofing vs. weatherproofing: what's the actual difference?
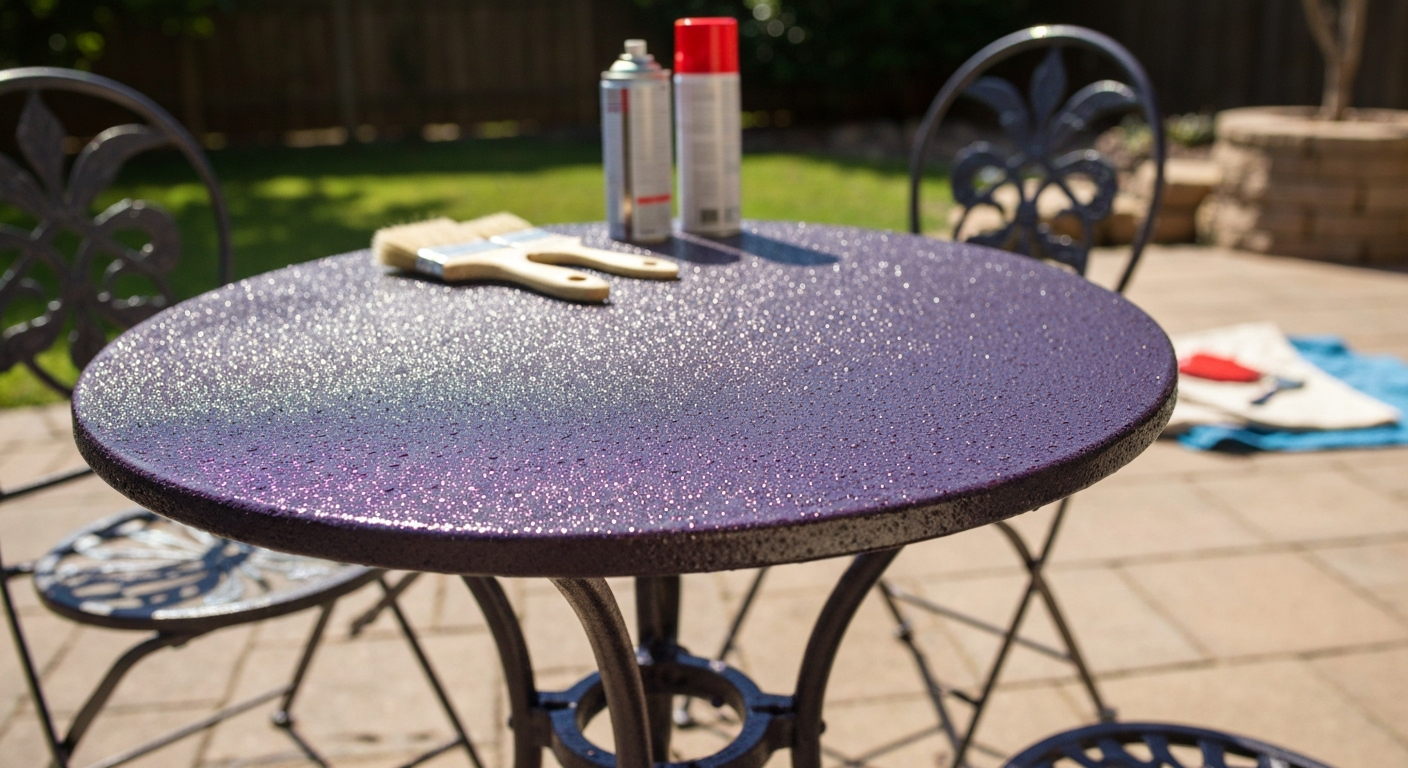
These three terms get used interchangeably all the time, but they mean different things and that matters when you're shopping for products. Sealing metal furniture means creating a physical and chemical barrier over the metal surface that blocks moisture and oxygen from reaching the bare metal underneath. blank" rel="noopener noreferrer">Corrosion is an electrochemical process: iron atoms lose electrons when moisture and oxygen are present, forming hydrated iron oxide (rust). A sealed coating interrupts that process by denying contact. Waterproofing is a broader goal, often describing the overall resistance of a piece to standing water and rain. Weatherproofing goes a step further and covers resistance to UV degradation, thermal expansion, and freeze-thaw cycles on top of moisture. Sealing the metal frame is the core step inside any waterproofing or weatherproofing project, so if you want to fully weatherproof metal patio furniture, proper sealing is where you start. For step-by-step guidance, see the guide on how to weatherproof metal patio furniture. For broader steps on protecting entire pieces (frames, cushions, and surfaces) see our guide on how to waterproof patio furniture.
Start here: inspect the furniture before you buy a single product
I learned the hard way that skipping inspection leads to buying the wrong products and doing double the work. Spend fifteen minutes going over each piece carefully before anything else. Here's exactly what to check.
Inspection checklist
- Metal type: Is it steel, wrought iron, aluminum, or galvanized steel? Steel and wrought iron rust; aluminum pits but doesn't rust the same way; galvanized steel needs special primers. Tap it (iron rings dully, aluminum is lightweight and brighter), look for manufacturer markings, or use a magnet (aluminum is not magnetic).
- Existing finish condition: Is the current paint or powder coat intact, chipping, or completely gone? Intact paint that's just faded may only need a light scuff and topcoat. Chipping or bubbling paint means prep work is significant.
- Rust extent: Surface rust (orange-red dust, easily brushed off) is easy to address. Pitting (small craters in the metal) means rust has gone deeper. Flaking scale that lifts paint is moderate. Rust holes or deep structural corrosion are serious.
- Structural damage: Squeeze tubular sections, flex joints, and check welds. Soft spots, cracks at welds, or sections you can push inward mean structural compromise that paint won't fix.
- Fastener condition: Check bolts, screws, and connecting hardware. Mixed metals at fasteners (for example, steel bolts on aluminum frames) can cause galvanic corrosion, where the less-noble metal corrodes faster when two dissimilar metals are in electrical contact in the presence of moisture.
- Size and complexity: Count the tubes, joints, lattice sections, and decorative details. A simple bistro chair is a two-hour job. A six-piece wrought iron dining set with ornate scrollwork is a weekend project or more.
- Surface area estimate: A rough square-footage count helps you buy the right amount of primer and topcoat without three extra hardware store trips.
Repair or replace? DIY or hire out? When powder-coating makes sense
I'm always going to lean toward repairing, but there are honest situations where it's not worth it. Here's how I think through the decision.
Repair vs. replace
If the metal is structurally solid with surface or moderate rust only, repair is almost always the right call. Even a heavily rusted piece with no holes or cracked welds is a great candidate for DIY sealing because the labor is essentially free and materials run $30 to $80. If you find actual rust-through holes, cracked welds, or sections that flex when they shouldn't, get a cost estimate on welding repair first. A local welding shop might fix a cracked joint for $40 to $80, making the full restore still worthwhile. Actual structural collapse or rust holes covering more than a quarter of a section means replacement is more economical.
DIY vs. hiring a pro
DIY sealing is genuinely beginner-friendly for pieces with light to moderate rust and a simple finish. The prep takes the most time and patience, but no special skills are needed. Hire a professional painter if the furniture has highly detailed ornamental ironwork you want to look perfect, if you're working with a large volume of pieces (a restaurant patio, for example), or if the piece has significant historical or sentimental value and you want a museum-quality result.
When powder-coating is worth it
Powder coating is a factory-level finish where electrostatically charged dry powder is sprayed onto metal and baked in an oven at around 400°F, creating an extremely hard, uniform, chip-resistant coating. It's not DIY-accessible at home, but many metal fabrication shops and auto body shops offer it. Expect to pay $50 to $150 per chair and $200 to $400 for a table frame depending on complexity and your region. It's worth the cost if you have a high-quality wrought iron set worth several hundred dollars or more, if you want a like-new finish that will last ten or more years with minimal maintenance, or if the piece has intricate detail that's nearly impossible to paint evenly by hand. For budget pieces, a good DIY spray-and-prime job is perfectly adequate.
Everything you need: materials, tools, and where to save money
Here's the complete list for a standard steel or wrought iron sealing project. I've marked the items where you can save money or borrow rather than buy.
| Item | Purpose | Budget Option / Where to Save |
|---|---|---|
| Wire brush (hand) | Mechanical rust removal | Dollar store or hardware bin, $2–5 |
| Wire wheel attachment for drill | Faster rust removal on larger areas | Rent from hardware store (~$5/day) or borrow |
| 80-grit sandpaper or sanding block | Initial rust feathering and paint edge sanding | Buy a multi-pack, use leftover for other projects |
| 150–180 grit sandpaper | Intermediate smoothing | Multi-pack, ~$6–8 |
| 220–320 grit sandpaper | Final surface smoothing before primer | Multi-pack |
| Chemical rust remover or converter | Treating remaining rust before priming | Phosphoric acid converter (~$8–12) is cheapest; chelating types like Evapo-Rust are pricier but gentler |
| Degreaser or TSP substitute | Cleaning oil, sunscreen, and residue before priming | Dish soap + water works for light grease; TSP substitute is ~$6 |
| Rust-inhibiting metal primer | First coat, bonds to metal and blocks corrosion | Rust-Oleum Stops Rust quart ( |
| Metal topcoat paint (outdoor rated) | Color, UV protection, final weather barrier | Rust-Oleum Protective Enamel or equivalent, ~$10–15 per quart |
| Paintbrushes (1-inch and 2-inch) | Detail work and flat sections | Foam brushes from dollar store work fine for flat areas |
| Aerosol spray paint (primer + topcoat) | Fastest method for tubular frames | $5–8 per can; estimate 1 can per chair |
| Drop cloth or old bedsheets | Protecting your workspace | Use old bedsheets or cardboard |
| Painter's tape and plastic sheeting | Masking cushion hardware, glass, etc. | Buy once, reuse |
| Safety glasses and nitrile gloves | Eye and skin protection from rust dust and chemicals | Dollar store pack is fine |
| N95 respirator or half-mask | Breathing protection from rust dust and spray paint fumes | N95 works for dust; upgrade to organic vapor cartridge for spray painting |
| Tack cloth or lint-free rags | Final surface wipe before priming | Cut up old cotton t-shirts |
For tools you'll only use once, check if your local hardware store rents drill attachments or HVLP sprayers. Many tool libraries, makerspaces, and community workshops also lend equipment for free. A corded drill with a wire wheel attachment rents for about $15 to $20 a day and cuts your rust removal time in half compared to doing it by hand.
Why surface preparation is the whole game
Here's the thing most people get wrong: they focus on finding the right paint when the prep is actually what determines whether that paint lasts two years or ten. Coatings protect metal by blocking moisture and oxygen, but even a tiny defect, a thin spot, a missed rust patch, or a greasy fingerprint under the primer, is enough to let moisture in. Once moisture gets under the coating, you get underfilm corrosion that spreads outward from that small defect, lifting paint in a bubble pattern. That's why paint peels in sheets from a rusty starting point. No primer or topcoat can compensate for poor prep. Industry coating standards use prep ratings from hand-tool cleaning (removing loose scale and paint) up to abrasive blasting (removing everything). For DIY patio furniture, you're working at the hand-tool and power-tool cleaning level, which is completely sufficient when done thoroughly.
Cleaning the frame: get rid of everything before you touch the rust
Start cleaning before you do any rust removal. Trying to remove rust on a greasy, dirty frame just smears contaminants around and ruins your wire brush. This step should take fifteen to thirty minutes per chair.
- Hose off the furniture to remove loose dirt, bird droppings, and cobwebs. A garden hose with a spray nozzle works fine; you don't need a pressure washer.
- Mix a cleaning solution: a few drops of dish soap in a bucket of warm water handles general grime. For mildew (black or green spots), use one cup of white vinegar per gallon of water, or a diluted oxygen bleach solution. Avoid chlorine bleach on metal because it accelerates corrosion.
- Scrub every surface with a stiff nylon brush or old toothbrush for joints and crevices. Get into weld seams, scroll details, and tube ends where moisture and debris collect.
- Rinse thoroughly with clean water. Any cleaner residue left on the surface will interfere with primer adhesion.
- Let the furniture dry completely, ideally in the sun for an hour or more. You want zero moisture before the next step. If you're in a humid climate or it's a cloudy day, give it two hours minimum.
- Degrease: wipe down the entire frame with a clean rag dampened with mineral spirits, acetone, or a dedicated metal prep degreaser. This removes sunscreen, oils, and invisible residue that primer won't stick to. Let it flash off completely before moving on.
Rust removal: choosing the right method for the job
Once the frame is clean and dry, deal with the rust. The method you choose depends on how much rust you're dealing with and how much time and budget you have. There are two main approaches: mechanical and chemical.
Mechanical rust removal
Mechanical removal means physically scraping, brushing, or sanding the rust away. A handheld wire brush handles light surface rust on flat sections. A wire wheel or cup brush attachment for your drill is significantly faster and more effective on anything beyond surface rust. Work in short passes, keeping the wheel moving so you don't gouge the metal. Wire wheels work on steel and wrought iron but should not be used on aluminum, which is soft and easy to damage. For ornate wrought iron with detail work, a Dremel rotary tool with a wire attachment or small grinding stone gives you access to tight scrollwork. Always wear safety glasses: wire wheels fling small metal fragments at speed.
Chemical rust removal and conversion
Chemical methods are especially useful when rust is in crevices that a wire brush can't reach. There are two main types to know about.
Chelating rust removers (like Evapo-Rust) work by chemically bonding to iron oxide molecules and pulling them away from the metal. They're water-based, non-acidic, and gentle enough to use without etching the base metal. You soak or brush on, let dwell per the manufacturer's time (often 30 minutes to several hours), then rinse off. They work well for moderate rust and awkward areas but cost more per ounce than acid-based options.
Phosphoric acid converters (often labeled as rust converters or rust reformers) take a different approach: they don't remove rust but chemically react with iron oxide to form iron phosphate, a more stable compound that becomes a paintable surface. These are great for spot repairs where you can't get perfect mechanical removal, like pinhole areas or tight welds. Products like Rust-Oleum Rust Reformer are a specific type that converts rust to a black, paintable layer. Read the TDS (technical data sheet) for your specific product because dwell times and overcoating windows vary.
| Method | Best For | Pros | Cons | Approx. Cost |
|---|---|---|---|---|
| Wire brush (hand) | Light surface rust, small areas | Cheap, no chemicals, no drying time | Slow, tiring, misses crevices | $2–5 |
| Wire wheel drill attachment | Moderate rust over larger areas | Fast, effective, thorough | Can gouge soft metal, flying debris, not for aluminum | $8–15 to buy or rent |
| Chelating remover (Evapo-Rust type) | Moderate rust, tight spaces, aluminum | Non-acidic, gentle on metal, no scrubbing | Slower dwell time, costs more, requires rinse | $12–20 per quart |
| Phosphoric acid converter | Spot rust, crevices, areas after mechanical prep | Converts remaining rust, affordable, primes in one step for some formulas | Doesn't remove heavy rust, needs compatible primer | $8–14 per bottle |
| Rust reformer aerosol primer | Spot repairs, lightly rusted areas where full removal isn't practical | Fast, combines conversion and priming | Not a substitute for mechanical prep on heavy rust, limited to spot use | $6–9 per can |
Sanding and feathering: getting the surface ready for primer
After rust removal, sanding serves two purposes: it smooths the surface so primer can bond evenly, and it feathers the edges of any remaining old paint so you don't have a visible step-down ridge under your new finish. Using the wrong grit or sanding when you shouldn't is a common mistake, so here's exactly how to approach it.
Grit progression and technique
- Start with 80-grit on areas with heavy rust scale or thick chipping paint. This is aggressive material removal. Work in short strokes and don't press so hard that you flex thin-walled tubing.
- Move to 150–180 grit to refine what the 80-grit left behind and to feather the edges of intact paint surrounding any bare metal patches. 'Feathering' means sanding the edge of old paint so it tapers gradually into the bare metal rather than having a sharp cliff. A sharp edge will telegraph through your new coats and eventually lift.
- Finish with 220–320 grit over the entire surface to give the metal a fine 'tooth' that primer can grip. If you're painting over intact existing paint, 220-grit scuffing is often all you need on sound sections.
- For aluminum: skip wire wheels and aggressive grits. Aluminum scratches easily and the goal is scuffing, not grinding. 180–220 grit by hand is enough. Aluminum's natural oxide layer actually helps protect it, so you're scuffing for adhesion, not stripping for rust removal.
- For wrought iron with decorative scroll details: use folded sandpaper or a sanding sponge to get into curves. A Dremel with a small sanding drum works well in very tight areas.
- After sanding, wipe everything down with a tack cloth or a lint-free rag dampened with denatured alcohol to remove all dust. Sanding dust under primer is a bonding failure waiting to happen.
What to leave alone
If there are sections of existing paint or powder coat that are fully intact, firmly adhered, and showing no bubbling, peeling, or underlying rust, you don't have to strip them down to bare metal. Scuff them with 220-grit for adhesion and prime over them. Stripping solid paint unnecessarily creates more work and more bare metal that needs priming. The goal is adhesion, not a blank slate everywhere.
Choosing the right primer for your metal type
Primer is not optional. I skipped it on my first patio chair restore and the topcoat started peeling within one season. Primer bonds to bare metal, provides a uniform base for topcoat adhesion, and on rust-inhibiting formulas, actively suppresses corrosion. But the primer you need depends on your metal type.
| Metal Type | Recommended Primer Type | Notes |
|---|---|---|
| Steel / mild steel | Rust-inhibiting alkyd or oil-based metal primer | Rust-Oleum Stops Rust Clean Metal Primer is a reliable, widely available option. Apply within the flash-rust window after prep. |
| Wrought iron | Rust-inhibiting oil-based primer; zinc-rich primer for high-corrosion situations | Wrought iron has slag inclusions that behave differently from mild steel; oil-based primers penetrate better than water-based on porous surfaces. |
| Aluminum (bare/uncoated) | Self-etching primer or dedicated aluminum/non-ferrous primer | Regular metal primers don't adhere well to aluminum's oxide layer. Self-etching primers bite into the surface chemically. Do not skip this. |
| Galvanized steel | Galvanized metal primer or self-etching primer after degreasing | New galvanized steel has an oily passivation layer that repels paint. Degrease with acetone or allow to weather naturally for a few months before priming with a compatible product. |
| Previously painted metal (sound paint) | Adhesion-promoting primer or direct-to-metal primer over scuffed surface | A bonding primer over scuffed sound paint saves time and avoids stripping. |
For timing: most consumer rust-inhibiting primers (like Rust-Oleum Stops Rust quart) list dry-to-touch around 2 to 4 hours with a recommended recoat or topcoat window around 24 hours at normal conditions (roughly 70°F and 50% relative humidity). Aerosol primer variants dry to touch faster, sometimes within 20 to 30 minutes. Always check the TDS for your specific product and adjust for your actual conditions. If it's hot and humid, extend those windows; high humidity (above 60 to 70%) slows curing and significantly increases the risk of moisture getting trapped under the coating.
Topcoat selection: what actually protects the finished piece
Your topcoat is the part you see and the layer that takes the daily abuse of UV exposure, rain, and physical contact. For metal patio furniture, you want an outdoor-rated enamel or a direct-to-metal (DTM) paint with UV inhibitors. Oil-based alkyd enamels are harder and more durable on metal than water-based latex. Rust-Oleum Protective Enamel and the Stops Rust line are standard DIY choices that perform well and are available in hundreds of colors. For a very high-traffic piece like a dining table, a two-part polyurethane or epoxy topcoat adds significant scratch and chemical resistance, though it's more expensive and less forgiving to apply. For most residential patio furniture, a quality alkyd enamel topcoat applied in two coats over good primer is completely adequate and will last three to five years before needing a maintenance coat.
Application methods: brush, aerosol, and sprayer compared
How you apply the primer and topcoat affects the finish quality and how long the job takes. Each method has a real place depending on your piece and skill level.
Brush application
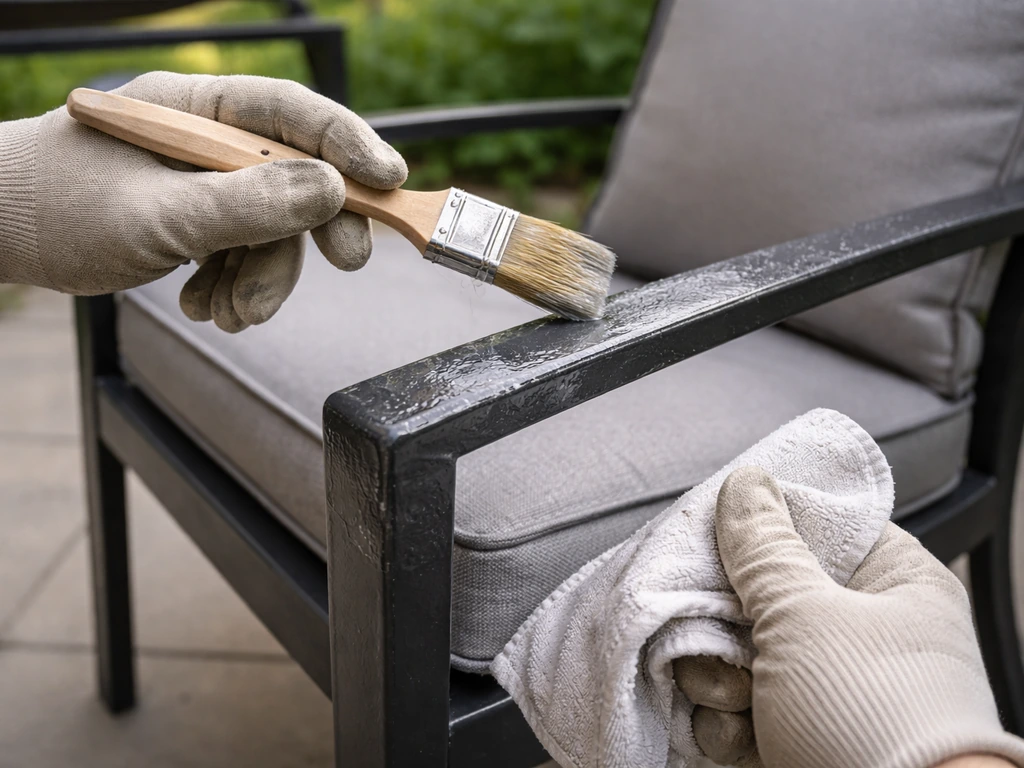
Brush application is the easiest entry point and requires no equipment beyond a $3 brush. It's ideal for touch-up work, spot repairs, and flat sections. On ornate ironwork, a narrow brush lets you work paint into scroll details and welds. The downside is brush marks: oil-based enamel self-levels reasonably well but will show brush strokes if you overwork wet paint or use too little material. Use a quality 1-inch or 2-inch natural-bristle brush for oil-based paints. Apply in thin coats and resist the urge to keep brushing once paint starts getting tacky.
Aerosol spray cans
Aerosol cans are the sweet spot for most DIY metal furniture projects. They give a much more even finish than a brush on tubular frames, they're cheap per chair (one can of primer plus one or two of topcoat typically covers a chair), and they require no cleanup. Hold the can 10 to 12 inches from the surface, use overlapping passes, and keep the can moving continuously so you don't build up runs. Multiple thin coats beat one thick coat every time. Rotate the piece so you're always spraying at right angles to the surface rather than at steep angles that create uneven buildup.
HVLP or airless sprayer
If you're doing a full set (six chairs plus a table) or want a near-professional finish, renting an HVLP (high-volume low-pressure) sprayer from your local hardware store is worth the $25 to $40 daily rental fee. HVLP sprayers atomize paint finely and apply it more efficiently than an airless, with less overspray. Practice your trigger technique on cardboard before touching the furniture. Thin your paint per the sprayer manufacturer's guidance (typically 5 to 10% with the appropriate solvent for oil-based paints). Always spray in a well-ventilated area, wear an organic vapor respirator cartridge (not just an N95) for spray painting, and mask off anything you don't want coated.
| Method | Best For | Finish Quality | Ease for Beginners | Cost |
|---|---|---|---|---|
| Brush | Touch-ups, spot repairs, flat sections, tight detail work | Good with practice; shows brush marks on large flat areas | Easiest | $2–5 for brushes |
| Aerosol spray can | Single chairs, small sets, tubular frames | Very good; even coverage on curves | Easy with basic technique | $5–8 per can |
| HVLP sprayer (rented) | Full sets, tables, large or complex pieces | Excellent; smooth, professional-level finish | Moderate; requires practice | $25–40/day rental |
| Powder coating (pro) | High-value pieces, want 10+ year finish | Superior; hard, chip-resistant, uniform | Not DIY; drop off at shop | $50–400 per piece depending on size |
Drying and curing: give it the time it actually needs
Dry to touch and fully cured are two very different things. Most oil-based primers feel dry to the touch in two to four hours but don't reach full hardness and adhesion for 24 to 48 hours. Topcoats may feel hard in 24 hours but continue to cure and harden for up to seven days. During that curing window, the finish is more vulnerable to scratching, denting, and water spotting. I try to finish a project on Friday so the furniture has the full weekend to cure before it goes back into regular use. If ambient temperatures drop below 50°F or humidity rises above 70%, extend your drying time estimates significantly, and don't paint in those conditions if you can avoid it. Temperature and humidity both slow the cross-linking process that makes coatings hard, and coating metal in high humidity dramatically increases the risk of moisture getting trapped under the film. Filiform corrosion is promoted by high relative humidity (roughly 60–95%) and temperatures around 20–40°C, which increases the risk of moisture getting trapped under coatings, see Filiform corrosion: interactions between electrochemistry and mechanical properties of the paints (Prog. Org. Coat., ScienceDirect) for the supporting research.
Safety and environmental notes: don't skip these
- Rust dust from wire brushing and grinding is a real inhalation hazard. Always wear an N95 at minimum during mechanical rust removal, even outdoors.
- Spray painting outdoors doesn't eliminate the need for respiratory protection. Aerosol and sprayer application creates fine particles that carry into your lungs. Use an organic vapor cartridge respirator for any spray application.
- Oil-based primer and paint rags can self-ignite if wadded and left in a pile. Spread used rags flat to dry outdoors, then dispose of them in a sealed metal container.
- Used rust remover chemicals and paint thinner should not go down the drain or into the regular trash. Check your municipality's household hazardous waste disposal program.
- Aerosol cans are pressurized and flammable. Don't store them in vehicles or hot garages, and never puncture or incinerate them.
- Keep children and pets away from the work area during prep, painting, and curing.
How long the whole project takes and what it costs
Being honest about time is something I care about, because nothing is more frustrating than thinking a project is a two-hour job and finding yourself still outside at 8 PM. Here's a realistic breakdown.
| Project Size | Estimated Active Time | Drying/Waiting Time | Materials Cost (Approx.) |
|---|---|---|---|
| Single bistro chair (light rust) | 2–3 hours | 24–48 hours between coats | $25–45 |
| Single bistro chair (moderate rust) | 4–5 hours | 24–48 hours between coats | $35–55 |
| 4-piece set (2 chairs + table + bench, moderate rust) | 8–12 hours over a weekend | 24–48 hours between coats | $60–100 |
| 6-piece dining set (heavy rust, wrought iron) | 14–20 hours over 2 weekends | 24–48 hours between coats | $80–140 |
| Professional powder coat (drop-off) | 0 hours DIY (drop-off and pickup) | Usually 3–7 days at shop | $200–600 for a full set |
Seasonal maintenance: what to do each year so you're not starting over
The best way to avoid a full strip-and-repaint job is a quick annual maintenance pass. Every spring, wash the furniture with mild soap and water, let it dry, then walk around each piece and look for chips, scratches, or small rust spots. Catch them at the first sign of surface rust and you're looking at five minutes of sanding, spot prime, and a dab of matching topcoat. Let them go another season and those spots become a full prep job.
- Spring: wash, inspect, spot-treat any chips or rust with touch-up primer and matching paint.
- Mid-summer: wipe down with a damp cloth after heavy rain periods to prevent standing water in joints and tube ends.
- Fall: apply a thin coat of paste wax (Johnson Paste Wax or similar) over the entire painted surface to add a sacrificial moisture barrier for winter. This is especially useful in humid or coastal climates.
- Winter storage: if storing indoors, clean and dry the furniture fully before putting it away. Moisture trapped under a furniture cover in a shed creates ideal conditions for under-film corrosion. If storing outdoors, use breathable furniture covers rather than plastic tarps that trap condensation.
Troubleshooting: why your new paint is already failing
If you've done the work and the finish is already peeling, bubbling, or showing rust, here's how to diagnose what went wrong and fix it without starting from scratch.
Peeling paint
Peeling almost always points to an adhesion failure, which almost always means the surface wasn't clean enough before priming. Grease, moisture, or sanding dust under the primer breaks the mechanical bond. Strip back to where the adhesion is solid (the paint won't lift when you press on it with a fingernail), re-prep, degrease, and re-prime. Applying topcoat over primer that wasn't fully cured also causes this, as does using a water-based topcoat over an incompatible oil-based primer without a bonding coat in between.
Bubbling or blistering
Bubbles under a freshly applied coat usually mean moisture was present on the surface or in the existing coating when you painted. It can also mean you painted in direct hot sun where solvent flashed off the surface before the coating could level, trapping air underneath. Let the bubbles fully cure (don't pop them), then sand back the affected area, ensure the surface is bone dry, and re-apply in cooler, shadier conditions.
Rust returning quickly after painting
If rust is reappearing within a season, you either missed existing rust beneath the paint during prep (it will expand and push paint off from underneath because rust physically expands as it oxidizes, lifting coatings), or moisture is entering through an uncoated area like tube ends, screw holes, or weld seams. For tube ends especially, seal them with a small bead of exterior-grade silicone caulk before priming. Touch up screw holes with rust converter and primer. For small areas of rust return, sand back to bare metal, apply a rust converter, prime, and topcoat.
Metal-specific tips for aluminum vs. steel vs. wrought iron
While the overall process is the same, each metal type has a few quirks worth knowing about.
Steel and mild steel
The most common material for affordable patio furniture. Rust is the main enemy. Steel's rust (hydrated iron oxide) physically expands as it forms, which is exactly why it lifts paint from underneath rather than staying put. Be aggressive in rust removal and don't skip the primer. If your steel furniture has mixed metals at fasteners (say, stainless screws on a carbon steel frame), be aware that this junction can become a site of galvanic corrosion, where the less-noble metal corrodes faster in the presence of moisture. Isolating fasteners with plastic washers or painting over contact points reduces this risk.
Wrought iron
Wrought iron is softer and more porous than modern mild steel and contains slag inclusions that create uneven behavior during corrosion. This means standard wire brushing sometimes reveals pitting and texture that requires more careful attention with sanding and primer to fill. Oil-based primer penetrates the surface better than water-based on wrought iron. If you have a historic or decorative piece, avoid aggressive power-tool grinding that can alter surface detail; do more hand work with a wire brush and folded sandpaper.
Aluminum
Aluminum doesn't rust in the traditional sense, but it does corrode through pitting and oxidation. Its natural oxide layer is actually protective, so you're not stripping aluminum down to bright metal the way you are with rusted steel. Your goal with aluminum is mechanical scuffing for adhesion (180 to 220-grit by hand) and chemical degreasing, then a self-etching or dedicated aluminum primer. Never use a regular steel primer on aluminum without checking compatibility. Also avoid mixing aluminum components directly against steel or other metals without isolating fasteners, as aluminum is the less noble metal in most pairings and will corrode faster where the two metals are in electrical contact.
A note on related projects
If you're also working on wood components, teak pieces, or wicker furniture alongside your metal frames, the principles of surface prep and sealing carry over but the materials are quite different. Teak, wood, and wicker each have their own sealant chemistry and application approach. If you need guidance for wooden pieces, see our step-by-step guide on how to seal wood patio furniture. The seasonal maintenance schedule and the concept of building protection from the ground up (prep first, protective barrier second, maintenance annually) applies across all outdoor furniture materials, so the work you do here will make those other projects feel familiar. For woven materials, see my guide on how to weatherproof wicker patio furniture for material-specific sealants and maintenance.
FAQ
What’s the difference between sealing, waterproofing, and weatherproofing metal patio furniture?
Sealing: applying a coating (primer/topcoat) that bonds to the metal to block moisture, oxygen and contaminants. Waterproofing: focused on preventing liquid water intrusion (often by filling seams and using impermeable coatings or sealants). Weatherproofing: broader — resists UV, temperature swings, condensation and rain; usually achieved with UV‑stable topcoats and good detailing. All three overlap — a proper primer + durable topcoat provides sealing and much of the weatherproofing; additional seam seals or cushions give extra waterproofing.
How do I inspect metal patio furniture before starting? What should I look for?
Check for loose joints, flaking paint, surface rust, pitting, deep corrosion, bent parts, and incompatible fasteners (different metals touching). Tap to hear hollow vs. corroded areas. Note old coatings (powder coat vs. paint) and any fragile decorative areas. If structural weakness or heavy pitting is present, consider professional repair or part replacement.
What tools and materials do I need for a weekend DIY sealing project?
Basic list: wire brushes, 80–320 grit sandpaper, sanding block or electric sander (orbital), chemical rust remover or converter (optional), degreaser or metal prep solution, rags, masking tape/plastic, primer (metal‑appropriate), topcoat (enamel/alkyd, acrylic, or spray paint for metal), brushes/rollers or sprayer (HVLP/airless or aerosol cans), drop cloths, gloves, eye protection, respirator for solvents/spray, and disposable mixing cups. Optional: power washer, small abrasive blaster (rental), zinc‑rich or epoxy primer for extra protection, touch‑up brush.
How do I prepare the surface (cleaning, rust removal, sanding, degreasing)?
1) Remove cushions/soft parts and hardware you can. 2) Clean dirt/grease with detergent or degreaser; rinse and dry. 3) Remove loose paint and heavy rust with a wire brush or scraper (SSPC‑SP2/SP3 equivalent for DIY). 4) Feather edges of remaining paint with 80–120 grit, then smooth with 220–320 grit. 5) For remaining rust, use a rust remover (chelating) or rust converter per product instructions. 6) Wipe with a recommended metal prep or solvent and let fully dry. Good prep and degreasing are critical — primers won’t stick to oily or dirty metal.
Which primer and topcoat should I use for steel, wrought iron, aluminum and pre‑painted pieces?
Steel/wrought iron: use a rust‑inhibiting primer (zinc‑rich or epoxy for high exposure; consumer rust‑inhibiting or self‑etching primers for yard furniture) followed by an enamel/urethane topcoat. Wrought iron: be conservative with mechanical cleaning; use primers that bond to irregular surfaces and flexible topcoats. Aluminum/galvanized: use self‑etch or galvanized/aluminum‑specific primer; standard primers for steel may not bond. Pre‑painted/powder‑coated pieces: if powder coat is intact, clean and use touch‑up paint; for badly failing powder coat, strip or sand to sound substrate and use a compatible primer—an etch primer may be needed. Always follow TDS for substrate compatibility and recommended overcoats.
What application methods are best — brush, spray, aerosol or powder coat? Pros/cons?
Brush/roller: easy, low cost, good for touch‑ups and detailed work; risk of brush marks. Aerosol spray: convenient, good finish on tubular/ornate pieces, limited color/volume options. HVLP/airless sprayer: best even finish, faster for many pieces; needs masking and practice to avoid runs. Powder coat (professional): most durable, uniform, excellent corrosion resistance — requires stripping, blasting and oven curing; higher cost and typically professional only. Choose based on budget, finish desired, and piece complexity.