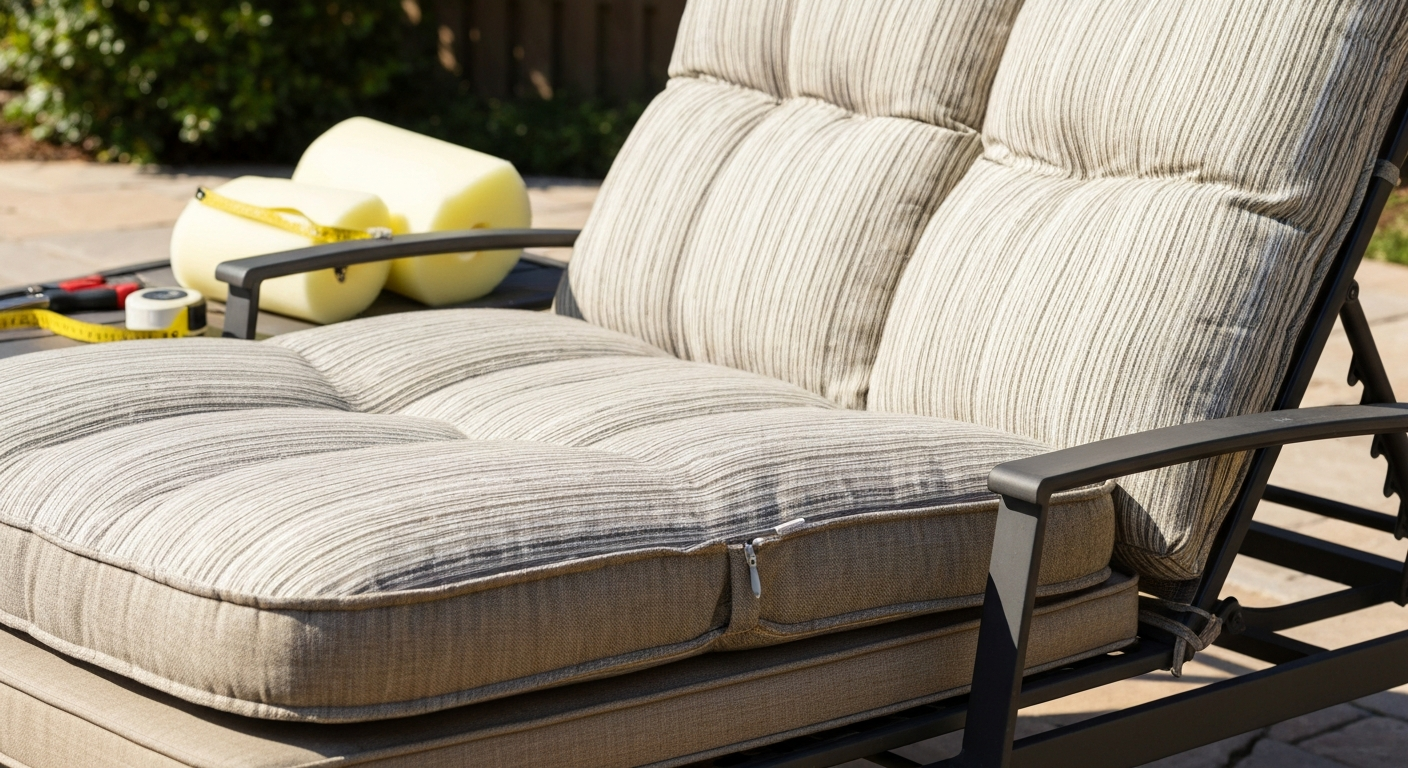
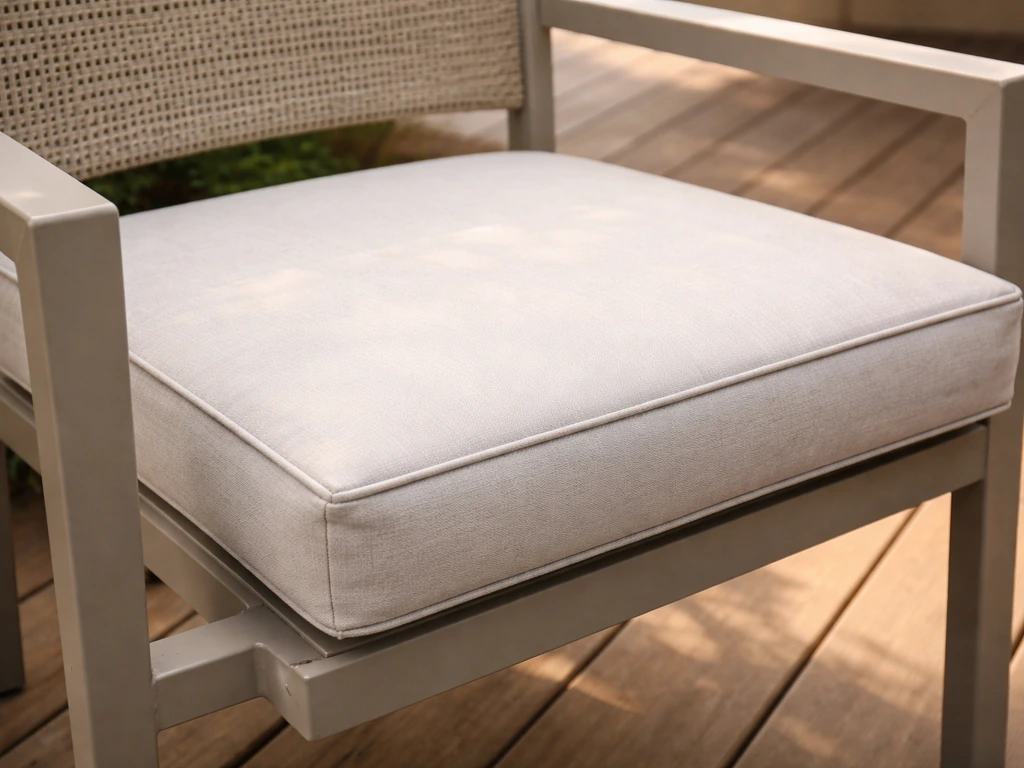
You can make removable patio cushion slipcovers at home for roughly $20–$60 per cushion depending on fabric choice, and a standard bench or chair cushion cover takes about 2–3 hours start to finish once you have your materials ready. The process comes down to four things: picking an outdoor-rated fabric that won't rot or fade, measuring your cushion correctly (this is where most people go wrong), drafting a pattern from those measurements, and sewing a closure that makes removal easy. You don't need a fancy machine or prior sewing experience to get a clean result. I've botched enough of these to know exactly where the pitfalls are, and I'll walk you through all of them.
How to Make Patio Cushion Slipcovers: Complete DIY Guide

Maren Grady
21 Jul 2026
What patio cushion slipcovers actually do (and why bother making them)
A slipcover is a removable fabric shell that fits over your existing cushion insert. Unlike a permanent upholstered cover, a slipcover unzips or unfastens so you can pull it off, toss it in the wash or hose it down, and put it back. That single feature extends cushion life dramatically because the interior foam or fill stays protected and dry while the outer fabric takes all the UV, rain, bird droppings, and spilled drinks. If you've ever had a set of patio cushions go moldy inside because moisture got trapped, you'll understand why removability matters so much outdoors.
This project covers everything: closure styles, fabric selection, measuring (including deep-seat cushions, which need their own approach), pattern drafting, cutting, sewing, no-sew shortcuts, and care after the fact. If you're also thinking about replacing the foam inside while you're at it, or building cushions from scratch on a budget, those are related projects worth exploring alongside this one. For now, the focus is the slipcover shell itself.
Zipper, envelope, or welt: pick your closure before you cut anything
The closure style determines how your slipcover goes together structurally, so you need to decide this before you draft your pattern. Each option has real trade-offs in difficulty, cost, and how the finished cover looks and functions outdoors.
Zipper closure
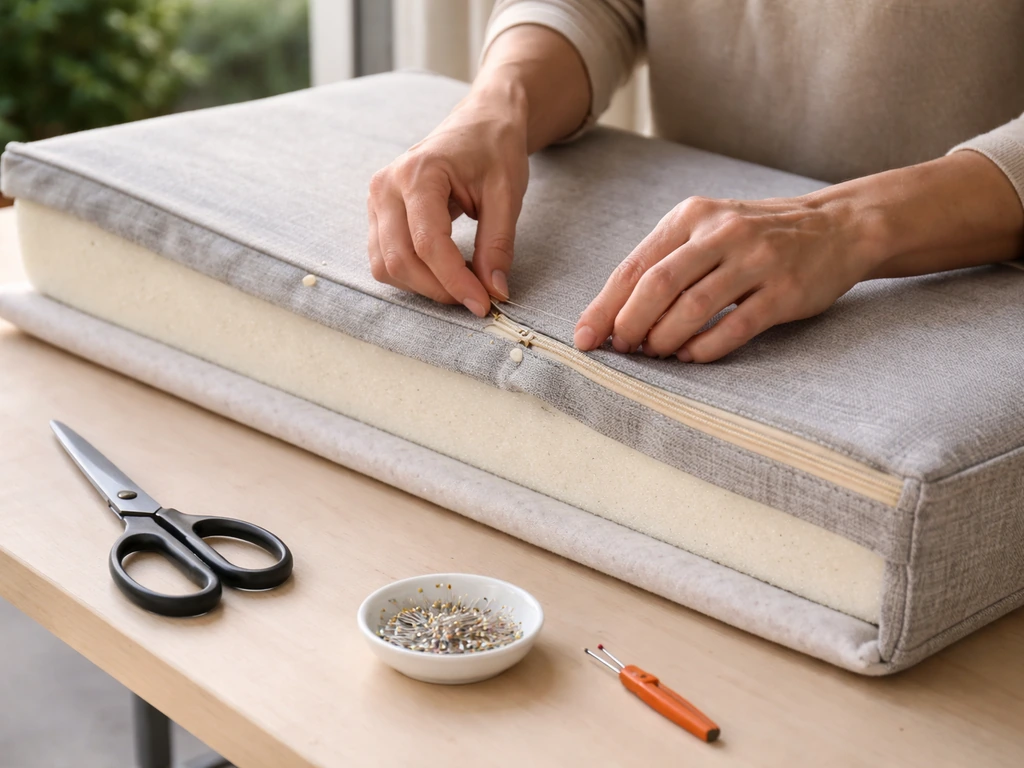
A zipper gives you the cleanest look and the most secure fit. For outdoor use, skip regular nylon coil zippers and use YKK AquaGuard (PU-laminated tape for water resistance) or VISLON molded plastic-tooth zippers. Both are designed for marine and outdoor applications. AquaGuard is water-resistant rather than fully watertight, which is all you need for a cushion cover. Place the zipper along the back boxing strip (the gusset panel at the rear of the cushion) so it's hidden when the cushion sits in place. The zipper should be at least as wide as your cushion's width, and many people run it the full length of the back panel for easier insertion. Zipper installation is the trickiest part of this whole project, but once you've done it once, it goes fast.
Envelope closure
An envelope closure uses two overlapping fabric panels on the back instead of a zipper, exactly like a pillow sham. There's no hardware at all, which means nothing to corrode or jam. The downside is that the opening can gap slightly on thick cushions, and the overlap edges can fray faster if your fabric isn't hemmed well. This is the beginner-friendliest option and works best on flatter cushions (2–3 inches thick). For a deep-seat cushion at 5–6 inches, I'd push you toward a zipper instead because the envelope method just doesn't hold as snugly on chunky inserts.
Welt (piping) detail
Welt, or piping, is a decorative cord-filled trim sewn into the seam between the top/bottom panels and the boxing strip. It's not a closure on its own but a finishing technique you layer on top of either zipper or envelope construction. It gives slipcovers a polished, furniture-store look and actually reinforces seam edges. You can buy pre-made outdoor piping, or make your own by wrapping 3/16-inch cotton cording in bias-cut strips of your cushion fabric. The extra sewing step adds maybe 30–45 minutes per cushion but the visual upgrade is significant. If you're recovering a nice set and want it to look intentional rather than homemade, add the welt.
| Closure Type | Difficulty | Best For | Hardware Needed | Approx. Added Cost |
|---|---|---|---|---|
| Zipper (AquaGuard/Vislon) | Intermediate | All cushion depths, clean look | Outdoor zipper ($3–$6 each) | $3–$6 per cushion |
| Envelope overlap | Beginner | Flat cushions under 3 inches | None | $0 |
| Welt/piping (add-on) | Intermediate | Any cushion, decorative finish | Cording ($0.50–$1/yd) | $2–$5 per cushion |
Everything you need before you start: materials and tools checklist
Gathering materials before you start saves you from stopping halfway through to run to a store. Here's what the project actually requires, split by category.
Fabrics and notions
- Outdoor upholstery fabric (solution-dyed acrylic, polyester canvas, or marine-grade — see next section for details): 1.5–3 yards per standard chair cushion depending on size
- UV-resistant polyester thread or PTFE/Tenara thread for maximum outdoor longevity (more on thread below)
- YKK AquaGuard or Vislon zipper(s) in the appropriate length, or heavy-duty outdoor hook-and-loop (Velcro Brand Extreme Outdoor) for no-sew closures
- 3/16-inch cotton piping cord if adding welt (optional)
- Bias tape or binding for edge finishing (optional but tidy)
- Seam sealant such as Gear Aid Seam Grip if using coated/laminated waterproof fabric
Sewing tools
- Sewing machine with a zipper foot and a heavy-duty needle (size 16/100 or 18/110 for outdoor fabric)
- Heavy-duty fabric shears (Gingher or equivalent) — do not use paper scissors, they'll destroy the blades
- Rotary cutter, acrylic ruler, and self-healing cutting mat for accurate straight cuts
- Hot knife or wood-burning tool for sealing cut edges on synthetic fabrics to prevent fraying (optional but very useful)
- Fabric marking chalk or water-soluble pen
- Metal tape measure (not cloth, which stretches)
- Pins or Wonder Clips (clips work better on thick outdoor fabric than pins)
- Iron and pressing cloth for setting seams (low heat — many outdoor fabrics melt under direct high heat)
No-sew supplies (if skipping the machine)
- Heavy-duty outdoor-rated hook-and-loop tape (Velcro Brand Extreme Outdoor, not standard craft Velcro which fails in UV and moisture)
- Outdoor fabric adhesive or contact cement rated for UV/moisture exposure
- Tenacious Tape or Gear Aid repair patches for reinforcing seams without sewing
- Binder clips or clamps to hold seams while adhesive cures
Choosing the right outdoor fabric: what the specs actually mean
Not all 'outdoor fabric' is equal. Walk into a fabric store and you'll find everything from basic polyester canvas to high-performance solution-dyed acrylic, and the price range is huge. Here's how to read the specs so you're not guessing.
Solution-dyed acrylic (Sunbrella, Outdura, and similar)
This is the gold standard for outdoor cushion fabric. In solution-dyed acrylics, the color is baked into the fiber itself during manufacturing, not surface-printed. That means UV light can't bleach the surface coat away because there is no surface coat. Sunbrella is the best-known brand and carries limited fabric warranties. Outdura is a comparable 100% solution-dyed acrylic at a similar weight (typically around 9–9.25 oz per square yard for upholstery grades) and is sometimes marketed as slightly stiffer, which some people actually prefer for structured boxing strips. Both brands score well on UV and mildew resistance ratings. The trade-off is cost: expect $15–$30+ per yard for name-brand solution-dyed acrylic. For a set of four chair cushions, that's a real investment, but one that pays off over five-plus years of use.
Polyester canvas and marine-grade polyester
Solution-dyed polyester canvas (not the same as cheap poly from a craft store) is a solid budget alternative at $6–$15 per yard. It won't match solution-dyed acrylic for long-term fade resistance, but it holds up reasonably well for 2–3 seasons with proper care. Look for fabrics labeled 'marine canvas' or 'outdoor upholstery polyester' with explicit UV and mildew ratings. Plain craft-store cotton canvas, no matter how thick, will rot and fade outdoors within a single season. Don't use it.
Waterproof and laminated options
If you want actual waterproofing at the fabric level (not just water beading), you need a laminated or coated product. Options like Outdura Trio or laminated Sunbrella variants bond a waterproof PU or PVC film to the back of the woven face fabric. Serge Ferrari makes composite membrane fabrics (Soltis, Batyline) used in high-end outdoor furniture and marine applications when a fully waterproof, coated surface is required. These are heavier, require larger needles, and seams need to be sealed with an appropriate sealant like Gear Aid Seam Grip to maintain waterproofing at stitch holes. Most residential patio cushion slipcovers don't need this level of waterproofing. A quality solution-dyed acrylic with a DWR (durable water repellent) spray treatment like 303 Fabric Guard handles typical rain and splashes just fine.
A quick fabric comparison
| Fabric Type | UV Resistance | Mildew Resistance | Weight (approx.) | Cost/Yard | Best For |
|---|---|---|---|---|---|
| Solution-dyed acrylic (Sunbrella/Outdura) | Excellent | Excellent | 8–9.5 oz/yd² | $15–$30+ | Long-term outdoor use, investment pieces |
| Marine-grade polyester canvas | Good | Good | 7–10 oz/yd² | $6–$15 | Budget builds, 2–3 season use |
| Laminated/coated (Outdura Trio, Serge Ferrari) | Excellent | Excellent | 10–14 oz/yd² | $20–$40+ | Fully waterproof seating, wet climates |
| Standard craft canvas (cotton) | Poor | Very poor | Varies | $3–$8 | Not recommended for outdoors |
Thread: this is not the place to use old spools from a junk drawer
Regular cotton or cheap polyester thread degrades fast in UV and outdoor cleaning chemicals. Use UV-resistant bonded polyester thread as your minimum standard. For the longest life, especially on cushions that will be hosed down or treated with bleach solutions, use PTFE thread (GORE TENARA is the brand name). Tenara is made from expanded PTFE, which is inherently UV-stable and resists bleach, salt, and virtually everything you'd throw at outdoor upholstery. It costs more (around $20–$30 per spool) but a spool goes a long way and is worth it for cushions you want to last. Size V-69 (also called Tex 70) is a practical weight that most home sewing machines can handle. Heavier sizes like V-92 typically require an industrial machine.
Measuring your cushions: do this carefully or redo your whole pattern
Measuring is where I see people rush and then wonder why their cover is too tight to zip or baggy enough to slip around. Take your time here. A metal tape measure is non-negotiable because fabric tape stretches. Measure the actual foam or fill insert, not the existing cover (existing covers are often stretched or distorted). For each cushion, you need five measurements.
The five measurements you need
- Length (front to back): measure along the longest horizontal axis of the cushion top
- Width (side to side): measure across the shorter horizontal axis
- Depth (thickness): measure the cushion from top surface to bottom surface at its thickest point — don't compress it while measuring
- Perimeter: this is 2 x (Length + Width) and is used to calculate your boxing strip length
- Corner type: note whether corners are square/sharp, rounded, or have a welt notch — this affects your boxing strip layout
Standard vs deep-seat cushions
Standard patio chair cushions typically run about 20–22 inches wide, 18–20 inches deep (front to back), and 2–3 inches thick. Deep-seat cushions (the kind on sectional or lounge-style outdoor furniture) are often 24–26 inches deep and 5–6 inches thick. Deep-seat cushions need more fabric, especially for the boxing strip, and the insertion angle during assembly is trickier. If your cushion is deep-seat style, double-check your boxing strip math especially carefully. Building deep-seat cushions from scratch is a related project worth reading about separately if you're replacing inserts at the same time.
Measurement checklist and common pitfalls
- Always measure the foam insert, not the old cover
- Measure length and width at the widest points, even if the cushion tapers slightly at the back
- Measure depth at the center, not at the edges where foam compresses
- Record measurements in inches and double-check them before calculating yardage
- Add seam allowance AFTER measuring — never build it into the raw measurement
- For cushions with ties, measure where the ties attach and note that for placement later
- Round up, not down, when calculating yardage — being short by 6 inches ruins a project
Yardage tables for common cushion sizes
These tables assume 54-inch-wide fabric (standard upholstery width), a 1/2-inch seam allowance on all sides, and no pattern matching. If your fabric has a large repeat pattern that requires matching across panels, add 15–20% to the yardage estimate. Figures are per cushion cover.
| Cushion Type | Typical Dimensions (L x W x D) | Top/Bottom Panels | Boxing Strip | Total Yardage (est.) |
|---|---|---|---|---|
| Standard chair cushion | 20" x 20" x 3" | 2 panels ~21" x 21" | ~1 strip 9" x 84" | ~1.5 yards |
| Standard bench cushion | 44" x 18" x 3" | 2 panels ~45" x 19" | ~1 strip 9" x 126" | ~2.5 yards |
| Deep-seat chair cushion | 24" x 24" x 6" | 2 panels ~25" x 25" | ~1 strip 13" x 100" | ~2.5 yards |
| Deep-seat lounge cushion | 28" x 26" x 6" | 2 panels ~29" x 27" | ~1 strip 13" x 112" | ~3 yards |
| Round bistro cushion | 15" diameter x 2" | 2 circles ~16" diameter | ~1 strip 6" x 54" | ~1 yard |
These are working estimates. For your specific cushion, calculate top/bottom panels as (Length + 1 inch) x (Width + 1 inch) each. Boxing strip width equals Depth + 1 inch. Boxing strip length equals your perimeter measurement plus 2 inches. Use an online yardage calculator (Sailrite's fabric calculator is a free industry reference) to sanity-check your numbers before buying. Always buy an extra quarter-yard as insurance.
Drafting your pattern: turning measurements into cut pieces
You don't need formal drafting experience for this. A pattern here is just a paper template for each panel. Use kraft paper, newspaper, or even a paper grocery bag opened flat. Label every piece before you cut anything.
One-piece (envelope) pattern
For a simple flat cushion with an envelope closure, you need three pieces: a top panel, and two back panels that overlap. Top panel: Length + 1 inch (seam allowance) x Width + 1 inch. Back panels: each is Width + 1 inch wide, and each is (Length divided by 2) + 3 inches long (the 3 extra inches create the overlap). This is your simplest pattern and works well for tie-on chair pads and thin bench cushions.
Box cushion pattern (with zipper)
A box cushion pattern has three types of pieces. Piece 1, Top panel: (Length + 1 inch) x (Width + 1 inch). Make two of these (one for top, one for bottom). Piece 2, Front and side boxing strip: this is one long strip, Depth + 1 inch wide, and long enough to run along three sides of the cushion (front + two sides). Calculate this as: (2 x Length + Width) + 2 inches. Piece 3, Back boxing strip (the zipper panel): split this into two equal strips, each (Depth divided by 2 + 0.75 inch) wide and (Width + 2 inches) long. The zipper gets inserted between these two back strips before they're attached to the rest of the boxing. This split-back approach is the standard method used in cushion manufacturing and by detailed tutorials from upholstery suppliers.
Deep-seat pattern adjustments
Deep-seat cushion patterns follow the same logic but with wider boxing strips and more yardage. The key adjustment is in the zipper panel: because the cushion is thicker (5–6 inches), use a zipper that runs the full width of the back panel for easier insertion. A 5-inch-thick cushion is genuinely hard to stuff into a slipcover with a short zipper, I learned that the hard way. Also, with deep-seat cushions, plan for a slight negative ease (cut the panels just slightly smaller than the foam dimensions by about 1/4 inch per side) so the cover fits snugly rather than bagging. For reference, deep-seat cushions typically measure 24–26 inches front to back and 5–6 inches thick, compared to standard cushions at 18–20 inches deep and 2–3 inches thick.
Cutting and layout: get this right and sewing becomes easy
Outdoor fabric is expensive and wide (usually 54 inches), so layout efficiency directly affects cost. Lay your fabric flat on a large surface and arrange all your pattern pieces before you cut a single thing. Here's what to pay attention to.
Grainline and nap
Always align pattern pieces so the fabric's grainline (the direction of the lengthwise threads) runs along the length of the cushion top. Cutting off-grain makes panels stretch unevenly and the finished cover will pull and twist. If your fabric has a directional pattern or a nap (a surface texture that looks different from different angles), all panels must be cut with the nap running the same direction. Mark an arrow on each pattern piece before you start. Directional patterns also require pattern matching: if your fabric has stripes or a large motif, the design needs to align visually across the seam between the top panel and boxing strip. Add that 15–20% yardage buffer when working with large repeats.
Seam allowances and marking
Standard seam allowance for upholstery work is 1/2 inch. Mark your seam lines directly on the fabric with chalk or a water-soluble pen rather than eyeballing from the edge. On thick outdoor fabric, the presser foot guide alone can drift. For very heavy fabric or laminated products, mark notches (small cuts of 1/4 inch into the seam allowance, not through the seam line) at center points and corners so panels match up correctly during assembly.
Cutting tools and edge sealing
Use heavy-duty fabric shears or a rotary cutter with an acrylic ruler on a self-healing mat. Paper scissors will be destroyed by outdoor fabric in about five minutes. For synthetic fabrics (acrylic, polyester, nylon), a hot knife or even a wood-burning tool is genuinely useful: it cuts and seals the edge simultaneously by melting the fibers slightly, preventing fraying without any additional finishing. Work on a silicone mat or a piece of glass when using a hot knife. If you don't have a hot knife, cut with shears and immediately run a lighter flame very quickly along the cut edge to seal it (this takes practice, go too slow and you'll scorch the fabric).
Fabric yield optimization
Arrange your pattern pieces like a puzzle before cutting. Boxing strips can often be pieced together from smaller cuts if you're short on yardage, as long as the seam falls at a corner rather than mid-panel. Bias-cut piping strips (cut at 45 degrees to the grain) are traditionally placed last after the main panels are arranged, using whatever oddly-shaped pieces remain. Don't discard scraps until the entire project is finished because that one awkward offcut might be exactly what you need for a repair patch later.
Step-by-step sewing: assembling the slipcover
The sequence matters here. If you try to attach the boxing strip before installing the zipper, you'll be fighting the machine at every step. Follow this order and it stays manageable.
Step 1: Install the zipper in the back boxing strip
Lay your two back boxing strip pieces right-side-together and sew a basting stitch (longest stitch setting) along the long edge where the zipper will go. Press the seam open. Center the closed zipper face-down over that seam on the wrong side of the fabric, and pin or clip it in place. Using your zipper foot, topstitch along both sides of the zipper, then remove the basting stitches to open the seam. The zipper should now operate cleanly. Test it before going further. AquaGuard and Vislon zippers both install the same way.
Step 2: Join the boxing strips
Sew the back boxing strip (with the installed zipper) to the front/side boxing strip at the short ends, right sides together, to form a continuous loop. The total boxing strip loop should equal your cushion's perimeter plus a small overlap. For clean corners, notch the seam allowance at each corner point of the boxing strip so the strip turns the corner without puckering.
Step 3: Attach piping (if using)
If you're adding welt piping, baste it to the right side of both the top and bottom panels along all edges before attaching the boxing strip. Place the piping cord edge toward the center of the panel and the raw edges aligned with the panel raw edge. A piping foot or zipper foot works for this. The piping gets sandwiched and sewn in when you attach the boxing strip in the next step.
Step 4: Attach the boxing strip to the top panel
Open the zipper at least halfway before this step. (If you forget to open it, you can't turn the cover right-side-out at the end. I have done this. It is unpleasant.) Pin the boxing strip loop to the top panel, right sides together, matching corner notches. Sew all the way around. For sharp corners, clip the boxing strip's seam allowance almost to the stitching line at each corner so it bends cleanly. Pivot the machine needle down at the corner, lift the presser foot, turn the fabric, and continue.
Step 5: Attach the bottom panel
Pin the remaining edge of the boxing strip to the bottom panel the same way, matching notches and corners. Sew all the way around. Clip corners. Trim seam allowances to about 3/8 inch to reduce bulk.
Step 6: Topstitch and finish seams
Turn the cover right-side-out through the open zipper. Press seams flat with an iron on low heat (use a pressing cloth to avoid scorching). For extra durability, topstitch around the top and bottom panels about 3/8 inch from each seam line. This reinforces the seam from the outside and is standard practice in marine and outdoor canvas work. If you're using a laminated waterproof fabric, apply seam sealant to all interior seams now, working on the coated side, and allow full cure time before inserting the cushion.
No-sew and budget-friendly methods that actually hold up
If you don't own a sewing machine or just want a quick seasonal refresh, there are legitimate no-sew approaches. The key is using products explicitly rated for outdoor, UV, and moisture exposure. Standard iron-on hem tape and regular craft-store fabric glue are not. They'll fail within a few weeks in direct sun.
- Heavy-duty hook-and-loop (Velcro Brand Extreme Outdoor): rated for weather and UV exposure, bonds to fabric with strong adhesive backing. Use this for envelope-style closures on flat cushions. Standard Velcro from a craft store will peel and stop gripping within one season outdoors.
- Outdoor-rated contact cement or fabric adhesive: apply to both surfaces, let tack up, then press together. Useful for hemming raw edges. Clamp or clip while curing (usually 24 hours).
- Gear Aid Tenacious Tape: a flexible, waterproof tape originally designed for gear repair. Works as both a seam reinforcement and a no-sew edge finisher. Cut in a rounded shape (no sharp corners) to maximize adhesion.
- Outdoor snaps or plastic toggles: hand-press snaps installed with a snap setter (a $10–$15 tool) work well on envelope closures and require no sewing — just two pieces of fabric and a hammer.
No-sew covers generally won't be as structurally clean as sewn ones, and they're harder to execute on box cushions with boxing strips. They work best for flat, simple cushion pads or as a quick fix while you plan a more permanent sewn version. If budget is a primary concern, there's a more detailed breakdown of cost-cutting strategies that covers cheap fabric sourcing, repurposing drop cloths, and other budget approaches worth reading alongside this guide. See our guide on how to make patio cushions cheap for detailed cost-saving tips on fabric sourcing, repurposing, and no-sew alternatives.
Time and cost estimates: what to realistically expect
Be honest with yourself before you start. This is not a quick afternoon craft if you've never sewn upholstery before.
| Project Scope | Experience Level | Estimated Time | Estimated Material Cost |
|---|---|---|---|
| 1 simple envelope flat cushion cover | Beginner | 1.5–2 hours | $15–$30 |
| 1 box cushion cover with zipper | Beginner/Intermediate | 2.5–4 hours | $25–$55 |
| 1 box cushion with zipper + piping | Intermediate | 4–6 hours | $30–$65 |
| Full set of 4 chair cushion covers (box, zipper) | Intermediate (after first) | 8–14 hours total | $80–$200 |
| No-sew flat cushion cover | Beginner | 30–60 minutes | $15–$25 |
First-time projects always take longer than the estimate. Budget your time generously and do your first cushion as a practice run using less expensive fabric before committing to premium solution-dyed acrylic. The skills transfer directly, once you've done one box cushion, the second one takes half the time. If you're wondering is it cheaper to make your own patio cushions, read our concise cost comparison of DIY versus store-bought options to help decide.
Fitting and finishing: getting a crisp result
Before inserting the cushion, turn the finished cover inside out and check every seam. Any skipped stitches need re-sewing now while the seam is accessible. Trim threads flush to the fabric rather than leaving tails, which can unravel and work their way into the zipper.
To insert a thick cushion, fold the foam in half lengthwise (if it's flexible enough), push it into the open end, then let it unfold inside the cover. For very firm foam, have a second person hold the cover open while you work the foam in. Never force a zipper closed against a stuffed cushion, if you can't close it comfortably, the cover is too small or the boxing strip was cut too narrow. A well-fitted slipcover should zip with one hand and no strain.
Once the cushion is in, look at the corners. If they look pinched or the boxing strip is pulling, unzip and check whether your corner notches were deep enough. A small V-clip into the seam allowance at each corner usually fixes a pucker instantly. If the overall cover looks baggy rather than fitted, this is likely a measuring issue: you may have not added negative ease for a deep-seat cushion, or your seam allowance was too small.
Care, cleaning, and making covers last
The whole point of a removable slipcover is that you can clean it. For solution-dyed acrylic (Sunbrella, Outdura), the manufacturer-recommended approach for routine cleaning is a mild soap solution and a soft brush, then rinse thoroughly and air dry. For severe mildew, Sunbrella's official guidance recommends a cleaning solution of 1 cup bleach plus 1/4 cup mild soap per gallon of water. Apply, let sit, scrub lightly, rinse extremely well. Some removable Sunbrella covers are machine washable on delicate cycle, but always check the specific product and air dry, never high-heat tumble dry, which can damage the fibers and any coating.
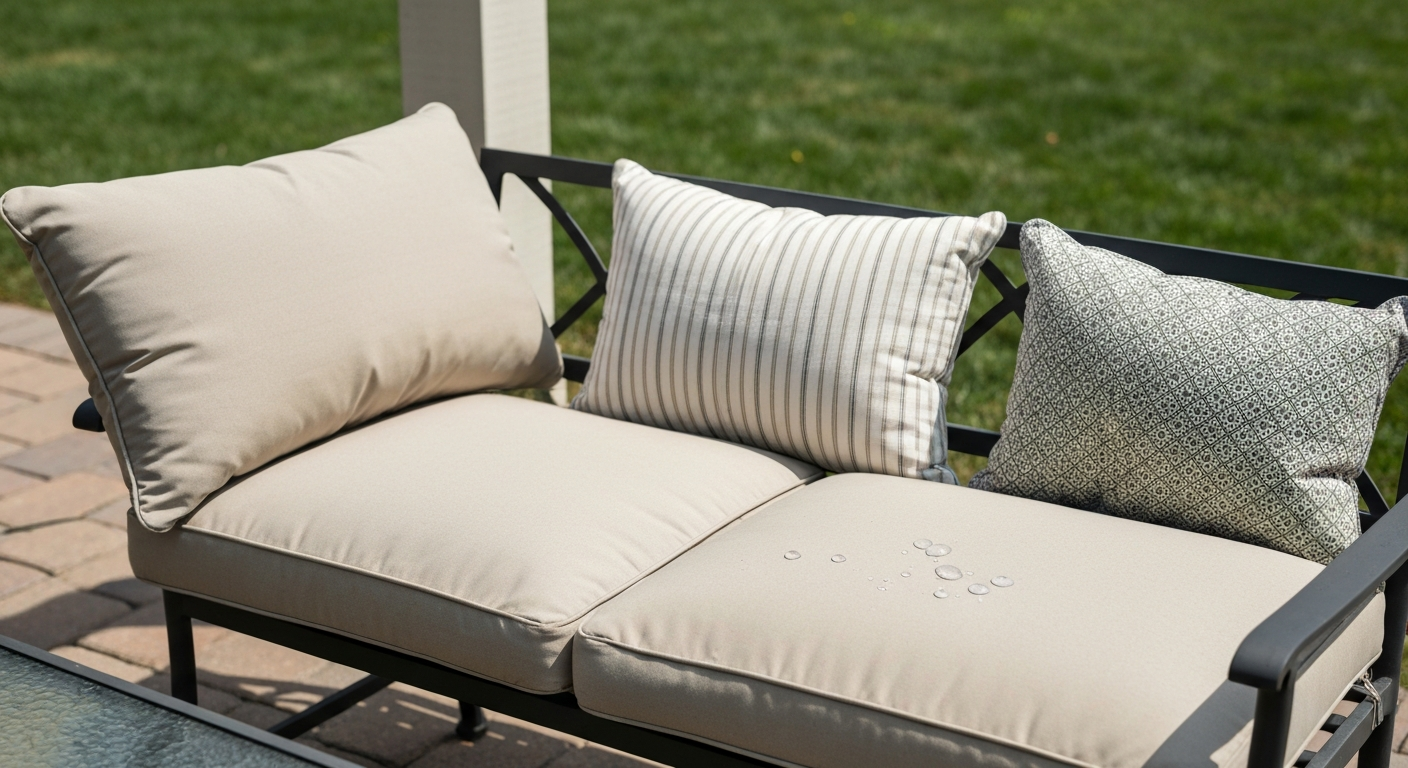
To maintain water beading on your fabric over time, apply a DWR (durable water repellent) treatment periodically. Products like 303 Fabric Guard, Nikwax TX.Direct, or Grangers restore water-beading performance after washing and UV exposure. The process is: clean the fabric first, apply the treatment per label instructions, and allow to air dry or use low heat to reactivate the DWR. Expect to reapply every 1–2 seasons with regular outdoor use, or after several washes.
For waterproof laminated covers, reseal any seams that show signs of delaminating or leaking using Gear Aid Seam Grip, applying to the coated side and allowing full cure before re-exposure to rain. Tenacious Tape can patch small fabric punctures or tears without re-sewing. Store slipcovers removed and dry during off-season months to prevent mildew growth even on mildew-resistant fabrics.
Troubleshooting common problems
| Problem | Most Likely Cause | Fix |
|---|---|---|
| Cover too tight to zip | Not enough ease or seam allowance too large | Let out seam allowances 1/4" at a time; re-sew |
| Cover is baggy and shifts | Panels cut too large; no negative ease on deep-seat | Remove cover, take in side seams evenly |
| Corners pucker on boxing strip | Insufficient notches at corners | Clip deeper into seam allowance at corners (don't cross the stitch line) |
| Zipper jams or skips | Thread caught in teeth; zipper too short | Clear thread debris; use a longer zipper next time |
| Seams fraying after washing | Wrong thread; no edge finishing | Re-sew with bonded polyester or PTFE thread; seal edges |
| Fabric fades in first season | Not solution-dyed acrylic; surface-printed fabric used | Replace with solution-dyed acrylic for future covers |
| Mildew forms under cover | Cover stored damp; moisture trapped at base | Remove cushions for off-season; treat with bleach solution; air dry thoroughly before storage |
FAQ
What fabrics and materials are best for durable outdoor patio cushion slipcovers?
Choose solution‑dyed acrylics (Sunbrella, Outdura) for fade, mildew and UV resistance; for fully waterproof needs use laminated composites (PU/PVC backings or Serge Ferrari‑type membranes). Use UV‑stable thread (bonded polyester for domestic machines; PTFE/TENARA® for longest life and heavy exposure). For zippers pick outdoor types like YKK AquaGuard® or VISLON®; use outdoor‑rated foam, sewing needles sized for heavy fabric (90/14–110/18), and durable interfacing where needed.
How do I measure a standard box cushion for a removable slipcover pattern?
Measure length (L), width (W), and depth (D) of the cushion. Pattern pieces: top = L×W, bottom = L×W. Boxing (gusset) length = perimeter = 2×(L+W) plus seam allowances. Boxing height = D plus seam allowances and any ease (usually 0–1/4" negative ease for snug fit or 1/4–1/2" positive for easier insertion). Add seam allowance (typically 1/2"–5/8") on all edges.
How do measurements differ for deep‑seat or rounded cushions?
For deep‑seat cushions increase boxing height by the extra depth measurement and allow slightly more ease (1/2"–1"), especially if cover must slip over thick foam. For rounded or tapered cushions take multiple depth measurements at several points and draft a tapered gusset or use darts/curved boxing. When in doubt, make a mockup in muslin to test fit before cutting expensive fabric.
What's the best way to draft patterns quickly and avoid mistakes?
Use the box‑cushion math: top/bottom = L×W; boxing length = perimeter; boxing height = D + seam allowances + ease. Transfer measurements to kraft paper or pattern paper, include grainline and nap arrows, mark zipper location. For complex shapes trace the cushion profile and add consistent seam allowances. Make a test cover from inexpensive fabric to confirm fit and adjust pattern before cutting main fabric.
What cutting tools and techniques work best for outdoor fabrics?
Use a rotary cutter with acrylic ruler and self‑healing mat for straight cuts or heavy‑duty shears (Gingher/industrial) for multiple layers. For synthetic outdoor fabrics consider a hot‑knife to seal edges and prevent fray. Lay pieces flat, align nap and pattern repeats, and plan yardage to minimize seams. Cut outside or in a well‑ventilated space if using heated tools.
How should I finish seams and make them water‑resistant?
For strength use reinforced plain seams with topstitching, flat‑felled seams, or double‑stitch rows. Serge/overlock edges for neatness but expect abrasion on heavy use. To make seams water‑resistant on coated/laminated fabrics use appropriate seam tape or seam sealer formulated for the coating type (apply on the coated side and allow full cure). For uncoated fabrics rely on good fit, DWR treatments and consider laminated backing if waterproof seams are critical.