Making your own patio cushions is cheaper than buying them in most situations, but not all of them. If you already own a sewing machine and you need custom sizes or a full set of six or more cushions, DIY can save you 40 to 70 percent compared to mid-range or premium store options. If you only need one or two standard-size cushions and you have to buy tools from scratch, buying ready-made almost always wins on cost. The break-even point for most homeowners lands somewhere around three to four cushions when you own basic tools, or five to six cushions when you need to rent or buy a sewing machine.
Is It Cheaper to Make Your Own Patio Cushions?

Maren Grady
3 May 2026
When DIY patio cushions actually cost less
The honest answer is that DIY wins on cost under specific conditions. You need enough cushions to spread your material and tool costs across multiple pieces. You need outdoor-appropriate materials, not just whatever fabric is on sale at the craft store. And ideally, you're reusing foam or covers from existing cushions rather than starting completely from scratch. Here's how each scenario plays out:
| Scenario | DIY Likely Cheaper? | Why |
|---|---|---|
| Full set (6+ cushions), custom size | Yes, often 50–70% savings | Material costs spread across many pieces; store custom orders are expensive |
| Full set (6+ cushions), standard size | Yes, moderate savings | Bulk fabric cuts cost, but cheap store sets exist |
| 1–2 cushions, standard size, no tools | No | Tool cost plus materials exceeds a $25–$55 store cushion |
| Recovering existing cushions (covers only) | Yes, almost always | Fabric cost alone is $5–$15 per cushion; foam already paid for |
| Custom size, one cushion, Sunbrella fabric | Possibly, but close | Made-to-order custom cushions can run $80–$150+ each; DIY may break even |
| Deep seat cushions, premium retailer | Yes, strongly | Premium sets run $399–$439 (Northern Patio catalog); DIY equivalent is $80–$150 |
The big unlock is recovering existing cushions instead of rebuilding from scratch. If your foam is still in decent shape but the fabric has faded, torn, or gone moldy, making new covers is the cheapest possible DIY move. You skip the foam entirely, cut your material cost dramatically, and the project becomes beginner-friendly fast.
DIY cost breakdown: what you'll actually spend
Materials
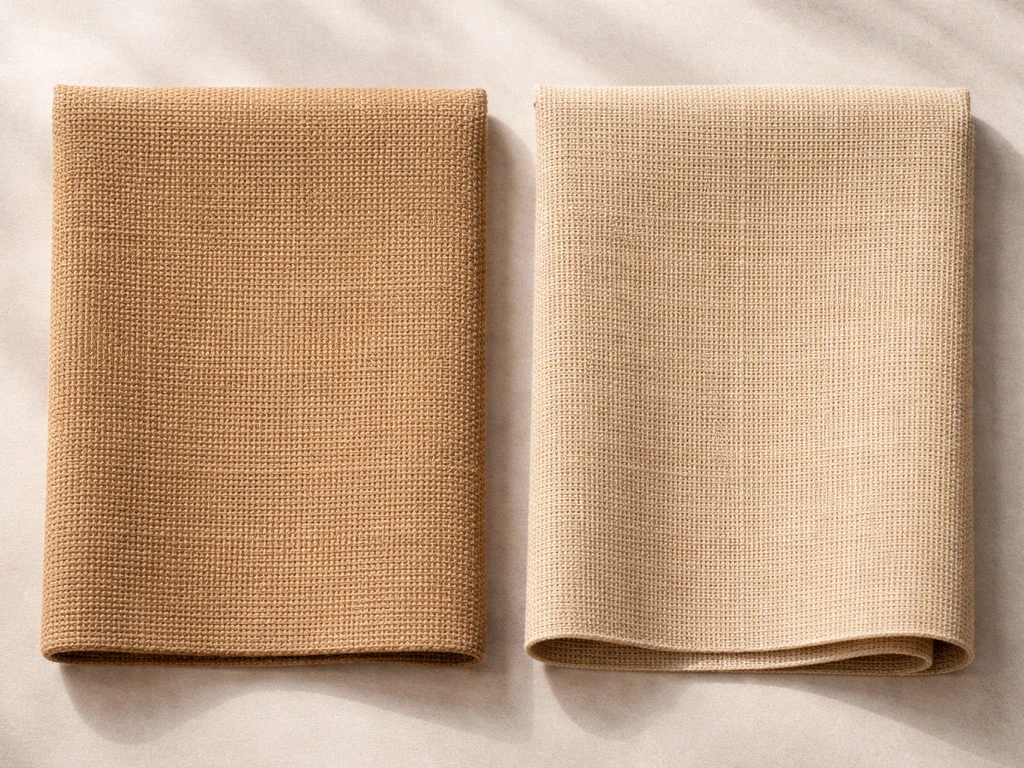
Outdoor fabric is the single biggest variable in your budget. Solution-dyed acrylic (Sunbrella being the best-known brand) costs $20 to $40 per yard and is worth the investment for longevity. Budget-friendly outdoor polyester runs $6 to $12 per yard and works fine if you're not in a high-UV or high-moisture climate. A standard 24-inch square seat cushion cover uses roughly 1 to 1.25 yards of 54-inch wide fabric. A back cushion at 24 x 17 inches uses about 0.75 yards. So for a four-piece chair set (4 seats plus 4 backs), budget 8 to 10 yards of fabric total.
| Material | Budget Option | Mid-Range | Premium (Sunbrella-type) |
|---|---|---|---|
| Outdoor fabric (per yard) | $6–$9 | $12–$18 | $25–$40 |
| Closed-cell foam, 4" thick (per sq ft) | $3–$5 | $5–$8 | $8–$12 |
| Polyester batting wrap (per yard) | $2–$4 | $4–$6 | $6–$10 |
| Zipper or Velcro closure (per cushion) | $1–$2 | $2–$4 | $4–$6 |
| Outdoor thread (per spool) | $3–$5 | $5–$8 | $8–$12 |
| Waterproof liner (optional, per cushion) | $1–$3 | $3–$5 | $5–$8 |
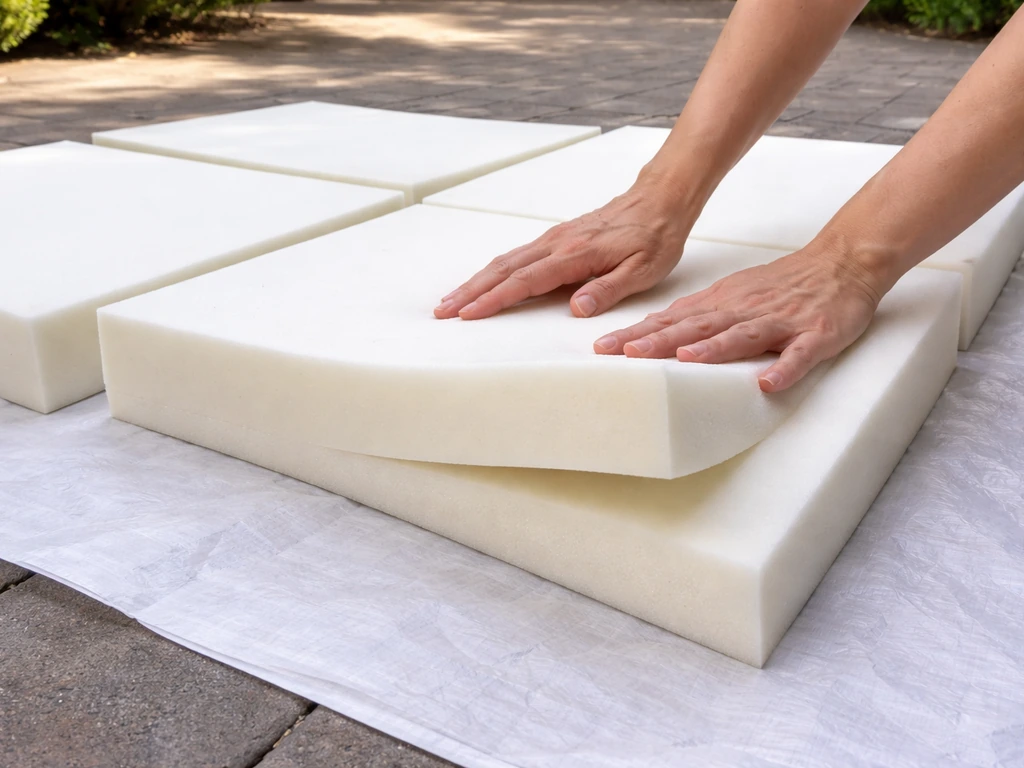
Foam is the second big cost if you're doing a full rebuild. For outdoor cushions, you want closed-cell foam (it repels water) or dry-fast open-cell foam specifically rated for outdoor use. Standard cushion foam from a fabric store is open-cell and will hold moisture like a sponge. A 4-inch thick slab for a 24 x 24 seat pad will cost $8 to $20 depending on density and where you buy it. Higher density (1.8 lb or above) holds its shape longer but costs more.
Tools
A sewing machine is the biggest potential added cost if you don't already own one. A basic machine capable of sewing heavy outdoor fabric runs $80 to $200 new, or $20 to $60 at a thrift store or Facebook Marketplace. If you're doing a no-sew approach using fabric glue, iron-on tape, or a staple gun (more on that in the cheapest options section below), you can skip the machine entirely.
Other tools you'll need: fabric scissors or a rotary cutter ($10 to $20), a cutting mat ($15 to $25 if you use a rotary cutter), and a fabric marker or chalk ($2 to $5). A zipper foot for your sewing machine costs $5 to $15 if it doesn't come with one.
Optional upgrades worth knowing about
- Waterproof inner liner: A lightweight waterproof fabric or plastic inner bag protects foam from rain that sneaks through seams. Adds $3 to $8 per cushion but dramatically extends foam life.
- UV-resistant thread: Regular polyester thread holds up reasonably well outdoors, but UV-stabilized outdoor thread (like Coats and Clark Outdoor) resists fading and brittleness. Worth the $8 per spool.
- Drainage grommets: Small plastic grommets sewn or punched into the underside of seat cushions let rain water drain instead of pooling. A pack of 10 costs $3 to $6.
- Piping or welt cord: Fabric-covered piping along seam edges looks professional and adds seam strength. Adds roughly $5 to $10 in materials per cushion set but takes practice to sew correctly.
Buying vs. making: real prices side by side
Let's ground this in actual retail numbers. IKEA's FRÖSÖN cushion cover for a 24 3/8 x 24 3/8 inch seat pad runs around $15, and a back cushion cover in the 24 x 17-inch range runs about $25. Those are genuinely hard to beat on a per-piece basis if the size fits your furniture. At the other end of the market, Walmart carries deep seat patio cushion sets (seat 24 x 24 x 4.
33 inches, back 24 x 22 x 5. 9 inches) in the $54 range. Mid-grade to premium catalog cushion sets, like those from Northern Patio's 2026 catalog, run $399 to $439 for a deep seating set. Custom made-to-order Sunbrella replacements from specialty retailers can easily hit $80 to $150 per individual cushion.
| Source/Type | Price Range | Notes |
|---|---|---|
| IKEA FRÖSÖN seat cover (24x24) | ~$15 | Cover only, standard size, limited colors |
| IKEA back cushion cover (24x17) | ~$25 | Cover only, standard size |
| Walmart budget deep seat set | ~$54 | Full cushion (foam + cover), standard size |
| Northern Patio deep seat set (catalog) | $399–$439 | Premium quality, likely Sunbrella or similar |
| Custom Sunbrella made-to-order (per cushion) | $80–$150+ | Any size, professional grade |
| DIY covers only (fabric + notions per cushion) | $8–$25 | Depends on fabric choice |
| DIY full rebuild per cushion (foam + cover) | $25–$60 | Depends on foam density and fabric |
The math becomes obvious at the premium end. If you're replacing a six-piece deep seat set and the Northern Patio equivalent runs $400, making your own for $30 to $60 per cushion (about $180 to $360 for a full set with quality materials) saves you $40 to $220 and you get to choose exactly what goes into them. If you're replacing one standard-size IKEA-compatible cushion and the cover fits off the shelf for $15, there's no DIY case to make.
Cheapest DIY approaches, ranked
Not all DIY cushion projects are created equal. Here are the three main approaches in order from cheapest to most expensive, along with honest notes about what each one actually involves.
Option 1: Make new covers only, reuse existing foam
This is the cheapest and most beginner-friendly move. If your foam is still structurally sound (it springs back when you press it, no crumbling, no musty smell that won't air out), just make new covers. Your cost per cushion drops to roughly $8 to $25 in fabric and notions. If you're comfortable skipping the sewing machine entirely, making slipcover-style covers using fabric glue or even a staple gun and wood backing can get the cost even lower. Make your own patio cushion slipcovers by reusing sturdy foam and choosing outdoor fabric that fits and stays put. This approach works especially well for bench cushions and simple chair pads where a clean, fitted slip cover is practical.
Option 2: Replace foam, reuse or adapt existing cover
If your cover is still in decent shape but the foam has compressed, crumbled, or gotten waterlogged beyond recovery, flip the script: buy new foam cut to your existing dimensions and slip it back into the existing cover. Many foam suppliers (including online options like Foam Factory or Foam by Mail) will cut foam to your exact dimensions for a flat fee. A replacement foam slab for a 24 x 24 x 4 inch cushion runs $15 to $35 depending on density. This approach requires zero sewing.
Option 3: Full rebuild from scratch
This is the most expensive DIY option but still well below premium retail on a per-cushion basis. You're buying foam, batting, fabric, closures, and thread. The payoff is complete control: you choose the exact dimensions, foam density, fabric pattern, and closure style. This is where DIY clearly wins against custom-order services that charge $80 to $150 per cushion for the same result. Budget $30 to $60 per cushion for a solid quality full rebuild using mid-range outdoor fabric and proper outdoor foam.
How to figure out your own break-even number
Run this quick math before you commit to either direction. It takes about five minutes and will save you from a project that costs more than just buying the cushions outright.
- Measure your cushions: Write down length x width x thickness for each seat and back cushion. Non-standard sizes (anything that isn't 18x18, 20x20, 24x24, or 24x48 approximately) are your strongest argument for DIY, since standard-size cushions have the most competition at retail.
- Count how many cushions you need: This is your multiplier. One or two cushions push toward buying. Four or more push toward making.
- Price out the ready-made equivalent: Search your actual size at Walmart, IKEA, Home Depot, and Wayfair. Note the cheapest option that uses outdoor-rated fabric (not just cotton or canvas). This is your buying baseline.
- Price out your DIY materials: Use the per-yard fabric estimates above, calculate yards needed (length in inches x width in inches x number of cushions, divided by fabric width in inches, then divided by 36 to get yards, plus 15% for seam allowance waste). Add foam if needed. Add closures and thread.
- Add tool cost if you don't own them: Divide the tool cost by the number of cushions you're making. A $100 sewing machine across 8 cushions adds $12.50 per cushion. Across 20 cushions over two seasons, it becomes negligible.
- Compare totals: If DIY total per cushion is within $5 of the ready-made price, buy them. If DIY saves $10 or more per cushion, make them. If you're doing covers only with foam reuse, DIY almost always wins unless the ready-made price is truly rock-bottom.
Example: You have six 24x24 deep seat patio cushions that need replacing. Ready-made comparable sets at Northern Patio run $399 to $439. DIY with mid-range outdoor fabric ($14/yard, about 10 yards total) plus foam ($20 per cushion) plus notions comes to roughly $140 for fabric and $120 for foam plus $30 for notions, totaling $290 for all six cushions, or about $48 each. You save $110 to $150 and get exactly the fabric you want. That's a clear DIY win.
How to actually make or recover the cushions: a practical overview
This is a workflow overview to get you from measurements to finished cushion without the common mistakes that kill the project early. For detailed instructions on specific approaches, the no-sew method and deep seat builds each deserve their own walkthrough. If you're specifically making deep seat patio cushions, start by choosing outdoor-rated fabric and closed-cell foam so the cushions hold up in sun and rain deep seat builds.
Step 1: Measure twice, cut once (seriously)
Measure your cushion or the space the cushion needs to fill, not just the old cushion if it's already compressed. A foam cushion that originally measured 4 inches thick may have compressed to 3 inches. Buy foam at the original designed thickness. For cover construction, add 1 inch to each dimension for seam allowance (0.5 inch seam on each side). If you're adding piping, add another 0.25 inch per seamed edge.
Step 2: Cut fabric with a system
Lay fabric flat on a hard surface. Use a rotary cutter and cutting mat for the cleanest lines, especially on slippery outdoor fabrics. Cut all pieces before you start sewing: two main panels (top and bottom), and a boxing strip (the band that wraps around the sides and gives the cushion its thickness). The boxing strip height equals your foam thickness plus 1 inch for seam allowance. Pre-cut and label everything with fabric chalk.
Step 3: Sew the boxing strip first
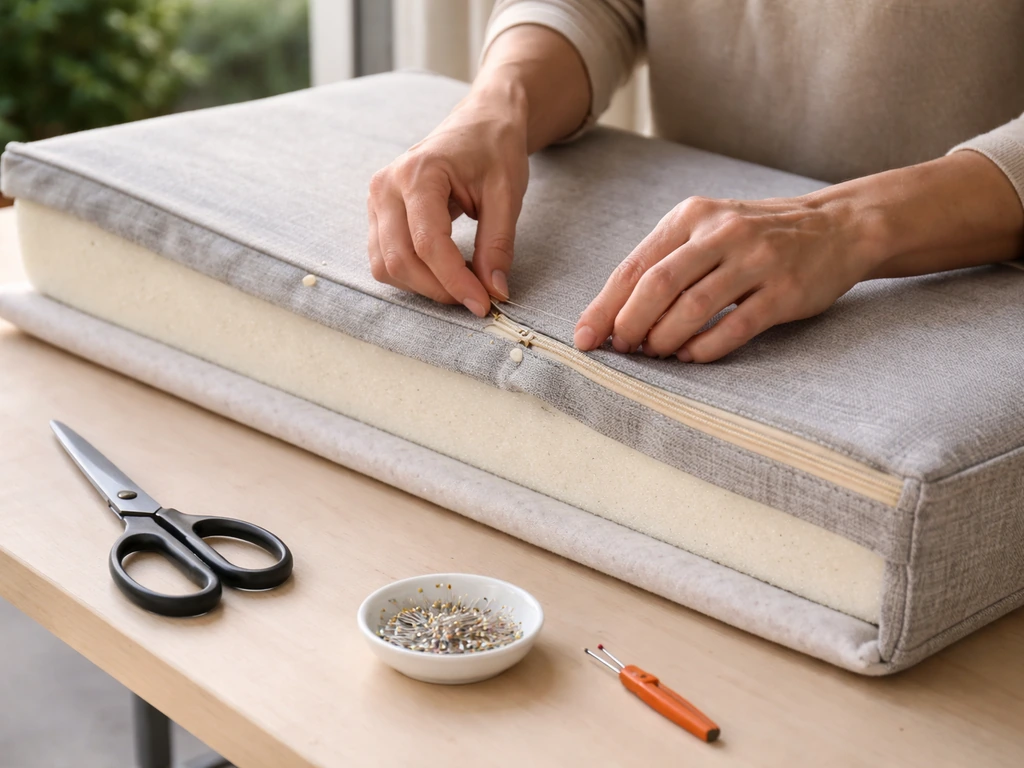
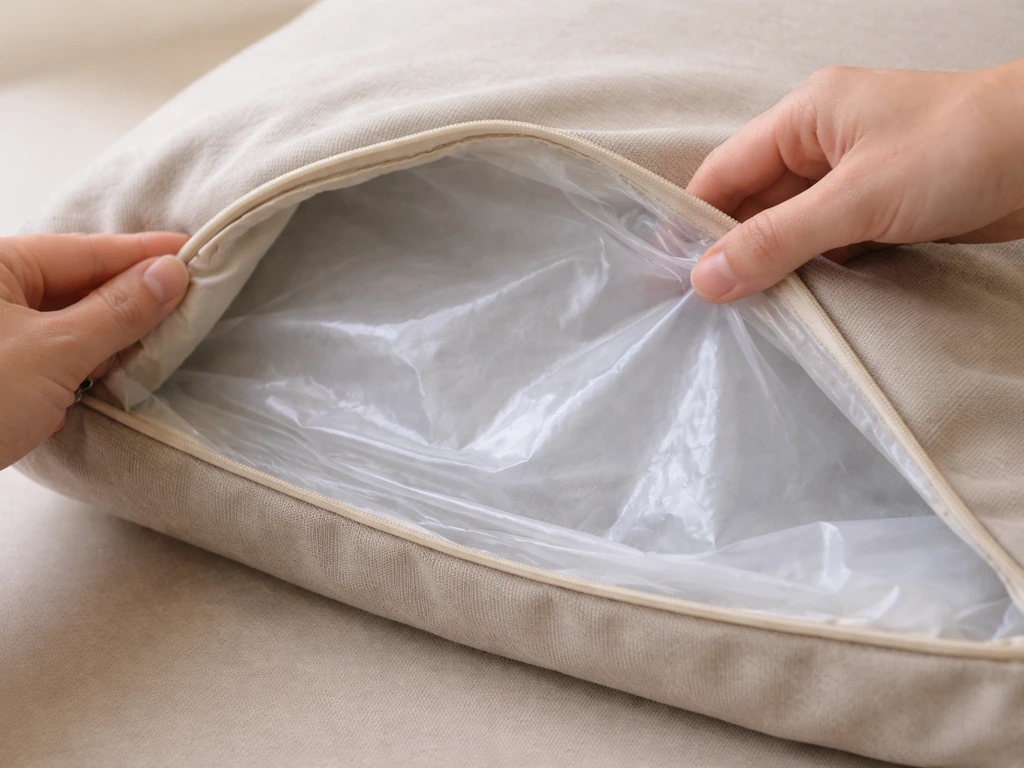
Join your boxing strip pieces into one continuous loop the perimeter of your cushion. Sew the zipper or Velcro closure into the back edge of the boxing strip before you attach it to the top panel. This is where most beginners go wrong: they try to add the closure after the cover is mostly assembled, which is miserable. Put the closure in early while everything is flat and accessible.
Step 4: Attach panels to boxing strip
Pin the top panel face-down to the top edge of the boxing strip, right sides together. Sew around the perimeter. Clip corners at a 45-degree angle to reduce bulk. Attach the bottom panel the same way, leaving the closure side open. Turn right-side out through the zipper opening, check corners and seams, then insert foam (wrapped in a thin layer of polyester batting for a smoother, fuller look). Close the zipper.
Step 5: Add drainage and finishing details
Before inserting foam, punch or sew two small drainage grommets into the bottom panel near the back corners. This single step makes a huge difference in how long both the cover and the foam last. If you're using ties to attach cushions to chair frames, cut 18-inch strips of matching fabric, fold and sew into flat ties, and attach them to the back corners at this stage.
Making cushions that actually survive outdoors
Here's where a lot of first-time outdoor cushion projects fail, not in the sewing, but in the material choices and finishing decisions that determine whether the cushion lasts one season or five.
The water and mildew problem
Standard upholstery foam will absorb rain, stay wet for days, and grow mildew. This ruins the foam and the cover from the inside out. Use closed-cell foam or outdoor-rated open-cell foam (often labeled 'dry fast' or 'reticulated') that allows water to pass through rather than pool. Adding a thin waterproof inner liner around the foam before inserting it into the cover gives you extra insurance, especially if you don't always bring cushions inside during rain.
The UV fading problem
Solution-dyed acrylic fabric (Sunbrella and its equivalents) has color locked into the fiber, not just applied to the surface, which is why it resists fading for years. Budget polyester fabrics fade noticeably within one summer in high-sun climates. If you're in a southern state or your furniture sits in full afternoon sun, the extra cost of quality outdoor fabric pays back in not having to remake cushions every year.
UV-stabilized thread matters too: regular thread can break down at seams before the fabric itself fails. Coats & Clark Outdoor Thread product listing highlights that the thread is ideal for sewing and repairs of sturdy outdoor fabrics and materials, including UV resistance and weather-related wear Coats & Clark Outdoor thread offers UV resistance and weather durability.
The seam leak problem
Even water-resistant fabric lets water through at stitch holes under sustained rain. You can apply seam sealer (a liquid sold at outdoor gear stores for tent seams) to finished seams on the inside of the cover. It takes about 20 minutes to apply and dramatically reduces moisture infiltration. Do this before your first use.
Quick durability checklist
- Use closed-cell or dry-fast foam, not standard upholstery foam
- Choose solution-dyed acrylic or UV-rated polyester fabric, not indoor canvas or cotton
- Sew with UV-stabilized outdoor thread (Coats and Clark Outdoor or equivalent)
- Install drainage grommets in the bottom panel
- Apply seam sealer to all interior seams before first use
- Bring cushions inside or store in a covered bin during extended rain or off-season
- Spot-clean mildew early with a diluted bleach solution (1/4 cup bleach per gallon of water) before it spreads to the foam
Your shopping list to get started
If you've done the break-even math and DIY makes sense for your situation, here's what to gather before you start cutting anything. Adjust quantities based on your cushion count and measurements.
- Outdoor fabric: solution-dyed acrylic for premium durability, UV-rated polyester for budget builds. Calculate yards needed using (cushion length x cushion width x number of cushions) divided by (fabric width x 36), then add 15%.
- Closed-cell or dry-fast foam cut to your cushion dimensions (order pre-cut from an online foam supplier for clean edges).
- Polyester batting (one layer around foam for a smoother silhouette), roughly the same square footage as your foam.
- Outdoor-rated zipper or Velcro: one per cushion, length equal to the back edge of the cushion minus 2 inches.
- UV-stabilized outdoor thread in a matching or complementary color.
- Waterproof inner liner fabric (optional but recommended): same square footage as your foam.
- Drainage grommets: two per seat cushion, available in packs of 10 to 20.
- Seam sealer: one small bottle covers multiple cushions.
- Rotary cutter, cutting mat, and fabric chalk or marker.
- Sewing machine with a zipper foot, or fabric glue and clips for a no-sew build.
Once you have materials in hand, the actual sewing for a basic boxed cushion cover takes two to three hours per cushion for a beginner, faster once you've done one or two. If you want to skip sewing entirely, a no-sew approach using heavy-duty outdoor fabric glue can work well for simple flat cushions. And if you're tackling a specific style like deep seat cushions or want to make replaceable slipcover-style covers that you can swap out seasonally, those projects each have their own techniques worth digging into before you start cutting.
FAQ
What’s the real break-even point if I need cushions but I don’t have a sewing machine yet?
If you must buy a machine, DIY usually only wins once you need several cushions. A common practical break-even is around five to six cushions, because the machine purchase (even a used one) and extra tools get amortized across multiple pieces. If you only need one or two, consider recovering existing cushions or using a no-sew or staple-gun approach instead of buying equipment.
Does DIY still work out cheaper if my old foam is moldy?
If foam has a persistent musty smell or the foam crumbles when squeezed, treat it as unrecoverable and replace it. In that situation, DIY can still be cheaper than custom orders, but the “cheapest” path is new foam plus either recovering with a new cover or replacing only the covers if you can truly salvage the foam.
How much should I expect to pay in hidden costs I may forget (zippers, Velcro, batting, thread)?
Budget a small add-on per cushion for closures and finishing materials. Zippers or Velcro, UV-rated thread, and a thin layer of polyester batting for a smoother profile typically push DIY higher than just “fabric plus foam.” A good rule is to plan roughly 5 to 15 percent extra beyond the fabric and foam line items, especially for boxed cushions with closures and piping.
Is no-sew actually cheaper, or does it only seem cheaper?
No-sew can be cheaper when you’re making simple flat cushions and you already have or can borrow tools like a heavy staple gun, but it often becomes less economical for boxed cushions with tight corners and closures. For deep seat or heavily contoured cushions, sewing usually creates a more durable cover seam and closure fit, which matters if you leave cushions outside year-round.
Can I use regular indoor upholstery fabric to save money?
It will likely cost you more long-term. Indoor fabrics and cheaper outdoor lookalikes tend to fade faster in strong sun and can trap moisture at seams, which leads to earlier replacement. If you want a lower-cost DIY, the best compromise is usually budget outdoor polyester for the outer cover but still using outdoor-rated foam and UV-stabilized thread.
What’s the easiest way to confirm my foam dimensions before ordering or cutting?
Measure after compression, not just based on the original cushion label. Foam in use commonly compresses by 0.5 to 1 inch, so verify current thickness and the designed thickness you want the cushion to return to. If you plan to replace foam, also check the cushion’s actual top opening size so the cover will fit without fighting the corners.
Is it cheaper to recover covers only, or replace everything?
Recovering covers only is cheapest when the foam is structurally sound and doesn’t smell musty. If the foam still springs back, new covers can dramatically reduce material cost because you skip the foam. If the foam is waterlogged, compressed beyond use, or degraded internally, replacement foam plus a new cover is the safer and often still cheaper option than buying replacements.
Do I need outdoor-rated thread and seam sealing for DIY to last?
They are often worth it for longevity. Using UV-stabilized thread reduces seam failure in sunlight, and seam sealer helps limit moisture infiltration through stitch holes during sustained rain. Skipping these steps can reduce cushion lifespan even if you used good outer fabric.
How do I avoid buying too much fabric, especially for sets with different cushion sizes?
Calculate per cushion based on your measured top and back dimensions and add a waste factor for matching patterns. The yardage estimates change if your fabric has directionality or if you need to align stripes. For multi-piece chair sets, it’s safer to plan totals by piece and then add 10 to 15 percent extra rather than relying on a single overall “bundle” estimate.
What drainage steps are actually necessary, and where do they go?
Drainage helps more than people expect. The common approach is adding small grommets near the back corners on the bottom panel, so water that gets inside can leave instead of staying trapped. If your cushions are always sheltered or you bring them in after rain, you can sometimes get away without it, but for outdoor furniture left outside, it materially improves durability.
If I don’t have the right closure style for my furniture, what’s the cheapest option?
If replacement covers need to match an existing system, buying or reusing the original closure hardware is often the cheapest route. If you’re building from scratch, closures that are simple to install (like zippers placed early during construction or Velcro where it won’t show) reduce time and rework. Avoid retrofitting closures after most of the cover is assembled, because it increases errors and scrap.
When is DIY likely to cost more than buying ready-made cushions?
DIY tends to cost more when you need only one or two standard-size cushions, you must buy a sewing machine and specialized tools, your furniture requires complex custom shapes, or you choose premium fabric but end up buying extra foam because you mis-measured. Quick check, do a five-minute cost tally for each cushion piece including closures, thread, batting, foam type, and any tool purchases before you cut anything.