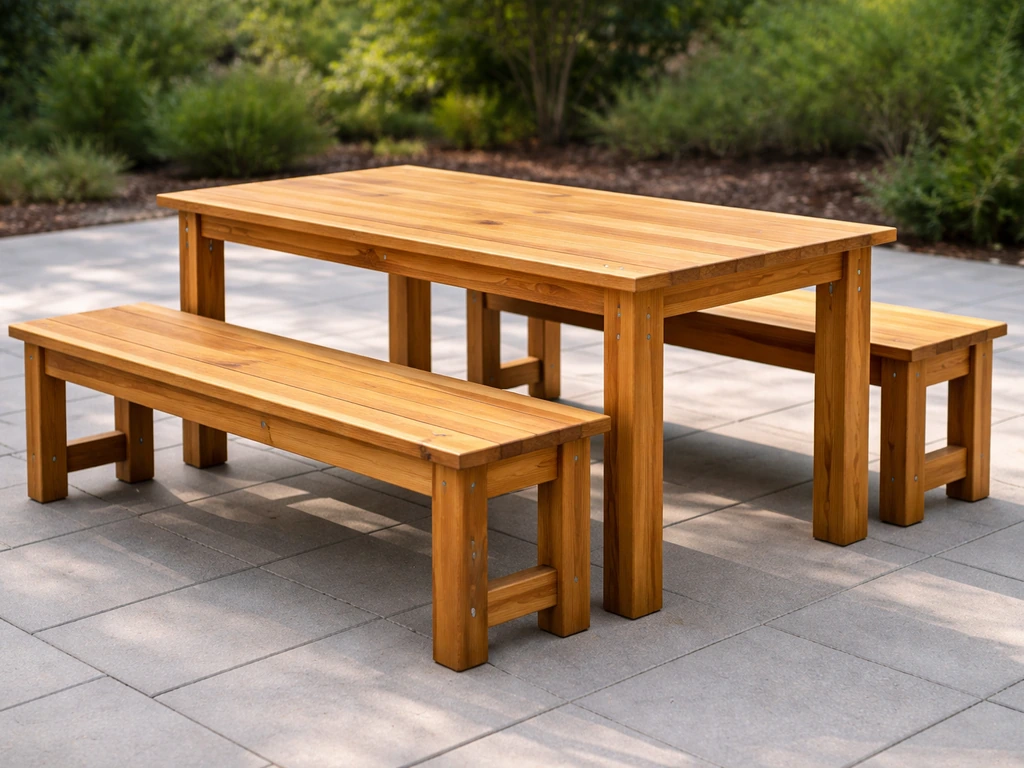
You can build a matching patio set yourself in a weekend or two using basic lumber, a circular saw, a drill, and about $150 to $400 in materials depending on what you're making. Once you pick your design and measurements, you can follow a step-by-step process for how to make patio furniture. The most beginner-friendly approach is a simple set of two slatted Adirondack-style chairs and a matching side table, or a four-piece dining set with a rectangular table and three to four chairs. Both are doable with no prior woodworking experience if you follow a clear plan, cut accurately, and use the right fasteners and finish from the start.
How to Make a Patio Set: DIY Step-by-Step Guide

Maren Grady
1 May 2026
Choosing your patio set type, size, and materials
Before you buy a single board, figure out what you actually need. A patio set can mean a lot of things: a lounge set (chairs, maybe a loveseat, and a coffee table), a dining set (table and chairs), or a simple conversation arrangement (two chairs and a side table). Think about how you use your patio. If you eat outside most nights, prioritize the dining set. If your patio is for relaxing, a lounge or Adirondack-style chair set makes more sense. And be realistic about your space.
Also think about your site conditions before picking a material. A shaded covered patio is very different from an exposed south-facing deck that bakes in the sun and gets rained on. Wood needs more maintenance in wet climates. Metal frames can get uncomfortably hot in full sun. For most DIYers, cedar or pressure-treated pine is the practical choice for wood, and standard steel or aluminum square tube is the go-to for metal frames.
| Material | Cost (approx.) | Durability | Ease to build with | Maintenance |
|---|---|---|---|---|
| Cedar | $$ (mid-range) | Excellent naturally rot-resistant | Very easy, cuts and drills cleanly | Oil or seal every 1-2 years |
| Pressure-treated pine | $ (budget-friendly) | Very good with proper finish | Easy, slightly heavier | Seal annually, check for splinters |
| Douglas fir / SPF | $ (lowest cost) | Moderate if well-finished | Easy, widely available | Needs thorough sealing outdoors |
| Redwood | $$$ (premium) | Excellent, beautiful grain | Easy but pricier | Minimal if kept oiled |
| Steel square tube | $$ (mid-range) | Excellent if rust-proofed | Moderate, needs welder or bolted joints | Repaint every few years |
| Aluminum tube | $$-$$$ | Excellent, won't rust | Moderate, rivets or bolts | Very low |
My honest recommendation for a first build: use cedar or pressure-treated pine. Cedar is lighter, smells great, and naturally resists rot and insects without chemical treatment. Pressure-treated pine costs less at most lumber yards and is plenty durable, but it needs stainless-steel or hot-dipped galvanized fasteners (more on that in a moment). Avoid SPF or Douglas fir unless you plan to finish it thoroughly, since untreated softwoods degrade quickly outside.
If you want to go the pallet route for an ultra-budget build, that's a whole separate approach worth exploring on its own. If you want to learn how to make patio furniture out of pallets, you’ll need to plan for pallet disassembly, safe wood preparation, and a more durable outdoor finish.
Picking the right size for your space
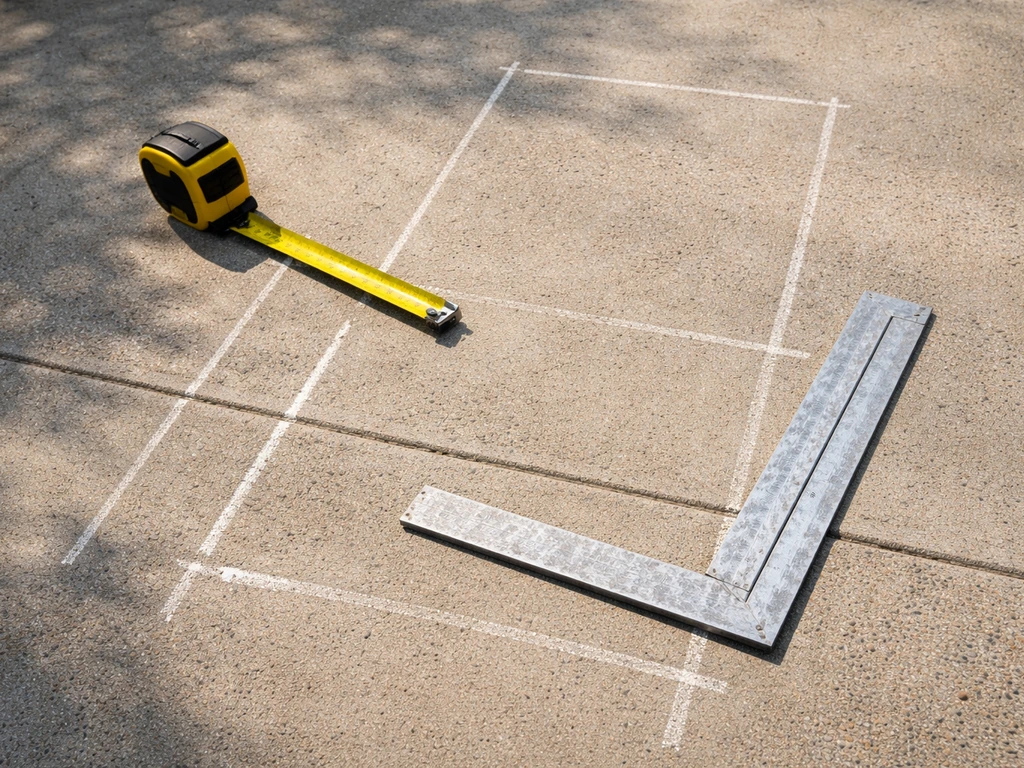
Measure your patio before you commit to a design. A standard outdoor dining chair takes up roughly 24 inches wide by 24 inches deep, and you need at least 36 inches between chairs at the table and 36 inches from any chair back to a wall or railing so people can pull out and sit down comfortably. A four-person dining table is typically 36 by 60 inches. A two-person Adirondack setup needs at least a 6 by 8 foot clear area. Sketch it out on paper first, or use painter's tape on the actual patio surface to mock up the footprint before you build anything.
Planning, measurements, and a build outline
Good planning is 80 percent of a successful build. I've rushed this step before and ended up with chairs that wobbled and a table that was an inch too wide to fit where I wanted it. Spend an hour here and you'll save yourself a lot of frustration.
Draw a simple cut list before you buy anything
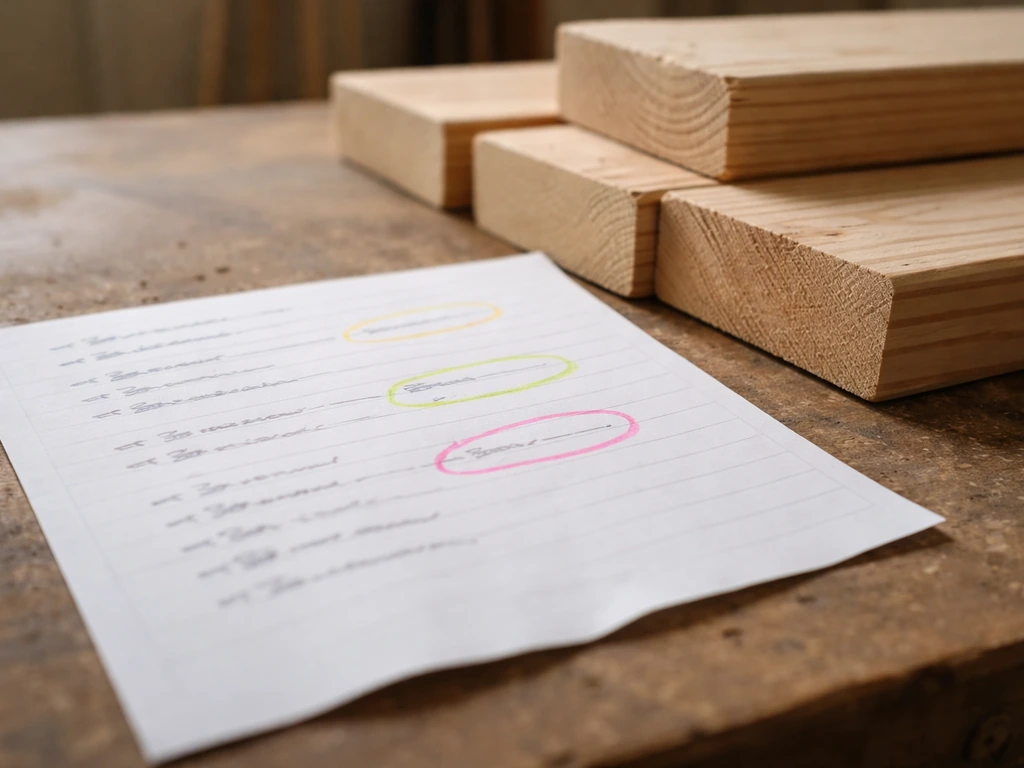
A cut list is just a written inventory of every piece of lumber you need, with its dimensions. For a basic Adirondack chair, that's roughly 15 to 18 pieces of 1x4, 1x6, and 2x4 lumber ranging from about 12 inches to 36 inches long. For a simple dining table, you're looking at 2x4 and 2x6 boards for the frame and top, plus 4x4 legs. Write each piece down, group by board size, and calculate how many full boards you need to buy. This prevents wasteful overbuying and under-buying.
For a starter four-piece patio set (one small table plus two to three chairs), here's a rough materials estimate to get you planning:
- Eight to ten 8-foot 2x4 boards (frames and legs)
- Six to eight 8-foot 1x4 boards (seat slats, back slats, tabletop slats)
- Two 8-foot 4x4 boards (table legs, optional for heavier chairs)
- One box of 2.5-inch stainless-steel or hot-dipped galvanized exterior screws
- One box of 1.5-inch stainless-steel screws for slats
- Exterior wood glue (optional but adds strength)
- Sandpaper: 80-grit and 120-grit
- Finish of your choice: exterior stain, paint, or sealer
A realistic timeline
Be honest with yourself about time. A single Adirondack chair from scratch takes most beginners 4 to 6 hours including cutting, assembly, and sanding. A matching pair of chairs and a small table realistically takes a full weekend. A four-person dining set with four chairs and a table can take two to three weekends if you're working alone with basic tools. Factor in drying time for finish coats too: a primer coat needs at least 48 hours to fully dry before topcoat, so plan your finishing days accordingly.
Account for your site before building
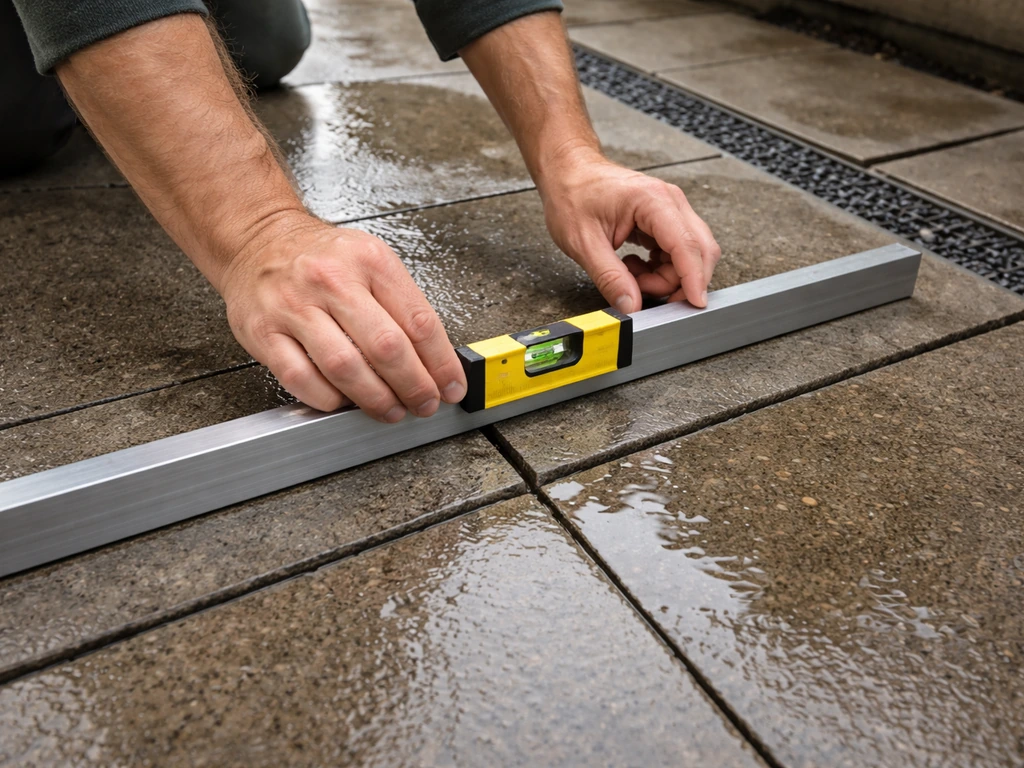
Walk your patio and note a few things: Is the surface level? Does water pool anywhere after rain? Which direction does it face? An uneven surface means you'll need adjustable feet or leveling shims on your finished set. A spot where water pools will rot wood legs fast, so raise them on rubber feet or concrete pavers. A west-facing patio that gets hours of afternoon sun will fade finishes faster, so a UV-blocking topcoat matters more there. These details shape your material and finish choices before you cut a single board.
Tools, supplies, and cutting and assembly basics
You don't need a full workshop. Here's what you actually need for a wood patio set build:
- Circular saw (or a miter saw if you have one, for cleaner angled cuts)
- Cordless drill and driver bits
- Measuring tape and a square (a speed square costs about $10 and is essential)
- Clamps: at least four bar clamps or pipe clamps to hold pieces while you fasten
- Pencil for marking cuts
- Sandpaper or orbital sander
- Safety glasses and hearing protection
- Work gloves, especially when handling pressure-treated lumber
A miter saw is genuinely worth renting for a weekend if you're cutting angled chair backs or legs. A clean 15-degree angle cut at the back of a chair seat is hard to do accurately with a freehand circular saw. Most tool rental shops charge $40 to $60 for a weekend rental.
Fasteners: do not skip this part
This is where a lot of first-time builders make a costly mistake. Standard zinc-plated or electroplated screws will corrode rapidly when used with pressure-treated lumber, because the preservative chemicals in the wood react with the coating and cause [pitting corrosion](https://www. fpl. fs.
us. usda. gov/documnts/pdf2009/fpl2009zelinka002. pdf).
You need either stainless-steel screws or hot-dipped galvanized (HDG) screws. For ACQ-treated wood, the BCHousing guidance specifies that compatible fasteners and connectors include stainless steel and hot-dipped galvanized connectors, with a minimum G1851 coating requirement for the galvanized option [hot-dipped galvanized (HDG) screws](https://www. bchousing. org/sites/default/files/rcg-documents/2022-04/ACQ-Treated-Wood.
pdf). Stainless steel (grades 304 or 316) is the best choice if you're in a coastal or high-humidity environment. Hot-dipped galvanized is solid for most inland climates and usually costs a bit less. Do not substitute mechanically plated or just 'corrosion-resistant' labeled screws if you're using pressure-treated lumber.
The labeling can be misleading and the protection is significantly lower. For cedar or redwood, stainless steel is also the right call since these woods have natural tannins that stain and react with standard fasteners.
Basic cutting and assembly technique
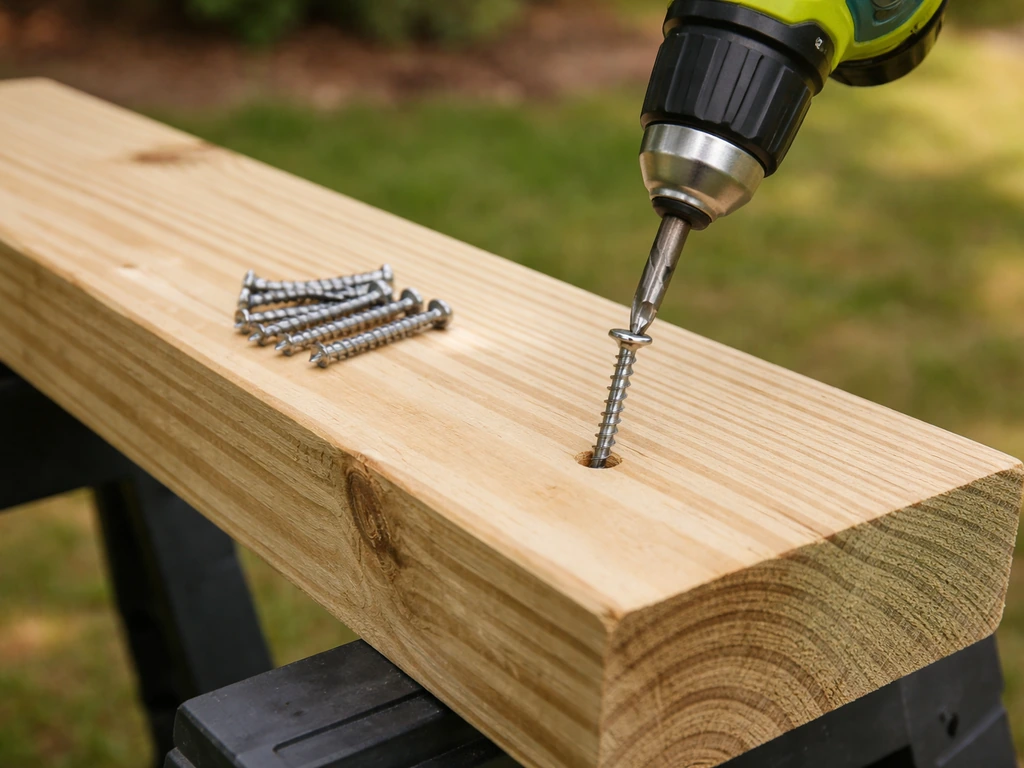
Always mark your cut line with a pencil and square before sawing. Cut on the waste side of the line, meaning the blade should just kiss the outside edge of your pencil mark, not split it down the middle. This keeps your piece at the right length. When drilling screws into 2x4 lumber, pre-drill a pilot hole about 80 percent of the screw's diameter to prevent splitting, especially near the ends of boards. Counter-sink the screws slightly so the head sits flush or just below the surface. A combination countersink-pilot bit makes this one step instead of two and costs about $8.
Building the frames, seats, and backs (or table)
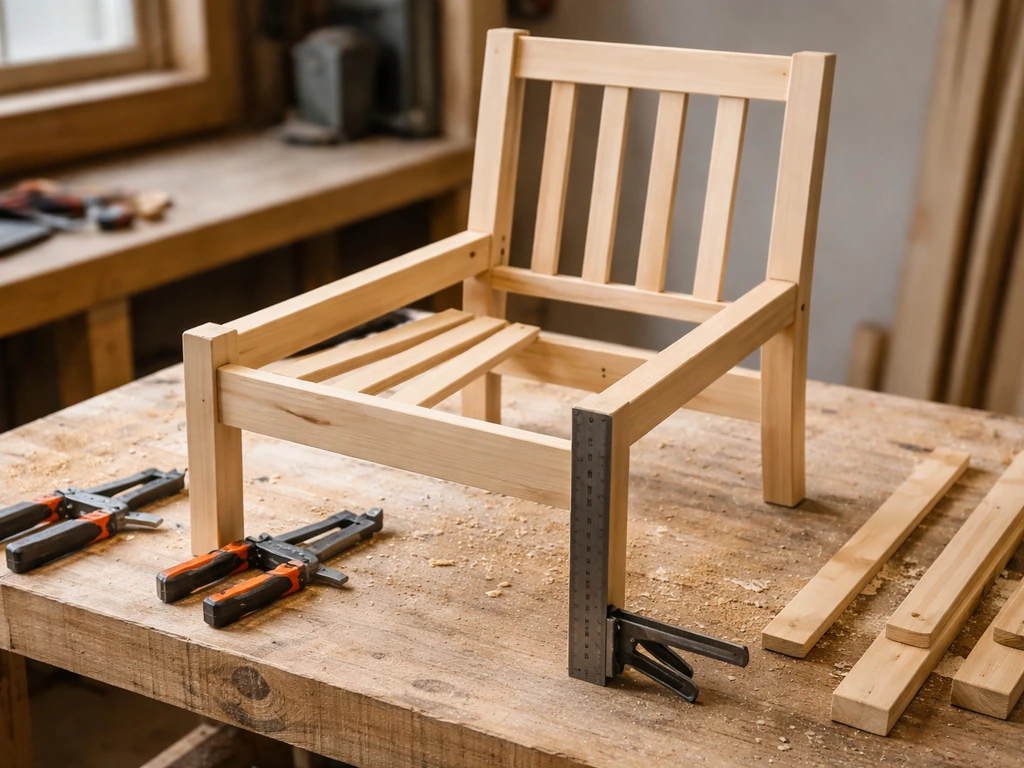
The build order matters. Always build the frames first, verify they're square and level, then add slats, legs, and any supports. Trying to fix a crooked frame after slats are attached is miserable. Here's how to approach each main component.
Chair frame
- Cut your two side pieces (the side rails that run front to back under the seat) from 2x4 lumber. For a standard dining chair, these are about 18 inches long. For an Adirondack chair, the side rails are longer, around 30 to 36 inches, and often cut at an angle at the back to create the reclined seat slope.
- Cut your front and back seat rails (the crosspieces connecting the two side rails). These set the seat width, typically 18 to 20 inches for a dining chair.
- Assemble the four pieces into a rectangle using two screws at each corner. Check that all corners are at 90 degrees with your speed square before the screws fully seat. If a corner is off, loosen the screw, adjust, and re-tighten. This is the moment to fix it.
- Attach legs: for a dining chair, four legs of 2x2 or 2x3 lumber at about 17 to 18 inches tall work well. Clamp each leg to a corner of the seat frame, check it's plumb (vertically straight) with a level, then drive two screws in from the rail into the top of the leg.
- Add a lower stretcher rail between the front two legs and between the back two legs at about 6 to 8 inches off the ground. This adds rigidity and dramatically reduces wobble.
Seat slats and back
Cut your seat slats from 1x4 lumber to span the width of your seat frame. Space them roughly a quarter-inch apart (a scrap piece of the same wood makes a perfect spacer for consistent gaps). These gaps allow water to drain and air to circulate, which extends the life of the wood dramatically. Attach each slat with two screws into each rail it crosses. For the chair back, cut vertical slats from 1x4 and attach them to a back rail assembly. The back rail angle for a comfortable dining chair is roughly 5 to 8 degrees from vertical. For an Adirondack-style chair, that angle opens up to about 20 to 25 degrees for a relaxed recline.
Table frame and top
A simple outdoor table has four legs, two long side aprons, two short end aprons, and a slatted top. Cut your legs from 4x4 lumber at your target table height (standard dining height is 29 to 30 inches, coffee table height is 16 to 18 inches). Attach the aprons to the insides of the legs using two screws per joint, or use pocket hole joinery if you have a pocket hole jig (about $20 to $40 at any hardware store).
Once the base is assembled and square, flip it upright and add your tabletop slats from 2x4 or 2x6 lumber. Leave consistent quarter-inch gaps between slats for drainage. For a 36 by 60 inch top, five 2x6 boards work well. Overhang the top by about 1.
5 inches on each long side for a finished look.
If you want to extend this project into a full chair build with detailed dimensions and templates, the companion guide on how to make wooden patio chairs goes deeper on chair geometry and angled back joints. The companion guide on how to make wooden patio chairs goes deeper into chair geometry and angled back joints. If you want to apply the same approach to other backyard pieces, this guide on how to build a patio furniture will walk you through the planning, measurements, and construction steps.
Bracing for wobble prevention
Any rectangular frame has a natural tendency to rack (shift into a parallelogram) under load. The fix is diagonal bracing. On a table, you can add a diagonal brace between opposite legs on each long side, hidden under the apron. On chairs, the lower stretcher rail handles most of this. If you're building a larger bench or loveseat-style piece, add a cross brace from one lower corner to the opposite upper corner of each end panel. This is the same principle used in deck framing to stop lateral sway, and it makes a real difference in long-term structural integrity.
Weatherproofing and finishing for outdoor durability
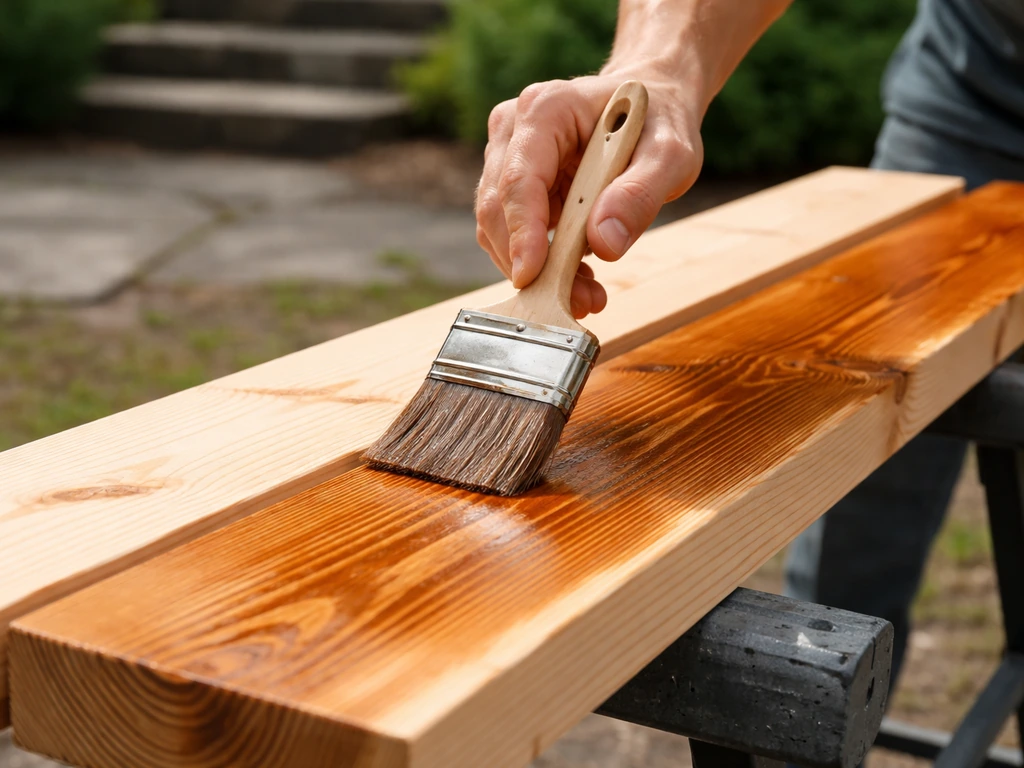
The finish is what separates a set that looks great for ten years from one that starts peeling and cracking by its second summer. Don't rush this step after the build high wears off.
Sand before you finish
Sand all surfaces with 80-grit first to remove rough mill marks and any raised grain from the wood. Follow up with 120-grit for a smooth surface that will hold finish better and won't splinter. Pay special attention to end grain (the cut ends of boards), which absorbs moisture faster than face grain and is the first place rot starts. End grain benefits from an extra coat of sealer.
Choose your finish based on your material and look
| Finish type | Best for | UV protection | How often to reapply | Notes |
|---|---|---|---|---|
| Penetrating oil (teak oil, danish oil) | Cedar, redwood, hardwoods | Moderate | Every 1-2 years | Easy to apply, enhances grain, low-sheen look |
| Exterior wood stain (semi-transparent) | Pine, cedar, any softwood | Good | Every 2-3 years | Shows wood grain, resists mildew |
| Solid exterior stain or paint | Pine, pressure-treated wood | Excellent | Every 3-5 years | Hides grain, longest UV/moisture protection |
| Clear exterior sealer/waterproofer | All wood types | Low to moderate | Annually | Easiest but least durable UV protection |
| Exterior enamel paint + primer | Metal frames | Excellent | Every 3-5 years | Rust-inhibiting primer is essential on steel |
For pressure-treated pine, a solid exterior stain or exterior paint with a bonding primer gives the best protection. Apply primer first and let it dry for at least 48 hours before applying your topcoat. Rushing this step causes peeling within a season. For cedar or redwood, a penetrating oil or semi-transparent stain is ideal since it lets the natural beauty of the wood show while still protecting it. Reapply oils annually if the set is fully exposed.
Application tips
- Apply finish when temperatures are between 50 and 90 degrees Fahrenheit and no rain is in the forecast for at least 24 hours
- Work in the shade when possible: direct sun dries finish too fast and causes lap marks
- Use a brush rather than a roller on slatted surfaces so finish gets into the gaps and covers all faces
- Apply two thin coats rather than one thick coat for better adhesion and a more even look
- Pay extra attention to end grain, undersides of slats, and anywhere wood contacts metal hardware
- For metal frames, use a rust-inhibiting spray primer before any topcoat
Common issues, troubleshooting, and maintenance after build
Here's where I want to be real with you. Even a careful build will have some issues. Here are the ones you're most likely to hit and how to fix them.
Wobbly chairs or a rocking table
The culprit is almost always one of two things: uneven leg lengths or a racked (non-square) frame. To diagnose, set the piece on a known flat surface. If it rocks diagonally, the frame is racked. If it rocks front-to-back or side-to-side, one leg is too long.
Fix a racked frame by adding a diagonal brace (as described above) or by clamping the frame back into square and adding a gusset plate at the problem corner. Fix uneven legs by setting the piece on a flat surface, letting it settle naturally, and then scribing a line around the bottom of each leg with a compass at the height of the tallest gap. Trim each leg to that scribed line.
For minor unevenness (under a quarter inch), rubber furniture feet with adjustable pads are a fast fix.
Screws splitting the wood
This almost always happens near the ends of boards when you skip pre-drilling. If a board has already split, you can glue it back with exterior wood glue, clamp it for several hours, and then pre-drill before re-driving the screw. Going forward, always pre-drill within 2 inches of any board end, especially in dry hardwoods and pressure-treated pine which splits more readily than cedar.
Finish peeling or bubbling after one season
This typically means either the wood was wet when you applied the finish, you applied it too thick, or you didn't prime first. Pressure-treated lumber from the store is often still damp with preservative moisture and needs to air-dry for several weeks before finishing. A simple test: sprinkle a few drops of water on the wood. If they bead up, the wood isn't ready. If they absorb quickly, it's ready to finish. To fix peeling finish, sand back to bare wood (or as close as you can get), make sure the wood is fully dry, prime with an exterior bonding primer, let it cure 48 hours, and then apply two thin topcoats.
Rust stains appearing around screws
This means you used standard zinc-plated screws in treated lumber or a moisture-prone environment. The stain is iron oxide leaching out from the corroding fastener. The only real fix is to remove the corroded screws (or grind the heads flush and set them), treat the stain with oxalic acid wood bleach, and replace with stainless-steel or HDG fasteners. This is also a structural concern, because a corroding fastener loses holding strength over time. Don't ignore it.
Seasonal maintenance to make the set last
Once a year, ideally in early spring, do a quick inspection of your set. Check every fastener for signs of corrosion or loosening, look for any cracking or checking in the wood (normal, but worth sealing), and check joints for any play or gap. Tighten any loose screws. Re-apply oil or stain if water no longer beads on the surface. Bring cushions or fabric components inside during heavy rain seasons or winter, and consider storing the whole set under a cover or indoors if you're in a freeze-thaw climate. A little annual attention extends a DIY patio set's life from five or six years to fifteen or more.
Once you've completed your first set, the skills transfer directly to building other pieces: a matching patio bench, a larger dining table, or even a sectional-style lounge setup. Every project gets faster and more intuitive. Start with one chair and a small table, get comfortable with the process, and you'll find the rest of the set goes together quicker than you expect.
FAQ
Can I build a patio set with cedar or redwood instead of pressure-treated pine?
Yes, but plan for a different hardware setup. Use the same stainless or hot-dipped galvanized screws you would for pressure-treated wood, and expect to tighten joints more often because cedar and redwood can compress slightly as they weather.
What finish choice lasts longer on a table top versus chair seats?
If you want it “set and forget,” use a bonding primer plus an exterior topcoat system, or a penetrating oil system designed for horizontal surfaces. Horizontal slats and table tops need the most maintenance, so prioritize a finish that’s specifically rated for outdoor wear, not just fence or siding.
How do I calculate lumber quantity without running short mid-build?
Not always. Even with an accurate cut list, you can end up short if board dimensions include saw kerf waste or if your design uses extra rails and stretchers. Add 10 to 15 percent to your lumber count for mistakes and for matching pieces, especially when you need consistent slat spacing.
What’s the best way to handle a patio that is not perfectly level?
If you’re building in place on uneven ground, do not rely on the furniture being “adjustable” by luck. Use adjustable feet or leveling shims and start with leg bottoms level. Then check square again after you flip and load the frames, since racking often reappears once everything is assembled.
Should I seal the bottom of slats and aprons to stop water damage?
If your set will see rain, plan for drainage from day one. Keep the slat gaps (around a quarter-inch) and avoid trapping water under table aprons. After assembly, test the underside for any areas that become “water pockets,” then add small stand-offs or adjust the layout so water can run off.
Is it better to prime before assembly or after everything is built?
You can, but it changes the process. Pre-priming can be helpful for end grain, but you still need proper sanding, and you must keep finish off the areas you’ll glue or screw unless the plan specifically accounts for bonding and coating thickness. If you use any glue, make sure the finish system is compatible and fully cured.
How long should I wait after buying pressure-treated lumber before finishing?
Typically, no. Pressure-treated pine often releases moisture for weeks after purchase, and trapped moisture under a heavy coat increases peeling risk. If you finish too soon, you’ll usually see clouding, peeling at edges, or soft spots. Use the water-bead test, then wait for full cure.
Will a set build hold up on a south-facing patio that gets intense afternoon sun?
Yes, and this is a common failure point. If the patio is very hot in full sun, choose a finish with UV protection and keep fasteners and hardware minimal to reduce heat buildup. Metal frames can be fine, but you may want to add a wood seat or use outdoor-rated cushions that won’t degrade quickly.
What’s the correct build order if my first frame is slightly out of square?
Start with the frame and do not “chase” square after slats are installed. Once slats and back rails are attached, minor racking becomes hard to correct without pulling parts apart. Build, square, then add slats and supports, and re-check diagonal measurements before finishing.
Do I need extra bracing for a larger bench or loveseat-style set?
Consider adding cross-bracing or diagonal braces if you plan to sit with side-to-side motion, such as on chairs used for lounging or a bench with active leaning. The basic stretcher rails help, but larger spans (wide tables, long benches, loveseat-style pieces) benefit from braces on each end panel.
What’s the best way to prevent splitting when screwing into 2x4 ends?
Yes, especially if you’re using screws near board ends. Pre-drill holes near ends (within about 2 inches) to prevent splits, and use a countersink so you can drive screws without forcing them. If you see splitting even after pre-drilling, slightly reduce screw diameter or switch to a longer, properly countersunk bit for cleaner seating.
How do I choose the right screws so I don’t get rust stains later?
Pick hardware based on the wood, not the marketing label. “Corrosion-resistant” screws can still corrode fast in treated lumber, leading to rust staining and joint loosening. If you’re using pressure-treated pine, stick to stainless 304 or 316 (especially near coast/high humidity) or hot-dipped galvanized (for most inland builds).
How often should I inspect and recoat my DIY patio set?
Plan a maintenance routine around your climate. In freeze-thaw areas, inspect after winter, because wood movement can loosen fasteners. In rainy regions, check seal integrity after storms, recoat when water no longer beads, and keep cushions covered or stored to prevent mildew.
What should I do if the stain or paint looks uneven on my prototype piece?
Test with a single board section first. If you apply finish and it immediately darkens unevenly or looks blotchy, you may need extra sanding, a stain conditioner (for some woods), or a different product viscosity. Also, end grain usually takes finish differently, so prime or seal end grain more consistently before topcoating.